You guys all know that we’ve slowly been making over John’s sister Emily’s nursery on a major budget and the good news is that we’re back with yet another update. We already shared how we painted some modern vertical stripes, added large mirrors to open things up, whipped up a super easy no-sew bed skirt, made some free art and even hung some hooks to add function and fun. But what about the lighting sitch in there?
Other than a clean-lined overhead fixture, there was nary a light source to be found. So we decided that we needed to bring in at least a couple more to keep things feeling bright and functional (Emily mentioned that the ability to illuminate one corner while the overhead light is off is a nice perk in a nursery). But after some discussion about purchasing a sleek floor lamp or a small clean-lined table lamp for the corner with Emily’s plush reading/nursing chair (a $40 thrift store score from years past), we realized a better use of the space would be to hang a swing arm lamp from the wall- thereby freeing up valuable floor and side table space for a less cramped result. Here’s that corner before the big swing arm score…
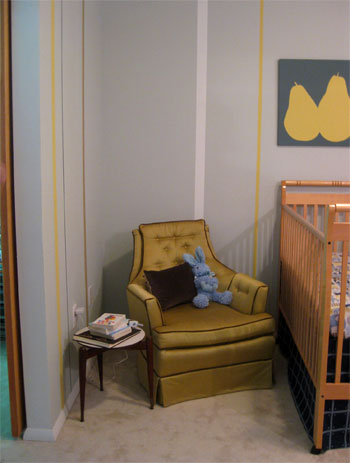
… and here it is about twenty minutes later (after John worked his swing-arm-mounting magic while we supervised/complemented his manliness):
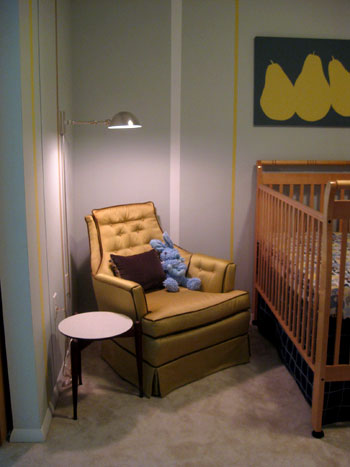
And in good budget news, we snagged it for just $39 (on sale from $159 at The Decorating Outlet here in Richmond). Oh happy day. It instantly feels airier than a floor lamp or a table lamp would (since it appears to float serenely above the chair). And it’s also super functional thanks to the dimming option that’s built right in (there’s a soft setting and a brighter one, which always comes in handy depending on if the baby’s in rest-mode or wide-awake-and-ready-to-go mode).
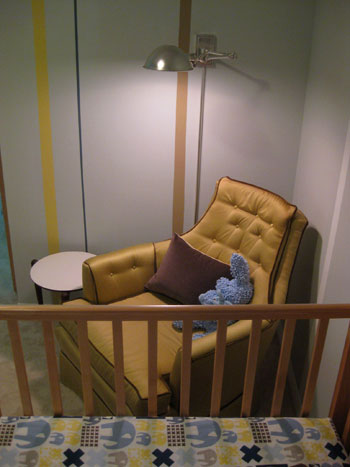
We were sure to hang it so it wouldn’t get in the way when someone sat down or stood up, and also used the metal cord covers to neatly run the cord down the wall for a clean and polished look (which is also more child-friendly than a dangling one).
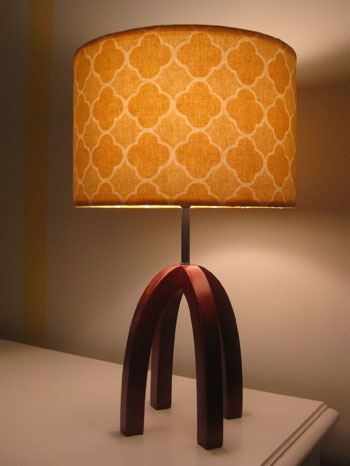
So with one corner of the room’s lighting problemo solved, we moved on to the light that we’d be placing on top of the small armoire on the opposite side of the room. But we didn’t just want to just purchase a table lamp to plop down on the freshly painted armoire (which Emily purchased for her daughter’s old room years ago). Instead, we opted to repurpose an existing lamp that Emily already had and we seized the opportunity to give the basic white fabric shade a whole new look with some fun yellow fabric that we picked up for less than eight dollars. Here’s the illuminating finished product:
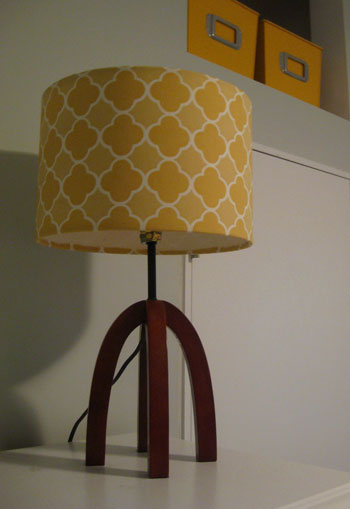
And the good news is that anyone can freshen up a lamp shade with some fresh fabric and a glue gun (note: this project works best with fabric shades and not paper shades, which can overheat and melt the glue). You also may want to use high-temp glue sticks with your glue gun for even more no-melt security (although we used regular glue sticks without incident). Completing our custom shade from start to finish only took about a half hour. First we grabbed a half of a yard of graphic yellow fabric from our favorite local fabric store (William’s & Sherrill) which we knew would be enough to easily cover the lamp’s existing white shade. Oh and we went with moderately thin yellow fabric so the lamp would still cast a lot of light into the space (dark thick fabric wouldn’t allow for nearly as much of a glow). Then we laid out the fabric and measured the circumference of the shade and the height of the shade (and added two inches to each before cutting our swatch of fabric to that size).
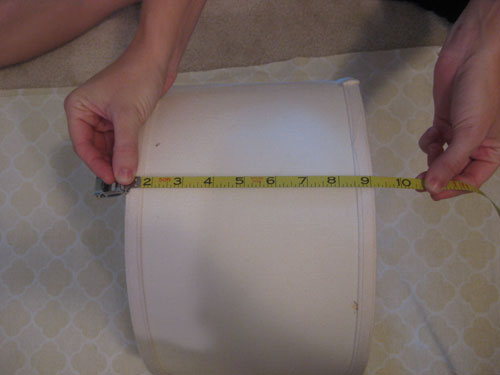
Since our fabric has a pattern on it, we were careful to follow the lines of the pattern while we cut (so we weren’t left with a crooked-looking swatch to cover the lamp). After trimming it down to two inches longer and wider than the circumference and width of the shade, we had one long panel of fabric that could be wrapped around the shade with a bit leftover on all ends (which we would use to secure things in place).
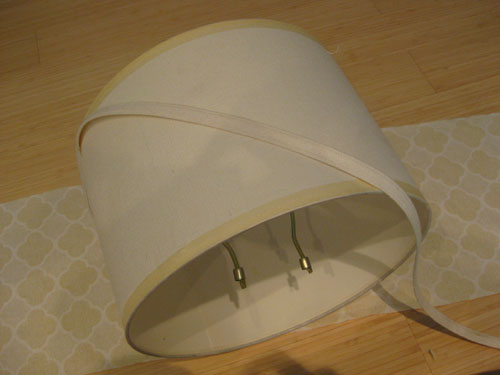
Oh and our shade had a bit of banding around the top and the bottom that was just glued on, so we carefully pried both strips off to create a perfectly flat shade to serve as the foundation for our new fabric.
Then we used one of Emily’s had-them-forever glue guns to carefully adhere one end of the fabric in place on the shade. We learned pretty quickly that we had to work fast (nothing stuck to the line of glue if it had too much time to dry, so we just peeled off our first too-slow attempt and picked up the pace for a much better result).
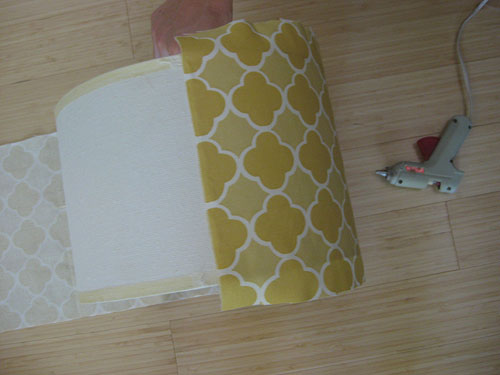
Next we made a nice finished looking edge on the other side of the fabric by folding about a half inch of it over itself and gluing the hem in place (not shown). Next we applied another bead of glue on top of the other side of the fabric…
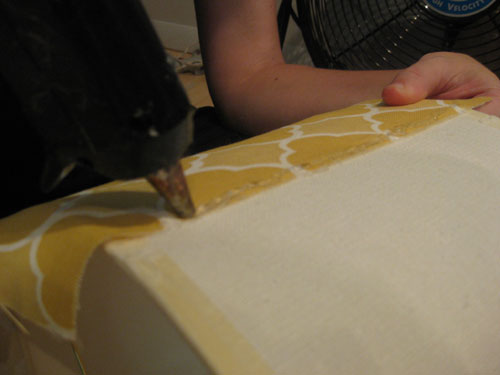
…so we could tightly wrap the entire panel of fabric around the shade and stick one end on top of the other to create a nice clean-looking seam. Tight is the key word so be sure to have someone hold the shade while you pull the fabric around and secure it for a sleek and professional look (baggy just won’t look nearly as good as fitted fabric).
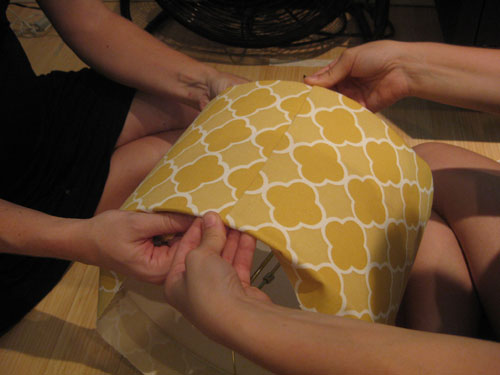
Of course your pattern might not match up perfectly when you glue the ends together to create the seam, but ensuring that everything is straight and even on the rest of the shade (top to bottom, so nothing looks like it’s slowly slipping up or down) makes for a nice polished look. And of course after you’re done you can simply turn the seam to face the wall so the perfect looking front of the shade is on display.
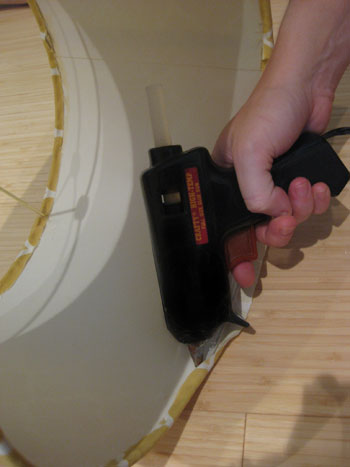
You can see from the photo above that after we attached the fabric panel securely around the lamp shade at the seam, we still had extra fabric around the top and the bottom of the shade. We trimmed a bit of the excess off and then got to work using our trusty glue gun to adhere the sliver of fabric that we had leftover around the inside rim along the top and bottom of the shade for a nice finished look. It was easy to run the glue gun against the inside lip of the shade and glue down three to four inch sections at a time (anything much longer was hard to get to before the glue dried).
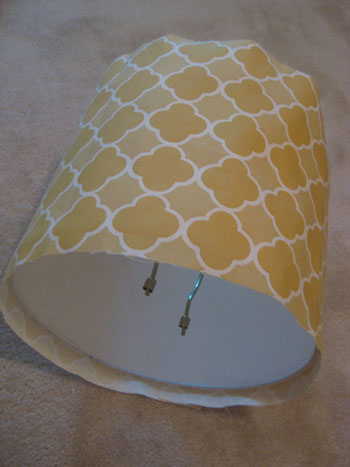
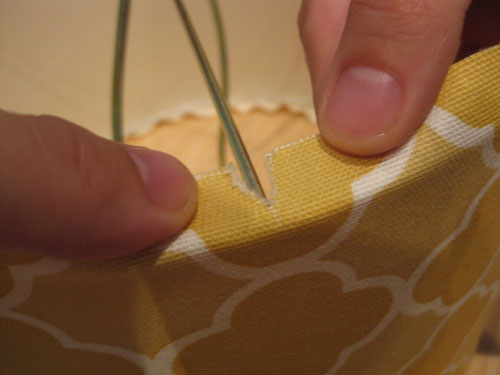
We also realized that to get a nice tight edge we needed to carefully snip the fabric around the metal rods that hold the shade to the light bulb, so we made some tiny snips and just glued them on either side to hold the flaps in place around the rods for a seamless look (see photo above for one a finished one).
So that’s it. All you need is a half yard of fabric, a scissors, a glue gun, a tape measure, and a helping hand (this project is definitely easier with two people). And for less than eight dollars you can totally spruce up an old table lamp (or even a floor lamp or a giant ceiling pendant!).

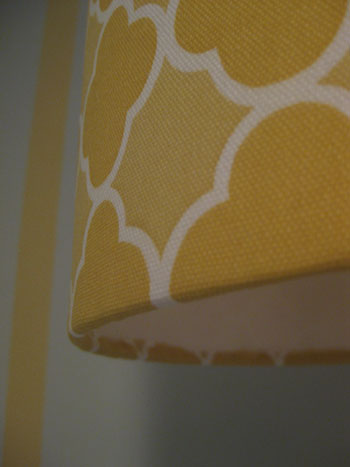
Here’s a delectable detail shot. We got so lucky with our fun fabric find!
And here’s our baby all lit up and glowing. And speaking of babies, isn’t Emily’s little guy going to be one lucky man? With this fun little lamp shade to gaze at we think he’s destined for greatness.
So that’s how, for just $47, we installed a swing arm lamp and made a custom lamp shade to cast more than enough light around the room. Next on the agenda are just a few finishing touches and stimulating accessories, which is pretty good news considering the baby’s October due date is just around the corner.
What do you guys think? Anyone out there who might take on the lamp shade recovering project? Any swing arm seekers who might add one to free up some table or floor space in their home? Anyone else doing a fun nursery or kids room project? Any newly pregnant ladies out there? So many of our friends and family members are telling us they have a bun in the oven that we wonder if there’s something in the water…
Psst- Lighting projects should always be handled with caution. Remember to leave a lamp’s original fabric shade in place and in good condition to ensure that your exterior layer of fabric is an ample distance away from the bulb so it’s not a fire hazard. Oh and using CFL bulbs (which are much cooler to the touch) will further reduce the risk of anything overheating. And of course remember to turn off the power to the entire house if you’re hardwiring a fixture like a swing arm lamp. Safety first!

court. says
John and Sherry,
I just re-covered a lampshade following this post and I must say it was a breeze! My lamp looks 1000X better and I’m now a HUGE fan of black lampshades.
Thanks again!
-court.
YoungHouseLove says
So glad it worked and that it was such a snap. Yessssss!
xo,
s
SEO Specialist Blog says
Amanda, Thanks a lot for all the information on fabric, it was fantastic! I love the nusery
Julia Perry says
Hey guys,
Was introduced to your blog last week and have been surfing it for hours tonight. In love! I’ll definitely send links to projects as I complete them, and you’ll get the credit: http://www.istealgoodideas.com.
Anywho … wondering if you’ve tried recovering lamps that aren’t so lovely and drum-like. I’m sitting here pawing the pair of lampshades that came with some Lowe’s lamps I bought years ago and DYING to recover them. The shades are rectangular and they are smaller at the top than at the bottom. Fabric shades. Any ideas on how to measure, etc?
Thanks for an awesome blog! You are inspiring me to be more prolific with my own!
Julia Perry, Idea Thief
YoungHouseLove says
Hey Julia,
What a fun concept for a blog! As for how we might approach recovering a tapered rectangular shade, we would still try to use one “loop” of fabric glued with a seam in the back and also glued around the top and bottom of the lamp. Just as you can pull it taught around a drum, it stands to reason that you can pull fabric taught around a tapered rectangle- you probably just want to avoid patterns with obvious lines or grids since the tapered nature of the shade might make the pattern “migrate” so it doesn’t look “centered.” Does that make sense? But any fabric that’s solid or even floral or paisley should work if you follow the same basic steps that we outlined in this post. Hope it helps!
xo,
s
Carie says
I am 8 months pregnant and we are moving to Bham, Al in 1-2 months and I have been planning on recovering lamps to hang as a pendant lamp on the ceiling for my 2 boys. Love the idea and cannot wait to get settled to start some projects. I just found your website today and love it. We plan on painting kitchen cabinets soon too – hopefully a gray/green with neutral walls. Very excited. Thanks for the good ideas!
Carie
ana says
the link to your lampshade redo came up when i finished typing up my own redo on my blog. i like your choice of fabric, and it’s interesting to read how you went about this!
Tasha says
Have ya’ll done a lamp that is narrower at the top? I just did, and it turned out okay, but I’m sure there is a way to make it look cleaner. Thoughts? It’s here: http://diyingtobedomestic.wordpress.com/2010/06/23/mason-jar-lamp/
YoungHouseLove says
We haven’t tackled one yet but yours looks great! Thanks for sharing the link!
xo,
s
Jenn says
I saw Tasha’s great lampshade makeover and thought she or others might enjoy seeing another way to try a tapered shade without pleats.
http://craftyclass.wordpress.com/2010/06/12/lampshade-makeover/
georgina says
Love the look of the new lampshade.I was wondering if you could still use the same instructions if your lamp shade was wider at the bottom than at the top of the shade.
YoungHouseLove says
You can use the same basic approach, but since the shade isn’t the same width on the top as it is on the bottom, instead of a rectanle of fabric to wrap around the shade, you’ll need a more irregular shape of fabric. Just take your time and maybe even cut an old sheet up to make a template to be sure it fits. Good luck!
xo,
s
Dee says
Stumbled across this post because I wanted to paint my bookshelves
and it’s not the normal mode to paint timber so I found you two, who by the way look so happy together, and I just kept on reading. I love, love, love your willingness and passion for flair and colour on a budget. I say
Yeehaa for your vivacity and fun loving spirit.
You know I found a site a few weeks back where a woman got seriously mocked for wanting to sand and re-do a vintage mahogany table and speak it up. I told her “staying safe leads to a
Mundane life lived to someone elses comfort.
Bless you both. You look so happy.
How do you answer all these comments???
Hope you take time for each other to keep that warmth alive.
Bless you
YoungHouseLove says
Aw thanks so much Dee! So glad you found us! We just love chatting with people so answering comments is fun for us (along with painting and demo-ing and all that other stuff that not everyone loves- haha). We’re just weird, but we definitely have fun with it!
xo,
s
Mary says
I love the lampshade & the fabric you used. I may want to try this with one of my shades. (Although, I am not sure if it’s paper or fabric). On a lamp shade related question….Do all lamp shades in the same room have to be the same shape type? For example, I am thinking of having a table lamp on one side of the couch and a floor lamp on the other side. The table lamp has a more modern, round shade whereas the floor lamp has a more traditional bell type shade. Would this look okay or is it best to match the shade shape type (bell, square, circle, whatever it may be)? Also, do the shade colors have to match?
Thanks!
YoungHouseLove says
I love a layered look, so in my book the color and shade type doesn’t have to match- it just has to “go” when you look at the room as a whole. Trust your eye!
xo,
s
grace adkins says
Thanks so much for these easy to follow lamp upholstery instructions! I followed them to cover my own very tiny lamp: http://graceadkins.blogspot.com/2011/11/diy-upholstered-lamp-shade.html
YoungHouseLove says
Love it! So cute!
xo,
s
Courtney says
Do you mind if I link to this? I just wrote about either buying or making a new lamp shade to replace my boring old one, and then I found this!
YoungHouseLove says
Sure! Link away!
xo,
s
Jamie says
I was wondering if the lamp would get too hot for the fabric/glue? Would the glue start to melt? I love this idea though!
YoungHouseLove says
Lots of fabric lamp shades are actually secured with glue, so there’s no issue with heat or anything!
xo
s
Dee says
Hi there. I know this is an old post but I came across it and was wondering if you would share on The CSI project next week for lamp week.
Come on over and check us out.
http://www.thecsiproject.com
Each week we have a new challenge and new judge. We also have 3 tutorials from bloggers.
I would love for you to do a tutorial on how to cover a lamp shade.
email me if you are interested
[email protected]
ashleyat87 says
Wow, I’m super behind with this post, but I LOVE the fabric choice! It took me a good 2 hours to decide on the fabric for our drum shade we made to fit over our dining room chandelier but you have to look at it forever (or until you recover it again). Check it out…
http://designwaffle.wordpress.com/2013/01/22/chandelier-drum-shade/
YoungHouseLove says
So cool!
xo
s
Angela says
I’m a regular reader… and I’m always happily surprised when I click on a link from pinterest and it dumps me here :) I’m covering a lampshade tonight to hang over an existing (hideous) chandelier in our dining room. I should have known to just start here for my tutorial search!
YoungHouseLove says
Aw thanks Angela!
xo,
s
Krystal says
Question! What do I do if my fabric on my existing shade is black? I’m afraid that adding the fabric to it will make it so it’s too dark.
YoungHouseLove says
Hmm maybe hold it up to see if it’s too dark first?
xo,
s
Candace says
Crazy story…I covered a thrift shop lamp shade in our guest room with the same exact fabric last year. I love your blog and style in general. I couldn’t believe my eyes when I saw this post. So excited to know my fabric choice was vindicated by yours truly. Keep up the good work, you two are great!
YoungHouseLove says
So funny, I love that!
xo
s