I never pictured myself painting a wall in our house black, let alone doing it at 5am. But that’s what I found myself doing two weeks ago. Allow me to explain.
When our postcard wall moved into place last week, it meant our much loved wallflowers above the desk had to be relocated…
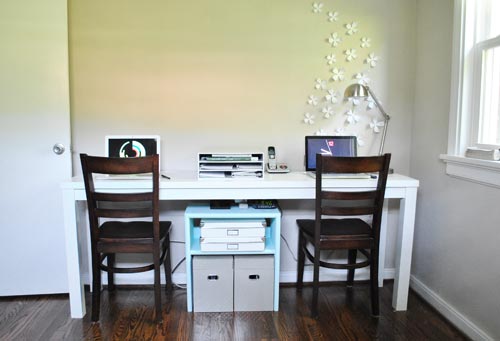
… well, some stayed in place when we decided we liked leaning a few on the shelves of our postcard wall– but the rest needed a new home.
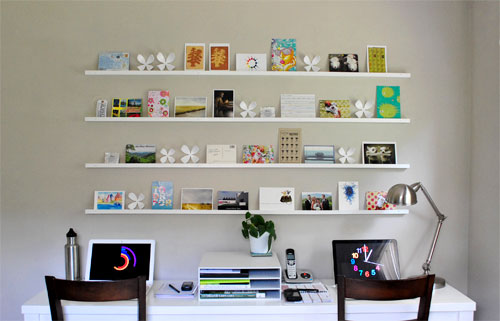
Well, they didn’t go far. We decided to move them just one wall over to the small space under the office/guest room/playroom’s one and only big window.
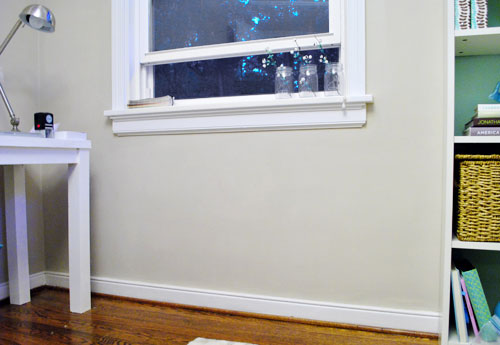
Why? That’s probably best explained by answering the “how” first. Instead of relying on the special nails that came with our magnetic wallflower kit- which firmly affix the arrangement in one spot thanks to the magnet-backed flowers which stick to the magnetized nail heads- we decided to try something new: magnetic paint (note: some of the new wallflower kits snap instead of being magnetized). We thought magnetic paint would be just the thing for this project since we’d been dying to try it for years and were just waiting for the right project. We often wondered if the rumors were true- did it really work? We were about to find out.
See, by creating a large magnetic canvas we could design a spot where the wallflowers could be displayed, but instead of being limited to the fixed spots where we placed the magnetic pins in the wall, this time the wallflowers (along with any other magnets) could easily be moved around into an infinite number of fun formations, adding a nice element of “play” to our office/guest room/playroom- especially once Clara becomes mobile enough to move them around. And they’re definitely at a kid-friendly height!
Luckily the magnetic paint rumors were true. Well, mostly – it’s actually magnetic primer. We found this $21 quart of Rust-oleum Magnetic Latex Primer at Home Depot (next to things like chalkboard paint, dry erase paint, and glow-in-the-dark paint). Update: Here’s an affiliate link to it over on Amazon if you can’t find it in stores.
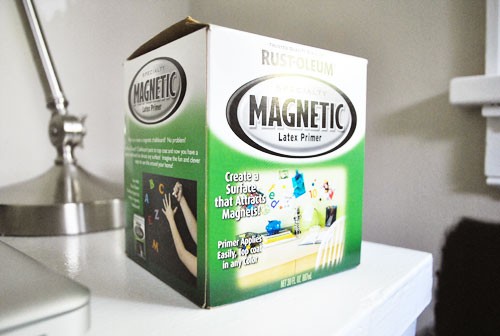
Oh and before heading home we noticed the instructions actually suggested having it shaken by the store’s paint department to help keep the iron particles from settling on the bottom – so don’t forget to shake yours like crazy! The instructions also suggested two or three thin coats to achieve the best results as opposed to one or two thick and gloppy ones. Good to know.
Well… we did seven.
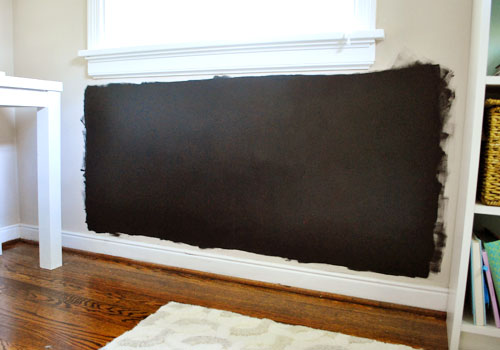
And we made sure they were all extremely thin so there wasn’t any bump or delineation where the magnetic paint started or ended. Maybe four extra applications were overkill, but we were determined to make this stuff work. Plus I realized only after coat number two or three that I was supposed to be vigorously stirring between each application. Oops. But since the coats dried really fast it only took me an evening, a morning, and one random 5am painting session to apply all seven (Clara had woken us up for a surprise feeding- she usually sleeps from around 10pm to 9am!- so I figured I’d be productive while Sherry sleepily nursed her). And ultimately… drumroll please… it worked. Woo hoo!
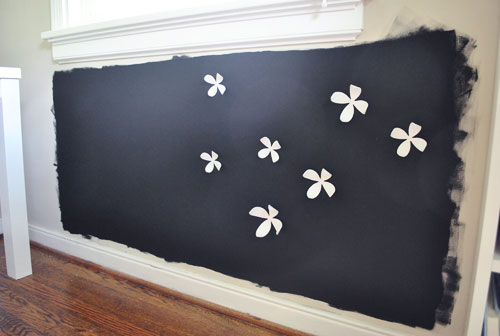
Well, it mostly worked. After each coat I tested variously sized wallflowers to see if they would stay up. The smallest sizes stuck almost immediately but despite my persistence I never could get the larger ones to stay in one spot (they’d just slide down the wall, hit the baseboard, and fall off). So we’d say that magnetic primer works, but not with anything terribly heavy. Now you know why some ended up on the postcard shelves. Oh well – happy accident.
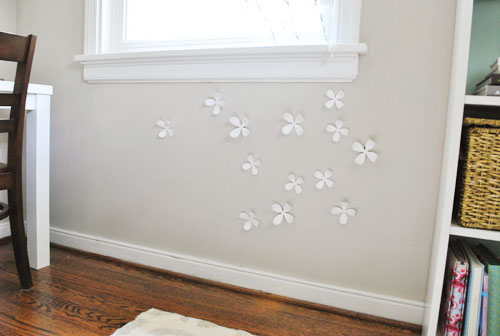
But in the good news category, despite the fact that we had just painted a huge black spot on our wall – it barely took two coats to cover it up completely with the original wall color (Glidden’s Sand White). Phew. Heart attack averted. And it didn’t seem to lose any of the magnetic attraction when covered with other non-magnetic paint. It’s also 100% non-toxic and kid-safe when dry (obviously it’s not safe for a kid to drink it in liquid form). We did keep Clara out of the room with the windows open and a fan on for the full drying period (and about three days after that since we happened to be out of town for the weekend anyway) just to be safe.
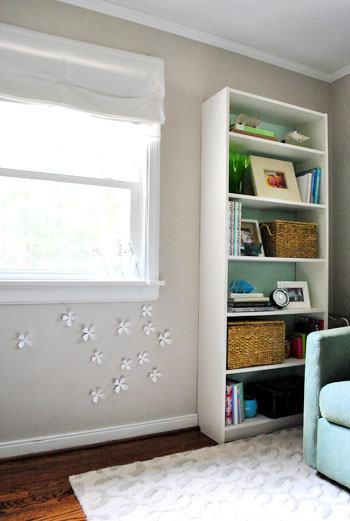
Even though we couldn’t get all of the wallflowers to stick, we’re actually really happy with how it turned out. And we can’t wait to find some other fun magnets to put up there so Clara can play with them when she’s a bit older. Speaking of which – does anyone know where we could find an all-white set of those alphabet magnets? We googled around for a while with no luck- and we think they would be a fun and educational addition to the little slices of “playroom” that we’re trying to squeeze into this small space for our favorite little girl.
Has anyone else tried magnetic primer? Or any of those other wacky chalkboard/dry erase/glow-in-the-dark paints? We’d love to know what you guys thought about using those newfangled products. Did they work? Were they messy or hard to apply? Spill the beans.
Psst- Wanna follow the entire office/guest bedroom/playroom makeover? Click here for the intro post, here to read about the big sleeper sofa hunt, here for the DIY desk play-by-play, here for the homemade light fixture project, here for our hacked Ikea bookcase, here for the file storage we built, here for how we squeezed in some toy storage, here for how we picked out some DIY art that we could agree on, here for how we wrangled our wires, and here for the play-by-play of creating our postcard art wall.

Felicia says
How about buying wood letters in the size of your choice (from say, Michael’s or JoAnn’s) and spray-painting them, and affixing magnets on them?
YoungHouseLove says
Great ideas everyone! We definitely have a lot to think about!
xo,
s
Mike and McGee says
We’ve used the magenta chalkboard paint. We rolled several coats onto a thin piece of fiberboard to create a chalkboard for Meredith and then framed it with an ornate frame. She loves it!
Deb says
Hey guys- I was at Kroger yesterday (not sure if you have one near you) doing my grocery shopping and hanging in one of the aisles were white Alpha. magnets that also glow in the dark. Thought I’d pass it along :) They were a whopping $4
YoungHouseLove says
Awesome – great to know, Deb!
Lisa says
This might sound like a silly question but after we had looked into doing a magnetic wall, we read some interesting things about it affecting wireless connections. As it’s in your office, do you have any problems with your wireless printer or internet connection?
YoungHouseLove says
We worried about this too but did some online research and learned that it’s not nearly strong enough to effect things like that. Sure enough, our wireless internet and wireless printing capabilities are unaffected, even though the magnetic wall is right next to our desk and printer. Hope it helps!
xo,
s
carak says
Love this! It’s a great alternative to the commitment of an all-black wall.
Sally says
I have a cool suggestion that isn’t alphabet letters, and probably would have to wait until Clara was older.
I have this “In the Garden” magnet set on my fridge. I think it looks cool and my 4 year old nephew likes playing with it. http://members.cox.net/tessellations/Puzzles.html
YoungHouseLove says
Oooh that looks really fun! We’ve actually figured something out when it comes to the magnetic letter project so stay tuned…
xo,
s
Rebecca Foxworth says
Be careful with the magnetic alphabet letters. The magnets often come out of the back and can be swallowed. Wait until Clara’s old enough to be past choking or mouthing age to get those letters. Or get high quality ones that have the magnets totally enclosed.
YoungHouseLove says
Hey Rebecca,
So true! We’re all about safety first, and our solution actually involves the magnets being 100% enclosed. Stay tuned for those details…
xo,
s
Shelby says
Oooh I’m actually doing a very similar project this weekend. I’m doing the magnetic primer on my living room wall, painting over it, and attaching small magnets to cute, colorful, paper cranes. I’ve been looking for something to do with my paper crane folding habit, so I’m pretty excited (:
Rachel Elizabeth says
I love these! Seriously a good idea and I love the 3d effect.
lizkayl says
Just a warning- my mom put some magnetic poetry sheets on the metal kitchen door (led to the garage). After a while, we quit moving them around regularly and they got somewhat stuck and when we moved them, they either left a residue or removed paint.
So, either stick to the solid rock style magnets or make sure to move them around on a regular basis.
Tara says
We just tackled a magnetic chalkboard project this weekend. The walls in our basement are dark gray, and we painted a 4 foot wide stripe in the middle of one of the smaller walls. We choose magnetic primer, and put a few coats of chalkboard paint on top of it. It gave a cool dimension with the four foot black stripe running down the middle of the walls. We ended up doing about 4 coats of magnetic paint. I wish we would have had the store shake the can, as you mentioned. There are a few glops and bumps up there. I guess it adds character!
Shana says
Hi! Sorry if this question was already asked. Did you use the entire quart can with your seven coats? A friend and I are interested in doing a similar project and wondered if we could share a can.
YoungHouseLove says
Hi Shana,
Given the small area we were painting we only went through about half of the quart, so if you and your friend are doing similarly small areas you should be fine sharing the can. Good luck!
-John
Bella says
Hi,
first of all I love your blog. It has inspired me a lot and I also copied a few of your projects in slight variations ^^
Second: you asked about the glow in the dark paint.
When I was a kid my grandpa painted stars on my ceiling with white glow in the dark paint that was invisible during the day (as my ceiling was white). Peace of cake, really easy to apply and comes in various colours^^
I’m sure Clara would love having stars on her ceiling. It’s just like sleeping under the stars and provides kind of a “natural nightlight” so the room isn’t that dark =)
About the All white magnets:
You could just buy some regular coloured or wooden ones and paint them white. I think it’s not really that difficult.
Greetings from Austria and keep the Creative Work going ^^
Love your Blog!
Bella
Nicole says
While browsing around other bogs I came across this cute tutorial for magnetic letters that are smooth and eye-pleasing. Check them out!
http://www.nicegirlnotes.com/magnets
Erin @ Letter Soup says
I love this idea! Thanks! Did you find some magnetic letters that stick well? I’m having a tough time finding the right magnets. (We need something super strong, toddler friendly, and preferably cute.) I posted some great alphabet magnet ideas here, but I’d love to hear about a set that contains particularly strong magnets: http://lettersoupblog.blogspot.com/2010/09/alphabet-magnets.html
YoungHouseLove says
Hey Erin,
We did! Here’s that post: http://blogs.babycenter.com/life_and_home/not-your-mothers-magnetic-letters/
xo,
s
Caroline says
Spray paint for the alpha-mags? non-toxic, of course. Nice idea to paint them all one color, but my teacher’s background is telling me to suggest a contrasting color for the vowels….and, ummm, lower case to begin with, not capitals. just saying, no sense in wasting an opportunity to teach!!
Caroline
YoungHouseLove says
No worries! We actually ended up with colorful fabric ones. Clara loves them!
xo,
s
Steph says
My friend is wanting to paint a magnetic chalkboard in her house, and I remembered reading about this project you did in your old house! Thought I’d check back for some tips!
Question – Did you guys apply the magnetic primer using a brush or roller? I think the brand she bought says to apply using a brush, but it could take FOR-EV-ER to paint her mega-wall.
YoungHouseLove says
John actually used a mini roller, but kept it nice and thin so it wouldn’t bump out from the rest of the wall when we repainted. Hope it helps!
xo,
s
Amanda says
I was just wondering what you guys thought about the brand of magnetic paint you used. Would you buy it again? I’m planning on doing a framed out magnetic patch of wall in our dining room and I want our kids to be able to use the plastic magnetic letters with it. I was surprised at how many different brands were out there. And I was surprised that after putting so many coats on, some of those magnetic wallflowers didn’t stick for you! Any advice for me? Thanks!
Oh, and I just wanted to mention how much I love, love, love your site! It’s so much following along with your new house!
YoungHouseLove says
Yup, we would totally buy it again. I think the rule with all brands is that super heavy things just aren’t meant to be held up by paint. Hope it helps!
xo,
s
Sherry says
Have you thought of doing fabric magnets in white felt or fleece or whatever. Look here http://www.purlbee.com/abc-fabric-magnets/
I think it would be cool to do in a variety of textures in white and off white. I am sure you will come up with something cool
YoungHouseLove says
We found some awesome fabric and magnet ones on etsy. Love them!
xo,
s
Karin says
We have used chalkboard paint on our very beat-up pantry door at our last fixer-upper house, and using some free samples people had returned to Home Depot, made an eyesore into a fun menu/message door.
The chalkboard paint did ok for about a year, and then it needed some touch up where our children had banged into the door a billion times with one toy or another (the paint chipped off). Also, it needed to be wiped down with a damp cloth to really ‘erase’ the chalk. :D Great ideas!
Ashley says
I know this is so long after you posted this, but I just did this for my nursery and we ordered the flower magnet set from Umbra like you have there, but they seem rather pokey! Did you guys have any problems or concerns with Clara poking herself with those flowers? My husband particularly thinks I’m nuts to put them at eye level…Thanks so much!
YoungHouseLove says
Oh no! It’s been years so I think they might be new makers/models (we hear they don’t have magnetic tacks anymore either). If they feel pokey I’d definitely move them higher (ours had rounded corners).
xo
s