We mentioned a few times that we wanted to get a bookcase for the office/guest room/playroom since they’re so great for storing things, displaying things, and adding some architecture and height. We thought a bit about placement and quickly realized that the area to the left of the uncentered window on the far wall of the room would be the best place for a bookcase, so we headed off to Ikea with the measurements of that wall on a little scrap of paper in my purse. And in a few short hours we found ourselves assembling our $69 Billy bookcase:
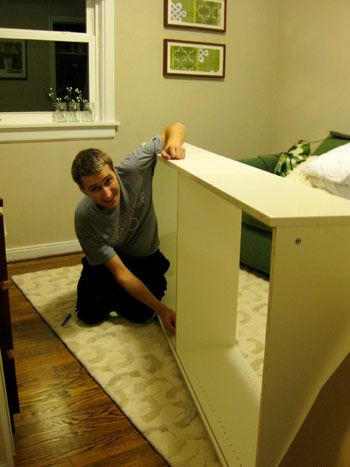
We actually checked out a few other Ikea options (like the Expedit and the Lack bookcase) but the measurements of that wall seemed perfect for the width and height of good ol’ Billy (and the $69 price tag wasn’t to shabby either). Plus whenever we snag something affordable we don’t feel too bad taking the time to tweak it a little. So when we realized that it wouldn’t sit flush against our wall thanks to the baseboard and shoe molding we grabbed a small coping saw and chiseled out the perfect shape.
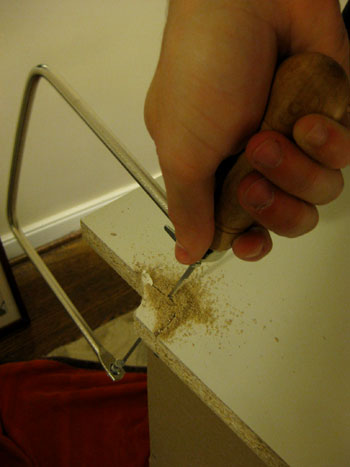
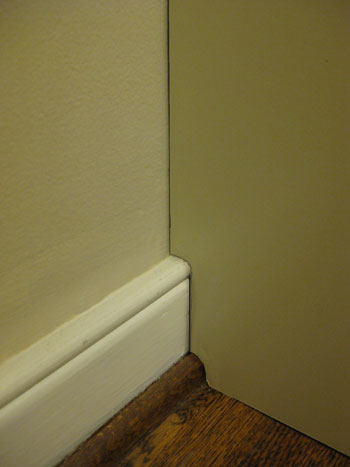
About ten minutes of sawing left us with this nicely customized setup. Flush bookcase = happy dance.
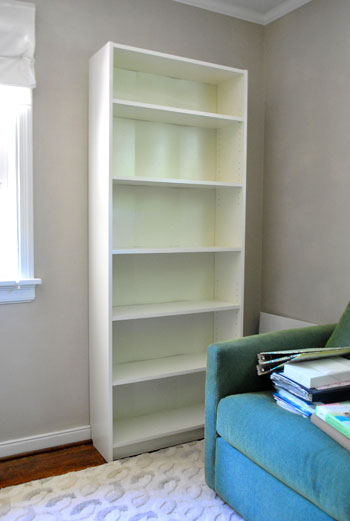
And when we stepped back and surveyed the full scene we loved how the bookcase added some much-needed balance to the entire wall. The height that it introduced on the right side of the wall really worked with the height of the window to the left. And the fact that it tucked right in next to our sleeper sofa without feeling crowded (thanks to the modest footprint of the bookcase) was the icing on the cake. But there was something that totally rubbed us the wrong way about Billy. The thin cardboard-ish back panel was folded into thirds in the flat-packed box, so when we unfolded it and secured it to the back of the bookcase with small finish nails it still had some telltale creases and looked a bit shoddy to boot. Cripes.
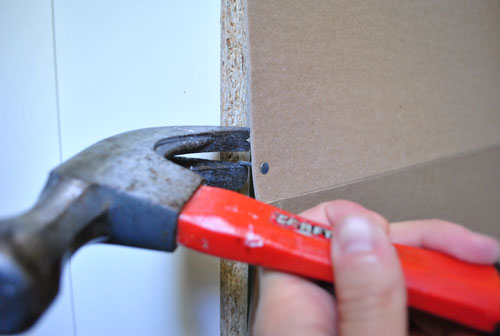
So we decided to take a moment to brainstorm a few possible solutions. We decided we could grab some foam core and cut it to the size of the six rectangular openings in the back of the bookcase and slip it back there (to obscure the view of the creased back). Heck we could even paint, wallpaper, or cover the foam core with fabric for a nice little customized look. But that seemed like a lot of foam core and a fair amount of work. Then came our second idea. What if we removed the back of the bookcase altogether and painted the wall behind it for the same effect? So off came the back:
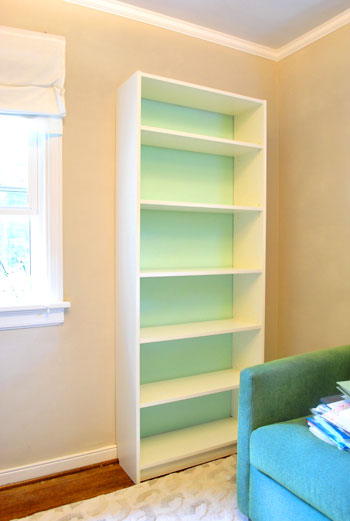
Then we realized that we could apply a quick and dirty tape rectangle around the wall (with the bookcase still in place) so we knew where to apply our background color. After we stuck up some Frog Tape and removed the bookcase, here’s what we were left with:
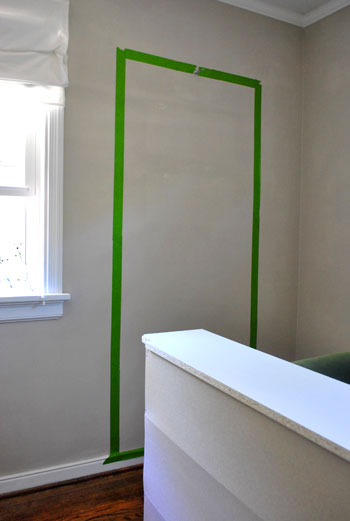
We opted to go with Mythic’s Adanna Aire, which was paint that we had leftover from the nursery ceiling. Gotta love a soft aqua tone that’s 100% free. Plus it worked really well with our blue-green sleeper sofa. Then we just slid the bookcase back into place in front of the painted portion of the wall.
But we had a second eyesore to solve. Removing the back panel left a dark crevice in the back of the bookcase that we could definitely do without. And all the holes for moving the shelves around didn’t exactly look high end either.
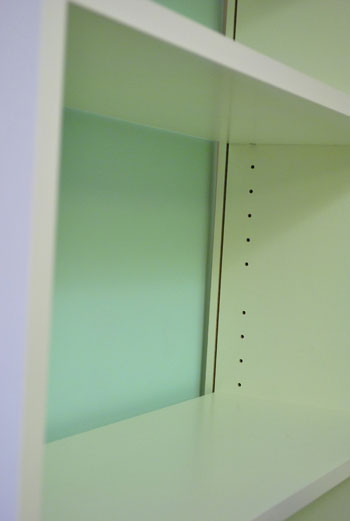
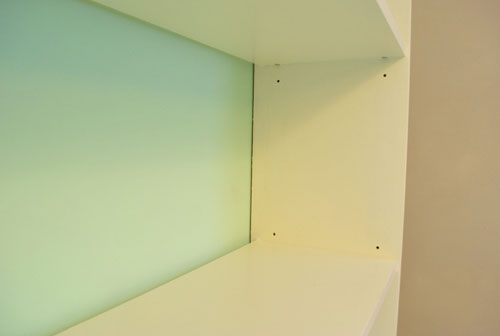
So we broke out some white caulk and filled them in. We opted to leave one hole above and below each shelf (in case we wanted to shift things slightly to accommodate something a smidge taller or shorter) but we loved the look of six unformly spaced shelves, so we knew we’d never use the other holes to create extra tall or short ones. And in an oh-happy-day moment, the white Dap window and trim caulk that we used turned out to be nearly identical in color to the bookcase, so it definitely obscured that ridge near the wall along with all those extra holes:
We did notice that deciding to lose that back did slightly compromise the bookcase’s sturdy-factor. By no means was it super rickety, but it didn’t feel quite as reinforced as it was with that panel in place – even though it was basically just a folded sheet of cardboard.
Happily, after anchoring it to the wall at the top it added back a bit more of the structural integrity, but for even more dependable sturdiness and kid-safety we would highly recommend adding some metal L-brackets for more structure (which can be painted white so they virtually disappear). We definitely plan to take that reinforcement project on soon when we do other kid-safe things like anchor the TV in the den and a few other bookcases around the house.
When it came to loading up the bookcase, we aimed for equal parts function and form. Since the room would have to work as an office and a guest room, we didn’t want it to feel like it was all business, but we also didn’t want to sacrifice practicality in the name of guest ambiance. So we actually whipped out a pad and a pen to jot down everything that we wanted to store (to be sure that we got the function in there before moving on to the form):
- office supplies like envelopes, tape, scissors, a stapler, notepads, etc
- extra printer paper and cardstock
- paint decks galore (since we refer to them while blogging, they were too far away in the den ottoman where we used to store them)
- books & binders
- a clock (I feed Clara every few hours on the sofa in here, so I knew that would come in handy)
- a few of Clara’s favorite stories and toys (since one of us plays with her while the other tends to the blog)
- treats for Burger (can’t forget about our other baby)
- a few decorative items to keep it from feeling too office-focused when we have overnight visitors
And here’s what we ended up with:
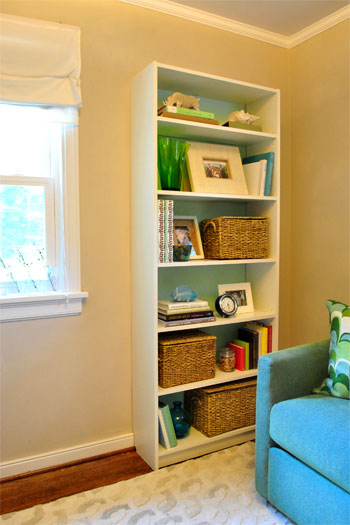
The baskets (from Michael’s for 50% off) easily housed things that we’d rather keep out of view (office supplies, extra paper for the printer, Clara’s books and toys, and a slew of paint decks) while everything from books and binders to a glass container of treats for Burger got premium placement on the shelves. We even had a small clock sitting around and a few decorative vases, frames, and other accessories on hand to keep it from feeling too industrial and office focused so our friends and family feel right at home when they spend the night.
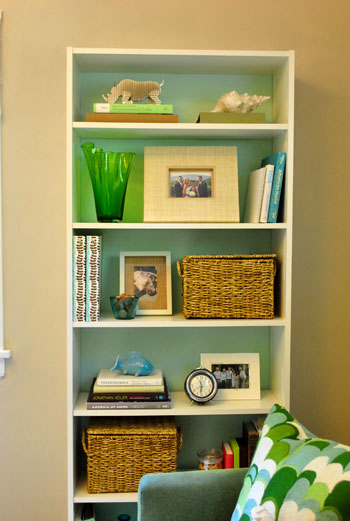
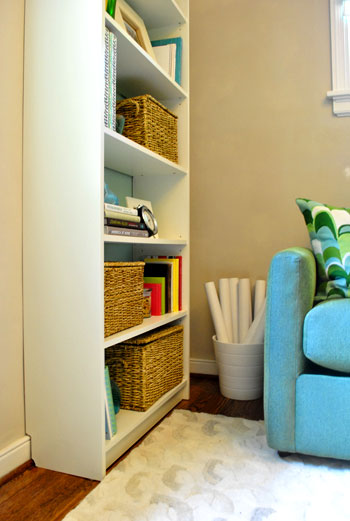
Of course we still have a bunch of files and other paperwork that we’re planning to store over on the desk side of the room (stay tuned for those details) but we love the balance, practicality, and visual interest that a simple $69 bookcase (along with some free paint that we already had on hand) added to the space. Oh and we even had room to squeeze a white planter that we already had (from Ikea) into the corner to hold some mailing tubes (which we use to ship shop stuff). Hooray for even more storage space.
So that’s the latest office update. What have you guys been up to this week? Any bookcase makeovers going on at your house? Any basket-buying going on to add concealed storage somewhere else in your casa? Do tell.
Psst- Wanna follow the entire office/guest bedroom/playroom makeover? Click here for the intro post, here to read about the big sleeper sofa hunt, here for the DIY desk play-by-play, and here for the homemade light fixture project.

Annie says
Just curious…can you tell me what type of Dap caulk you used to fill in the holes? I have the same Ikea bookshelves (but shorter) and want to fill in the holes. Dap has several choices out there so I wasn’t sure which one to try. Thank you!
YoungHouseLove says
We had some paintable door & window caulk lying around that we used (in white, not clear). Hope it helps!
xo,
s
Renee says
Hi,
Love how you have updated the ikea bookcase to be more unique!
Im from Australia. . I own the same ikea unit, pretty sure it is the billy but name aside, they are made with the same stuff I assume. . . I got it a few years back, and for some reason i picked the beech veneer – yuk!!
I have a black lounge, with a white and red theme in the rest of the lounge/living room. . so the horrid ikea bookcase and tv unit stand out.
I have wondered if it was possible to actually paint them rather then replace them?
Would you guys be able to advise or share any tips??
YoungHouseLove says
Hey Renee,
That can be a toughie, but this tutorial is the best we’ve seen: http://livingwithlindsay.com/2009/05/how-to-paint-laminate-furniture.html
Hope it helps!
xo,
s
Renee says
Thanks heaps :)
A bit of work to do it, might give it a try on one of the spare shelves that Im not using.
Buying a new unit would be easier, but ikea is now more then 3.5 hours drive away!
Renee says
Heya YHL :)
Me again – its painting day!! Not quite time to start yet, as its 6am here.
Just a quick question, that I hope you can answer :)
Should I take the ikea billy unit apart and paint each section – I think this would give me a better finish.
Would it be better to use a paintbrush or a roller?
I have both sitting here, and the pile of allen keys – let me know how you would tackle this one!!
Renee xx
YoungHouseLove says
We would actually recommend keeping it together since assembling it after painting it could scratch the finish.
Good luck!
xo,
s
Renee says
So glad I asked – didnt think of the assembling side!!
You guys rock!!
Adrienne says
Hey guys–Love the site and am always inspired…Can you please tell me what color the walls are painted? Thanks!
YoungHouseLove says
They’re Sand White by Glidden.
xo,
s
Carly says
We recently purchased some similar bookcases from Target and would like modify them to be flush with the wall, but the lowest shelf doesn’t clear the trim. Did you have to remove any of your lowest shelf, or just a little from the sides? Any suggestions?
YoungHouseLove says
In our case we didn’t have to alter the shelf, just the back and side of the bookcase. Perhaps measuring how tall and wide the trim is (and making a small paper template) will help you see how much you’ll have to remove. Good luck!
xo,
s
Sabrina says
I have two of the even-cheaper Kilby bookcases, and note they already have a cut-out for baseboards. It’s also super handy for running cables behind them.
I love this room! It’s super cute, and I bet your prospective buyers really enjoy imagining themselves in it.
Madison says
How is this bookcase holding up without the backing?
YoungHouseLove says
Well we moved so right now it’s in pieces leaning against the wall in the playroom. Haha. But it held up awesomely until the day we moved (thanks to anchoring it into the wall and reinforcing it with some metal L-brackets). Hope it helps!
xo,
s
Katie says
Think we’re going to try a similar bookshelf installation this weekend…this might be a dumb question, but where did you put the L-bracket? Under each shelf where they met the frame? Also, how did you anchor it to the wall? Thanks!
Michelle N says
Just a little FYI. We bought 5 Billy cases a few weeks ago and they now have a little cut-out for the shelf to sit flush on the wall. They sit perfectly against the wall!
YoungHouseLove says
Wow- that’s an awesome Ikea upgrade – love it!
xo,
s
Julie says
Hi guys… we’re considering getting a Billy bookcase of our own, however we’re not sure if the box will fit in our car, seeing it’s more than 6 ft. long! I read at some point that you have a Nissan Altima, which we also own. Did the Billy fit in the trunk/fold down seat space of the Altima without an issue?
YoungHouseLove says
Hmm, I can’t remember! We might have borrowed John’s sister’s car since it’s longer. I don’t think a 6ft long box would work in our car, but I’m not 100% sure since it was so long ago!
xo,
s
Julie says
Thanks, Sheri. We might just have to have our parents delivered it in their larger/longer car!
Julie says
Thanks, Sherry. We might just have to have our parents delivered it in their larger/longer car!
Kim says
Wonderful, beautiful and all from using a simple bookcase! I may have to steal the use of baskets to store paperwork etc in – very pretty. :)
Lily says
Looks awesome. Y’all are such an inspiration. Where did you get the pillow? I love it!
YoungHouseLove says
That’s from West Elm about 4 years ago. Maybe try ebay?
xo
s