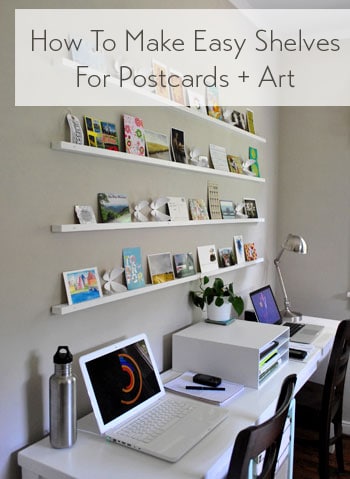
Oh sweet victory, our much debated office art project is done and I’m here to spill the beans about how it all went down, er, up.
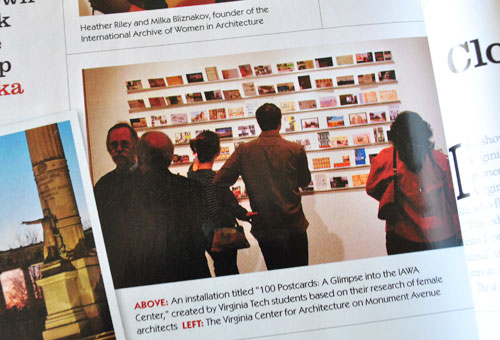
After all, we already gave you this no-detail-left-behind play by play about how Sherry and I fiiiinally agreed to base our design on this gallery of postcard ledges that we spotted in Richmond magazine:
The project was pretty darn easy and actually really fun to do, especially after some of you suggested that we collect reader-submitted postcards from across the globe to fill our wall with an ever-changing arrangement. That suggestion really made trips to our PO Box a lot more exciting than usual. So thanks to everyone who sent a postcard our way (from a bunch of exciting places like Hawaii, England, Spain, Canada and a slew of other spots in the lower 48).
The gallery-inspired shelves started with a trip to Home Depot (Clara’s very first!) to buy supplies. And boy were some of our orange-apron-wearing friends excited to see the tiny human who lived it up in Sherry’s belly for all those months. But back to business. Based on some measurements of the wall, we determined that we wanted four rails above the desk, each measuring 64″ long (we used blue painter’s tape to mark where we wanted them and how long they should be – it’s such an easy way to try out a few zero-commitment arrangements to land on something you love).
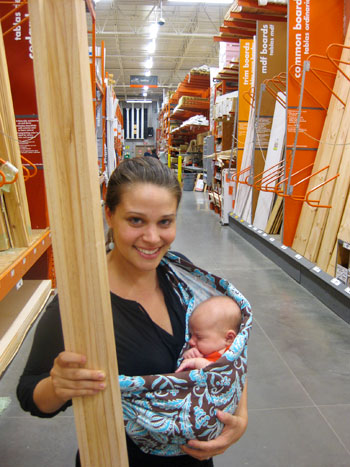
So with our trusty measurements in hand, we snagged some simple 1 x 2 pine boards for about $4 a pop, plus a bunch of screws and anchors (which I’ll talk more about later). In the end this would be the only cost for the entire art wall project, bring the grand total to under 25 bucks. Not bad for filling a giant expanse of wall, right?
And although we once had visions of taking a more complex narrow-shelf-with-a-raised-ledge approach, that all went away when we realized this was the perfect project to break out my Father’s Day present: a Dremel Trio. Sherry must’ve seen me lustily eying it every single time we entered any home improvement store (I’ll admit that I lingered a bit each time), so she surprised me with the $99 tool for daddy’s day (even though I didn’t have a specific sanding, routing, or cutting project in mind). I like to call it fate.
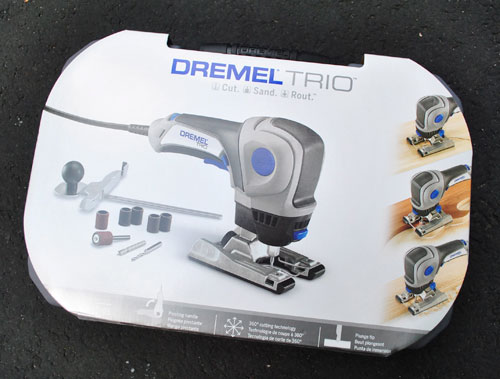
The reason the Dremel would be perfect for this project is because it would allow me to route a small straight groove along each of my four pine boards, creating a perfect spot for postcards and other small art to rest. But before breaking out my new tool, I used an old friend (the miter saw) to cut my four 1 x 2s to identical 64″ lengths. Note: you can have this done at the home improvement store if you don’t have a saw on hand.
Then, despite my enthusiasm to begin Dremel-ing, first I decided to read the directions and (more importantly) do a few test runs on a scrap piece of wood. Thank goodness I did, because I spent about five minutes trying to route with the cutting tool. D’oh. I also learned that the Dremel really likes to pull to one side, so making straight grooves posed a challenge. But thankfully it was a challenge that could easily be overcome by using the metal guide included in the set. Disaster averted.
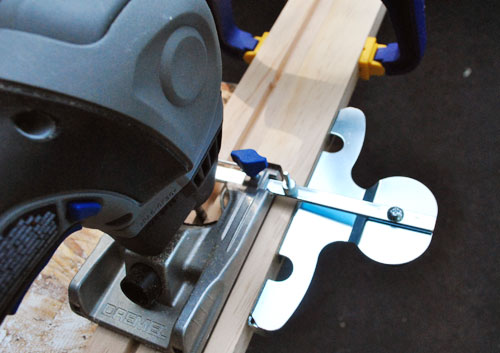
The adjustable guide let me set exactly where I wanted to make my grooves. Although I did hit one snag in that the 1 x 2 boards were thinner than the width of the Dremel. So to use the guide I had to clamp two boards together. No biggie.
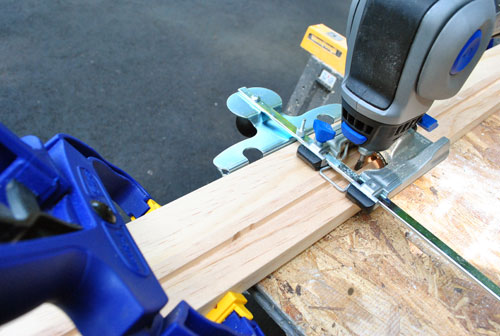
With everything clamped I set my guide so I’d make my cut about a half inch from the outer edge and I set my depth to about 1/3″ inch.
I found the Dremel really easy and fun to use, and once I had everything set and had practiced my system of moving clamps as I went (since they would eventually get in the way of my routing path), it took me about ten minutes to do the remaining three boards.
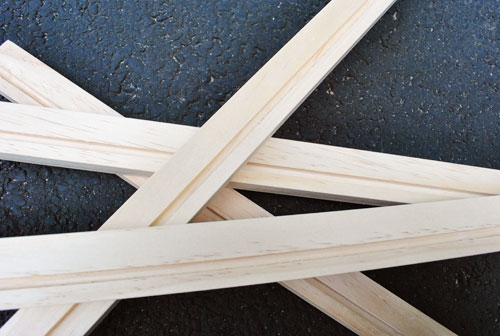
With everything cut, I did a quick sanding job to smooth everything out (by hand, not using the Dremel) and then applied one coat of primer followed by one coat of semi-gloss white paint. Sherry and I discussed staining them a dark wood tone or even painting them a color, but ultimately decided they weren’t the stars of the show so the white would help the postcards pop best while making the shelves feel architectural (like the white trim and crown molding in the room).
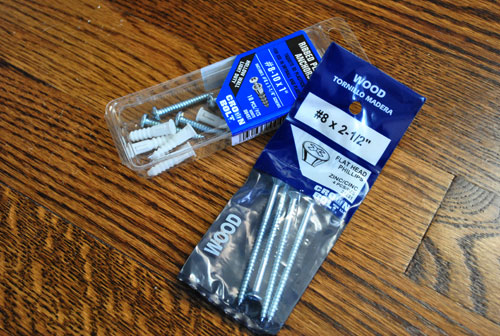
Then we could move into the installation phase of the project. Again we discarded any complex ideas about hiding the screws and decided we’d just screw straight through the boards into some anchors in the wall (and then roughly disguise the screwheads on the front of each shelf with a bit of white paint). Since the boards were pretty light, just 2″ deep, and would be holding postcards, we weren’t too concerned with them being able to bear any intense amount of weight. So our weapons of choice were some long 2.5″ screws and a pack of drywall anchors (since only about 1/2″ of screw would be sticking out the back end after it passed through the 1 x 2, we had to buy a separate pack of smaller anchors).
We opted to go the anchor route (instead of finding studs) so we could place the semi-visible screws evenly across the front of the 1 x 2s. Speaking of which, I took my first board, measured an even spacing for each of the four screws and marked spots to drill my pilot holes. Thus would begin my somewhat intricate one-person system of hanging these suckers. Sherry had already helped me mark a level line for the bottom shelf before Clara woke up (phew) so I was able to hold the shelf in place and then re-drill through my pilot hole far enough to make a small mark on the wall. After following the same process to mark the rest of my holes, I put the shelf down, drilled the rest of the holes, and placed the anchors.
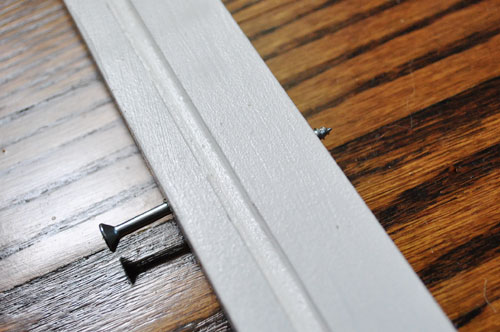
Now here’s a little trick I like to use when doing these things. Trying to screw the rail in place by myself could be a nightmare in terms of lining up the holes to the anchors. So instead I put the screws through each of the four holes in the 1 x 2’s on the ground, allowing the screw tip to poke through the back of the shelf, just a bit. Then when I held the shelf back up against the wall and attempted to line it up with the anchors that I sunk into the wall, I could feel when the screw tips fell into place (plus it helped to keep the shelf from slipping while I one-handedly tightened all of the screws into the anchors in the wall).
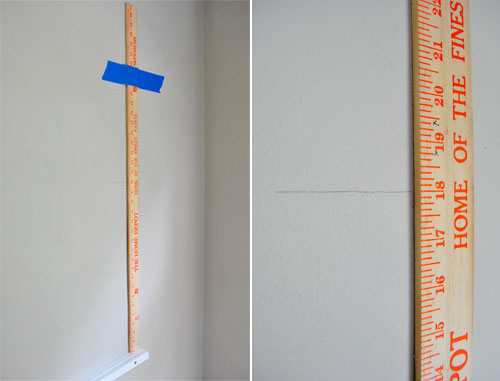
Hanging the first shelf was pretty easy (heck, it almost stayed in place with just one screw). But getting the other three to be straight and evenly spaced required a game plan. Sherry and I had decided that we wanted the four shelves to be nine inches apart to allow enough breathing room for a vertically placed 5 x 7″ piece of art on the shelves. So to measure my nine inch increments I vertically leveled a yard stick and employed some blue painters tape as my second pair of hands to hold it in place while I marked the wall. I did this for each of the four vertical spots that I’d be placing a screw to make sure all of my anchor points were lined up and evenly spaced.
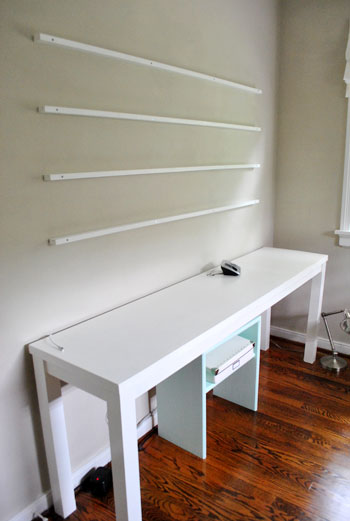
I spare you the rest of the process since it took longer than I expected, especially since I double and triple checked a lot of my measurements. But in about 45 minutes I had all four of the shelves hung. And wouldn’t you know it, they were perfectly level and extremely secure. Phew!
Then all that was left to do was to populate the shelves with postcards and other postcard sized artwork. And thanks to a bunch of you, we had plenty to choose from! We also peppered in a few photos, cards, and other miscellaneous items that we liked (from flattened foil chocolate wrappers with sweet quotes on them to art that we cut out of magazines and backed on cardstock to create a postcard-esque weight). Here’s a shot of what it looked like yesterday afternoon (after a trip to the PO Box- thanks again to everyone who sent cards our way!).
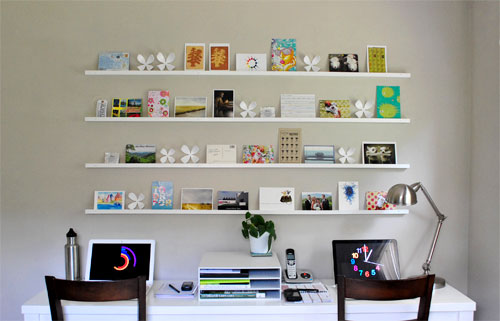
You’ll notice that a few of the displaced Wallflowers made it back up on the shelves. Oh and we found a new spot for the rest of ’em too, which we’ll share in our next office progress post. But for now we’re happy to bask in the glory of this project: the big intimidating blank wall is no more. And we finally have a rotating wall of eye candy to enjoy (and switch up whenever the mood strikes).
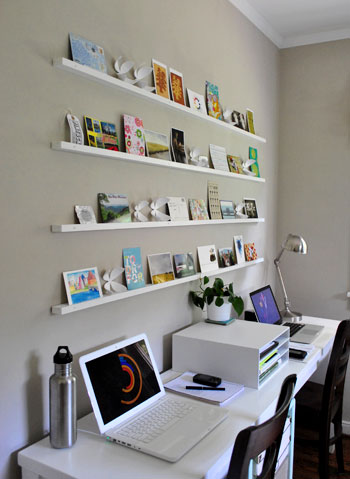
Heck, it’ll probably look different by the time we post our “big reveal” photos of the whole room.
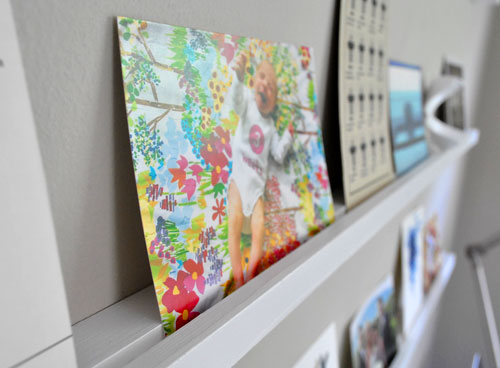
We know some of you are wondering how we’re going to keep things from blowing off of the wall. We haven’t devised a system for that yet, since it’s not a problem that we’re going to encounter ’til (at earliest) the fall when we might throw open a window or two. But when the time comes we’re thinking of possibly backing things on hefty mat-board to keep them from budging in the breeze, or even using that removable blue sticky tack to keep the backs of the cards adhered to the wall (other ideas we flirted with: magnets or even velcro). Ultimately we don’t want to do anything too permanent because it defeats the ever-changing nature of such a project. We promise to keep you posted if we find that we have to implement any of those stay-in-place strategies.
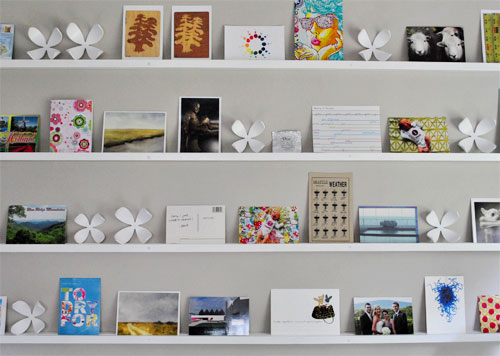
Thank you again to everyone who sent us postcards. It’s been such a sweet byproduct of this art project and we’re very grateful. We plan to keep a stash of all of them so we can continually rotate them out (so if you don’t spot yours in these pictures it’ll definitely still be enjoyed!). And if you want to add to the collection our address again is: PO Box 36665, Richmond, VA 23235. We’d love to hear from you!
But enough about us, we’re wondering if you guys have implemented or otherwise come across any other interesting ways of displaying collections, whether they be 3-D or flat-ish (like our growing postcard collection). Any gallery-inspired art walls? Or shelves full of like objects (snow globes? Eiffel tower statues? garage sale oil paintings?). Spill it.
Psst- Wanna follow the entire office/guest bedroom/playroom makeover? Click here for the intro post, here to read about the big sleeper sofa hunt, here for the DIY desk play-by-play, here for the homemade light fixture project, here for our hacked Ikea bookcase, here for the file storage we built, here for how we squeezed in some toy storage, here for how we picked out some DIY art that we could agree on, and here for how we wrangled our wires.

Anna says
Oh my gosh. LOVE LOVE LOVE THIS!!!!!
Crystal F. says
I’m not sure if someone else has asked this question. I was wondering where you got the clock screensaver. I have one that is black and white, but I like the colors of yours.
YoungHouseLove says
Hey Crystal- It’s from realsimple.com. Love it!
xo,
s
C says
I love this – just showed it to my husband as a simple idea for baby daughters nursery for books as baby books are usually so slim and it would look a bit like a library display.
Crystal F. says
THANKS! You guys are awesome!
Rebecca-Lyn says
I have a bunch of cheap glass photo holders from Ikea from years ago; the kind that doesn’t have a frame on it and is held together by the most inconspicuous little silver tabs. They are small and meant to hold little 3×5 and 4×6 photos. They aren’t free standing and are for wall hanging. I have always wanted to put them on the wall, find that they weren’t substantial enough for the walls, so your idea would be a perfect use for them–the photos or cards would remain protected and wouldn’t curl over time, and the glass would stay in place. Thanks for this post!
Nina says
I LOVE IT!!!
Carmen says
Quick question, is there any way that you guys could add a link to the timeline postcard without the timeline (the paper texture). Or could you tell me what exactly you searched for in google, since I cannot find something close to your picture and yours looks really real. Thanks a lot.
YoungHouseLove says
Hi Carmen,
I didn’t save the exact link, but I think it was this: http://www.clker.com/clipart-26051.html. I had to alter it a bit (duplicate it to fill the background and make it less yellow) but I think this is the one. If not, what I searched was “paper texture.”
Good luck!
-John
Anne says
I like it! But I really want to know… where did you find the “clock” screensaver? (MacBookPro on the right…?)
YoungHouseLove says
Hey Anne,
That’s from realsimple.com. Hope it helps!
xo,
s
Carmen says
Thanks so much. You guys are the best!
Ashley says
Love the wall!
Belinda says
Love the “weekly” pics of Clara…all the different backgrounds..what are those? So much color…so cheerful! Matches that adorable smile of hers!
YoungHouseLove says
Hey Belinda,
We actually snag one yard of fun discounted fabric for each picture (we’re planning to make something out of all that fabric down the line- maybe a garland or a quilt as a keepsake of the project).
xo,
s
BigFan says
Is the postcard on the bottom right, second from the right a Chihuly postcard?
I work there and got all excited!
YoungHouseLove says
Yup! Sent by one of our readers- we love it!
xo,
s
Corinne says
Thanks for this I Love it. I’m going to put these up in the babys room to display her books. Also love the hotsling, for us this really came into it’s own with Amelie from about 5 months and she could go into a hip carry, she loves hanging out with Mommy like that. It’s a great little around the house or quick trip into the shop carrier.
here be dragons says
I love it, and now I’m totally envious. It looks great. I just wish I were a wee bit handy-er so that I could take on this project. But, no, I do not have a ?Dremmel?, nor am I up for installing anchors! (Luckily, when I had to install anchors for my wall guitar hook, my dad was in town visiting and took over!)
Jen says
Love it! If you haven’t tried this already, how about those glass clip frames from IKEA? They’d give each art card enough weight that it’d take a lot more than an autumn breeze to move the display! And, nothing else to mount in the wall. I plan to use them in our new bathroom for a vintage postcard display.
Cassie B says
Hm. Is there a way to make a different version if you don’t have one of those wood cutting things!?
YoungHouseLove says
I bet you could use Liquid Nails to glue a long piece of wood across the top of a shelf at a right angle to create a picture ledge like the ones they sell at Ikea. Hope it helps!
xo,
s
Sarah says
I just stumbled across this wall on Pintrest and it got me thinking: what did you end up doing with all those postcards when you moved into your new place? Are they being saved for a later project?
YoungHouseLove says
We’re definitely going to hang those babies up when we find the right spot! Not sure if it’s in the guest room or the playroom. Or somewhere else. Haha.
xo,
s
Jennifer says
Love your blog and these shelves! I hope you don’t mind, but I’ve pinned it to my house board for a future project
Amy Christie says
Hey guys! I’m sure you are just innundated with messages from people thanking you for room inspiration so just count mine among them. I loved these little postcard shelves the minute I saw them and patiently waited to figure out how to use them in my home. Finally, this summer, I mounted three of them in my young daughter’s room to hold photos and art pieces and we love them. Just wanted to thank you and share the pictures of the wall you helped inspire. http://www.thisheartofmineblog.com/2011/08/26/its-a-wonder-wall/
You guys rock!
YoungHouseLove says
Cuuute! I love your whimsical spin on it!
xo,
s
Katie says
Where did you get your white table?
YoungHouseLove says
We actually made that here: https://www.younghouselove.com/2010/06/office-progress-deciding-to-diy-a-desk/
xo,
s
Natalie Royall says
Recently found your website, as in today… :) And I love this postcard idea!! I am an avid collector (I know! Dork alert! :) But I was able to score a really great wooden kitchen table at a yard sale to replace the wobble-ey glass table we had before. And they were the EXACT same size. I hated to donate this really great piece of heavy cut glass…. so I covered the entire table with postcards, stuck them in place using scrap book (acid free) tape and put the glass over it. Now people are always talking about the postcards at their seat when they come for dinner parties. It even keeps the kids entertained. I am a fellow Richmond-er and I LOVE LOVE your site, will definitly be checking back in. Keep up the great work guys!
YoungHouseLove says
Love that idea! So much fun!
xo,
s
Jenelle Ricci says
This is such a brilliant idea! I love how it looks in your office and I definitely think that I am going to do this someday for my own office! Beautiful job!
Sheetal says
This is a great look, excellent job! You can also find great photo shelves with a similar look at Ikea – but only white and black. With your idea you can at least paint it any colour you like.
happydigz.com
angelie says
Hi! We just discovered your site! My husband just made me your shelves for our basement slash family room slash playroom. They came out nice thanks to your step by step instructions w/ pics. Thanks
Cristina says
Wow! I love this style! so clean and essential!
Bye from Rome
Cris
Val says
This project is perfect for a blank wall above our sideboard. Thanks for a great, readable tutorial! (Have you considered little pieces of double-faced tape to keep your cards from blowing around?). Val
julia says
I love this idea and wand to do it over my desk. But I have a huge desk, twice as wide as the one you used. Do you still think it would work visually, and do you think it would be impractical having to climb onto the desk reach them. I have do it now anyway as we currently use a pin board.
thanks love your stuff.
YoungHouseLove says
I think it sounds awesome! Good luck!
xo,
s
Patrick Asselin says
This is great. We will definitely be doing this.
Patsy says
Great shelves. You may want to check out ana-white.com. She has a great do it yourself shelves that are super easy too.
Laura James says
Can we still post postcards to you?
I have a lovely postcard here from a lovely local beach here in Australia =)
YoungHouseLove says
Aw that’s sweet! We’d love one!
xo
s
Kim says
That’s awesome, I especially like the desk! Do you happen to have a post on it’s creation?
YoungHouseLove says
We do! Here ya go: https://www.younghouselove.com/2011/09/attack-of-the-13-foot-counter/
xo
s