Send out the ravens! (yes, that’s a Game of Thrones reference). Wallpaper stripping has commenced.
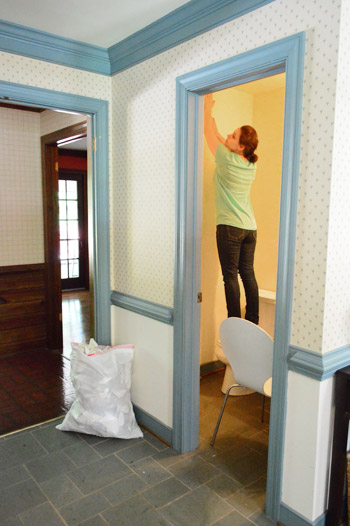
I was actually really excited to tackle the half bathroom’s wallpaper removal project, because I am a strange breed of human and that’s my idea of a good time. And since we have five rooms full of wallpaper (the foyer, the half bathroom, the kitchen, the dining room, and our bathroom), I decided that I would try a different removal method for each one and report back with the pros/cons about each approach as I went, all in the hopes of sussing out which ones bite the big one and which ones seem to work the best. I’m telling you guys, I’m like one of those people who works in “risk management” and gets their kicks watching paint dry. So hold onto your hats, it’s about to get crazy up in here.
My first step was to clear things out (the soap pump, mirror above the sink, toilet paper, etc). Just so I don’t have any accessories in the way of the serious peelage that I was about to dive into.
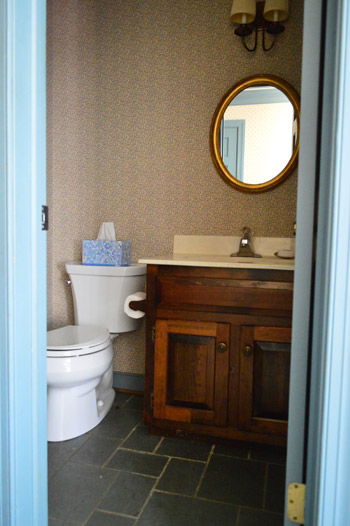
Then I removed the wall plates to free up some edges of the paper and hopefully make the removal process easier (there are two light switches and an outlet). I couldn’t help but marvel at the dedication that was once put into this wallpaper job – the outlets were papered and the flowers even matched up.
Next I boiled a pot of water on the stove, since the method I’m trying this time is intensely simple, but I’ve also heard that it works like gangbusters. Get ready for my method guys. Here it comes. Oh my gosh, it’s…. boiling water sprayed on the wall. That’s it. No scoring, no steamer, no spackle knife, no application with a weed sprayer, no fabric softener. While I’ve also heard awesome things about those methods, the simple boiling water applied with a spray bottle approach seemed like a good place to start. If it stunk, it was the smallest room (and if it straight up didn’t work I could abandon that method and move onto something else).
And speaking of moving onto something else, this approach almost went off the rails immediately? Why? Well, I had this vat of boiling water on the stove and I was holding my spray bottle thinking “how am I going to fill this without dripping hot water all over myself?” – seriously I stood there a solid minute wondering how I was going to avoid giving myself third degree burns filling the bottle. I stared at my ladle and thought “no way, that’s going to drip out all over my hands” and then finally slipped the empty capless spray bottle itself into the boiling water and used the ladle to hold it under the water. I heard that comforting glug-glug-glug sound as it filled itself up, which was music to my apparently burn-a-phobic mind. Then I used the same ladle that I had used to submerge it so it would fill itself up to fish out the bottle without touching the boiling water itself.
I used one of those silicone pot holder things to hold the bottle as it came out and then attempted to secure the top of the spray bottle and that’s when I realized – DUH! – that the bottle had warped from the boiling water…
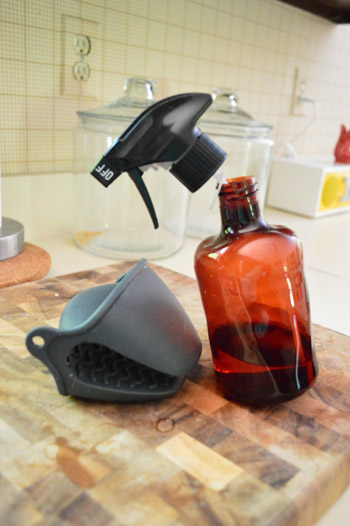
Guys, what was I thinking? I have no idea. I blame it on wallpaper-stripping-excitement. I was as wired as a kid hopped up on four boxes of Nerds. But I realized that the spray bottle still sprayed even without a perfectly shaped bottom or a perfectly attached nozzle, and in a very “the show must go on” moment I walked into the bathroom and just started spraying. Worked just fine.
What I learned:
- Spraying the entire room with boiling water and then attempting to peel the paper is a lot less effective than saturating small sections at a time (ex: half of one wall) and then peeling while the paper is still wet and loose. When I attempted to spray the whole room first (even a small room like a bathroom) by the time I got back to the first part I sprayed it was starting to dry and re-attaching itself to the wall. It came off much easier when I moved in smaller sections.
- Constantly spraying that bottle does get a little old (your wrist/forearm gets a little Jillian Michaels-ish workout) but it wasn’t bad enough that I cried or anything. I’ve heard that filling one of those plastic weed-spray containers from Home Depot gives your arm a huge break, so that might be helpful in a larger room, but I had such little wiggle room in the bathroom (there was a chair in there with me sometimes so I could reach a few high parts) that a big gallon sprayer would have cramped the room even more.
- I needed to use a silicone pot holder to hold the bottle the entire time I was spraying since the bottle itself was still really hot, but the super hot water really seemed to get the paper off the wall well, so it was worth it to bring the heat, so to speak.
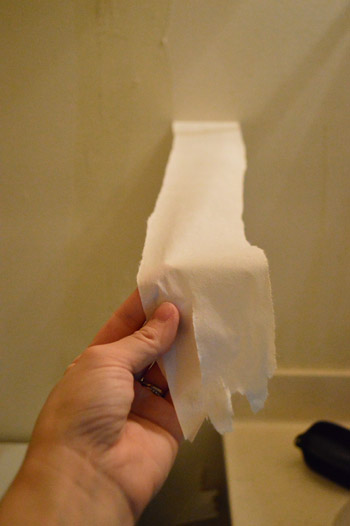
- Almost all of the front of the wallpaper came off in the first round of spraying and peeling, which took about 1.5 hours. Then I re-sprayed the entire wall again since the backing/glue was still there in most places, and that came off in a second round of peeling, which took about 1.5 hours. So all told, it was about a three hour project from start to finish.
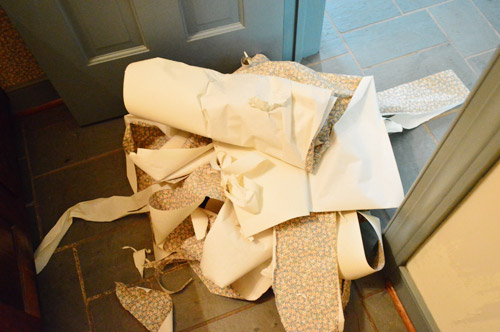
But when I was done I had a garbage bag full of wallpaper and white walls!
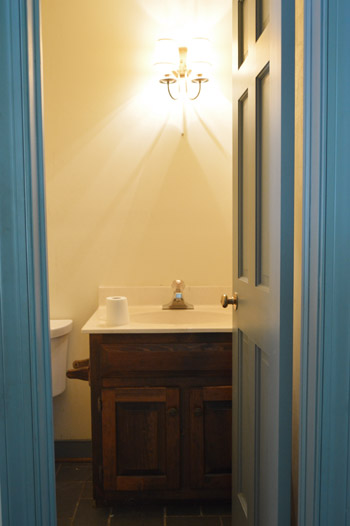
Glorious, glorious, de-flowered white walls.
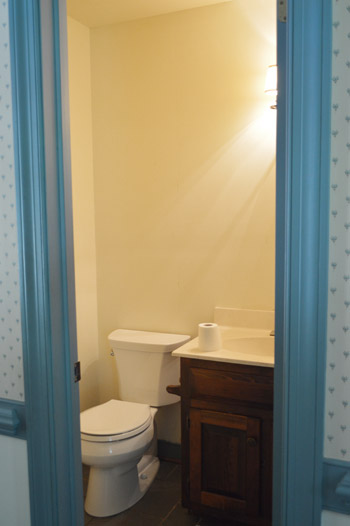
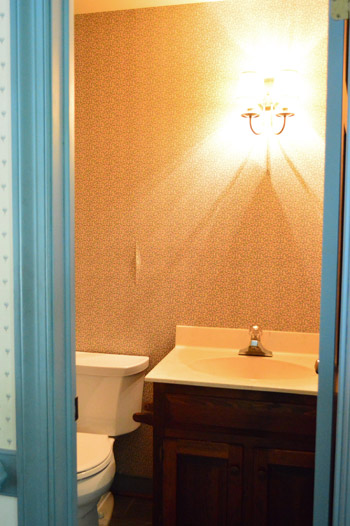
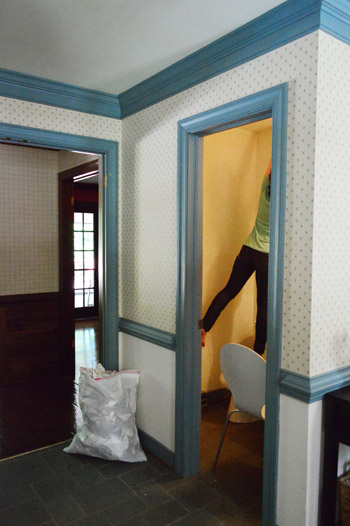
Which was definitely a welcome sight after seeing this for the last few weeks…
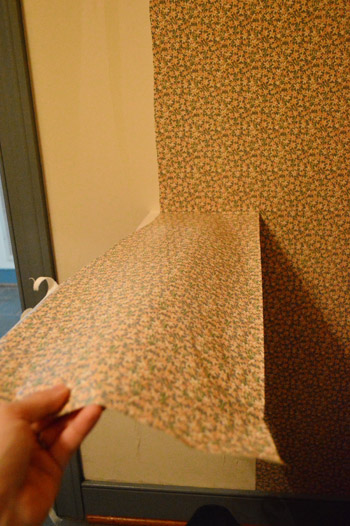
And now I can make loud proclamations, like “hear ye, hear ye, my house has four different types of wallpaper instead of five!” Not that I’m anti-wallpaper (I actually linked to a few options in this post that I’d love to see in here someday). Oh and I saved a small flowery wallpaper remnant from my removal process because I think it would be fun to frame little squares of each one of them somewhere – just for the memories. So… one room (and one wallpaper method removal) down, four to go…
Psst- OK, who’s watching Whodunnit? We saw the first episode last night and we’re hooked.

Christina says
Wow that’s the fastest/easiest wallpaper removal I’ve ever seen!!! Congrats! We have been trying to remove wallpaper in our master bath for a while, we actually sort of gave up. Although the paper comes off pretty easily thanks to the steam from the shower, we get stuck when we hit the glue underneath. It’s so hard to remove, it’s a blue-greenish color and just stays there on the wall. Scraping is not working. Wondering if you guys or any of the other readers have come across this and if there are any good tips/tricks to get rid of it? (It is at least 30 yrs old) Thanks! CJ
YoungHouseLove says
Have you tried spraying boiling water on the glue and then picking/peeling? That’s what worked for ours (1.5 hours of getting the top paper off, and then 1.5 hours of spraying it again and getting the backing/glue off).
xo
s
Bonnie says
I scrubbed ours off
Danielle says
We had a similar problem. The paper came off pretty well, but the backing was a struggle. We did use the hot water trick, which took MOST of the glue off, along with lots of hours of scraping. Then we put a coat of primer on it, and had to sand it down. The glue was reactivated by the paint and basically rose off the wall. It was a huge pain, but we tried everything else.
YoungHouseLove says
Oh man, that sounds like a nightmare!
xo
s
Sheela says
Windex works beautifully to remove wallpaper scraps or glue residue from the walls. Spray it on, let it set for just a minute, and then take a paper towel and wipe it off – the scraps and glue come with it. Just make sure to NOT mix Windex with any other chemicals/cleaners/strippers to avoid any potential toxic fumes.
YoungHouseLove says
Great tip Sheela!
xo
s
Eric @ AddSomeCharacter says
I hate wallpaper!! We used one of those perforaters and spray gels which took about 3 weeks to get rid of one room worth of wallpaper. I’m glad you found a better/cheaper method.
Shannon {Our Home Notebook} says
It’s looking so much better! I love that you’re so excited about it. I’ve only removed wallpaper once from a small bathroom in our old rental. Thankfully, its rewarding work!
jenna says
I use a pyrex measuring cup, the kind with the little spout top, when I need to pour boiling water from something wide-mouthed (like a pot) into something small-mouthed.
That bathroom is already light years better, but I was nearly transfixed by the attention to detail with those plates! Somebody really showed some love and care with that wallpaper :)
YoungHouseLove says
You guys are much smarter about boiling water than I am. Thanks for all the tips!
xo
s
Jenn says
My favorite method–and I chronicled a few on my blog–is half white vinegar/half hot tap water in a spray bottle. Non-toxic (your fingers do pickle a little) but the vinegar releases the glue from the wall. I was also dealing with a small bathroom (floor to ceiling paper), a foyer, dining room, family room, and a kitchen. Only the kitchen is left! Happy scraping!
Alyson says
What an incredible change!!
But, I feel like we’re going to need to see a before/after of those Jillian Michaels forearms. Just sayin ;)
YoungHouseLove says
I seriously think my spraying forearm (right one) might be an inch thicker than my left one. Not a good look…
xo
s
Soiledrotten says
Great advice Sherry! Thank you!
Deb says
I stripped the paper off of every room in my house over the last several years. The tried and true method that worked for me was a bucket of warm water and a rag. Get your rag good and wet and slop it on the wall. Works like a charm! You should be able to dry strip most of the top layer first. I am never putting wallpaper up again!
Tandra@LittleHousesBigDogs says
I was highly amused by the matching wallpapered outlet! What fun!Silly question are you going with white outlet covers or ORB/dark ones?
YoungHouseLove says
I think we’re on the white outlet cover train for now.
xo
s
Eliza says
Sherry – thank you for posting this! I’ve been putting off the wallpaper removal process in our bathroom for 3 years – it’s our only one so I didn’t want to mess it up too bad and then have to stare at it every day. Anyway, how did you get behind the toilet? I was thinking we’d have to remove ours to get back there. And I REALLY don’t want to be without a toilet for any length of time. Thank you!!
YoungHouseLove says
It actually didn’t go behind it, just a few inches that we could reach, so when I peeled it came up from around the back :)
xo
s
Linda says
The person who did my bathroom’s wallpapering really did a good job – like with the faceplates and, yes, all the way behind the toilet. I was lucky that it came off in big enough pieces that I could just sort of reach behind and get it off – same thing with washing the wall down post-wallpaper and I used one of the neat skinny rollers designed for that area to paint. It’s do-able, assuming the paper was put down reasonably professionally and if you’re reasonably limber. :-)
Sherry, I do think your prior owner had that paper done professionally,so you may be in luck all the way around. And, honestly, at my age and IMHO those were good choices back then – just dated now and the owner, for whatever reason, wasn’t able to keep up with remodeling along the way.
YoungHouseLove says
Oh yes, we believe this house was GLORIOUS in it’s day! It’s just in need of some love now, but you can tell when it was built and decorated it was the coolest thing ever.
xo
s
Ashley@AttemptsAtDomestication says
I’m so happy such a simple method worked so well for you! My house screamed dated and old lady when we moved in, but lucky for me the previous owner didn’t have any wallpaper!
Jennifer I says
Yeah, you! The space and all the stuff in there actually made that one of the tougher rooms to do. You will be good to go before you know it. Looks so much better already!
LauraC says
Hot-as-you-can-make-it water from the tap and a large bucket with a sponge worked for me. Oh, and a nice wide putty-smoother thing, you know with the straight edge? Wipe down sections, wait for it to soak the wallpaper, then scrape, baby, scrape. Fortunately none of our wallpaper had any vinyl in it, so the water soaked through easily. It was a stinky, sticky, messy, dirty job though!
YoungHouseLove says
Love all the tips guys! There seem to be 100 ways to skin these cats, er, walls…
xo
s
Megan @ Rappsody in Rooms says
Wow! I was skeptical about the whole boiling water idea but it really works! Seems to work really well too. It’s amazing how much better the room looks now. Do you have to do any more work to get the walls paint ready or are they all set and ready to paint?
YoungHouseLove says
Most of the drywall is paint ready but I’m going to run some sandpaper or a magic eraser over a few spots just to be sure they’re smooth (some tiny areas are a bit tacky still from glue left on the drywall). Hopefully won’t be too bad though :)
xo
s
Amy says
Hot water in a garden sprayer has been working for us. Only 1 wall left! Luckily we discovered that our most wallpapered room was actually wood paneling that was wallpapered over so we can just rip it all down, paneling, paper and all :)
For the boiling water you could use a teapot and then just pour it into your sprayer…
Good luck! Can’t wait to see the rest!
Brady says
Count me as another crazy who enjoys stripping wall paper! I just enjoy really mundane tasks like that for some reason.
Sarah says
When we moved into our house we had 4 very large rooms/areas with wallpaper on them. Luckily they used really high quality thick wallpaper because the wallpaper itself came off in whole strips and took almost no time at all. The glue was our big problem. So I have a nice hand held steamer (made by Haan) which is just boiling water but no having to hold a bottle by an oven mitt. It also has a lock on it so I have a constant spray and no hand cramping. I also found that doing it in smaller areas was much more effective than large areas. Any glue areas that were totally stubborn we just used our mouse sander to smooth everything out. The mouse sander was our saving grace when we de-wallpapered our bathroom!
Good luck!!
Jessica says
Sigh. You are so brave!! :P When we bought our house, the dining room, kitchen and closets (and the stairway to the basemet… what the…?!)were covered in the ugliest wall paper I had ever seen. The house sat on the market for a year before our offer and we were told it was likely because ALL of the rooms were covered in wall paper and the homeowners had just recently removed it in the bedrooms, entry and living room. Ack! Tee wall paper in the closets came off very easy using the method you described, though it was just hot water from the tap, not boiled. But the wall paper in the kitchen and dining room was a nightmare. It might as well have been super glued on and then another 5 layers of superglue over top. Though we got it all off in the dining room. we severely damaged the walls underneath (there was actually another even uglier layer of wall paper under the first – ugh!) and had to have someone skim coat the walls to repair them. We tried every method known to man to remove it in the kitchen UNsuccessfully so we finally gave up and had someone skim coat over it. What I learned from my experience is that I will NEVER buy another house with wall paper. Ever. In my life. Worst. time. ever!!! But I know y’all have WAY more patience than me – so I’m sure your process won’t be as bad. Happy scraping! :)
Lala117 says
Patience seems to be the key here. Patience and prep. After a week in our new house, I decided I could not stand the 80s wallpaper in the powder room one. more. minute. longer. So I started ripping it off, which was extremely satisfying. Atleast until it started separating from its cheesecloth backing, which still stuck to the wall and I reached some spots where the drywall started ripping away (stupidly, I did not use hot water or anything). I figured I’d skim coat it as Jessica mentioned. Turns out I am terrible at skim coating — and very particular about the smoothness of our walls.
In the end, my contractor (who was there to re-do the kitchen) convinced me to just hire him to fix it. So a bunch of money later, I have lovely walls. But my husband has forbidden me to take on any other large projects like this until we have the money saved to hire a pro just in case they need to fix my mistakes.
Wish I had known then a little water and some patience might have done the trick!
Ashley says
I highly, highly recommend getting a Hudson sprayer (weed sprayer)–we had a house full of wallpaper (and blue trim, coincidentally), and that sprayer made all the difference. I tried a spray bottle (among other things) but like you said, it killed my hand after awhile. The weed sprayer really isn’t that big, either–it’s just an extra step or two to assemble, but sooo worth it. Can’t wait to see all your methods! This is so fun to watch!
Tara says
We had 3 wallpaper boarders in our house when we moved in and I removed them using regular ol’ non-boiled tap water in a spray bottle. I just saturated them while pulling and scraping with a plastic scraper (like the ones for frost on a car window).
Sara says
My friend bought a house that had wallpapered everything, outlet covers, light switches, trim, tops of cabinets and even the tank to the toilet, she has some pretty fantastic before pics!
Liz | Hogs Ever After says
And on today’s PG-13 episode of YHL, $herdog strips and deflowers the walls while high on pot (*standing on the toilet*). Har har.
Looks great, guys!
YoungHouseLove says
I can’t be the only one who gets a natural high from DIY. Haha!
xo
s
Krystal says
Um…don’t want to burst your bubble or anything, but just because it looks like you took the wallpaper down doesn’t mean you actually finished it yet. You still have to scrub the walls to remove any lingering glue residue. I’m currently working on a wallpaper removal, and the front and adhesive backing was the EASY part. It’s the washing the walls that sucks because sometimes the residue just doesn’t budge (run your hand over the wall and if you get to spot that you can’t glide over as easy or feels slightly raised, there’s still glue there). I’ve finally resorted to just sanding.
YoungHouseLove says
Oh yes, the walls are smooth and paint-ready except for a few spots that I plan to sand or magic-eraser (I think that’ll take off the tiny tackiness, but in a lot of areas they’re bare to the drywall and ready to go).
xo
s
Nicole says
I also find a perverse joy in stripping wall paper!
I am going be renovation my mother in law’s house soon, so I will have to use this trick on the wallpaper in her front hall!
MJB says
Do you also like to peel sunburn and chip fingernail polish? :)
I’ve heard applying fabric softener works. Will that be one of the methods?
YoungHouseLove says
Haha, yes, yes, and yes!
xo
s
Sophie says
I have a hatred for dated wallpaper. Seeing that ‘after’ picture felt like taking off a pair of 5 inch heels after a night on the tiles- BLISS!
Nancy Laird says
would a can used to spray week killer with a pump work instead of the small bottle
Mamaw03t says
Ya gotta love the dedication to the wallpaper…the outlet is perfect. Very nice work. Bathroom already looks great without the wallpaper. Way to go.
michelle p says
What a difference! That blue trim still cracks me up! Just an fyi, I use the same method but just use really hot water from the faucet. No need to mess with boiling ;-)
Alicia says
haha! Next time use a funnel for that hot water. The soft plastic bottles at the dollar store should hold the hot water without warping too.
Whodunnit is basically awesome. I need to be on that show. Do you also watch Big Brother? It’s the best.
YoungHouseLove says
We don’t watch Big Brother but we watched The Mole back in the day, so it reminds us of that. We have all sorts of theories about everyone flying around the whole time we watch Whodunnit. Haha!
xo
s
betty says
ooooh. the mole! i LOVED that show!
Mary says
I am in the likes to apply and remove wallpaper category! I did my fair share of wallpapering in the 90s and more than my fair share of removal in the last couple of years.
The house we are currently living in has ‘orange peel’ texture on the walls. And there were 4 rooms of painted over wallpaper over the orange peel texture! The worst! Every room was different in what worked well depending on how many coats of paint were on top and how many coats of paint were underneath the wallpaper. I’ve used every method that you are going to test! And I always wash down the walls when I’m done with vinegar water to remove any remaining glue residue as it will eventually make the paint bubble even with primer.
The clean white walls look awesome!
YoungHouseLove says
Great tip!
xo
s
Emily says
I have a wallpaper boarder removal horror story. I was 18 and was working at my high school as a summer janitor. We cleaned classrooms, waxed floors, shampooed carpets, etc. A teacher had decided to add a wall paper boarder to the ladies faculty bathroom and we were going to repaint it so my boss wanted it gone.
Me, being 18 and not into the home renovations yet I knew nothing about removing wall paper. He, being 60 and close to retiring and a guy also must not have known much about wall paper removal. He sent me up there with buckets of different chemicals to try and remove it. I spent HOURS scraping at this wall paper boarder (of course which was over my head). He kept checking on me and offering different things (never water) and nothing worked. It wasn’t until one of my coworkers stopped by and asked why I didn’t just try water. I was dumbfounded. Seriously?! That’s all I had to do?! I sprayed it with water and it was down with in 30 minutes. Gah, I was so mad. And of course this was 10 years ago so it wasn’t like I had a smart phone handy so I could google it.
I still have nightmares about wallpaper.
YoungHouseLove says
Oh my gosh, that stinks!
xo
s
Jeannine @ Small and Chic in Cville says
The people who wallpapered my room when I was a kid did the slats in the AC vents. My mother spas over the moon with their attention to detail. In retrospect, I think they were insane. Can you imagine the time that took? And the pattern matched up when you closed the slats.
My mother hired them again and again. Some day, someone will curse us for that as they try to remove it all!
YoungHouseLove says
Holy cow, that’s dedication!
xo
s
Lauren @ The Highlands Life says
Boiling water?! That’s it? I never would’ve thought.
I remember the ole days when I was a pre-teen when I would go to the wallpaper stores and sit while my mom studied options upon options to buy for our house. One day I’m sure it’ll come back around and I’ll torture my kids the same way.
YoungHouseLove says
Haha!
xo
s
Sarah says
Oh… I’m so going to try this. My house currently has 6 types of wall paper (down from 7!) but we’ve been in the house for 3 years already. I may have started picking at one of our bathrooms already (windowless upstairs bathroom with black floral wallpaper) making it worse than how it started.
Laurie says
I’ve used this method but I boiled the water in a kettle…it was very easy to pour into the spray bottle. I was wearing oven mitts (those Silicon ones weren’t invented yet) and I did drop the bottle a few times but it worked pretty well. Much better than the stuff we bought to take it out…that didn’t work at all.
You get your kicks in strange ways lady! LOL
Andrea Worley says
oh man wall paper…. brings back memories of renovating an old house back in college :)
Vicki says
Wow – talk about a blast from the past… I recall how hard I worked 25+ years ago on a wallpaper project to get some flower petals to match up exactly on a switch plate cover! I will never complain about “just painting” again….
Tiffini S. says
I had a small bathroom full of cat butt wallpaper. Seriously, the kind where the cat is walking away from you and it’s supposed to be “cute.” Not sure what is cute about looking at a cat’s chocolate starfish, but whatever.
I went in armed with a scorer, a scraper, glue solvent, a steamer: the whole nine yards. They used some type of super glue, though, and nothing really worked. I finally just used hot water out of the tap in the solvent bottle, a scraper, elbow grease, and yes, lots of swear words. It took 2-eight hour days to get this stuff down. Maybe I should have boiled the water, but seriously I’m not sure it would have helped. I’m pretty sure this was .38 Special glue, because it “don’t let go.”
YoungHouseLove says
Haha, cat butt wallpaper is hilarious.
xo
s
Ginny @ Goofy Monkeys says
Straight up water didn’t work for us – we needed a steamer. Wallpaper on all the walls & ceilings of all our rooms. LAYERS thick.
Next time I’ll just use a hammer and put up fresh drywall. It would probably be faster.
YoungHouseLove says
That. Sounds. Terrible.
xo
s
Diane says
Agree. Wallpaper is evil. Removing it in hot weather is torture for some people.
Eve says
Ack! I can see doing something similar with the spray bottle. I wonder if using a paint roller to apply it over the wallpaper would work similarly? You could dip it in the pot of water. I’ve used the fabric softener/water method which worked well but left everything slimy with a residue (including the floor) and stunk to high heaven. Still, it wasn’t that hard to clean up. I’ve used a handheld steamer too which worked equally well (but threw my carpal tunnel into overdrive – my hand was numb for three weeks). I’ll be interested to see what other methods you use!
Sarah says
I still have nightmares about wallpaper. We bought a 1928 fixer-upper a couple of years ago in which every inch was covered in carpet (luckily hiding hardwood) or wallpaper–even the insides of closets. They were that dedicated. So much so that we discovered no less than 6 layers of wallpaper everywhere, each more hideous and dated than the last. It took an entire 2 week Christmas vacation to strip the house, involving multiple “stripping parties” (HA) where we enlisted willing-turned-regretful friends and family to help.
We tried several methods, but with that many layers it didn’t seem to matter. You were guaranteed to be sweating. We usually scored with a Paper Tiger, soaked the walls repeatedly with fabric softener and hot water, then scraped until we cursed the previous owners or our arms turned to jelly. Some areas/layers were almost impossible, others were easy… depended on the decade of paper I guess? Several rooms actually smelled like moldy bread once wet since they had used a old school flour paste as glue. Gross. On the plus side, I do remember the absolute satisfaction of bare walls, and seriously relished in getting ahold of a rare piece and tearing it floor to ceiling :)
Suzy says
You can also use an iron or clothes steamer to get your source of hot water and work in small areas.
Olivia says
Wow, SO much better. This brings back memories of our last house: layers upon layers of wallpaper. It was slightly interesting to see the different styles, but MAN, was it a lot of work to remove. One layer is like a dream in comparison – huzzah for that!
Megan says
Urgh. Wallpaper removal. I still have two rooms left. Every ! Single! Room! Had! Wallpaper! Some had layers. I found a lovely Amish looking fellow pulling a cart of apples under the THIRD layer in the kitchen. Steaming and a scrapper were my best friends for weeks.
YoungHouseLove says
No way! The whole layers of it thing is so scary! Although the guy pulling a cart of apples does sound pretty fun…
xo
s
Erin@Managing the Manor says
80% of the house I grew up in had wallpaper at one time. And it was all hidious. I had the “special job” of helping my dad take it all down throughout the 90’s, and we used the boiling water method for most of it. It really does work (minus the burned fingers)! I used a towel to hold the bottle, and it still burned!
Susan says
Our last home( now our rental) had paper both bathrooms and the kitchen. It was built in 1985, and had the hunter green/burgundy stripes to prove it-ugh. It also was put up directly on new drywall; no sizing or priming involved. We ended up using oil-based primer and painted over all of it.
Your house surely had a pro do that paper-( lucky you guys!)and just like everything else in housebuilding, proper preparation really does pay off down the road.
Like others have mentioned, use a tea kettle-and I’d get a metal bottle( no warping, won’t break like a glass one should you drop it).
Krista S. says
Ugh, I can’t stand removing wallpaper. My sisters and I once helped my mom remove it from a huge master bedroom and we rented one of those steam-generating wallpaper strippers. Funniest moment? When my mother hollered, “Girls, hurry up! We have to get the stripper back by 5:00!”
YoungHouseLove says
Awesome.
xo
s
Donna says
In the process of putting an addition on our house, we uncovered some of the original wallpaper from 1958. Since this is the house I grew up in, and I’m quite nostalgic, I salvaged about a 6 inch square to frame. A few rooms still have the original wallpaper in the closets, which I have guarded from “improvement.”
Dorothee B. says
Wow! What a change!
I am wondering: how smooth are your walls after you removed the wallpaper? Would you need to do anything to it before priming/painting?
Dorothee
YoungHouseLove says
I have heard spraying them with vinegar and water and wiping them down to be sure there are no glue remnants is a good idea. Ours are pretty smooth and paint ready in most spots, and I might run some sandpaper or a magic eraser over a few spots if they feel tacky.
xo
s