Send out the ravens! (yes, that’s a Game of Thrones reference). Wallpaper stripping has commenced.
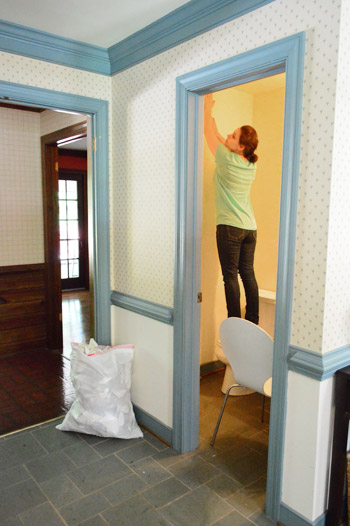
I was actually really excited to tackle the half bathroom’s wallpaper removal project, because I am a strange breed of human and that’s my idea of a good time. And since we have five rooms full of wallpaper (the foyer, the half bathroom, the kitchen, the dining room, and our bathroom), I decided that I would try a different removal method for each one and report back with the pros/cons about each approach as I went, all in the hopes of sussing out which ones bite the big one and which ones seem to work the best. I’m telling you guys, I’m like one of those people who works in “risk management” and gets their kicks watching paint dry. So hold onto your hats, it’s about to get crazy up in here.
My first step was to clear things out (the soap pump, mirror above the sink, toilet paper, etc). Just so I don’t have any accessories in the way of the serious peelage that I was about to dive into.
Then I removed the wall plates to free up some edges of the paper and hopefully make the removal process easier (there are two light switches and an outlet). I couldn’t help but marvel at the dedication that was once put into this wallpaper job – the outlets were papered and the flowers even matched up.
Next I boiled a pot of water on the stove, since the method I’m trying this time is intensely simple, but I’ve also heard that it works like gangbusters. Get ready for my method guys. Here it comes. Oh my gosh, it’s…. boiling water sprayed on the wall. That’s it. No scoring, no steamer, no spackle knife, no application with a weed sprayer, no fabric softener. While I’ve also heard awesome things about those methods, the simple boiling water applied with a spray bottle approach seemed like a good place to start. If it stunk, it was the smallest room (and if it straight up didn’t work I could abandon that method and move onto something else).
And speaking of moving onto something else, this approach almost went off the rails immediately? Why? Well, I had this vat of boiling water on the stove and I was holding my spray bottle thinking “how am I going to fill this without dripping hot water all over myself?” – seriously I stood there a solid minute wondering how I was going to avoid giving myself third degree burns filling the bottle. I stared at my ladle and thought “no way, that’s going to drip out all over my hands” and then finally slipped the empty capless spray bottle itself into the boiling water and used the ladle to hold it under the water. I heard that comforting glug-glug-glug sound as it filled itself up, which was music to my apparently burn-a-phobic mind. Then I used the same ladle that I had used to submerge it so it would fill itself up to fish out the bottle without touching the boiling water itself.
I used one of those silicone pot holder things to hold the bottle as it came out and then attempted to secure the top of the spray bottle and that’s when I realized – DUH! – that the bottle had warped from the boiling water…
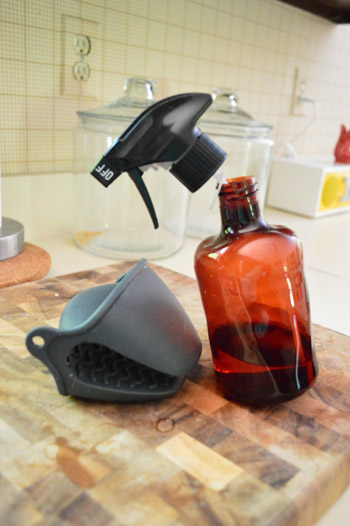
Guys, what was I thinking? I have no idea. I blame it on wallpaper-stripping-excitement. I was as wired as a kid hopped up on four boxes of Nerds. But I realized that the spray bottle still sprayed even without a perfectly shaped bottom or a perfectly attached nozzle, and in a very “the show must go on” moment I walked into the bathroom and just started spraying. Worked just fine.
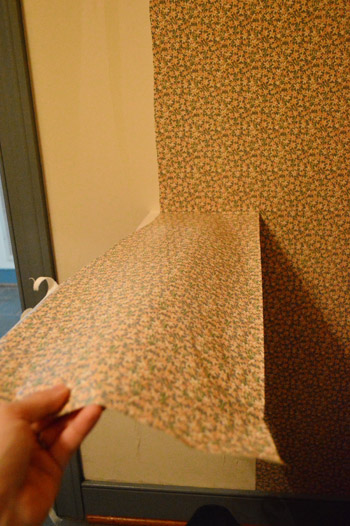
What I learned:
- Spraying the entire room with boiling water and then attempting to peel the paper is a lot less effective than saturating small sections at a time (ex: half of one wall) and then peeling while the paper is still wet and loose. When I attempted to spray the whole room first (even a small room like a bathroom) by the time I got back to the first part I sprayed it was starting to dry and re-attaching itself to the wall. It came off much easier when I moved in smaller sections.
- Constantly spraying that bottle does get a little old (your wrist/forearm gets a little Jillian Michaels-ish workout) but it wasn’t bad enough that I cried or anything. I’ve heard that filling one of those plastic weed-spray containers from Home Depot gives your arm a huge break, so that might be helpful in a larger room, but I had such little wiggle room in the bathroom (there was a chair in there with me sometimes so I could reach a few high parts) that a big gallon sprayer would have cramped the room even more.
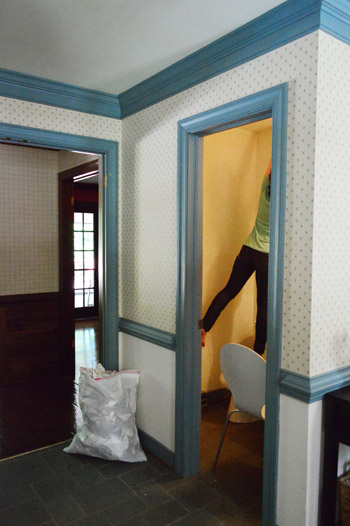
- I needed to use a silicone pot holder to hold the bottle the entire time I was spraying since the bottle itself was still really hot, but the super hot water really seemed to get the paper off the wall well, so it was worth it to bring the heat, so to speak.
- Almost all of the front of the wallpaper came off in the first round of spraying and peeling, which took about 1.5 hours. Then I re-sprayed the entire wall again since the backing/glue was still there in most places, and that came off in a second round of peeling, which took about 1.5 hours. So all told, it was about a three hour project from start to finish.
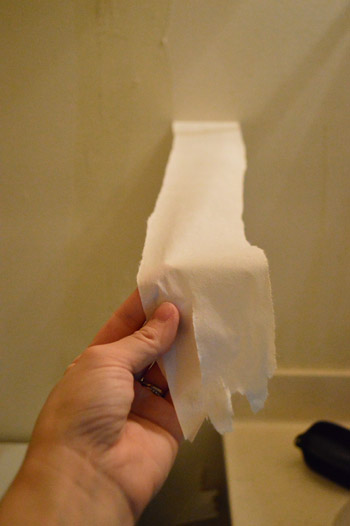
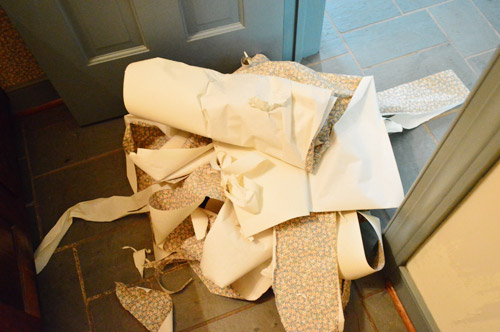
But when I was done I had a garbage bag full of wallpaper and white walls!

Glorious, glorious, de-flowered white walls.

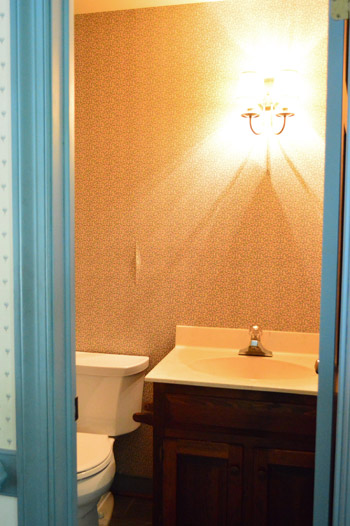
Which was definitely a welcome sight after seeing this for the last few weeks…
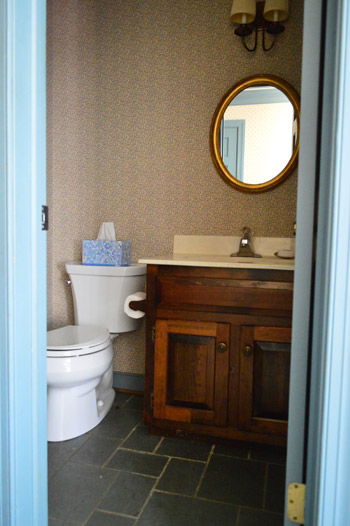
And now I can make loud proclamations, like “hear ye, hear ye, my house has four different types of wallpaper instead of five!” Not that I’m anti-wallpaper (I actually linked to a few options in this post that I’d love to see in here someday). Oh and I saved a small flowery wallpaper remnant from my removal process because I think it would be fun to frame little squares of each one of them somewhere – just for the memories. So… one room (and one wallpaper method removal) down, four to go…
Psst- OK, who’s watching Whodunnit? We saw the first episode last night and we’re hooked.

Erin says
Had a house full of the stuff when we moved and I tried a lot of techniques and finally gave up and called the pros. It was worth it, as I had so many little ones and not a lot of free time. We even had borders and wallpaper on textured plaster- so we couldn’t scrape without damaging the walls in some rooms. In the end, they told us the previous homeowners had used incorrect types of wallpaper and adhesive in combination and that some rooms I could not have done without damaging. Luckily they had the whole house’s paper removed and walls repaired and entirely repainted in a week. It was the best $ I spent :) but thank goodness yours removed easily and you like projects like this! I do not have the patience required for good DIY!
katie NC says
I don’t know if anyone has made the “Full House” reference about framing the old wallpaper. Anyone remember Uncle Jessie’s room had the framed bunnies from Michelle’s nursery.
Gah, I’m old.
YoungHouseLove says
Totally forgot about that!
xo
s
kelly says
Could you have put the hot water into your paint sprayer??
YoungHouseLove says
Didn’t even think about that – although it might have been too heavy (really you want more of a thin hot mist than a thick coat of water, ya know?).
xo
s
Nichole says
We have 6 rooms with wallpaper in our house and have removed three all using warm water in a spray bottle. What was interesting is that in the 3 rooms we have removed thus far, the same method had varying success. I think a lot of a success of a method depends on the glue used on the paper.
Donna says
I just finished removing a heavy layer of wallpaper glue form our main balthroom. Nothing beats trying to scrape off the glue behind the toilet :) The wallpaper came off easy, but the glue was a nightmare.
Vinegar and hot water ended up being the best solution of everything I tried. That and lots of elbow grease.
Lynn @ Our Useful Hands says
Doesn’t it look like the room just sighed? I love it! I ripped down our kitchen wallpaper about a month ago and we still are doing the ol’ back and forth on the color – “grey, no – blue, nah – light yellow, whatever…I’m hungry let’s eat!” I also enrolled this warm water and peeled and it worked like a charm. Now I’m all like “Take that, chemicals!” and I’ll never look back. I won’t have to thankfully because that was the only wallpapered room in the whole house. Yay!
My best, Lynn
Laurie says
Love this post!
When we bought my in-laws home (oh, do not get me started) almost 20 years ago, when we were still YOUNG and DIY’ing our house, it had at least 4 kinds of wallpaper. I still have samples, and love the idea of framing it! Thank you.
1) Pink and gold lame cupids shooting arrows, in the pepto bismal pink powder room.
2) Olive green flocked wallpaper that my father-in-law painted over with white paint when the horrified realtor told him to take it down or no one would buy the house. Feels like sandpaper.
3) 1970’s coffee pot motif in the kitchen, and underneath of that was 1960’s coffee pot motif. (2013 coffee pot wallpaper? Keurig pods?)
4) striped wallpaper in groovy ’70’s colors – orange, gold, brown that accompanied the super dark and depressing paneling in the family room.
Feeling it?!
At the time, I used DIF and a rented steamer since our stuff was so old it was pulling off the first layer of drywall.
Glad you are having fun with this project!
YoungHouseLove says
Haha, that sounds like quite a challenge!
xo
s
Alison says
We had one of those nightmare situations where ours was directly on the drywall. Our painter advised that we spackle the steams, sand them down, and just paint over the wallpaper itself. It sounded crazy, but when a professional advises you to do that, well….you know you have a special situation on your hands.
melissa says
You need to get one of those pump sprayers you usually use on weed spraying. the plastic is heavy enough not to warp plus then you just pump and hold the wand not abusing your hand muscles by spraying!
We did the same hot water tech. and it worked great!
Fd says
I’m a little sad that the lined up light switch wallpaper had to come off. I have never seen that before. I feel like you could have worked with it. Made it your Sue the napkin for the new house or something…
Krystle @ Color Transformed Family says
At least you have a reliable fall back method if any of your others don’t work.
Kay says
The science nerd in me LOVES how scientific you are being about this! Congrats on your wallpaper-less bathroom!
Sarah G says
That looks amazing!
I recently did this myself in our bathroom with less impressive results. My biggest question: how on earth did you get the wallpaper down behind the toilet tank and vanity? We’re replacing both of those in our bathroom so we’re waiting to take them out to get the rest of the wallpaper down. The fun part? We only have one bathroom! Needless to say, this will *hopefully* be a quick bathroom reno. But, I’d love to hear how you were able to get back there to peel it all off…and also, how will you paint back there when you do?
Betsy says
We had two wallpapered places in our 1947 ranch: the foyer and the kitchen. The foyer came down in huge satisfying sheets in literally less than 5 minutes. All I used were my fingers and a trash can. Amazing! The kitchen on the other hand was so bad (scoring, that gel stuff and a putty knife didn’t touch it) we actually put Guardz over the wallpaper, which makes it super hard, and then a thin coat of drywall mud over top. It was so much better than removal.
Love seeing the progress on this sweet pad. I commented before to say that I am so interested in your moving in/organizational process. Please keep posting pics of rooms in turmoil just to make us all feel better! :)
Karen says
When we lived in an apartment that had FIVE layers of the worst wallpaper ever in the kitchen I used the spray bottle method. I only used hot tap water, not boiling water. I saturated a section, let it set, saturated another, then went back and scraped off the first section. Worked great! Would use that method again if I ever had wall paper to contend with.
Jess @ Crunchy Hot Mama says
Congrats on being down one room of wallpaper!! I have to say it’s a brilliant idea, and now that I think of it…duh, that makes total sense. I’ve noticed the wallpaper in our bathroom coming up from all the steam showers I’ve had to do with Emma, and I feel like a tard for never putting two and two together!
I de-wallpaper 3 rooms in my parents house years ago and swore I’d never do it again. Now, I’m counting on you to motivate me to tackle the 2 rooms in our current house ;)
kazari says
Aw, nice tips!
But will you be taking the wallpaper off the hallway there? I kind of love the combo of the blue n white wallpaper + matching blue moldings there.
YoungHouseLove says
Oh yes, all of the wallpaper is about 30 years old and worn/yellowed in many spots, so it has to go.
xo
s
Sandi says
We used the ol’ fabric softener diluted with water in a spray bottle to get the paper off, worked great!
Are you definitely replacing that vanity? I kind of dig it… its a little rustic (or could be painted any colour of the rainbow too)
YoungHouseLove says
We’re planning to work with it for a while if we can (it has an… odor… so we have to deal with that, but here’s hoping!).
xo
s
Lacey Saggio says
Ok not only do I get it, but I totally get hopped up on stripping wallpaper. The key is applying sizing to the walls before you hang. My parents are seriously pros at hanging paper. And guess who’s a pro at ripping it off in big, huge, gloriously ripping sheets- ME. Feels so good. But I also love the trimming part of of painting and the sound of my nail gun. SorryI’mnotsorry!
YoungHouseLove says
Haha!
xo
s
Anne says
You’ve inspired me to get a move on peeling the remainder of the wallpaper in our house. Last summer we peeled the paper off of the walls in our home office and it was actually kind of fun/relaxing! We currently have paper in both of our bathrooms, one of which has paper hanging from it because I got curious one day while in the shower and started pulling at it. But, like I said, this has inspired me to work on that bathroom this weekend! It will look so much better when I’m done :)
Christy Hughes says
Hello – a few years ago we moved in to a house with lots of wallpaper and I also tested all the methods… I settled on this: washcloth/rags soaked in super hot water…I brought a giant pot of water, a few bowls and a microwave into the rooms I was doing..and just had a rotation of cloths going. It turned out to be a timesaver. Good luck!
YoungHouseLove says
Thanks for all the tips everyone! So fun to hear what works for everyone!
xo
s
Hilary says
The room looks so much better without the wallpaper! My parents have a half-bath in their house that desperately need the wall paper removed. I think I might try out this method.
Julianne says
Bathroom looks a lot fresher without the wallpaper! On your next go…if you have a clothes iron that doubles as a steamer, it might be worth a try. It worked really well with our last de-wallpapering project. Looking forward to see what you do with this space. Will you be keeping the slate tile? Personally, I love slate and could really envision a nice, modern look for that powder room!
YoungHouseLove says
We’d love to keep it! It’s a little damaged in a few spots, so we’ll have to see if we can fix/patch it somehow…
xo
s
Jody says
Our house is 110 years old. When we moved in back in the late 80’s the plaster walls several of the rooms were covered with layers and layers of wallpaper, like probably one for every decade from 1900-1960. Our parents let us help out with the removal. We had water bottles to spray and putty knives to scrape it off. My sister and I have the opposite problem. Since we bought the house 10 years ago some of the our rooms have been three or four different colors. My mom jokes our house won’t ever fall down because of the paint holding it up. Due to a small water leak, our kitchen is ready for layer number four. :)
Cheryl says
Sherry and John, Sorry if you’ve gotten this tip already, but I’ll ad my two cents to your wall-stripping advice. We didn’t use a spray bottle _or_ vinegar to strip our paper… we used a sponge with warmi-ish water in a bucket. We took the sponge, soaked it thoroughly in the bucket, wet once strip of paper top to bottom, repeated with the next strip, the peeled the first strip off, wet the third strip, peeled the second… repeat ad nauseum. I really REALLY couldn’t believe my aunt when she claimed this worked, but it truly did. Saved my hand from the constant spraying, really got through the paper to the glue which is water soluble, which is why the spraying also works. We had very little glue left to clean up, but took our sponge to what was leftover and BOOM! Wallpaper stripped. Getting the paper as wet as possible is the key, and why we liked the sponge method better. ;-) You’re good sports for putting up with all this armchair quarter-backing…
Cheryl says
Oh, I’ll also add this method does NOT work on paper applied with elmers glue, as the border in our bedroom was ;-)
YoungHouseLove says
Eeks!
xo
s
YoungHouseLove says
Love all the tips!
xo
s
Jennie says
Ah, I have “fond” wallpaper removal memories from when we bought our house. We also had (tons of) flowered paper and I can’t tell you how many “deflowered” jokes we made. How, oh how, could you resist?
Lindsey says
As crazy as it sounds, I LOVE to pull down wallpaper. So much so that after reading this post, I wish I had some wallpaper in my house to pull down. The bathroom already looks so much better.
Laura says
I’m looking forward to the next step- painting the bathroom! Hopefully it will finally inspire me to paint mine!
Dory says
Oh, you are so brave to tackle 5 rooms of wallpaper. I helped a friend take the wallpaper of of her kitchen, and it was so frustrating. 2 days, our clothing steamer, and lots of burns on my hands later… and I swore that I would hire someone for the next de-wallpapering project.
On a separate note, we watched Whodunnit? too, thinking that it was going to be a big fat joke. We were wrong! Totally utterly hooked!
Nina says
When we redid our bedroom we got a cheap steamer from our local DIY store and it worked like a charm, even with six layers of wallpaper, and it was quite fun to use when you saw the results straight away.
Wish you the best of luck with the rest of the rooms!
Rachel says
Just a heads up, I cracked my toilet seat cover by standing on it. So maybe you won’t want to do that in the future.
YoungHouseLove says
Thanks for the tip!
xo
s
Britnie says
I can hear your excitement! This makes reading your posts so entertaining. Your bathroom is looking great. Can’t wait to see the rest.
Britnie
Jamie says
Our 1928 bungalow had one room that had been wallpapered. The wallpaper had then been painted over a number of times over the years. My husband removed it all by spraying sections with cold water in a garden weed sprayer, then going over this with a heat gun and a paint scraper. It all came off very easily, first go.
emma says
I’m not used to seeing that shaped power poibt, but to me they look like they are in shock/sad they are covered in such horrible wallpaper! haha
YoungHouseLove says
Haha!
xo
s
Marc says
There almost as many methods of removing wallpaper as there are rooms! I’d never heard of the boiling water method! Learn something new every day. I am waiting with baited breath for every post for the new place.
Marianne in Mo. says
Go to Wallwik.com and see another method, but specifically an easy to use sprayer that holds in the heat better. You can get these type sprayers anywhere, like H.D. or Lowes. I used to work selling wallpaper, and tried this wallwik product in our store. A waste of money IMO, hot water works just as well. The sprayers can be used for other things too. The advantage is that you don’t have to constantly pump, they work awesomely!
YoungHouseLove says
Thanks for all the tips guys! Love them!
xo
s
H4rl3y says
De-flowered. LOL! You crack me up, Sherry!! Anyway, great job!
Kate | This Wandering Life says
BAHAHAHAHA. Deflowered walls! Going Katie Bower on us, are we?!?!?
YoungHouseLove says
Wink, wink. Nudge, nudge.
xo
s
Gigi says
The fastest way my husband I found was to make it a two person job and to definitely bite the bullet and rent a steamer. One person uses the steamer, the other comes right behind and scrapes. We finished our bathroom in 90 minutes and that was with 2 layers of the junk.
YoungHouseLove says
That’s awesome!
xo
s
Liz says
Kinda sad to see you using Ermahgerd. It’s in essence making fun of people with speech disorders. http://netforbeginners.about.com/od/e/f/What-Is-Ermahgerd-What-Does-Ermagherd-Mean.htm
YoungHouseLove says
Oh my gosh, I had no idea it was associated with that! Of course I don’t mean to make fun of anyone with a speech issue (my brother had one growing up) – I thought it was just a pop-culture term like “d’oh!” or “duh!” – sort of like Kristin Wig’s character in the Target lady skit from SNL. I’d never want to offend anyone (this is our happy place) so I’ve removed it from the post. Thanks for the tip, Liz!
xo,
s
Jackie Toye says
Great tip! I need to “re-do” the wallpaper in my Masterbath (I got sloppy and pieced a few areas together. shame) …. I will putting my bottle in the sink when I fill it. Holding the bottle in place with a butter knife (insert it in opening and let the water slide down the knife or use a funnel. I have those for “Kool-Aid” (I know, now Hey, Kool-Aid is stuck in my head)
Again, Thanks for the tip
Kelsey says
I didn’t read through all the comments so someone probably already mentioned this but what if you hear the water in a teapot-then you can transfer it more easily into a water bottle and avoid the warping? Maybe the heat would still warp the plastic but probably less so…
YoungHouseLove says
Smart!
xo
s
Teri Pickenst says
The bathroom looks so much better minus the wallpaper. I can not wait to see the finished product! All the blue trim makes me cringe almost as bad as the wallpaper. I have to comment on your risk management technique of standing on a chair while working. Use a step ladder not a chair.
Jen says
I’ll throw my vote in for a wallpaper steamer. I think it was only about $30-$40 bucks and worked wonders! I used a putty knife scraper thing as I pulled the paper off to help get the glue off at the same time. Then just needed to wash the wall to make sure it was clean. My entire 2nd floor and staircase is wallpaper. Ugh!
Emily says
I’m glad that your first wallpaper experience was a good one. I really caution you about being over-confident as you approach the next rooms, an experience that I definitely had. I did my bathroom first, and the wallpaper came off easily in about an hour. Then I did the guest bath and it was so tedious and time-consuming, ultimately taking about three 8-hr days of working non-stop. The paper itself and how it was applied can make a HUGE difference in how painful the experience is.
YoungHouseLove says
Oh yes, I’m fully prepared to encounter some insanely frustrating road block at some point! Five rooms full of paper probably have the odds against me!
xo
s
neeta says
Dumb question, but how did you reach behind the toilet tank? I am dealing with exactly same thing and am stuck with that last bit.
YoungHouseLove says
It only went behind it enough to look like it was back there (maybe just an inch or so) so I could just yank it to get it out.
xo
s
Chris says
When I stripped I used “hot” water and a sponge and it was very effective…just 2 more cents…it makes sense that hot and boiling would be similar…and I agree that it’s per area…loving the progress…<3
Kendall Clare McPeters says
Sherdog- You might try a solution of 1/2 warm water and 1/2 fabric softener. I swear by it.
YoungHouseLove says
Love the tip!
xo,
s
Danielle says
I watched Whodunnit! (Actually I recorded it since I was also enjoying a baseball game this weekend.).
I am considering making some “Clue” evidence cards for my husband and I to try and play along. Nerdy? Yes. Awesome? Absolutely!
YoungHouseLove says
I was just telling John we should take notes each episode!
xo,
s
Angela says
I almost feel bad commenting–wow 450 comments! And I didn’t get through all of them to see if this was suggested, but I’m also ripping down wallpaper. I found the top layer comes off great, dry. Then I use a clean garden sprayer (the kind you pump air into) to spray the underlayer with water. It saves my hand from all that squeezing. I just use warm tap water, until it cools in the sprayer and then I use cool tap water. It works like a charm. Can’t wait to see what other methods you try and review.