Send out the ravens! (yes, that’s a Game of Thrones reference). Wallpaper stripping has commenced.
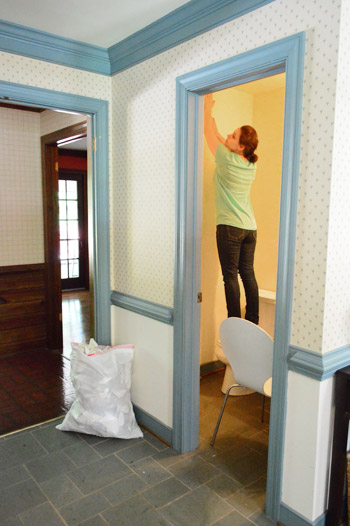
I was actually really excited to tackle the half bathroom’s wallpaper removal project, because I am a strange breed of human and that’s my idea of a good time. And since we have five rooms full of wallpaper (the foyer, the half bathroom, the kitchen, the dining room, and our bathroom), I decided that I would try a different removal method for each one and report back with the pros/cons about each approach as I went, all in the hopes of sussing out which ones bite the big one and which ones seem to work the best. I’m telling you guys, I’m like one of those people who works in “risk management” and gets their kicks watching paint dry. So hold onto your hats, it’s about to get crazy up in here.
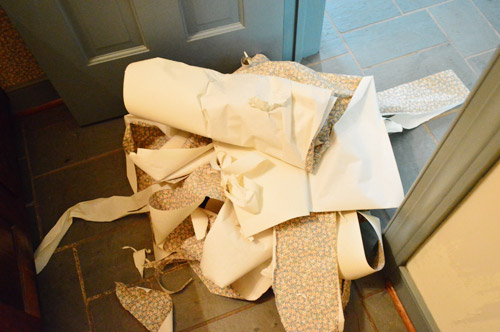
My first step was to clear things out (the soap pump, mirror above the sink, toilet paper, etc). Just so I don’t have any accessories in the way of the serious peelage that I was about to dive into.
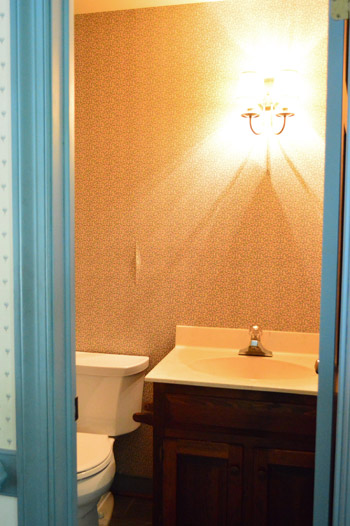
Then I removed the wall plates to free up some edges of the paper and hopefully make the removal process easier (there are two light switches and an outlet). I couldn’t help but marvel at the dedication that was once put into this wallpaper job – the outlets were papered and the flowers even matched up.
Next I boiled a pot of water on the stove, since the method I’m trying this time is intensely simple, but I’ve also heard that it works like gangbusters. Get ready for my method guys. Here it comes. Oh my gosh, it’s…. boiling water sprayed on the wall. That’s it. No scoring, no steamer, no spackle knife, no application with a weed sprayer, no fabric softener. While I’ve also heard awesome things about those methods, the simple boiling water applied with a spray bottle approach seemed like a good place to start. If it stunk, it was the smallest room (and if it straight up didn’t work I could abandon that method and move onto something else).
And speaking of moving onto something else, this approach almost went off the rails immediately? Why? Well, I had this vat of boiling water on the stove and I was holding my spray bottle thinking “how am I going to fill this without dripping hot water all over myself?” – seriously I stood there a solid minute wondering how I was going to avoid giving myself third degree burns filling the bottle. I stared at my ladle and thought “no way, that’s going to drip out all over my hands” and then finally slipped the empty capless spray bottle itself into the boiling water and used the ladle to hold it under the water. I heard that comforting glug-glug-glug sound as it filled itself up, which was music to my apparently burn-a-phobic mind. Then I used the same ladle that I had used to submerge it so it would fill itself up to fish out the bottle without touching the boiling water itself.
I used one of those silicone pot holder things to hold the bottle as it came out and then attempted to secure the top of the spray bottle and that’s when I realized – DUH! – that the bottle had warped from the boiling water…
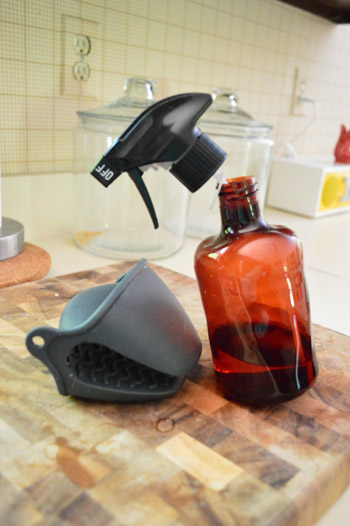
Guys, what was I thinking? I have no idea. I blame it on wallpaper-stripping-excitement. I was as wired as a kid hopped up on four boxes of Nerds. But I realized that the spray bottle still sprayed even without a perfectly shaped bottom or a perfectly attached nozzle, and in a very “the show must go on” moment I walked into the bathroom and just started spraying. Worked just fine.
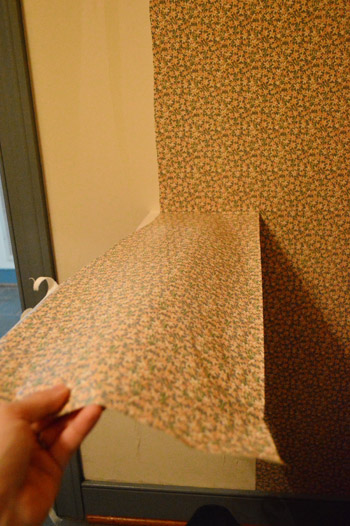
What I learned:
- Spraying the entire room with boiling water and then attempting to peel the paper is a lot less effective than saturating small sections at a time (ex: half of one wall) and then peeling while the paper is still wet and loose. When I attempted to spray the whole room first (even a small room like a bathroom) by the time I got back to the first part I sprayed it was starting to dry and re-attaching itself to the wall. It came off much easier when I moved in smaller sections.
- Constantly spraying that bottle does get a little old (your wrist/forearm gets a little Jillian Michaels-ish workout) but it wasn’t bad enough that I cried or anything. I’ve heard that filling one of those plastic weed-spray containers from Home Depot gives your arm a huge break, so that might be helpful in a larger room, but I had such little wiggle room in the bathroom (there was a chair in there with me sometimes so I could reach a few high parts) that a big gallon sprayer would have cramped the room even more.
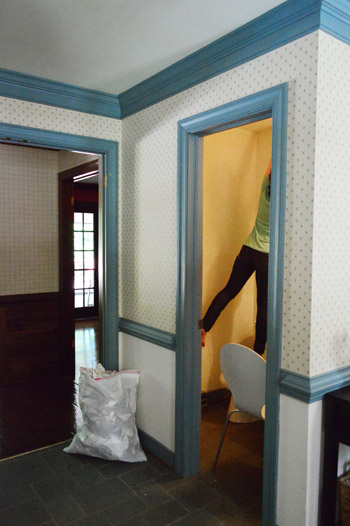
- I needed to use a silicone pot holder to hold the bottle the entire time I was spraying since the bottle itself was still really hot, but the super hot water really seemed to get the paper off the wall well, so it was worth it to bring the heat, so to speak.
- Almost all of the front of the wallpaper came off in the first round of spraying and peeling, which took about 1.5 hours. Then I re-sprayed the entire wall again since the backing/glue was still there in most places, and that came off in a second round of peeling, which took about 1.5 hours. So all told, it was about a three hour project from start to finish.
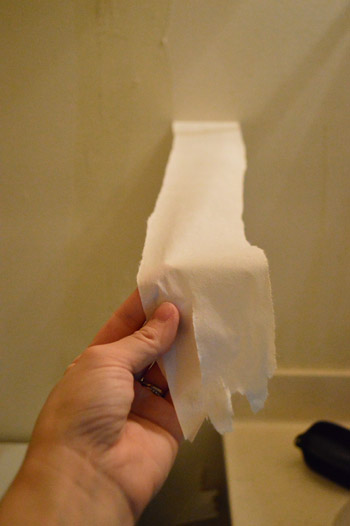
But when I was done I had a garbage bag full of wallpaper and white walls!

Glorious, glorious, de-flowered white walls.

Which was definitely a welcome sight after seeing this for the last few weeks…
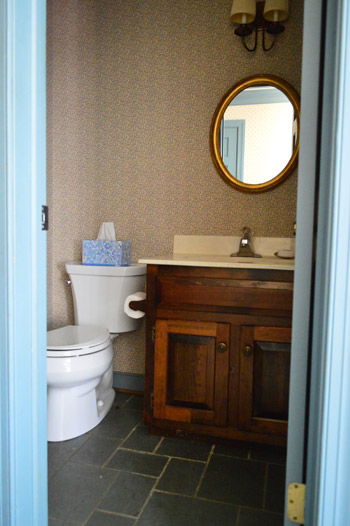
And now I can make loud proclamations, like “hear ye, hear ye, my house has four different types of wallpaper instead of five!” Not that I’m anti-wallpaper (I actually linked to a few options in this post that I’d love to see in here someday). Oh and I saved a small flowery wallpaper remnant from my removal process because I think it would be fun to frame little squares of each one of them somewhere – just for the memories. So… one room (and one wallpaper method removal) down, four to go…
Psst- OK, who’s watching Whodunnit? We saw the first episode last night and we’re hooked.

Heather MacFeather says
Congrats on successfully removing the wallpaper. In my last kitchen, wallpaper was applied to unprimed walls and then this weird fibery texture stuff was rolled on and then painted. The texture became sharp like when you spill paint on carpet and let it dry. 30kgs of drywall compound and lots of sanding later and I had smooth walls.
Pouring things down a rod (or a wooden spoon if you aren’t in a chemistry lab) works well too.
Whodunit? was totally entertaining. Does the murderer know they are the murderer? I haven’t quite figured out how the show works but I’ll keep watching to see what happens.
As always, thanks for sharing.
Liz P. says
It’s amazing how good that vanity looks in a white room. I really like it :)
Nerine Mostratos says
Ummm, I don’t know if this has been said but why didn’t you boil the kettle? Then you could just pour the water in once it was boiled! I couldn’t help but laugh as I was reading this thinking that’s something my husband would do! ( sorry) : D
YoungHouseLove says
Oh yes, much smarter than a vat of boiling water in a pot!
xo
s
jiturka says
Hi! Today I am visiting the first time here and I have to say it is pretty awesome what you do with the houses. I am going to move in with my boyfriend soon (hopefully) and this is loads of inspiration! In the past I have helped with some things around the house I currently live in with my parents, but this is on much a larger scale and it is an awesome inspiration.
Helene says
Probably tons of people said this already, but I can’t help it. I removed lots of paper from our house, too, (NONE left!) I just used warm tap water. Worked great. One small section at a time, one layer at a time. And no spray bottle. I had one of those large super-absorbent car washing sponges. I took a small dishpan of warm water with the sponge in it. And I set up a couple towels over the trim on the floor to catch the overflow. You quickly get the hang of how much pressure to use without causing a big mess. And the paper comes off quickly. I also would wait a few minutes to let the paper get saturated by the water before trying to peel it. Your bathroom already looks great!
michelle says
Hi! I would highly recommend the Home Depot weed sprayer next time. I used a sprayer on 4 rooms in our old house. Plus I only used hot tap water instead of boiling water and it still worked. One room had crumbling wallpaper from the 50s and the other rooms had vinyl-like paper from the 90s. My kids loved pumping up the sprayer and spraying the walls. Our new house doesn’t have any wallpaper anywhere… oddly I was a little sad since I love peeling wallpaper too!
BTW… I absolutely LOVE following your blog! So many ideas and I love seeing your quick and beautiful transformations!
Meg says
When you need to transfer the boiling water boil it in a tea pot, then you have an easier spout to work with and a good handle! Good luck on the other rooms. Progress looks great!
Sara says
You may have already heard this suggestion, but after trying water and vinegar and just plain hot water, I found that a spray bottle of room temp water and dawn dish detergent made incredibly short work of some ridiculously bad wallpaper installations. I think it even cut down the two-step requirement in many areas.
YoungHouseLove says
Thanks for all the wallpaper tips guys! Can’t wait to try some more suggestions.
xo
s
Jen says
We also just bought an 80’s house with a good amount of wallpaper so I appreciate your trials with ways to take it down:) I have to add that the previous owner was kind enough to leave us extra rolls of the wallpaper in case we needed to replace any as well as extra plastic grids to go over the fluorescent lights. So thoughtful of him!
Kel says
Nice progress so far.
While you are deciding on the direction you new house will take, could you do some posts on mood boards for your future rooms?
It would be fun and nice to see where you get your inspiration from and what direction you are thinking of taking this house. Thanks
YoungHouseLove says
Oh yes, we definitely will share a lot of planning posts along with actual doing posts as we go! We did link to a bunch of inspiration rooms in this To-Do list that we shared, so hopefully those help too :)
xo
s
Michelle says
Why didn’t you just boil the kettle?
YoungHouseLove says
That’s a great rational answer that my over-excited brain just didn’t think of. Haha! Now I know…
xo
s
Beatriz says
I don’t know if anyone asked… but is there wallpaper behind the vanity?????
YoungHouseLove says
It seemed to just end around it (nothing felt like it was trapped behind it, I just peeled and it came up around the edge as if it was cut there) so that definitely helped!
xo
s
Kelsey says
Oh my gosh, nightmares! My sister-in-law has a 20X30 family room in her basement that was floor to ceiling in three different types of wallpaper. It’s took us two days to remove, but we got it off! We used a shark pro lift off steam mop and just used the small head attachment for the lift off part and it worked wonders! I’m sure it probably did the same kind of reaction with the boiling water/steam combo.
Catrina says
We had wallpaper in every room of our house, and mutilple layers of it, with just drywall behind it; no paint. We invested in ones of those $50 steamers from Home Depot and it was well worth the money and worked great! I highly recommend one!
Sarah says
Yep, have done the hot water thing in a 100 year old home….talking layers! To help dissolve the glue we added white vinegar to the water. Worked but, still a monotonous job. Good things are worth the work, however.
Bailey says
What a great trick!! Can’t wait to see all of the other methods too. The white room looks much better!
xox
Bailey
http://akabailey.blogspot.com
Rebecca says
My husband and I watched Whodunnit too! So glad to find someone else that watched it. At first we were a little put off by all the cheesiness, but then we loved it! We are “Mole” lovers and this is the closest thing to it in a long time!
Mindy Cook says
Hi Sherry! Love your new house-it is so beautiful! I can’t wait to see all that you do to it! What do you recommend for painted over wallpaper???!!!
YoungHouseLove says
Thanks Mindy! I’ve never dealt with that but hear it’s a real pain to get off. Anyone have tips for Mindy? Maybe try googling it?
xo
s
Courtney says
Awesome job! Are you planning to texture and/or seal your walls? We have an abundance of wallpaper in our new home that needs to go! Trying to decide if I can tackle it myself or not…
YoungHouseLove says
Our walls are flat (no texture) so they’re paint ready for the most part (might rub some areas with a magic eraser to make sure all the glue is gone, and we hear vinegar and water sprayed on and scrubbed can work too).
xo
s
Heidi P. says
WordPress won’t let me leave this comment on today’s post, so I’m trying it here. Hopefully it isn’t a duplicate…
Good luck little tree!!
I’ve always planned on dividing my perennials whenever I move to take half with me.
Pruning tips: Never prune more than 1/3 of the branching at a time. Best to prune in the fall after leaves have fallen or in the spring. Cut as perpendicular as possible and as close to the crotch as possible without cutting into the collar. That’ll help it to seal properly over time. Prune branches that are coming out too close to each other (like right on top of each for example) or that are growing too close to the trunk (like at an acute angle as it comes out of the trunk). Best of luck!
YoungHouseLove says
Thanks for the tips Heidi!
xo
s
Lolita says
I know you listed you want to replace the vanity, but it’s kind of cute in a rustic sort of way. Maybe different a different plumbing fixture and a new top would freshen it up a bit, but the cabinet itself looks pretty cool.
Liz says
We have wallpaper in every.single.room. in our house also (along with wood paneling in 3/4 of them also!). We used the hot water method and it was awesome! I now also find it to be an oddly enjoyable process. We used a paint sprayer that hooks up to an air compressor, got it pretty cheap at harbor freight…and we just let the tap water run as hot as it gets and fill up the paint sprayer from there and it works wonderfully!
Kate says
This comment has nothing to do with wallpaper removal, but I LOVED Whodunnit? and am totally hooked. One of my favorite movies (and games) of all time is Clue so I’m really hoping a future episode will have a singing telegram girl. I’m just glad to know I’m not the only person who watched. I already have theories on who’s the murderer.
YoungHouseLove says
Wahoo! Me too! I was telling John last night that I’d totally watch it again and take notes. It’s Clue brought to life…
xo
s
Khadija says
Hi, There are some steam cleaning gadgets made by shark and other companies that might work wonders for this kind of project. The water boils in a hand held pitcher thingy and you can spray it right out of the appliance. hth
Helene says
A plastic paint scraper really helps too!
Kelsey says
Love your blog! I have been reading it for about 3-4 years now…. since moving into my first home with my husband.
I just have one thing I need to say because I just don’t want you guys to get hurt!
I am in Health & Safety and sometimes you guys scare the crud out of me!
From John not lifting properly to your balancing act on the bathroom toilet I am surprised you guys haven’t had to make any runs to the emergency room!
I love you guys and just want you to be safe!
:)
YoungHouseLove says
Aw thanks Kalsey! You’re sweet and we definitely don’t want to get hurt (slows down our DIY mojo!).
xo
s
Mari Jo says
The bathroom looks great without the wallpaper! I have one question, though. Who’s going to continue the reno after Sherry busts her butt falling off the toilet/step ladder?
YoungHouseLove says
Burger?
xo
s
Amanda B says
You could make a scrapbook! Use the wallpaper as the background for the “before” pages with photos of the room before you made it over. And then on the adjacent page show the “after” photos. You can show it to visitors or future potential buyers so they can see what hard work youve done.
Jamie Smith says
This is one of my favorite songs and it totally applies to your wallpaper stripping. http://m.youtube.com/watch?v=OyILRoOhvyQ
Take it off, take it off!
YoungHouseLove says
Haha, thanks Jamie!
xo
s
Brent says
In case you have other areas to de-wallpaper, you could try this other less dangerous method. What I’ve done before is just lightly sand the wall paper (just quick rough up with 100 or 150 grit) and spray the paper with water. Then just let it be for 30 minutes or so (could be less I guess depending on the glue?). You may need to spray it again to keep it moist during the waiting, but that has done the trick. I doesn’t have the immediate gratification of removing the paper with boiling water or a steamer, but it definitely slips right off the walls once the glue is wet. Hope that helps keep things safe!
YoungHouseLove says
Thanks for the tip Brent!
xo
s
lynne says
i just wanted to say i am in a little bit of love with your vanity in there. maybe not the top but the wooden bottom makes my heart flutter a little. am i totally crazy? does it totally suck close up? just looks so nice and antiquey somehow!
YoungHouseLove says
It’s a lot prettier in the pics than real life (I owe you guys detail shots in better light) and it has a bit of an odor that we have to deal with, but we hope to work with it for now at least!
xo
s
Leeann says
My new house has a couple of rooms that have painted-over wallpaper. Is there any hope that this can be removed, and with the method you used? It usually doesn’t bother me too much, but you can definitely see the paper seams when the light hits it just right, and that may just sends my perfectionest brain into convulsions someday. :)
YoungHouseLove says
We hear it’s really tough once it’s painted over – but maybe google around to see if anyone has done it or has tips? Good luck!
xo
s
Jenny J says
Sherry, how did you get to the wallpaper behind the toilet? I’m removing wallpaper from two of my bathrooms, and that’s the area I’m struggling with the most.
YoungHouseLove says
Thankfully it only went behind it by about an inch all around, so it was easy to just yank it out since it wasn’t all the way back there.
xo
s
Christiana says
We just bought our first home and removing the wallpaper has been the worst! Actually, the wallpaper peeled off like wrapping paper (no tears or anything). But there is SO MUCH glue! I have no idea how long it’s going to take us to get the glue off. The master bedroom is so bad we’re considering re-mudding the wall!!
Leonie HF says
Wallpaper stripping is one of those love/hate tasks. This method does make it seem so much easier though! I will definitely be trying it out.
Jyl says
Oh Sherry,
I love you and your little wallpaper removal arabesque so much. Please don’t ever change.
Exploding Water in the Microwave Prevention: Stick a wooden spoon or chop stick in the cup to diffuse the energy. Problem solved!
YoungHouseLove says
Who knew? Thanks Jyl!
xo
s
Josh says
Wallpaper is such a hassle to get off, but it looks a lot better without it!
Seaweed & Raine says
Oh yeah. Hubs and I love the way you said you didn’t have flowers on the walls any more. Gave us a good laugh. Loving the makeover so far. You SHOULD shout it from the roof tops. :)
Sheree
Candace says
I am so glad you are sharing your wallpaper removing results. I just recently purchased a house that was built in the 90’s and three of the rooms are covered in wallpaper. In one of your next wallpaper posts, could you address why you are removing it as opposed to painting over it? I have been contemplating remove/paint over and have been told by everyone to paint over. I was even told by a very successful interior decorator to paint over it, because removing it can expose a mess if it wasn’t put on right in the first place. I am still on the fence and would love to know what your take on it is.
Thanks!!!
Candace
YoungHouseLove says
No way, really?! Everyone we have ever talked to (and even shows on HGTV) have always said “DON’T PAINT OVER WALLPAPER!” – essentially painting over it makes it a LOT harder to remove down the road, and in order to have a seamless look you need to take it down (otherwise you’ll see “cracks” in the paint wherever the wallpaper meets – at least that’s what I hear). Hope it helps!
xo,
s
Claire says
Hi Sherry,
What is the best way to remove wallpaper behind the toilet? I’m struggling with that in my powder room right now. I just removed newsprint wallpaper AND a creepy teddy bear border around the top. I used half boiling water (from the kettle) and half fabric softener and it worked like a charm. I just can’t figure out a way to get all of the paper off of the wall behind the toilet without moving the toilet….which i don’t want to do! Any tricks?? Is it tacky to just remove enough so you can’t see whats stuck behind the toilet???
Thanks!!
Claire
YoungHouseLove says
Ours only overlapped the back of the toilet by about an inch, so I could pull it off with my fingers, but if it’s out of your reach maybe you can use a ruler or something to get behind it? Otherwise hopefully taking the tank off (don’t need to take the whole toilet up I don’t think) might not be so bad.
xo
s
Teri says
Hi! I posted this comment on your FB wall also. Not sure of the best way to reach you. I’m in a bit of a panic and need some advise.
The previous owners painted over the wallpaper in our bedroom. I want to change the color. Should I A) strip the wallpaper or B) paint over it again?
Have you EVER run into something like this before? The wallpaper is in good shape. no peeling or cracking. I didn’t even realize it was wall paper until I went to prep the walls for paint. Thoughts? and Thanks in advance for ANY suggestions you might have.
YoungHouseLove says
We’ve heard that painted over wallpaper is really hard to remove so maybe google for tips on how to do it and see if you’d like to try that or if you just want to paint over it again.
xo,
s
Pam says
So… I too have a bathroom to conquer; however, mine has wallpaper that was painted over! Do I have any hope?? Have you removed painted wallpaper?? Thanks!!
Pam says
Well I should have read the comment right above me- I was hoping you might have some tips, but nevermind!!