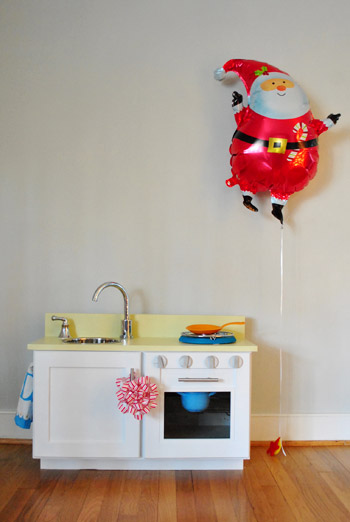
Remember how we DIYed Clara a play kitchen last Christmas? Well, it was such a hit then (and still is – in fact it’s probably one of the only toys that she plays with every day) we immediately knew that we should add to it. More kitchen = more fun, right?
What can you add to a play kitchen like ours? Well, it was clearly lacking a frigid kitchen staple. You know, a refrigerator. So we quickly homed in on that as an easy way to upgrade Clara’s setup. And the decision was made even easier by the fact that we had another cabinet leftover from the kitchen remodel that we had been hoarding saving for nearly a year in the basement with this play-kitchen “expansion” in mind.
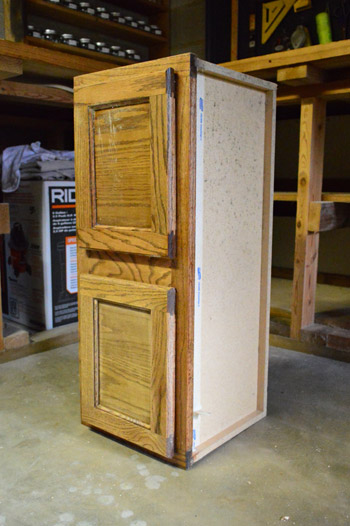
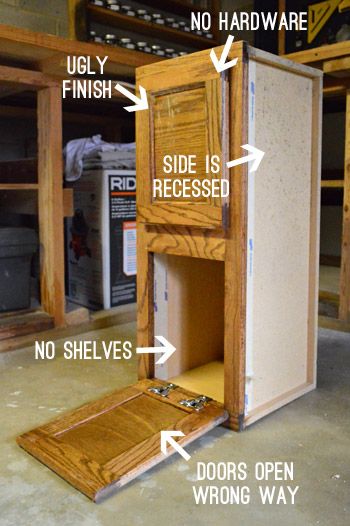
It was from the Habitat for Humanity Restore (maybe for $15? I can’t remember and the receipt is loooong gone) and we had considered using it for above our fridge, but then found one that was a better size. So this puppy has been sitting in our basement for over a year now, just waiting to be fridge-ified. But it had some obvious shortcomings before it was ready for its kitchen close-up. Observe:
But if it’s got a problem, yo I’ll solve it. Check out the look while my drill bit revolves it. (whisper this part: Ice, Ice, baby. Ice, ice, baby). Yup, $herdog isn’t the only one who can spit mad rhymes.
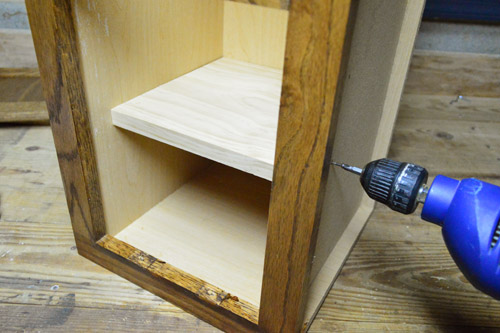
Fixing those aforementioned problems wasn’t too bad. First I removed both of the doors and added three shelves inside using one 10″ wide piece of pine board that I grabbed at Home Depot for $6 (which was the width of the cabinet). I attached each shelf with some simple screws straight through each side as you can see from the photo above.
Here it is with the shelves added. If I were doing a real “to scale” refrigerator I would’ve added more shelves closer together. But from Clara’s experience with her current play kitchen, the wide shelves are easiest for her to maneuver in (and some of her items are around 6″ tall, so spacing these shelves 7″ apart seemed to be the most functional. Neither of us had any great expectations that our creation would ever hit a super high level of fridge realism anyways… we just want the kid to have fun.
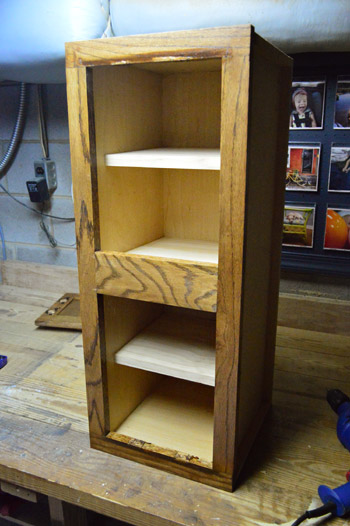
Next up, I wanted to cover the recessed portion of each side so that it would be a flat box (plus it would cover up my screw holes from the shelf-adding step). So I used my table saw to cut some panels of plywood to size and then used wood glue to secure them in place. These were the first items I purchased since I didn’t have them in my scrap wood pile, and they ran me $8 for all of the wood that I used on both sides.
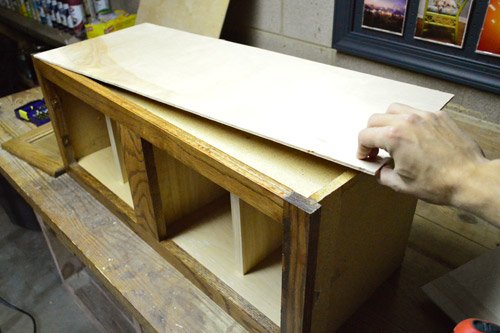
Here’s my fancy step of letting my glue dry, with the help of clamps and some heavy objects to keep the plywood pressed flush to the cabinet.
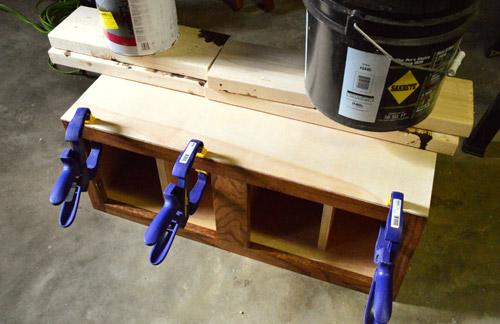
Here’s how it was coming along after both sides and a top panel were done. It was definitely starting to look less like the bedraggled old cabinet that we started with.
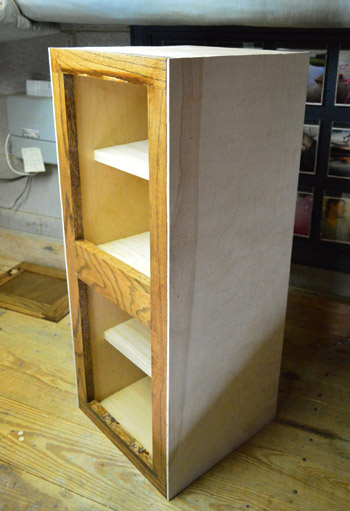
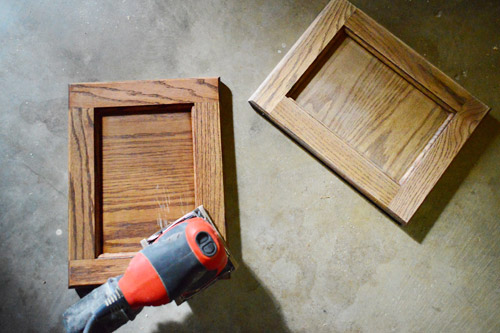
Before painting, we lightly sanded the finish off of the doors and the face of the cabinet – just like we do when we’re painting kitchen cabinets for real.
We also thought a fun feature of her fridge would be to make the front magnetic – just like the real deal. So I busted out the can of magnetic primer that we still have plenty of (even after this project and this project). We did three coats, since we’ve found that to be stronger than one (tip: shake the heck out of it before applying it so all the magnetized particles don’t settle to the bottom of the can).
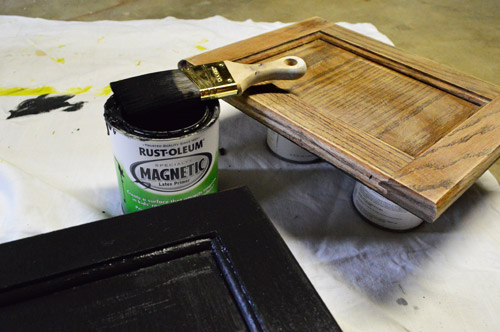
Here are the doors all primed with the magnetic stuff and the rest of it primed with just normal primer (Zinsser Smart Prime, which is low-VOC – it’s actually the same stuff we used for our real kitchen cabinets and we still had it leftover).
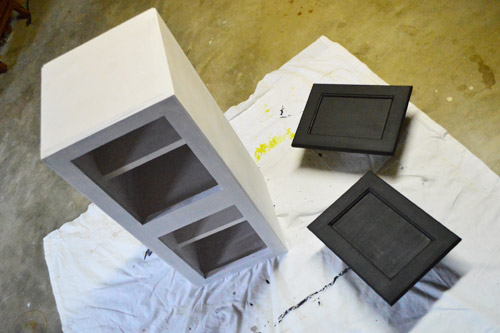
Once that was all dry, it was time to get our paint on. While some sort of silver or grey on the outside might have looked stainless-ish, we thought it would be nice if this guy fit in with Clara’s existing white play kitchen. But because we can’t resist a little bit o’ “fancy” we painted the inside a light blue with a small quart of paint that was leftover from a few book projects (Sylvan Mist by Benjamin Moore). You know, to lend an air of “cool” to the thing.
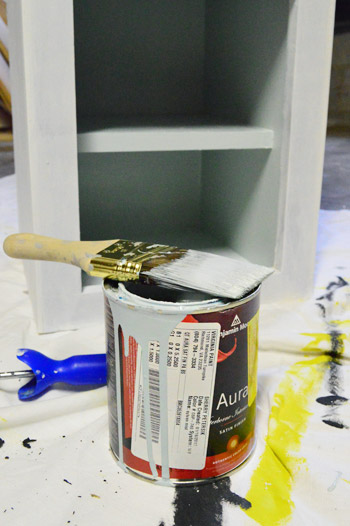
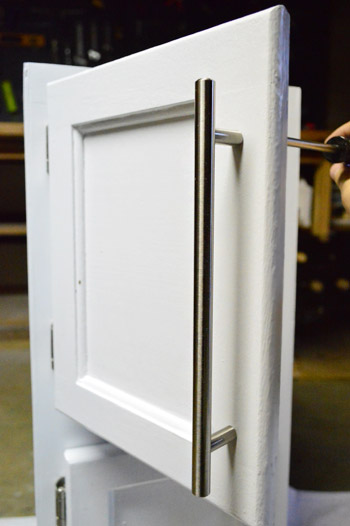
Once the inside was “chilled” with blue paint, we painted the outside surfaces semi-gloss white (Decorators White by Benjamin Moore – which we just always seem to have around for painting trim, the office cabinets, etc). It only took us one coat on the outside framing thanks to the white primer that we added first, but the doors took three coats to cover all of that black magnetic primer. But once it was all said and done, I reattached the doors with some new hinges and added some pulls that matched the rest of her kitchen. Those were the only other items that we purchased for the fridge-building project (also from Home Depot like the plywood) and they came to $5.25 for all the hinges and $6 each for the long fridge-ish hardware pulls – which were 7″ long for anyone wondering.
Then we thought it would be fun to give the fridge a logo of sorts, to help it look less like a cabinet and more like a fridge (we thought crazy-gluing them in place would help them stick for the long haul). So Sherry found these scrap-booking stickers at Michael’s that were as close to stainless steel as we could find. We thought one of the snowflakes could be a cool logo-ish-looking icon next to the name of our fictitious appliance brand.
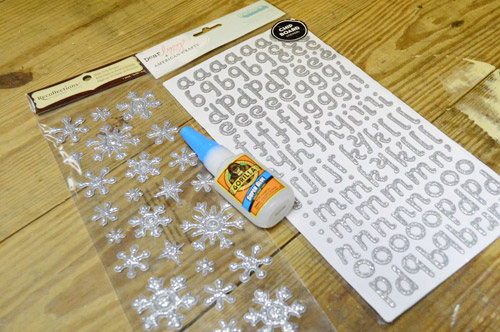
We had a nice spirited debate as to whether it should be called “Cool” or “Chilly.” This is what happens when two former advertisers get into a branding discussion.
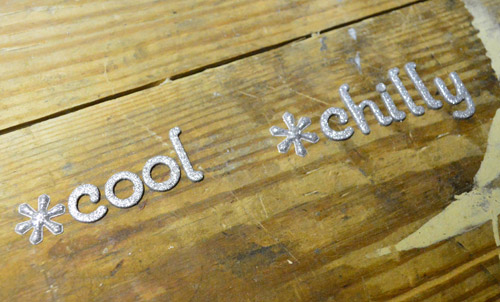
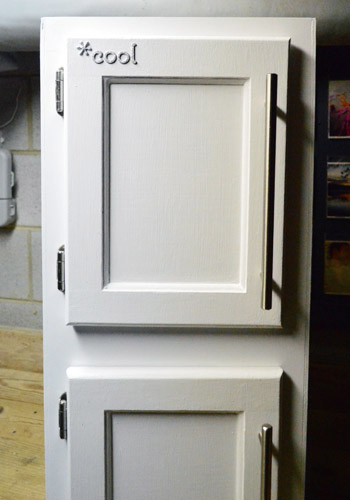
Ultimately we decided on cool… but we weren’t 100% sure so we just softly stuck them up there without any crazy glue on them quite yet. Just to get a feel for our little logo idea. Then we both stood there staring at it for a while and realized that it was a lot cooler in our minds. Hah. And in real life it just seemed kind of cheesy on the otherwise clean front (there’s not any lettering on Clara’s original kitchen, so maybe we were going overboard with this addition on the fridge). Plus, Sherry was convinced that Clara would peel them off in 2.2 seconds – even with crazy glue (perhaps ripping corners of them off, digging at them with blocks, etc). But here’s a pic of how it might’ve looked had we stuck with it…
But now you get to see the whole shebang all finished and ready for Christmas morning. I hope you’re all gently shaking jingle bells and/or playing various holiday-songs, because here’s what Clara’s gonna wake up to Christmas morning:
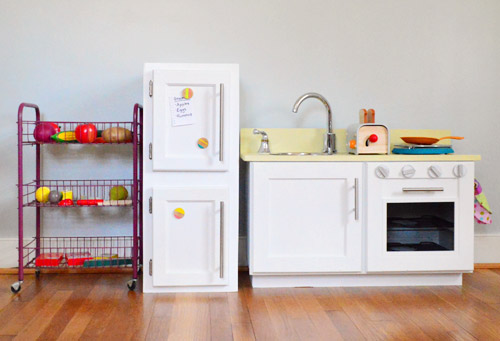
Yup, there’s Clara’s new fridge (okay, it sort of could double as a pantry too) next to her kitchen from last year, plus a little food cart that we’ll get to in a minute. And of course, you can’t give someone a fridge without stocking it full of food, right?
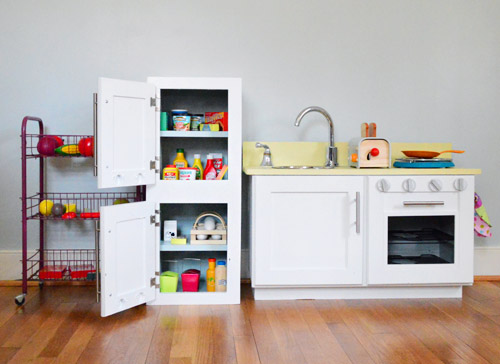
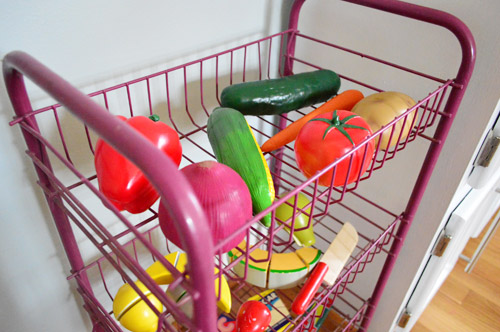
For the most part this is actually play food that we already owned. We’d purchased a bunch to give her last year, but after seeing how well the few sets of play food that she opened last Christmas had entertained her, we opted not to shove two more boxes down her present-riddled throat and instead planned to wait a while and introduce them later in the year when she was getting bored of a few other toys that we could phase out. Little did we know that those two boxes would sit unused in the spare room for an entire year. How did a whole year pass? Doesn’t it feel like we were just sharing Clara’s play kitchen a week ago?
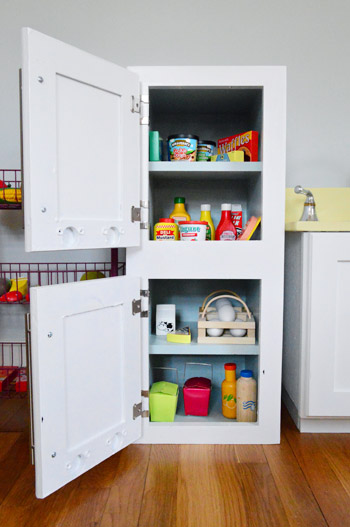
Most of it is Melissa and Doug stuff that we scored on Joss & Main at a nice deep discount. I personally love the bologna.
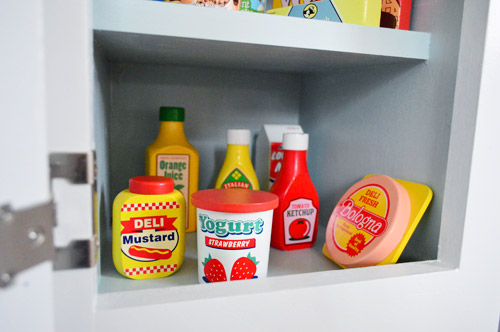
We also supplemented with a few “DIYed” items of our own. For example, we picked up (and emptied) a couple of these teeny tiny Ben & Jerry’s cartons. I took one for the team and downed both of them in about four scoops.
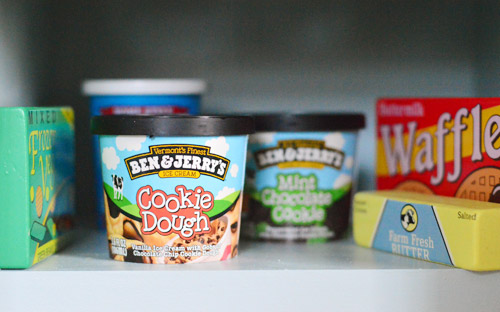
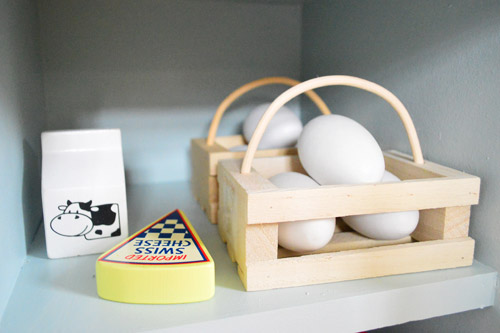
Sherry also found these wooden eggs and egg crates at Michael’s to fill out what apparently is the dairy shelf in her fridge. One day – maybe around Easter? – we might even decorate them with Clara as a fun holiday activity. The funny thing is that Clara met Santa a little while ago (yes, the real one who hangs out at community events) and asked him for “eggs for her kitchen” so we thought that was sweet enough to warrant an actual crate of eggs. Make that two.
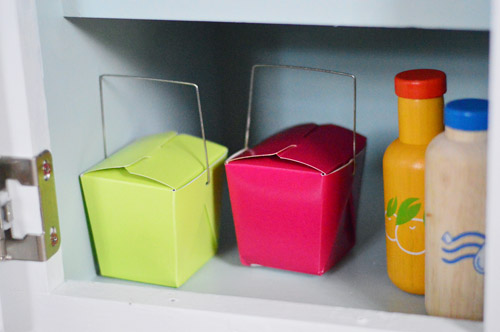
Also at Michael’s Sherry found these little Chinese takeout containers. You know, so Clara can pretend she has some leftover General Tso’s or something.
Oh yeah, and about that cart…
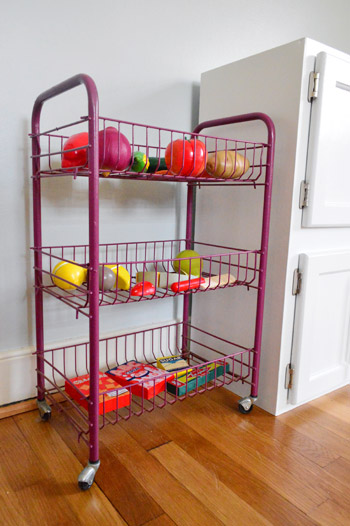
It was a thrift store find at one of our favorite local places. It was $5 and it was already this color, which was a pretty lucky break considering how many other strange colors it could have been. Clara actually helped us bring it home, so hopefully we didn’t just damage the illusion of Santa there.
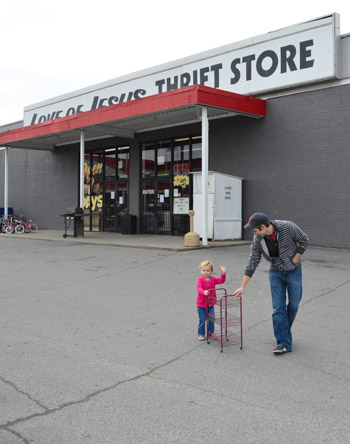
We thought it’d be a great addition to the kitchen set because Clara has gotten a lot of fun out of a little wire fruit/veggie basket that she already has. And since this one is large enough to hold all of her produce along with some pantry-ish items on the bottom and it wheels around, hopefully it’ll add up to hours of enjoyment.
As for a budget breakdown, here’s how this little fridge & rolling cart full of food stacked up:
- Cabinet – already owned (maybe $15 originally?)
- Wood for shelves & sides – $14
- Primer & paint – already owned
- New hinges from Home Depot- $5.25
- 7″ hardware handles from Home Depot- $12
- Stickers that we never used – $5 (with 50% coupon from Michael’s)
- Thrift store cart – $5
- Wooden eggs, crates, & takeout containers – $6 (with 50% coupon from Michael’s)
- Tiny Ben & Jerry’s ice cream cartons – $2.50
- Other play food – already owned (about $30 originally)
- TOTAL: $50.75 (it would probably cost around $95 if you didn’t already have the cabinet and the play-food on hand)
Under $51 for both the fridge and the cart isn’t too bad, right? The play kitchen from last year rung in at 74 beans, so it’s nice to add two other kitchen items for less. The only thing that’s missing are some grocery store gift cards so Clara can take care of some of the items on her shopping list…
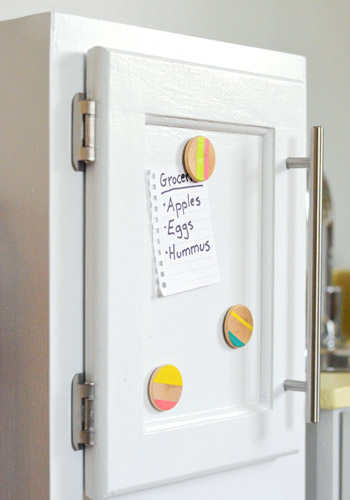
Oh and the magnetized doors are worth the effort, so we highly recommend those if you’re in the mood to add some “extra sauce” to your fridge. We can both picture Clara hanging little drawings that she does on Post-Its and someday writing her own lists in sloppy kid-handwriting.
We’ll be sure to share video or photos of Clara actually receiving her gift, just like we did last year, so stayed tuned for that. And oh yeah, if you were wondering what mystery room we shot these photos in… it’s the playroom, which still has walls painted in a bunch of random colors from shooting our book back in February. This particular wall is Sylvan Mist by Benjamin Moore (the same color that we used on the inside of the fridge, so we cracked up when we realized that).
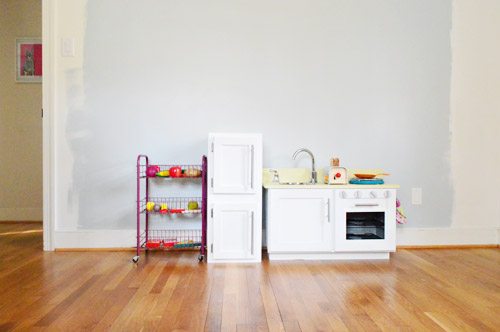
So, are any of you other “Santas” out there whipping up something in your workshop for next week? Are your kids as obsessed with play food (specifically play eggs) as our daughter? Do you find it funny that play fruits and veggies are usually life sized but most of the “pantry items” are at least half of their normal size (even when they’re made by the same company)? I’ll pause while you ponder that.
Psst- I grabbed a quick video of Clara playing with her kitchen the other morning, so that’s over on Young House Life for ya.

Kacie says
So sweet! I love this project. Clara is going to be so excited on Christmas morning. <3
Amy @ drivethirtythree says
this looks amazing!! I wish I had the time and talent to pull something like this off. my daughter is getting a lovely plastic play kitchen this year. i did score her some melissa and doug food though!
but um, where was the super helpful advice about really shaking the magnetic primer when I was putting six, yes six, coats of the stuff on the inside of two of my kitchen cabinets (dreams of a magnetic spice “rack”) and the thing STILL won’t hold a magnet :(
magnetic primer fail.
YoungHouseLove says
Oh man, yeah we read the directions and it mentioned that in tiny tiny print. Should be huge on the front I think!
xo
s
Amanda says
I was unimpressed with my magnetic paint. I had the paint department shake the can in the paint shaker before I left the store. When I got ready to paint, I shook it again a bit. Even after 3 or 4 coats, it was pretty wimpy. Magnets with any heft just fell off. Magnets that were too weak fell off. Pretty much the only thing that stuck to it was flat magnets, along the lines of Magnetic Poetry magnets.
Sarah says
Love it!
There should be a light on the inside that comes on when she opens the door! (And then turns off at some inopportune moment, and then starts to beep at you because you’ve left the door open too long.. ha)
Clara will be SO thrilled. Great work elves! xxx
YoungHouseLove says
Hahahahahahahahahh! She does love the push-light inside her oven…
xo
s
Christie says
Yes they make these for closets! That would be a perfect addition!
Sarah says
That. Is. Amazing. Such a cool (haha) idea!!!!!
I’ve only just recently discovered your blog, and I LOVE it!!! It’s given me so many ideas for my own house… much to my boyfriend’s chagrin.
YoungHouseLove says
Aw thanks Sarah! So glad you found us.
xo
s
Colleen Wilson says
super cool!! you’re great inspiration.
Kristen | Popcorn on the Stove says
Oh, this is adorable! She’s going to love it!!
Lindsey d. says
Adorable! I’ve had a play grill pinned for a while now… Just need to get on that whole “have kids” thing…
I did do a couple of semi-DIY gifts this year, which involved mounting Instagram prints and an odd size poster to canvases with Mod Podge, as well as making and decorating clay ornaments to act as gift name tags.
YoungHouseLove says
Those sound really cool Lindsey!
xo
s
April says
That’s awesome! She’ll love it. They love opening & closing the cabinets and sorting the items where they want them to be, she’ll need a little table for tea!
Emily says
This is sooooooo amazing. I just watched the video of Clara wiping Gee and giving him a bath (the look she has on her face while John grabs the wipe is frame-worthy… I bust out laughing at work). She is so sweet and caring!!!
She is so lucky to have y’all as her parents, and I can’t wait to see the video of her with her fridge on Christmas morning :)
Urban Wife says
Oh my gosh y’all! So amazing. It makes me want to be a kid all over again so I can play with this awesome fridge and kitchen. I’m sure Clara will absolutely love it. Great job! :)
Leah says
Awesome! I loved my play kitchen as a kid (just a plastic one from a garage sale), and I think this is even better.
One neat thing I’ve been seeing on pinterest/various blogs is felt food. You can buy or sew lots of different felt foods, and it just adds another layer of play and possibility. Just wanted to put that out there for a future present possibility.
YoungHouseLove says
Oh yeah that stuff is awesome!!
xo
s
Sherry in BC says
Oh this is fantastic. Clara will have tons of fun with her new appliances. I totally agree that the magnetic paint is worth it. The only thing I would change would be to buy a couple of sets of plastic magnetic letters and then spray paint them in the colours of your choice. Saw that done on pinterest and can’t understand why I didn’t do that. She may not be spelling much yet but that is coming soon. So a nice big basket of the alphabet would be great. What a great way to repurpose a cabinet and the food is so much fun for them.
YoungHouseLove says
That sounds really cute!
xo
s
Anele @ Success Along the Weigh says
AHHHHHHHH super cute!! She’s gonna love it and I can’t wait to see video of her playing with it!
lauren | rebuild (health & home) says
Cool! (Pun intended).
That came out really well and I’ll bet it will be so neat for Clara to have homemade play things to pass on to her children when she’s older.
I’m looking forward to making toys for my children when we start our family. I’ll be coming back to this idea!
mariela says
So so cute! I was going to say looks more like a pantry hehe, then I saw your comment and I was laughing. Its the cutest. Love that you guys make this stuff for her instead of buying the plastic ones they sell. If we have a girl I will be trying to persuade my hubby to diy a play kitchen for her; If its a boy then maybe a tool bench :)
Jess @ Crunchy Hot Mama says
Ahhhh I love it! I was wondering what ya’ll were coming up with!
Emma’s actually getting one, too, and since it’s not yet finished, I can steal some ideas from you ;)
Our girls will be Head Chef’s in no time! Merry Chrismas Petersiks :D
YoungHouseLove says
Haha, so funny since I can burn rice.
xo
s
paintergal says
Aw, that’s adorable! You guys are the sweetest parents.
I love that you magnetized it!
Fran Siefert says
You make me want to be a kid again. At the very least, I would love to come play with Clara. Lucky Grandma Kathy (and Sherry’s Mom too – I just don’t know her).
Jamie says
Seriously, best present ever! Great job guys! I can’t wait to DIY this someday, you know, when we have kids (fingers crossed!)
Karly says
Aw,what an awesome gift! When my sister and I were little our dad built us a play kitchen as well out of plywood and my parents still have it! Much more long lasting than the store bought ones and with way more sentimental value :)
JSi says
I love it!! What a great idea!
I’m trying my hand at a few gifts for my little one this year: I turned a plain hoodie into a dinosaur hoodie and made a magnetic fishing game, but my crowning achievement has been making him a “Quiet Book”. I’m not a master seamstress, so it’s been a big learning experience for me, but I am thrilled with how it has turned out! Only two more pages to go and it’s ready to wrap!
YoungHouseLove says
So sweet! Those all sound like awesome gifts that Clara would love!
xo
s
Janelle says
Looks great! The sleek pulls of the fridge are my favorite part. Can a fridge be sexy? Haha.
YoungHouseLove says
Hahah! Hubba hubba, fridge.
xo
s
Diana says
“Check out the look while my drill bit revolves it.”
My morning = made. You got mad skizzills. :)
YoungHouseLove says
Hootie hoo.
-John
Rachel says
Ice ice baby!
Chelsea @ Riding Escalators says
Oh my gosh! You guys are awesome elves! Clara is going to be so excited! I love that last wide shot that makes it all look so tiny!
I used to have a play kitchen in our kitchen where I could “cook” right along with my mom. Total hit. Though I apparently didn’t ACTUALLY learn how to cook then… good thing I married a former chef or we’d be surviving on mac&cheese and ramen still.
YoungHouseLove says
Haha, seriously! The irony isn’t lost on me that I can’t cook my way out of a paper bag.
xo
s
mary @ B&Gjournals says
i seriously can’t believe its been a year since clara got her play kitchen, i swear you all were just posting about it a couple months ago, right? where does the time go…
YoungHouseLove says
I know! It’s so crazy how much time flies. I really feel like we were just screwing in that hardware and adding those little oven knobs a month ago!
xo
s
Tracie@MiddleClassMod says
How awesome is it that you painted the inside blue? Gives it a nice vintage fridge vibe, and a little visual clue for Clara that her fridge is cold!
I’m rather sorry you guys didn’t record the “discussion” over the fridge’s brand name. Ha.
YoungHouseLove says
Haha, I think that would have blown your mind. We can get intensely nerdy over things like that.
xo
s
Ade@fortheloveofpainting says
What great parents you are…she is going to LOVE it!
Emma (Broke Ass Home) says
Uhhh this is so cute I might die. Like…actually die. I can’t wait to have kids to do stuff like this with! The most extensive I’ve gotten with christmas is surgically removing fluff from dog toys and putting the limp bodies into the dog stocking lol
YoungHouseLove says
Hahahhahah! We used to have to do that with Burger! He was a toy killer. Now that he’s older and more mature he’s just a bone killer but a toy snuggler.
xo
s
Kenz @ Interiors By Kenz says
Heart = melted!
This is such a great Christmas gift. I love hand made gifts. They are SO much more meaningful. I love it because you get to think of the person the ENTIRE TIME you are creating it. It makes the giving process so much better. You are both wonderful parents. When Clara is an adult and looks back on this she will be so grateful for it all :)
YoungHouseLove says
Aw thanks Kenz, you’re so sweet!
xo
s
Lauren says
Clara is one lucky girl. I had so much fun playing with my kitchen when I was little…I can’t wait for my daughter to be old enough for one! :)
Kari says
My little She Hulk has been asking for a pink reindeer for Christmas…for four weeks now. Try whipping one of those puppies up. Thank God for Etsy.
YoungHouseLove says
Haha, that’s adorable!
xo
s
Cair says
Clara is going to love it! Added bonus, you’re going to love watching her play with it. So rewarding to have her love something you crafted, isn’t it.
Now the question … your house is pretty much an open book and I can figure out where in the house your pictures were taken, but I’m lost on this one. Help? Please.
YoungHouseLove says
Oh yes, check out the bottom paragraphs for that info. It’s actually our spare bedroom (that we randomly call the playroom) which has all sorts of paint swatches on the wall from Feb when we shot the book.
xo
s
pen || new york nonsense says
This is seriously too adorable for words! Especially when you pan back in the last photo and realize just how teeny it all is. She’s such a lucky kid to have such crafty parents. My future kids will be lucky if I can roll them a ball of playdough. ;)
Christina P (NS) says
It’s awesome!!!
I have been plugging away at my play kitchen (modelled after Clara’s) for my daughter for her gift this year and have been wishing I had enough time to add a fridge (so NOT going to happen in the next 6 days) but after seeing yours I think I will work on that next!!
As always – thanks for the inspiration – Happy Holidays!
Erin says
This is incredible!! This looks so much more real than the play kitchens you buy, plus the cabinet is something she could use later for something else!
Beth says
Holy Jingle Bells! Just stop it with all of this cuteness!!! It may or may not have made me squeal…Clara’s a lucky gal!
Casey @ Waffling says
I think this set up needs more height! What about hanging some spatulas above the sink (or does it move around a lot?)
YoungHouseLove says
Oh that’s not where it’ll live, we’re just hiding things in the spare room until we give it to Clara on Christmas! I’m sure it’ll have some art or a window or something above them :)
xo
s
meg shannon says
The fridge looks great and I love the cart. It is even cited than the blue one IKEA came out with this year. At 5 bones it was a steal.
We are finishing up a desk for our kids’ playroom and still need build an Ana white doll bed for our 2yo daughter.
Here is the progress to the desk so far.
http://www.timandmeg.net/?p=4368
YoungHouseLove says
That’s awesome Meg! Good luck!
xo
s
Sara says
Thank you so much for posting this! I was looking (and still am) for a cabinet to make into a fridge for when we give our daughter a play kitchen for her 2nd birthday in May (we snagged the Ikea play kitchen on craiglist for only $50). You definitely got a deal on yours–I went to our Habitat store (in Manassas, VA) and couldn’t find anything under $30! So, the search continues, but at least I have the time to find one and now the instructions on how to pretty it up! Love the idea of making the front magnetic, wouldn’t have thought of that! I think I might even make the sides magnetic too, more places for her to display her artwork!
YoungHouseLove says
One tip would be to go a few times! We have even found cabinets for $1 or even free there, it’s just hit or miss sometimes. Good luck Sara!
xo
s
em says
This is wonderful! And I think I am about to lose a similar cabinet in a kitchen remodel, so I may actually be able to do this. Quick question- for the Ben and Jerry’s, did you just wash out the containers with soap, let it dry, and stick the lid back on? Just wondering if you did something to make them less destructable.
YoungHouseLove says
Oh yes, I just rinsed them, dried them, and let them air out a while. Seemed to work for now. I think you could add Mod Podge to try to seal them more, but I figure if the girl plays with toilet paper tubes forever they’ll hopefully hold up fine. And replacing them may or may not be fun… haha!
xo
s
Sarah | The Accidental Okie says
It’s amazing to see the commitment you have for your child – making DIY Ben and Jerry’s cartons and having to eat the ice cream for real. I aspire to be that awesome of a parent some day – eating Ben and Jerry’s whenever I’m called to do so. Way to be awesome.
:)
YoungHouseLove says
Haha!
xo
s
Meredith says
I’m so committed to my future hypothetical children that I eat Ben & Jerry’s now. All the time. Clearly, I will be a rock star mom. :)
YoungHouseLove says
Hahahah!
xo
s
jenny says
Very cute! It looks like it needs an extra splash of color. Perhaps some yellow? I love that you made it yourselves-what a sentimental gift.
The picture of Clara pushing the cart is adorable.
And you do know that eggs are not dairy? Lol.
YoungHouseLove says
Haha!
xo
s
Lori says
Sooo cute! There’s no doubt in my mind that she’s going to love it as much as she loved her kitchen last year. Top Chef, here she comes!
Erin D says
It’s adorable! I’ll have to pass on the links for this kitchen & fridge to my sister-in-law who just had a baby girl. My boys are growing out of their kitchen stage now, unfortunately.
Also, just wanted to say THANKS to you guys for introducing me to the kreg jig. I had never seen it before your blog and we got it for my husband last year for Christmas. He just got around to using it in the last month or so while building cabinets for the playroom and he loves it. So, thanks!!
Also, I saw your video on NBC12 online this morning. You guys did great!!
Merry Christmas!
YoungHouseLove says
Aw thanks Erin!
xo
s
Brenda says
Love that you made the doors magnetic! I can’t wait to see Clara’s reaction when she sees it!
Maureen @ The Parkland Project says
Seeing stuff like this makes me want babies even more. Please stop with the adorable kid stuff. My hubbie better really get handier with wood working (he’s already handy with things like drywall) very soon.
Ben @ The House of Lists says
The magnetic primer is great! That really would “make it” for my kids. I need to get on this.
Kate says
My partner and I are making our daughter a dollhouse based on your design! We loved the simplicity of it. Really excited about starting it tomorrow (she’s a teacher and I just finished my college work), so we are finally able to get down to work and make some Christmas presents. Thanks for the tutorial! :)
YoungHouseLove says
That’s so sweet! Good luck Kate!
xo
s
Q says
Love it! I bought an old trunk to make a “tickle trunk” for my kids – in Canada, we grew up with “Mr. Dressup.” He had this wonderful old (albeit tacky) trunk full of costumes.
http://3.bp.blogspot.com/_YSj9VerPFmY/TS3CH1ucZtI/AAAAAAAACZs/1a5_ieYlj7M/s1600/tickletrunk.jpg
To my delight (and relief), my mother-in-law just happens to have an old trunk that she cleaned up about 40 years ago and is willing to give it to us. It comes complete with super-tacky mactac (a la yellow and orange flowers) – perfect for our tickle trunk! And perfect for me since I’ll I have to do is fill it with costumes!
Q
YoungHouseLove says
So cute!
xo
s
Kim says
Super cute play fridge! Clara is so lucky to have creative and crafty parents like you guys.
I love how the shopping list on the fridge says “hummus” because Clara loves hummus. :) (Clara, you have good taste!) I can’t wait to see her reaction on Christmas morning. You guys have to make a video!
YoungHouseLove says
Haha, it was funny to make that list since she loves those three things.
xo
s