This is it. The big wall-opening week (aka: w.o.w). So… woot! The first order of business is to share a few details that we’ve been asked about a bunch:
-
- how we went about picking a contractor
- how we’ve dealt with permits
- how we planned out the exact spot for the opening (would hate to knock everything down, only to wish we had shifted it a little to the left or the right)
First, here’s why we need a contractor: we love DIY as much as the next guy, but there are some things that we’re happy to leave to the pros, especially when it comes to the structural integrity of our house. We’re no strangers to demo-ing out a small non-load-bearing wall (like we did to create the laundry nook in our first house)…
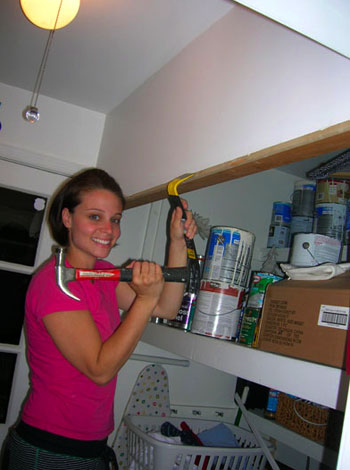
… but an 8 foot opening in the heart of the house which needs to be reinforced with a heavy-duty perfectly-placed header is definitely something we were happy to do with the help of an expert. You know, since “decades of experience” beats “DIY blogger of four years” when it comes to let’s-not-break-the-house (more on how we choose what to do and what to hire out here).
So we set off to find the right person for the job by:
- asking friends or family members if they had any recommendations (we even put out a call on Facebook to ask locals if they had a contractor they used and loved)
- visiting their websites to learn a little more about the ten or so people we had on our short list
- weeding ’em down to our four favorite prospects (based on the info on their websites and the specific recommendations that we got)
- calling all four of our potential contractors to request an in-person estimate
In some miraculous home improvement blue-moon, they all came out and gave us a quote within a few days. We explained that we’d be getting multiple estimates (so no one assumed the job was theirs & so folks would hopefully give us their most competitive price). All of the estimates were for removing an 8 foot section of wall between the dining room & kitchen, installing a support beam above the doorway, adding additional support under the floor, reframing the doorway and threshold, building a short knee-wall for the kitchen peninsula, patching/adding drywall, and installing a door jamb & trim on both sides of the opening.
Here’s where our four bids came in:
- Contractor #1: Nearly $4,000
- Contractor #2: Around $3,200
- Contractor #3: $650-$1,000 (depending on the cost of materials)
- Contractor #4: $700 if we did our own drywall, jambs, & trim ($950 if we didn’t)
Is that crazy or what? And they’re all licensed and insured Class A contractors with decades of experience, so it’s not like any of them would do a bad job. They were all very nice too. We believe the first two contractors are used to doing much more major work (ex: additions in the 100K range), so it might make sense of their bids when you think about the giant undertakings that they’re used to tackling. The first contractor actually included a port-o-potty rental and a dumpster fee as two of his line items (as homeowners who’ve had walls opened in our first house, we knew that doorway debris could be hauled in the back of a truck and that folks could use our bathroom to their heart’s content).
Even before the bids came in, we felt the most comfortable with Contractor #3 (he does work for Habitat For Humanity on the side and is a father-son team, which is always awesome) and Contractor #4 (he’s actually a friend of a friend – John was even a groomsman with him in a mutual friend’s wedding – and he has 30+ years of experience).

So although we loved Contractor #3, the opportunity to work with someone that we already knew (who had been doing this stuff since before we were born) was the deciding factor. Plus the other half of Contractor #4’s team is a girl who is about my age, and you have no idea how much that thrills me (more than it should). So contractor #4 was our pick. Not to mention that he was willing to allow us to do the easier non-structural stuff (drywall/jamb/trim) ourselves – which we love – to save some loot. And let me tell you, $700 sounds like the perfect number after our first estimate came back at 3K over that.
We’ll share more contractor info as we go, but now onto the whole permit thing. We fully believed that we needed a permit for this job from day one. And since a permit is only around $150, we were ready to bring our drawing down to the office and pay our fee (they award same-day permits here, which is really convenient). But before heading down, I decided to give ’em a call since all four contractors believed that if we talked to a “plan reviewer” and explained a few things we’d be told that we didn’t need one.
So I called and was passed along to a nice plan reviewer named Jay and explained things. It’s too much to get into, but it helped that our house is a one-story ranch (so the load on that wall was just partial and not a full second story of weight) and the fact that there used to be a doorway there about three decades ago helped as well (since it was already partially enforced). The verdict from Jay The Plan Reviewer: we didn’t need a permit after all. So we’re glad we called to save that money and time. These things differ by location though, so be sure to check with your local municipalities to learn about the rules in your area.
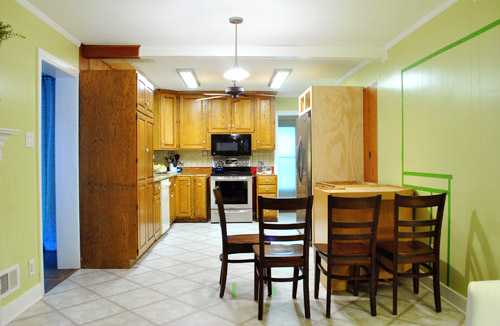
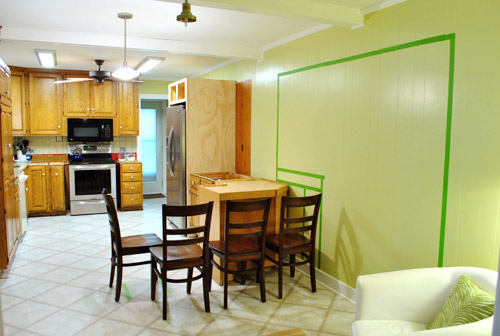
As for how we planned the exact opening’s placement, we knew we needed to build in our fridge and relocate an existing 36″ cabinet (which used to live where the stove now sits) in order to begin finalizing the peninsula placement to pin down our opening. And when we found a corner cabinet at the ReStore we were finally able to judge exactly how everything would sit against that wall so we could decide exactly where to place the opening.
We’re still looking for an 18″ cabinet to jut into the room to finish off the peninsula, but since the corner cabinet was the most important part of the puzzle (in order to pin down where we wanted the opening to be) we just taped off where the 18″ cabinet would end on the floor to picture things further and even brought in four chairs to help envision the seating area that will be created when we get that giant 3′ x 5′ counter installed (it’ll have a 12″ overhang on the two sides where you see chairs).
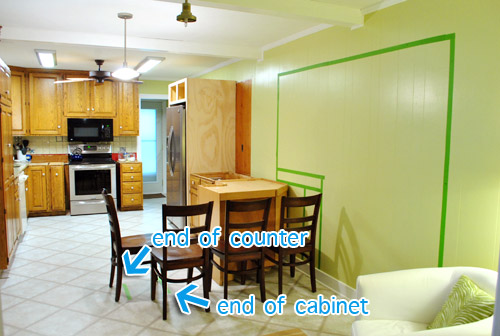
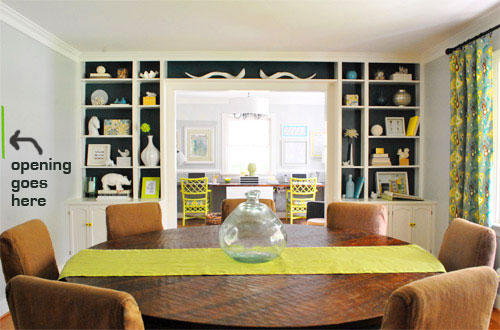
Then we just made sure that we had ample walking room beyond the stools and peninsula that will live on one side of the opening (we’ll have about 4′ of walking space) and decided to line up the other side of the opening with the beginning of the peninsula (things lining up = looks intentional and balanced, as opposed to an afterthought). This will allow the entire 8′ opening to line up almost perfectly with the giant picture window in the dining room, which really should make the newly added doorway look like it has always been there (again, things lining up = looks intentional).
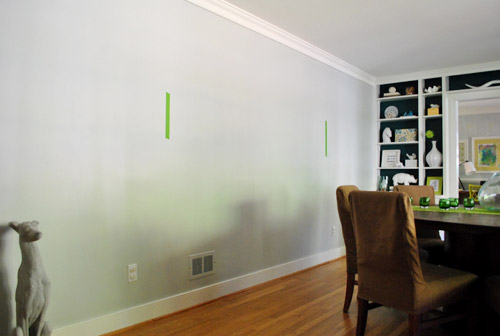
Oh and a few folks were wondering why we were opting for a half-wall instead of just doing a huge doorway with some sort of cabinetry on the back side of the peninsula that’s accessible from the dining room, but we think a half-wall is the best choice for us because:
- we didn’t want the peninsula to look like an afterthought (like it was placed in the middle of a doorway without much planning)
- we thought the half-wall would ground the peninsula, so it would feel solid and supported (instead of more like it’s floating between two rooms)
- we already have four base cabinets in the dining room thanks to the existing built-ins (so we don’t need additional cabinetry/storage)
- because of those existing built-ins, we thought an open bookcase, cabinet, or other form of built-in located less than three feet from the giant wall of existing built-ins would be a bit much
- our threshold would be a lot more seamless (if the half-wall weren’t there, there’d be an awkward strip of cork flooring between the peninsula cabinet and the dining room floor)
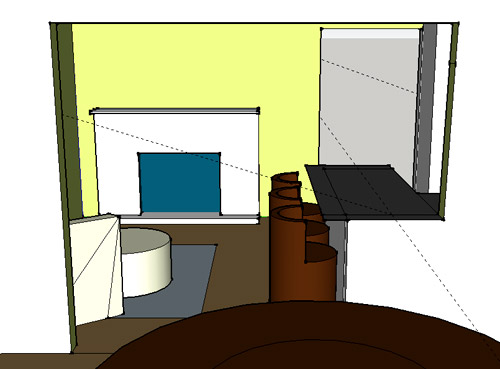
Oh and here’s the google sketch-up of the view through our future doorway according to our little tape job…
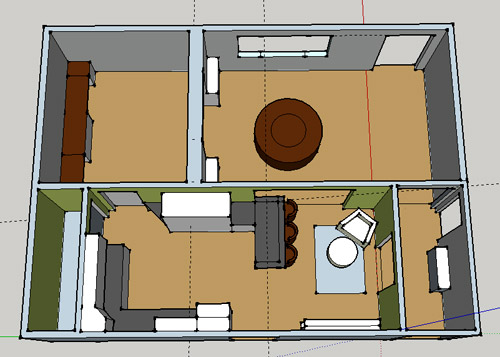
… and the full floor plan sketch to jog your memory of the top view (much more on that here):
So that’s where we are. Enough words. Bring on the demo pics. If all goes as planned, we’ll be sharing those within 48 hours. Anything major on your to-do list this week? Do anything fun this weekend? Tell $herdog all about it.
Psst- The groomsman pic in this post was taken by David Abel.

FirstCorinthiansThirteen says
I’m super excited to follow this transition you guys! My husbad is a carpenter so we’re always (well, I’M always) coming up with ideas on how to change things up in our bungalow. I love getting inspiration from your blog. Yay demo!
heather says
Hahaha! I’m with you. My husband just laughs at me, because he knows once I think things up to the point of sketching them out, that it’s “up here” (*taps head*) and it’s as good as done. Now whether it’s actually as good as done is another thing since he knows what can realistically be done and what can’t haha. Since we have limited storage my newest thing is a murphy bed for the office, so I’m not stuck with a random bed taking up tons of floor space when we rarely have guests overnight. I might be pretty stuck on that one though, unless our floor plan in there changes radically. :)
Jessica F. says
Let the demo begin!!! WHOO!!!!! :D
Isabel says
The space will look so beautiful with the light flooding in. It almost feels a little silly to be so excited about someone else’s kitchen, haha.
And unrelated: there’s an “awkward” typo on the last bullet point.
YoungHouseLove says
Thanks for the tip! Fixed!
xo,
s
jules says
The weather was surprisingly nice this weekend in Ontario so I spent about 4 hours on Sunday outdoors sanding our old storm doors….this has been an ongoing project since July, one I was hoping would magically do itself if I left it long enough. Alas it just started getting drafty in the house so I had to get it done!
Brittany W. says
Your kitchen is really taking shape! Can’t wait to see where you go from here. Where did you guys start or who did you contact to see if your cabinets/floors could hold concrete countertops?
YoungHouseLove says
We learned that our floors couldn’t support the weight of tile flooring at inspection time (the sellers disclosed it and our inspector confirmed it) so we had a feeling concrete counters would cause a similar issue. Then when we had a few contractors out they confirmed that the way the beams were laid out under the house made it structurally unsound to add so much weight. Hope it helps!
xo,
s
Brittany W. says
Thanks so much! I was figuring we’d have to ask a pro at some point – hoping to DIY some concrete countertops in the next few months. Can’t wait to see your bright white kitchen! Even your food will taste better, I’m sure.
Larissa says
Can’t wait to see everything unfold!
I’m curious – when you guys were house hunting and you saw this house did you have the idea to demo the wall right then? I’m always so impressed with your think-outside-the-box ideas!
YoungHouseLove says
Yup, on our first walk-through we somehow came up with the almost immediate realization that we wanted the dining room to be our office, the formal living room to be our dining room, and then we’d just knock down the wall to join the kitchen and dining room so it makes more sense! No idea how it came to us, but it just seemed to pop into our brains!
xo,
s
holly says
this is going to be great!
i dont know if i missed this already, but have you tested the wall for asbestos? its typically found in the joint compound, which you may not be disturbing, but its sometimes also in the tape or muds. just a fyi!
YoungHouseLove says
Thanks! We did have walls and flooring tested (the lining under the vinyl flooring came up positive, negative in walls though) so since we’re floating the cork over the floor and not disturbing it all should be good. You know us… safety first!
xo,
s
Melissa Evans says
Exciting times!:)
Kristi says
I am SO excited to see what everything is going to look like with that wall gone! I have to say that you guys have done such an excellent job at making that kitchen beautiful and bright! It was so dark in there before, but now with the grellow paint, the new opening – awesome! I’m waiting with baited breath to watch the transformation when the cabinets are painted!
I have to tell you that you’ve inspired me to do some DIY around my new house (purchased in September). I refinshed a bench, two lamps and removed some stain glass (circa 1980) from two of our kitchen cabinets and replaced it with glass I frosted myself!! I refinished the bench with your “furniture painting” tutorial!
Thanks!!!!
YoungHouseLove says
Sounds like you’re making great progress! So glad to help.
xo,
s
Kristi says
oh – and a quick question. I was wondering if there is some way you can set up the comments section, so that when you click on a link a commenter has provided it automatically opens in another window? I click on the links, then have to back track to your page and then scroll down through all of the comments again….or wait…is this a setting I control on my end?…
YoungHouseLove says
So sorry- that’s not something we can code, so when you click any link in a comment the best way to came back is just hit back. Wish we could make that easier though!
xo,
s
Janet says
I always try to remember to right click on a link and open in it a new tab, that way nothing on the YHL page changes at all!
alex says
I have that same issue but I just right click, click “open to another tab/window”, and the you won’t have to find where you were again.
heather says
You can right click the link and choose to open them in a new tab or window, so you don’t have to leave the page you’re one. Hope that helps!
Nicole says
Just as a tip, I always right click the links and say open in another window/tab so then you can check out the link but the YHL page stays as you were.
Jenny @ Words On Wendhurst says
If you right click on the link in the comments, it should bring up a menu that gives you the option to “open in new tab/window”. That way you can keep your place in the comments, and still see the link. :-)
YoungHouseLove says
So smart!
xo,
s
Heather says
I just had to say the first picture of back-in-the-day Sherry is adorable! Maybe it’s just the short hair but she looks like a teenager. :)
YoungHouseLove says
Haha- ah yes. Those were the days!
xo,
s
Bboss says
Is that a heat/cooling vent right in the middle of the wall? I hope your contractor knows how to re-route that.
Contractors are really looking for work these days. If they don’t make an extra effort to do a good job, especially with work that is getting free advertising, make sure they know it.
YoungHouseLove says
Yup, we had a hvac pro come out and ensure that losing the vent wouldn’t compromise our system. Then with his blessing John went under the crawl space and disconnected and capped it (so the vent you see isn’t connected to anything). We actually did that in our first house for our kitchen remodel as well.
xo
s
Becky says
That’s exciting! Can’t wait to see how the reno is coming along.
This past week we ripped out the closet in our mudroom, it was too cramped and awkward (not to mention, the inspiring green checked linoleum HAD to go). Instead, we’re creating a built-in bench, hook and cubby system along the far wall to maximize space, storage and style. We are going with black, white, grey and a pop of yellow for the colour scheme. As yet, I am unprepared to create a cushion for the bench… no sewing skills or machine. Hopefully google will provide an answer :) Good luck with the renos!
[email protected] says
hi $herdog,
are you able to tell us roughly how much this costs? i’ll tell you why. when i research contractors, i’m getting VERY different numbers from all of them, and i’d like a baseline to go by so i know i’m not getting ripped off, but also not going with a joe schoe who has no idea what he’s doing.
in brighter news….i bought a sample jar of what i’d like to paint my kitchen cupboards in.
i decided not to go with white because the imperfections are showing waaaaaaaaaaay too much on my test board, so i chose a grey with a hint of green from martha stewart.
i plan to haul down the uppers and install bead board with open shelving.
i want to open the wall between the living room and kitchen. right now, we have french doors between the two, and it’s just too tight of a fit.
also, i plan on removing the island entirely from our kitchen. it’s right in the middle of EVERYTHING and it ruins the potential for us to all eat dinner together. because of how big it is, we’re only able to fit two chairs at our dining table. the kids at the island. it’s really sad.
this is what my kitchen looks like now:
http://238windsor.blogspot.com/search/label/kitchen%20inspiration
egad! said ashlee. sad face. blinded by the orange.
i would like to make it look like the one directly beneath it but with a farmhouse sink.
YoungHouseLove says
Oh yes- check out the bullets in this post for all of the prices from each contractor! We included all of their estimates in bullet form so folks could hopefully read through them quickly but maybe your eyes just skipped over the bullets?
xo,
s
[email protected] says
no doubt they did. lol. i’ve had my mind on about a billion things today!
[email protected] says
so it looks like you are cutting a section in the wall. do you recall how much it cost to widen your doorway in your last house (which i believe you did?)
i wouldn’t be removing a wall entirely, but widening a doorway by about 3-4 feet
YoungHouseLove says
It was around $100 to widen doors that weren’t load bearing in our first house. Hope it helps!
xo,
s
Stephanie says
My 3rd floor washer exploded on Saturday and this week I’m replacing the entire ceiling on the 2nd floor. At least I’ll finally be rid of the popcorn ceilings…
YoungHouseLove says
Oh man- so sorry about the drama, but you’ll love popcorn-less ceilings!
xo,
s
[email protected] says
i have a ceiling that is kind of popcorny – or i suppose it’s more swirly. anyway, i love it! lol. i have no idea why. everyone else can’t stand it and thinks it screams 1990s.
Brynn says
So thrilled to see this kitchen progress! My husband and I bought our own (first) new house in December of last year and have been plugging away at lots and lots of little projects ever since, but it’s the kitchen that I really want to tackle. I have lots of plans to DIY most of it, but it’s definitely a daunting project. Seeing you two progress through your kitchen remodel might just be the push we need to get started. Keep up the great work!
jeannette says
i don’t love peninsulae, but then it’s not my house. what i do love is your thoughtful planning, and i totally adore the kozy fireplace korner created by your plan, with floorspace for littles. great work.
Erin says
I am particularly excited about this post since my fiance and I are renovating our kitchen and are also about to tear down a wall (we’ll be swingin’ sledge hammers next week). I actually just started a blog last week so we’ll be chronicling the whole process. So excited to see the rest of your kitchen transformation! Thanks for the extra inspiration :)
Cathleen Pearson says
I think it’s a great decision to leave the half wall for the peninsula too. Can’t wait to see the after pics!
Michelle N says
WooHoo! So exciting!!
heather says
So, this is a bit random but I just got out of a meeting that got me thinking about you guys, and your readers. I know you’re super into sustainability so I was curious if you guys are members of your local United States Green Building Council Chapter? Or if you had even heard of it. They (at least our chapter) has a ton of awesome resources for homeowners who are interested in helping their home be sustainable, including some DIY stuff. The USGBC also puts out a fantastic Green Home Guide that answers some questions homeowners have and more. I think it varies by state, so you’ll have to check VA’s, but the yearly fee is super affordable.
Even if you aren’t interested, I super recommend checking out the Green Home Guide to help answer home questions in a sustainable way.
And as full disclosure, I am a volunteer on one of our state chapter committees, but I just love it and it got me thinking of you guys!
heather says
Duh – here’s the link to the green home guide. Maybe I’m dorky (confirmed) but I think it’s great.
http://greenhomeguide.com/
YoungHouseLove says
Thanks so much for the info Heather! We’d never even heard of it! Off to check it out…
xo,
s
heather says
It’s pretty fantastic. They even have their recommendations for sealer (Acrylaq is on there) and countertops!
YoungHouseLove says
Yay! Love me some Acrylaq. Thanks so much for sharing!
xo,
s
heather says
You are duuullyyy welcome.
Jackmo says
Did you repaint the chairs in the office? Or is it just the light that is making them look more yellow?
YoungHouseLove says
Just the sunlight! It’s a lime-ish color, so it definitely has some yellow undertones in certain lighting situations!
xo,
s
Kara says
I’m so excited for you! My parents did this exact same renovation in their home 4 years ago (the kitchen and formal dining room & living room had a massive long wall separating them with this silly 1970’s swinging door at one end) and they opened up a 6.5 ft part of the wall so it’s one big flowing space. It like a new home! I wish they had done the renovation when I lived there as a kid. :)They also added an island (my husband built it).
I can’t wait to see your after pictures!!
John Bachman says
You will be amazed by the additional light from the dining room window.
partyofsix says
It looks like you moved the fridge over about a 12-18″ or so to the right of where you had it originally on that wall?? If you don’t mind the constructive criticism, I think you should move it back to the left and put in another cabinet in that space–the way you have it right now in today’s posting makes the fridge appear a bit unbalanced by where it lines up in the kitchen (ie in the middle of that wall section, vs being left of center). It will give you more counter space (which will balance the space) and the cost for that little extra bit of cabinetry isn’t much (relatively speaking). I wonder….would one of your extra office cabinets fit in that space??
YoungHouseLove says
So sorry for the confusion! We actually only moved the fridge 3″ to the right! No room for another cab there. Maybe it’s just the angle we took the pics from?
xo,
s
partyofsix says
Must be the angle that exaggerates it. I could see that one the power boxes was now covered by the fridge, just couldn’t accurately estimate how much. 3″ isn’t that big of a deal.
Since you gained a few extra inches on the left of the fridge to what you had already, I wonder what you think about doing something like this, both for function and to balance out the height of the fridge, and perhaps for a pop of color: http://pinterest.com/pin/285290932/
YoungHouseLove says
You have no idea how much I love that idea! Pinning it momentarily!
xoxoxoxo,
s
partyofsix says
sweet!
threadbndr says
No demo this week – but I did pick out the colors for the master bedroom. Instead of ‘Sue the napkin’, I have a chip sheet of ‘historic home colors for Arts and Crafts interiors’ that I’m using so that it doesn’t look like I’ve just gone nuts in the paint asile LOL.
That opening between the dining room and kitchen will be so great. Looking forward to the ‘in progress’ pictures.
Mary says
This is one of the things that I hate the most, calling and getting estimates and then choosing the right contractor.
My dad was a contractor before retiring and I was able to rely on him for so many years for everything. Physically, he just can’t do it anymore and since we’ve moved cross country, I can’t just call and have him run by when getting estimates.
I’m getting ready ‘to do’ the basement and have been touching base with my new friends here for recommendations. I’m stuck right now on whether we should do a major or minor upgrade and will be calling a couple of area realtors to help me judge that.
Can’t wait to see the wall down!
DJ says
I saw this kitchen inspiration and thought I would share with you. It looks great with the white counter tops.
http://www.jillianharris.com/post/ask-jillian
YoungHouseLove says
Love it!
xo,
s
Jen @ Domesticated Nomad says
I’m excited about your big wall removal! It’s going to be great.
Now, normally, if I have different taste than a blogger, I keep my mouth shut, but I notice it every time you have pictures and since I have a suggestion I am going to brave leaving this comment. I’ve followed the whole dining room redo and I love 99% of it, but the chairs make me so sad! I completely understood how the green dye didn’t turn out right, but the brown just not in keeping with the flair of the rest of the space and is too similar to the table color. So, my suggestion, can you dye the chair a similar color to the back of the built-ins? It would still feel kind of neutral, but they wouldn’t look so forgotten in the rest of the coolness that is your space. (Like how I worked in another compliment so you wouldn’t be all mad that I didn’t like something? ;) )
YoungHouseLove says
Someday I’d love to over-dye them navy or plum or some other dark yet muted color when the rest of the room is more complete (don’t want them to compete with things or do anything too soon that looks garish once the rest of the room comes together).
xo,
s
Ilana says
I love the brown! I think the earthiness plays off the brighter colors really well, and grounds everything else. I also think the brown adds a needed warmth.
Glenn says
We are about to start a very similar project only there is a step down between the kitchen/ family room that is creating a dilemma so waiting to start until we can really make sure we have the best solution. Searching for that solution is what led me to your blog this week so good outcome already! Love your style! I was amazed at how similar our “taped off” area is compared to yours. Tried to paste a picture but couldn’t figure that out. Happy demolition week!
YoungHouseLove says
Aw thanks Glenn! Good luck with yours too!
xo,
s
Esther says
I am so excited to see the finished product. probably not as much as you guys though. Thanks for sharing your DIY adventures with us.
We started reno-ing our toy/TV Room this last weekend.
http://the6wolfeden.blogspot.com/2011/11/toytv-room.html
And we started our christmas shopping, which is really early for us, since we usually leave it to the last week before christmas!
Gwen says
I’m excited to see how this turns out. We’re in the middle of debating whether or not to tear down the wall between our kitchen and future living room or to just widen the opening to keep the same look as the rest of the doorways and add a peninsula island. Good luck, how awesome to find a contractor that you like and trust with a great price. Out here it seems you get one or the other.
Jo says
Not really related to any kitchen redesign and demo, but I was just curious if you were doing the daily “thanks” note in the jar that you did last year for the month of November. I thought that was such a great idea! Sorry if you already commented or said anything about this. I haven’t had time to pour through everything. Thanks! And BTW I think all your hard work is going to make for one fabulous kitchen!
YoungHouseLove says
Yes! We have been meaning to mention that soon! We’re hoping to do another Thanksgiving project this year and link to that one and post an update!
xo,
s
Izabelak says
Cutting out window frames, cleaning it out, putting in new window frames, building window sills, painiting.
Donna says
Looking forward to your after pics!
Kelley says
Ooooo! It’s gonna be great! I can’t wait!
Carrie says
I’m babysitting today, and we just made Sherry’s glass bulb ornaments! They came out really cool with solid and glitter paints. Can’t wait to hang them on the tree! Thanks for the fun project idea.
YoungHouseLove says
Aw, so glad!
xo,
s
Christi says
Congrats on your project, I was hoping you would start this sooner than later!!!
We took down three walls in our first house and we hired a contractor who’s a good friend and it was an awesome experience. He also let us demo the walls {along with ten of our friends} and it was a great party to celebrate the changes and get out some stress!!!
Good luck, I cannot wait to see the changes!
Leslie says
Wow,I am new to your blog and spent the entire rainy Sunday afternoon reading your blog and looking at pictures. Can’t wait to see how the opening turns out.
Roeshel says
I cannot wait to see the process and reveal! Wow! Great plan! Looks like it’ll definitely make serving/entertaining a lot easier. We’ve had the same experience with contractors so I agree that it’s always better to get more than one quote!
julia says
I was wondering why not get rid of the wall between the kitchen and that little hallway and open up the kitchen and then have a larger opening between the kitchen and dining room? Is there a reason for that hallway? Thanks!
YoungHouseLove says
Just wanted it to feel open but not too open with a column (since it’s a load bearing wall it would necessitate a bit column in that corner- and we think the chair by the fireplace is so cozy with a wall corner there instead of just a column behind it).
xo,
s
Carol N. says
How exciting to be getting started on that! We are having a major remodel done to the house right now (adding on space for an elevator and a master bathroom and a storage room in the basement, making the existing master into two big closets and redoing all of the flooring in the house and having tile put over the brick of the fireplace and then finally repaining every wall, door and all the trim in the house). So today we had all of our belongings moved out into two pods so they can start doing the demo on the existing floors. The dust this is generating is absolutely unbelievable and they have not started the sheetrock yet! We are living in our basement right now and will be for the next month or so. I’ll try to take some pictures as they go along and send if you are interested.
YoungHouseLove says
Yes! Pics please!
xo,
s
Alexandra says
Did you guys tweak that picture of your dining room, or did you repaint your office chairs yellow?
YoungHouseLove says
Neither- that’s just the way they read with light streaming into the room. The color is truly grellow- so it’s more limey-yellow in some lighting situations – and more green in others!
xo,
s
Kiran @ KiranTarun.com says
Huge changes! I can’t wait to see the overall look once it’s done :)
Kirsty says
I’m so excited to see the wall get knocked out at your place!! It’s going to look great! Hmm, this weekend I finally put up some before and after pictures on my blog of our slow-moving renovation! We’ve never tackled a kitchen reno (ours was more of an update) so I can’t wait to see yours come to life!
Pamela says
So glad you could save the permit money, but a word of caution when you need a permit. At least in our location, it is recommended that the contractor pull the permit. If anything is not up to specifications and/or corrections must be made, the contractor is responsible for doing this at no additional charge. If the homeowner pulls the permit, then he is responsible for any additional costs to make corrections. Saved us a ton of money on a major masonry project gone wrong.
YoungHouseLove says
So smart! Thanks for the tip!
xo,
s
Lisa in Seattle says
I think we need a new feature* here on YHL called “Tell $herdog All About It” – a forum for DIY/decor therapy. We could flop down, spill our heartaches, and you’d give us virtual hairpats and say “There, there, it will all be OK.” And we could go back out and face our DIY/design dilemmas with renewed hope. What kind of heartaches? Well, the kind where you’ve put up 15 different paint swatches over the course of a month and can’t make a decision, and your husband is getting that haunted look that he gets right before bellowing “JUST PICK ONE ALREADY!” You know.
I can’t wait to see the finished product on Wallmageddon!
*Because you’re looking for extra work, amirite?
YoungHouseLove says
Bwahahahaha. I love it. I’m sold.
xo,
s
Maggie says
Glad you don’t need a permit, and hope you pass along any tricks of the trade you learn from your contractor about support headers, door jambs and all that good stuff (yep, I have to resize a doorway, and put in a new door, and need all the tips I can get).
partyofsix says
Once you have the wall open to the dining room, what do you think about have sliding barn doors on either side of it on the dining room side for a little interest to the room and so you can close off the kitchen when needed?
Like this: http://pinterest.com/pin/224898575111402895/
or this: http://pinterest.com/pin/279919646/
YoungHouseLove says
I love a barn door, but we love open living and natural light even more – so we’re thinking that we might never want to close off the kitchen from the daylight once we have the wall down! We would love to add one somewhere though- maybe in a bedroom or something….
xo,
s
priscilla says
Hey, this is going to be lovely!! Before you demo away, please check out this gov website about the requirements to renovate anyhome built before 1978. I know you may have checked for lead, but the federal govt requires contractors to do this test, and have you sign this paperwork, or else there is a $35,000 fine PER DAY!!!
http://www.epa.gov/lead/pubs/renovaterightbrochure.pdf
Just check it out and make sure you sign the forms etc. The law says that if a child under 6 resides at the house, you must move out during that renovation. I work with a lot of contractors, and it is strictly enforced in my state. Plus, you must keep the paperwork and be able to provide to any future buyers.
Just want to keep you guys and that adorable Clara safe!!!
YoungHouseLove says
Of course we know all about that! Thanks for the tip for anyone not in the know, though! We learned about it in our first house so we’re completely on top of it. Safety first!
xo,
s