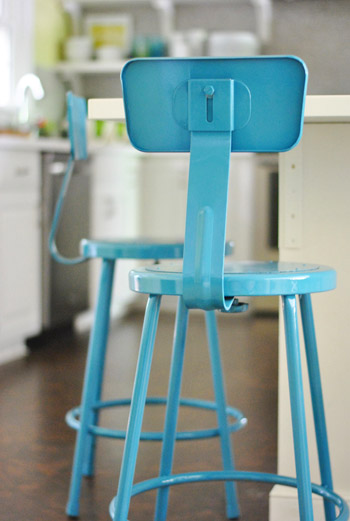
Well, after reading every last one of the 750+ suggestions you guys left on this post (no doubt about it – there are definitely a million ways we could have gone with these guys!) and putting lots of thought into pretty much every possibility under the sun, we ended up going with our very first instinct. A chipper turquoise-y-teal tone.
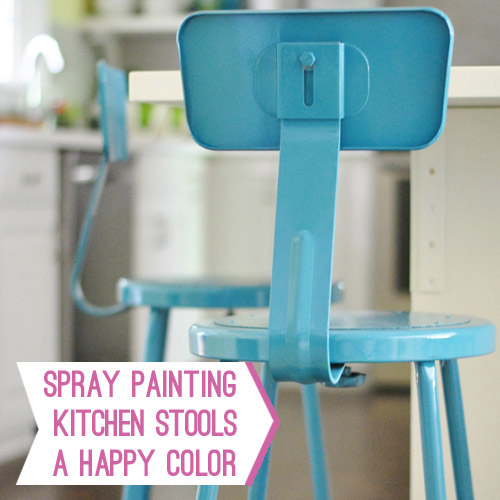
So here’s the rundown of how we transformed these basic $32 stools from an online supply store.
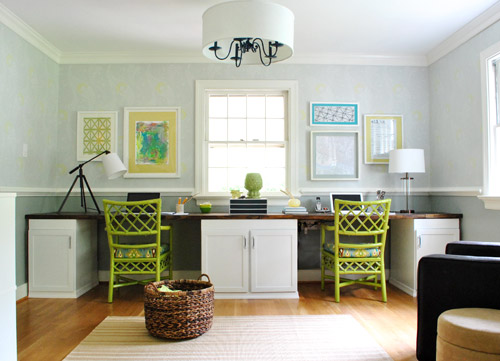
The funny thing is that there were probably the most votes for blue from you guys too (closely followed by yellow). Although there were definitely suggestions for a ton of other options (four different colors, tones like orange/coral/purple/pink, upholstered cushions, seats painted a different color, dipped legs, an ombre effect, etc). But even before sharing our stool musings we found ourselves gravitating towards turquoise or teal. Especially since we already have green chairs that we painted and reupholstered for the office…
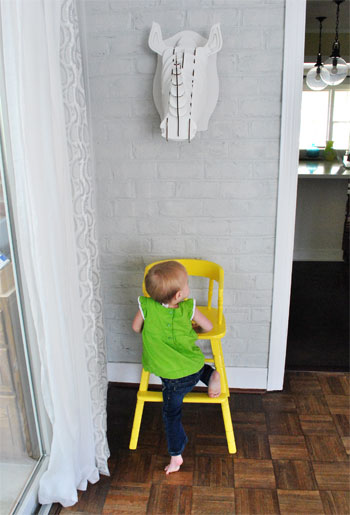
… and a yellow highchair for Clara that gets used in the dining room/living room (it’s not counter height, so it works better at normal tables than the kitchen peninsula, where we typically use a booster seat attached to one of our stools).
We decided not to make any final decisions until our rug arrived, and then to just follow our gut and pick a darn color already go with whatever we liked best. The truth is that a ton of other colors definitely could have worked (white cabinets & counters + gray tile + brown floors = a pretty neutral backdrop for any splash of color), so it really just came down to personal preference. I think we always would have done the “what if” thing if we hadn’t just followed our nose heart.
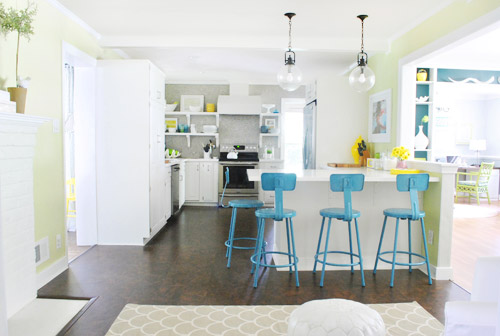
We love how the color relates to the dark teal built-ins in the dining room without being too matchy-matchy, and even ties into the small pops of color on the open shelves. Although I’m sort of tempted to completely white-ify the stuff on the shelves and the counters (fewer pops of yellow and blue) so the stools can really be the star – just because a lot of the kitchen photos that I’ve pinned as inspiration with colored stools don’t usually have a lot of bold pops of color all over the rest of the room (although some have a few). So I’ll keep you posted as the accessories continue to evolve in here!
In the meantime, it’s an especially great upgrade when staring at the other side of the room from the stove. Without any penny tile to the ceiling or colorful shelf accessories, this side used to look sort of bland. We love how the new stool color makes it look alive, but not too clown-car-crazy. It just feels like us.
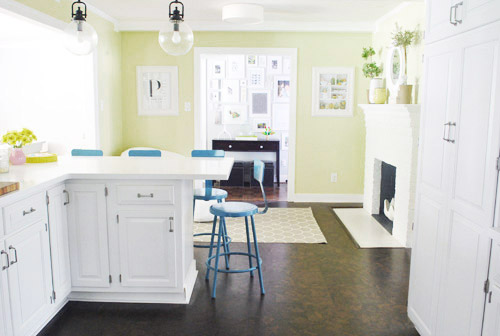
The kitchen officially fits into the rest of our house, which has other bold pops of color going on in every room that we’ve tackled – like our teal guest room with a bright yellow rug, our gray living room with a bright green rug, our pink nursery with bold floral curtains, our stenciled office with green chairs and multicolored art, our gray-blue bedroom with a teal and charcoal rug, and our gray dining room with green curtains and dark turquoise built-ins.
And ultimately it was freeing to realize that the worst that could happen if we didn’t like our choice was that we’d repaint. Although I’ll admit that I’m very thankful that we like them this way (this wasn’t exactly a ten minute project). Haha. And luckily the veneer-ish brown seat took the new coat of paint really well, so the whole chair looks even and feels nice and durable. We opted to paint the brown part of the seat the same color just to keep things graphic and simple (we feared they might get too busy-looking with a brown seat and a blue painted frame).

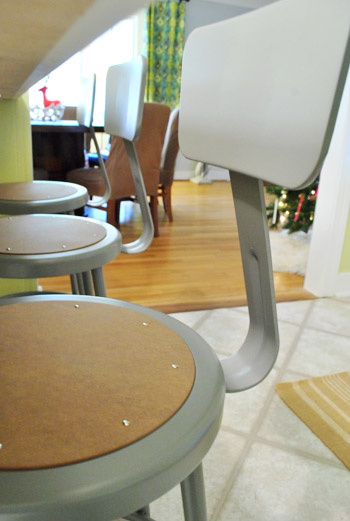
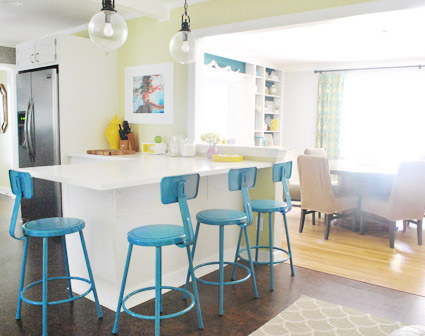
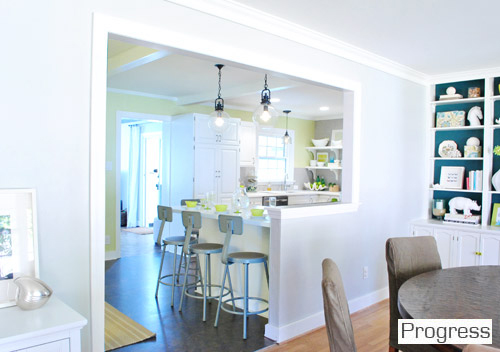
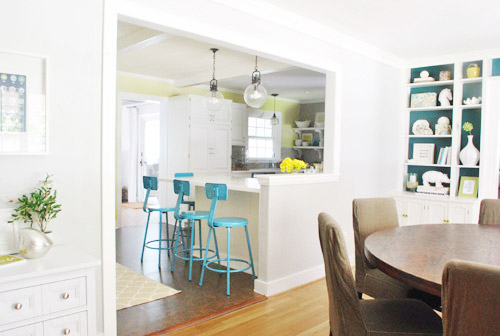
One of our favorite views of them is this one, which used to look sort of flat with the stools in their gray-with-brown-seats state…
… but now looks cheerful and less monochromatic to color lovers like us (thanks to those hot little turquoise gams).
Even the view into the dining room makes a lot more sense in person (now that the stools tie into the subtle pops of turquoise in the ikat curtains). It used to be dull with eight brown dining chairs in the background and four gray stools with brown seats in the foreground, so it’s nice to have broken things up a bit more with some color to set the stools apart. And someday we’ll figure those dining room chairs out once and for all. Haha.
But I doth jabber on. Here’s how I got ‘er done.
1) I roughed them all up with 300 grit sandpaper. Just to give them a little tooth so they’d be more durable for the long-haul.
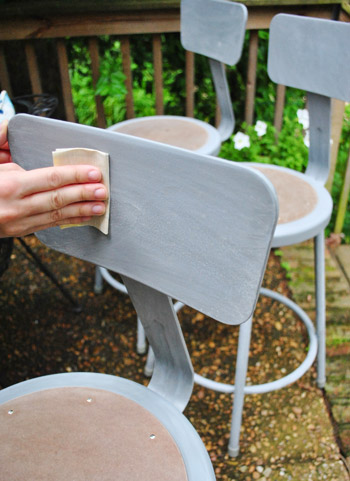
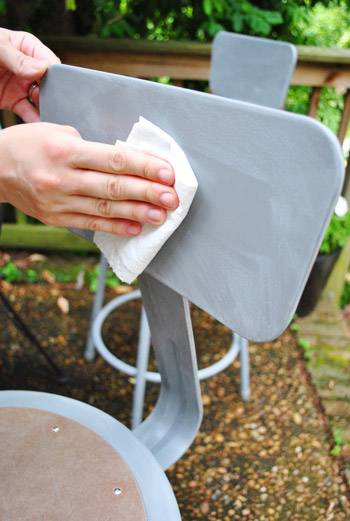
2) I used a liquid deglosser to remove all that sanding dust and further ready them for primer and paint (I like how it looks like I’m thumbless in both this photo and the one above it). We use a no-VOC deglosser called Crown’s Next that we got from Home Depot a while back for a few bucks.
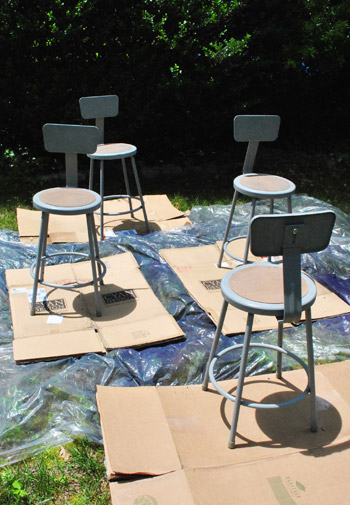
3) I sat them out in the yard on an old tarp and some cardboard (so their legs wouldn’t sink into the grass so they could be sprayed evenly).
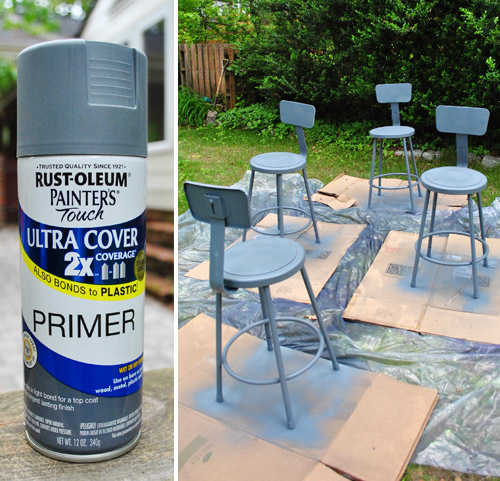
4) I misted them with very thin coats of spray primer until they had a nice even coverage (we generally love spraying metal since it takes paint really well – especially if it’s sanded, deglossed, primed, and painted in thin and even coats). You can check out some general spray painting tips of ours here.
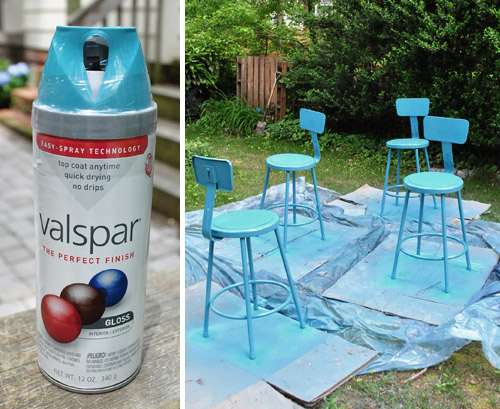
5) I misted them with very thin coats of spray paint until they had nice even coverage. We went with Tropical Oasis by Valspar in a gloss finish (we liked that it had a fair amount of gray in it, while some other teal options looked a little too bright for us without any muted undertones to tie them into things like our gray wall of tile and our new scalloped rug). We applied around five super thin and even coats, beginning on the next coat pretty much as soon as the first one was done (light misty applications like that hold really well and don’t drip or peel like thicker ones tend to do).
6) I left them outside in the sun for 24 hours (after checking to be sure there was no rain in the forecast) so they could off-gas and cure up. Next they got brought into the sealed-off sunroom for another two full days, just so they could continue to cure up and let out any fumey smells before they were allowed into the house. Then finally (those few days felt like years of waiting) we got to bring them back into the kitchen and see how they looked. They should hold up for a nice long time (painted metal, when done correctly, can look great for decades). We’ll definitely keep you posted on how these guys do over time.
And now for a budget breakdown:
- 3 cans of primer + 3 cans of spray paint = $29
- 300 grit sandpaper and liquid deglosser = $0 (already owned, but they might run you $6 if you have to buy ’em)
- TOTAL: $29 (which meant each of my $32 stools got a $7 upgrade)
I totally think people would spend way more than $39 a pop for these chipper little stools at a furniture store. So, yay. As for a time breakdown…
- Sanding and deglossing them all = 1 hour
- Priming them all = 1.5 hours
- Painting them all = 1.5 hours
- TOTAL: Four hours (obviously with time in between steps since I primed during one Clara-nap and painted during another).
Speaking of the bean, Clara actually stopped to pet one and say “blue stool! so pretty! like a princess!” right after we brought them in. No idea why she equates blue stools with princesses, but we’ll take it. I gotta say that the kitchen finally feels semi-complete. Huzzah! And I might be imagining things, but proofing 352 pages of book layouts (not exaggerating) on our upgraded stools was a little less of a grind for some reason.
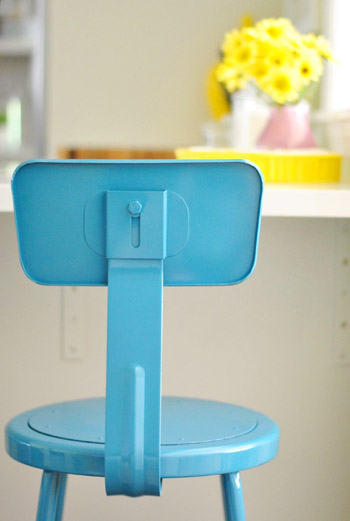
Maybe they have magical happy powers?
What have you guys been upgrading with paint or primer these days? Have you ever used a liquid deglosser? We used to be so scared of it since they seemed like it’d be fumey and burn your fingers off, but we love the stuff we use (and it has yet to remove my fingerprints – although it might have taken off my thumb for a few pics).

Claire Jain says
Thanks so much for the time + spray paint and primer use rundown. That’s very useful info! I love the new color :-)
meg shannon says
Love!
Shannon says
They look great. Really tie things together. Congratulations on the embrace of color.
On a side note, y’all gave me the courage to buy a rug with a hole in it! You can’t even see it when it lays flat, it totally works in the room and it is a $1,200 rug I got for $95. Thank you!
YoungHouseLove says
Wahoo! That’s amazing!!
xo,
s
Jillian@TheHumbleGourmet says
So cute…definitely fits in with the house!
jeannette says
i think it’s maya angelou who says, believe them, when people show you who they are, the first time. my first instinct isn’t always right, but i have learned my second instinct is always wrong.
good work, guys. the grellow and the soft turquoise, along with the penny tile rug, are zinging together. excellent.
YoungHouseLove says
Aw thanks Jeannette!
xo,
s
Jen says
LOVE them! So you don’t use a top coat sealant or anything? I’m just starting down the DIY path & thought you needed one after spray painting items that will get lots of use. Thanks!
YoungHouseLove says
Since we used a semi-gloss finish (which isn’t meant to be combined with a top coat) these guys should hold up a nice long time. If we think they’re getting beat up we can always add some sealer on top, but we didn’t want to risk gumming them up since they’re so nicely sprayed and seem to have cured up nice and hard. Sometimes adding more coats makes things more apt to crack and peel, ya know?
xo,
s
Katherine says
You picked the color I would have picked – yay! I feel like I won. Haha.
I have a corner banquette from Target in our kitchen that I painted about 7 years ago. It is wood; I sanded it, primed with a latex brush on application and used latex paint. It is chipping a lot so it needs re-painted now. Do you think the method you used on the stools is a good option for this banquette?
YoungHouseLove says
Hmm, I always use a small foam roller with bit items of wood furniture so that’s what I’d recommend. Be sure to sand it a ton, degloss, prime, and then maybe use a high quality paint like BM advance (it’s what we used for our office built-ins and kitchen cabinets) since it’s self-leveling and super durable. Hope it last forever!
xo,
s
Carolyn says
Magical happy powers! Haha. I love that.
Melody @CCC says
Love ’em! If yall had super powers, it would definitely be picking the right colors.
maribel says
I have these frames from the thrift store blacks and ugly wood tones. Is there a rule with primer, I’ve seen you use gray and white…I will be painting them white.BTW, over on Tori Spelling’s blog she has your pinata tutotorial…it’s amazing how far your kitchen has come…it was so dark, now it’s seen the light…love it.
YoungHouseLove says
We use gray primer if we’re going with a bright or deep color since it helps with coverage and use a white primer if we’re going with a light/white color. So I’d use white primer for yours. Hope it helps!
xo,
s
Aly says
love the colors! great pick on the rug too!
Erin says
To be honest, when you first shared all the potential color options, this one wasn’t my first pick. But now that they’re finished, I LOVE IT. I think you really chose the perfect color for the space. These chairs turned out so gorgeous!
Also, interesting fact (considering how frequently you guys seem to use spray paint): did you know that it’s illegal to sell spray paint in the city of Chicago?? My husband and I were baffled when we learned that on our first trip to Home Depot here a couple years ago. Us Chicagoans have to trek out to the burbs for spray paint!
YoungHouseLove says
No way! That’s so crazy! Maybe it’ll help spray paint manufacturers make it more eco! We have been waiting for a long time for no-VOC spray paint! Can’t wait for that day to come!
xo,
s
Alissa says
They look excellent! I didn’t see this asked in a quick scan of the comments so sorry if it’s a repeat, but why did you decide not to remove the tops/backs when painting and spray them separately? Seems like it would offer more options if down the line you decided to change the height of the back support.
YoungHouseLove says
We just lived with them for so long that we realized we never adjust the back (it’s most comfortable for both of us at this setting) so we knew we could always just adjust it and spray the small swatch of metal that didn’t get painted if we needed to in the future, but thanks to waiting a nice long time before painting we lived with them enough to know we don’t adjust them! Haha.
xo,
s
Nora Rose says
Love the new color. I love all the blue, yellow, and cheery green (or grellow) that you guys are using these days. Or at least in those rooms. I find myself using a lot of blue, red, and taupe. Maybe people just gravitate toward certain colors? Or is Sue the Napkin always at hand? :)
Now that the book is for pre-order, you should totally have a pre-order or order day. If all of your fans order on the same day, it can bump the book up higher.
http://apracticalwedding.com/2011/11/the-great-apw-book-buy/
Similar to this, though I doubt you’ll need any additional press with all of the fans you have! :) Can’t wait for it!
YoungHouseLove says
Oh my gosh- that’s so interesting! Never heard about that! Thanks for sharing the link!
xo,
s
Amanda says
Definitely the right choice! I love how it picks up the color from the dining room shelves and curtains and even little pieces from your open shelving. Out of curiosity, where do you shop for spray paint? If I have a specific color in mind, I can never seem to find it. There’s not a great spray paint color selection in my area, for some reason.
YoungHouseLove says
I go all over! For these we went to a local paint shop that sells Ben Moore, Home Depot, Michael’s, and Lowe’s – and just compared all the colors and went with our favorite!
xo,
s
sarah says
Aren’t you worried about pollen and other floating tree bits getting on the wet paint? pretty sure they would be ruined in my yard, but you’re basically in the same climate…
YoungHouseLove says
My tips are to do it in a clearing (no trees overhead to drop things on them) on a non-windy day (no breezes to blow bugs/debris on them) in very very misty and thin coats (so if something drops on them it bounces off since it’s already dry instead of getting stuck in globby wet paint). Hope it helps!
xo,
s
Emily says
Isn’t it amazing what a little spray paint can do? I’m such a fan of the stools..your color selection is perfection!!
Meredith @ La Buena Vida says
Wow, that is a HUGE difference between the progress picture from the dining room and the current photo–amazing what a little spray paint can do! Love them!
YoungHouseLove says
Aw thanks Meredith!
xo,
s
cara says
LOVE them! So cute and bright. Way better than the metal color.
Robyn says
Where did you purchase the stools? Nice paint job!
YoungHouseLove says
If you click the link in that top paragraph there’s info (a screen grab with the name of the online school supply place, etc).
xo,
s
Sarah says
You hit it out of the park! I really like how the color speaks to the built-ins in the dining room without being matchy-matchy. I agree with taking out some of the competing accessories, but would probably just remove the yellow urn on the counter (and maybe one more piece over there). I love everything about the penny tile wall!
kaylan says
love them!
i just painted an old chair for my desk with almost the exact same color, though my can of paint claimed it was “aqua”… regardless, i love the bright pop against another otherwise neutral background.
Becky says
Love the color!
I’ve been eyeing that rug on Urban Outfitters for a while, so I was stoked when that’s the one you picked. In some pictures it looks gray, in others it reads slightly tan? I want to get it too, but it needs to be gray to fit in my living room.
YoungHouseLove says
It’s definitely more gray than tan but it’s a warm gray with tan undertones if that makes sense!
xo,
s
Ann says
Loved the chem lab nerdiness of the original look but these are so cheerful. You guys really made them pop and now you can see their form against the white cabinets really well. Good job, you are pro spray painters. My painting always gets globby. Is that a word? ;)
Lauracinindy says
Ive hated these stools for so long. I just thought it threw the whole kitchen look off. I didn’t think the paint would work either…but I was SO WRONG!! Looks fantastic!!! Thanks for having the nerve to try things that I don’t. Now, I’m off to preorder my book on amazon.
Flo says
love them–the work really, really well! i am a huge fan of the new rug as well… i also submit one vote for taking the color pops out of the open shelves to see what it looks like!
Anna says
I love the color that you chose! Those stools look so bright and happy!
My vote would be to keep the yellow and blue pops of color in the kitchen – they look great with the stools without overwhelming them from the spotlight, and they break up an otherwise neutral kitchen in a nice way.
Ryan says
The blue looks awesome! Perfect choice.
Jaime @ Queen of the Creek says
Pretty much perfect. As always! ;)
Jessica@HomewithBaxter says
Love the color you chose! I think the stools really do finish your kitchen now.
Sabrina says
Oh my goodness, this color is gorgeous in your already beautiful kitchen! I love everything about them!
keegan says
so i’m about to start my first furniture makeover and have been reading SO many blogs because it’s a huge good quality dresser that i’ve had forever and am terrified to screw up. i thought since it’s so many long flat surfaces i’d just sand/wipe down and then prime/paint with a roller…do you only use spray paint on things with lots of curves/vertical surfaces? i think i’m more confident with a roller for this one. also, do you only use deglosser on metal? would i need to use it after using a sanding wedge and before priming on wood?
ah thanks so much, you guys are great! i actually went out and bought the yellow and cream target pillows from your target shopping post last night beucase i couldn’t stop thinking about them! there were only two left in the store and i got them!
YoungHouseLove says
On big wood furnishings like dressers and armoires and desks we always use a small foam roller to apply primer and paint (and a brush to get into the corners). You can definitely sand and use a deglosser on wood. We have a furniture painting tutorial on our Projects page (see that link under our header?). Hope it helps!
xo,
s
eRin @ growing up senge says
Love the stools (fond memories of my middle school art class!) and LOVE the color! The kitchen officially looks AMAAAAAZING. I love the rug, too! What a great find, perfect for the space.
Nichole says
I LOVE how the stools turned out. This was my favorite option too, even though I didn’t tell you that :)
I love seeing your spray paint transformations – only problem is that I now want to spray paint everything in our new house! I already started painting the tan vent covers to make them blend in with our dark brown floors, but I keep taking stuff out of boxes and saying “I want to spray paint this a new color!” while my hubs rolls his eyes haha! My name is Nichole, and (like Sherry) I’m addicted to spray paint.
Jennifer says
Wow, and audible gasp from here – love, love love the color, especially with all the other colors you have going on.
Hannah says
I’m going to be trying my hand at spray painting the old, ugly green, metal closet doors in my daughter’s room very soon. I was wondering how to go about it and now I have an idea! Thanks again guys for your help! :)
P.S. Love the blue. I kept wondering why you guys were going to paint the stools, I thought they looked great the way they were! But sometimes you gotta go with your instincts right? You never know how it will turn out. And then sometimes you end up painting your bedroom 3 times. Just saying…:D
Sarah says
I just painted my kitchen chair the same color. I primed and gave it 4 light coats. My chair (which started as wood) is still tacky a week later. Do you have that problem? I painted the other chairs a different color and don’t have that problem.
YoungHouseLove says
Oh no! I would try to sit it outside on a sunny day to cure up more and maybe even sprinkle it with baby powder to absorb the moisture? We haven’t had that issue. Maybe it was applied a bit more thickly or the wood was somehow moist so it didn’t set as well?
xo,
s
Erin says
Cool beans. I love ’em. Great color. Thought you might go that direction. Was it my imagination or did you give a little clue yesterday with the shot of the chair in the fireplace area? Blue garden stool next to chair with blue and white pillow.
YoungHouseLove says
Haha, it’s true! Must have been subliminal!
xo,
s
Emily says
LOVE the teal. It looks so good and cheerful in that space!
Hilary says
Nice! I wasn’t a huge fan of the stools when you first got them… I wanted to like them (I really did!), but I just couldn’t get there. But, now…oh, I’m sold. Love them. Want them. Yes, please. I am forever amazed by how much good a new coat (or 3-5 light dusting coats) of paint does.
Christine says
Your kitchen looks so happy! I was on Team Leaf Green, but as usual, your choice is perfect. Those look like $400 chairs or something. And I really like the all the pops of color all around the room with your accessories, personally. Moving color all around the room is a tough thing to pull off, and you’ve done it.
Now I can’t wait to see what you do next to your dining room chairs!
Jaime says
Did you slipcover the dining chairs again? I thought they were painted?
YoungHouseLove says
Oh yes read yesterday’s rug post for more on that. I just slipped the covers back on for Clara’s party to protect them from stains and make them easy to wash and have yet to remove them/wash them!
xo,
s
Nicki says
Oh man, they look so great!!! I adore the color they turned out to be. Way to go!
Tiffany @ The Mister and Missus says
LOVE the color! Great choice. I haven’t ever used a liquid deglosser – honestly, I didn’t know that there was such a thing. But I must look in to it. I actually got my spray paint on this weekend! I haven’t blogged about it yet, but I took an old, black room divider and spray painted it slate blue to serve as a headboard. I’m pretty stoked about it. Enjoy the new chairs!
DJ Sherry says
Beautiful! I always thought the stock gray paint color looked like primer, unfinished and drab. Talk about a lot of bang for the buck! Glad you went with the softer, grayed blue…very soothing but still has pizazz…
Rebecca says
Absolutely LOVE how the stools come out!! I have the website that they came from saved on my computer and can’t wait to redo my kitchen and put those stools in! If/when i do get them i am definitely going to paint them a fun, happy color like you have!
Just wondering, did you need to take them apart at all (like take the seat backs off) to spray paint them, or were you able to do it with everything in place?
P.S. Just pre-ordered your book too… love you guys!
YoungHouseLove says
We were able to do them all still together. And thanks for ordering the book. You rock!
-John
Linda says
Beautiful colors, I really like how the chairs turned-out. Regarding white-ify-ing the shelves: Personally,I like the pops of color, but it’s cool that you can make the chairs the focus of the room (from that angle) by going monochrome on the shelving, when you want to.
Courtney says
You nailed it. I think they really bring the whole kitchen together. I wish I had your sense of color.
Natalie V. says
OUTSTANDING! They are awesome! Love the blue. Your kitchen has come together so well! Love it all!
Melissa says
Loooove the color! I’m blaming you guys for my recent “must spray paint all the things!” state of mind. I’m avoiding the fumes right now because I’m pregnant so unfortunately this is translating into “must make my husband spray paint all of the things!” So far he’s cooperating though.