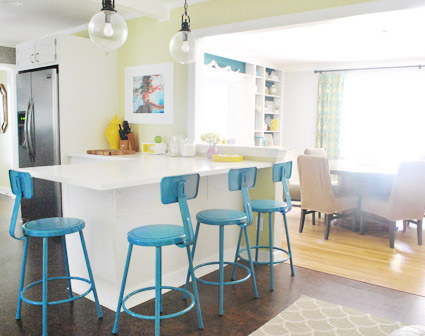
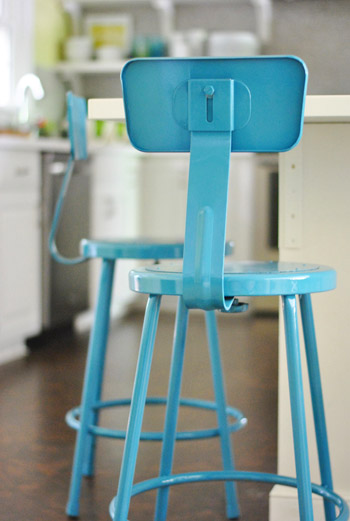
Well, after reading every last one of the 750+ suggestions you guys left on this post (no doubt about it – there are definitely a million ways we could have gone with these guys!) and putting lots of thought into pretty much every possibility under the sun, we ended up going with our very first instinct. A chipper turquoise-y-teal tone.
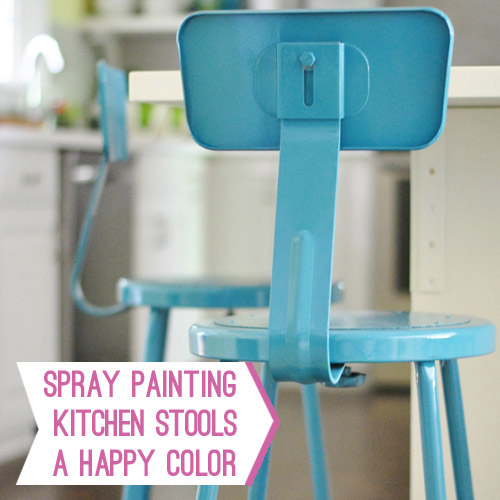
So here’s the rundown of how we transformed these basic $32 stools from an online supply store.
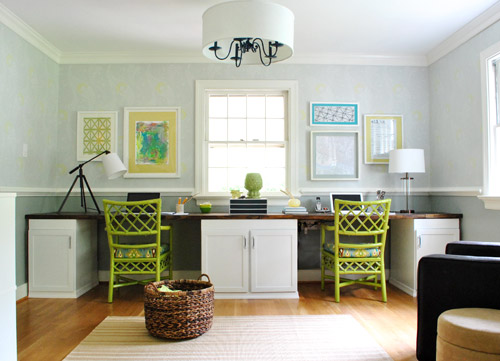
The funny thing is that there were probably the most votes for blue from you guys too (closely followed by yellow). Although there were definitely suggestions for a ton of other options (four different colors, tones like orange/coral/purple/pink, upholstered cushions, seats painted a different color, dipped legs, an ombre effect, etc). But even before sharing our stool musings we found ourselves gravitating towards turquoise or teal. Especially since we already have green chairs that we painted and reupholstered for the office…
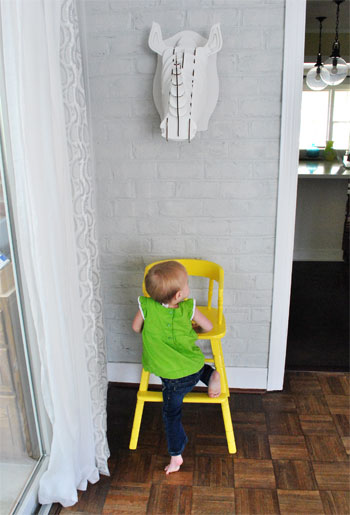
… and a yellow highchair for Clara that gets used in the dining room/living room (it’s not counter height, so it works better at normal tables than the kitchen peninsula, where we typically use a booster seat attached to one of our stools).
We decided not to make any final decisions until our rug arrived, and then to just follow our gut and pick a darn color already go with whatever we liked best. The truth is that a ton of other colors definitely could have worked (white cabinets & counters + gray tile + brown floors = a pretty neutral backdrop for any splash of color), so it really just came down to personal preference. I think we always would have done the “what if” thing if we hadn’t just followed our nose heart.
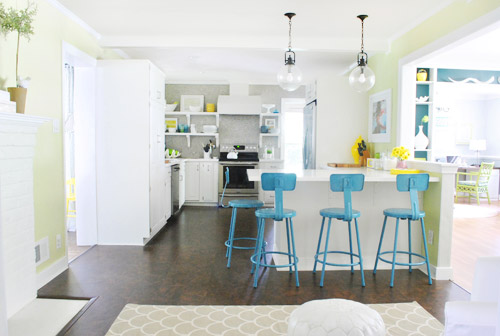
We love how the color relates to the dark teal built-ins in the dining room without being too matchy-matchy, and even ties into the small pops of color on the open shelves. Although I’m sort of tempted to completely white-ify the stuff on the shelves and the counters (fewer pops of yellow and blue) so the stools can really be the star – just because a lot of the kitchen photos that I’ve pinned as inspiration with colored stools don’t usually have a lot of bold pops of color all over the rest of the room (although some have a few). So I’ll keep you posted as the accessories continue to evolve in here!
In the meantime, it’s an especially great upgrade when staring at the other side of the room from the stove. Without any penny tile to the ceiling or colorful shelf accessories, this side used to look sort of bland. We love how the new stool color makes it look alive, but not too clown-car-crazy. It just feels like us.
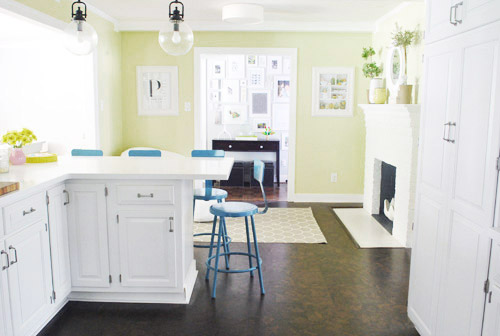
The kitchen officially fits into the rest of our house, which has other bold pops of color going on in every room that we’ve tackled – like our teal guest room with a bright yellow rug, our gray living room with a bright green rug, our pink nursery with bold floral curtains, our stenciled office with green chairs and multicolored art, our gray-blue bedroom with a teal and charcoal rug, and our gray dining room with green curtains and dark turquoise built-ins.
And ultimately it was freeing to realize that the worst that could happen if we didn’t like our choice was that we’d repaint. Although I’ll admit that I’m very thankful that we like them this way (this wasn’t exactly a ten minute project). Haha. And luckily the veneer-ish brown seat took the new coat of paint really well, so the whole chair looks even and feels nice and durable. We opted to paint the brown part of the seat the same color just to keep things graphic and simple (we feared they might get too busy-looking with a brown seat and a blue painted frame).

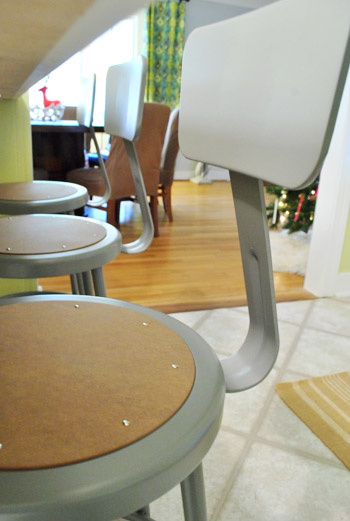
One of our favorite views of them is this one, which used to look sort of flat with the stools in their gray-with-brown-seats state…
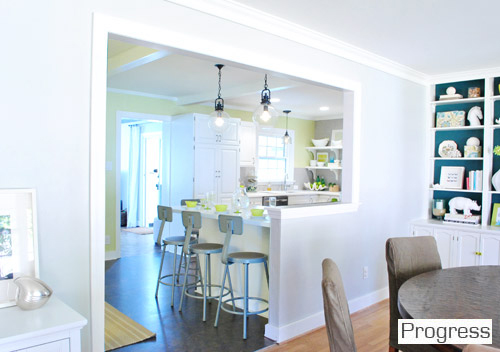
… but now looks cheerful and less monochromatic to color lovers like us (thanks to those hot little turquoise gams).
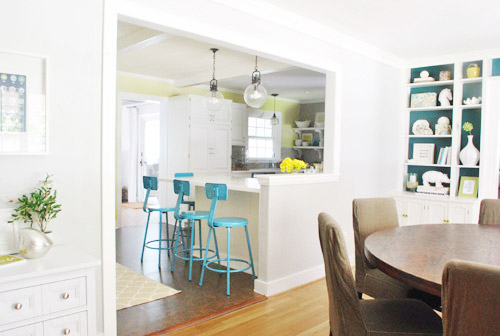
Even the view into the dining room makes a lot more sense in person (now that the stools tie into the subtle pops of turquoise in the ikat curtains). It used to be dull with eight brown dining chairs in the background and four gray stools with brown seats in the foreground, so it’s nice to have broken things up a bit more with some color to set the stools apart. And someday we’ll figure those dining room chairs out once and for all. Haha.
But I doth jabber on. Here’s how I got ‘er done.
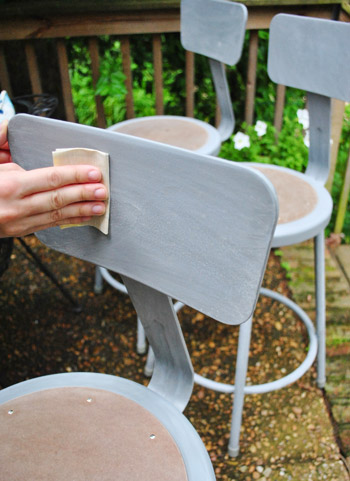
1) I roughed them all up with 300 grit sandpaper. Just to give them a little tooth so they’d be more durable for the long-haul.
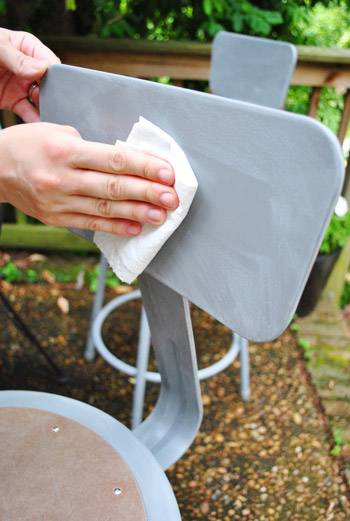
2) I used a liquid deglosser to remove all that sanding dust and further ready them for primer and paint (I like how it looks like I’m thumbless in both this photo and the one above it). We use a no-VOC deglosser called Crown’s Next that we got from Home Depot a while back for a few bucks.
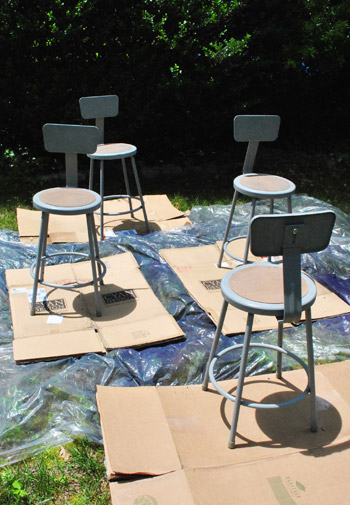
3) I sat them out in the yard on an old tarp and some cardboard (so their legs wouldn’t sink into the grass so they could be sprayed evenly).
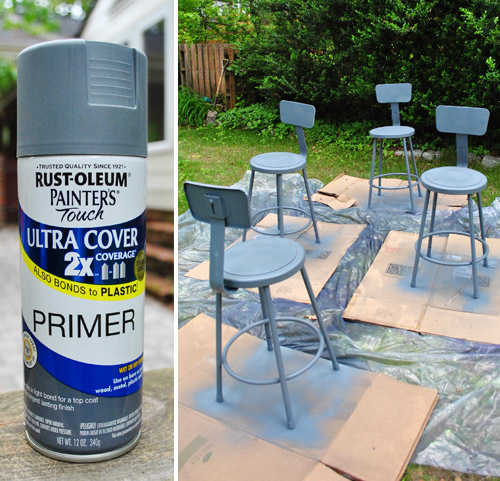
4) I misted them with very thin coats of spray primer until they had a nice even coverage (we generally love spraying metal since it takes paint really well – especially if it’s sanded, deglossed, primed, and painted in thin and even coats). You can check out some general spray painting tips of ours here.
5) I misted them with very thin coats of spray paint until they had nice even coverage. We went with Tropical Oasis by Valspar in a gloss finish (we liked that it had a fair amount of gray in it, while some other teal options looked a little too bright for us without any muted undertones to tie them into things like our gray wall of tile and our new scalloped rug). We applied around five super thin and even coats, beginning on the next coat pretty much as soon as the first one was done (light misty applications like that hold really well and don’t drip or peel like thicker ones tend to do).
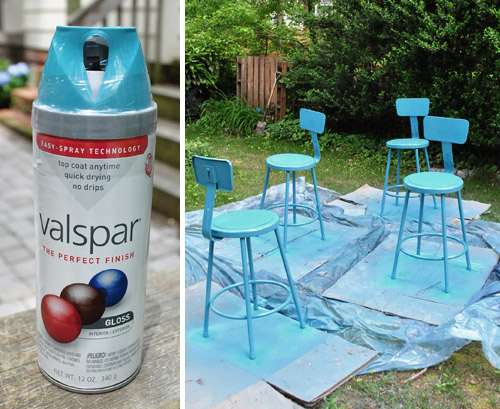
6) I left them outside in the sun for 24 hours (after checking to be sure there was no rain in the forecast) so they could off-gas and cure up. Next they got brought into the sealed-off sunroom for another two full days, just so they could continue to cure up and let out any fumey smells before they were allowed into the house. Then finally (those few days felt like years of waiting) we got to bring them back into the kitchen and see how they looked. They should hold up for a nice long time (painted metal, when done correctly, can look great for decades). We’ll definitely keep you posted on how these guys do over time.
And now for a budget breakdown:
- 3 cans of primer + 3 cans of spray paint = $29
- 300 grit sandpaper and liquid deglosser = $0 (already owned, but they might run you $6 if you have to buy ’em)
- TOTAL: $29 (which meant each of my $32 stools got a $7 upgrade)
I totally think people would spend way more than $39 a pop for these chipper little stools at a furniture store. So, yay. As for a time breakdown…
- Sanding and deglossing them all = 1 hour
- Priming them all = 1.5 hours
- Painting them all = 1.5 hours
- TOTAL: Four hours (obviously with time in between steps since I primed during one Clara-nap and painted during another).
Speaking of the bean, Clara actually stopped to pet one and say “blue stool! so pretty! like a princess!” right after we brought them in. No idea why she equates blue stools with princesses, but we’ll take it. I gotta say that the kitchen finally feels semi-complete. Huzzah! And I might be imagining things, but proofing 352 pages of book layouts (not exaggerating) on our upgraded stools was a little less of a grind for some reason.
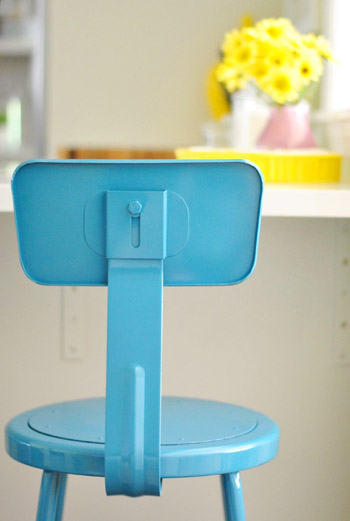
Maybe they have magical happy powers?
What have you guys been upgrading with paint or primer these days? Have you ever used a liquid deglosser? We used to be so scared of it since they seemed like it’d be fumey and burn your fingers off, but we love the stuff we use (and it has yet to remove my fingerprints – although it might have taken off my thumb for a few pics).

Amy says
I LOVE THEM!!!!!!!!! amaze-balls!!!
Erica says
Wow, that’s amazing! Great job!
Audrey says
Adorable!
The process you posted actually reminded me of a question that’s been bugging me for a while. You may not know the answer at all, but I figure it’s worth a shot!
Is there a cheap/ quick option for sprucing up an ugly countertop? My parents have this horrible powder blue (with a tone-on-tone design that looks like a tinier version of the squares on graphing paper) laminate counters in their kitchen.
They have a gorgeous granite picked out, but it’s going to be a year or two before they can get it, financially speaking. The granite will look great with the cream paint my mom is about to paint their wood cabinets. The powder blue… not so much. Can they somehow paint their blue counter in the meantime? Or will that make it unusable?
Thanks!
YoungHouseLove says
Oh yes, we have heard Home Depot sells this stuff by Rusoleum called Counter Transformations (I think that’s the name) and you can paint it on to change the color. I think it’s pretty fumey but some other bloggers seem to have luck with it and it’s really affordable! I would definitely get the kit and not try to use regular paint since it’s made for that. Hope it helps!
xo,
s
Amanda says
I have to agree with some other comments – I wasn’t sure how I felt about them when you first got them and then you went ahead turned them into something magical. I LOVE them!!! You guys are totally awesome :)))
YoungHouseLove says
Aw thanks Amanda!
xo,
s
bfish says
I was a doubter about painting the stools — though didn’t comment on it lately — but I think they look great and really add a lot to the looks of your kitchen!
Darlene says
Love, love, love the stools!
Danielle says
I just used that same blue spray paint on an outdoor chandelier. I absolutely LOVE it! It’s so fun and bright! Liquid deglosser has been my BFF lately…I’ve been painting my kitchen cabinets using your tried and true method. Fingers crossed mine come out looking just as fabulous :)
Kristan says
I love the new look! Of course, I may be partial since I’ve used that exact color of spray paint on a few projects myself. All about pops of teal. And yellow. And red. And…
Jen says
Stools look great! But I must say the pic with the dinning room chairs showing says to me – “we need a pop of color too!” Sorry if you or the other readers already said that, I didn’t have time to read EVERYTHING!
YoungHouseLove says
Actually there were a few votes for white slipcovers for those and I think one for gray. Haha.
xo,
s
Jeff Patterson says
Wonderful job Sherry! I love using Rustoleum-it’s an awesome spray paint and we’ve always had great success with it. You’re right about painting metal, if done correctly it lasts a loooooong time. :)
Amy says
Those look lovely… quick question though… do they ever feel sticky from the spraypaint? what happens if they get a scuff? do you start over? or can you just re-spray the area?
… BTW… I ordered a Bum genius for cloth diapers that i first read when John posted it… i saw it months ago… and used that for my trigger point of remembering! So much thanks for that !
YoungHouseLove says
If you use spray paint right, it should be dry to the touch in about an hour and totally cured up in 24 hours, so it should never be sticky if you sand, degloss, prime, and paint (with super thin and even coats). If you get a scratch or scuff you can just sand that area, hit it with a spray or two of primer and then spray it with paint to recoat it! Hope it helps – and good luck with the dipes!
xo,
s
Michelle says
They look great. They look like they belong there now and, really make the room. I wonder what the manufacturer would think. Ever think of sending them a pic?
YoungHouseLove says
The funny thing is that we think someone who works there reads our blog (we vaguely remember a comment from them back when we bought them) so that’s kinda fun!
xo,
s
Melissa says
Would love an update on how your cork floors are holding up under those stools. Did you put felt pads on the feet? If not, any scratching when you move the stools? We are considering cork for our house and I’d be interested to hear how they are holding up in a high traffic area.
YoungHouseLove says
They’re great! The stools have little rubber pads built into them so they’re nice and soft on the floor. Not a scratch, and we’ve probably moved them in and out a thousand times!
xo,
s
MegP says
I love your fun blue stools! Such a great color choice.
Also, I very excitedly pre-ordered your book. Can I ask how the # 251 came about? No problem if you can’t answer (if I just wandered into book secret territory, I understand), haha.
YoungHouseLove says
The funny thing is that not only is a picture missing, but the copy needs to be updated! We think the new number is 243, which is actually a very meaningful number for us (43 is our lucky number) so we hope it stays that way! The layout is in flux so the number keeps shifting! Haha. Will keep you posted! And thanks so much for pre-ordering!
xo,
s
Jeanne Wagner says
Oh yeah… the perfect shade of blue. Now I’m like, no other color would look as good. HOW do you do that with a gazillion shades to choose from? I cannot get any right shade. Our whole house is a dull sage and I’m over it. I repainted our Florida room with a what I thought was “grello” like your room because I loved it so much, and mine turned out way too over the top and now my husband says I don’t get to choose the colors any more. I chose a light dreamsicle kind of peach in a hall way… it was so dark because there is no natural light down there… and although it brightened the space, I still get teased over it. I don’t want boring old white to brighten the space. I spend tons of time in the store agonizing over colors and I never seem to choose the right one. I feel like I have to hire an interior decorator now. ha ha ha Sometimes I crack myself up.
YoungHouseLove says
Haha, I think the truth is that these guys would have looked cute almost every color since the rest of the room is pretty neutral! Oh but as for wall colors, my tip is to completely underestimate the intensity (our grellow swatch almost looks like a beige tone in your hand but you see a hint of golden yellow and green, but once it’s on the wall it’s a lot more intensified since it’s everywhere and not just on a tiny swatch. They also sell little test posts of paint for a few bucks if you’re not sure about a color, so you can get a few and paint swatches on the wall to pick your favorite! Which is definitely cheaper than hiring a decorator! Haha. Good luck with everything!
xo,
s
cori roberts says
LOVE THIS!!! You guys have a great eye for this stuff and its so CLEAN looking! As I was looking at it I thought it would be cool to paint chalkboard paint on the long white cabinet! clara would love it and you could write awesome quotes or messages, grocery list, weekly menu.. anything! Is that something that you guys even like? :)
YoungHouseLove says
Oh yes, we have plans for that cabinet someday! Not sure if we’ll go with chalkboard paint or what, but we’ll keep you posted!
xo,
s
cori roberts says
awesome! cant wait to see!!!
Tiffany says
Brilliant! Love the color and everything else goes so well together.
Jen says
I will admit that I was originally in the “leave them as is” camp, but I have been proven wrong! You guys picked a really awesome color. It’s both bright and muted at the same time, so it adds life and happiness without visually monopolizing the room (if that makes any sense).
One suggestion, if I may, that I meant to leave on yesterday’s post but forgot: have you considered adding a small pop of bright yellow to the sitting area? Since you have a few bright yellow accents in the kitchen-proper, I feel like it would be the final touch to balance the spaces and tie them together.
YoungHouseLove says
Aw thanks Jen! You’re so sweet! We actually switch out that pillow on the chair by the fireplace all the time, so sometimes it’s a little yellow guy, which looks pretty fun! Will have to post pics!
xo,
s
Judith says
I just love the new improved “princess” stools. Clara is right, they are really pretty.
I am always looking for old furniture that I can repaint. They already call me “the crazy furniture lady”. ;) Just recently I found a 60 year old side table (for free!) and a wall shelf (for 12 €) and painted them yellow and white:
http://kleinesgelbeshaus.blogspot.de/2012/05/kleiner-gelber-tisch.html
http://kleinesgelbeshaus.blogspot.de/2012/06/shabby-chic-wandregal.html
YoungHouseLove says
Beautiful! You’re great at that! They look like really expensive “pro” pieces!
xo,
s
Kismet says
Perfect! Love! Painting the brown seats was the exact right decision.
YoungHouseLove says
Thanks Kismet!
xo,
s
Kirsten says
Please, please, please keep the pops of color on your shelves in the kitchen!! I love those little details!
That said, love the stool color (if this were a different kind of blog that would take on a completely different meaning…sorry!). Your kitchen makes my heart sing :-)
YoungHouseLove says
Aw thanks Kirsten! After I said that I realized that those shelves just change with my mood, so I’m sure they’ll get whiter someday an even brighter than they are now another day. Accessories seem to change all the time around here! Will keep you posted!
xo,
s
Clare says
Just to add to the chorus of admirers – that color is fantastic! Love it – and the rug too. Thanks for sharing!
One question – we just bought our first house, and the kitchen has corian countertops (a speckled gray) – do you have any cleaning/maintenance tips for corian so far? Thanks!
YoungHouseLove says
We have been loving our Corian so far but we haven’t had any disasters (no major wine spills or anything) so all we do is wipe it down with a moist towel every night. Since ours is bright white anything like a smear or a smudge will show so we can wipe it up before bed. So far, so good! We generally love mild cleaners like Mrs Meyers or Dr Bronners so that’s what we’d try if we get a stain.
xo,
s
Jamie says
Love that color! I have been so inspired by all of the pops of color you have been using that I’ve started adding some fun colors to my very neutral colored home and loving it!
Becky says
I was originally bummed when you said you were going to paint the stools, I was really digging the industrial look. But I LOVE the blue. It is really perfect. Great choice!!
YoungHouseLove says
Aw thanks Becky!
xo,
s
Jenn @therebelchick says
They look so beautiful! I love Rustoleum!
carolyn says
The chairs look great! I think Clara said “princess” because they are close to the color of Cinderalla’s ballgown.. ;)
YoungHouseLove says
So true! I wonder if that was it!
xo,
s
Patti says
Woohoo! Love it!! Never doubt the YHLOvers!!
Mamaw03T says
LOVE, LOVE, LOVE them! When I saw the photoshop pic of it I couldn’t see it, but OMG! They turned out fabulous! Y’all rock!
N Shirley says
Can I tell you a funny? My kids are selling their house and my grand-daughter noticed a spider had built a little web in a corner. She said to her daddy that she did not think the new people would want their spider. My son said they would put it on the disclosure form and take the spider to the new house. My grand-daughter just looked at him like she was not sure if he was kidding. Anyway- love the new color pop in the kitchen! Very pretty!
YoungHouseLove says
Hahaha, that’s hilarious! I love it.
xo,
s
Mo says
I love this! I felt something was off once everything else was done and I often blamed the stools. Now they make sense and really start to complete the space, even if it will never really be fully complete!
Jennifer says
They look fantastic!!! It is such a nice color-not too pungent, just the right tone.
Liz says
LOVE this! I’m not a big “commenter” but this looks fantastic. Your house is so cheerful and tasteful. The teal color ties in with so much without being overpowering. I will admit I was not in love with those stools before, but this makes them so much fun. Well done :)
YoungHouseLove says
Aw thanks Liz!
xo,
s
Debbie L. says
I’m impressed it only took you 3 cans of spray paint for 4 chairs. I was telling my hubs we must be doing it wrong b/c we painted our blinds and it took like 6 cans of spray paint. We even tried hard to use your light misty coats method. Again, impressed!
YoungHouseLove says
The key is definitely thin coats and primer (that helps the coverage a ton!).
xo,
s
grace Nielsen says
ABSOLUTELY PERFECT!! As always, you guys nailed it – spot on!! Love it!!
Sharon Sprague says
It’s a beautiful color! One of my faves. It’s amazing what you guys have done with your kitchen. I’m so inspired. :)
mrs. limestone says
I did the exact same thing to my kitchen benches a few years ago (same color too). They are still looking good.
mrs. limestone says
Oh but i didn’t prime them and the paint has stuck very well without it.
YoungHouseLove says
That’s awesome! So funny it’s the same color!
xo,
s
Dizee says
LOVE the stools.
Because of you guys, I now spray paint anything not moving… My mailbox, garden statues, my kids…(just kidding) :)
Nothing is safe when I am on the loose.
YoungHouseLove says
Haha, I love it.
xo,
s
Michelle O says
LOVE IT!
drew says
How about a pop of teal on the gallery wall in the hallway.
YoungHouseLove says
Ooh that sounds fun! Always a possibility! That framed stuff switches in and out all the time!
xo,
s
Stacey says
I just want to thank you both for YHL. I so look forward to reading all your posts, it is the best coffee break in the work day. In fact…I would fully support 10 posts a week :)
I pre-ordered your book and cannot wait until it appears on my doorstep!
But meanwhile, can I just say: WOWEEEEE! I loved the industrial vibe of the chairs and was struggling to picture them painted from the photoshop images. Oh man! Looking at them now, I can’t believe I ever loved them in their original form. It just makes the room look so inviting. Thanks for inspiring me yet again to bring more color into my tiny NYC apartment!
YoungHouseLove says
Aw thanks so much Stacey! You’re so sweet!
xo,
s
marie says
I love the blue because it cools down the wall color, which I loved at first but started to seem too warm and 70s avocado-y to me once you put in all the yellow pops of color. Now it looks more muted and modern. I would love to see what would happen to the tone of the room if you swapped out some of the yellow “pops” for accessories in sea glass colors or a darker bolder teal.
YoungHouseLove says
That’s always another possibility! I love changing out accessories all the time- haha. Nothing is safe in my house…
xo,
s
Tanis MacDonald says
The stools look great!
This week, I spraypainted the vanity light bar in my upstairs bathroom – from its original rusty cheap chrome finish to oil rubbed bronze to match the shower rod and towel bars. Best $4 I ever spent for that can of paint, it looks fantastic!
YoungHouseLove says
That sounds awesome!
xo,
s
Joy says
I LOVE THEM!
Amy@healthy grits says
It looks great! I was so excited to see if and how you guys would make these over – we bought them on sale as well after seeing your post and I’ve been waiting for your update before tackling it myself. Tagging this post in my home projects file! Thanks for the great ideas!
Bek Howard says
They look amazing!! I would love for you guys to do a spray painting video one time. I know you always say slow and even coats but when I come to spray paint it doesn’t always work out like that. I think you should keep the yellow and blue accents I definitely don’t think they take away from the boldness of the seats.
YoungHouseLove says
That’s a great idea! I’ll have to try to remember to make a video next time!
xo,
s
Jamie Herzlinger says
What a fun way to add color to any space!!! It’s a simple idea that makes a world of difference!!!
Monica says
These look great. I almost bought these stool when I saw your several months ago and then last weekend I was a lucky craigslister who found vintage lab stools from the UCLA Physics lab already painted a bright yellow and chipped to perfection, but if I hadn’t I would’ve done exactly what you did. They look fab.
xoxo…mONICa
YoungHouseLove says
That’s amazing! Congrats on the score Monica!
xo,
s
Andrea says
Oh wow, I must admit I was a bit sceptical about spray painting the chairs because I really liked them before. But what can I say… I LOVE THEM NOW! It’s amazing how great the colour of the chairs works with your built ins in the dining room. That’s what caught my eye first ^
Tara says
Love the stools! How many cans of spray paint did you go through? Love the step-by-step DIY, too. Your blog is one of the ones that is giving me courage to just ‘Do it!’ in my house, too!
YoungHouseLove says
It was just 3 cans of primer and 3 cans of paint total (thin coats and primer help for better coverage without wasting lots of paint).
xo,
s