As several of you noticed in Monday’s party recap, our patio area boasted another feature on Saturday (beyond more balloons and little kids than you can count). Yep, there’s a new 6′ privacy fence going on back there. When did it get installed? In the sliver of days between completing the patio and hosting the party. But time was so tight that I didn’t get to blog about it until after the bean’s shindig (aka: today).
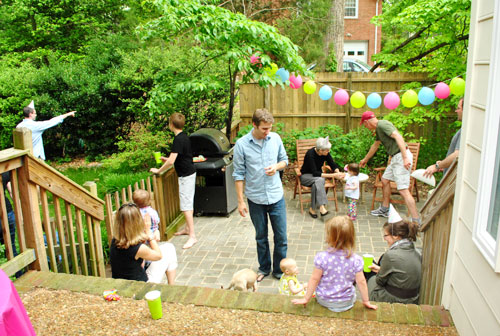
Here’s how it all went down up. Throughout my patio-ing, Sherry regularly reminded that me she wanted to beef up the fence situation between us and the neighbor before Clara’s birthday party. Her goal was to prevent this big blue car that was always parked next door from becoming the backdrop to all of our party photos.
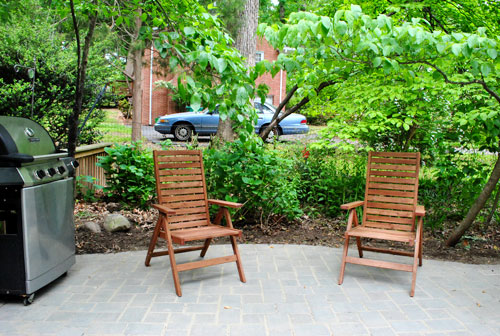
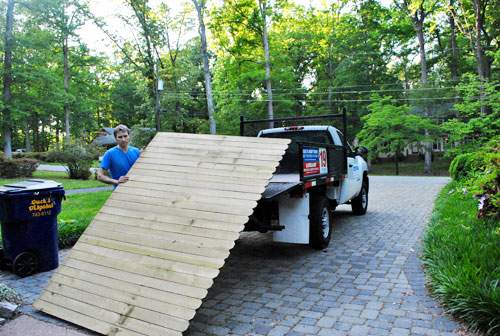
Though I agreed with her motive, my patio-ravaged muscles didn’t appreciate her timing and my mouth decided to say things like “you’re crazy,” “no way!” and “are you kidding me???” (yes, I’m a bit of a grump when sore, tired, and stressed). So for those wondering what the heck we argue over, getting to this whole fence project was one of those things that we didn’t exactly see eye to eye on. Of course Sherry got her way in the end though. When the patio project wrapped up with three days to spare, I begrudgingly rented a Lowe’s truck on Tuesday night and hauled home my supplies which amounted to four 8ft-long-and-6ft-tall fence panels, five 8ft-tall fence posts, and some other miscellaneous items.
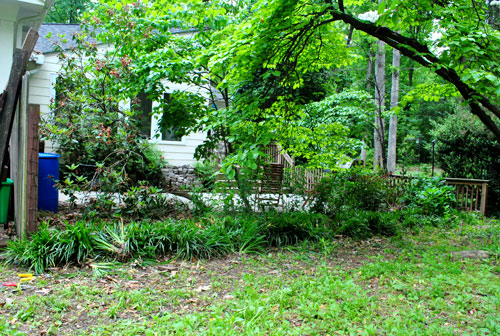
The plan was to replace the current fence – a 4ft-ish wire mesh fence held up by a combo of wood posts and a single steel rod – with something taller (6 feet, to be exact) and, of course, less see-through.
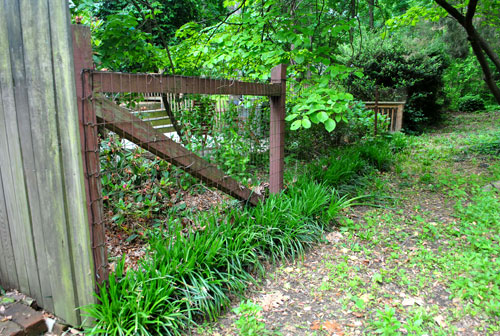
First, that old fence had to come down. Luckily my wire cutters were sharp and both the wood and that steel post were pretty rotted, so I was able to strip them out quickly:
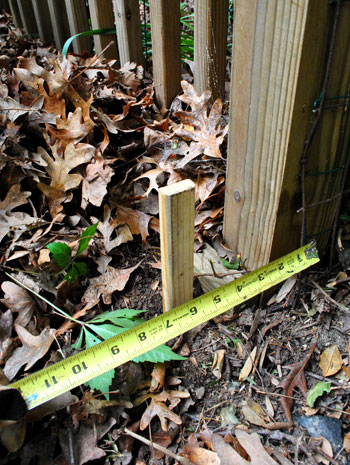
Next up was measuring and marking the spots for my posts. Using these ever-helpful Lowe’s videos that I keep finding on youtube, I knew placing my posts accurately would be extremely important (they’ve gotta be exactly 8 feet apart, or else my pre-made panels wouldn’t line up right). So first I roughly marked all of my holes with wood stakes, so that before I dug each of the holes I could triple-check my measurements (and then check them again before placing my post).
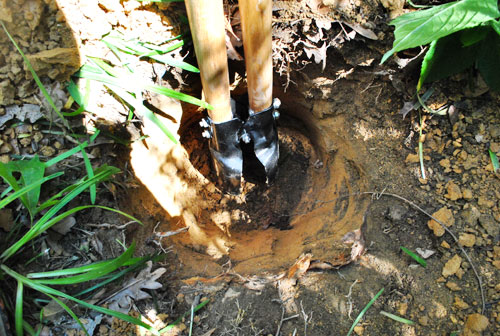
Next was the sucky part: digging. I had myself a hole digger and all, but it still made my already-sore body even more miserable. And you better believe I let Sherry know it. I’m that kind of hubby when she gets her way. Anyway, I had heard from a few folks that I should set my post 24 inches deep. But as I approached about 20 inches, the thick clay earth officially had me beat (and had me thinking weird things like “how do all of those sorority girls in horror movies manage to dig graves to hide bodies?”). So I cheated a smidge and just power-sawed my posts a few inches shorter so they’d stick no more than 6 feet out of the ground. Post-hole-depth purists, feel free to wag your fingers at me (thankfully in the end everything is still extremely solid and those last few inches of depth didn’t seem to compromise a thing thanks to our dense clay soil and my next step which involves concrete).
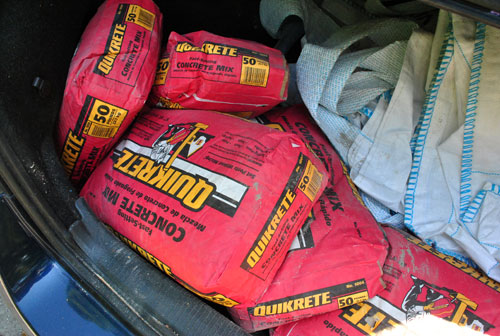
My post holes got an inch or two of gravel on the bottom (supposedly for drainage), followed by my post which was then surrounded by a couple of bags of Quikrete (the no-mix stuff that sets when you just-add-water). Oh and here’s a tip about that stuff. Obviously you don’t want it to get rained on in the bags before you use it (or it’ll set into giant rectangles of useless concrete). So I kept it in the trunk since I worried that our carport was still too moist/clammy for it and I knew it would be rain-free in there. It actually stormed in the 24 hours between getting it home and using it so I was definitely glad that I did the trunk thing.
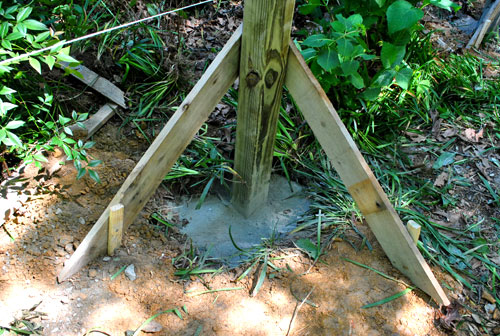
But back to my fence posts. I rigged up some makeshift supports out of scrap wood to keep the post from shifting, though I think the concrete (both dry and eventually wet) did most of the work.
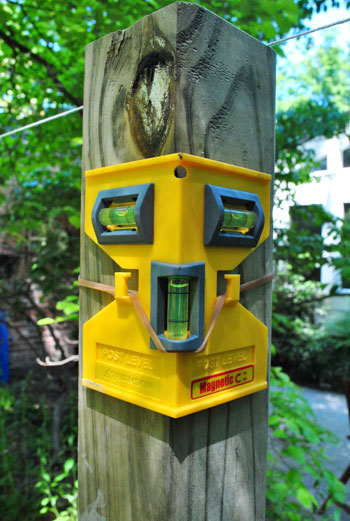
The true hero of the day was my post level, which is pretty much the only way I could ensure that each post wasn’t leaning too far forward, backward, or slanting to the side. So I highly recommend grabbing one of these babies if you’re ever tackling a fence project.
Second to the level were these couple of strings that I tied up – one to mark the front edge of my fence (to be sure that I’d set my posts in a straight line) and another to represent the top of my posts (to make sure everything was set at the same depth).
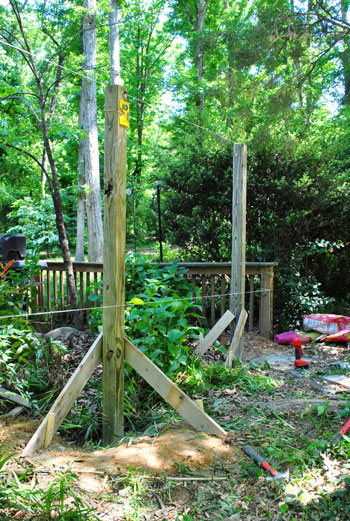
I won’t pretend it wasn’t a hard Wednesday afternoon, but eventually I did get all four posts placed (and realized that I didn’t need the fifth, thanks to one leftover from the old fence). And once all of my Quikrete was watered, dried, set, and covered with dirt, I decided to call it a day – just to be sure things were solid before putting any weight on them.
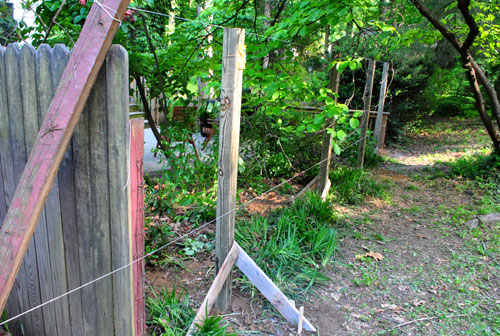
Thursday wasn’t all that complicated by comparison. Sure, the panels were a bit unwieldy but one by one I carried them into place and drove a few wood screws into them to keep them from going anywhere. I had to do a bit of digging and leveling to counteract the slight slope of the land, but – as you can see – I managed to keep a smile on my face. This is the point where Sherry stopped feeling as bad for me and starting saying things like “See how much of a difference it makes?!” and “Aren’t you glad we’re getting this done?!” and I had to admit I agreed with her. I hate when that happens. But some projects just feel pretty darn good in the home stretch and immediately make a dramatic difference – and this was definitely one of them.
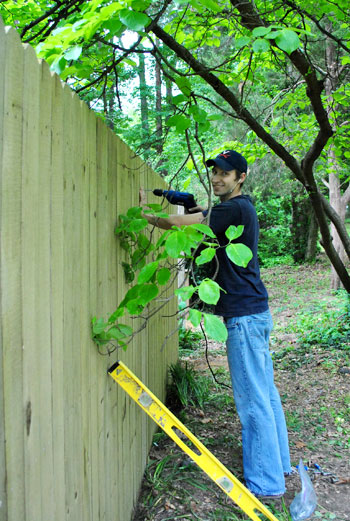
The stars must’ve aligned for me that day because, more importantly, my fence panels aligned PERFECTLY – including the one that I had to cut down to fit (the space was 27 feet long, so I needed three full 8-foot panels and about 3-feet of the fourth). Cutting them involved taking a handsaw to the three horizontal rails, which drained the last few ounces of energy I had left in me. This is my tired face:
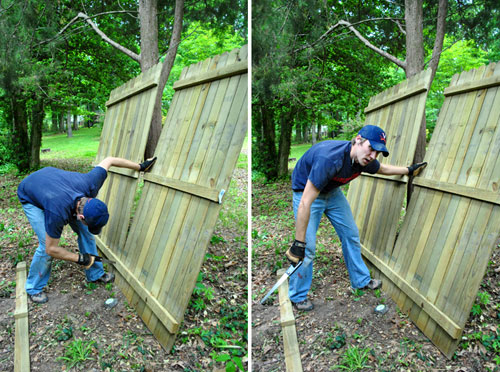
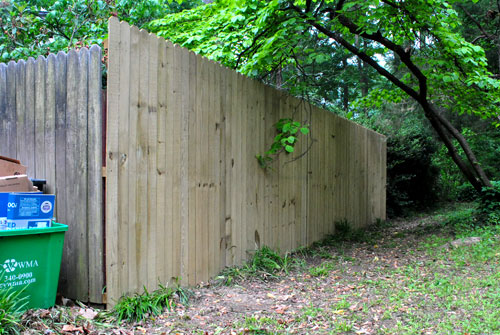
But here’s what I was left with – a virtually seamless, twenty seven foot stretch of privacy-rich fencing… done just in time for me to focus on Clara’s party on Saturday (which was about 48 hours away at that point).
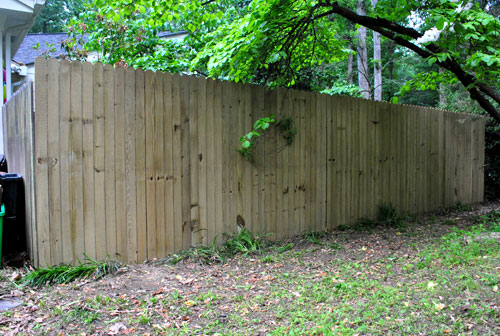
We’ll stain the fence eventually – along with the existing panel in front of it – so it looks a bit more finished. As you probably guessed, we chose this new fence style to match that existing panel that was behind our recycling bin (but wanted the full 6′ height to gain as much privacy as possible from nextdoor (since their land slants up so we needed all the height we could get). Someday we might upgrade the shorter existing panel in the front to match the height of the side panels, but for now it doesn’t look too noticeable since there are a ton of plantings right in front of that shorter panel that make it really hard to see from the street anyway.
Oh and do you see that tiny sliver of space where the fences meet? A small 1 x 1 x 6″ piece of wood should conceal it perfectly whenever we have a chance to grab it (did I mention time was tight thanks to the impending party?).
I’m notoriously bad at keeping receipts, so this is my best guess at a budget breakdown based on my credit card statement:
- Quikrete concrete mix (8 bags): $30
- Lowe’s truck rental: $19
- Fence panels (4) and posts (4): $171
- Post level: $5
- Hole digger: borrowed from my sister
- Screws, stakes, line level, rope and screws: already owned
- TOTAL: $225 (for a 27-foot long, 6-foot tall fence)*
* Our actual total was really more like $213 because we purchased all of the above at Lowe’s and used our Lowe’s card which gives you 5% off every purchase (just like a Target credit card). Woot.
** This post isn’t an ad for Lowe’s, we just happened to find their youtube video helpful and then bought our stuff there – but we’re not in cahoots with them or anything.
I know we may have been able to tackle this project for less if I built the fence slat by slat, but in light of the tight wife-imposed timeline (and my tired arse) those prebuilt panels were a lifesaver. And they weren’t even that costly, considering all the time and effort they saved ($39 for each 8 ft long by 6 ft tall panel). As for Clara’s party this weekend, the freshly installed fence did its job: no big blue car playing camera hog in the background.
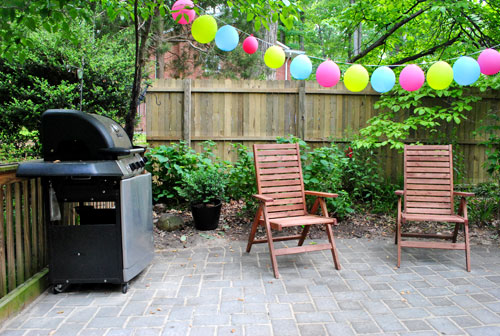
Ah, what a difference a fence can make:

As for me, my body has finally recovered from my two manual-labor-filled weeks. But that doesn’t mean I’m looking to take on any heavy lifting anytime soon. Sherry, I hope you’re reading this.

Stephanie says
where’d you guys snag those patio chairs again? i could prob find this info elsewhere on your site, but i’m laaaazy :)
YoungHouseLove says
Those were from Ikea about four years ago. Hope it helps!
xo,
s
cafenoHut says
Your garden looks amazing now and if it is possible, I want a like this husband:)
libbie says
Job well done! You guys are pretty amazing! I always reference you both to my husband whenever I am wanting a project done around the house :)
Pammy says
Wow. I must say i’m jealous. Our neighbor’s tore down their perfectly fine privacy fence a few months ago, who knows why. The wrong side was facing us though… but we didn’t care. We were shocked to see it gone when returning from work that day! Anyway, soon we are planting some gorgeous evergreen trees to create a natural privacy screen, so hopefully I won’t be bitter about nice privacy fences anymore :) Great job John!!
peg says
Hahaha this post is so timely. We moved into our newly constructed house before it was completely done and I.am.going.insane. To be fair, my fiance is a contractor and did all of the work on it, so after a long day of working on other people’s houses he’s a little bunt out.
But I’m still itching to git er done. We’ve been in for three weeks and yesterday when I heard my him pull into the driveway I quickly pulled his table saw out of the shop and grabbed his goggles and acted like I was just about to cut some wood for a shelving system we had talked about. Needless to say it got done pretty quick!
Karrie says
haha I’ve found that method pretty effective for getting the husband to get on those jobs he’s been delaying on too!
Nothing works better than ‘attempting’ to do it yourself, in front of him, especially if you just ‘happen’ to not be doing it the ‘right’ way. Works every time!
paula says
Wow, John, what a trooper! It looks terrific, job well done :)
Erin C says
Y’all crack me up!!! Great work John and wonderful supervising Sherry (ha ha ha)… it looks fantastic! I wish I could visualize things… very jealous of that :)
Andy B says
Very cool! We are in the middle of putting up a fence too. What kind of wood did you go with?
YoungHouseLove says
We just went with the stuff they sold at Lowe’s (they sold pre-treated fence panels and posts so we grabbed them and ran).
xo,
s
Heidi says
Love it!! You make these projects seem so easy! I’ve been daydreaming about upgrading to a privacy fence for a while now, but I don’t think it will be happening any time soon. This does give me a bit of hope though!
Sarah K says
It looks great!
R says
Looks like it’s time for you to step up for some big projects, Sherry, while John has an easy week or two – that’s some hard manual work he’s put in on the fence and patio. Both look great!
YoungHouseLove says
Seriously! My little homemade piñata and slipcover shrinking has nothing on this. Haha.
xo,
s
RA says
Sherry, you get LOTS of points for nursing Clara every three hours.
YoungHouseLove says
Aw thanks! That girl is insatiable in general! For lunch she had an entire sweet potato, a whole chicken breast, a slice of cheese, and a cup of yogurt. That’s more than John or I had! Must be growing…
xo,
s
Wendy says
It looks great. I had no idea you can buy those pre-built fence panels. We need a privacy fence in one area of our yard and I’ve been putting it off because the whole idea of a fence scares me as far as effort and expense, but with my dad’s help and my measly bank account, I think we could accomplish this!
Laura says
(and had me thinking weird things like “how do all of those sorority girls in horror movies manage to dig graves to hide bodies?”)
And this is why you’re awesome.
Carolyn says
I’m impressed with how quickly you got it up! (and I totally didn’t mean to make a ‘that’s what she said’ comment … but there ya go!)
Once again, I’m jealous of your warmer climate. In Minnesota I’m pretty sure our fence posts need to be 3 feet deep! (Can’t remember for sure, but I know it’s a lot deeper than other parts of the country because of the arctic freeze we get in the winter). Enjoy your new backyard!
Erin says
Looks awesome! Good job, John (and Sherry, of course, who I presume was in mega party planning mode at this point).
I will say this is yet another example of the benefits of living in warmer climates. Here you have to sink fence posts, etc. at least three feet deep to avoid frost heaving. Stupid weather.
YoungHouseLove says
Wow- never even heard of frost heaving!
xo,
s
heather says
Haha, I was thinking the same thing about the fence posts and frost heaves! Frost heaves are horrible. They have single handed caused front end replacements in my car (which thankfully and begrudgingly my fiance has done after announcing I should be required to sit for my license exam again). It’s really a crap shoot when they will appear in the winter. Lesson learned – go slow no matter what because there might be a huge one over the hill, that just appeared overnight, that makes your car go BA BOOM! When you hit it. Buh-Bye Shocks.
YoungHouseLove says
Oh man that sounds hardcore!
xo,
s
Micha says
Wow, that earned you a permanent spot on the Top Husband list, I’d assume. Looks great!
LindseyR says
” happy wife makes for a happy life” right John? Your hard work paid off…and it really finishes project patio.
(Sherry….you were totally RIGHT…finishing it a week or so AFTER the party and looking thru a bunch of pictures without it finsihed probably would’ve drove you (both) crazy for years! Good call!)
YoungHouseLove says
Amen. I never would have let John forget that I wanted that darn fence to be done if it wasn’t!
xo,
s
Diane says
Nice job, you guys (aka John!). It really looks like it was always there to begin with. John, I hope Sherry gave you a nice long backrub for those 2 weeks of slave labor – ha ha! My hubby would have negotiated up front for that before plowing into the project (and for a ncie fence like that, it would be worth a backrub a a cold beer).
YoungHouseLove says
I gave him lots of praise and took care of the baby the whole time. Haha. And we’re going out to a nice dinner to celebrate any day now. Mmm…
xo,
s
Jill says
John, you’re a HOSS!!! Super job :)
Naomi says
It looks great, but I’m just wondering, why did you choose to put up a new fence rather than a hedge or something like that? In my neighborhood nobody seems to have fences over 4 ft–and even those are rare. I worry that if we put one up (something we are considering) it would seem unfriendly towards the neighbors. Any thoughts?
YoungHouseLove says
We just wanted something instantly filled in and budget friendly (almost 30 feet of dense shrubbery that was 6 feet tall would have been $500+ bucks) and fences are really common in our neighborhood since it’s full of mature trees and pooches running around (so they don’t really stick out very much thanks to all the vegetation and they keep the dogs from running all over- haha).
xo,
s
Renee says
We put a new fence in last year. First we pressure washed our 15+ yrs old fence and then reused the boards. We poured a concrete base to build the new fence on and framed the old boards with new panels. It came out really well.
I think you were smart to go with the pre-fab panels. It would have taken a lot longer to use the individual slats.
Also…if you don’t have one…you need to get a Sawzall, it will save you lots of time in the future. We also used a line level when installing our fence, which was a huge help.
I’m also really impressed with how fast you get things done. It took us months to get our fence done.
YoungHouseLove says
Oh yeah- we’re dying for a Sawzall! I think we might get one for our anniversary. Haha. So romantic.
xo,
s
Shannon says
I LOVE it with a capital LOVE!
Kristen says
Well done John! The fence looks great!
Hillary says
Hmmm…we’re needing a new fence so this was great inspiration. It’s so straight and perfect!! Instead of staining our new fence (if/when we do it), I’m thinking about using the vinegar/steel wool oxidizing treatment to give it an old feel, and then seal it with something clear to protect the wood. I think it will give an immediate silver/grey patina.
YoungHouseLove says
We’ve seen projects like that and they look really cool!
xo,
s
sarah (sarah learns) says
the fence looks so great! nothing like a deadline to get some projects completed, huh?!?
Kevin M says
You’re the man John, way to suck it up and do a great job! I think she owes you a nice dinner at your favorite restaurant.
YoungHouseLove says
Ok, ok, I agree!
xo,
s
Rachelle says
Great job on your projects! So much hard work!
Quickcrete is really cool. My mom found a few bags left out in the weather which hardened. She used them for steps on her flower garden bank. She needed a few more, so she bought more quickcrete and purposely left it in the rain. Her steps turned out great.
YoungHouseLove says
That’s so creative!
xo,
s
Eileen says
The complete patio area looks great through and through! So glad you guys don’t have to worry about a HOA in your neighborhood. It may have perks in some areas, but it definitely slows down the work process.
Sue says
I’m really curious building permits in your area. Maybe it’s because I am not living in the United States, but we need building permits filed and approved for any major renovations to a house or property (including installing and replacing a fence, moving walls or finishing basements). We would also need a surveyor to ensure our fence is within our property boundary. We once got into a nasty battle over a fence that was already on our property when we moved in but we actually owned another two feet of land…the neighbours weren’t happy when we asked them to move their shed two feet to the left when we were replacing the fence. It was very stressful, but our land is very small and we owned another two feet!! What are the requirements for building permits and surveyors in your area? Thanks!
YoungHouseLove says
In our area, if you want a fence over eight feet you need a permit, but any 6′ ones are ok as long as they’re on your property (and we just followed the lines of the old fence so we knew it would be ok and well within our property line). Hope it helps!
xo,
s
Caroline @ The Feminist Housewife says
I have been dreading and putting off building our picket fence for our home, and it looks like an ass-load of work…but, I must say, wow, John, that work really paid off. Your fence makes SUCH a huge difference! Well done. = )
Lisa says
Not to suggest another project (sorry, John) but have you thought about putting pavers, concrete, or some other non-porous material under the bottom edge of the fence, to keep it away from direct contact with the soil and help prevent rot? Concrete curbing under wood privacy fences (even cedar or treated wood)is common where I live, both to make the fence last longer and to make mowing/edging easier!
YoungHouseLove says
We have some leftover brick from the walkway that used to be where we added the patio so it’s definitely a possibility!
xo,
s
Elin Glenn says
I’m not sure how, but the fence makes the patio look both more intimate and larger. Great work, John! Sherry, he’s a keeper, just like my sweet hubby, who doesn’t shy away from a to-do list either!
Tivisiana says
Love how the patio looked decorated for the beautiful bean’s party! Clara is such a doll and the party was great! Loving the new fence too!
Elisabeth says
Dear Sherry and John!
I love the new patio, the fence, the Clara- party – decoration and YHL, but the question is: Where is John´s charming orange “hat”??????? (I don´t know the translation for “Schirmmütze”!) Did you digg one über extra hole for it?
Greetings from Germany.
Elisabeth
Love your blog so much!
YoungHouseLove says
His poor orange hat (he actually has two of them) are so beat up that he has retired them for the most part (and got the new blue one you see here). I’ll have to make him break out the orange ones for old times sake for ya!
xo,
s
Torrie @ a place to share... says
Sherry was definitely right on this one. That fence makes a huge difference! My husband recently built a fence around our garden, and he (like you) surely let me know about the pain- when it came to the post digging part. And I, like Sherry sure did remind him of the *gain as it progressed =).
I just showed him the post level… LOVE that! That would have made it much easier for him! We’ll be sure to pick one up for the next fence project. I look forward to hearing about what you use to stain it with. We haven’t stained ours yet, but need to.
Tivisiana says
Wow, John, you’re awesome for accomplishing both of those big projects in sucha a short time! I love the look of the patio with the fence. It seems more “done” and finished. Kudos to you for putting the “nice” side of the fence out towards your neighbors too!
Kelly says
Wow, I had no idea this could be done so quickly and cheaply! I wish my husband would get on it! John, you’ve got skills!
Karena says
Wow I am amazed at how beautifully your projects always turn out. Can you move next door?!!!
xoxo
Karena
Art by Karena
Come and enter my New Giveaway from Serena & Lily! You will love it!
Amanda Wells says
Wow, John looks thrilled in that third picture! Great job, you guys are busy little bees for sure!
http://www.amandadovewells.com/?p=476
Ashley @ DesignBuildLove.co says
looks great! Privacy is so important! (PS- that level is awesome! Never seen one like that so definitely keeping it in mind in case we have some more fence rebuilding!)
Giulia says
OMG, your timelines are insane! Our biggest problem when digging holes for our deck was that code requires us to dig 4ft down because of our cold winters! That get’s pretty challenging when you start hitting clay and rocks…the only consolation my hubby had was that he could use his concrete breaker on the rocks he found.
Melissa says
That looks really great! My neighbors are about to tear down an UGLY garage that is the scene stealer in our backyard – can’t wait to see the final result!
LYM says
Wow, Sherry really has the gift of persuasion or maybe she just has a really long white stick!
Great job on the fence! But I think John sore muscles need a little bit of massage therapy at the spa. Hint, hint Sherry:-)
Katie Thomas says
Wow- such a big difference- nice work!
heather says
Oh Man, the look on John’s face, while taking the panels out of the truck, say it all. Un.Im.Pressed.
In our house, “we’re” can mean my fiance, or me, or actually “we”. Normally it will be along the lines of “are we (points at fiance) working on the barn this weekend?”. Needless to say I’ve seen that look, and the “We (points at me) need to make sure I get a back massage tonight”.
April says
Sooo, can I rewrite this post and remove all of the references to it being anything but super easy, fun and sexy to put up a privacy fence so my husband will want to do it? Haha, great job at that fence work though, it looks fantastic!
YoungHouseLove says
Haha, yes. Just be sure to stress how much fun the hole digging portion is. I was loving every minute of it.
-John
Courtney says
I’ve been sending my husband all of your backyard DIY posts because we want to do the exact same thing in our yard (paver patio and fence). He seems to think we can do it no problem.
Do you think this is a task that two people with ZERO DIY experience could take on? We are using our vacation fund this year to do the yard so I want to make sure it’s done well.
YoungHouseLove says
Well we had no previous experience with pavers or fences before this project and we made it out alive! It definitely takes a lot of time and steps to make sure you’re doing it right (youtube videos are amazing), but there’s nothing too “expert” about the process of laying the patio or putting in a fence – anyone who knows the steps and goes slowly and steadily should be able to accomplish them! It did take us (well, mostly John) about 30 man hours to lay the patio (and probably about nine more hours to add the fence) so don’t get too upset with yourself if things take a while- it’s all worth it in the end!
xo,
s
Courtney says
Thanks for the vote of confidence! We have a whoooolle lot of fence to build (~ 200 ft!) so I’m nervous about the scope of the project.
PS. Your blog is a must read for me every day – keep up the great work.
Rachael says
You did such an amazing job. The fence looks amazing in that patio space. I am gonna show this to my husband and hope he will want to try to install a fence in our backyard. Thanks for the inspiration.
Jess says
Way to go!!
Do you guy’s have a video tour of your front and back yard space? I am trying to piece together all of your different yard pictures…Like where is your side ally in relation to your new patio??
YoungHouseLove says
We’d love to make a little video soon! We did write this post a few weeks back with lots of photos to try to get you oriented (the side ally is on the other side of the house from the patio).
xo,
s
Jess says
Thanks, I revisted that post. I love how big your yard is! I am very envious, I live in Los Angeles and I would give a an arm to have a great outdoor space like that…well maybe that is a bit of an exaggeration…
Jen A says
OK, I’m back, chuckling again that John’s last post was how to derect and erect a 27′ long 6′ tall fence solo in 12 minutes flat and Sherry’s last post was on how to make a pretty pink pinata. (John, she DID use a blowdryer though.)
The party looked awesome. Clara is blessed to have you both as parents. And Sherry … b-feeding outside … BONUS!
I heart YHL.
YoungHouseLove says
Haha- yup. I even used a “power tool” on that piñata (a hairdryer plugs in, am I right?). Haha. Somehow I think the next big project will be mine!
xo,
s