As several of you noticed in Monday’s party recap, our patio area boasted another feature on Saturday (beyond more balloons and little kids than you can count). Yep, there’s a new 6′ privacy fence going on back there. When did it get installed? In the sliver of days between completing the patio and hosting the party. But time was so tight that I didn’t get to blog about it until after the bean’s shindig (aka: today).

Here’s how it all went down up. Throughout my patio-ing, Sherry regularly reminded that me she wanted to beef up the fence situation between us and the neighbor before Clara’s birthday party. Her goal was to prevent this big blue car that was always parked next door from becoming the backdrop to all of our party photos.
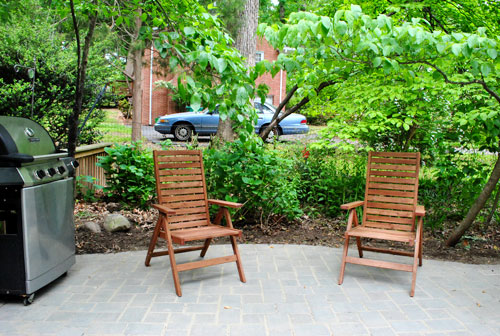
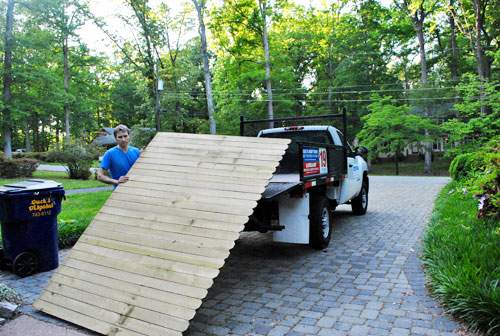
Though I agreed with her motive, my patio-ravaged muscles didn’t appreciate her timing and my mouth decided to say things like “you’re crazy,” “no way!” and “are you kidding me???” (yes, I’m a bit of a grump when sore, tired, and stressed). So for those wondering what the heck we argue over, getting to this whole fence project was one of those things that we didn’t exactly see eye to eye on. Of course Sherry got her way in the end though. When the patio project wrapped up with three days to spare, I begrudgingly rented a Lowe’s truck on Tuesday night and hauled home my supplies which amounted to four 8ft-long-and-6ft-tall fence panels, five 8ft-tall fence posts, and some other miscellaneous items.
The plan was to replace the current fence – a 4ft-ish wire mesh fence held up by a combo of wood posts and a single steel rod – with something taller (6 feet, to be exact) and, of course, less see-through.
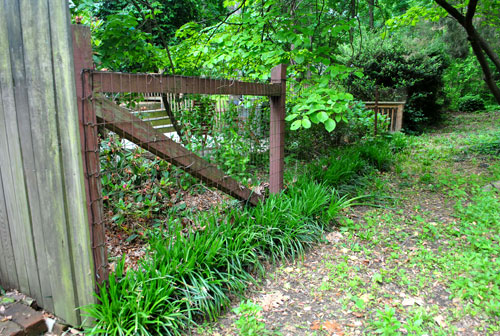
First, that old fence had to come down. Luckily my wire cutters were sharp and both the wood and that steel post were pretty rotted, so I was able to strip them out quickly:
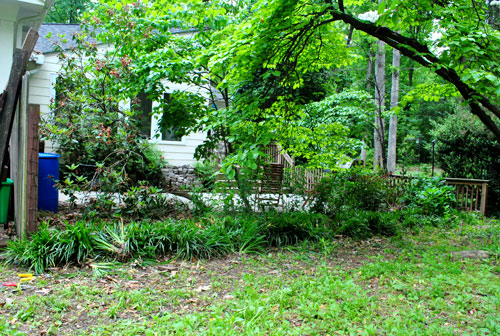
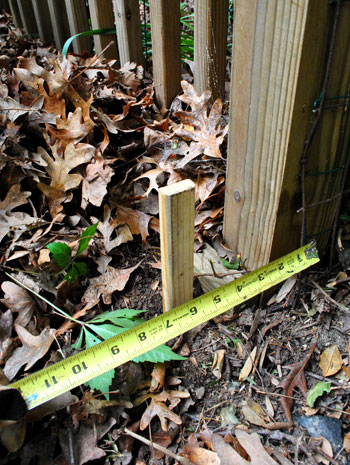
Next up was measuring and marking the spots for my posts. Using these ever-helpful Lowe’s videos that I keep finding on youtube, I knew placing my posts accurately would be extremely important (they’ve gotta be exactly 8 feet apart, or else my pre-made panels wouldn’t line up right). So first I roughly marked all of my holes with wood stakes, so that before I dug each of the holes I could triple-check my measurements (and then check them again before placing my post).
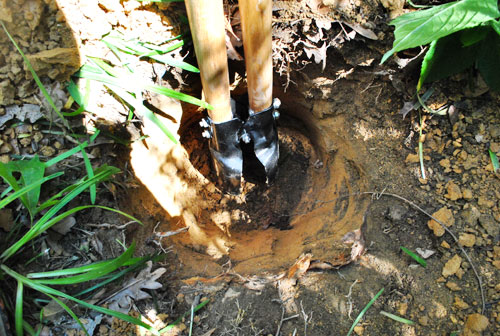
Next was the sucky part: digging. I had myself a hole digger and all, but it still made my already-sore body even more miserable. And you better believe I let Sherry know it. I’m that kind of hubby when she gets her way. Anyway, I had heard from a few folks that I should set my post 24 inches deep. But as I approached about 20 inches, the thick clay earth officially had me beat (and had me thinking weird things like “how do all of those sorority girls in horror movies manage to dig graves to hide bodies?”). So I cheated a smidge and just power-sawed my posts a few inches shorter so they’d stick no more than 6 feet out of the ground. Post-hole-depth purists, feel free to wag your fingers at me (thankfully in the end everything is still extremely solid and those last few inches of depth didn’t seem to compromise a thing thanks to our dense clay soil and my next step which involves concrete).
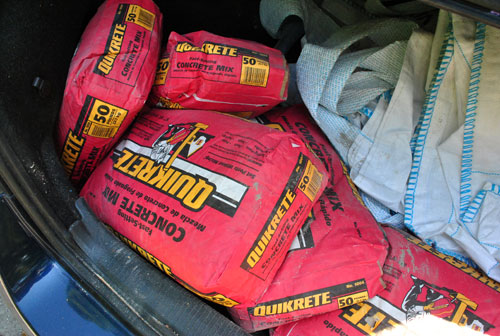
My post holes got an inch or two of gravel on the bottom (supposedly for drainage), followed by my post which was then surrounded by a couple of bags of Quikrete (the no-mix stuff that sets when you just-add-water). Oh and here’s a tip about that stuff. Obviously you don’t want it to get rained on in the bags before you use it (or it’ll set into giant rectangles of useless concrete). So I kept it in the trunk since I worried that our carport was still too moist/clammy for it and I knew it would be rain-free in there. It actually stormed in the 24 hours between getting it home and using it so I was definitely glad that I did the trunk thing.
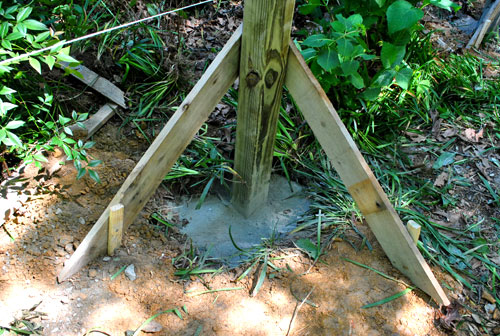
But back to my fence posts. I rigged up some makeshift supports out of scrap wood to keep the post from shifting, though I think the concrete (both dry and eventually wet) did most of the work.
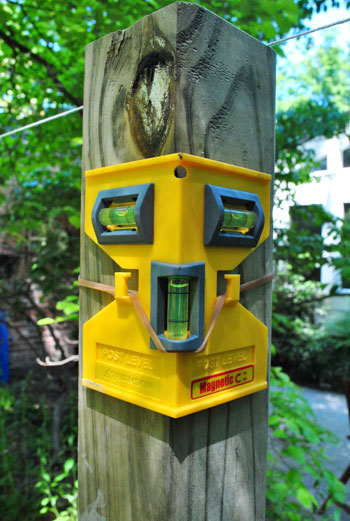
The true hero of the day was my post level, which is pretty much the only way I could ensure that each post wasn’t leaning too far forward, backward, or slanting to the side. So I highly recommend grabbing one of these babies if you’re ever tackling a fence project.
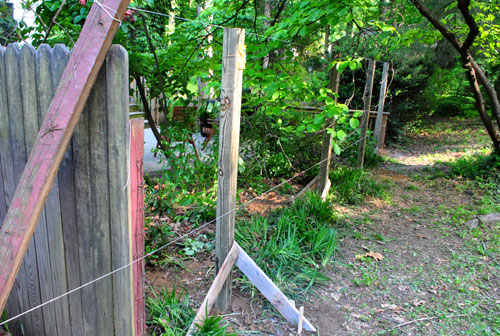
Second to the level were these couple of strings that I tied up – one to mark the front edge of my fence (to be sure that I’d set my posts in a straight line) and another to represent the top of my posts (to make sure everything was set at the same depth).
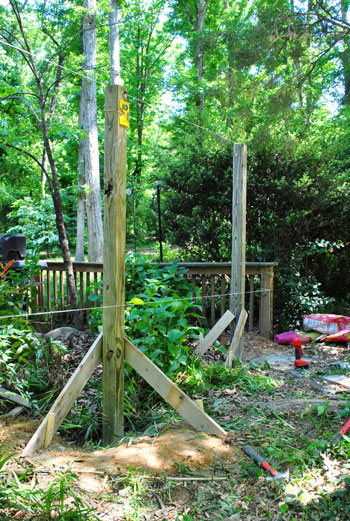
I won’t pretend it wasn’t a hard Wednesday afternoon, but eventually I did get all four posts placed (and realized that I didn’t need the fifth, thanks to one leftover from the old fence). And once all of my Quikrete was watered, dried, set, and covered with dirt, I decided to call it a day – just to be sure things were solid before putting any weight on them.
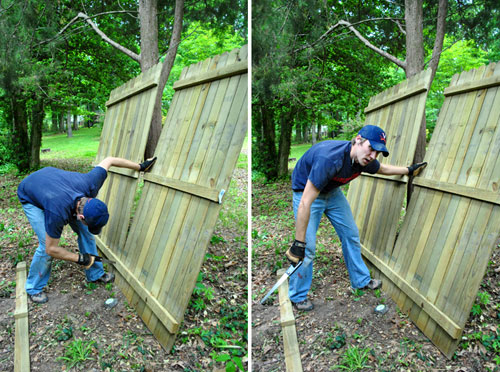
Thursday wasn’t all that complicated by comparison. Sure, the panels were a bit unwieldy but one by one I carried them into place and drove a few wood screws into them to keep them from going anywhere. I had to do a bit of digging and leveling to counteract the slight slope of the land, but – as you can see – I managed to keep a smile on my face. This is the point where Sherry stopped feeling as bad for me and starting saying things like “See how much of a difference it makes?!” and “Aren’t you glad we’re getting this done?!” and I had to admit I agreed with her. I hate when that happens. But some projects just feel pretty darn good in the home stretch and immediately make a dramatic difference – and this was definitely one of them.
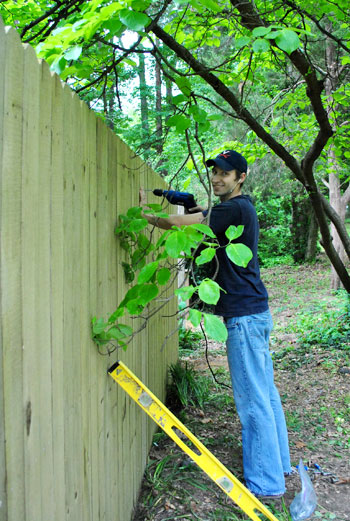
The stars must’ve aligned for me that day because, more importantly, my fence panels aligned PERFECTLY – including the one that I had to cut down to fit (the space was 27 feet long, so I needed three full 8-foot panels and about 3-feet of the fourth). Cutting them involved taking a handsaw to the three horizontal rails, which drained the last few ounces of energy I had left in me. This is my tired face:
But here’s what I was left with – a virtually seamless, twenty seven foot stretch of privacy-rich fencing… done just in time for me to focus on Clara’s party on Saturday (which was about 48 hours away at that point).
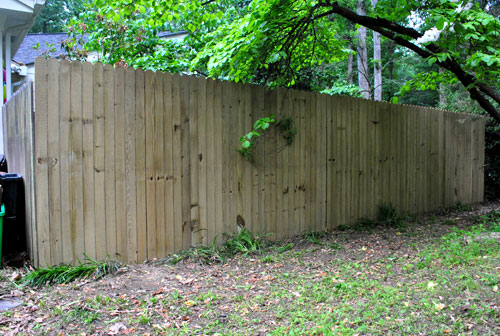
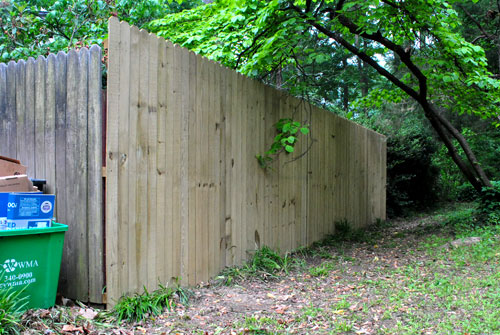
We’ll stain the fence eventually – along with the existing panel in front of it – so it looks a bit more finished. As you probably guessed, we chose this new fence style to match that existing panel that was behind our recycling bin (but wanted the full 6′ height to gain as much privacy as possible from nextdoor (since their land slants up so we needed all the height we could get). Someday we might upgrade the shorter existing panel in the front to match the height of the side panels, but for now it doesn’t look too noticeable since there are a ton of plantings right in front of that shorter panel that make it really hard to see from the street anyway.
Oh and do you see that tiny sliver of space where the fences meet? A small 1 x 1 x 6″ piece of wood should conceal it perfectly whenever we have a chance to grab it (did I mention time was tight thanks to the impending party?).
I’m notoriously bad at keeping receipts, so this is my best guess at a budget breakdown based on my credit card statement:
- Quikrete concrete mix (8 bags): $30
- Lowe’s truck rental: $19
- Fence panels (4) and posts (4): $171
- Post level: $5
- Hole digger: borrowed from my sister
- Screws, stakes, line level, rope and screws: already owned
- TOTAL: $225 (for a 27-foot long, 6-foot tall fence)*
* Our actual total was really more like $213 because we purchased all of the above at Lowe’s and used our Lowe’s card which gives you 5% off every purchase (just like a Target credit card). Woot.
** This post isn’t an ad for Lowe’s, we just happened to find their youtube video helpful and then bought our stuff there – but we’re not in cahoots with them or anything.
I know we may have been able to tackle this project for less if I built the fence slat by slat, but in light of the tight wife-imposed timeline (and my tired arse) those prebuilt panels were a lifesaver. And they weren’t even that costly, considering all the time and effort they saved ($39 for each 8 ft long by 6 ft tall panel). As for Clara’s party this weekend, the freshly installed fence did its job: no big blue car playing camera hog in the background.
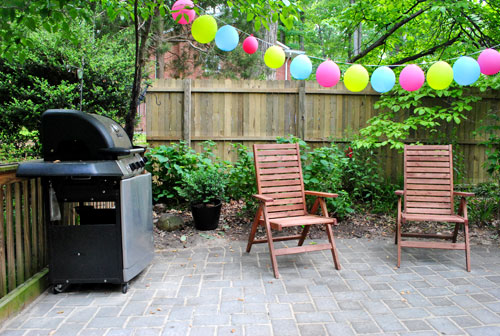
Ah, what a difference a fence can make:

As for me, my body has finally recovered from my two manual-labor-filled weeks. But that doesn’t mean I’m looking to take on any heavy lifting anytime soon. Sherry, I hope you’re reading this.

Christine B says
I can relate to your comment about the soriety girls digging graves, my hubs and I are STILL digging and working on a retaining wall to eventualy hold down our new asphalt driveway. Digging is so miserable and we only went a few feet in. I could never bury a body!
Josh says
Not going to sift through all of the comments to see if this has been mentioned, but definitely keep the remaining slats you cut off the fence panels! Having put up that fence from Lowe’s a few years ago, its definitely work the money, but you may have to replace a few individual pickets over time!
YoungHouseLove says
So good to know!
xo,
s
alison says
A new patio, a fence, and still able to write up a detailed post? Quite impressive.
melissa @ simplegatherings says
a privacy fence would make. my. life.
definitely on the top 5 to do list.
ps – our house if verrrrry similar to your first lil’ cottage!
Julie W says
What did people do before Youtube? It is probably one of the best DIY tools out there.
YoungHouseLove says
Amen.
xo,
s
Mandie says
THe fence looks great. How do you get him to work like this Sherry? WHat are your tricks?? :)
YoungHouseLove says
Lots of eye batting. Haha. And cheering and back massages. I think I just got lucky that the patio was done on Tuesday and John realized he’d never hear the end of it if the fence went up a week after the party but all of our photos had that blue car in the background. Haha.
xo,
s
Jenny says
So, Sherry, do you stain the fence? And are you just pushing these projects so John ends up looking like a football player or something, what with carrying around fence, stone, cement, etc.? :-)
YoungHouseLove says
Haha- we do have to stain the fence (or just clear-seal it) eventually- but you’re supposed to let them “acclimate” a while before doing that since they can expand and contract outside with the weather for a while, so waiting to do the staining/sealing can cut down on issues with cracking and peeling for a longer lasting result.
xo,
s
erica says
Wow! I’m tired for you just reading about all of the work you got done in such a short amount of time. I know Sherry knows she’s got a good man, but I think you win the “Husband of the Week” award on this one. Just painting our bathroom recently this medicine cabinet drama had my husband deferring some other house projects for a while.
kristine says
That is one freaking cool 3-sided kick-ass spirit level!
Dawn Levasseur says
Awesome job John! As I’m reading this, I’m calling my husband to come downstairs and see how you DIY’d the fence. By some freakish planing by our builders, our family room on the back of our house has french doors that look out to our neighbor’s front doors. Or should I say, “Our neighbors can walk into their front door and see right into our family room”. It’s like living in a fishbowl, especially at night! (and I don’t want to spoil the look of the french doors by putting curtains, blinds or shades on them. Anyway, my hubby still hasn’t descended the stairs, so I’m gonna drag him down. We need this fence YESTERDAY! Absolutely LOVE your blog.
p.s. Sherry, I saw on your “to do” list: Paint a giant canvas or two to add color to the walls of some of our undone rooms (the dining room, the office, the playroom, etc). I just bought a giant canvas to DIY some art in the aforementioned family room and can’t wait to see (copy) what you do.
karen says
bahaha!! i noticed the look on John’s face in the third pic! Not too excited about it!
Amber says
whoa!! what an improvement!! oh the things our husbands do for us :) :)
kim m says
Gotta say, I love Johns face when he is standing at the truck unloading the fence panel. Raw emotion! Great job by the way!
Katie says
So I just wanted to say that I love you guys. Not only for your wonderfully written posts and adorable kid, but for the fact that you guys seem to love Target as much as I do. I’m a college kid who has at least 2 jobs at all times — Target being one of them! I have worked there for almost a year now and it hasn’t killed my complete love of all things Target. So seeing your little reference to the 5% Target credit card discount made me smile in my heart. :)
Melissa says
Hi, guys! The fence looks awesome but I have always been intrigued by the fact that some people put the pretty side of the fence to their neighbors instead of themselves. I understand if it is facing the street or front of your house but isn’t this on the side of your house? Am I just being selfish by giving myself the finished side of the fence? Are you guys really just that nice? I feel so inadequate! ;o)
YoungHouseLove says
Haha, you can scroll back to the first page of comments for that info. Hope it helps!
xo,
s
Liz says
I personally like the “ugly side” in. It has more character than the finished side! Great job guys!
Nicky H says
John, YOU ROCK! What an awesome husband & father! (even with the whining. ;) ) When you show the two pictures- of the car vs the fence, it makes a HUGE difference!
EB says
Love it! That fence makes a huge difference!
Question though – don’t you need permits from the city to put in patios and fences? Is this a silly question?
YoungHouseLove says
Here you need permits for fences over 8 feet tall (since ours is 6′ we were good to go).
xo,
s
Jackie says
Trying to figure out why you left that big tree or branch dangling over the fence ?.? Just had a falling tree take out a section of our privacy fence
YoungHouseLove says
We like the leafy lushness that it adds and it’s a very solid strong branch so we’re not too worried about it. If we ever get nervous we’ll just cut it though.
xo,
s
Rach says
I am so jealous that your fence went up so quickly. We got all the materials to build our fence in March and have been working on it ever since. Though technically we got delayed a month thanks to our neighbor having some property line issues. Anyway, last week we got the posts in, this week we got the rails up and hopefully soon all the pickets will be on. Also, the post leveler… that was definitely my best friend. I made sure the post was completely level while my husband poured in the concrete earning me the nickname “The Leveler”… hmm… probably funnier at the time than it is now. ;)
Kate says
The fence looks absolutely beautiful! Congratulations and job well done–it really did make quite a difference! Well done
Dwana says
Wow, it really looks great and adds so much. I’m glad you were able to get it done in time for the party. I need to work on my persuasive “nagging”! Great job, John! Both of you guys rock!
ginai says
John is sooooo cute sexy cute! and Sherry is gorgeous! it’s just not fair, yall are perfect! I love yall!!!
r8chel says
Looks great! The privacy fence really does make your patio much more cozy.
Amy says
Love the fence and so affordable. Doesn’t progress feel great?!
YoungHouseLove says
Yes! Although sometimes I worry we’ll finish this house in a year and then have nothing to blog about. Haha. Then I look at my loaded to-do list and realize I need to relax. There’s plenty more to tackle and it’s going to take us forever! Haha.
xo,
s
Heather says
I showed my Dad this before and after picture with not-so-subtle hints about the view into our neighbor’s backyard. I think I’m allowed to make requests after I performed a paver-stone rescue mission last summer.
Kudos for tackling these harder projects efficiently!
Felicity @ Our Little Beehive says
Oh my goodness, that wife of yours needs to buy you a sawzall for your birthday…father’s day…whatever the next closest holiday may be! :)
Anna says
I had to laugh as I was reading this post, especially when you mentioned “what do we fight about”. My husband and I just put up a similar fence (and by we I mean he and his buddy) and in the beginning all we did was argue how it should go up! In the end, the privacy fence in the back of our yard made a huge difference as well (we also had a wire fence tha was falling apart and could see back to the neighbors when they recently cut down all their shrubs). Good to know we aren’t the only couple fighting over fences!
ell.uu says
holy cow. I’m exhausted after reading your patio and fence posts. I don’t know how you do it. it does look a million times better, though. I hope you get to relax a bit soon, John,
Jane @ The Borrowed Abode says
S- I’d say you picked a winning husband.
J – If you keep working like this, you’re gonna need larger shirts for your larger muscles.
Ok, that sounded better in my head. But it’s supposed to be a joke. :)
YoungHouseLove says
Haha, I agree. John is one short step away from bodybuilder. Haha.
xo,
s
Rebecca @This Nest is Best says
Wow! We’re in the middle of updating our backyard and it’s so inspirational to see your projects and progress! Love it!
Erin says
Your fence looks amazing! My husband and I have been meaning to finish the sides of house with fence (connect to the neighbors fence) since we got our dog three years ago so he cannot run into the front yard. So, thank YOU for the step-by-step instructions as it gave us the moral boost that we can do this ourselves. We worked on it this weekend and I am proud to say our dog can go to the back yard unsupervised. Thanks!
YoungHouseLove says
So glad! Congrats!
xo,
s
SamiJ says
RE: Using Lowe’s Card to get 5% back, if you use your Discover card, you get 5% back and you for every $45 you can redeem for a $50 Lowe’s gift card (so extra savings)
YoungHouseLove says
Wow- never knew that!
xo,
s
Maggie says
Cannot believe what a great job you guys can do. I follow you blog almost every day. It brights my day. Keep doing what you are doing. I like it.
Alana says
I know this comment is late in the game but thought I’d shoot one over in the off chance that you still check these out…
On the post-holes that you didn’t dig to the complete depth and you cut off with a power saw…did you cut before or after the posts were installed. I see some tutorials that suggest cutting after to make sure all is in line which scares me a little. If I mess up and everything is cemented…big whoops. Was it hard to get all posts to an even height?
YoungHouseLove says
I did all the cutting before for the same reason you mentioned. It all worked out really well. Once I cut them I just made adjustments by digging my hole deeper or shallower before adding cement. Hope it helps!
-John
Alana says
Thanks for the comment! I’m thinking that seems like the safest bet.
My bf and I dug 10 holes over two days this past weekend, we have 35 more to go. NUTS! I live right outside of Ohio and they recommend digging 3 feet deep because of all the snow/ice we receive every year. We rented an auger…an adventure all in its own! It doesn’t make the job any easier, it took two of us to keep it from throwing our bodies to the neighbors yard, and anytime you hit a rock/root, etc. the blade would get stuck. Anyway, thanks again for the tip and tutorial!
YoungHouseLove says
Woah- that’s a huge job! Good luck with everything!
xo,
s