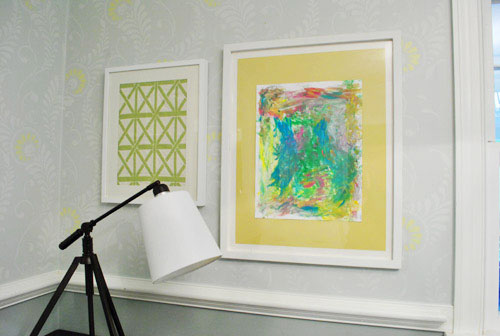
This art wall makes us so happy – and we didn’t overthink it (to the point of what-should-we-frame paralysis – which can happen if we’re not careful). Although we did talk about a few other options and eliminate them based on certain factors, such as: one giant piece of art on each side of the window = too symmetrical for our taste, and too repetitive with the big rectangular window in the middle (so it would look like three big boxes) open shelving = too much shelving since there are two walls of it thanks to the dining room built-ins (it would be shelving with more shelving beyond it) mirrors = too much, since we
It’s baaaack…
Yup, Katie B (and Will & Jeremy) drove up to VA to pay us a visit this past weekend. Sneaky little Bowers. And among other things, we posed in the yard holding big white signs. You know, the usual. We’ll share more what-we-did details a little later in the week, but for now we’re here to issue the second ever Pinterest Challenge (it’s not actually sponsored or endorsed by Pinterest – we’re just obsessed fans). My Pinterest addiction runs deep (as you know from this heartfelt post of yore), so a few months back when Katie called me to say that she thought we should challenge ourselves to make one thing each season that’s inspired
A Bathroom Makeover With Dark Gray Tile
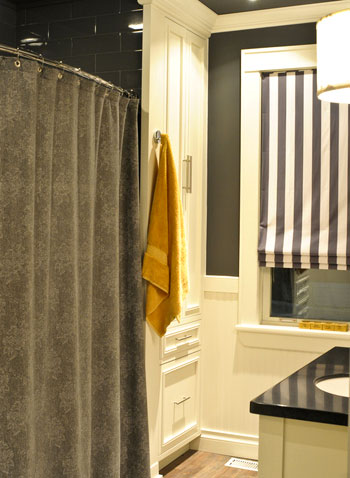
This latest before & after comes from one of our neighbors to the north, Kahley from Ontario, Canada. She and her husband Steve revamped their home’s only bathroom. And in the process proved that going dark and sophisticated can still be bright and airy. Here’s her letter: We are a young family of four – me, my husband, and our kids Noah (4) and Lexie (2). The only bathroom in our house dated back the 1950’s, so it was HIGH TIME to reno! Since it was our only bathroom, we wanted it to be insanely multi-purpose. We needed a tub AND shower, some closet space, a dirty laundry area, lots of concealed storage, etc etc
Digging Up A Dated Row Of Bushes
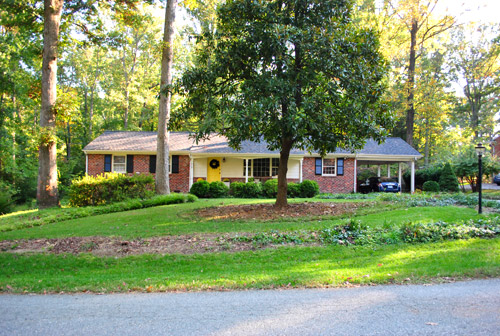
We did it! Over the course of two nice long Clara naps (and with a little help from a friend) we managed to open up our front yard in what we like to call “Phase Two Of Ten Million” when it comes to slowly transforming our front yard. Why so many phases? Well it started out looking like this: Much like our first house’s yard, we figure it’ll take a few years of tweaks to get it where we want it, so this phase was just about clearing things out for a you-can-actually-see-the-house-now effect (Phase One was limbing up the magnolia). In short: we dug up/transplanted/removed a ton of bushes (with the help of a
Fab Freebie: Cameo Appearance
***This giveaway is no longer accepting entries – see who won below!*** Random.org cut its way through over 6,000 entries and picked our winner as… Stephanie (who would love to have a few hundred laughs with Zach Galifianakis). Congrats! I believe it was the renowned Dave Coulier who once immortalized the words “cut it out” on Full House… but I don’t quite think Uncle Joey had a clue what potential those words could hold when it came to the Silhouette CAMEO digital cutter. You guys may have seen Silhouette cutters mentioned around the blogosphere before (our friends Jessica at How About Orange and Nicole at Making It Lovely did some cool projects with theirs). Now
Our Kitchen Renovation To Do List
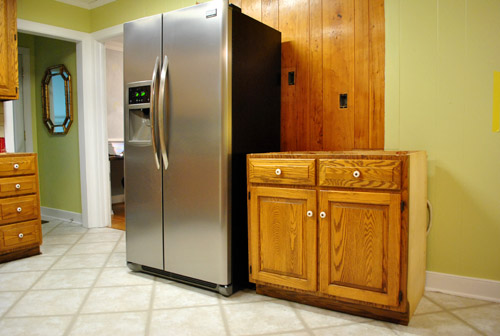
We’re back with a quick kitchen update since we promised to share every step of the process, just like we did 4+ years ago with our first kitchen makeover (which ended up taking 113 days from start to finish). So the latest news is that the electricians came by as we mentioned last week. We’re definitely DIYers who aren’t afraid to paint or demo or drywall or build furniture (we’ve even dabbled in a little bit of plumbing) but we’re happy to call in the pros when it comes to risky things like electrical work in an older home that could lead to something major (aka: a house fire). So we hired a two-man electrician
Using A Display From The Gap As Home Art
A couple of weeks ago we were at the Gap and I spotted this on the wall. It’s a bicycle from Public Bikes that was disassembled and shot for this in-store display (thereby they’re not for sale). I thought they were pretty darn good looking. I’m more of a bike admirer than an actual bike rider (apologies to my cycling enthusiast father), so I feel like a bit of a poser saying this, but… I really want those posters to hang in our house. Not sure where, but somewhere. Here’s a better shot of one of the panels from the Public Bikes blog. I talked with the manager at my local Gap and they “made
A Blue And White DIY Kitchen Renovation
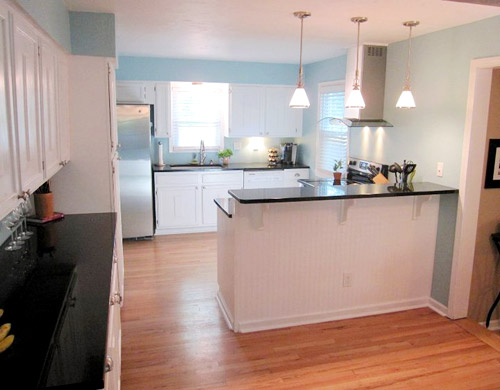
It’s no surprise that we’re in the mood for a good kitchen makeover these days. Okay, who are we kidding, we’re always in the mood for one. But Erin & Zach’s do-it-yourself remodel of their 1950’s kitchen is especially familiar (and inspiring since we’re just at the beginning of our current kitchen’s transformation). Here’s their letter: We wanted to share the redo of our 1951 kitchen (take note of the sweet before lamp and the heavy-duty ceiling beam disappearing act). We were so lucky to peel up the old laminate floor and the plywood to find original (albeit quite damaged) wood floors that extended into the middle of the kitchen. We found matching red oak
Four No-Cut Pumpkin Decorating Ideas For Kids
Since one-year-olds aren’t really “of age” when it comes to pumpkin carving, we’ve been trying to figure out a way to involve Clara in pumpkin decorating this year. And she deserved a promotion from last year’s job as hand model: So a few days ago we finally figured out a way for Clara’s hand to come in, um, handy again. But first – let’s introduce our subjects. We’ll call them Big Brother, Middle Child, and Little Piggy. On Monday night I broke out my favorite all-purpose medium (aka painter’s tape) and marked out a traditional jack-o-lantern stencil on Middle Child. Then with an exacto knife I cut out the pattern carefully (okay, not that carefully
Rehanging Cabinets And Removing Granite Counters
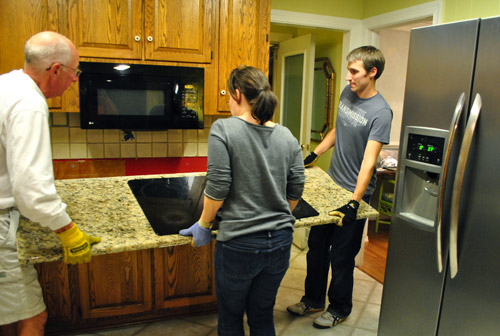
When our saga last left off, our heroes were being shuffled around the kitchen. That is, if a refrigerator and a pantry are your kind of hero. But before our new appliances arrived last week, we had to put the moves on a few more things. First in line? The cabinet that held the wall oven. You probably recall that we were ditching the wall oven because it was burnt on the front, bisque colored, and cooked things unevenly. We opted not to replace it with another wall oven because (1) wall ovens are expensive – usually 1K more than ranges, (2) our cabinet is unconventionally narrow – most modern wall ovens wouldn’t even fit,
Why We Chose Penny Tile For Our Kitchen Backsplash
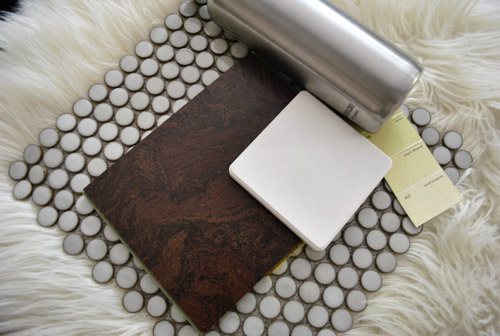
We did it. Since this morning’s post we made one more trip out to the tile store and finally made a tile decision (we ordered over 50 square feet of it to do the entire wall above the stove where we’ll add open shelves and a vent hood as mentioned here). Our process was visiting a bunch of small local shops and big box stores just to see what was out there. And we had the most luck finding stuff that we loved at a local tile store (The Tile Shop). The only problem was that many of their gorgeous offerings were nearly $20 a square foot, which can work if you’re doing a standard
Planning A Kitchen Wall Full Of Tile And Open Shelves
We’ve mentioned having a backsplash + open shelving + range hood idea a few times without much elaboration, so here’s the full monty explanation: we basically want to create a counter to ceiling accent wall of backsplash tile with open shelves and a range hood going on. This Sarah Richardson kitchen is especially appealing to us when it comes to the tile choice (we love white subway tile, but we’re thinking we might do something a little less white since our cabinets will be going white and we don’t want to completely whitewash the whole room). Now I will read your mind in a move I like to call “David Blaine-ing” you. You are thinking
- « Previous Page
- 1
- …
- 126
- 127
- 128
- 129
- 130
- …
- 240
- Next Page »
