***This giveaway is no longer accepting entries – see who won below!*** Random.org had a tough job of sifting through nearly 7,000 jewelry hungry ladies (and gentlemen!) but has selected two random winners as… Lisa S. (who, like many, always wears her wedding ring but never gets sick of it because her husband did a great job) and SJ (who also wears her wedding and engagement rings out everyday). Congrats! Sherry here. I don’t usually write the giveaway posts, but we’re making an exception since I was the one who twisted John’s arm into this week’s giveaway. Instead of our usual DIY & decor-related prizes, this week we’re giving away some body decor that was
Painting The Wall Under Our Chair Rail Gray Horse By Benjamin Moore
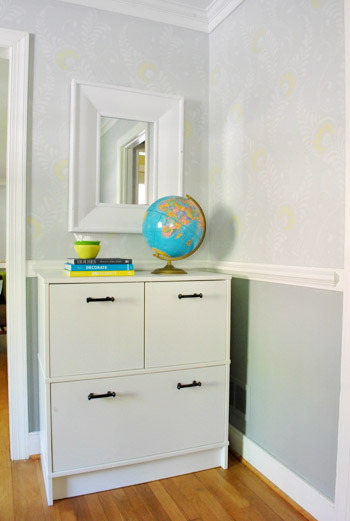
We finally got around to painting the area under the chair rail in the office a shade darker than the stenciled wall above it so it feels more balanced (as mentioned here). It was a little top heavy with the stencil going on above the chair rail and nada happening underneath, so I slid one square down on the Benjamin Moore paint swatch with the wall color on it (which is Moonshine by the way) and landed on Gray Horse (which we also had color matched to Olympic No-VOC paint in satin). Total spent: $10 for the quart of paint. Das it. Doesn’t it look more grounded now? Hence the title. You might notice that
A Porch Update: Adding Mums With Our Yellow Door
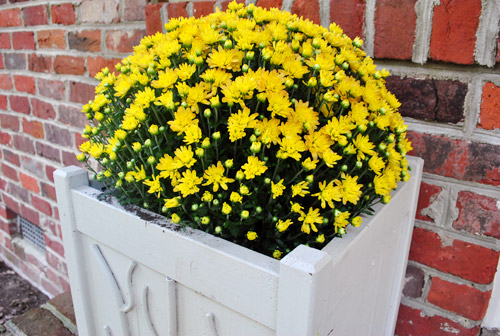
We’ve done it again! For the second year in a row, we managed to accidentally allow the bushes in our big wooden porch planters to die. Oh the shame. Chalk it up to a miscommunication. Sherry thought I was watering them. I thought she was. Clara didn’t have a clue who was watering what (or what watering even is) and all the while Burger was “watering” plants in the back. By the time we realized our folly it was too late (although Sherry desperately dumped five cups of water a day on them for the last few weeks to no avail). So I’d say we’re equally to blame for our plants getting a bit on
Reupholstering A Loveseat With Striped Fabric
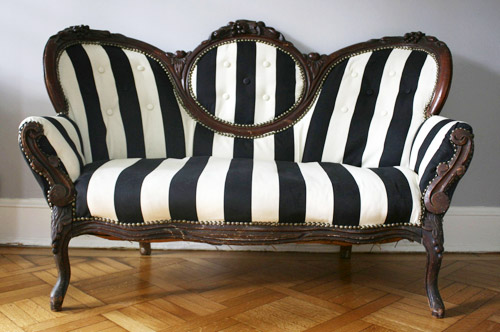
Having wrestled for an unnaturally long time with our own chair upholstery project (well, I was more a bystander while my wife played the role of the wrestler), we’re that much more impressed with Erin’s redo of her great aunt’s loveseat. Here’s her letter: A few months ago I set out to reupholster my great aunt’s old loveseat. I actually planned on hiring someone to reupholster it, as I have never done anything like this before (not even close!). But then I got to thinking “Why not try my hand at it first?” So Project Loveseat was born! It was definitely a challenge. And one that I just sort of winged. I couldn’t even write
DIY Halloween Decor With Spiders And Snakes
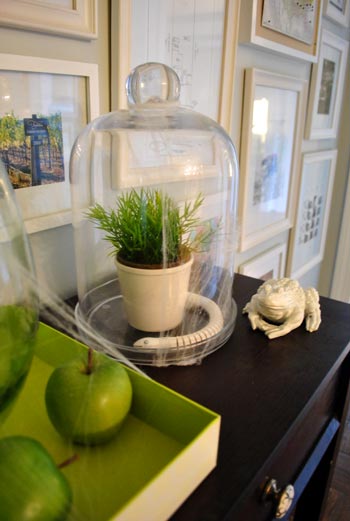
Clara likes little creatures (seriously, the girl thinks snakes and spiders are cute), and is currently in the midst of an apple/pumpkin obsession (which is very fall-appropriate). So we decided this year’s loose Halloween theme could be “nature” (said a la Will Ferrell as Robert Goulet on SNL). That way it encompasses things like pumpkins, gourds, and apples along with creepy things like spiders and black crows and snakes. But let’s go back to the beginning. I had some fun with Halloween stuff. First, I grabbed some $1.99 spiders and $2-3 snakes at Michael’s (the snakes were in the wood toy aisle and definitely not meant for Halloween but you know I’m weird…). When it
Shifting Cabinets And Appliances For A New Kitchen Layout
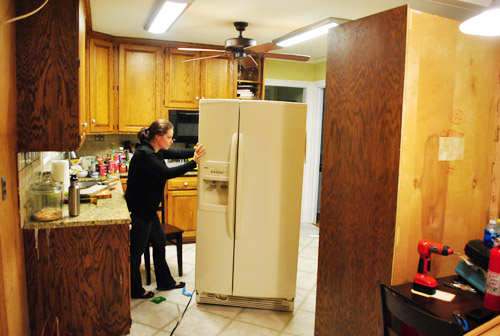
In Monday’s appliance post we mentioned a couple switches (like wall oven out, stove in) but that was just the beginning. And then yesterday we shared that we were contemplating a new spot for the fridge. Well, it has all been settled. And we’re excited about it. But before I lay out the new layout for you, let’s talk demo again. This past weekend we found ourselves poised to purchase a slightly smaller yet not counter-depth fridge at the Sears Outlet (aka Scratch & Dent) – which was basically short and narrow enough to fit into the existing fridge spot but a bit deeper (so it actually would have stuck out into the room more
A Beautiful Outdoor Makeover
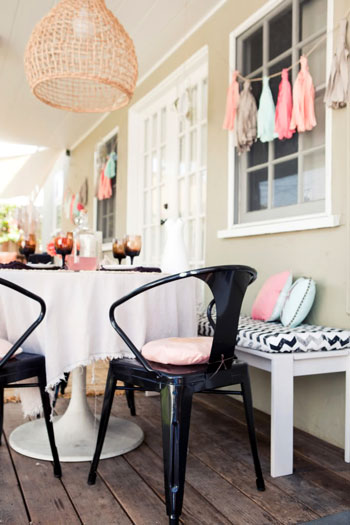
Remember when we house crashed Jaime’s colorful and cozy home last June (more on that here)? Well, she redid her back deck and sweetly sent the eye candy our way. And we were instantly in love. It’s so welcoming and full of awesome DIY inspiration. What do I mean by DIY inspiration? Let’s look a little closer at the daybed under that sweet breezy canopy (that Jaime made here). When you get even closer you’ll notice that the daybed… … is actually made from pallets! Check out a full tutorial on how Jaime built it (all by herself) here. And just look at this cozy eating area. I love the mix of smooth and natural
Removing Cabinets For A Kitchen Reno
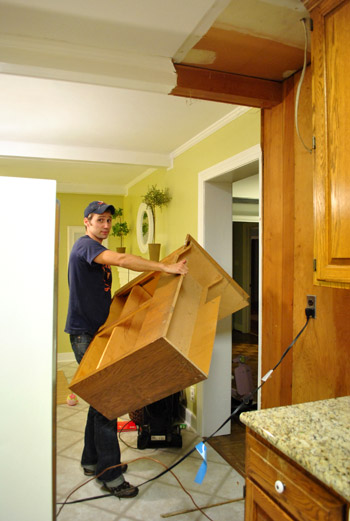
We knew pretty early on in our appliance shopping that we’d need an oddly tiny fridge to fit into the existing fridge hole that we had going on in our kitchen (yes, fridge hole is a technical term). And after some searching we realized we were probably more likely to discover the Loch Ness Monster than a perfectly sized fridge (preferably in stainless with side by side doors, since we loved that so much in our first kitchen – but we were flexible). So we slowly came around to the idea of removing the built-in box around the fridge to free things up a lot more when it came to dimensions. That way we could
Fab Freebie: Ideas For Ikea
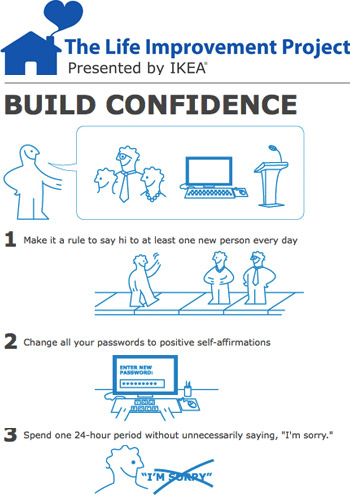
***This giveaway is no longer accepting entries – see who won below!*** Random.org has selected the two random folks who are about to get $100 to IKEA. And they are… Jennifer (who improves lives by teaching and will also be adopting a child from Ethiopia) and Ashley (who says needs some improvement for herself). Congrats! If you take one thing away from this post, it should be this: two people are winning $100 gift cards to IKEA this week. Woot! But if you have room for a second thing, know that it’s because Ikea is hosting their second annual Life Improvement Project that, among other things (like hilariously helpful “instructions” for living a better life)
How We Saved Money On Our Kitchen Appliances (63% off!)
We bought nearly $3,800 worth of kitchen appliances this weekend. But if you know anything about us, you know we love a deal. So here’s how we managed to shave off about $1,400 from that total (we ended up paying 63% of their original cost). Yee haw! Before I dive into the heavy math, let’s cover some basic questions first. Why new appliances? We’ll make this one multiple choice: A: We prefer stainless steel over the current bisque / black mix we’ve got going on. B: The wall oven has a big burn mark up the front of it and cooks/burns things unevenly. C: Our refrigerator is slowly dying (the ice maker doesn’t work and
A Quick Trip To The Carolinas
Last weekend my cousin got married in Brevard, North Carolina. Translation: weekend road trip! Okay, so it wasn’t on the scale of our road trip to Texas for my cousin’s wedding two years ago (different cousin, btw – I’ve got lots of ’em) but it was still a good time. Brevard is in southwestern NC somewhere between Asheville and the South Carolina border (so close actually, the rehearsal dinner was in SC). It’s about a seven hour drive from Richmond, though we broke up our ride with a stop in Charlotte to see our pals Matt and Kristin. The wedding was obviously the highlight of the trip (you can see some pics over on Young
Stenciling A Wall In The Dining Room
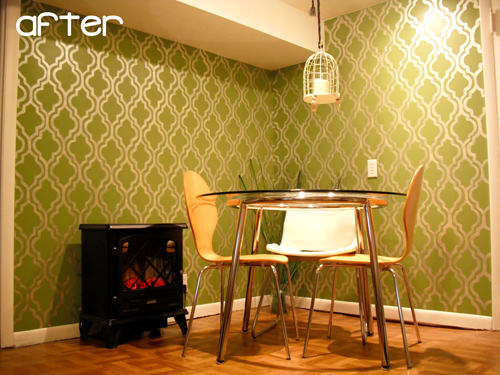
Coming off of the heels of our own adventures in stencil land, we just had to share this note from Ginny who stenciled her dining nook earlier this year. Methinks she had a clawed hand of her own going on after she finished (just like my lady wife). Here’s what Ginny had to say about her dining area makeover: I wanted to create a dining corner in my living room. Well, although I bought my table, finally got the chairs I wanted, and tried to dress it up, it still didn’t feel like a dining room to me. It was just this table in the corner of the room. Then it hit me like a
- « Previous Page
- 1
- …
- 127
- 128
- 129
- 130
- 131
- …
- 240
- Next Page »
