And now, for the dang paneling update. Hold on to your hats ladies and gents. This post = wild ride.
As you probably know, we’re no strangers to priming and painting paneling. Sure we could remove the paneling, but it would mean removing and rehanging all the cabinets since they’re hung in front of it – and revealing goodness knows how many scary issues behind it (they’re old plaster walls so that just felt like a big ol’ can o’ worms). And we could attempt to drywall over it (but it would mean drywalling around the existing cabinets and a lot more expense/trouble than just painting it). So we decided early on that we’d once again say yes to painted paneling – just like we did in our former den (which ended up being our favorite room in the house) when it (slowly over the course of 4.5 years) went from this…
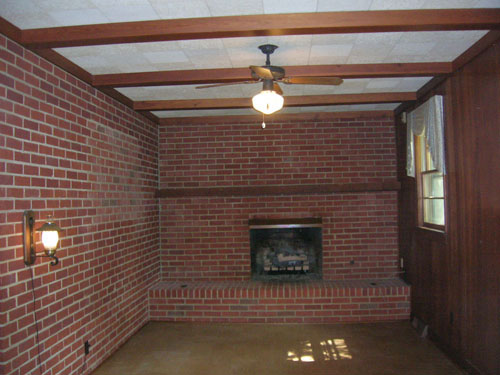
… to this:
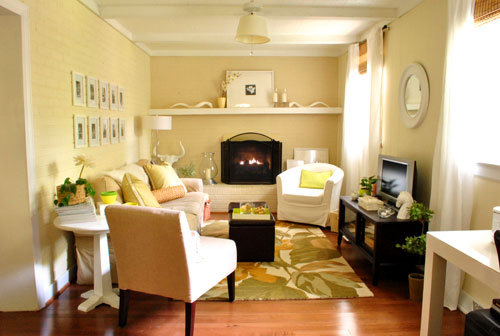
We never regretted the whole painted paneling choice – I guess it’s just like painted brick to us (we don’t mind the grooves that remain after it’s painted since they just add charming and subtle texture). But folks have caulked or puttied those grooves to hide ’em, so you can always do that (or rip it the heck out) if it’s not your thing.
But this time there was a slight variation to the painted paneling process since the last time we tackled it. That variation: the time that it took to get ‘er done. Last time it took us an afternoon (more on that here). So we went into this whole priming and painting thing with high hopes that it would be a quick little project. Yessiree, an afternoon spent completing the paneling would have been awesome (as would seeing a unicorn on our front lawn or finding out that Burger laid golden eggs). Spoiler alert: that didn’t happen.
The time difference was all because we decided to attempt to prime and paint our paneling the no slash low VOC way this time. Just because we like the idea of avoiding as many harmful fumes as we can since we work so regularly with paint and caulk and primer (especially now that we have a baby around). We knew this choice wasn’t a short cut. Heck, it would crack our margin for error right open (since oil-based stainblocking primer is the only professionally recommended way to guard against nasty yellow-orange wood-bleed, which can ooze through as you prime and paint). But we thought it was a risk worth taking in the name of family health. And it was in the end… it just took a while to get there. So here’s how it all went down.
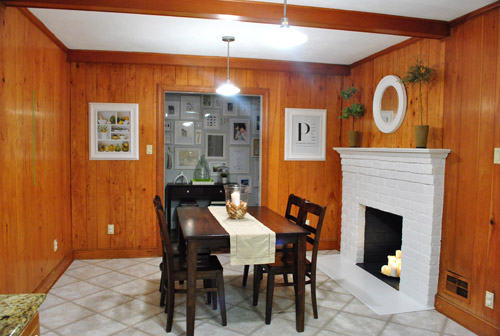
First, here’s what our kitchen looked like before we embarked on our little priming adventure:
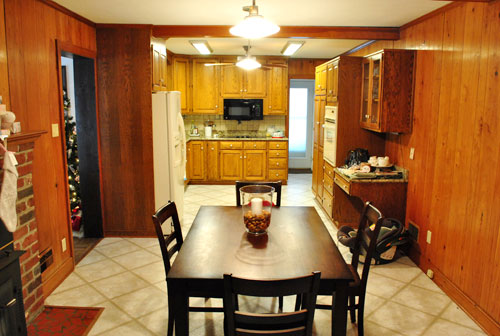
And here’s an old shot of the kitchen from the other direction just for reference (it was actually taken a while back, before we removed the wood stove and painted the fireplace):
Step 1: We wiped down the paneling, beams, and trim with a moist cloth. Some people use TSP for their wipe-down, but we didn’t (didn’t use it last time we painted the den paneling either – but it’s not a bad idea, especially if your paneling feels especially greasy). We also didn’t sand at all (didn’t last time either) but you can if your paneling is especially tough, splintery, or super glossy & shellacked.
Step 2: We removed the vent covers and outlet covers since we decided that we’d be replacing them all (they were bisque and we wanted fresh white).
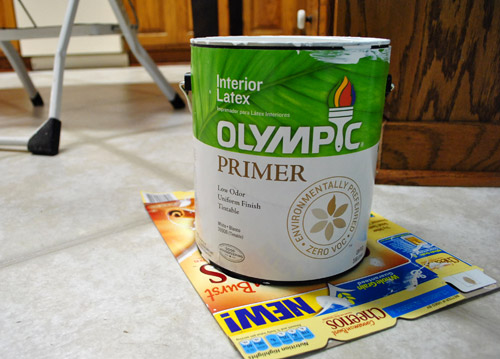
Step 3: We spent about three hours applying a coat of primer to the trim, beams, and paneled walls with Olympic No-VOC primer.
After our first coat it looked like this (about fifteen minutes in we knew we were in trouble):
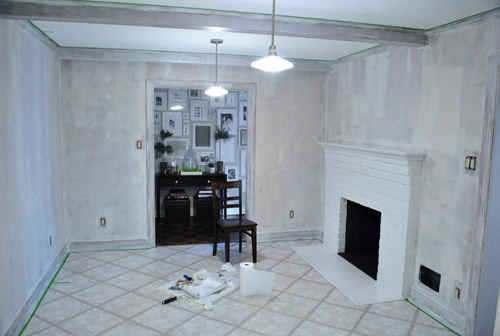
Primer never needs to be super consistent and perfect looking (it often looks uneven and rough but still totally does the job) but we experienced almost immediate bleed-through in a number of spots (when the orangey-brown stain of the wood seeps through the primer and threatens to ruin your paint job). Not good.
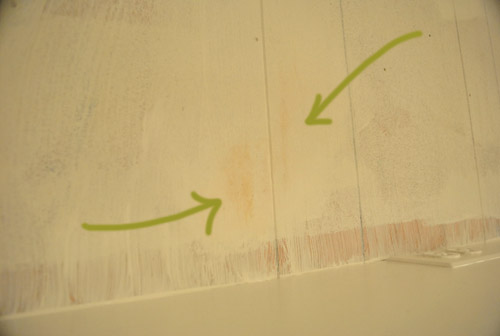
Step 4: We waited for that to dry a bit and tried a second coat of the same primer in certain obviously-bleeding spots, hoping it would block more nasty orange seepage. Nope. It did not.
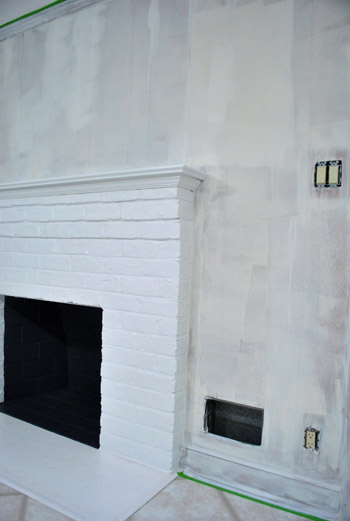
Step 5: We noticed that we had a can of Behr Primer + Paint (in white semi-gloss) in the basement from a previous project (which is low-VOC and nice and thick) so everything got a coat of that (yup, the trim, beams, and paneling got another full coat).
We still had bleed through. Not much, but in certain places it was definitely still there. And it was maddening.
Step 6: We went to Home Depot and found Kilz Clean Start No-VOC primer. It said “stainblocker” right on the label so we gave it a shot on everything (yup, another full coat of a third type of primer went up on the trim, beams, and walls).
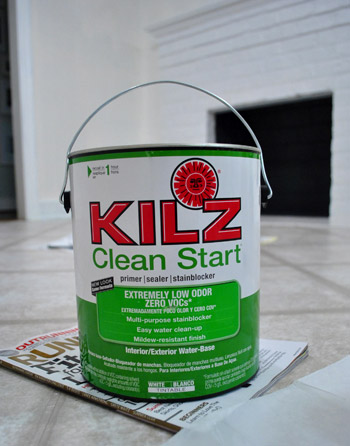
It worked. Angels sang and two white-haired Petersiks rejoiced in the privacy of their freshly primed (finally) kitchen.
Step 7: We painted just the trim and beams with our Behr Primer + Paint (in white semi-gloss) since leaving things primed but not painted for the long term can lead to a nasty and grungy hard-to-wipe-down mess (it’s a dust and dirt magnet since primer is intentionally sticky for paint adhesion). Happily the Behr stuff had great coverage over that last coat of Kilz and looked glossy and amazing. A sight for sore eyes (and arms).
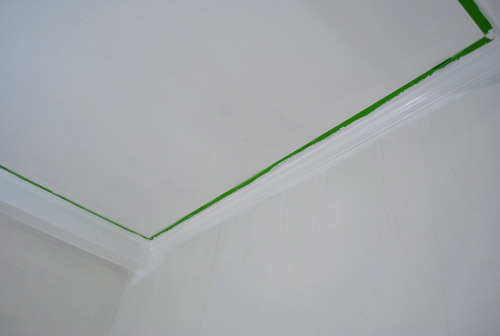
Step 8: We removed all the painter’s tape while the last coat of paint was still fresh for the cleanest lines possible (waiting for everything to dry can cause the paint to peel when you remove the tape). In cases when it was stuck to the primer/paint, we used an exacto knife to carefully slice it along the line of the tape so the primer/paint wouldn’t get pulled off with it.
We’re usually happy to avoid painters tape when we can (I rely a lot on this little miracle short handled brush instead) but since I’m short and I’m the resident cutter-inner/edger, I don’t have as much control up on a stool. So taping around the ceiling trim (and in this case tossing down a quick frame of tape around the baseboards) helped me go faster while I was happy to freehand around the door frames and fireplace.
About 48 hours after the beginning of our priming adventure, it finally looked like this. The trim looks whiter because it’s topped with that semi-gloss Behr paint and not just a flat finish white primer (which was more creamy and less snow-white-ish in color). Now we just have to paint those walls.
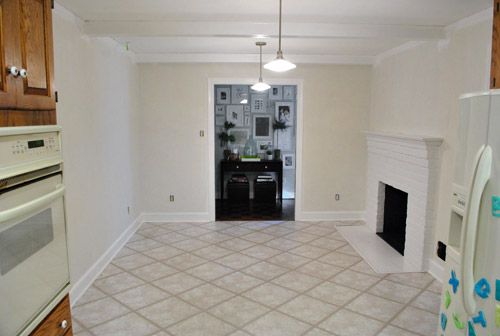
We’re not sure if the Kilz No-VOC primer worked because it was the best choice for the job or because it was layered with the other methods beneath it (perhaps on its own you’d need two or even three coats of it to get full bleed-blockage) but we definitely would recommend 2-3 coats of Kilz Clean Start No-VOC primer followed by two thin and even coats of latex paint if you’re planning to paint your paneling without messing with fumey VOCs. Fingers crossed that’ll work for ya. Otherwise one coat of oil-based stainblocking primer followed by two thin and even coats of latex paint should do the trick (find more step by step instructions on that method here).
It probably won’t take you an afternoon if you go low/no VOC (it took us two days with some babysitting help from John’s parents just to complete the priming stage). And we’re not gonna lie. It was not fun. But it was worth it as soon as we got through to the other side. You know, when we finally crossed that rainbow bridge from bleed-ville to clean-white-walls… hallelujah. It should be mentioned that in very rare cases bleed can come through weeks or even months later (which would make us want to stick paintbrushes in our eyes). Thankfully we painted the wood trim in the living room using the same no-VOC method (four coats of Olympic Premium Paint instead of with an oil-based stainblocking primer) five months ago and nothing has since seeped through. And because the baseboard and trim in the kitchen is the same exact wood, all signs point to: this should work. Of course we’ll tell you if something supremely annoying happens though.
So if somebody would be so kind as to do a nap-time dance for Clara, we’d really appreciate it. So far swinging her stuffed giraffe back and forth and saying “you are getting sleeeepy” isn’t quite doing the trick. Well it’s making us sleepy, but we’re not the target. Has anyone else tried to paint paneling without VOCs? Or been forced to apply four coats of paint or primer for any reason at all? Sucks right? Let’s commiserate.
Psst- Read more about the whole Phase 1 kitchen plan here.

Mel says
I haven’t painted paneling (we are planning to rip ours off and put up drywall, since we have the 70s below-the-chair rail almost wainscoting), but I did prime some old chairs we found in our shed. I used two coats of KILZ low-VOC water based primer. I didn’t sand or strip the chairs. The primer didn’t smell at all, and so far I haven’t had any bleed through. I am going to start painting them tonight (a super bright green)in hopes of making them less ugly.
What I do not like about it is that it is very hard to get off your skin. We have used Natura and Ben from BM and that washes off very easily, but the primer, even though it’s water-based, sticks on your skin! Hopefully I won’t get as much on me when I’m not crawling on the floor, contorting while I paint chairs. ;)
Tina says
I’m curious to read your experience with green. I’ve painted one wall and a bedroom green and both experiences were frustrating as hell. But you guys are much smarter and more patient than me. And you’re not trying to accomplish three day projects on one vacation day!
These pix don’t show the colors too well, but give you can idea. I think it’s the green + yellow combo that might cause the problem.
http://with-this-ring-i-thee-obsess.blogspot.com/2009/11/our-fireplace-project.html
http://with-this-ring-i-thee-obsess.blogspot.com/2010/03/indecision-2010-final-votes-been-cast.html
Keth says
My mother swears by Kilz. She moved into a house previously owned by chain-smokers, and everything – everything – had to be repainted. After experimenting with some other primers, she ended up using Kilz on everything to keep the tobacco tar from coming through the paint.
I used it when I repainted my old, dark kitchen cabinets, and it worked brilliantly.
Ashley P. says
I feel your back-breaking pain. This year for mothers day I gifted my mom the gift of painting her paneled living room. I was going to do it by myself, but thankfully my hubs helped while the grandparents babysat. We used the Olympic no voc primer and paint. All imported from the biggest town an hr away….they live in a small Arkansas town. I just picked up a gallon of each thinking that would be fine. After the first gallon of primer and some major bleedthrough, we managed to find another quart of Olympic no voc primer at their hardware store. We used every drop of primer and paint to cover the walls. The end results, however tiring, were well worth the 2.5 day process. And then we drove 6 hrs home with an 18 month old.
Jennifer says
It’s looking good you guys!!!! The inspiration kitchen looks great!! I haven’t seen anyone comment on the green parsons chairs in the background! Too funny!!
We are around the corner if you need a babysitter.
You guys have great spirits when it comes to looking back and laughing!!
corinne purnell says
WOW that sure makes a heck of a difference. Especially on the floor. That’s first time I even noticed the floor, looks great!
Adriane (aka the greenhorn) says
Hooray! It defintely sucks when a plan goes awry–no bueno. But you did amazing.
The two thrifted storage pieces pieces I refinished also were a pain (I had brushstrokes, peeling, bleeding, dirt attracting, husband/lawnmower bumping wet paint, and one accidental left-the-paint-can-lid-off-overnight debacle).
But when I finished it all it was soooo worth it!
…until I found a dried drippy run mark…that I thought I could just sand down and paint over in that spot…that ended up pulling up the paint and primer for about 6 inches in a really visible area. {falls on floor, raises paintbrush to sky and screams “Whyyyyyyyyyyyyyyyyyyyyyyyyyyyyy?!”}
Then I found a cute placemat to go right on top ;) Done and done.
Brandan WH says
You did great! We don’t have any such panelling in our house, but I can’t even get my husband to agree to painting our bedroom. Maybe if I show him this post and how difficult it COULD be, he’d be more apt to “just do it already”! I can’t wait until you’re done…it’s going to be fabulous!
Reenie says
What a diff a lil paint does ~ I can’t wait to see the flavor you picked :)
DanielleR says
Not to get off subject … but I just clicked on the ZGalleries link on your page, and I have been trying desperately to find curtains for our living room and frankly I think I just fell in love with some (after nixing about a zillion). BUT …I didn’t so much fall in love with the price, $50 per panel for the Mimosa panels in apple green. Ouch. Do you guys offer any coupon codes on your website? I feel like I might have seen them before but can’t find them, and I can’t find any online that aren’t already expired. Thanks :)
YoungHouseLove says
We share all of our sponsor’s coupon codes on the sidebar under the corny phrase “Discount O Rama” – but I don’t think we have a ZGallerie one going now. Sometimes they have site sales and other discount codes available though. Hope it helps!
xo,
s
Sarah says
My husband and I repainted our dining room, but first we had to remove the dark blue painted wallpaper. This came off without a problem, but the walls underneath were old plaster and not very nice looking. We thought primer would work (not even low VOC primer, but full on Kilz) Two coats of primer and three coats of a nice bright yellow still left the blue paint (apparently the pervious owners took off some of the wallpaper and painted the wall, but didn’t bother to remove all the wallpaper) and several patched holes and weird dark spots showing through.
We asked at Home Depot what we should try and the guy told us that yellow paint just sucks to work with and that we’d just have to keep putting coats on until it covered. We were standing in the pain aisle, when a woman whispered to me that she uses ceiling paint to cover and then paints over that because the ceiling paint is thick and sticks to anything. Well, two coats of Kilz ceiling paint and primer in one worked like a charm to cover everything…now if we could just get around to putting the coats of yellow up…
angel p. says
Ugh! I hate having to prime. I never get mine to cover in just 1 coat and besides I’m too impatient to wait for the good stuff to go up (the paint color). I love the inspiration color. Probably because it’s the color that we painted our daughter’s nursery. :O) I don’t remember which brand paint we went with but the color was “apple” and we got it at Lowe’s. It was so gorgeous on the walls and we got tons of compliments. Good luck on your next phase of painting!
Alex says
We painted our kitchen “Tea Light” by sherwin williams and love the color. Its a yellow with some green/gray tints. Very crisp and clean, but also soothing/pleasant feeling.
YoungHouseLove says
Thanks for the tip!
xo,
s
Jnbean says
It looks great, you guys have mad skills!! Painting can really be a bear sometimes, but is oh so rewarding!
Angie says
Wow! I know it was a lot of work but what an improvement you guys made! I am so impressed and wish you luck (and rested arms) before you tackle the walls.
Shreya says
It looks so much brighter! I love it – waiting with bated breath to see what color your finally end up with for the walls :)
Suzanne says
WoW! Looks so much bigger with the primer done. Love me a green kitchen…can’t wait to see how it all comes together!
Jenny says
I primed and painted our kitchen cabinets and paneling using Kilz latex primer (one coat) and Behr semi-gloss (2 coats) in “Cornhusk Green” and we love it. It’s been 3 years and there has been no bleed-through. So I wonder if oil-based primer is really necessary (or maybe I was just lucky–guess I’ll find out when I paint the paneling in the basement).
Mel says
Two years ago, when we bought our house, my brother offer to paint two rooms for us as a wedding gift (he paints for a living). Our kitchen was painted a glossy pea soup green. Yuck! We picked out the matte lemon twist from Sherwin Williams. He tried to convince us to buy a different color, maybe something not so bright. We wouldn’t budge on the color. My brother began his adventure of painting with a coat of primer, and then proceeding to apply five coats of lemon twist because the pea soup green kept popping through. His may have been a “little” upset with us.
Good luck with the painting.
becca says
ok, random question: the ceilings in your old den – what were they? and what did you do with them? our kitchen has something like that (from what I can tell in the pics) that we painted, but I’d like to move the light fixture and I’m concerned about patching the hole. any ideas/tips?
YoungHouseLove says
It was one of those soft foam-like ceiling tile dealies (for sound insulation I think). First we tested them for asbestos (none) and then we painted them over and over again to get them glossy white (they sucked up a lot of paint but in the end it was worth it).
xo,
s
Hope says
Love, love, love it! Great job, so refreshing!!!
Heather says
Gorgeous! That Kilz is sticky stuff. My Dad is a carpenter and swears by it.
mandy madison says
So far, I am loving this transformation. I wish you guys lived in Iowa…I would hire you to re-do my whole house! Love your work!
Allison says
I painted Behr Outback (a mustardy yellow with green undertones) in our family room last summer. In natural light it’s straight mustard, but in artificial light, the green comes out. (Sometimes I cringe, because it looks like a “What did that baby eat?!” diaper.) But I love it overall- There’s constant variety, so I don’t think I’ll get sick of it.
I’d recommend lots of swatches (or even test paint) in different places around your kitchen. And pay close attention in different lights. (I know you’re all over it! Can’t wait to see it.)
L says
Looks great, and I feel for your sore arms!
As a 70s relic who has worked on restoring some Victorian homes, I can’t help but grin inside, thinking about the young couple who might move in to your house in 50 years and proceed to blog about stripping all that white paint off brick and paneling to restore it to its former glory.
Aint fashion a giggle?
bridget b. says
Kilz is the only primer that I ever use to prime wood. Maybe I’m a sucker for their advertising, but they just seem to work the best to cover a multitude issues that come up when painting wood.
Glad to know that they have a low VOC version.
kathy says
Thanks for posting details about the no VOC paint brands you use. I used to use FreshAire no VOC paint exclusively and was disappointed when I recently learned that it is no longer being made. :-(
shannon says
Amazing! I’ve never painted paneling and hope to never get that pleasure either! I about fell out of my chair to discover that your inspiration kitchen has been hung in my kitchen cabinet for nearly a year as MY inspiration. Once our bathroom remodel is finished we’ll be looking to replacing our counters with black one!
Erika says
WOW! It already looks 100x better! Can’t wait to see it all finished!
sarah says
I cannnot wait to see the after!
I have a red wall in my kitchen (yes, I did it to myself) that will soon be taking a cooler tone. I’m guessing that will take a few coats, too.
Kaci says
It looks fantastic!!!! This is inspiring me to get on it already and prime my bathroom cabinets. Thanks for the tips.
Ladizzle says
What an amazing transformation! Totally worth all the effort! Cant wait so see it painted!
Angella says
It looks amazing already. It seems like the space doubled in size! Paint is almost magical. This is great inspiration. The house we’re looking to buy has a LOT of paneling. Every single room has a different style of paneling, I’ve never seen anything like it. Hideous, but so much potential. Can’t wait for the actual paint update!
Shelley says
Wow! What a project! (I think I would have been crying halfway through!) But the room already looks so much better! I agree with you about painting the paneling over ripping it out. I actually like the look of painted paneling over just plain, flat walls. It adds so much more character and texture. After all, it always looks great in the Pottery Barn catalogs!
Gina @ Running to the Kitchen says
That looks like one heck of a project! The first picture made my laugh though. It’s like an overexposed picture attacked your kitchen ;)
Katie says
Go $herdog, go J-Pete! (Does John have a nickname? I made one up, if not.) Looks FAB, can’t wait to see the end result (and I bet y’all can’t, either)!
YoungHouseLove says
Haha J-Pete is good. People call him JP sometimes. Or Bosco. Or Juan Two Three. Or Yohan. So many strange ones.
xo,
s
MaNell Hembree says
WOW! Don’t you just feel like you can breathe now?? Kudos to you both for your hard work. We all feel a little better about the kitchen now! I bet those knobs were even giving you an “atta girl, atta boy” wink. Enjoy the fruits of your labor :)
Denise says
Sherry,
In the den of your old house, it looks like ceiling tiles in the before picture. How did you make the ceiling look so even and smooth in the after picture. Is that the magic of paint, too? All the hard work in your new kitchen looks awesome!
YoungHouseLove says
Yup, just layers and layers of paint. It sucked up a lot but it was worth it!
xo,
s
Tiri says
… that’s what he said.
Tracy says
I have to get all gushy for a moment…you guys are soooooo awesome. It doesn’t even look like the same kitchen! I always thought your den transformation was AHHH-MAZING, and this one is no exception. Keep it up, this is why I keep coming back here every day – REAL solutions to design dilemmas that normal people (with budgets) have. Gorgeous, and I am IN LOVE with the inspiration kitchen. But I used green glass tile in my own kitchen reno, so maybe I’m partial.
Emily says
Looks great! I will say that once I used latex paint on a wood project (I painted a chair) and I HATED how it came out. Whenever I paint wood (trim, furniture, etc)I use an oil based paint. You just can’t beat how it self levels, and NEVER shows brush strokes. I know its bad for me, and th environment, but I can’t get around it.
Kate says
We are re-paining our kitchen cabinets white. They are primed and we tried a semi-gloss durability paint, but don’t really like the finished product. Do you have a recommendation on a type of paint we should use for kitchen cabinets? Not sure if we should use a more glossy paint or a duller white (not as bright of a white). Help!
Love your blog by the way. I tell everyone about it!
Thanks!
Kate
YoungHouseLove says
We have heard great things about Benjamin Moore’s Decorators White for cabinets. Not sure what we’ll do though. Hope it helps!
xo,
s
Karin K says
You guys deserve some applause for going through all this misery, just so the rest of us don’t have to. It has to feel so much better in there now! Such a difference! The green – er, grellow – is going to look great.
mariela says
I love it! Looks so good!! I have a question for you Sherry. My FI and I just bought a house (!) we close next week. He wants to paint right away before we move our stuff in. But I think we should wait until we get settled and we know what colors we want. What to do?
YoungHouseLove says
We like to wait and see what we like after moving in and getting settled, but it can work both ways for sure. In our first house we painted too quickly and pretty much repainted every single room in the end, so that made us gunshy about rushing into stuff.
xo,
s
Jen N says
I feel your pain! We moved in to our first house 2 months ago and it had lovely 70’s paneling in our huge den. We went the Kilz route, and the priming alone was exhausting – that stuff is messy! Then after 2 coats of paint and lots of touch ups, we were finally done! The entire den took us at least a week because we decide to replace all the baseboards and trim ourselves – yes, we’re crazy. But we are so happy with the results! Our room looks so much bigger and open.
Sara says
Wow, just priming made a huuuuge different. It looks so fresh and clean and bright! With the panelling, I had not noticed the hanging light fixtures, but now they really stand out and look great with the bright clean paint. I imagine you guys don’t get a lot of natural light in this room? But you will when you knock the wall out to the dining room I’m sure. Either way, it’s definitely much brighter and more cheery. I can’t wait to see it when you paint it green!
Shari @ Chicago Cuisine Critique says
The kitchen is going to look so great when it’s finished! I love that “grellow” color!
Mary says
Dear Jon and Sherry, we will take Clara for the rest if the week so you can finish the project. Love grandma and grandpa P. Ha! Looking good . It will all be worth it!
YoungHouseLove says
Haha, we wish. We’ll get ‘er done though. The worst is over. Wait, did I just jinx myself?
xo,
s
Ellen says
I cannot wait to see the green paint up as well, but I have a question about your outlets… I have the same problem that mine are all bisque or beige and I want them all white too. Are you going to have an electrican replace the switches and electrical outlets as well? If I just swap out the covers with white, I will have beige switches and outlets with white covers which would look strange. I was just wondering what people do to remedy the problem. Paint them ?
YoungHouseLove says
We switch those out too. It’s like switching out a light fixture. We just turn off the power and attach the wires (in whatever configuration the wires were attached before). Definitely consult a manual or google around for more info (or borrow a book from the library) but it’s something you can safely DIY with the right research beforehand.
xo,
s
Audra says
I just painted a paneled room in our house about a month ago. I used the Zinsser primer though, so no bleed through. I did decide not to prime the trim and the windows however. The base boards and molding did fine, but the windows took about 5 coats of off the shelf white no-VOC before they stopped bleeding through, so I feel your pain, and it’s such a gross looking color, bluchk! Hope you’re done with the hard part now and the rest goes smoothly for you.
Bryony says
Crazy! But it’s already looking better. About that whole commiseration thing…I’m painting this scary old storage chest/coffee table we “inherited” from the house my husband was sharing with friends just before we got married. 2-3 coats of primer later, I was definitely having fits about the stupid bleed through of the wood. (And only on the lid! The rest of the thing is fine…) I’m about 3 coats of glossy white paint into this job (hopefully no more!) and waiting to see what it looks like when it dries. (I wonder if trusting the paint lady about my water-based primer & paint was the *wrong* idea…)