I learned in grade school that trying to be perfect would probably result in a caffeine-pill-fueled freakout a la Jesse Spano (yes, many of my life lessons were learned thanks to Saved By The Bell). Pretty much since then I’ve been in the camp of try-to-do-it-right-but-perfect-isn’t-possible.
So sometimes it’s weird when people mention that they think we live in this perfect world where nothing goes wrong and we never fight and life is just hunky-dory from the minute we wake up to the minute we go to bed. Unicorns and rainbows if you will. I think sharing Clara’s birth story helped a little in that regard (that day was definitely not the fairytale that we expected). But beyond dealing with some serious and scary moments like that, we’re also no strangers to everyday stresses. In other words, just like the rest of the world, stuff doesn’t always go our way. We fight, our house gets messy, we go over budget, projects take way longer than we expected, our moving truck gets stuck in the snow. We like to joke that we’re so normal it’s crazy, so chances are if you deal with it at home (dust bunnies, burned dinners, stupid arguments, spilled milk, broken china ceramic animals) it also goes down here.
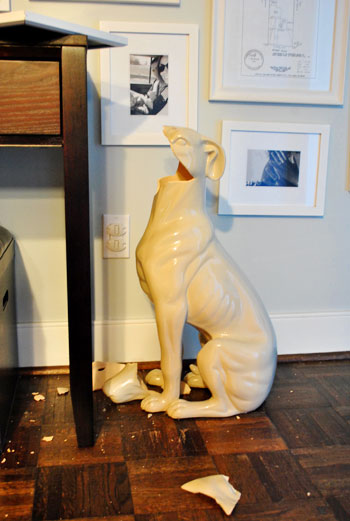
But since our blog is mainly just a big diary about our home improvement projects and making our house a home, it’s hardly fitting to devote a post to our latest argument about Clara’s missed nap or the dust bunny under our TV stand (this just in: dust happens, and if you don’t see it we’re just not zoomed in enough, haha). But when things don’t work out like we hoped in the home improvement realm we always try to share those trials right along with our triumphs (the good, the bad, and the ugly all have a place here). Like this post about a ton of mistakes that we hope we don’t make again and this post about a failed recycled glass project and this one about a bummer of a string lantern attempt. We’ve even posted a super candid average day video with junk all over the place and I’ve shared my goo-related secret. Our house is not a showroom, that’s for sure.
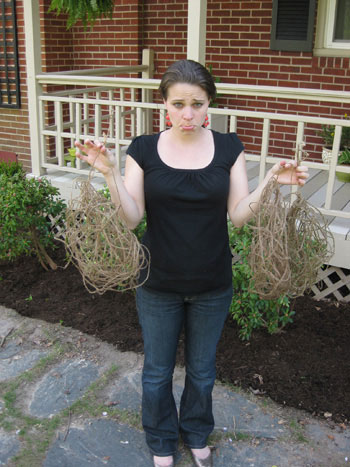
And although we pride ourselves on being cheap-os who hunt down deals, save our pennies, and research projects within an inch of their life as we go, we still totally break obliterate the budget from time to time. Take the patio we’re currently putting in, for example. Going into it I was intensely naive. “I’m certain it’s a two day under $500 project.” Famous last words, right? Originally we were going to go for those cheap 12 x 12″ gray concrete pavers at Lowe’s and Home Depot (I think they’re around $1 a pop) so I thought we’d just need to dig out a flat spot and lay ’em down. Maybe it would come to $450 tops with some ground tamping tools and all the pavers. Then we decided we should do it right and match the fancier cobblestone pavers in our driveway, which turned out to be around $2.67 a square foot at Home Depot…
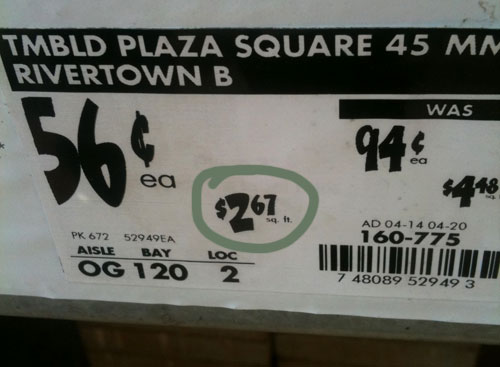
…and a whopping $3+ at Lowe’s. Our patio will be around 300 square feet, so $3 a square foot = $900 in just stone (let alone other supplies). We hoped that pricing out something local might save our budget and headed to a place nearby (Southside Builder’s Supply) and found out that they offered even higher quality cobblestone pavers than Home Depot and Lowe’s (that match our driveway and are made locally- score) for just $2 a square foot (67 cents cheaper than Orange and a dollar cheaper than Blue – which really adds up). Plus it was just fun to walk around their multi-stone sample patios to see what things would look like all laid out:
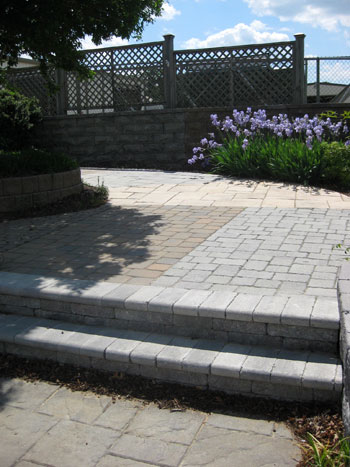
So after our local stone yard reconnaissance mission we felt pretty good about our deal seeking skillz and returned home to start digging up the side yard. And in a post about that I mentioned that the patio project would hopefully run us under 1K (I readjusted from my original $500 guess after realizing that cobblestone pavers to match our driveway would be pricier than the cheap $1 concrete square pavers that we originally planned to use). How did I get to 1K? Well, 300 square feet of stone at $2 a square foot = $600. And we figured that around $400 in gravel and sand and other materials and supplies should be about right.
More famous last words. But we’ll get to that.
First, we figured we’d do some digging before heading back over to the stone yard to place our order. Just to be sure we could get a nice level bed to place stones and not hit some unforseen craziness like a buried car or something that would make a non-returnable $600 purchase of cobblestone pavers a bad move. Remember that John had a little liriope digging party last week but we still had that brick path to remove? Well, at first it came up really easily…
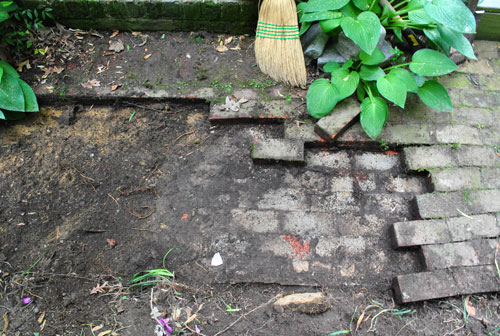
… until we learned that half of it was laid on top of a huge thick slab of concrete…
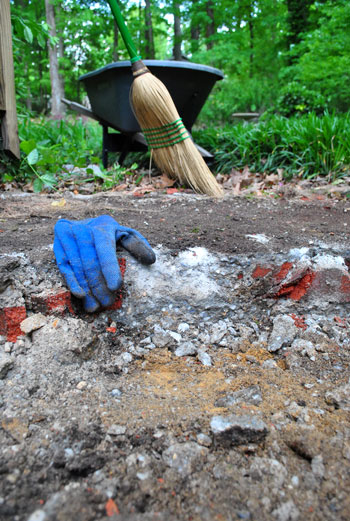
… which took some pretty major sledgehammering to get through (and effectively demonstrated how NOT a two day project this was, seeing as we were already on day two without a single paver in sight).
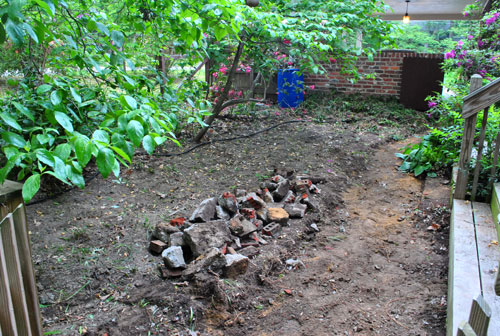
But lo and behold, John got ‘er done. Ding dong the path is out. It took longer than we guessed and hubs was more than a little sore but it was a pretty sweet victory indeed (we worried we’d have to rent a demolition hammer for the thick concrete slab but John was a rock star with the sledgehammer).
He’ll drop in with more details about the entire digging process soon, but back to our stone order. After all that brick was up, we headed back over to the stone yard to place our order and were blown away when they worked up a grand total for us. Are you ready? $1,565. I almost dropped the baby. How could $600 worth of stone nearly triple when it came to the total cost? After I got a little color back into my cheeks I managed to stammer “ok, what can we do to get that down, because it’s waaaaaay over our budget.” Notice I was the one doing the talking stammering – John hates negotiating so it falls into the things-I-do category. Oh well, he does laundry so it’s all good. Anyway, we worked with this lady Jeri (she was great) for at least an hour to get costs down (we reduced the amount of gravel we were getting, which then allowed all of our cargo to come in one truckload- which reduced the delivery fees we were being charged and we even negotiated a discount on the stone and downgraded from the fancy top layer of sand to regular sand).
In the end we got our total down substantially, but nowhere beneath our 1K goal. We walked out of there paying $1,260 for all of the stone, gravel, sand, border edging, and stakes that we needed (well actually $1,340 but we’ll get an $80 deposit back when we return some of the bags that our shipment comes in). But that total still doesn’t include the tamping tools, landscaping fabric, and a few other supplies we still have to purchase/rent. And you might remember that we mentioned wanting to add a 6′ privacy fence along the back wall, so if you toss that expense in on top of everything else it’s fair to say that this might end up being a $1,500-2K undertaking when it’s all said and done. Which is definitely a far cry from that original stupid-me $500 budget that I tossed out in the beginning. Oops.
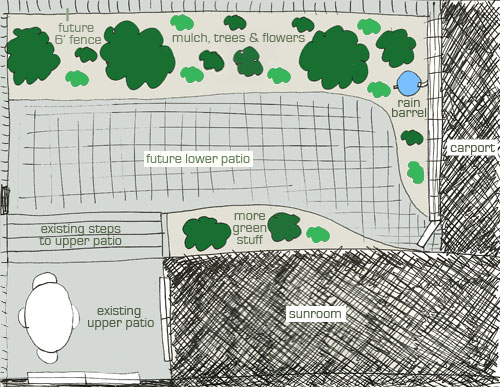
But there’s no use whining about it right? I mean don’t get me wrong, I whined the whole way home from that stone yard, even after we negotiated our total from nearly $1,600 to $1,260, but there’s no sense in blog-whining about it (although sometimes sew-crying can lead to blog-whining). But we did want to share our budget explosion with you guys to demonstrate that junk like this just tends to happen in the home improvement game. Not all the time, but definitely some of the time.
In the end we’re still psyched to save some major money by tackling it ourselves (hiring someone to whip up a 300 square foot patio with the same materials would run us around 5K+) and we’re sure we’ll get a ton of use out of it so it’s still well worth the time, loot, and effort. See there I go being all cheerful about something annoying that happened. Haha. More pluses: I get to see John get all dirty. Which is always my idea of a good time. And Clara can have some fun with chalk and a baby pool out there when it’s done, which is going to be priceless. We just try to keep plugging away, even when curve balls like broken budgets or broken spirits threaten to derail us. Such is the DIY way I think. You just gotta keep on keeping on or you lose momentum and might never pick up the ol’ hammer (or crowbar or shovel or paintbrush) again.
So all of this is to say, I know that I’m annoyingly enthusiastic most of the time, and John can be a pretty chipper guy too. But crap happens. We just try to make the best of it. And you’d be surprised how helpful it is to blog/blab about failures and shortcomings (the entire reason we started this blog was because John wanted to blow off some kitchen-planning steam and we thought it would be fun to keep our family in the loop about it). So I highly recommend publicly airing your dirty home improvement laundry to come to terms with it and maybe even find a few folks who can commiserate, offer some helpful advice, and encourage you along the way. Seriously, blog-venting = our Prozac. And you guys are our therapists. So thanks. You know we love a good deal, and free therapy is up there with paint sales and appliance close-outs.
Psst- Ahhh, Mother’s Day is coming. Check out this week’s BabyCenter post about how I spent the last one and how I’m guessing we’ll spend this one (aside from hopefully laying some pavers).

Caroline says
I always think back to this episode whenever I’m stressing…just like I think of Tom Hanks on Family Ties each time I’m baking with vanilla or Tony on Who’s the Boss who made me afraid to mix ammonia and bleach.
btw, keep the Bethenny references coming! I think Cookie and Burger would get along famously!
TangerineViking says
Speaking of ceramic animals, I came across this when I was rug hunting online today.
http://www.westelm.com/products/origami-bank-a925/?pkey=csale-accessories
I was devastated the horse was sold out, but I snapped up the crane.
YoungHouseLove says
Oh so pretty! Glad you got the crane!
xo,
s