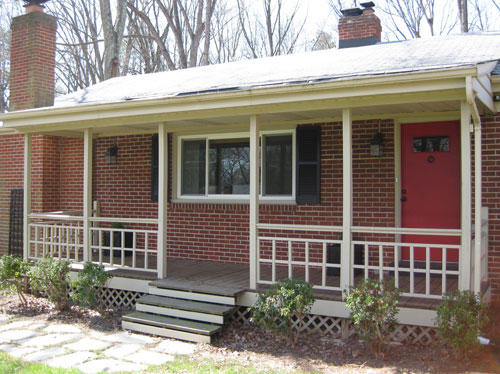
We’ve been dashing in and out of Home Depot like it’s our job and doing our best to stretch our $500 porch makeover budget for Better Homes & Gardens’ 48-Hour Challenge. The goal? A lighter and brighter porch that looks more like the interior of our totally overhauled home. Because nothing’s more depressing than a house that looks all airy and soft on the inside but dark and dated from the curb. To refresh your memory, here’s more info about the challenge and a before shot of the porch before we started the project. Total snore, right? Not for long…
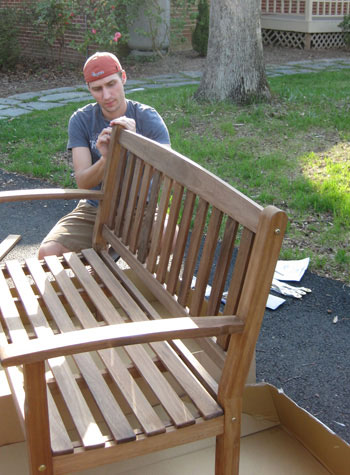
We’ve picked up a slew of fabulous finds, like this wooden glider bench to create a cozy seating area. John put the whole thing together in about ten minutes with an allen wrench- and I only had to help a little (always a plus) so for the most part I was in charge of taking pictures.
We also grabbed a bunch of punchy green planters to add life to our previously bare porch. We went with varied colors, sizes and styles for layered interest and plan to pop in a bunch of different plants for even more of that mixed and matched look that we love (note: finding plants that are cool with partial shade is always a good tip when they’ll be living on a covered porch). Oh and remember we promised that we’d create a two minute side table on the cheap? We grabbed this extra large planter and a terra cotta saucer that we’ll seal, paint and use as a tabletop. Easy peasy. Of course you’ll have to stay tuned for the big reveal and the step-by-step tutorial…
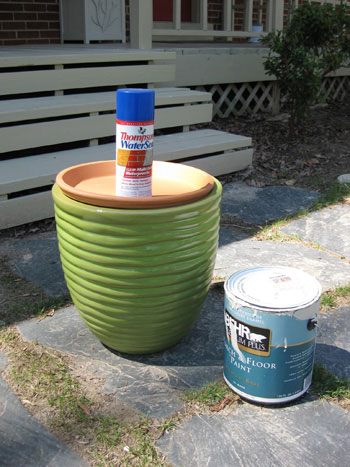
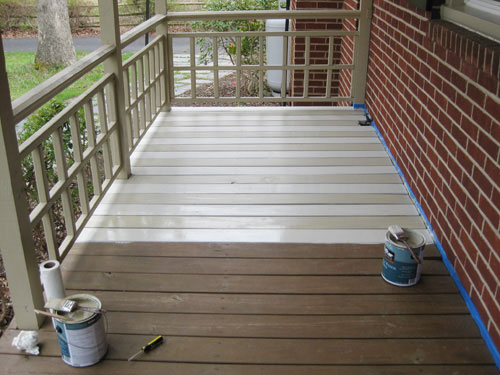
Then, in a bold and totally transformative move (cue the dramatic music) we also snagged two gallons of porch and floor paint…
…to create subtle stripes that lighten up our seen-better-days porch. Here it is halfway done. The difference is almost unbelievable! Talk about bang for your buck. And it only took a few hours and one coat of paint. Whew.
What about the puppy food & water station that we previously mentioned? We grabbed a piece of wood and four pre-cut corner molding pieces (for a dollar each) and used wood glue to turn them into a small feeding pedestal for the dog days of summer. Gotta love a construction project that doesn’t even call for screws or nails!
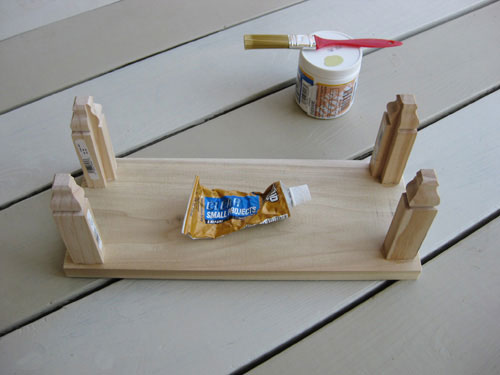
Painting it glossy green and setting Burger’s food and water dishes on top will finish it off nicely. It turned out to be one of those fast and easy projects with a major payoff- in fact it only set us back about $9, and it really adds infinite charm (and function) to the porch. And of course Burger sincerely appreciates the effort.
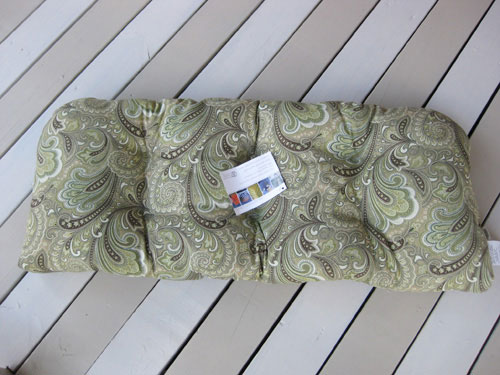
But the shopping spree didn’t end there. Do you know us at all? We can’t resist soft, serene pillows and cushions, so we stuffed a bunch of fresh green outdoor ones in our cart and hit the checkout. We were drawn to some patterned and solid pillows along with a paisley lounge cushion that we cut in half to make two floor pillows for our lazy dog. Here it is before surgery…
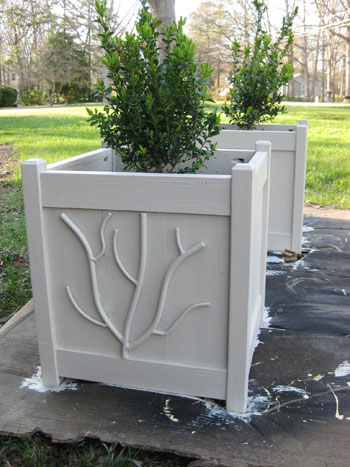
We knew Project Lighten Up The Porch was working when our old black planter boxes (already purchased from Home Depot about a month ago) looked dark and imposing on the freshly painted cream and tan floor. So we gave them a soft and airy look thanks to two coats of our leftover cream porch and floor paint:
And since we still had a bit of budget burning a hole in our pocket ($14 to be exact) we grabbed some twine to create a couple of cool hanging mobiles. It really is amazing how far you can stretch your moolah if you’re using things in unexpected ways (four pieces of molding become pedestal legs, a planter becomes a side table, a lounge cushion becomes two floor pillows, a ball of twine becomes a mobile, etc). In short: we are absolutely LOVING this fun little challenge, and we can hardly wait to show you how everything turns out! We’ll be pulling the whole thing together this weekend (and weather.com says it’ll be sunny and nice– score). Wish us luck!
To check out our weekly blog post about the porch project and see what the other four challengers are doing, just drop in on BHG’s 48-Hour Challenge.

jennifer says
Looking really really good!! I especially love the striped flooring! :) Good luck!
Lindsay says
So did I totally misunderstand the rules (specifically, what the “48 hours” meant) or is this thing already over? either way, I’m confused, but also SUPER excited to see the whole thing! :)
YoungHouseLove says
Hey Lindsay,
Good question! The rules are that the completion of the entire project must be physically possible within 48 hours (aka: one weekend, so really it’s more like 24 hours since you wouldn’t work through the night both days). But the challengers are allowed to work on it in chunks of time (4 hours here, five hours there) to get it all done on their own schedule (cute Nicole from Making It Lovely is expecting a baby so we can only imagine how she’s found a way to squeeze this in!).
The idea is that anyone who wanted to transform their porch in a weekend could, but they could also do it a little bit at a time (just like we’ve been doing). We think it’s just so that no one got too complicated and drummed up a plan that would take five months to execute (building a pergola for instance… they really want simple and do-able ideas. We’re actually pretty much done already (we did almost everything two weeks ago if you can believe it) but we just need to hang the twine mobiles and pop some plants into our planters). But of course we’ll be devoting a bit of time to photographing all of our projects in some nice morning sunlight so that’s also our weekend project. Gotta have good after pictures, right?! Hope it helps to clarify!
xo,
Sherry (& John)
Shelly says
Good luck this weekend! I can’t wait to see the reveal!
Sara says
I’m so excited to see it! Love the green planter/side table. Best of luck!
heather s. says
Love the stripes! I’m also buying some porch and floor paint this weekend to paint my front porch (a cement slab) – it looks like the color I’ve picked out is close to yours. I’m excited about a warm weekend!
Good luck with the contest!
MegRuth says
I am loving the alternating colors on the porch. What a great idea! Where do you guys come up with this stuff?
YoungHouseLove says
Hey MegRuth,
Our striped porch idea was actually inspired by a cream and tan jute rug that we love so much we have two (one in the kitchen and one in the third bedroom). We knew we needed to lighten things up out on the porch (dark red brick + grungy brown wood= dreary), so painting the porch a lighter shade seemed like the obvious solution. And since we were really trying to achieve the same tone on tone, layered, neutral feeling that we have going on inside the house, the striped rug was just the thing to get us thinking about stripes!
xo,
Sherry
Courtenay says
You two are so cute and creative! It looks great so far:-)
Kim Hannemann says
Two things:
(1) C’mon, Petersik, you went to TJ. Where did you hide the duct tape?
(2) You said, “Nicole from Making It Lovely is expecting a baby” but when I first read (skimmed) it, I thought I read, “Nicole is making a baby,” which of course wouldn’t leave her time for ANYTHING else.
Amanda says
Insert my squeals here- your DIY porch makeover is looking amazing!! I’m interested in what the planter/saucer cost, if you wouldn’t mind. I just bought one of those ceramic “drums” for my patio (like the one on your sunporch), and curious if I could save some money… I know planters can be pretty costly though, so maybe not.
YoungHouseLove says
Hey Amanda,
The funny thing is that we actually envisioned a ceramic “drum” as a side table, but since the entire makeover must be done with Home Depot products we knew we wouldn’t have any luck finding a sleek garden stool there…. which is where we got the idea of combining a ceramic pot and a saucer (since HD’s real side tables start at around $80). The drum and saucer combo only ran us about $35, which certainly helped us stretch our budget and make something totally one of a kind. It also happens to be the perfect height for our bench so we couldn’t be happier. Hope it helps! And thanks so much for the kind words about our porch progress! We are seriously on the edge of our seats for the big reveal. Stay tuned…
xo,
Sherry
Melissa Anderson says
I read alot of blogs but yours is ALWAYS the first and the ONE I LOVE the most. Your style is incredible and I adore the fact that you and the hubby do it together. Keep up the great work, I can’t wait to see what you do with the porch. While I don’t have a porch we have a deck that is quite boring. It is a large trek deck with a table, 6 chairs, an umbrella, and 2 potted plants. What else can we do?
YoungHouseLove says
Hey Melissa,
Thanks so much for the sweet note! And the good news is that there’s a TON you can do with your deck! We love the look of an outdoor rug for a back patio or deck (slipped under the table and chairs to make it feel like a bona fide outdoor room). Then bringing in some planters full of lush plants will add texture (outdoor rooms need accessories just like indoor ones). You can also add different areas & functions if you have the space (a bench with some plush pillows in one corner, maybe even a chaise lounge for relaxing on a lazy Sunday).
There are also lots of other outside accessories that can add personality and style (we love the look of breezy outdoor curtains if there’s a spot for those to blow in the breeze) and you can even swag white garden bulbs overhead (the big glass lights that you see in Italian cafes). A few other easy touches are some glass candleholders or lanters for your table, some hanging planters (which can be hooked over a deck railing) and maybe even a firepit (be sure to put it in a safe clearing where it won’t do any damage). Hope it helps! And hopefully our big reveal will give you even more ideas! Fingers crossed it all goes smoothly this weekend…
xoxo,
Sherry
Marelis says
I am soooo excited to see your final reveal :) I’m sure it’s going to come out gorgeous just like the rest of your projects :) I’m living in a rental and can’t wait to make over the outdoors so we can entertain and relax!
Anne says
Hi guys–
First question: How much did the bench set you back? We are potentially in the market for one, and I really like that one.
Second question: John, does TJ happen to refer to Thomas Jefferson HS for Science & Tech?
YoungHouseLove says
Hey Anne,
The glider bench was $200 but we thought it was a great deal for the natural weather-resistent wood and the gliding feature. It’s soooo comfortable that I even find myself out there rocking when it’s raining. Love it! As for the TJ reference, yes, John went to Thomas Jefferson HS- I snagged myself a smartie. I always knew he was the brains of this operation, but now that his high school wins “best high school in America” every year, I’m reminded of his brilliance on a regular basis!
xoxo,
Sherry
Kelly says
My favorite thing about your blog (other than you guys are totally adorable and have *almost* motivated me to do some work around our bought-in-awesome-shape house) is that your dog is named Burger. His constant name-dropping always makes me smile.
Kathleen says
The stripes are fantastic!
KK says
I CAN’T WAIT TO SEE THE STRIPED PORCH!!!! HOW ADORABLE!!!
Kim says
You’ve totally inspired me with painting the beams on the floor. It looks amazing.
East End says
I’m wild about the porch floor!
Amanda says
Thanks for the cost info and for giving me the “real” words for the “ceramic drum”- haha. I knew it was commonly referred to as a Garden Stool, but when I was posting that comment I had a complete mind block and kept saying to myself “what the heck do they call that thing that I just bought? I know it’s not DRUM, but that’s all I can come up with!” :) Funny… love moments like that.
I got my “drum” for $39, so pretty cost comparative to the pot and saucer price- but yours is so very unique and creative! Can’t wait for the reveal!
Making it Lovely says
How funny that we were planning on buying that same glider! I guess it’s good that we changed our minds at the last minute so we’re not twinsies (with all of the green too). ;) I can’t wait to see how your porch turns out – I LOVE the stripes!