Our Cape Charles beach house quickly taught us the value of an outdoor shower. By giving people a spot to rinse off before coming inside, it keeps sand off your floors and out of your plumbing. It took us a couple of summers to get that outdoor shower fully enclosed and functional (you can see it here in this post), so it was a nice perk that our new Florida house already had one ready to go. Well, if you consider non-functioning plumbing and grime-covered walls “ready to go.”
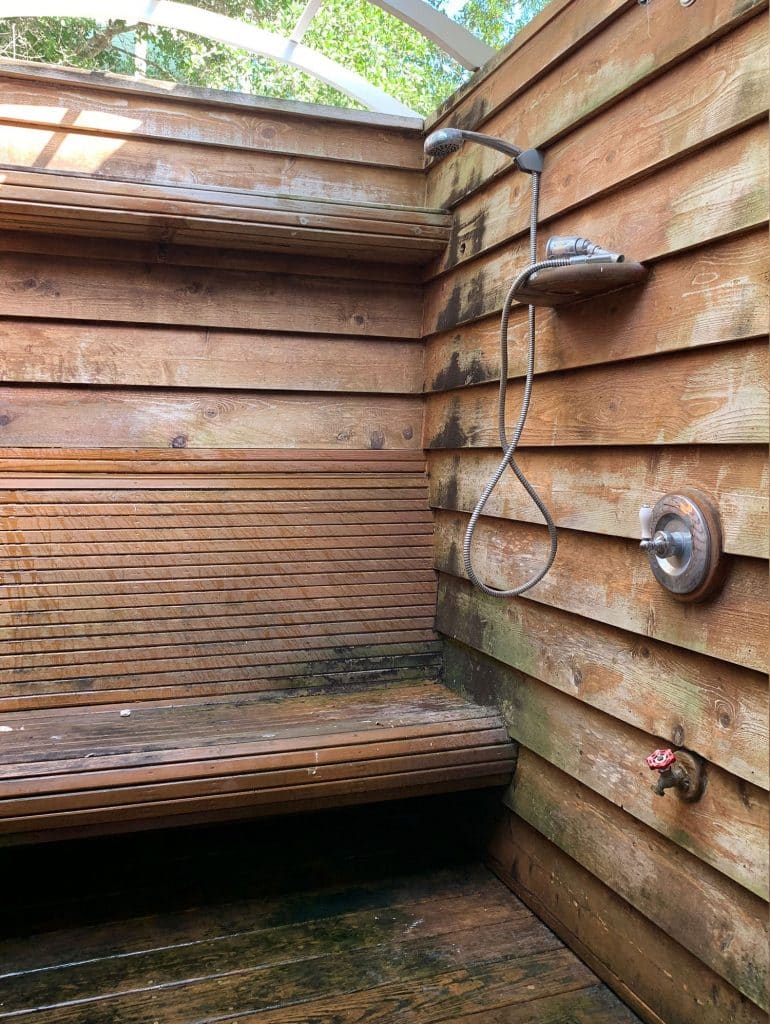
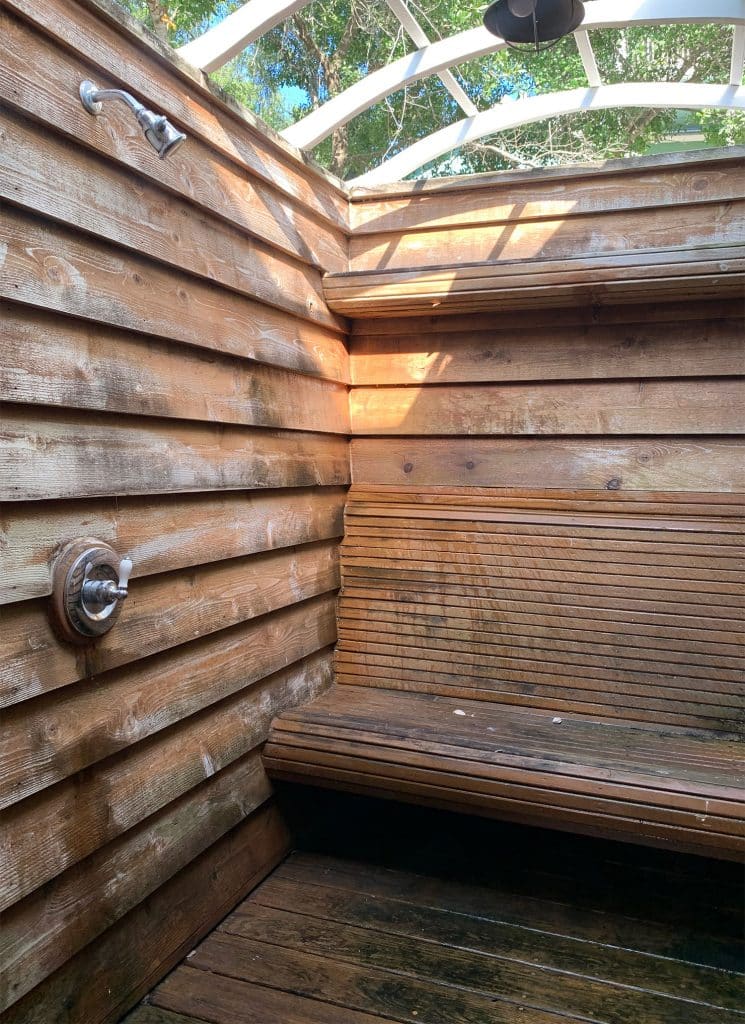
This space kind of baffled us at first. It looked like some sort of open-air sauna thing. And maybe it was just all of the dirt and leaves, but neither of us could imagine wanting to spend a lot of time in there. So we basically instructed our contractors to leave it alone during the initial renovation and focus their energy (and our money) basically everywhere else (more on our big outdoor makeover here). So that photo above is what it still looked like last week.
We did get the plumbing hooked up so that we could use it to rinse off our sandy feet under the spigot. But neither of the showerheads were very functional (one was rusted/clogged and the other wouldn’t rotate away from spraying the wall).
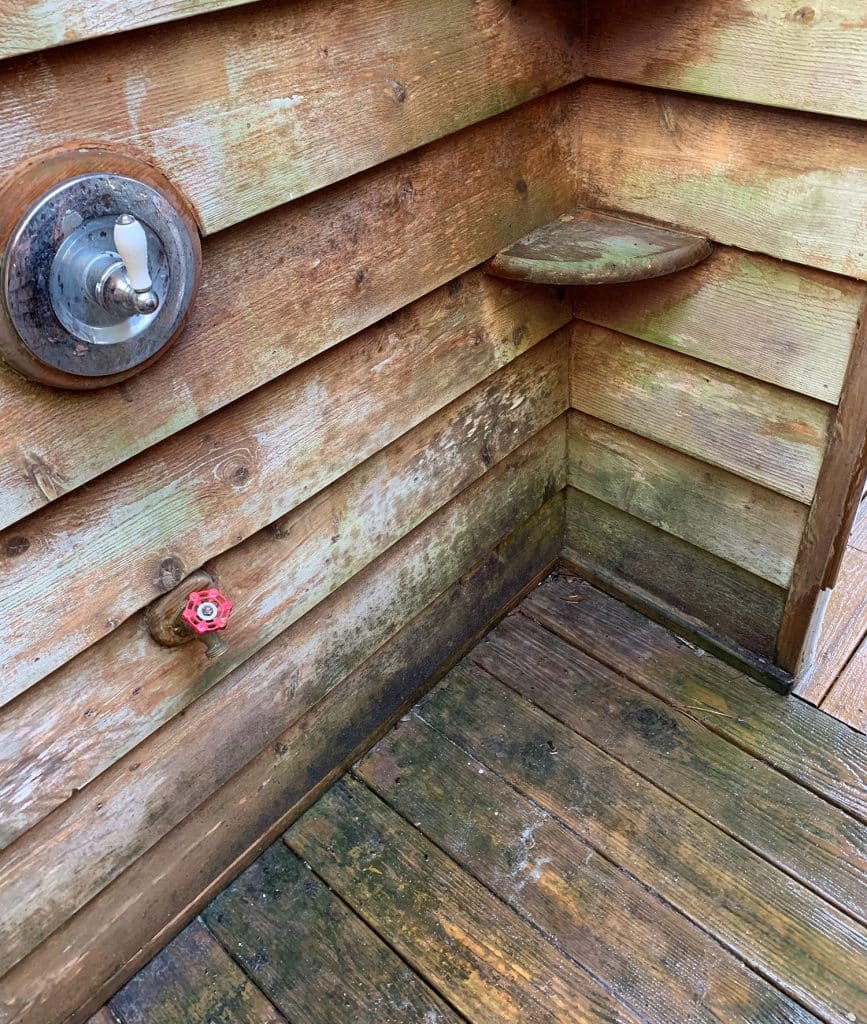
So over the last few days we dedicated a few hours each day to freshening it up – so it would become a much more functional (and non-grimy) space to wash off, shower, hang things to dry, and look up at the green branches overhead (it’s actually a pretty great view). There are some reasons why things are still going to change in here over the long haul (I’ll explain more at the bottom of the post) but there’s no denying that it has become such a great space that our entire family loves using. It just needed a little TLC.
And by TLC, I mostly mean power washing (aka pressure washing – we use those terms interchangeably).
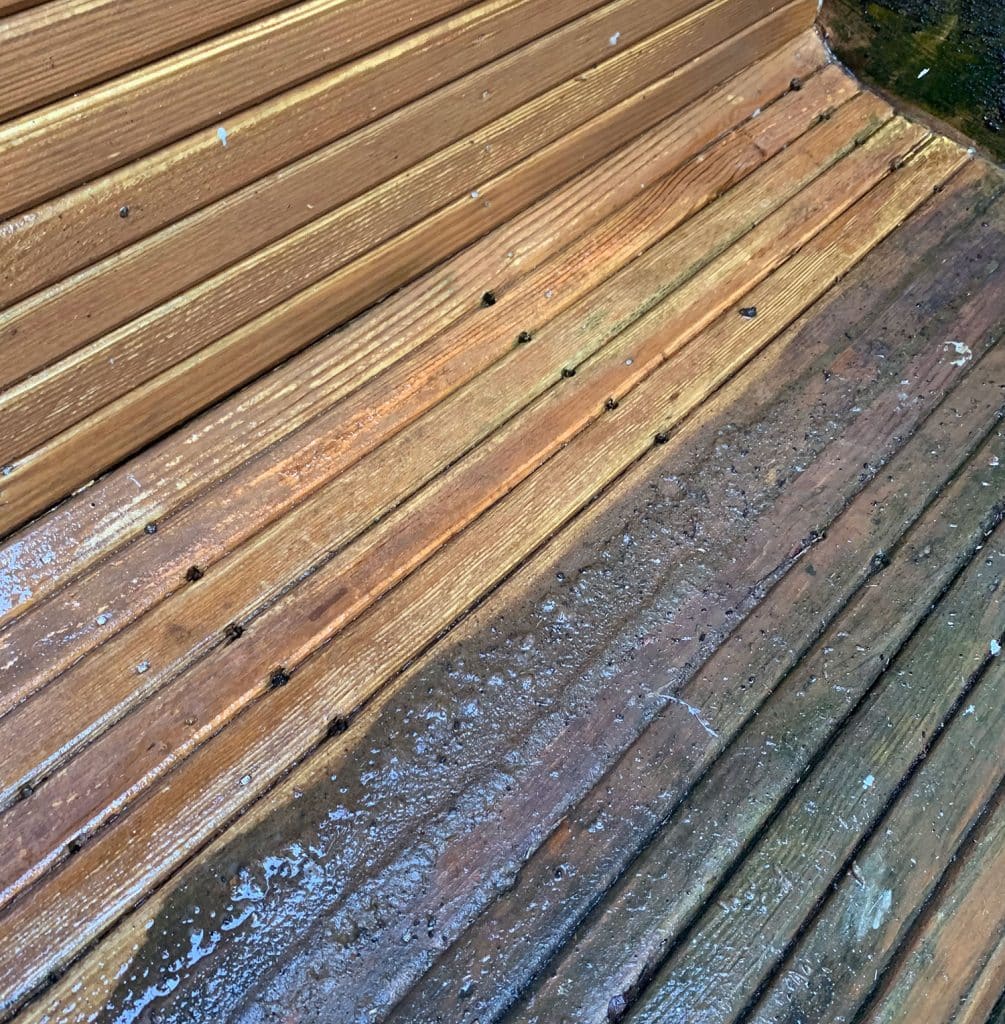
Over the past few days, we meticulously washed every surface (the walls, the floor, the bench, that top shelf, the door, etc) to get all of the layers of grime and dirt off. We used this pressure washer with the medium (orange) nozzle and you can see it work some miracles in the VERY SATISFYING video below. One thing to note is that it sometimes took a few passes (but the first one was especially satisfying and the most obvious) so that’s what you’re watching below:
NOTE: You can also view the above video here on YouTube
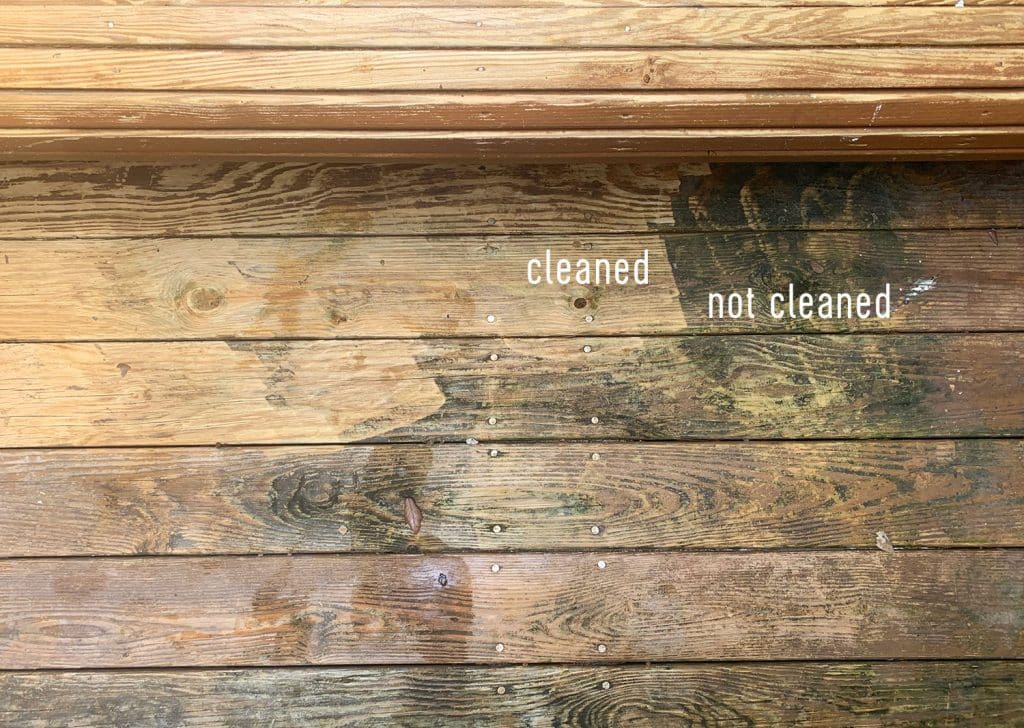
I also took the photo below before we started power washing the floor on Day 3 of this mission, so you could see the difference between the cleaned & uncleaned floor when both surfaces were dry. Not only is the washed wood cleaner, but it’s also brighter-looking too. But as you can tell from this photo, some areas of the “cleaned” portion still needed a second pass to get them fully back to their glory.
Pressure washing wood can damage it if you’re using too high of a setting or if you get your nozzle too close. The wood can splinter or get “fuzzy” from the pressure, so be careful – especially if you’re washing new pristine wood. This was neither of those things and we liked this method because we didn’t have to buy or use any smelly chemicals or cleaners – but I just had to throw that out there for anyone else who might accidentally go too hard. Check yourself before you wreck your wood.
Ok, it’s clearly before & after time. So… before:
And after:
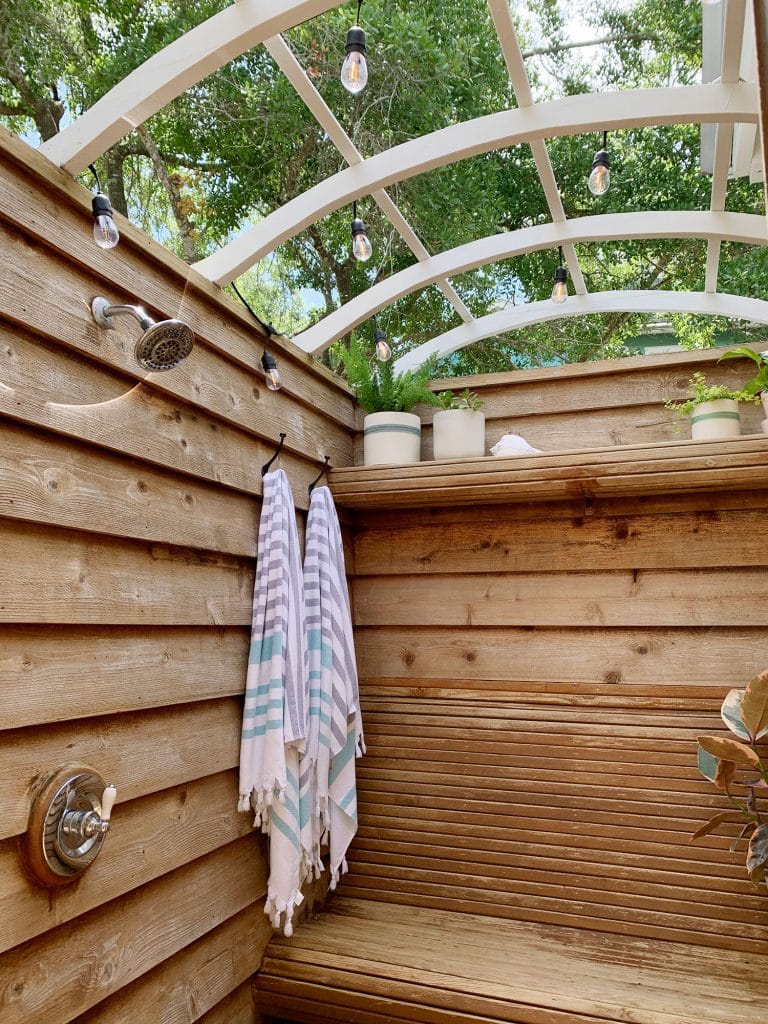
We still need to oil the wood (we’re going to use teak oil which can just be wiped on with a rag to provide protection and make it even more refreshed and rich looking – it’ll also even out that bench which was the only wood that appears to have been previously stained) so there’s that to look forward to. But even without that final step, it’s looking a whole lot better.
We replaced the shower heads (including this handheld sprayer), hung some hooks for drying towels and bathing suits, strung up some lights overhead that look great with all that greenery above them, and Sherry brought in some plants (because of course she did).
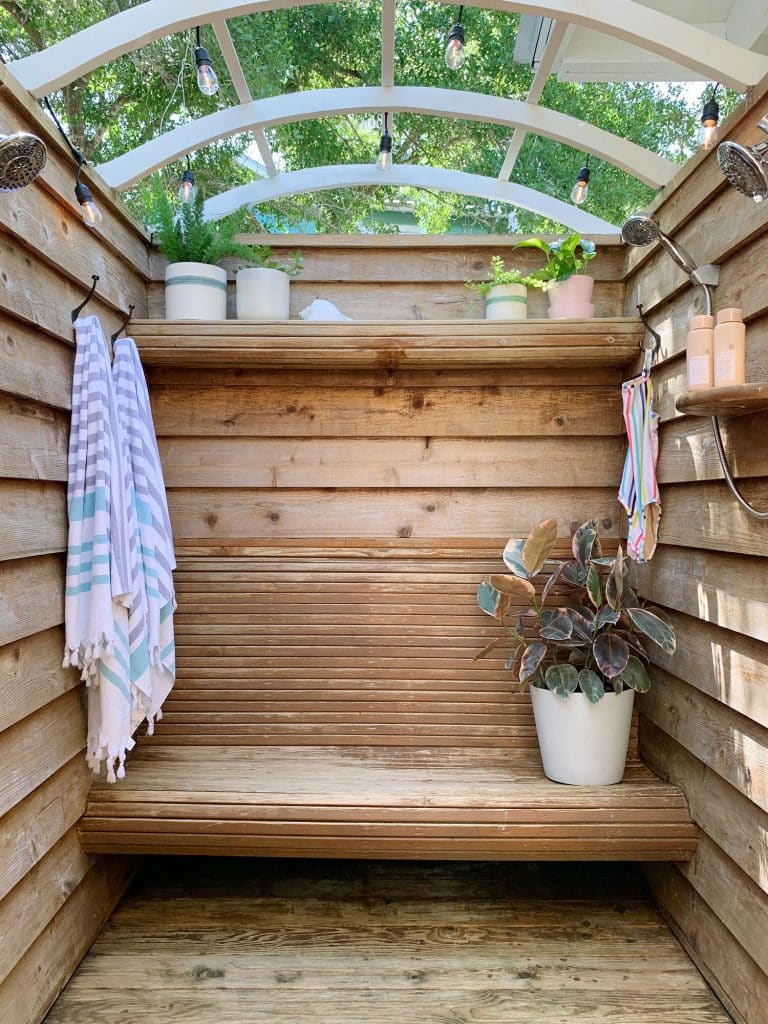
We all LOVE this outdoor shower now. In fact everyone in our family prefers this to the indoor shower! This might be the most luxurious shower we’ve ever had. It’s full of sunlight and overhead branches that sway in the breeze.
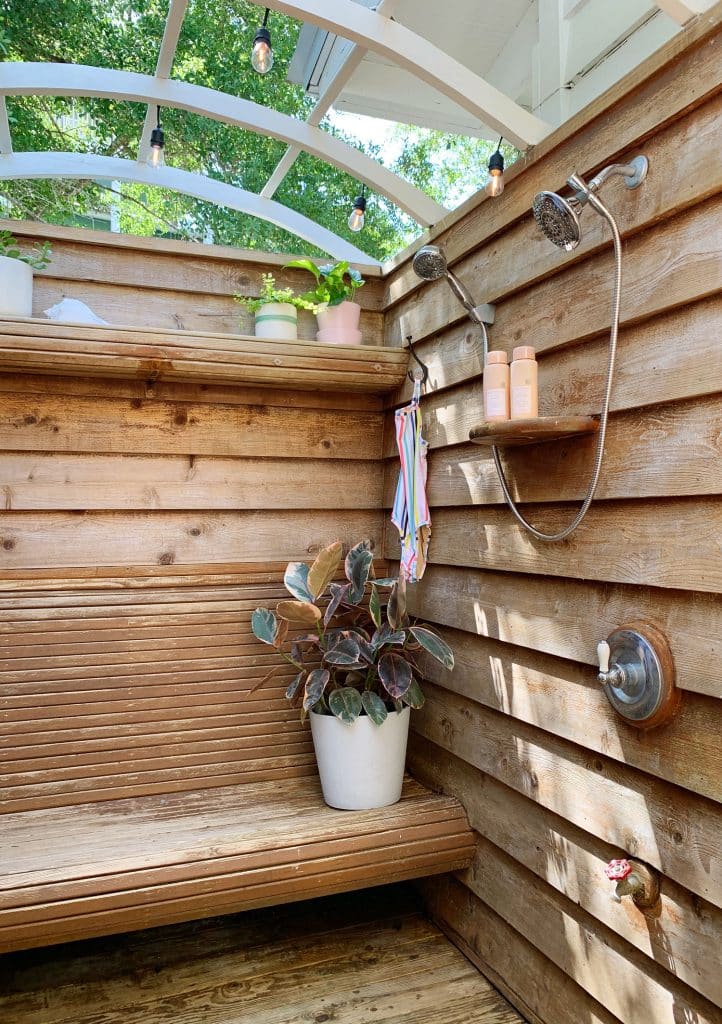
Now I know what you may be thinking, because Sherry got a deluge of questions on Instagram. “Can people see in?!” The short answer is: nope. I’m the opposite of an exhibitionist, and zero body parts are visible to anyone outside of the outdoor shower. The house in the background of this photo does have an upper balcony that is visible through the open roof of the shower from certain angles (you can see it in the background of this photo below for instance)…
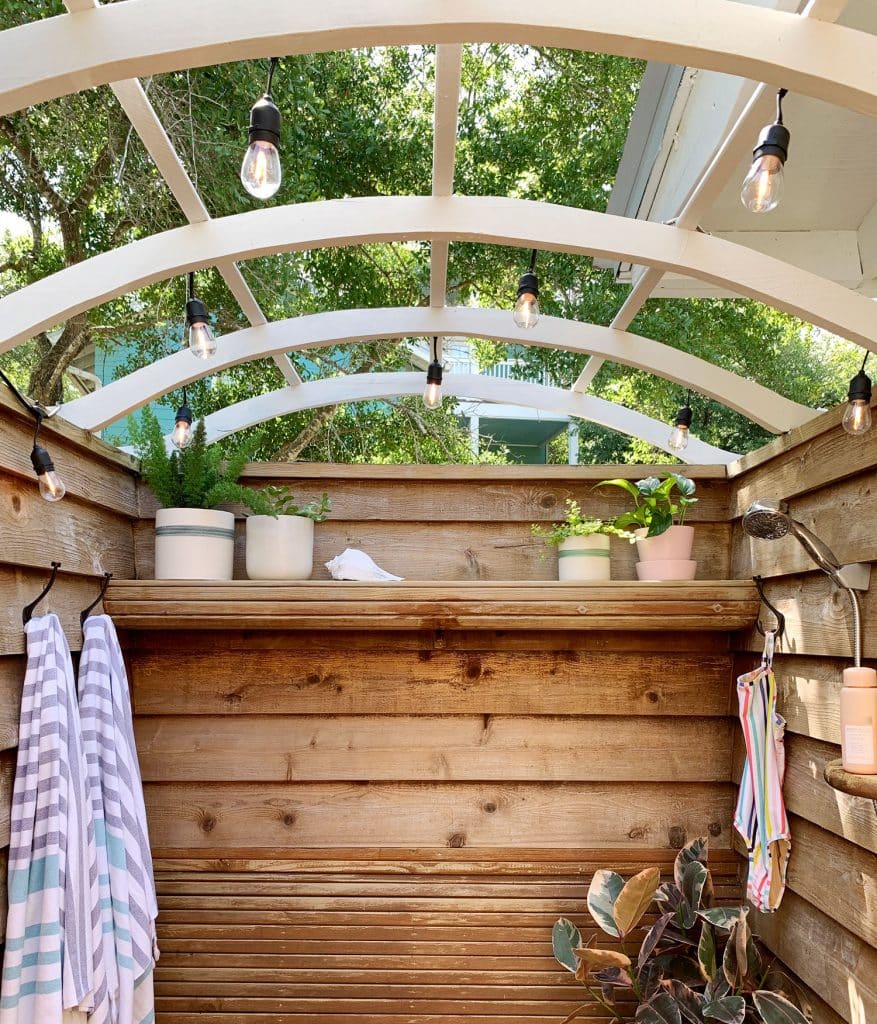
… but that photo was taken with the phone held up over my head and angled upwards. So if I was wearing an extremely large top hat they might see the top of my hat – but their eyes can’t shoot across from that balcony and then take a 90 degree turn to see DOWN into the shower and view actual body parts. You’d literally have to be standing on our own roof for that.
I took the next photo at my head level from the spot where you’d actually stand when showering. Observe. Nothing but a big wood wall with leafy trees beyond it.
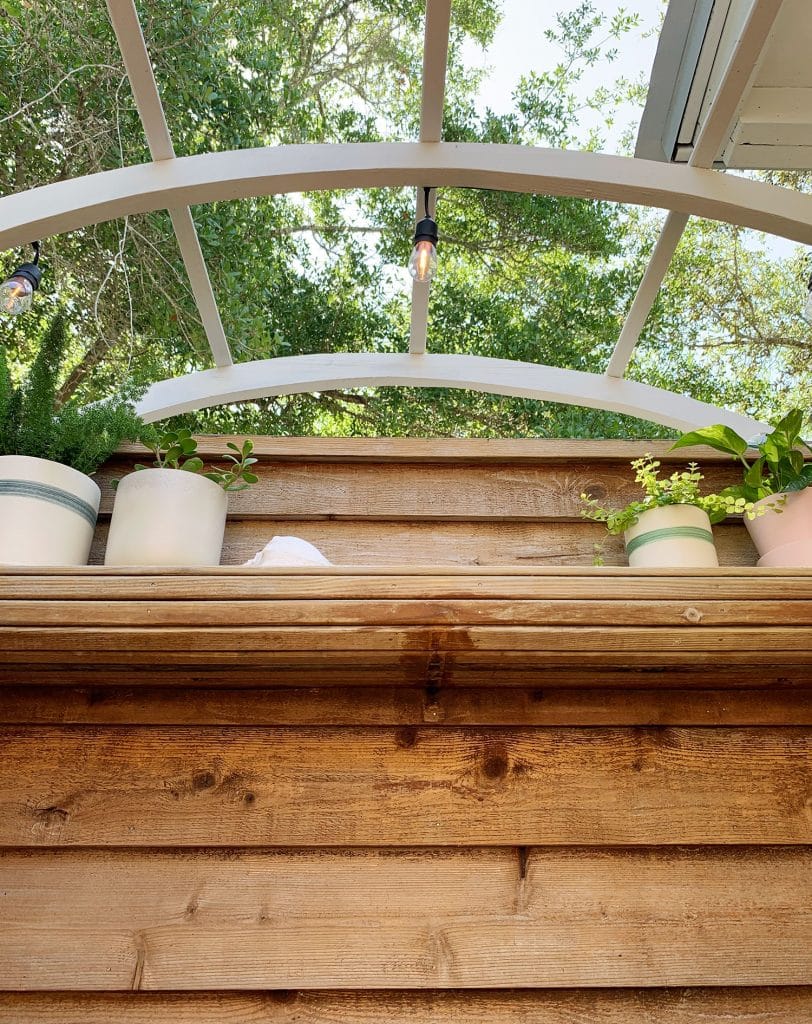
It’s actually pretty simple to determine if someone can see you from within a shower because you’d be able to see them. We’d immediately build up a much higher side wall or fully screen things with huge plants along that top shelf if even 1% of me believed that someone could peer into this shower.

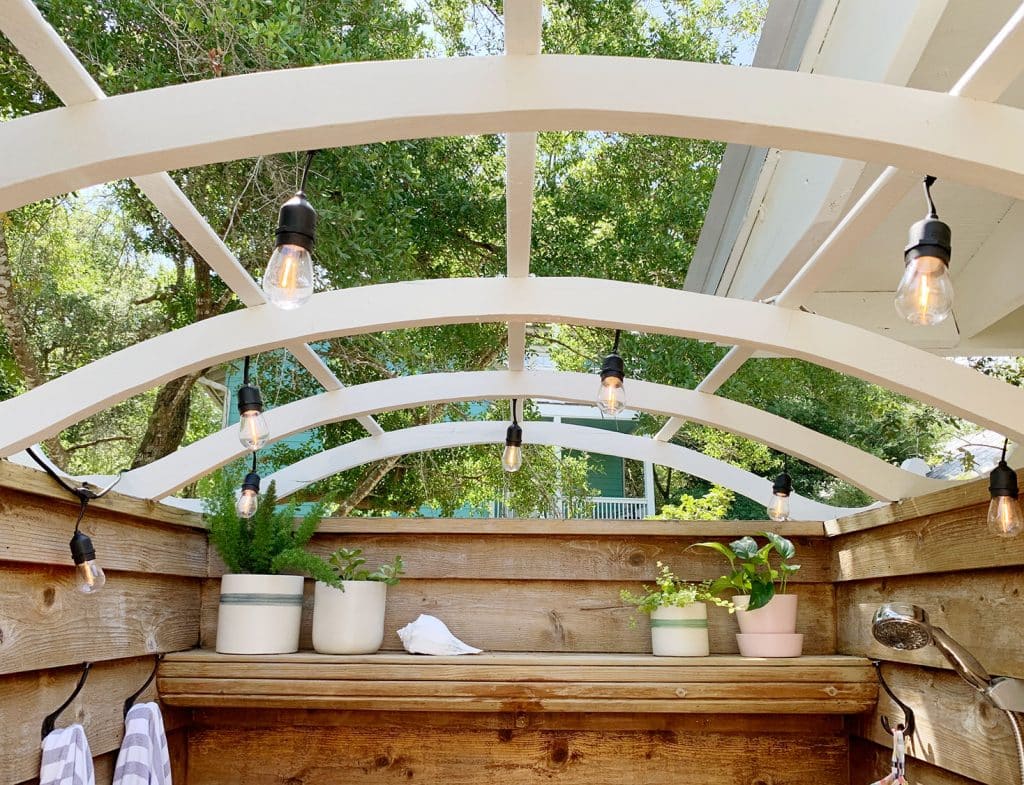
In electrical news, we removed and capped the wiring to the old light fixture that hung in here with the help of an electrician and instead strung these LED string lights across the upper framework.

They’re just nailed up along the back side of the wooden roof arches so that the wiring stays mostly hidden & they’re plugged into a smart outdoor plug along the back of the house so we can turn them on with our Alexa. Once again, I was holding the phone over my head and angling it up at the lights for this shot – hence you seeing that balcony.
Sherry even snuck out there last night after the sun went down to snap a picture of them at night. We were pleasantly surprised by how soft and even the light was, compared to the spotlight effect that old dangling fixture in the middle would’ve given off.
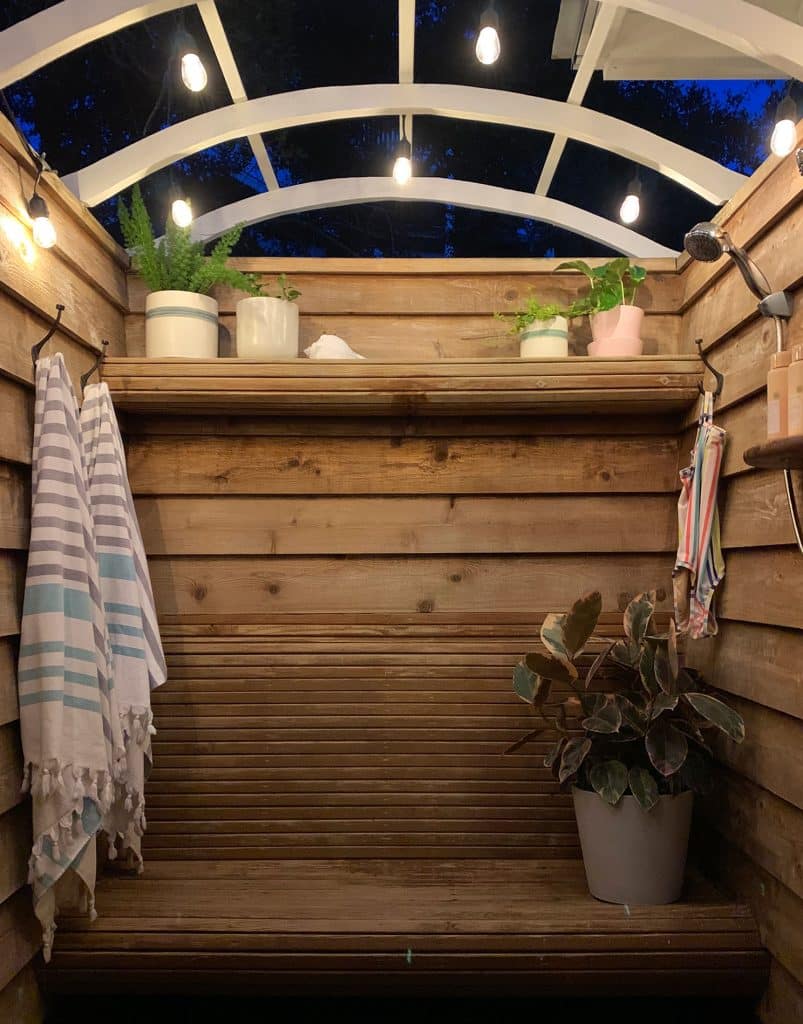
Now I mentioned that this space might have some additional tweaks coming down the line, which is partly because this room may serve us better as something like a true “pool bath” complete with a toilet and sink (yes, that’s a thing you can do down here outside without things freezing – and then kids don’t have to run through the house all wet to use the bathroom – they just duck in here to do it and run back out to the pool).
We also think we’ll add a doorway that leads to the future pool, which would be right where the middle of the bench is above. So that bench might not be for keeps – but so far we haven’t really used it for more than setting things down to dry. Sherry wants to put a door in the middle but keep the sides of the bench so her plant still has a spot to sit. She’s not kidding.
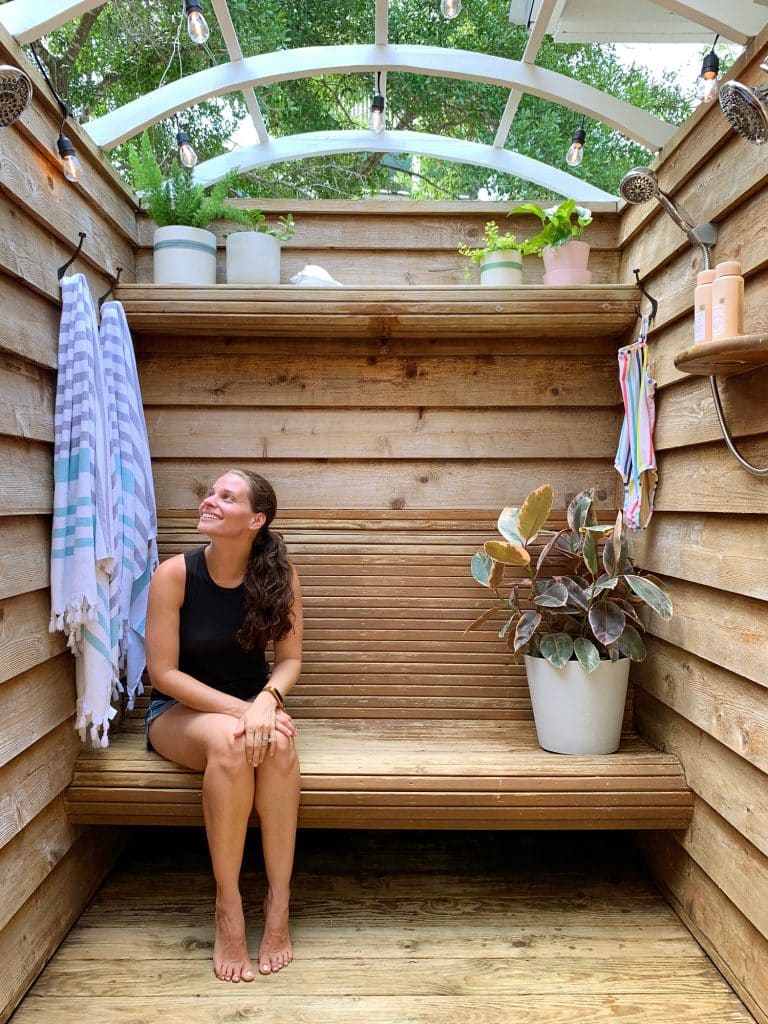
Now that it’s clean and functional for us, we’re certainly in no hurry to redo any of it, apart from putting a fresh coat of teak oil on the wood (we’re just going to rub it on with a rag). So for the time being we’re just excited not to have to shield our eyes every time we need to rinse off some sand. Also how amazing is it that our Trex color choice (Havana Gold) which is on that side porch floor) matches the original raw cedar so well inside the shower? Couldn’t have planned that better myself (it was a total accident!).
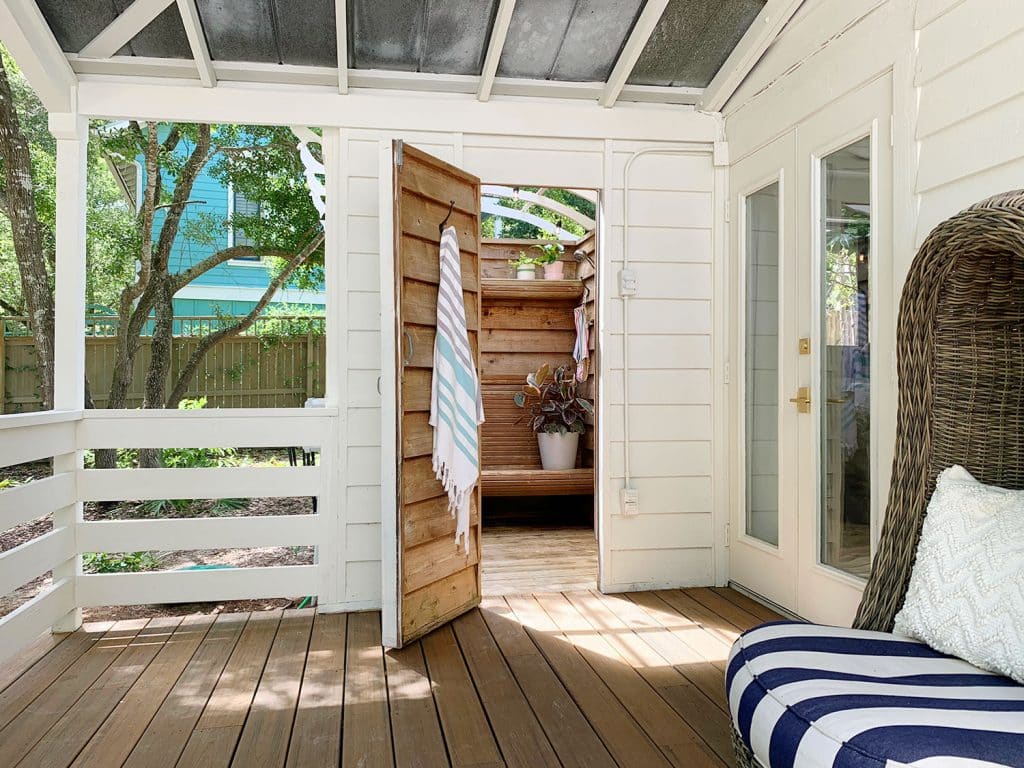
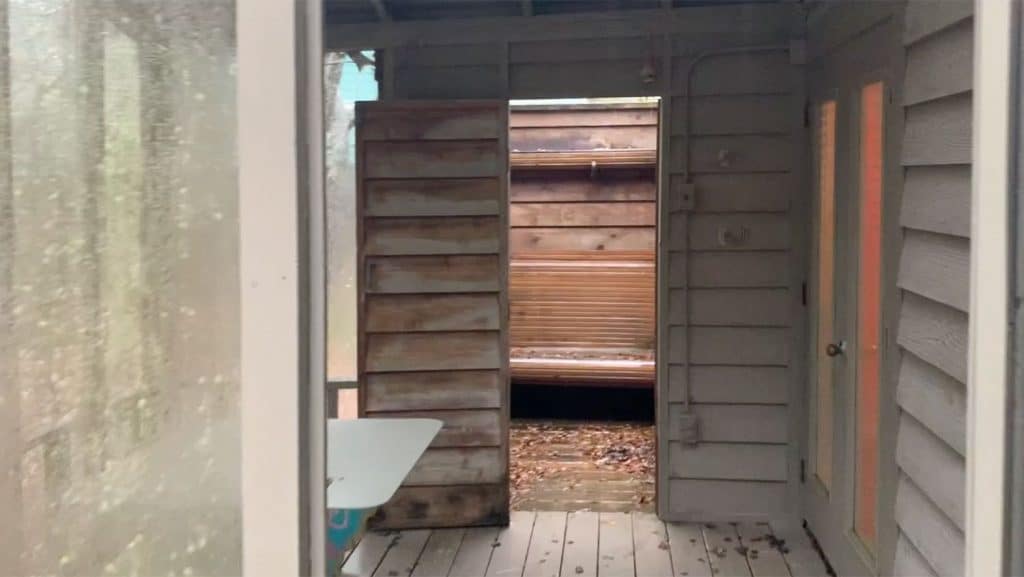
Oh and I tried to dig up a “before” of this angle but the best I had was this screengrab from our before video tour. This also illustrates how much it helped to open up the old screened-in porch (if you have mosquito questions please see this post).
From the after picture you can see that we still have some work to do just outside the outdoor shower. The underside of our covered porch is just the raw, exposed underside of our metal roof.

So hopefully this week we’ll be getting some metal primer and a few coats of paint on it. We picked a soft green color that ties into all the greenery around the house, so we’re excited to see that go up – plus a nice big exterior fan!
P.S. You can catch up on our entire Florida house renovation in just 9 posts right here. From the exterior makeover to how the living room and the kitchen are coming along (and the projects we planned from afar), we’ve covered a lot of ground.
*This post contains affiliate links, so we may earn a small commission when you make a purchase through links on our site at no additional cost to you.
