This is supposed to be the post where I declare “The floors are DONE… enthusiastic exclamation point!” But instead I’m here to say “The floors are almost done… sheepish period.” But they’re mostly down and they weren’t actually that hard to do! Seriously, anyone can do this.
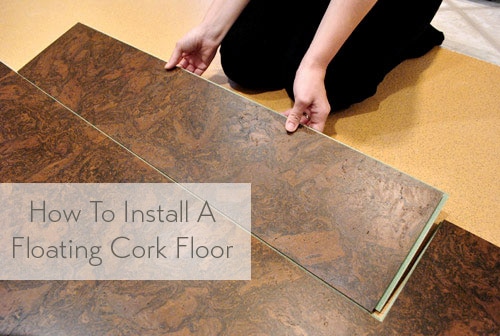
Since we last updated you, they’ve gone from this:
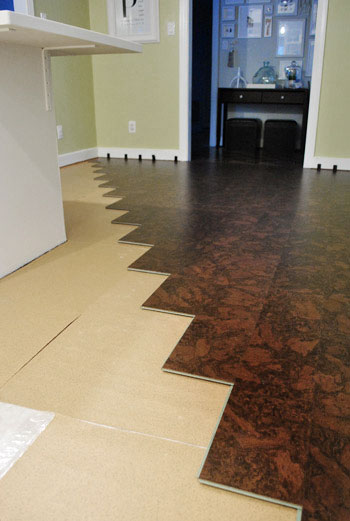
To this:
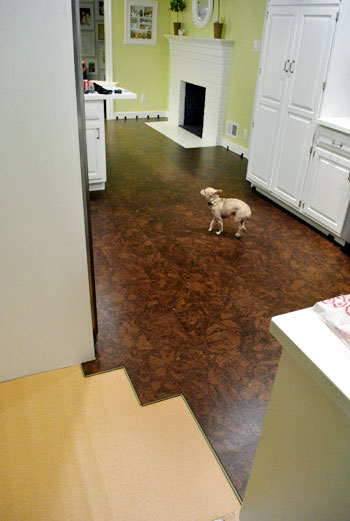
Note: Some of these photos have the cork looking more red/orange than it is in real life. But if you watch the video where we’re installing it (or the one with Clara in it), it’s probably the most true to life (a rich mocha color). We’ll try to take better pics next time!
We thought we could knock out the rest of it in the last few days, but between making all of the cuts to snake around our peninsula/cabinets/doorways and moving appliances out to make way for a few planks of flooring under them (to keep them level without pinning down too much cork), it just took a little longer than we thought. And since this whole blog is in real-time, as much as we wish we could fast forward to the end and share all the glossy after pics (no one wants to call this turkey done more than we do, haha) we just have to keep plugging away and share the pics whenever we get ‘er done. We did stop to take some how-to pics and a video along the way this time though – so we’ve got that to share with you. Shall we begin?
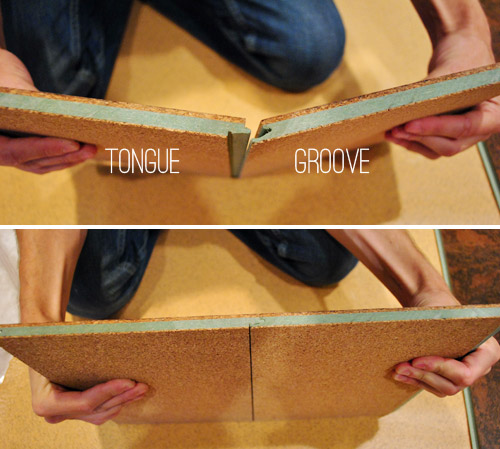
Here’s how the snapping system works on these cork boards. Tongue goes into groove. Boards lay flat together. Everybody’s happy.
When it came to actually putting a board in place, it went something like we show in the video below. If you can’t watch the video (we don’t want to blow your cover at work) we’ve also included the same information via photos below. Watching the video on mute is probably more explanatory though, just to see things in action.
Okay, so now for the photographic, Burger-cameo-free version of that same info. We first slid the tongue into the groove at a slight angle.
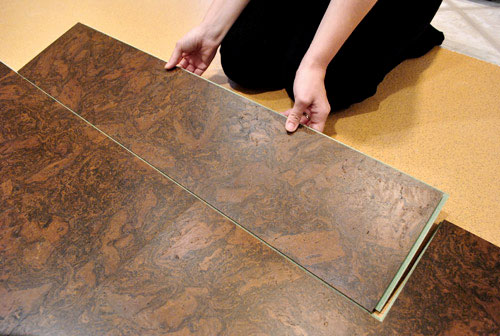
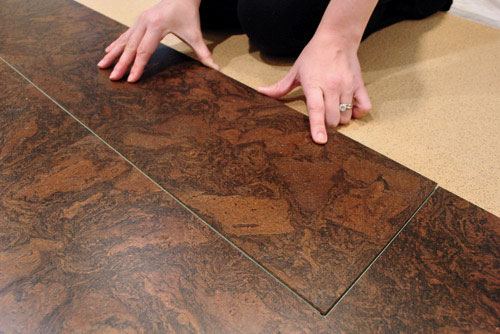
That held it very loosely together so that we could then lay it flat and slide it into the groove on the short end of the board.
Obviously that isn’t enough to hold the board in place, so out came the hammer and the tapping block (we got the tapping block in a flooring kit from Home Depot mentioned here). The block allows us to give the board a pretty solid wallop (technical term) without hurting the cork (since it takes the brunt of the hit instead of slamming the cork directly).
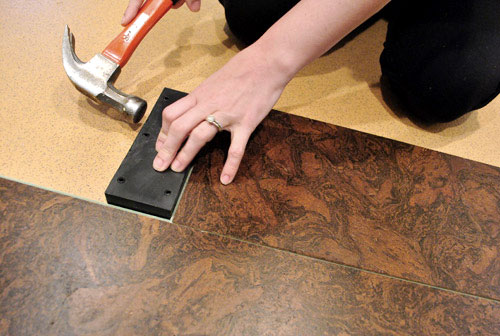
Once we had the short end tapped in enough to make the seam disappear, we did the same on the long side of the board. See that slight seam? After a few taps it was history (you can watch it disappear in the video above).
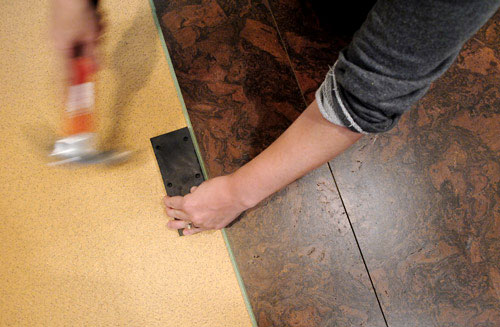
In our experience, when the long side popped into place the board sometimes, well, popped up a little bit on the outside edge. No bueno if your goal is a nice flat floor. So we found that if we put our weight on the board to keep it flat, then hammered it a couple more times it would get the board to lay flat and behave.
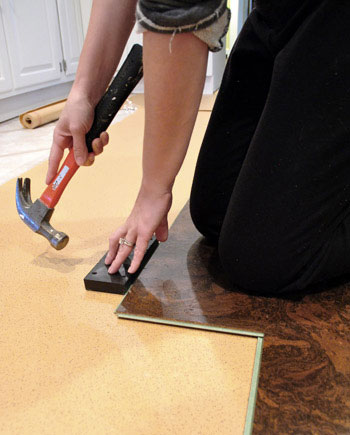
See, it’s behaving.
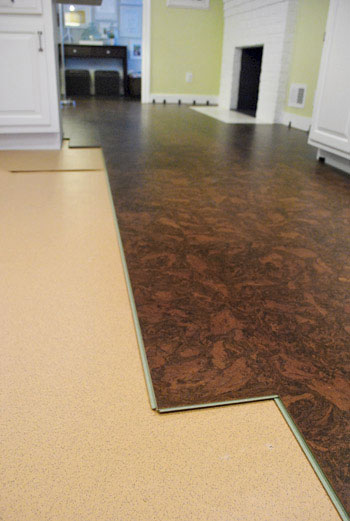
Of course it was a bit different when we got to boards close to the edges because (bummer alert) you don’t have room for your block or hammer.
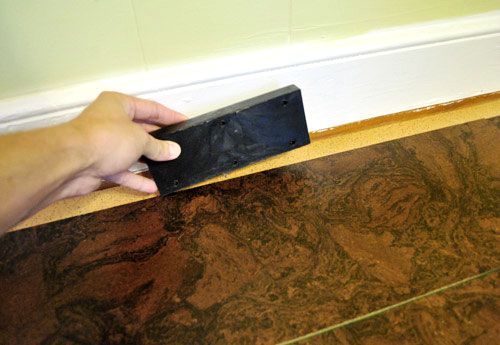
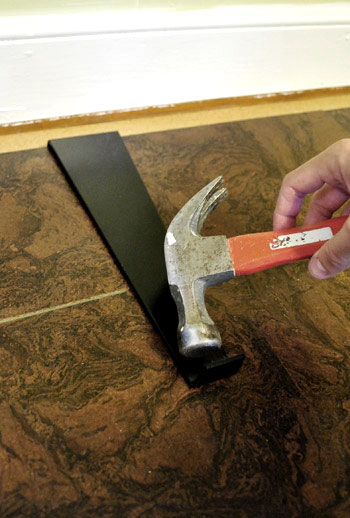
That’s where the pull bar comes in handy (it was also included in the kit from Home Depot along with the tapping block and spacers mentioned here).
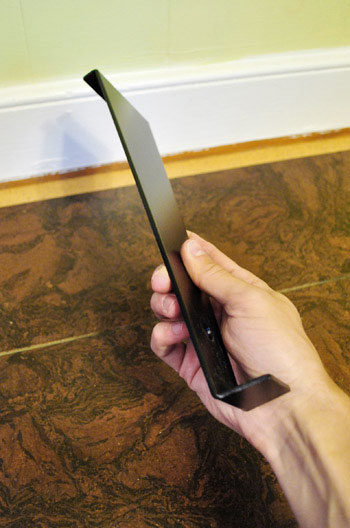
The wide side hooks over the board so that you can tap the other end with your hammer to get that seam to disappear. Oh and see that gap near the baseboard? There’s a recommendation of a 5/16th gap around the perimeter of the room (floating floors need to be able to expand/contract a bit to keep from warping, and the shoe molding will completely cover these slivers of space so they’re undetectable) – so we did have to cut a sliver and stick it in there. But nothing too snug to the wall since we don’t want warping. We used spacers to help us keep our place. More on that here.
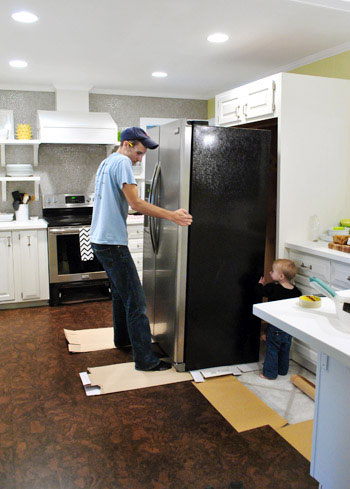
Both techniques weren’t that time consuming, actually. It was the cuts that were a big time suck. Well, that and sliding the appliances out so we could run a few planks of flooring under them to keep them level. And since we got a big groove in our hardwood floors at the old house from sliding the refrigerator out, we were SUPER careful about it. Like two-layers-of-cardboard-over-a-scrap-piece-of-cork careful.
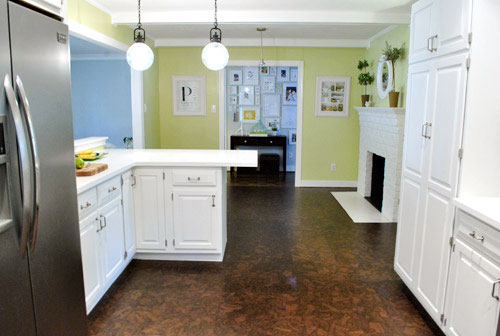
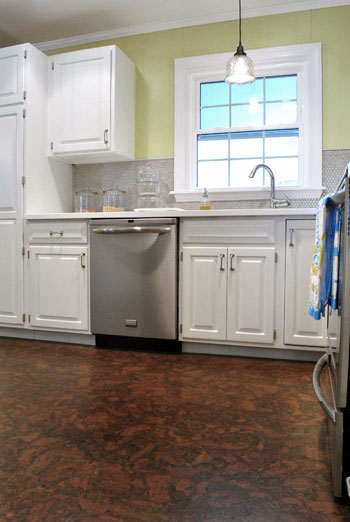
So I’m sorry we don’t have “after” pics for you yet (not that they’d be totally done anyways since we still have to reinstall transitions and shoe molding along with seal all the cork for added durability), but I did try to fake it by taking some pictures from angles where you don’t see the unfinished section in the laundry room. Yep, I’m clever like that.
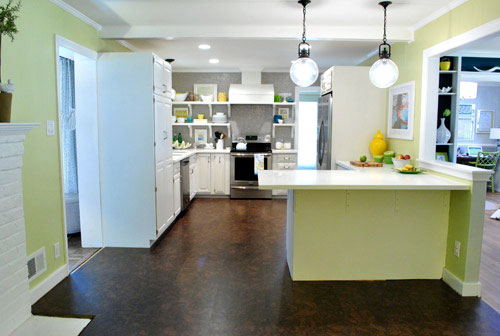
Who knows, maybe we’ll never finish it and just shoot around it for the rest of our time here.
Just kidding. Of course we’ll finish it. Especially since I couldn’t even shoot one cute video of Clara without blowing our cover. Darn you Clara, always being adorable in the most inconvenient places! Note: for some reason every time Clara throws the football on this video the floor appears to makes a crazy loud sound, but in person the floor is really soft and absorptive of sound, so it doesn’t make loud hollow noises when you walk on it or drop things – must just be the sound quality of the Flip camera (it seems to amplify voices to hear them better, so it must have amplified the football sounds too).
Luckily the laundry room should be pretty speedy. Knock on wood…er, cork.
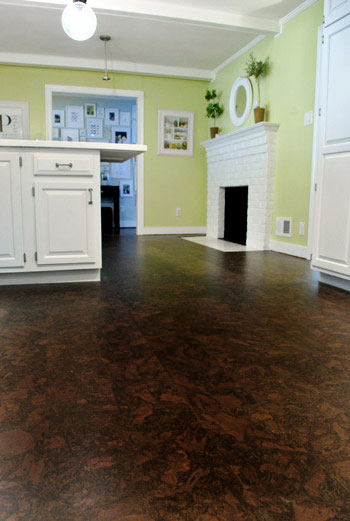
Anyone else in the midst of a project that’s taking longer that expected? Ever laid a cork floor? We have been so happy with it so far (the rich deep color adds so much for the formerly white-on-white room, there are no scratches/dings where Burger runs around from his nails, no dents where we drop things, it’s very soft and easy on the back/knees, and it should be even more durable once we seal it after it’s all in). We’ll definitely keep you posted! Oh and we did learn that if you’re redoing a kitchen from scratch you should install your cabinets first and then add the floating cork floors around them (like we did in this case as well) since a floating floor shouldn’t have big heavy cabinetry resting on it (remember, it needs to be able to expand and contract a bit to keep from warping – more on that here). So we just thought we’d toss that tip out if it was helpful to anyone.

Katrina @ 'Sota is Sexy says
Okay…I have to admit that at first, I was a cork skeptic. I wasn’t a huge fan of the flooring and couldn’t see how the warmer tones would work in such a modern kitchen.
And now, I am officially eating my words. It’s looking amazing! Can’t wait to see the finished results.
Also, isn’t cork pretty eco-friendly? Portland would be proud :)
YoungHouseLove says
Yes, it’s green! Even the underlayment is made from recycled material. So happy with it!
xo,
s
Melanie @ Mailbox Journey says
So close! My Saint Patrick’s Day wreath is taking FOREVERRRR to finish. I’ve been using white & green felt – the green I chose tends to be sold out in every craft store I visit. I managed to find 2 sheets at JoAnn, and then 9 sheets at Michael’s, but I’m short by two sheets to finish the darn thing! I have to wait until Friday now to see if they get anymore in.
Are you guys happy with the way the floors look? I think before the floors were in, the kitchen looked “cold”, and now it looks all warmed up! :D
YoungHouseLove says
Yes, we love how it’s not a whitewashed box anymore for sure!
xo,
s
HeidiG. says
I love how you run into real world DIY problems…makes me feel less like an idiot in my DIY adventures. Your floors are looking great by the way!!!
Amy says
Yay, cork! Looks lovely and rich.
Jenn @My Southwestern Life says
It looks great so far! It really makes your cabinets pop (in a good way). Do they make an eco-friendly sealer for cork floors?
YoungHouseLove says
Experts (and the manufacturer) actually recommend water based poly- which is a lot lower VOC than oil-based stuff! We’ll keep you posted on what we end up using for sure!
xo,
s
Lisa says
The floors are beautiful and I love that they are “green” and warm and soft underfoot, etc. But why don’t they make the floors pre-sealed?! So many flooring options today are pre-sealed and low-maintenance or maintenance free. Seems like a pain, especially since you have to pay for an extra product, provide the labor, stay off the floors until they are thoroughly dry, re-seal periodically, etc.
YoungHouseLove says
They actually are pre-sealed, but since they’re snap and lock, the only way to seal the seams is to seal them one more time once they’re installed for the most protection! It’s not mandatory, but we hear it’s definitely worth doing for the added durability!
xo,
s
Lisa says
Nvmd! Should have read through the posts before I jumped the gun on my comment! haha
YoungHouseLove says
No worries!
xo,
s
Barb says
Stunning!
Hillary says
I didn’t realize it needed to be sealed?! I’m looking forward to seeing what you use. It’s beautiful!
annabelvita says
Hooray! Lookin good.
I’m in the middle of making over an old secretary desk (this one http://annabelvita.com/secretary-desk-with-hutch-makeover)… at least I say I’m in the middle of it because I’ve thought about it a lot but I haven’t actually been able to get started as it’s stuck in my future in-law’s garage. Argh!
Oh well, pinning ideas for it is keeping me sane and a few other side projects.
YoungHouseLove says
Haha, nice. Totally something I’d do! Brainstorming counts as a step for sure!
xo,
s
Kristen @ Popcorn on the Stove says
The floors are looking AMAZING! Ah! To be honest, I was a little nervous when you said you were doing cork floors (I envisioned cork-board floors haha) but I’m really liking the way they look – much more than wood! It’s going to look really lovely when it’s 100% done :)
And look at Clara being all helpful trying to move the fridge. It’ll be a matter of time before she’s helping you DIY around the house!
YoungHouseLove says
Haha, she’s a curious little bean, for sure.
xo,
s
Katie says
I’m surprised to hear that you are going to seal it. I thought floating cork floors were presealed?
YoungHouseLove says
They are, but both experts and the manufacturer recommend sealing it after installing it since all the cracks between the boards (even though they’re tiny from all that tapping) are “open” but once they’re sealed the floor is a lot more stable/protected.
xo,
s
Ainhoa@ALittleBite says
How come every project always takes a lot longer than expected? We’ve been transforming some Ikea cabinets into built-ins for weeks now… anyway, it’s looking great so far! I love the “after” pics from strategic angles.
Danielle says
I installed a pergo over the summer, the very last piece, was impossible to get in the tongue with the hammer and crowbar, so we wound up cutting just the tongue off, gluing it in with a little wood glue, no one knows the difference!
YoungHouseLove says
Ooh, smart!
xo,
s
The Mrs @ Success Along the Weigh says
Looking good! I like that you’re not done yet because if you were with you being back from Hawaii less than a week, I would feel horrifically inadequate! :)
mariela says
I’m loving it! Can’t wait to see it all finished :) Off the topic question: Where did you guys get the topiaries that you have on your mantel? I really like them!
YoungHouseLove says
Those were from Crate & Barrel on clearance a long time ago (maybe three years ago?). Hope it helps!
xo,
s
meganleiann says
Looks good! When we did our floors, I wasn’t prepared for how loud the process was. I was hearing the mallet tapping in my dreams for a month!
YoungHouseLove says
Oh yes, hammering that tapping block is loud! Thank goodness Clara sleeps through it so we can work on the floor during naps and after she goes to bed!
xo,
s
Yulia says
Wow, looks great!!! You are almost there!
Jillian {Her Split Ends} says
LOVING the look of the cork. Nicely done…and i’m totally inspired now to do something similar in my currently unfinished basement! {Here’s hoping the Hubs agrees!}
Wahoo!!
~ Jillian
http://www.hersplitends.com
Rebecca @ the lil house that could says
Have a project taking longer than expected? I sure do! We expected to finish painting our nursery last weekend but because we ended up hating the color, we had to stop for a few days to scratch our heads which has totally screwed up our timeline. It’s like one of those dreams where you can’t get to your destination (or am I the only person who has those dreams?)
YoungHouseLove says
Aw man, I totally have those dreams too! Here’s hoping you’re all caught up soon!
xo,
s
Morgan says
Love how the floors balance everything out! You all were right the whole time :-) 2 questions…are you going to put some type of window treatment on the window over the sink? and does Clara always walk on her tip-toes or was it the new floors? I had never noticed it until this video. I know 2 very random questions.
YoungHouseLove says
Haha, she doesn’t usually walk on her tiptoes, just randomly from time to time she becomes our little ballerina. Haha. As for the window, I definitely like the idea of a colorful fabric roman shade or even a bamboo one so I’m not sure where we’ll end up, but we’ll keep you posted!
xo,
s
Amanda Wells says
I love your little chatty cathy. She has lots to say! So cute!
http://www.amandadovewells.com/?page_id=45
Kara says
WOW!!! Great job guys! It’s amazing the difference… The darker cork really grounds the space beautifully! Cheering you on from Upstate New York. : )
YoungHouseLove says
Aw thanks everyone! You’re so sweet!
xo
s
Mallory says
I love watching Clara walk around on her tippy toes! Maybe you have a ballerina in your future?!
YoungHouseLove says
Haha, she’s so funny about that. She only does it sometimes, but it cracks us up how she switches from regular walking to tip toe walking!
xo,
s
Anna Lisa says
Such an improvement! White-on-white-plus-stainless-steel-and-silvery-grey is lovely of course but this really adds the warmth I think a kitchen should have.
GirlyObsessions says
I love the way the floors look! I think the cork adds such a great warmth to the room without looking out of place! Great job, as usual!
Bryanna S says
aaah it’s looking great!! I’m so excited… the room looks SO much better with the dark floors to ground all the light colors.
About the video though… does Clara often walk on her tip toes? Or was it just for the video? if she does it a LOT (most to all of the time) I strongly recommend working with her to get her off her toes. I have a few friends who did the same and their parents thought it was super cute (well, it is) and didn’t correct it… now they have all sorts of issues. One has needed surgery, most can’t walk regular. muscles are super tight so they can’t put their feet flat. A year of it probably won’t do much, but if she does it most to all of the time, I recommend working with her to walk more flat and in the mean time stretch her feet a bit so make sure those muscles don’t get stiff and used to being in the tip toe position.
YoungHouseLove says
Oh no, she usually walks on flat feet- so it’s just occasionally that she does the tip toe thing and then goes back to “normal” – haha. Her doc said the same thing (if she does it a lot it can be an issue, but it’s maybe five percent of the time (and never in shoes).
xo,
s
alex says
I think its just something little kids do…as long as your not encouraging it or pointing it out to her…she will stop…I walked on my top toes til I was like five. It’s just something new and fun they figure out…then skipping…and hopping….and somersaults.
Meg says
Looks great! I’ve heard cork isn’t great with water. Were you concerned at all putting it in the kitchen? Or is the sealer the magic touch to help this? I really want to put cork in my kitchen – working on convincing the hubster.
YoungHouseLove says
The manufacturer and a few contractors we know recommended it for kitchens and living areas and even half-bathrooms if it’s sealed, so the only space that’s off limits for cork is a full bathroom (the wetness from a shower or bath can warp it since it’s a lot more excessive than water in a half-bath or kitchen). From what we understand, even big wet spills are ok as long as they’re sopped up right away, but if someone was stepping out of the tub every day onto cork it could hurt it over time since the wetness is such a regular occurrence.
xo,
s
D says
I seriously love Clara videos!
Amy @ The Button Casa says
We put in bamboo floors a few years ago and if I never see another nail gun I’ll be happy :)
Love the floors and that they don’t dent or scratch is huge. Bamboo both scratches and dents, thankfully they can be refinished.
Meredith says
Yay! Beautiful. Typo alerts:
I think you mean, “Well, that AND sliding the appliances out…” [the and is missing]
And also you have a “We though” instead of “We thoughT”
Just a heads-up. :) John’s facial expression at the end of the first video cracked me up; he looks so pleased with the process!
YoungHouseLove says
Thank Meredith! Off to fix that!
xo,
s
Belinda says
Looking great! And I love Clara’s long speech…she’s not related to you guys or anything, right? :)
YoungHouseLove says
Haha, we’re a wordy bunch!
xo,
s
Bob says
The cork floor is not working. At least in jpegs. Maybe it works in person, I don’t know. I can’t decide what you want me to look at… the crowded shelves, the massive pendant lights or the floor.
I’m sure you’re thrilled with the results so far, but I think the room is a missed opportunity. It IS better than before, so I guess there’s that.
Christina says
Wow. Sounds like somebody woke up on the wrong side of the bed this morning.
Ali says
They look great!
Hahaha…it took my husband 2 years to install the base boards in our kitchen. He finally installed them when we moved out! Angry face!
YoungHouseLove says
Haha, angry face = hilarious.
xo,
s
Kate says
Great progress! So once the floors are finished (sealed, transitions in place, etc), what’s next? Molding for the back of the peninsula?
YoungHouseLove says
Yup! Then some accessorizing (maybe a window treatment over the sink, possibly some more art, a chair and rug in the corner by the fireplace, etc) and it’s done!
xo,
s
Ann Marie | white house, black shutters says
Looks beautiful! We were just at Lowe’s last weekend taking a look at floors. I have never seen cork in person and wondered what the flooring would look like in a large space. And now I see your post! Looks beautiful, good luck with finishing the last legs of the project (in my opinion, harder than starting a project). ;)
YoungHouseLove says
Aw thanks Ann Marie!
xo,
s
jess says
Love it!!! It looks great you guys. Congrats!
adriane Wacker says
What a difference. The whole thing is looking amazing! Great Job guys!
Nicole says
I love how everything’s coming together. those cabinets with that penny tile, to die for. are you guys still digging the green wall color now that everything else is almost done, or do you have plans for that too?
YoungHouseLove says
Yes, we love the color on the walls since the floors and cabinets and counter are all such safe/neutral tones (chocolate + white + light gray + soft avocado = our jam).
xo,
s
Kara from kara paslay designs says
We have had plenty of projects that run past their “due date!” I think it’s more normal to be behind on home projects than on time! :) The floor looks great! PS- thanks again for contributing on my blog today!
YoungHouseLove says
Thanks for having me Kara!
xo,
s
Laura says
Clara videos make my day. Girl is as cute as they come!
Also, LOVE the floors. So very rich and luxurious looking. :)
Amy @ Lovely Nest says
My in-laws have a cork floor in their kitchen and love it! It’s soft to walk on and doesn’t show a lot of scratches when the dogs run around chasing each other like crazy!!
SingleMama says
I like how Burger looks like he is twirling in the picture :). The floors look great!
Kristin in OR says
The floors look amazing! The whole kitchen looks amazing! So different! And you’ve got a little dancer on your hands if Clara loves to walk on her tip toes. :)
Brandi @ His Shabby Her Chic says
It looks terrific!
We installed floating hardwood floors in our house over 2 years ago and only just now finished the final touches. Talk about being a slacker…
Jess @ Little House. Big Heart. says
I agree with Katrina.. I was a little skeptical at first, too. I’ve definitely come around though.
How does the cork look next to your existing hardwood flooring? We’re getting ready to rip out the carpet in our office and are considering options for what to put down in it’s place. The rest of our house has gorgeous original oak hardwood, and we want it to flow into the office (which is also how you get in/out of the backyard, necessitating something durable).
YoungHouseLove says
It looks the best next to the hardwoods in the hall that are close to the same tone but the lighter hardwoods in the dining room are a little weird next to it since they’re not the same tone. Our plan is to eventually refinish all the hardwoods in the house in the same rich mocha color for a seamless look (our first house had wood floors that were all the same color and we loved the easy flow it added).
xo,
s
Dianne says
I generally love coming on your site and seeing what you come up with. This is the first official time I’d have to disagree with a choice you made. As much as I love cork, I just think it doesn’t fit the aesthetic of the room. To each their own and what ultimately matters is that you like it and you do. But I’m just surprised at the choice.
YoungHouseLove says
No worries Dianne! I think when it comes to decor it’s par for the course for everyone to have a different POV! It seems as though a lot of commenters have revealed that they were originally not into the choice of the cork but they love it now that they’ve seen it, but it’s certainly not for everyone!
xo,
s
Sarah @ The Strength of Faith says
I’m sorry this is taking longer than expected! I know how frustrating that can be.
When you do the final reveal will you do a side-by-side before/after? This room in particular is going to be so drastic!
YoungHouseLove says
Yes, I’d love to!
xo,
s
Amy says
The room looks great, but why I really had to comment was to thank you for another video with Clara in it. My son (he’s 2) was kind of cranky last night, so I showed him a video of her and it calmed him right down. At least until it finished and he said, “More Clara!”
YoungHouseLove says
Aw, so cute!
xo,
s
Jackie says
Oh. Em. Gee. I adore your kitchen! It looks incredible, you guys certainly have an eye for design…I would hire you in a heart beat to design mine for sure! ;)
YoungHouseLove says
Aw thanks Jackie, you’re so sweet.
xo,
s
Jenn W-M says
The floors are looking so great!!! Thanks for the real life timing. We have a 16 month old and I always felt frusterated because I could not get things done in a timely manner. Thanks for showing us you can spread a project out over naps or days. Though, our little one refuses to nap through anything DIY related – esp painting.
YoungHouseLove says
Aw man, I don’t know what we’d do if we couldn’t DIY over naptime! Although the best chunk of time is when Clara’s in bed for the night (after 7:30). So many night projects going on in our world. Haha.
xo,
s
Katie R says
A project that has taken longer than expected? Our kitchen floor! (haha) We made great timing getting through our kitchen renovation (Thanksgiving to New Years) but then I got pregnant, which is wonderful and very exciting, but was suddenly too sick to do anything. So, our floor sits missing most transitions and all baseboards and base shoe. We have yet to buy the tile to do our backsplash too but at least all of our appliances are functional!
YoungHouseLove says
Congrats on the baby! I’m sure after the morning sickness passes you’ll be raring to go! I was such a nester before Clara came I wanted everything done done done!
xo,
s