This is supposed to be the post where I declare “The floors are DONE… enthusiastic exclamation point!” But instead I’m here to say “The floors are almost done… sheepish period.” But they’re mostly down and they weren’t actually that hard to do! Seriously, anyone can do this.
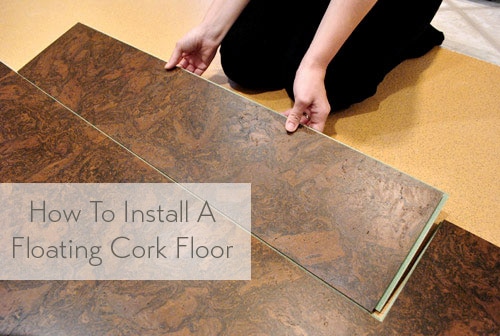
Since we last updated you, they’ve gone from this:
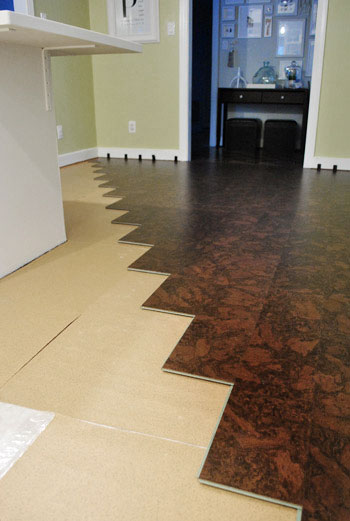
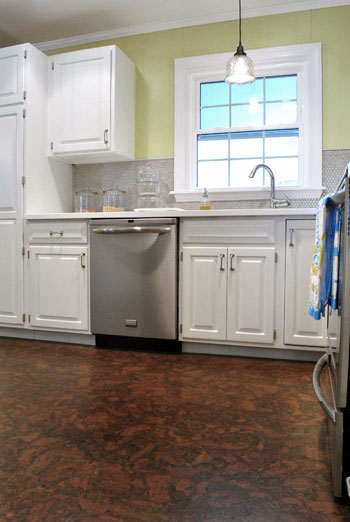
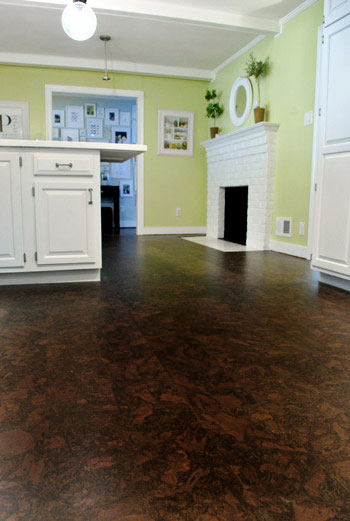
To this:
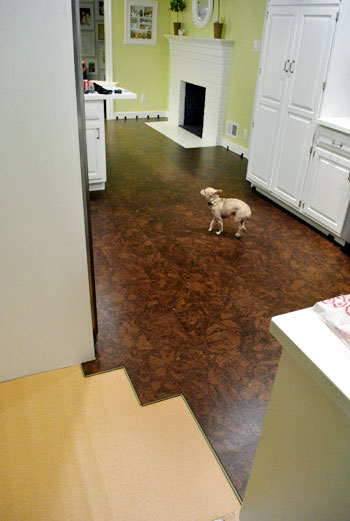
Note: Some of these photos have the cork looking more red/orange than it is in real life. But if you watch the video where we’re installing it (or the one with Clara in it), it’s probably the most true to life (a rich mocha color). We’ll try to take better pics next time!
We thought we could knock out the rest of it in the last few days, but between making all of the cuts to snake around our peninsula/cabinets/doorways and moving appliances out to make way for a few planks of flooring under them (to keep them level without pinning down too much cork), it just took a little longer than we thought. And since this whole blog is in real-time, as much as we wish we could fast forward to the end and share all the glossy after pics (no one wants to call this turkey done more than we do, haha) we just have to keep plugging away and share the pics whenever we get ‘er done. We did stop to take some how-to pics and a video along the way this time though – so we’ve got that to share with you. Shall we begin?
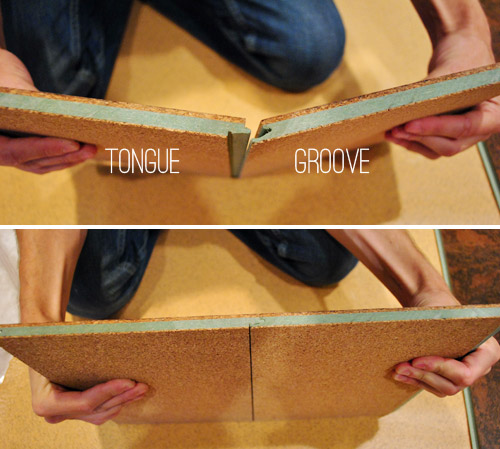
Here’s how the snapping system works on these cork boards. Tongue goes into groove. Boards lay flat together. Everybody’s happy.
When it came to actually putting a board in place, it went something like we show in the video below. If you can’t watch the video (we don’t want to blow your cover at work) we’ve also included the same information via photos below. Watching the video on mute is probably more explanatory though, just to see things in action.
Okay, so now for the photographic, Burger-cameo-free version of that same info. We first slid the tongue into the groove at a slight angle.
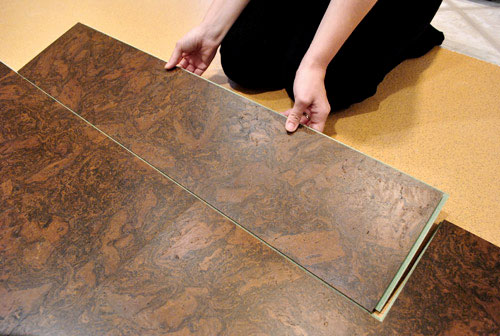
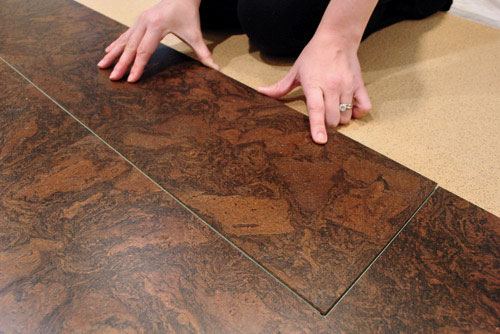
That held it very loosely together so that we could then lay it flat and slide it into the groove on the short end of the board.
Obviously that isn’t enough to hold the board in place, so out came the hammer and the tapping block (we got the tapping block in a flooring kit from Home Depot mentioned here). The block allows us to give the board a pretty solid wallop (technical term) without hurting the cork (since it takes the brunt of the hit instead of slamming the cork directly).
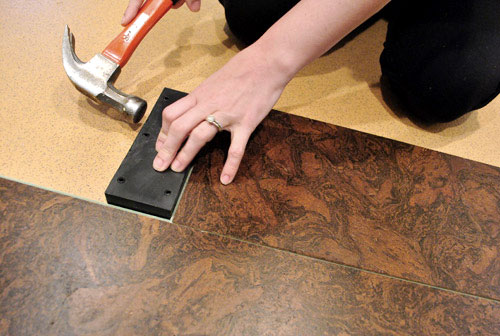
Once we had the short end tapped in enough to make the seam disappear, we did the same on the long side of the board. See that slight seam? After a few taps it was history (you can watch it disappear in the video above).
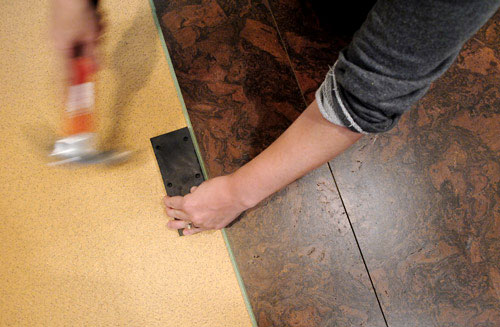
In our experience, when the long side popped into place the board sometimes, well, popped up a little bit on the outside edge. No bueno if your goal is a nice flat floor. So we found that if we put our weight on the board to keep it flat, then hammered it a couple more times it would get the board to lay flat and behave.
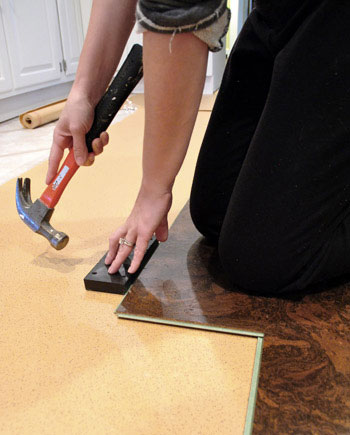
See, it’s behaving.
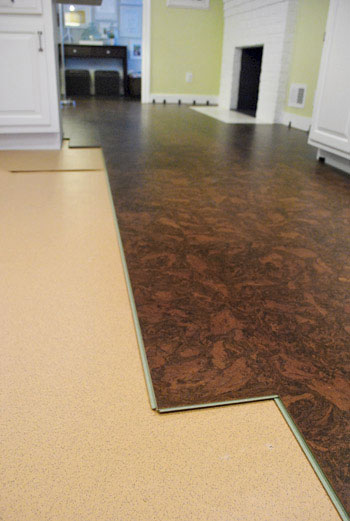
Of course it was a bit different when we got to boards close to the edges because (bummer alert) you don’t have room for your block or hammer.
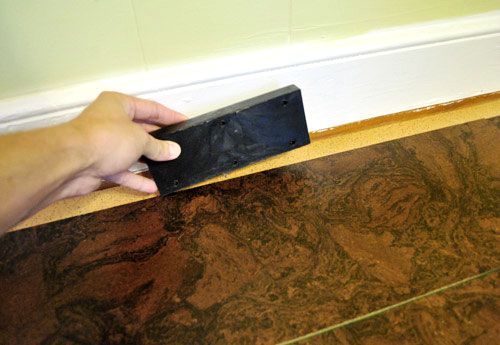
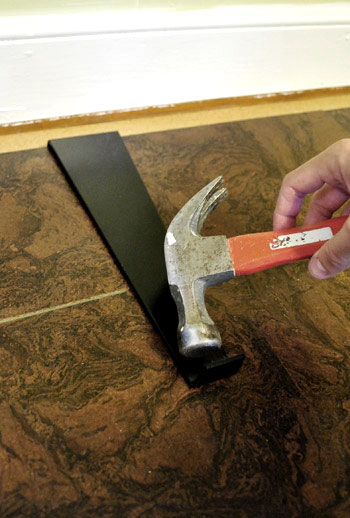
That’s where the pull bar comes in handy (it was also included in the kit from Home Depot along with the tapping block and spacers mentioned here).
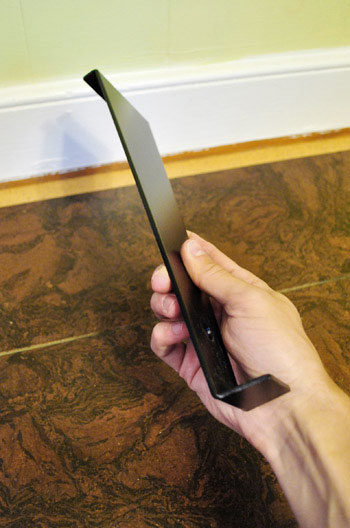
The wide side hooks over the board so that you can tap the other end with your hammer to get that seam to disappear. Oh and see that gap near the baseboard? There’s a recommendation of a 5/16th gap around the perimeter of the room (floating floors need to be able to expand/contract a bit to keep from warping, and the shoe molding will completely cover these slivers of space so they’re undetectable) – so we did have to cut a sliver and stick it in there. But nothing too snug to the wall since we don’t want warping. We used spacers to help us keep our place. More on that here.
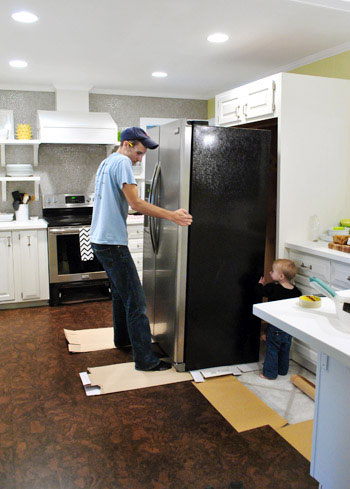
Both techniques weren’t that time consuming, actually. It was the cuts that were a big time suck. Well, that and sliding the appliances out so we could run a few planks of flooring under them to keep them level. And since we got a big groove in our hardwood floors at the old house from sliding the refrigerator out, we were SUPER careful about it. Like two-layers-of-cardboard-over-a-scrap-piece-of-cork careful.
So I’m sorry we don’t have “after” pics for you yet (not that they’d be totally done anyways since we still have to reinstall transitions and shoe molding along with seal all the cork for added durability), but I did try to fake it by taking some pictures from angles where you don’t see the unfinished section in the laundry room. Yep, I’m clever like that.
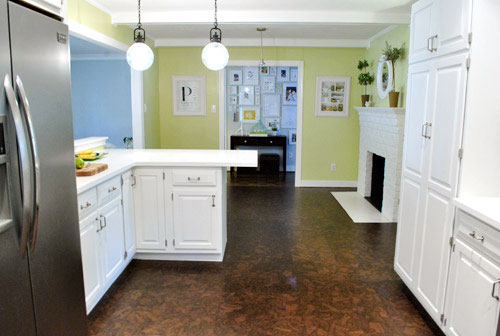
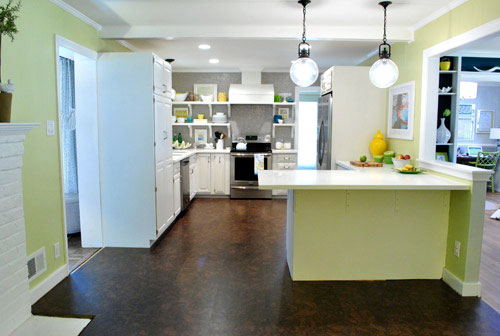
Who knows, maybe we’ll never finish it and just shoot around it for the rest of our time here.
Just kidding. Of course we’ll finish it. Especially since I couldn’t even shoot one cute video of Clara without blowing our cover. Darn you Clara, always being adorable in the most inconvenient places! Note: for some reason every time Clara throws the football on this video the floor appears to makes a crazy loud sound, but in person the floor is really soft and absorptive of sound, so it doesn’t make loud hollow noises when you walk on it or drop things – must just be the sound quality of the Flip camera (it seems to amplify voices to hear them better, so it must have amplified the football sounds too).
Luckily the laundry room should be pretty speedy. Knock on wood…er, cork.
Anyone else in the midst of a project that’s taking longer that expected? Ever laid a cork floor? We have been so happy with it so far (the rich deep color adds so much for the formerly white-on-white room, there are no scratches/dings where Burger runs around from his nails, no dents where we drop things, it’s very soft and easy on the back/knees, and it should be even more durable once we seal it after it’s all in). We’ll definitely keep you posted! Oh and we did learn that if you’re redoing a kitchen from scratch you should install your cabinets first and then add the floating cork floors around them (like we did in this case as well) since a floating floor shouldn’t have big heavy cabinetry resting on it (remember, it needs to be able to expand and contract a bit to keep from warping – more on that here). So we just thought we’d toss that tip out if it was helpful to anyone.

Lisa@wanderdownpennylane says
The progress is going great. Keep it up!
I have been having that same problem with our grouting experience I told you guys about on Monday. It seems like almost every project we do lately takes a little longer than we anticipated.
http://wanderdownpennylane.blogspot.com/2012/03/you-know-its-makes-me-want-togrout.html
YoungHouseLove says
Aw, good luck with it Lisa!
xo,
s
Carley says
They look awesome! Your kitchen looks so warm with the rich floors! I think once it was done, I would want to lie down and hug the floors. Um..is it possible to hug floors??
YoungHouseLove says
I have tried it. It just looks like taking a nap with your arms out. Haha.
xo,
s
Liz says
I love the floors!! I swear, you guys can do it all!
We are moving to a new house in the next three weeks and I find myself wanting to rush and get it done and make everything perfect, even though we don’t have the time or the budget to do that. How do you deal with having things imperfect for a certain amount of time? I need to learn to take my time and things design ideas through. Does it ever bother you do have things disorganized/unfinished in your home?
xo
Liz
YoungHouseLove says
I think in our first house we expected to have everything done right away and were frustrated when things took a while and the house was messy and in-progress. But then we learned over 4.5 years of living there that a house is never done and you can’t do it all in one week or one month or even one year (and if you’re a DIYer you actually love having projects going on) so we embrace the in-progress lifestyle of being DIYers and completely know that it takes years to get where you want to be! But that’s what makes for the best rooms- the ones that come together thoughtfully over time (instead of being thrown together quickly on a crazy deadline). Hope it helps!
xo,
s
olivia says
Wow, it looks fantastic! I absolutely love your kitchen makeover-it’s been so fun to follow. (I know it’s not all the way done yet, but it looks pretty done from those last few pics!)
YoungHouseLove says
Thanks so much Olivia!
xo,
s
Thad says
Don’t get me started in flooring taking longer than expected! We are currently in the middle of installing laminate in our new upstairs. We started on a long weekend and the original plan was to finish the whole floor that weekend (or at least in the evening that week). Now, here we are several weeks later and only one room is done! Another to go, plus a hallway and closet!
YoungHouseLove says
Oh man, good luck Thad! It’ll all be worth it when you’re done!
xo
s
Bridget says
lookin good!!! sidenote: I had a seriously weird dream about seeing you guys… I was at an open house and you guys were there too, but I was too shy to say hi. But then you asked me to take a photo of you guys and Clara, so then I was like “No problem! I”m a hug fan!” and then Sherry got super creeped out that I knew you and I ran out the door. The end. Like I said weird dream… Happy Thursday!
YoungHouseLove says
Haha, so weird! I’d probably just awkwardly chat you up while Clara pulls my shirt down or talks about pooping (or something equally embarrassing). Haha.
xo,
s
Meghan says
The cork floor looks fantastic with the white cabinets! Are you going to continue it through the whole house?
YoungHouseLove says
We’re planning to stain the hardwood floors that we have everywhere else in the same mocha color so it all feels more seamless and has a nice easy flow. We love hardwood too, so mixing it with cork when it’s all the same tone should be nice.
xo,
s
Michelle says
LOVE it! The cork is beautiful.
My hubby and I installed a laminate floating floor in our living room and hallway. Such a marvelous improvement over carpet!
Julie says
Ahhh. Now THAT’s what I’m talkin’ about. Love the floors.
meryl rose says
Looks awesome! I love the dark mocha contrast with the white cabinets.
We’re working on building a dining room table from reclaimed wood and doing a collage on top of all the sports tickets I’ve saved for the last 10 years (sports nuts over here!) Needless to say, it’s a project that’s taking A LOT longer than anticipated (we started in early January and we’re still. Not. Done.)
http://www.picardyproject.com/2012/01/starting-to-prep-our-ticket-table-wood.html
YoungHouseLove says
Such a cool project! Good luck getting ‘er done!
xo,
s
Kelly says
Just 4 words….You guys are awesome!
YoungHouseLove says
Aw thanks Kelly.
xo,
s
Ashley @ everydaybetty says
Great tip on installing floating floors with new cabinetry. We did NOT follow that advice… And have paid for it with weird gaps when the weather changes and gets colder. Sigh.
Also be sure that when nailing your shoe/quarter round you aren’t nailing into the flooring. We made that mistake too in a few spots so that contributes to the gaps as the floor contracts.
YoungHouseLove says
Oh man, thanks for the tip about the quarter round. So sorry about those gaps!
xo,
s
Brenda says
In my head I was picturing that it would look darker, and I didn’t know how it would contrast with the lighter rest of the kitchen, especially since I’m used to looking at those light floors. But it’s warmer than I was expecting, so I like it more than I thought I would. It’s really exciting to see the progress!
Brenda says
Oh! I just realized what was bugging me about the floors! (Bugging meaning something in the back of my mind that I couldn’t quite place.) The kitchen table at my parent’s house has that same swirly design as the cork does, and it’s probably only a few shades lighter.
Mandy says
It’s looking so good! Wish I lived closer…I would hire you guys to do some work to my house!
Jessica says
My husband and I did this to most of our house right when we moved in over 4 years ago. It has definitely held up nicely with a 65 pound dog running around (just don’t drop a surround sound speaker 8 feet off the ground). Will you (or do you) have a post on how to reapply, paint and caulk the base trim? I have reapplied all the trim but have yet to paint anything and need some motivation/help!
Love your blog!
YoungHouseLove says
Our trick is to use a short handled brush (we like one called the Tight Spot with a purple handle sold at Home Depot and Benjamin Moore) since you get more control and can’ stay in the lines (you can also tape things off if you’re nervous). Hope it helps!
xo,
s
Brianna says
I normally don’t comment on your posts ’cause I think everything you do is great, and I’ve used quite a few tutorials to do my own projects. But I found myself asking a bunch of BIG questions upon seeing this reveal—as in, “am I the only one who sees this as an old, 70s version of laminate flooring you’d find in your grandmother’s basement?” Are you guys as in love with it now that it’s on the floor as you were when you picked it out?
Is it as orange-toned as it appears in the photos? Maybe it looks way better in person….it’s just the first time I’ve seen one of your project reveals and had an immediate “noooooooo” reaction. Just curious how you guys feel about it now (haven’t seen a “and we love it so much!” line yet). Don’t hate me for questioning the choice, please :(.
YoungHouseLove says
It’s a rich mocha color in person! No orange at all. Watch the video with Clara in it- that’s probably the most true to life. We’re so happy with it- we love the warmth and the richness it adds. It reminds us a lot of the rich brown floors from our last kitchen but the movement of the cork (and the green-ness/softness is a step up). It’s definitely not the same flooring that everyone in America would pick for their kitchen or anything though, haha. All this decor stuff is definitely subjective!
xo,
s
Esther says
Loving the cork floors!!
Our entrance project is going at a snail’s pace. Nothing like learning the virtue of patience.
http://the6wolfeden.blogspot.com/2012/03/at-snails-pace.html
Happy flooring!
YoungHouseLove says
Looks good! Love that color! Good luck with everything!
xo,
s
MelP says
L.o.v.e.
I wish the jeep didn’t just steel 2k out of our new flooring budget!
Debbie says
I was hoping to like the floors but they just look so brown and I’m not sure brown and grey go together so it looks off with the gray penny tile wall. I liked the idea in theory but it doesn’t look like I imagined it would. Kudos to you for getting right back to work after your trip to Hawaii!
Ben says
Maybe someone asked this or I missed it in your blog but what do you do with the pieces next to the wall that need to be cut? How do you fit those pieces in so they are snug against the wall and the actual floor? Thanks for showing these steps, if I ever own a house, I feel more confident that I could do this myself haha.
YoungHouseLove says
See the photo of the plank against the wall in this post? With the little metal arm that you bang to get them in there? You actually don’t want them snug against the wall, you want a small space so the boards can expand and contract so they don’t warp (that sliver of space is then covered by quarter round). Hope it helps!
xo,
s
Kate says
I am SO satisfied (sounds creepy kinda, but SO true) reading your post this morning. Talk about unfinished projects, I thought it would be a fabulous idea to start a bathroom redo one Saturday when my husband was working. Turns out, it was a terrible idea. Not only did it take forever to paint (such a small space and very few full walls = a lot of cutting in), but our vanity that I chose to repaint and just replace the top – is a custom size. Going on week three, with no sink or mirror, and a lot of tools roaming around the tile floor. Still on the hunt for a custom size, somewhat good quality (high quality went out the window once we saw the prices) custom vanity top.
Thanks again for keeping it real! :)
YoungHouseLove says
Aw man, I feel for you Kate! Here’s hoping you find the perfect vanity top!
xo,
s
Adrienne B says
Definitely seal the whole floor after it’s installed. We have cork in our house, and the manufacturer said it didn’t need to be sealed- big mistake. Where the planks meet, water and dirt get in there and the seams start to show up or lift up some.
On the plus side- it is super warm and you probably won’t break anything if you drop it on the floor. I’ve had wine glasses just bounce! It’s also held up quite well to our 70 pound dog- no scratches or gouges. The cork itself is super durable- it’s the seams that can cause some problems, so seal away! (great, now I have Come Sail Away in my head….)
YoungHouseLove says
Thanks for the tip Adrienne! We’ll definitely seal it and give you guys all the details! So glad to hear that yours has held up so well, even with a 70 pound dog!
xo,
s
Allison says
Question! You said that you shouldn’t put a floating floor under cabinets, but you mentioned running it under appliances. Are appliances less heavy than cabinets? Or were you just closing the gaps around the wall that holds the fridge and the fridge itself, but the floor under the fridge itself isn’t cork?
(Maybe the answer is obvious, but I’m 100% new to this DIY stuff and I need those things spelled out! Ha.)
YoungHouseLove says
Yes, we were just running it under all the feet so things like the fridge, dishwasher, and stove weren’t tipped back since their front feet were on cork and their back feet weren’t. From what we hear it’s ok to run it under appliances, maybe because although they’re heavy they’re just about 3″ wide or less (and it’s not like you’re running it under all the cabinets along two walls or anything). Hope it helps!
xo,
s
Kathy says
So cute! Clara walks on her tippy toes just like I did when I was her age! ;)
Staci @ My Friend Staci says
This looks fantastic! I am imagining how much warmer and softer it would be under my feet right… now :) aahhhh….
As for me, I have spent HOURS over the past week getting my new home tour ready to go live on my blog, and now it’s officially up! http://myfriendstaci.com/home-tour/
YoungHouseLove says
So charming! I love your house! And your pooch!
xo,
s
Staci @ My Friend Staci says
Thanks, Sherry! I’m so elated that you like it! :)
Amy @ this DIY life says
I’ve decided for Father’s Day (and his birthday) my husband is going to get a new workspace in our basement. Partly because he needs it and partly because I need my dining room table and my entry room back. Yep, secretly selfish Amy here! He works on electronics and was complaining the other day that when he drops itty bitty screws they bounce on the hard concrete floor he has now and he can never find them. I’m not thrilled about the idea of hardwood or laminate in our basement because of the moisture, so I’ve been tossing around the idea of cork in that space (soon to be room). My question for you: You mention that it’s soft and not hard on your knees and back. Does it actually have a little bit of give? Like if you drop a screw from a camera or glasses, would it bounce like on concrete?
Thanks and the floor is looking great!
YoungHouseLove says
Hmm, it seems to absorb items that fall on it (which is probably why they don’t crack) so yes, I’d say it has a bit of give. I’m not sure if things wouldn’t bounce at all (the football bounces in the video) but a screw probably wouldn’t bounce as much on cork as concrete. Just be sure to check that the cork is ok if your basement is too moist because it’s not recommended for truly wet spaces (like a full bath) but is ok in rooms with occasional splashes and stuff (like a kitchen or half bath).
xo,
s
Amy @ this DIY life says
Thanks for the info! Our basement isn’t terribly wet considering our house is over 100 years old :) We have a great local flooring store – I will have to check in with them as far as the moisture goes.
Sidenote: I think I have something all jacked up in my browser because for the last few months none of the videos in your posts actually show up for me [sadface]…I just trust they are there and Clara and Burger are as adorable as ever ;)
YoungHouseLove says
Oh no! Maybe try clearing the cookies/data/cache and they’ll hopefully pop back up if YouTube isn’t blocked at your office!
xo,
s
Randa says
The cork is gorgeous but I’m taking the time to post NOT because of that… but because I just have to say that YOUR CHILD IS ADORABLE!!!!!!!!! I love how Clara walks in circles on her toes in that video, chattering happily to herself (well, I guess to you) and making all kinds of sense in her baby way. Seriously, I could eat her up! :) How do you get anything done with her around? I know, I know, she’s not this intensely cute/funny/edible every single second of the day… :) but I’m glad you capture those moments!
YoungHouseLove says
Aw thanks Randa! She’s so much fun these days since she’s so chatty and interested in everything. Here’s hoping we have a little DIY diva on our hands…
xo,
s
Elesea says
I realize that the cork is supposed to be the star in this post, and it’s really beautiful, I love it. BUT i just can’t get enough of that penny tile. Really that whole wall is just stunning. Bravo!
YoungHouseLove says
Aw thanks Elesea. It’s my favorite too!
xo,
s
MamaJ @ TheSecretLife of a Scientist'sWife says
Ahh, what a difference – the cork has really anchored the whole room.
I’m clearly not very ambitious. I still have misplaced furniture and empty walls from painting nearly a week ago. Ya, internet distractions!
Monika says
It’s coming together! Happy dance! We are getting hardwood floors put in next week, including in the kitchen. Any recommendation on keeping them in good conditions with all the water/knives/falling plates? I’m really looking forward to the look (over viny we have now, ick!), but a little worried about it getting super beat up. I know you had hardwoods in your last home in the kitchen…
YoungHouseLove says
We just tried not to drop crazy heavy things on them (like weights, hahah, or a hammer) but everyday drops (like dishes and knives and forks) were just fine. Hardwoods should be hard enough to take it I think!
xo,
s
Heather says
We are leading strangely parallel lives :) I have followed your blog in the past, but haven’t popped in lately. I was looking for industrial stools and a friend linked me back to your blog. We are in the middle of a kitchen remodel and just finished installing an Ikea kitchen (ok well almost finished lol). We actually had cork picked out for the kitchen but changed to 18in tile at the last minute. I decided to use the cork I bought (the same cork that you just installed actually :) ) in the adjacent den instead. The square footage in both rooms is the same and the den needs a comfy floor.
Anyway, I wanted to ask what sort of saw you used to cut your cork. We need to either rent or purchase one and I couldn’t decide between a small table saw and a 12in miter.
Also, how are you finding your stools? I had the ones that you ended up with, the backless version of them and a couple of square ones pinned. My bar top is higher than average, so I need a stool that is over 30inches and these industrial stools are pretty much the only thing that I can find that isn’t either 300 bucks or remarkably ugly. I think I am going to paint them something super bright– possibly a red-orange. If you had it to do over again would you buy them? Did they meet your expectations in person or do they come off looking a bit cheap?
YoungHouseLove says
We actually used a table saw, which seemed to work well. As for the stools, we love them! It’s definitely comfy to have backs though, so that’s what we went with. Painting them a bright color is a great idea! They look great in person and even my doesn’t-always-see-what-we’re-going-for mom loves them!
xo,
s
Heidi P. says
OOooooooooohhhh!!!!!!! Woooooooooooooow. I clapped :) literally.
YoungHouseLove says
Aw thanks Heidi!
xo,
s
Renata says
Just wondering, it looks like the floor goes an inch higher than the fireplace hearth. What will be your solution for that? If that is the case, it just looks like it in one of the pictures.
YoungHouseLove says
It’s about a half-inch difference but we think we’ll add some wood trim pieces to create a sort of threshold to make it look better. We also would eventually love to retile that, so that’ll make up for the height difference.
xo,
s
Jen @ The Decor Scene says
Love how it warms up the room. Can’t wait to see it all done! Very exciting!!! :) We laid laminate flooring, so I know how easy and hard it can be. You’re almost there….your in the home stretch…don’t give up now. heehee! ;)
Judy says
Let’s see … something taking longer than expected … Other than my divorce, stenciling my breakfast has been a huge time suck, as you so eloquently put it! I’m using the same trellis stencil that “Casablanca Transformation” used and geez, I have to come to work to rest. Anyway, love your kitchen. If hubby and I were still together, we would’ve had 500 arguments and 500 trips to the marriage counselor!
Judy says
Sorry; meant to say breakfast NOOK.
Mary says
I’ve never laid cork floors, but I love these! The mocha color is simply beautiful against the white cabinets! I *just* finished this project which took FOR_EV_ER:
http://mkdesigndecor.blogspot.com/2012/03/long-time-in-coming.html
Why did it take for_eve_er (like the Sandlot)? Because of the bajillion-staples-and-oil-based-paint (at least I think it was oil-based) havoc that the previous owners wrecked on this poor chair! I am quite proud of the end product however. Though, after all that hard work I have yet to sit on the chair, since I am still enjoying just looking at it :)
Can’t wait to see the final reveal of the kitchen–It has come such a long way!
YoungHouseLove says
Haha, totally worth the work. It looks great!
xo,
s
Kerrie says
So, I was looking to see if this had been addressed already but I don’t think it has. Are the floating floors higher than your fireplace floor thingy – i have no idea what that is called!! if so, are you planning on leaving it? or building up the fireplace?
YoungHouseLove says
Oh yes, scroll back a few comments for my reaction to that (I just posted my answer, so it wasn’t up when you left your comment). Hope it helps!
xo,
s
karin says
Please post the sealer you’re going to use? We DIY’d cork floors in our kitchen too and haven’t sealed them yet because we can’t find a recommended sealer! Thanks!
YoungHouseLove says
Will do!
xo,
s
Lindsay M says
Love it! Does Clara always walk on her toes like that? Such a sweetheart! She totally stole the blog, sorry S and J! :-) But the floors are killer! And GREEN!
YoungHouseLove says
Haha, just every once in a while she gets in ballerina mode! Haha.
xo,
s
Sara says
Hey guys! I was at Home Depot and saw Resilient Vinyl flooring that looked almost exactly like your cork. I think it was something like $1.99 a square foot. Did you guys look into that at all or have any reasons why you would not get vinyl? I love the look of cork…but not the price! Heard much about it?
YoungHouseLove says
our cork was on clearance from Lumber Liquidators so it wasn’t too bad (maybe a dollar or two more than vinyl) and we like the eco benefits and the fact that it’s a natural material (and soft underfoot too). Vinyl is definitely another option though!
xo,
s
Emma says
The floors look great! It’s so cool how the tounge and grove planks form such a seamless floor. Good luck with the final ten yards!
Karyn says
As I was watching the Clara video, my son walked over and started chatting back to her like he knew exactly what she was saying. And to quote a movie classic… She had him at “hello.”… well, actually she had him at, “lollipops.”
YoungHouseLove says
Hahaha, hilarious.
xo,
s
Krystle @ Color Transformed Family says
Like some of the others I was also a little skeptical of your flooring choice. But not because I didn’t think it would work with the room more because I didn’t know how it would look laid in square tiles. I really like it as a plank though and the basically seamless look it gives it. I think you made an excellent decision with the countertops now. If you had gone with granite or something similar I think it would have competed with all the patterns in the flooring. It really does look beautiful.
YoungHouseLove says
Aw thanks Krystie! We thought the same thing about the counters, since we wanted the backsplash and the floor to add the most texture to the room.
xo,
s
Ginny @ Goofy Monkeys says
I think the floors are looking great and I totally understand how projects can run long. Don’t they ALL?? I swear the one week bathroom tile job took 3 weeks here and the quick faucet switch out that we did over last weekend took at least 3 hours. That’s just how it goes :)
So the cork has me intrigued – do you run it under the fridge? Is that too heavy?
Is cork appropriate for below grade like in a finished basement?
YoungHouseLove says
We just ran planks under the feet for the fridge and dishwasher and oven so they all sat level (didn’t want their front feet on the cork and their back feet off of it or they’d tip backwards). So although they’re heavy, resting them on just two planks of cork per item doesn’t “pin down” the whole floor like putting it under an L or C shaped bank of kitchen cabinets or anything (which would really keep it from expanding and contracting like it needs to). Hope that makes sense!
xo,
s
sophie says
I have two sewing projects that are taking longer than planned, mostly because life has been busier than planned. But luckily I started early! One is a present for a friend’s son who turn 1 in May and the other is a great big patchwork wall hanging for an empty and very bare wall in our family room. Using up all sorts of bits of left over fabric for the present and for the other, I went to Value Village and picked up cotton pillowcases and pajama pants in coordinating colours and patterns. It’s fun watching it all take shape.
Melissa says
The floor is turning out beautifully–really complements the rest of the kitchen. I was skeptical of “cork floor” but you’ve convinced me. I really need to learn to stop doubting. Everything you guys do turns out wonderful.
p.s. I love when Clara was walking on her toes! Adorable.
YoungHouseLove says
Aw thanks Melissa! You guys are so sweet.
xo,
s
Kate Battle says
Looking great guys!
I have a question about the durability of cork. I know Burger is a lot smaller than my dog (70 lb border collie/great pyrenees mix) but I am worried that if I installed cork in our hallway and bedrooms that the dog’s nails would destroy it in short order. I looked at some cork in Home Depot and I was able to make finger nail marks in it with just my thumb! Maybe a higher grade cork would hold up to my dog’s nails? What grade did you buy?
YoungHouseLove says
we actually got a comment from someone right in this post with a 70lb dog who says they have no marks/scratches! Isn’t that funny? Here’s hoping you can scroll back to see it (I commented under it if that helps). We got Lisbon Cork in Porto (not sure of the grade, but they’re a great manufacturer).
xo,
s
Lindsay@Tell'er All About It says
Oh, been there done that! We laid cork floors in our upstairs hallway a few years back. LOVE them!
http://tellerallaboutit.wordpress.com/2010/06/29/airing-our-dirty-laundry-chapter-4-pop-the-cork/
Lindsay@Tell'er All About It says
…and I should add – it took us WAY longer than we had planned as well! haha! Keep at it – it’s worth it when they’re done :-).
YoungHouseLove says
Haha, thanks for commiserating Lindsay! Yours look amazing!
xo,
s
Nicole Hyatt says
Wow! It is looking so good!! Can’t believe the transformation! I have a questions- more about your new painted cabinets- I am going to attempt painting our oak cabinets this spring and have been reading up on it and following your progress. I just saw a Nate Burkus show where they were talking about painting them and they said there is no way to prevent knicks and peeling unless you have them done professionally- how have yours help up- I have 4 kids under 8 and don’t want them to look tacky if I put all the work in- are yours sticky at all?
Thanks!
YoungHouseLove says
No way! Nate said that?! Aw man, he can do no wrong in my eyes but that’s just not true! John’s sister painted her cabinets and ten years later (a decade!!!) they had no scratches or nicks. And ours in our first house held up beautifully until we replaced them down the line (just because we wanted a different configuration,but they didn’t crack or peel or nick). If you use the cabinet painting tutorial we have on here they’ll do awesome. I expect ours will hold up at least two decades since paint has gotten so advanced (the high quality primer + Benjamin Moore paint – made especially for painting cabinets, which the pros use). Why would something a pro does (assuming you can follow the same method and use the same high quality paint) hold up better?
xo,
s
Nicole Hyatt says
To be exact- it was Nate’s guest who said it, but maybe there are people who just haphazardly paint them without going through all the time intense steps! But, you have given me hope!! I think I will tackle it this Spring! Still trying to decide if I should go black or white… :) Thanks for the good tips!!
YoungHouseLove says
Yes, I think for sure if you just slap paint on them and don’t use the right prep and the right materials (specially formulated paint) you might be in trouble!
xo,
s
Brandy E says
OH MY LAWRD!!!! I AM IN LOVE!!!!!!!
^^^ You made me get all caplock crazy! But for serious, I love this!!!!
YoungHouseLove says
Aw thanks Brandy!
xo,
s