I guess that title should really be “Puttering Around With Putty (aka: Wood Filler) And Sandpaper And A Spackle Knife And Deglosser.” But that was too long. In a nutshell, we prepped all of our cabinets for primer by:
- puttying all of our cabinet frames and drawers and doors
- sanding everything (to smooth the putty and rough things up for primer)
- deglossing everything (to further aid with adhesion)
- laying all doors and drawers out in the sunroom (on lifts) so we’re ready to prime
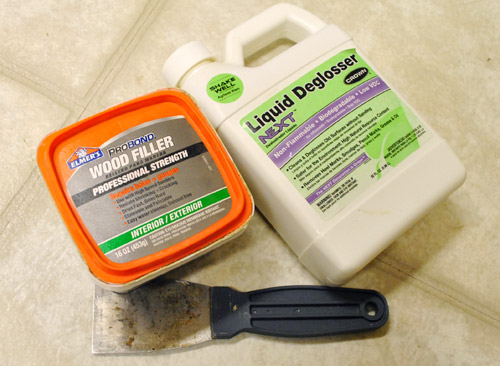
But that’s not enough detail for chatterbugs like us. So let’s get into the nitty-gritty. First we used Elmer’s ProBond Professional Strength Wood Filler (we asked around for a favorite filler among contractor friends and two mentioned this one) to fill any cracks, old hardware holes, etc. Since our new door and drawer handles will call for two holes instead of one, it was important to hide the old holes with filler so once they’re primed and painted they’ll be completely invisible.
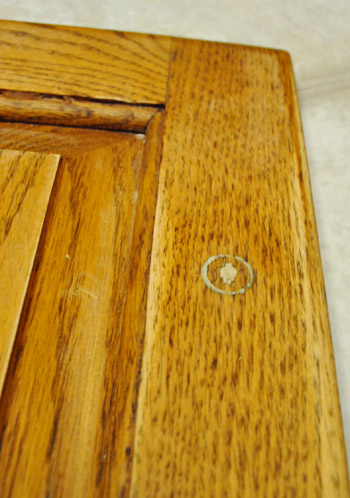
After using a spackle knife to firmly scrape the putty into the holes and cracks to fill them, the holes from the old hardware looked a little something like this:
Then it was sanding time. This is John’s Dexter face (not as good as his impression here):
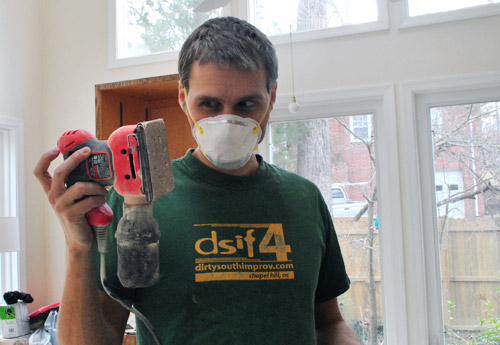
After carefully puttying and allowing for drying time (we just read the container to see how long to wait), we went to town with the hand sander (using 60 grit paper followed by 200 grit paper) to not only smooth out the parts that were puttied but to rough everything up so primer and paint would stick for the long haul. There are some folks who skip steps like sanding and deglossing but we’re Team Edward Team Super Thorough. Although shortcuts are tempting, we like to go the extra mile in the name of the best adhesion possible for more long-lasting durability (it might take us a day or two more on the front end, but if it gets us years or even decades more on the back end it’s well worth it).
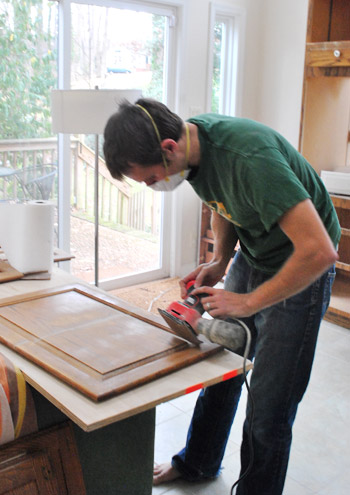
Oh and you can see that the cabinet above is one of the ones that we retrofitted using a pro method (pocket holes with wood glue and a number of heavy duty hidden steel screws) – so these doors are just as durable & sturdy as the rest of the doors in the kitchen. Once we puttied and sanded it the seams were pretty smooth. So we’re still crossing our fingers that primer + paint will add up to undetectable door surgery. Which is always the best kind of door surgery. If not, we’ll buck up and pay for a carpenter to create perfectly matched doors since the half-sunk ones that we have are rare/impossible to find in the custom sizes that we need. We just thought attempting to reuse these solid oak doors was worth a try first (you know we like to use what we have to save money that we can then put towards other things to elevate the room, like new counters/floors/backsplash, etc).
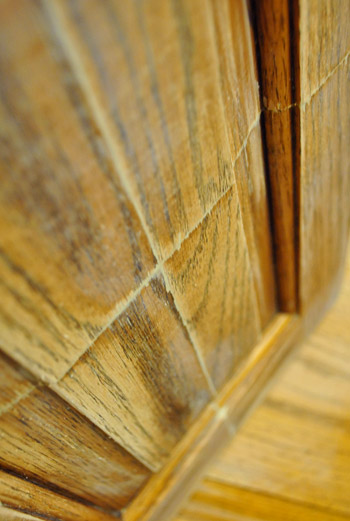
Here’s a photo of another door that was retrofitted:
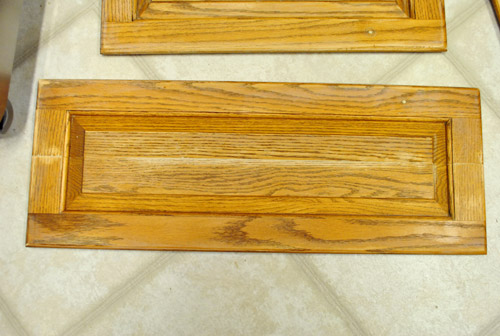
As you can see, the putty is lighter than the wood tone of the doors, but when you run your hand over the seams they feel nice and flush, which should be the key to a seamless finish. It’s easy to believe that primer and paint will fill gaps and hide flaws, but in our experience they DO NOT! They actually settle into fine lines and dings and cracks and emphasize them. So our big tip to you is before you get near the primer or the paint to get your doors as smooth and seamless looking as possible. Any inconsistencies in color (like the lighter putty) are ok, since primer and paint will cover that. But any inconsistencies in smoothness or dings/cracks won’t likely be hidden by primer & paint, and might even be more noticeable once the wood tones are gone and the door is one solid color.
Once those few retrofitted doors were puttied and sanded while the rest of the doors were just sanded (other than getting a dab of putty to hide the old knob holes) it was time for the liquid deglosser.
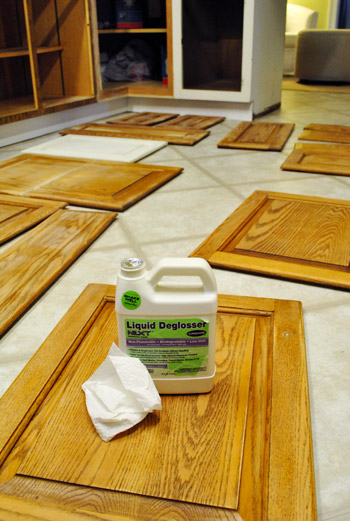
We like using Next Liquid Deglosser because it’s low-VOC and biodegradable (and still gets the job done). It removes any sort of oil or grease and strips down some of the shine on things (our doors weren’t too shiny after our rough-everything-up sanding session, but you know we like to be thorough). Especially in a grease-prone room like a kitchen, this step is a good one (the wipe-down also helps remove any sawdust that remains after sanding).
Oh and we also puttied the cabinet frames whenever necessary (like when there were dings, cracks, and screw holes that we wanted to hide). See this screw hole on the edge of the side of our pantry? That’s where another cabinet used to be attached, but since we reconfigured the layout that hole is now exposed, so we filled it and sanded it to make sure it won’t be visible once we prime and paint.
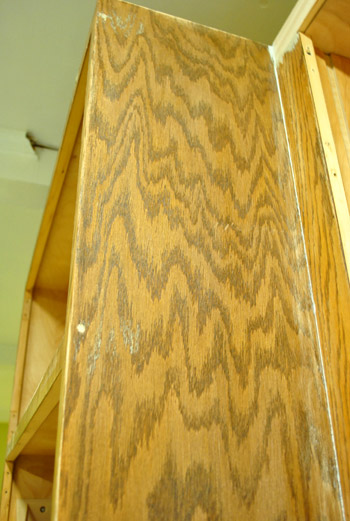
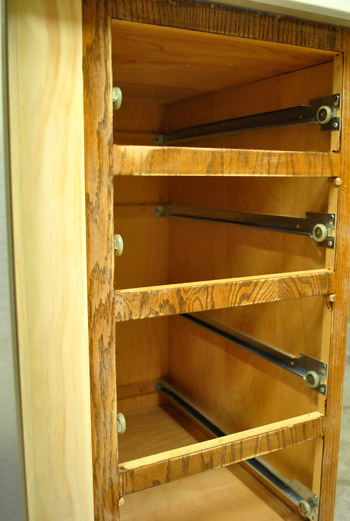
After puttying any areas of the cabinet frames that needed attention, we let them dry and then sanded everything (again to smooth any putty and rough everything up for the best possible adhesion). Then we deglossed everything for even more “adhesion insurance.” Are you sensing a theme? We want that primer and paint to stick for the long haul, goshdarnit. We’ve used this cabinet painting method in our first house’s kitchen, in John’s sister’s house (where it lasted over years until she moved – when it was still going strong), and I also used it to paint the cabinets that we used to make our built-in office desk, so we’re huge fans of how long-lasting & durable things end up being. Even though it’s a pain in the butt to get through since you’re dying to pick up the paint brushes and rollers already. But we’re there! We’re fiiiiiinally there!
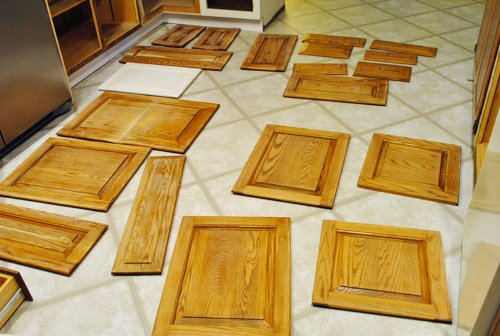
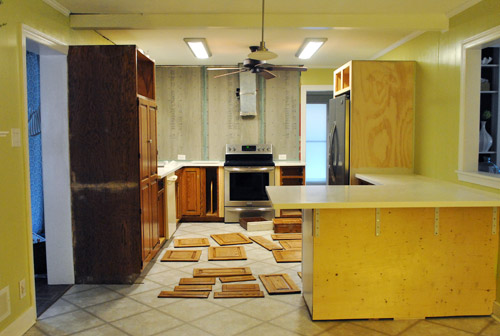
Here’s how the kitchen was looking after all those goings-on. Not gorgeous – but lovely because progress is a beautiful thing!
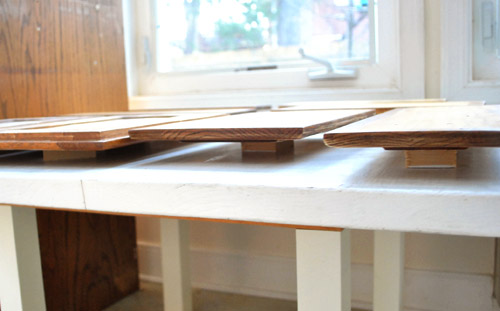
Then it was back into the sunroom with all the doors where we laid them all out for the priming and painting phase.
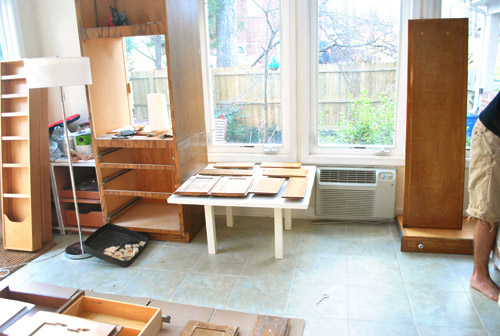
Oh and see how they’re all sort of popped off the ground a bit? John cut down a bunch of scrap wood pieces that we had in the basement to make little “risers” for them, so we can easily paint the part that faces up AND the sides without worrying about any doors dripping/sticking/sitting in a puddle of primer or paint.
Enough chit-chat, there’s priming and painting to do! We’ll be back with a primer peek later in the week… and once everything is dry and ready to be re-hung we’ll share the full monty reveal with tons of details, photos, and even a video about the full priming & painting process for anyone who wants to tackle this project (hopefully sometime next week, assuming everything is all cured up and dry by then). Exciting stuff. What have you guys been up to? Tell me we weren’t the only ones puttying our pants off (figuratively speaking).

Elle says
Quick question: How easy is the paint-your-own cabinet thing? I’m a pretty good painter, but level with me here. We bought a new house around the time you did and are slowly renovating (like you are, but much, much more slowly). After getting kitchen estimates I’m scrounging for ways to save and trying to figure out if we could do something like this. Also, do you know if it’s possible to customize old cabinets? Like buys second hand cabinets then add interior bells and whistles that new cabinets have? Thanks!!
YoungHouseLove says
Oh yes, you can add customized interior fittings to almost any cabinets (just check out online stores or even aisles at Home Depot to see what pull out and add-on options they have)! As for painting cabinets, it’s intense. Haha. Not gonna lie. But it can be done, especially if you’re a pretty good painter! It takes a while and your kitchen is out of commission for a while (but it would be that way if you hired it out anyway). It’s mostly just a lot of prep and basic priming and painting going on (which it sounds like you can handle) it’s just incredibly repetitive and takes days and days. But when it’s done you want to sing and dance! It’s definitely not for everyone, but you say you’re a pretty good painter so it seems like you can totally handle it!
xo,
s
Elle says
Thank you! I’m inspired!
T.D. says
Love the detailed steps, you guys are tracking right along.
Question: I saw the cabinet (maybe the ‘pantry’ you moved from the now fridge location?) looked like it still had the doors, hardware, etc on, was this intentional?
YoungHouseLove says
We waited until Clara was down for her nap to remove those since she likes to dig around in there! Haha. But they came down once she was off to bed!
xo,
s
Paige says
Sorry, no puttying over here! But I am sooooo excited that you are ready for the next phase in the kitchen reno. This is so exciting!
Britny W says
Good job! I know it’s a lot of work, and I am so excited to see the complete kitchen reno! I was wondering about the beam that goes across the kitchen over the cabinet. It seems like there is a big crack where it is separating from the ceiling. Is that easy to fix or is it just the lighting in the picture playing tricks on me?
YoungHouseLove says
Oh yes, we just need to hang the rest of the trim and paint it to match (we removed it when we were demoing out the fridge cabinet and haven’t gotten to it with all this cabinet stuff).
xo,
s
Alissa says
You’ll be grateful in the end that you put all this elbow grease in now! :)
What about those pantry doors and what looks like a corner cabinet? Looks like they haven’t been taken down. Are those going to be painted while attached? Trying to figure that out.
YoungHouseLove says
We just took those pantry doors down at the last possible second (after Clara went down for her nap) since those are cabinets that she likes to get into! The corner cabinet actually can’t come out without decostructing the whole frame (which makes it hard to prime/paint) so we’ll be leaving those on and priming and painting them in place. More details as we go!
xo,
s
Alissa says
Makes sense! I knew you guys would have a logical reason. :)
vks says
Do you sand again after you degloss. We painted our kitchen cabinets this year and we ended up doing 2-3 coats of deglosser and having to sand the deglosser off. Maybe I was putting it on to thick? The cabinets turned out fine though. Just curious about your deglossing process.
YoungHouseLove says
Hmm, I wonder if you’re thinking of something other than deglosser (it’s just a liquid that you wipe things down with, like when you wipe your counter down with a rag). So it doesn’t get applied thickly and stay there and need sanding (maybe you’re thinking of some sort of poly or gloss or sealer?). We just wiped things down with the deglosser and let each door and frame dry out and get nice and chalky (as opposed to slick and glossy, which they were before the wipe-down). Then it was prime time.
xo,
s
jodanders says
We painted our yellowy-wood oak kitchen cabinets a cream color too!! What a difference it makes in lightening and modernizing an 80s kitchen! Can’t wait to see your results!!
Lara says
Break time here from working on our guest bathroom! Ugly tile-gone. Pink wallpaper-gone. Wallpaper glue-still there!! Just how I like to spend my week off of work :-( Oh well, it will be worth it in the end!
YoungHouseLove says
Aw man, wallpaper glue is the worst!
xo,
s
Lisa P. says
I’m sorry if you’ve already answered this but are you using the Rustoleum kit? We used it and it was great. But still a lot of work! My least favorite part was the deglossing. It’s not very exciting, but so worth the effort!
http://www.blogger.com/blogger.g?blogID=2822269265434730796#editor/target=post;postID=1530820144929756571
YoungHouseLove says
Nah, we’re just using high quality primer and paint (with all this prep on the front end). But we have heard great things about kits too!
xo,
s
Karen says
Hi!
I have a question about the deglosser you’re using. My farmhouse kitchen walls are wood panelled and finished with a heavy shellac. (which is worn in some places-the house is 150+ yrs. old) I have always wanted to paint them, but my husband says that we would have to sand everthing, and I dread the idea of the work and mess involved with that and what we’d be breathing in. Do you think the deglosser would be a good alternative to sanding? Would it work on shellac? Do you have to scrape it off as you do with paint stripper? I know you painted over panelling in your kitchen but I think yours is much different than mine.
YoungHouseLove says
Hmm, I think you might need something heavier duty! Deglosser just removes oil and grease, but thick shellac might call for some sort of stripper and scraping or sanding. Hope it helps!
xo,
s
Lori says
Your kitchen is going to look so great! We have those exact same cabinets and the previous owners painted them white/cream, but unfortunately took a couple too many shortcuts. We need to re-paint them in the next couple years, but if the cabinets are already painted are the steps that you took the same as if you are starting with just plain wood cabinets? Thanks for giving such detailed steps of all your guys’ projects!
YoungHouseLove says
I would follow exactly the same method on wood or painted cabinets since you still want to sand them to rough things up and fill cracks with wood putty and use primer to help things stick! Paint over paint without all the prep probably wouldn’t even last a year before peeling and generally looking pretty rough. Hope it helps!
xo,
s
Debbie says
I love how you all are detailing all the work that goes into this process. On TV it’s magic that happens in 30 mins. We also get to see the trade-offs that happen due having a realistic budget. Some of the hgtv shows list budget for items, but not labor hours.
Marla says
Hi guys, looks like another exciting project! Having done this many times myself, I thought I’d share a couple tips/products that I’ve grown to really rely on over time. Who doesn’t love unsolicited advice? ;-) These handy things: http://www.painterspyramid.com/ are a time-saving must if you intend to paint the insides of your doors, not to mention future projects in which you’ll whip them out! You can buy a pack of them at HD/Lowe’s for a few bucks. You just paint the backs, allow to dry to the touch, flip them over, and set them on these placed at the corners. Major bonus with the hours of dry time saved! For a final protective coat, nothing is as wonderful as Varnish Plus from Faux Effects. It self-levels, is water-based, goes on effortlessly to look like a sprayed finish, and is incredibly durable. It kicks the butt of anything bought from a paint or home-improvement store. Happy finishing!
YoungHouseLove says
Thanks Maria! We’ll have to check that stuff out!
xo,
s
Teresa says
Oh deglosser!! Now see, that’s the step that I missed.. darnit. Here is my latest project!
http://wherelovemeetslife.wordpress.com/2011/12/27/vanity-not-always-a-bad-trait/
Progress is always good! Almost there! Do you guys already have your floors scheduled or can you do that in short notice?
YoungHouseLove says
Aw, so happy Hannah loves it! So cute! As for the floors, we’re laying them ourselves, haha. So there’s no scheduling other than praying that Clara takes some nice long naps and starting up again at 7:30 when she’s in bed for the night. Those will be one of the last things we do, so of course we can’t wait!
xo
s
Teresa says
Oh that works out great then, you can move at your own pace. And I know what you mean about those naps! I managed to get a few hours without my little guy (15 monhts old) on a Saturday. I hate being away from him, but there are just some things that can’t be done with the little ones underfoot.
Marla says
This is the painful part! Looking good!
My hubby will be putting on his puttying pants, so to speak, soon. We have some projects to finish around the house this week. Have you heard of using bondo for wood filling? It’s not for what you’re doing here, but it’s good for repairing gouges and screw holes in wood. Harder to sand but doesn’t shrink. Can’t wait to see the reformed cabinets!
YoungHouseLove says
Never heard of it, but sounds awesome! We’ll have to give it a try someday!
xo,
s
Rachel G. says
I totally wish I were up to something home improvement related, but with a 7 month old (also a May baby!) and a full-time job, those projects are on hold. Anyways, I do have two questions for you. One: do you all already have an electrician picked out for your kitchen lighting upgrade? I live in Midlothian and we would like to add some additional recessed lighting to our kitchen and adjoining family room. We hired an electrician to do some work when we moved into our house and I think he was WAY overpriced (at least I think he probably was). Any suggestions? Two: This is totally home improvement unrelated, but I will be staying home with our baby full time beginning in February and I’m interested in signing up for a music class. If you don’t mind me asking, where do you take Clara for her music class? If you do mind for privacy purposes, I TOTALLY understand. Just let me know.
The kitchen progress is amazing. Cheers to 2012 and a gorgeous new space that you all have knocked out of the park!
YoungHouseLove says
Oh yes, we loved the guys we used for this post, so we’ll be using them again. As for music classes, we go through a company called Musik Garten, so I’m sure if you search them and Richmond you can come up with a number of places and pick the one closest to you. Hope it helps! And yay for May babies!
xo,
s
Lizzi says
I am in the middle of a kitchen remodel…about two weeks behind you. It is fun to see where I’m heading- I’ll probably start painting cabinets next week! Luckily I get to skip this step as ours are brand new and unfinished.
I’m also looking forward to seeing you do the backsplash. I picked out the same penny tile in white gloss right before you and am hoping for some tips :)
Margaret says
Please tell me ya’ll numbered those cabinet doors!
YoungHouseLove says
Haha, we laid them out in a specific order in the sunroom, so we’ll hang them in the same order that we laid them!
xo,
s
SherriEakin says
Yay for putty! Can’t wait to see some paint on those babies! We have painted cabinets and slapped a fresh coat on this year, but we have never really taken the time to properly sand, fill, and prep them for a really nice finish (we did just a quick sanding for the paint to stick). They are great cabinets and I know it would be worth the effort to do it right. Thank you so much for sharing – one day I’ll come back to these posts for tips when we do a full blown kitchen overhaul. In other news, we did hang new exterior doors that actually close and lock properly! Yay us! :)
YoungHouseLove says
Wahoo! Congrats! Haha, that’s sort of important!
xo,
s
Nicole says
Ah I am so pumped to see your big reveal! I can’t decide if I’m more excited to see the penny tile go up, or your cork floors. Both are going to be spectacular!
Amy says
Wow, you have no idea what perfect timing this post is for me! My boyfriend and I are in the process of buying our first house, and among many other DIY projects we will be tackling (removing a TON of wallpaper, popcorn ceiling fun) I am so so excited to work on the kitchen and paint the cabinets. Thank you so much, and I look forward to seeing how they turn out!
Elle says
You probably already know this, but just in case, popcorn ceilings can contain asbestos. You can have a small piece tested just to be sure. Just a heads up!
Liz says
I can’t wait to see how the cabinets look painted!
Quick question – I love your blog and keep trying to add you guys to my blog roll, but instead of showing up as “Young House Love” you show up as “SUSPENDED.” I’ve tried changing it several times, but it seems to always revert back in a day or two. Any ideas?
YoungHouseLove says
Aw man, I have no idea. Maybe try removing it completely and then adding it (from the direct url: https://www.younghouselove.com) a day or two later? Hope it helps!
xo,
s
Amelia R. says
It does that on mine, too. Over, and over, and over again. I’m just ignoring it.
YoungHouseLove says
So sorry guys! Wish we could do something on our end to fix it!
xo,
s
Kristen says
Totally unrelated to your post, but these reminded me of you:
http://www.pier1.com/Catalog/SpecialValues/tabid/982/CategoryId/165/ProductId/32607/ProductName/Honey-Comb-Drinkware/Default.aspx
because 1- they’re on clearance! and 2- they’re honeycomb. Not sure if there’s a Pier 1 near you. Is that weird that when I shop I’m reminded of one of my favorite bloggers? :)
YoungHouseLove says
I love them! Thanks so much for the tip!
xo,
s
Wom Mom Ethne says
Team Edward!
Kathy says
Great progress! When I primed and painted our oak grain cabinets like yours, I used your cabinet painting tutorial…but to ensure that the exterior doors would be glossy smooth, I used a “buildable” primer and took time to alternate between lightly sanding and painting a thin coat of primer. I did this about 2 or 3 times, and then I painted the 2 thin coats of glossy paint. It took at least a full week to complete the doors, but it was worth it for a lasting, smooth surface.
The only downside was that the primer I used wasn’t no-VOC, so I’m looking forward to hearing how yours works so I can use something sifferent for my next paint project. :)
Rosalie says
I love reading about your chatty step by step by step instruction manual for re-doing your kitchen on a tight budget, since thats what were finally (after 3 years) about to get into. Thanks for walking me through all the steps involved in preping existing cabinets for years of future use. It’s got me searching craigslist for old cabinets that could have a new life.
Happy New Year, from Seattle.
YoungHouseLove says
Aw happy new year to you too! And good luck with the cabinet search!
xo,
s
Jennifer says
I can’t wait to see it! We painted our kitchen this summer after years of indecision. It looks like a new kitchen and I keep saying I wished we had done it sooner. I was so nervous about chipping, but it’s been six months and we haven’t had one chip despite me constantly banging pots and pans against the cabinets.
YoungHouseLove says
Aw, so glad! Congrats on a job well done!
xo,
s
JaeTree says
I think I’d rather just drop the cash on new cabinets :) Can’t wait to see the deal done.
Donna says
Looking good so far! I can’t wait to see the end result. BTW, are you guys posting any pics of how Clara’s kitchen came out? I bet she was so excited!
YoungHouseLove says
Wahoo! That’s on the agenda for next week when we have a moment to really write posts and upload pics again! This week is all about juggling relatives and the book deadline and sharing a few quick peeks and posts that we already have prepped!
xo,
s
may east says
im tackling a similar project filling some dents in my baseboards tomorrow, but they are already painted. should i sand first then fill then sand again?
(great blog. i read everyday. even from vacation :) ) good luck!
YoungHouseLove says
I’d fill the dings and dents and cracks with wood filler, let it dry according to the container, and then sand to smooth the putty and rough everything else up at the same time. Definitely use primer too! Good luck!
xo,
s
Tonya says
I can’t wait to see the rest of this process! I have the EXACT same cabinets, and I’ve wanted to paint them but just haven’t been brave enough to. I’m pretty handy with paint, but I don’t have a handy husband. He’s got many talents, but that’s not one! Ha! On the flip side, my girls are school-aged, so maybe that balances out. You very well may inspire me to FINALLY take action!
Kirsten says
Loving the Team Edward comment… but it should say Team Jacob (hehe)!! I’m thinking of a remodel for my kitchen in the near future, and now have some great ideas after reading your blog.
Lori says
Curious, what temp is it there, and is your sunroom heated? It’s chilly here in Indiana, so most sunrooms are very chilly right now, and probably too chilly to be the host of a painting party.
YoungHouseLove says
It’s been around 50-65 degrees here, but our sunroom has a heating and cooling system that we’ve kept on (to maintain a nice steady 70 degrees in there) which is what we plan to do for the entire priming, painting, and curing process – just to keep things nice and stable according to what they recommend on the primer/paint cans!
xo,
s
LaVerna DuBois says
I read a couple of posts concerning the deglosser and I’m curious if you have any knowledge or experience on its uses for unpainted finishes. I have a 1972 ranch with very tacky poly on dark stained original cabinets and casings. I’m refinishing one room at a time & my hubs doesn’t want to paint cabinets, only trim. I want to lighten up the room by removing the dark stain. If I sand without stripping the tacky poly gums up the sand paper. I wonder if the deglosser helps the stripping process, which I’m sure you are aware is a pain in the hootie. (hope hootie doesn’t offend any of our friends on foreign lands…non U.S. Lands to be politically correct and equal to all)
YoungHouseLove says
Hmm, in our experience, stripping things is a much heavier duty process that does a lot more (it can get through poly and shellack), while a deglosser just removes things like grease and oil. So I’d choose the right product depending on what you need to get through. Hope it helps!
xo,
s
Amanda says
I’m excited to see how everything looks once it’s done! Not as much as you are, I’m sure.
My husband and I went out and bought all the supplies this afternoon to fill the back wall of our bedroom closet with shelves. There is so little storage in our house, every little bit helps! We’ll hopefully get most (all?) of it done after the kids go to bed tonight.
Amanda says
I was ORBing it up! Our mailbox and porch light have gotten the treatment so far- nothing’s safe! Thanks for recommending that AMAZING stuff. I also spray painted some big flower pots in a cheerful red color. I just love all of your painting tips! P.S.- kitchen’s looking great! :D
Sally says
I primed and painted our old oak cabinets last spring and I love it! The cabinets look very similar to yours and I painted them white and added brushed nickle hardware. It really brightened up my small kitchen! I can’t wait to see how yours turn out. :)
Terresa says
I’m so excited for you guys! I don’t think your door surgery will be at all detectable. Hoping for the best!
Rachael says
Omigosh, John is wearing a DSI shirt. Did you guys come to Chapel Hill? That’s where I’m from!!
YoungHouseLove says
Yeah, my improv group participated both years I was in it (2003 and 2004). I think we only performed the second year, if memory serves. Loved it! And I almost went to UNC, but couldn’t resist the instate tuition of UVA.
-John
Carol N. says
No putty here yet, but probably in the next week or two. We just had a huge renovation finished up (added an elevator, a new larger master bath, turned the old master bath into two large walk in closets, put hardwood everywhere and painted the entire interior) and the furniture came back into the house today! We are no longer living in one room in our basement or bunking at my mom’s house. Feels wonderful to be back in our almost-new old home. Now I just need to finish up those furniture projects that I put off for the last 3 months. Can’t wait to see the cabinets!
Jenn says
Haha Sherry! Team Edward!
We painted our bathroom cabinet this year and you’re right! You just want to pick up the roller and go! We didn’t – we sanded, wiped down, primed, waited, primed, waited and painted {like good little DIYers! :)} and so far so good! We also painted our {really awful} pink tiles in the bathroom and WOW – was that a process. But SO worth it because now we have pretty white tiles for a fraction of the cost!
Thanks for your DIY tips! Happy 2012!
Sara says
Once you get your kitchen finished, you should check out evolutionaryfoodie.wordpress.com for recipe ideas! I wish that I could say that the blog was my own, but it’s not. It’s a very talented friend of mine whose writing style has reminded me of you guys since she started.
Marianne says
So excited to see your kitchen progress. I have been holding off painting my cabinets so I can follow your steps. I used a liquid deglosser on my desk project this summer and the fumes were horrible…and I was in a garage with the doors open. Does the low VOC deglosser make a really big difference? I hope so. That’s a step I would love to skip. I hate that smell.
Also can’t wait to see how you finish the cabinets. So many poly options are not truly clear. Will love that advice.
Happy New Year!
YoungHouseLove says
Oh yes! It smells sort of like orange cleanser – or goo gone! Very citrusy and still sort of strong in that “clean” smell but not chemicaly and fumey like the high VOC stuff! And when it dries or is put away the smell is gone almost immediately!
xo,
s
Sarah says
I’m so excited to see how the cabinets turn out! I’m always impressed by how thorough a job you guys do – and I keep that in mind when I get impatient with a project I’m working on! (I’m a newbie at DIY home improvement, so EVERYTHING is so s l o w.)
Just wondering…I’d like to paint my bathroom vanity and the doors are clearly solid wood, but the cabinet itself is clearly wood veneer. Do you think painting the wood veneer would work??
YoungHouseLove says
Oh yes, we’ve painted and stained wood veneer! The secret is just not to sand it too deeply or you can go right through it! But otherwise it’s just as good at grabbing paint as wood is since it’s actually wood- just a thinner slice of it! Hope it helps!
xo,
s
Meredith K A says
For once, we ARE working on some similar things to you guys! Yesterday we puttied all the holes in the soon-to-be nursery walls, and today we painted! I took off work this whole week, & hubby is in between semesters, so for once we have time to tackle big projects all at once, YHL style! By the end of the week I’m hoping to be all done, including a wall of chevron stripes – so lovely & trendy on pinterest right now. Hoping to share with you when it’s ready, since we also thrifted a dresser & painted it bright green!!
jbhat says
Just another comment to cheer you on to the finish line.
Gimme some putty! Gimme a sander! Gimme a broom! Gimme some primer! Give Clara a long nap! Gimme some paint! What’s all that? YHL’s gorgeous “new” kitchen cabinets!
xo
jbhat
Erika says
We pulled out our carpets today- we have a 1200 sq ft condo- and we pulled approx 8-900 fqare feet of carpet and underlay in prep for getting new carpet tomorrow- which means our belongings are in the bathroom, laundry room kitchen or on the deck.. Yesterday i used recycled paint for the first time- it came out amazingly! the Rona store brand recycled paint- low voc.. and it was alot more economical than the the other national brands..
We were channeling you guys this weekend to get it all done! cannot wait to see what the final result is.. its also giving us the excuse to purge alot of items- cannot wait till the new year to do just that…
our kitchen is the next project- nothing to the scale that you are doing though.. just some minor painting or something..
Malissa says
No idea if you are already planning to do this, but I would love to know how many man hours you have in the putty, sanding, priming, painting etc. We r going to start our cabinets soon and are really curious to know how much time we are looking at.
YoungHouseLove says
Oh yes! We’re going to lay out a full time breakdown and budget breakdown at the end of our reveal post! We have been keeping notes along the way!
xo,
s
Seema says
Inspired by you all, I decided to paint my bathroom vanity/cabinet this week. I read all of your previous posts on cabinet making over and over, Did the sanding, deglossing okay, but when it came to the primer, I had a “doh” moment and used foam rollers when y’all recommended exactly the opposite. Doors and drawers are all now primed but they seem to have a little texture (from the roller) now that they’re dry. Its not even noticeable unless u get really really close but im worried that this may result in a less than completely smooth coverage when i paint? So im here freaking out at 2 in the morning asking for your advice. Is this normal with primer? Or should I sand and re-prime with a better roller?
YoungHouseLove says
We actually use small foam rollers now! So it sounds like you’re on the right track! We used to hear that they rile up the paint and cause bubbles but we painted a few pieces of furniture with them (priming with them first) and actually really love the outcome! We didn’t notice much texture from ours (perhaps less smooth and stripey than brush strokes, but primer is supposed to look a little rough and inconsistent). If you let it dry and run your hand over it and feel bumps I would use a high grit sandpaper to sand it down/smooth things before painting. But if it dries and just looks a little stippled but feels flat, that’s just primer doing it’s job (it’s supposed to be a tiny bit rough to grab paint). Hope it helps!
xo,
s
KarenH. says
No nig reno projects currently–mostly, I’m prepping the house for a gut remodel of the sole bathroom. And because it’s the only bathroom the project will have a prefix project of a three-quarter bath in the basement. The new bath being necessary, so I can … Well, you know … While the firat bathroom is being gutted and remodeled.
So my project for January is to clear out the space behind the basement stairs , which is the easiest place to put the new bathroom to tie into current plumbing and access the ventilation stack from the first floor bathroom AND not place any permanent flooring over the top of the oil line from the tank to the furnace.
The bathroom was not supposed to be my first major reno in this house–I promised myself a brand new front entrance dierectly into a bigger kitchen. Sigh…. But the bathroom/tub surround tile is beginning to fail–no water seepage yet, but now it’s just a matter of time, so the bathroom will be first.
I’m taking notes on your cabinet painting, though, because to console myself further for delaying the new kitchen (I’d previously replaced most of the appliances), i decided to paint the old 70s era cabinets, which are totally solid, but butt ugly dark wood. I have stainless appliances now and the counters are a faux marble formica (in shockingly great condition–I wish the plain beige counters at my old house had held up half as well), so I’m thinking of painting the cabinets either a very light butter creme or light grey — both colors found in the counters. That will be my spring summer project.