I guess that title should really be “Puttering Around With Putty (aka: Wood Filler) And Sandpaper And A Spackle Knife And Deglosser.” But that was too long. In a nutshell, we prepped all of our cabinets for primer by:
- puttying all of our cabinet frames and drawers and doors
- sanding everything (to smooth the putty and rough things up for primer)
- deglossing everything (to further aid with adhesion)
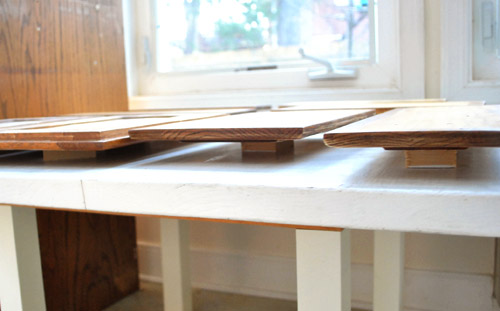
- laying all doors and drawers out in the sunroom (on lifts) so we’re ready to prime
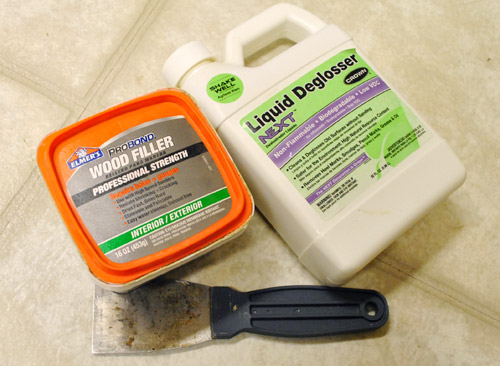
But that’s not enough detail for chatterbugs like us. So let’s get into the nitty-gritty. First we used Elmer’s ProBond Professional Strength Wood Filler (we asked around for a favorite filler among contractor friends and two mentioned this one) to fill any cracks, old hardware holes, etc. Since our new door and drawer handles will call for two holes instead of one, it was important to hide the old holes with filler so once they’re primed and painted they’ll be completely invisible.
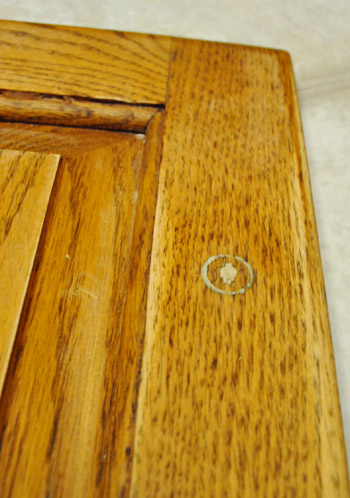
After using a spackle knife to firmly scrape the putty into the holes and cracks to fill them, the holes from the old hardware looked a little something like this:
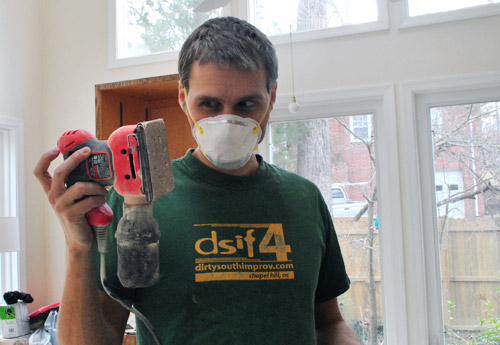
Then it was sanding time. This is John’s Dexter face (not as good as his impression here):
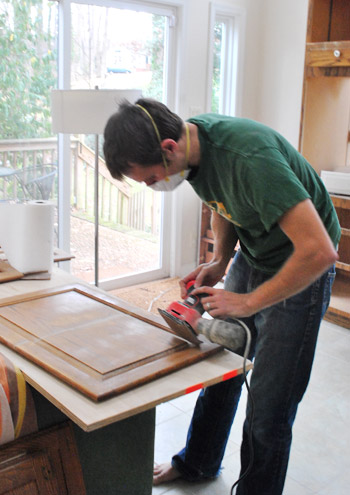
After carefully puttying and allowing for drying time (we just read the container to see how long to wait), we went to town with the hand sander (using 60 grit paper followed by 200 grit paper) to not only smooth out the parts that were puttied but to rough everything up so primer and paint would stick for the long haul. There are some folks who skip steps like sanding and deglossing but we’re Team Edward Team Super Thorough. Although shortcuts are tempting, we like to go the extra mile in the name of the best adhesion possible for more long-lasting durability (it might take us a day or two more on the front end, but if it gets us years or even decades more on the back end it’s well worth it).
Oh and you can see that the cabinet above is one of the ones that we retrofitted using a pro method (pocket holes with wood glue and a number of heavy duty hidden steel screws) – so these doors are just as durable & sturdy as the rest of the doors in the kitchen. Once we puttied and sanded it the seams were pretty smooth. So we’re still crossing our fingers that primer + paint will add up to undetectable door surgery. Which is always the best kind of door surgery. If not, we’ll buck up and pay for a carpenter to create perfectly matched doors since the half-sunk ones that we have are rare/impossible to find in the custom sizes that we need. We just thought attempting to reuse these solid oak doors was worth a try first (you know we like to use what we have to save money that we can then put towards other things to elevate the room, like new counters/floors/backsplash, etc).
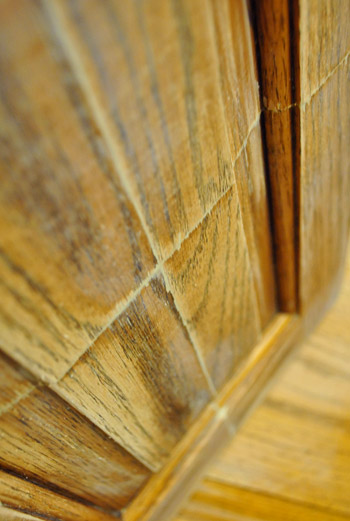
Here’s a photo of another door that was retrofitted:
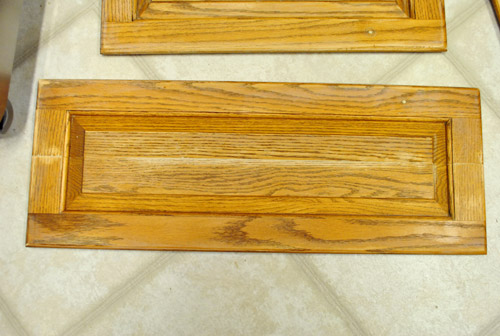
As you can see, the putty is lighter than the wood tone of the doors, but when you run your hand over the seams they feel nice and flush, which should be the key to a seamless finish. It’s easy to believe that primer and paint will fill gaps and hide flaws, but in our experience they DO NOT! They actually settle into fine lines and dings and cracks and emphasize them. So our big tip to you is before you get near the primer or the paint to get your doors as smooth and seamless looking as possible. Any inconsistencies in color (like the lighter putty) are ok, since primer and paint will cover that. But any inconsistencies in smoothness or dings/cracks won’t likely be hidden by primer & paint, and might even be more noticeable once the wood tones are gone and the door is one solid color.
Once those few retrofitted doors were puttied and sanded while the rest of the doors were just sanded (other than getting a dab of putty to hide the old knob holes) it was time for the liquid deglosser.
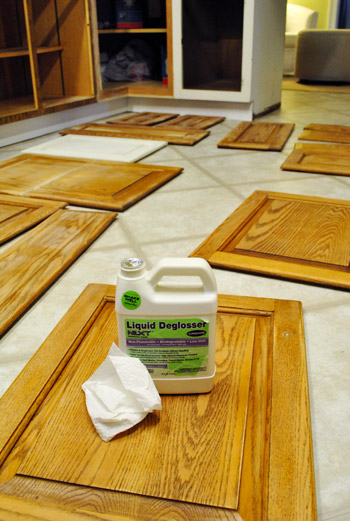
We like using Next Liquid Deglosser because it’s low-VOC and biodegradable (and still gets the job done). It removes any sort of oil or grease and strips down some of the shine on things (our doors weren’t too shiny after our rough-everything-up sanding session, but you know we like to be thorough). Especially in a grease-prone room like a kitchen, this step is a good one (the wipe-down also helps remove any sawdust that remains after sanding).
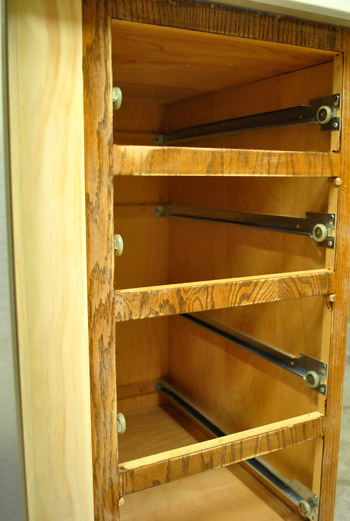
Oh and we also puttied the cabinet frames whenever necessary (like when there were dings, cracks, and screw holes that we wanted to hide). See this screw hole on the edge of the side of our pantry? That’s where another cabinet used to be attached, but since we reconfigured the layout that hole is now exposed, so we filled it and sanded it to make sure it won’t be visible once we prime and paint.
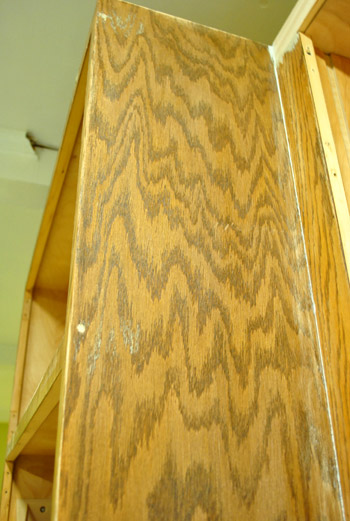
After puttying any areas of the cabinet frames that needed attention, we let them dry and then sanded everything (again to smooth any putty and rough everything up for the best possible adhesion). Then we deglossed everything for even more “adhesion insurance.” Are you sensing a theme? We want that primer and paint to stick for the long haul, goshdarnit. We’ve used this cabinet painting method in our first house’s kitchen, in John’s sister’s house (where it lasted over years until she moved – when it was still going strong), and I also used it to paint the cabinets that we used to make our built-in office desk, so we’re huge fans of how long-lasting & durable things end up being. Even though it’s a pain in the butt to get through since you’re dying to pick up the paint brushes and rollers already. But we’re there! We’re fiiiiiinally there!
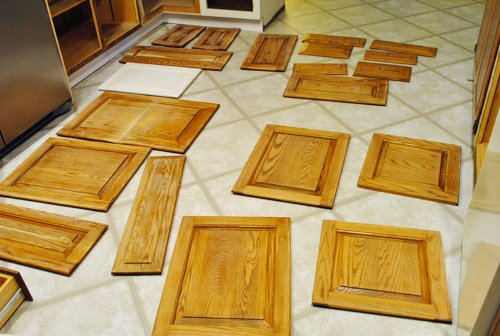
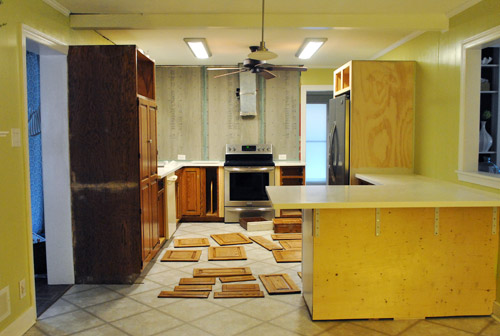
Here’s how the kitchen was looking after all those goings-on. Not gorgeous – but lovely because progress is a beautiful thing!
Then it was back into the sunroom with all the doors where we laid them all out for the priming and painting phase.
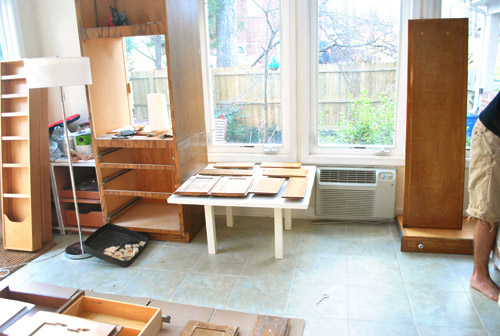
Oh and see how they’re all sort of popped off the ground a bit? John cut down a bunch of scrap wood pieces that we had in the basement to make little “risers” for them, so we can easily paint the part that faces up AND the sides without worrying about any doors dripping/sticking/sitting in a puddle of primer or paint.
Enough chit-chat, there’s priming and painting to do! We’ll be back with a primer peek later in the week… and once everything is dry and ready to be re-hung we’ll share the full monty reveal with tons of details, photos, and even a video about the full priming & painting process for anyone who wants to tackle this project (hopefully sometime next week, assuming everything is all cured up and dry by then). Exciting stuff. What have you guys been up to? Tell me we weren’t the only ones puttying our pants off (figuratively speaking).

Amelia R. says
I’m keeping my fingers crossed that those cabinet doors look absolutely seamless when painted; what a heartbreak it would be to do all of that amazing, careful work and have to scrap it! Good luck to you!
Lynn @ SafeBeauty says
Great job guys and way to leave us at the edge of our seats in anticipation. I thought this post would end in a “Tada! Painted cabinets!” but you guys go at your own pace and I appreciate that. Now about those bare feet in the pics of John sanding. I don’t see what the big deal is, I’m sure the thing has a safety that shuts off if you drop it and if it doesn’t what’s the worst that could happen? He gets a free super quick pedicure! Feel free to take safety advice from me whenever you want, I’m a silver lining kinda girl.
My best, Lynn
*house update, I’m up this early searching on here for how you negotiated an offer price – because today we make a move on hopefully our 1st and last house ever. Deodorant don’t fail me now!
YoungHouseLove says
Haha, hope that deodorant kicks in in the clutch for ya! And good luck (and have fun) with everything!
xo,
s
Meg says
I have never heard of deglosser, only sanding. I will have to check that out! I remodeled a house to become a dog daycamp and dog park. I tore all the cabinets out of the kitchen, etc., for our office/bathing area, and some of the paint is peeling – I think from years of kitchen grease underneath where we painted. So I’m thinking that deglosser might have been helpful. I’m going to use it for our touchups this year. Thanks for the info, and the inspiration to keep my butt in gear on my own projects!
Jeni says
I wish I could have given this post to the people who painted my kitchen! When I bought my house this past spring, my realtor recommended some people he worked with to paint the interior of the house. I hadn’t yet moved and just wanted the ugliness gone by the time I got there. Huge mistake! They did none of the prep work you guys did and now I have painted-over nails in the walls (!) and I can see the holes from the previous cabinet hardware through the paint. Total nightmare!
YoungHouseLove says
Aw man, that stinks! Prep is so annoying to do but so important because if you rush by it you don’t get a good end result so it’s all for naught!
xo
s
Hannah says
We are redoing our cabinets over the holiday break and are following along with your blog! Good luck with yours :)
Lorinda says
So grateful that you share your step by step instructions. We’re planning to redo our kitchen cabinets as well and this will be priceless! Our cabinet doors and drawers are very similar to yours, but the cabinets themselves have a wood veneer on the exposed surfaces. Have you ever run into that before? Any tips for removing it so we can sand and prime/paint that surface?
YoungHouseLove says
Oh yes, wood veneer is just like real wood (it is a sliver of real wood) so it can be sanded and puttied and primed and painted- just be careful when sanding that you don’t overdo it and go through the veneer!
xo,
s
Jessica says
HAND IT TO ME! I made pillowcases and cosmetics bags for a few friends and family members this year!
Bekah says
I *love* it that John is sanding in his bare feet. It’s that kind of freedom that convinced me to work from home, too! =)
Kari says
Looks great! I am just starting to paint ours as well. Ours are very “oaky” looking and I can still see the grains in the wood really bad after priming them. Do you suggest two coats of prime to help seal some of the grainy look? Any of your thoughts would be great, thanks so much!
YoungHouseLove says
It’s usually extremely hard to completely eliminate any wood grain (texture, not color) from peeking through, although a good primer (two coats probably can’t hurt if they’re applied according to drying times on the can) and a good self-leveling paint (like Benjamin Moore Advance) can help! We painted the oak cabinets in our office and those seemed just to be a smoother grain so it doesn’t show through at all, but we’re expecting our more traditional oak cabinets to have a hint of grain. Which is a-ok with us since we don’t mind when painted wood looks like painted wood! Hope it helps!
xo,
s
Lindsay says
I’m SO excited!
Jill says
Shout out to John’s t-shirt- Chapel Hill, NC! Wut Wut! Reppin’ my home state!
Okay, I’ll back to being a whitey now…
Reilly says
Non-sequeter post….you replaced all your windows in your last house–want to make me feel better about pulling the trigger tomorrow? So much money, and not as exciting as a kitchen. Did you like it? Was it a little fun? All of mine are painted shut so I just can’t figure out if opening windows is $10K awesome. I’m in 1928 house with originals right now.
YoungHouseLove says
We think you’ll really enjoy it. We had lots of old windows that stuck or wouldn’t open all the way, and it was soooo nice to have new ones that glided perfectly and let in tons of light. It was definitely fun to see everything fresh and new too, and know that we were probably saving on energy costs too. There – did that make you feel better? :)
-John
Katelyn says
We re-finished our cabinets last summer! No liquid deglosser (maybe for the next house), hand sander only, it was such a mess!
Katie says
Finally making my way through my beloved blogs after the holiday travel…just noticed John’s dsi (dirty south improv) t-shirt – did either of you ever attend dsi? I went to UNC-Chapel Hill for undergrad and my friends started dsi and performed in it for many years! Glad to see you guys had happy holidays!
YoungHouseLove says
John did lots of improv in college (UVA) and in NYC afterwards (at Upright Citizens Brigade, etc). He didn’t attend Chapel Hill but went to the DSIF (a festival they hold) in 2003 and 2004 with his improv group from UVA.
xo,
s
kari says
Love the progress. I’m totally impressed with your thoroughness. I’m in the process of painting my old 80’s kitchen cabinets. The lower cabinets were painted by the previous owners and are not my color of choice. Ugh. Have any tips for prepping cabinets that are painted? Any extra steps I should take?
Love the blog… totally jealous of all your DIY-abilities :)
YoungHouseLove says
Aw thanks Kari! I would follow these steps the same way (be sure to sand to rough them up and degloss to get rid of kitchen oils and grease! Then using a really good primer and paint should do the trick!
xo,
s
Cici says
What sandpaper grit did you use? Maybe you mentioned this earlier, but I can’t find it. Thanks! We’re trying to tackle our cabinets before the next baby comes!
YoungHouseLove says
Something around 150 grit should be great!
xo,
s
Lauren says
I’m trying to follow your process here to paint our double-hung stained window frames/trim and found that the sanding was really tricky with all the small crevices. Did you sand every single inch of your cabinets or just the main areas? Even all my trim is rounded and has indents…it’s hard to get in all the small spots. Advice? Thanks for taking the time to answer these questions :) :) SOOOOOO helpful!!!!!
YoungHouseLove says
I think just sanding as much as you can (every last indent isn’t always possible to get). Good luck Lauren!
xo
s
Tanya says
You have inspird me to paint my oak kitchen cabinets to white! What kind of sander and sandpaper inserts did you guys use and where can I purchase one? Thanks!
YoungHouseLove says
We just used an electric sander from Home Depot by Black & Decker with the sandpaper inserts that are made to work with that model. Hope it helps!
xo
s
Aubrey says
Hello! LOVE your blog (and new book)! I am soon to be moving into a home with terribly dark brown cabinets from the 70’s, and I am determined to repaint them to lighten and freshen up the tiny 8×8 room! Would you recommend your sander here to help with this process? I thought about renting one, but I thought it might just be better to buy one for future projects! We our very short on money right now, but this reno needs to be done!! Thank you!! :)
YoungHouseLove says
It definitely could help but if you’re tight in money you can totally do without it (by hand) too.
xo,
s
Maurice Leahy says
Great work….. your kitchen looks terrific. I have refinished kitchens more than once. I admire the detail you posted. Great instruction for anyone who wants to undertake a kitchen makeover. The secret is in the preparation
Just one note, I use Bondo Auto filler (yes the auto filler)instead of Wood putty to fill those hardware holes if I am painting stained cabinets. It does a wonderful job at filling those holes and cracks, drys quickly and takes to sanding very well.
Keep it up
YoungHouseLove says
Great tip!
xo
s
Kristin says
Love your blog. Just looking back at old posts for some painting advice. Why do you require sanding for kitchen cabinets but not for painting wood furniture?
YoungHouseLove says
What we sand generally comes down to how much and how hard we use something. Cabinets get a ton of everyday use and painting them is such a big job that you’d never want to have to redo it, so doing everything in your power to get good adhesion is important for a good result. We’d also sand a table that we’d dine at every night before priming and painting it (but we might not sand the legs of a stool that we’re repainting since they don’t get as much use since they support something but don’t have things banging on them everyday like a table or cabinets). Generally, if something gets lots of active use, so we would want to give it the best chance to look good for the long haul :)
xo
s
Mel says
Hi,
I’ve been contemplating doing this for my kitchen and have been reading up on tutorials online. Some tutorials recommend that we de-gloss before the sanding step. I noticed that you did the sanding before the deglossing. Any reason why you did that?
YoungHouseLove says
I like to degloss after so I get all the sanding dust off while I’m at it (you have to wipe them down anyway after that step, so doing it then the deglosser to penetrate deeply and get that dust off). Good luck!
xo
s