They say inspiration can come from anywhere and Sheena’s story definitely had us smiling. Here’s her letter:
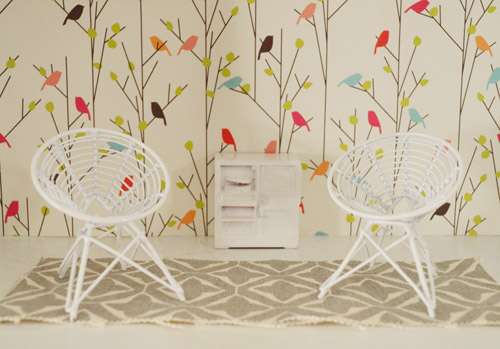
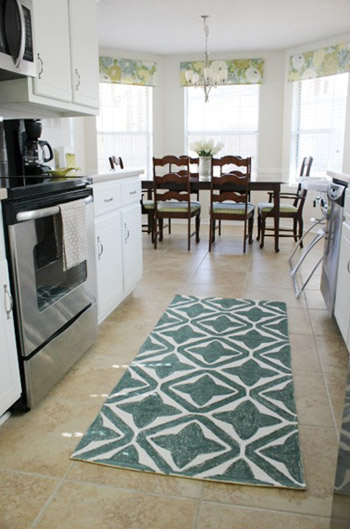
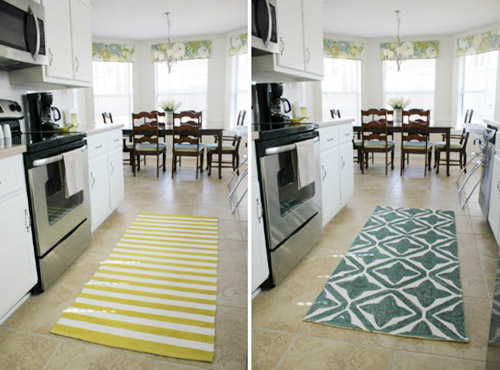
Hey John and Sherry (and Clara and Burger too!) I just wanted to write to thank you for some unintended inspiration you gave me recently. After reading about Clara’s dollhouse, I fell in love with the pattern on the fabric-sample-turned-rug in the tiny room and I just had to replicate it. So I did – with a plain rug, some foam insulation, paint, and a sponge brush. Think “Honey, I Shrunk the Kids” in reverse and decor style! :)
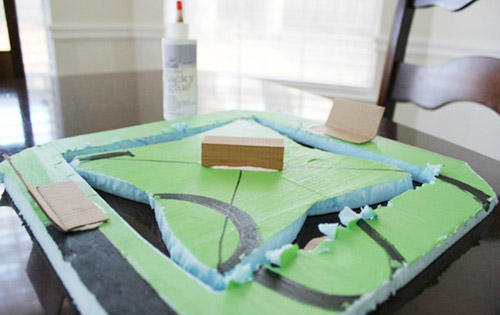
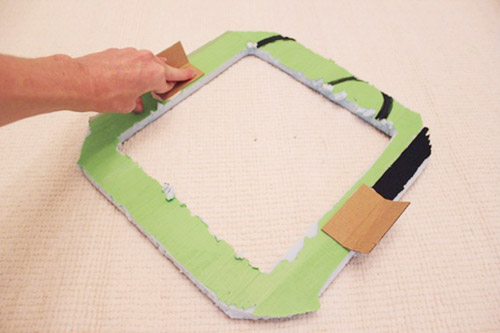
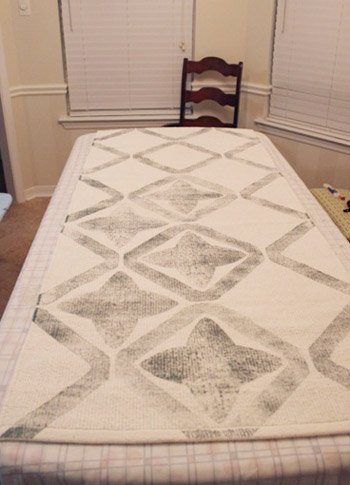
I used a 3/4 inch thick piece of insulation styrofoam to make a stamp and stamped the design over the entire rug. You could probably use a thick piece of cardboard or a piece of packing styrofoam as well. To give myself something to hold onto while I stamped, I glued a wood block to the back of the stamp and two folded pieces of cardboard to the outer square
So, starting with the outside square of my design, I brushed a coat of paint (Valspar’s Secluded Garden) onto the foam using a small foam brush. Then I stamped the very center of the rug, which I measured for and found beforehand.
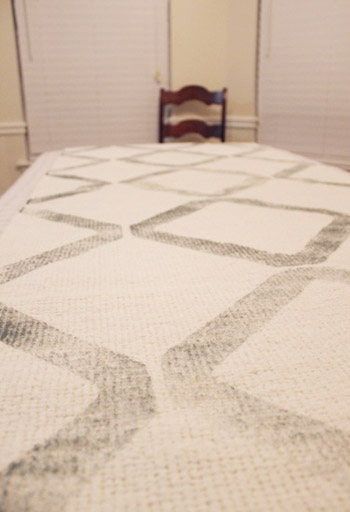
I worked my way out and around the entire rug until I had a basic lattice design.
Next I grabbed the inside of my design and stamped it inside each square.
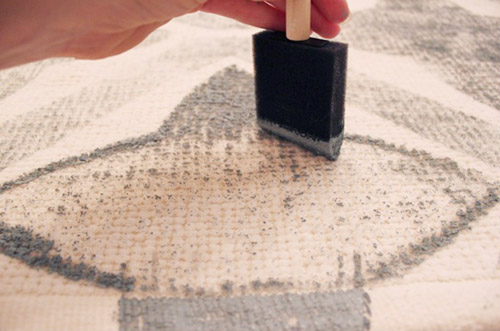
After I was done stamping, I filled in the design by sponging on paint using my foam brush.
I let it dry for 24 hours before I laid it down for fear that if I didn’t I’d be tracking paint all over our house.
But wait! There are two sides to every story, including this one…
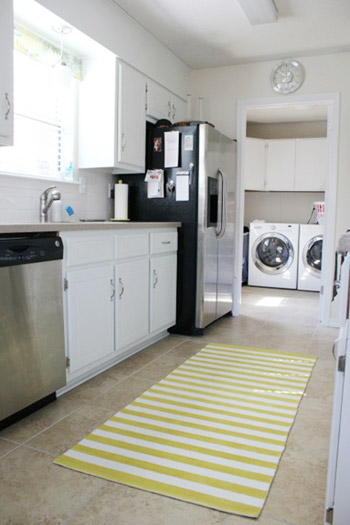
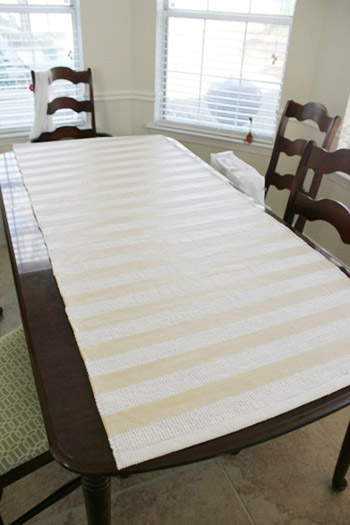
I used two-inch wide masking tape to create the stripes on the other side of my stamped rug, then I carefully took the rug outside and gave it a couple of coats of spray paint. I noticed that the spray paint preserved the texture of the rug much more than the sponged on latex paint did.
The cost?
- Rug: $20
- Paint: $6 (two sample-sized jars)
- Foam: already had
- Foam brush: already had
- Tape: $4 (used only about 1/8 of the roll)
- Spray Paint: $4 (used one leftover can and half of another)
- Grand total for the entire project: $34
Thirty-four dollars for a reversible rug that we can flip depending on our mood, that can be easily washed, that adds some much need pattern and color into our kitchen, and that gives our dish-washin’ footsies a soft place to land. Not bad, I’d say! – Sheena
So how cool is it to see a swatch of dollhouse fabric blown up into a real-life rug? And the whole reversible thing is great (the yellow stripes are Sherry’s favorite). If you’d like to read more about how Sheena knocked this out, here’s her full tutorial on the stamped side and her how-to on the striped side. And a big thanks to Sheena for sharing the goods!

SheLikesToTravel says
I love the rugs. But secretly I was hoping she was going to replicate that wallpaper!
Maureen @ Altes Haus says
You and me both!
Kat says
Me too! It would make such a cute accent wall for our daughter’s big girl room. Hmm, maybe I should get on that myself…
Christina B. says
Same here!
Liz says
Same! I love those birds!
Tara says
Me 3!
Mamaw03t says
Me too!
Anne @ Planting Sequoias says
Love that she painted the other side too! That’s what I did for the last Pinterest challenge, when I couldn’t *quite* give up the design on the other side but wanted something different.
http://annebronkema.wordpress.com/2013/02/27/purple-herringbone-painted-canvas-rug/
YoungHouseLove says
Looks awesome!
xo
s
Mary | lemongroveblog says
Pinning this one ;) Great way to brighten up that kitchen and add a lovely pop of color!
Christa @ BrownSugarToast says
LOVE that, Sheena!! Thanks for sharing inspiring projects, John & Sherry! And yeah…someone should totally duplicate Clara’s dollhouse in real-life size just for kicks. How awesome would that be?!?!
YoungHouseLove says
I’d want to live there!
xo
s
JG says
Maybe you should! All those rooms- there’s gotta be one that could be turned into that! :)
Robin-Lynn says
I wonder how the paint feels under foot? Does it get crunchy? Flake off?
Mind you, at that price point, I dunno if I would care much if it was a bit crunchy, ha ha!
Sheena says
I’ll answer that! Haha! No! No crunchiness (I was a wee bit concerned about that too) and no paint flaking! It looks as good today as the day I painted it!!! :)
Jen says
I used straight latex paint to paint two striped rugs and had the opposite experience – very crunchy. In fact I hated the texture so much that I only used them for a little while, and will probably end up throwing them out (I started with old, beat-up rugs thinking that if the project failed I wouldn’t feel bad about ditching them since that’s what was going to happen anyways). It could be that I over saturated the rug with the paint, as I was going for really solid stripes and ground that paint into the rug good. My suggestion would be to spring for the stuff that you add to paint to make it good for fabrics if you want a really saturated color that might require a fairly heavy hand with the paint.
Megan @ Rappsody in Rooms says
That’s an awesome project! I love it. I’ve been thinking about stenciling a rug too…now I’m going to have to do it!
Donna says
Wow, this looks great! I have been looking for the perfect rug and not finding it, maybe now I’ll make it!
Jackie says
I think this is the first stamped rug DIY I have ever seen. I love it! Make it reversible was genius, too. Thanks for sharing :)
Tara says
Where is everyone finding these awesome blank-slate cheap rugs? I need a 4×6 rug, and I can’t seem to find something that cheap anywhere! I’m gonna go ona rug stealing spree in all of your houses…
YoungHouseLove says
Hers is from from Ikea!
xo
s
HK says
For a dark background that is also waterprood, try Wally Mart.
Tara says
Darn you Ikea! I miss it so much – the nearest one is 6 hours away! Thanks HK for the idea about Wal-Mart, we definitely have that (who doesn’t?) :)
Liz says
Love this idea! I would probably end up with paint everywhere (one time ended up getting paint inside my purse). I am a messy painter.
Jessica says
Love the project, and really really love the window treatments in the background! I’ve been trying to think of what I can do with existing blinds to pretty them up a bit. Great inspiration! Thanks!
Joan says
I was thinking the same thing about those window treatments! They are gorgeous – can we find out where she got them/where the fabric is from? Too sweet!
YoungHouseLove says
Hope she drops in with that info for ya!
xo
s
Julianne says
Fantastic idea & very creative! Great job! :O)
Krystle @ Color Transformed Family says
Clara should feel like a star now that people are imitating her doll house. She has the coolest toys. My goal for this fall is to make a doll house for my little girl either for her birthday or for Christmas. I have loved Clara’s ever since I first saw it.
Emily says
I love this project!
I’m in PA school at the moment and have absolutely zero time to devote to house prettying projects, and reading YHL is definitely a) keeping me a little sane in the madness and b) helping me build up a giant list of things to try when I have a life again. My husband is a little afraid of what’s going to happen when I graduate… :)
YoungHouseLove says
Aw thanks Emily! All the best with all that studying (and future-to-do-list-making).
xo
s
Deme says
I’m in love with this project! Both colors/patterns are fantastic!
Carrie @DreamGreenDIY says
How clever is that!! Love it.
Kristin @ Little Corbin Hill says
Ohhh, I love both sides of her rug! Looks great! I’m curious where she got her rug at though! I need one =)
YoungHouseLove says
I think over on her blog she says it’s from Ikea :)
xo
s
Lindsay M says
Love it! I did the same with the 5×7 white rug from Ikea. Taping my design took well over 8 hours, but was totally worth it! The bright yellow design looks awesome on my gray flagstone patio! I wish I was savvy enough to share the photo on here :-) Cheers!
YoungHouseLove says
That sounds awesome Lindsay!
xo
s
Heather P. says
This is such a cool idea! I love seeing how people are turning plain area rugs into something amazing – gives me hope for finding just the right rugs…or being able to make one if I can’t find exactly what I want!
Chrystina says
That was very cool.
Eric @ AddSomeCharacter says
What an awesome and cheap idea! I know what we are doing once our office walls are done being painted.
christina @ homemade ocean says
LOVE IT!
So dang creative :)
Kristina says
Love this, I also just did a DIY painted rug last night and had a tutorial on my blog today!
Dorothy says
Good job planning out the pattern and sizing the stamps, Sheena! It wasn’t random that it looks so terrific.
YoungHouseLove says
I thought that too! So awesome that she centered the design.
xo
s
Wendy @ New Moms Talk says
Sheena,
It looks awesome! So well done! Thank you for sending in, so we could all enjoy it!
J&S,
Thanks for bringing back a Reader Redesign. They’re much enjoyed!
YoungHouseLove says
So glad.
xo
s
Kristin says
I love this! I get tired of stuff quickly, so being able to do a quick change would be perfect. Can you make me one now :)?
HK says
Fantastically Ingenious!!! Thanks for the tip about spray painting preserving the texture. WOW! Great idea with the foam stamping. Here I am only imagining using bottle caps and you fabricated a genius stamper. =D AWESOME!!!!!!!!
Maggie Budiono says
wow !! what a super idea to create that reversible rug using cheap things :)
What paint did she used? Is it really washable?
YoungHouseLove says
I believe she just used latex paint (when I get that on my shirt and wash it, it stays put).
xo
s
Tracy says
I think she means: is the rug itself washable? That’s my question too! Yeah, the paint color will stay, but how does the rug itself hold up with washing?
Bailey says
Wow, what a unique place to find inspiration for a project! High fives to her!
xox
Bailey
http://akabailey.blogspot.com
Eva-Oro y Menta says
It looks great! I really love the first one. But could you wash this rug?
YoungHouseLove says
I believe in her letter she said it’s washable. Maybe she’ll drop in with more info for ya.
xo
s
Sheena says
Hi Bailey!!! I haven’t washed it yet but am going to need to soon so I’ll be sure and write about how it holds up! The rug itself is washable and I’ve used latex paint to decorate shirts that have held up amazingly through the wash so I’m going to assume it’s washable but again, I’ll check in with the result on my blog! :)
Tracy says
And If I just would have scrolled down a bit, there’s my answer to the “washable?” question. Duh!
Sheena says
Thanks to the moon and back for featuring our rug John and Sherry! I am so honored! You’ve made my year!!!!!!
YoungHouseLove says
Of course Sheena! We love it.
xo
s
Erin says
I love this! I think this is a stencil project I could do!
Susie says
Wow! Thanks for the inspiration.
Amelia@Monograms'nMud says
Yeah so happy to see the Reader Redesign series back. Great job Sheena…love the personalize touch it brings to the space.
XXX
Steph Nelson says
What doubly awesome creativity !! :)
What kind of paint was used for the stamps??
YoungHouseLove says
I think it was regular old latex paint (sticks to my clothes and doesn’t come out, so I can see how it would stick to a cotton rug!).
xo
s
Lynn @ Our Useful Hands says
I really like the striped yellow side because I’m also a sucker for some “yeller”. Great job! I’m so busy with work these days that I haven’t dove into nearly enough house stuff like I said I would this summer but I swore that all day at the end of the day I am tackling at least one thing – no matter how minute. Off I go.
My best, Lynn
Rishia O'Neill says
Holy CANOLLI! Superfine inspiration! Love what you did! Truly inspiring!
WSquared says
Okay, I howled with laughter at this one, because it’s just too cool– and clever, too! Great job!
Athena says
This caught my eye because my younger sister is named Sheena, and it’s just not a common name you run into all the time. And this is definitely not a common rug! I love that it’s two sided, so you get two different looks that can be changed on a moment’s notice but doesn’t require you to store the other option. Drawing inspiration from the dollhouse is just a bonus, although I think I speak for many that I kind of hoped she was going to replicate the whole room with the wallpaper and rug. Such a cute space, and I love seeing the rug in its full grown version!
Rachel @ Personality Crafts says
What a great project– both sides look so good! Very impressed with the quality and the low, low cost. And such an interesting design inspiration… YHL must be so proud. :)
Janet says
I love the rug and I love her blog. I’m hooked!
Thanks for this Reader Redesign!
A. @ Hello Door Seven says
I love the color they have used!! <3
DeniseZ says
We never got the wallpaper information. I loved the project, but at this point in time, probably could use the paper more than the rug.
YoungHouseLove says
That’s just gift wrap from a local store called Mongrel (it’s a dollhouse, so we just glued it along the back wall). That info is in the dollhouse post that we linked to this post (it’s found here: http://www.snowandgraham.com/index.php?_a=viewProd&productId=75&parentCat=&catId=23#.UcMBi-vlytI). Hope it helps!
xo
s
Katie says
Wow! That is so cute and creative! I love the patterns too!
Amy says
Fun project, but what I really love are those curtains — beautiful!
Jenny@simcoesteet says
Love this rug project!
Unrelated, but saw this and immediately thought of Clara (unless she is way over the worm thing… I don’t think there is a dragon version of this ha ha).
Jenny
http://Www.simcoestreet.blogspot.com
Jenny@simcoesteet says
Duh here is the link
http://m.instructables.com/id/Bowl-of-Worms-Anyone/
YoungHouseLove says
Love it!
xo
s
Tatiana says
Haha, that’s just too cool! I actually prefer how it’d looked like before she filled in the contours with a sponge. Had a really nice vintage-y effect.
Sarah says
This is the coolest idea, thanks for sharing!
jennifer says
Such a great idea! Thanks for sharing.