Since we last checked in on the sunroom last Thursday, Sherry and I have managed to check four more things off the list: installing two ceiling fans, cleaning the concrete floor, leveling it, and cutting the tile and planning out our pattern (aka: dry fitting). But excuse me while I backburner the fan installation tutorial (I promise it’ll pop up in a few days) because we’re just too psyched to share those three tiling prep steps with you guys. We made some serious weekend progress – more than we thought we would – and we couldn’t be more excited about the tile pattern that we landed on. In fact, I’m probably outside tiling as you read this… so hopefully within a week it’ll all be fully installed and grouted and ready for the big reveal!
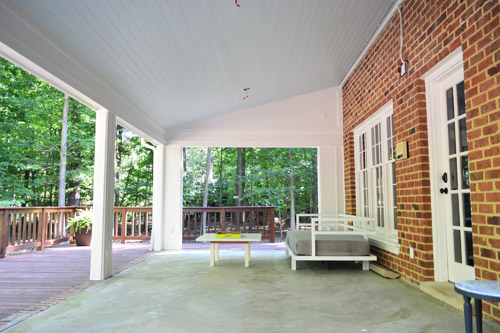
So let’s talk about how we got this tile train moving (and if you didn’t realize you boarded the tile train, you can check out this post for why we’re headed to that destination). Our trio of prep tasks were to: remove a lingering smell, level the ground since this is now open to the elements and we didn’t want water pooling in certain places, and determine our tile pattern (border? no border? running brick pattern? modern grid?). Let’s start with deep cleaning the concrete to eliminate the odors it was holding onto – because, as you may recall, this room was once covered in a wall to wall carpeting that got wet over time due to broken doors and wood rot, so it was definitely something we needed to attend to.
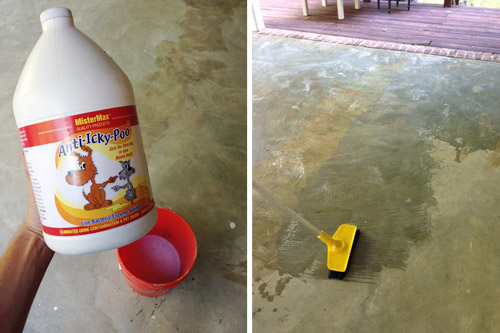
In our post about removing the old carpet a bunch of you actually recommended using this product (MisterMax Anti-Icky-Poo) which many of you described as having a hilarious name but also being the best thing you’ve ever tried on deeply penetrating odors. Even though we’d be tiling over the cement, we wanted to make sure every time it got hot outside there wasn’t any old whiff of something that wafted up from the cement floors). Most of the more obvious smells had thankfully vanished once we removed all of the glass doors to permanently air things out, but since we’d already bought the bottle based on your recommends, we figured it couldn’t hurt to scrub some on just to be sure nothing would re-emerge on a muggy day. It’s really easy to apply (scrub on with a brush + let dry = smell’s gone).
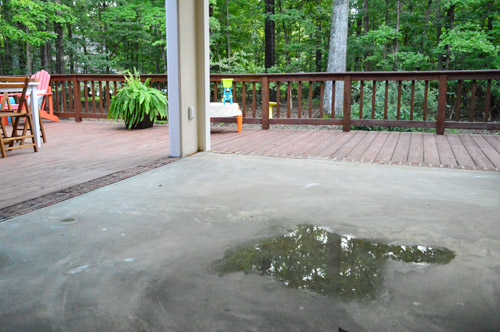
The other issue we needed to solve before tiling was taking care of some not-so-level spots. With the glass doors removed, the space does collect a bit of moisture when it rains. For the most part it dries off quickly, but small puddles do form in a couple of low spots – most of which seem to be closer to the house (in spots where we’ll probably have furniture). And furniture sitting in little puddles after every heavy rain = not so great.
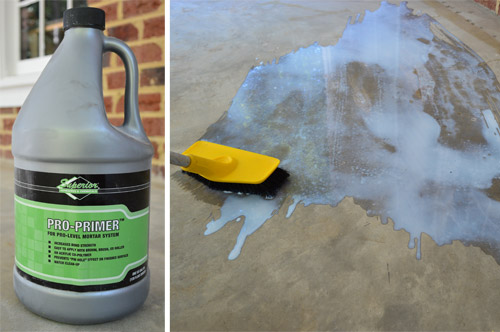
So we decided to give self-leveling concrete a try. It sounded scary (and messy) to us at first, but after watching a few videos online it actually didn’t seem so bad. We got all of our supplies at The Tile Shop which, in addition to the concrete mix itself, included a primer they recommended to help the new cement bond to the existing surface. Unlike a paint primer, it was a really watery substance that I could brush on super fast.
One bag of self-leveling concrete was supposed to cover 15 sq. ft. and I wasn’t planning to do the whole sunroom floor (since I just wanted to fill in some low spots and, if anything, create a very slight slope away from the house). So I ended up getting five bags – but only using four of them. I also got two buckets so I could mix two batches at once, but only used one because the 5-gallon Home Depot bucket ended up not being big enough. So if you’re attempting this at home, go straight for a 6-galloner (the Tile Shop one fit the bill).
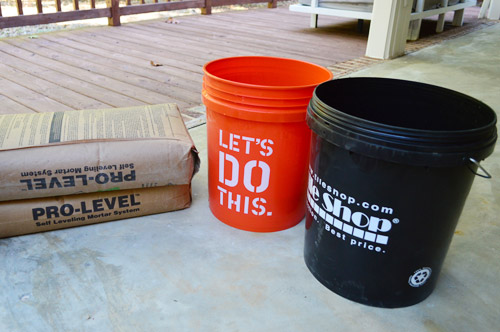
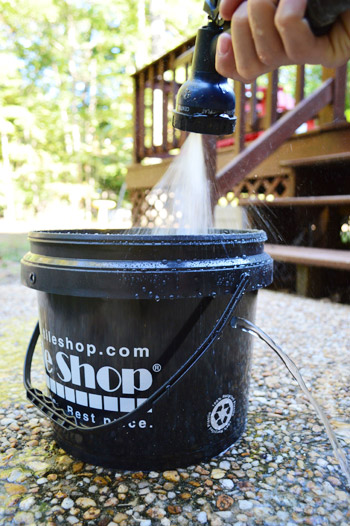
Speaking of buckets, I also bought this “measuring bucket” that’s designed to measure out the perfect amount of water for one bag of concrete (if you fill it too high the water drains out of the hole and then you’re all set). I felt a little silly for paying $2 for a bucket with a hole in it, but it ended up being worth the peace of mind that I got from not having to worry that I made my mix too soupy or not soupy enough.
After pouring the water in my 6-gallon mixing bucket, I added a bit of the cement powder at a time – mixing it really well before adding more, until the bag was empty. You basically have to mix this stuff with a paddle-mixer (i.e. giant whisk attached to a drill) so I was glad to have already purchased one for my upcoming tiling job.
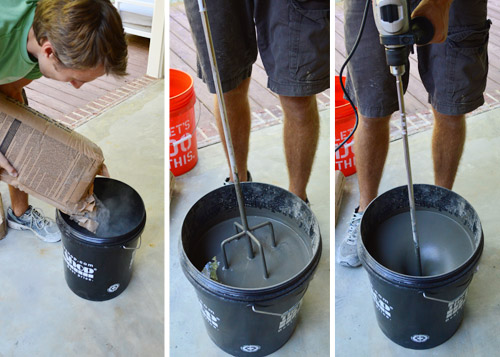
This stuff is actually really watery. You picture cement being kinda like a thick cake batter consistency, but this was more like sunscreen that’s been sitting out in the heat. But it’s that liquid-y property that actually helps it level things off mostly on its own.
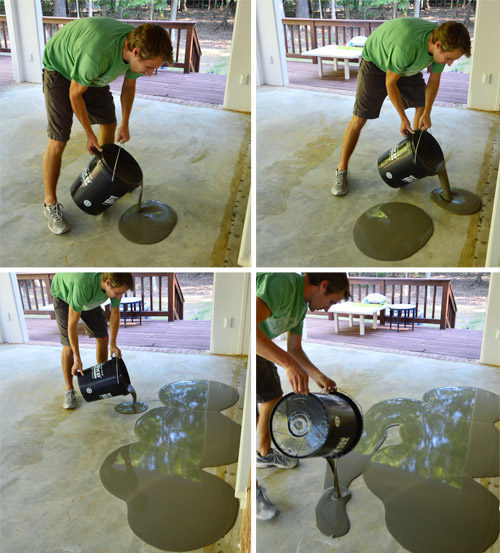
It doesn’t do all of the work for you, but it definitely works with you as you go. I used a broom to push some of my puddles together and into corners. But it wasn’t hard or meticulous work by any means. Wherever I swept, the liquid just magically reformed into a level, flat surface. It’s almost like that liquid that Alex Mack or those kids from those old Capri Sun commercials would turn into, just less silvery.
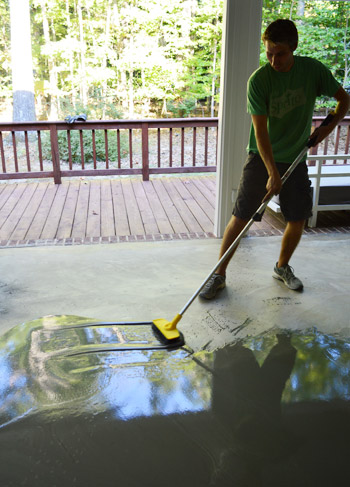
I ended up using four bags in total and you can see how the area closest to the window was already starting to harden by the time my last batch (to the left of it) went on.
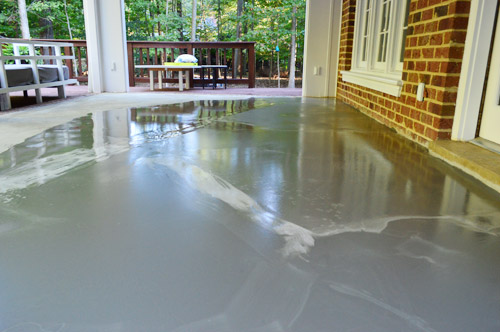
But it wasn’t until the next morning that it was completely solid and ready to walk skip on.
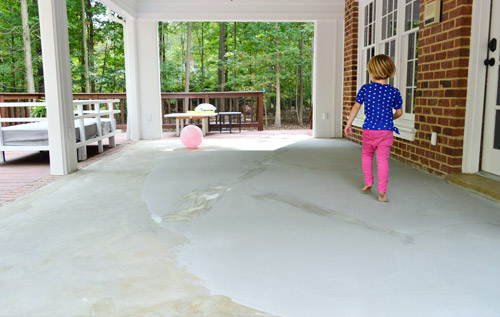
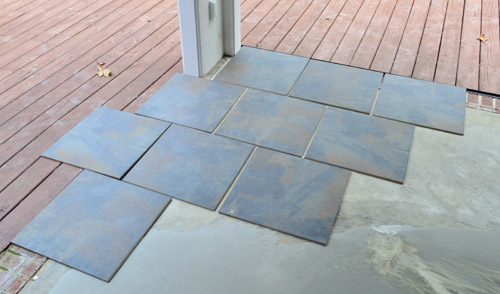
With that out of the way, we could finally start placing tile. Well, start planning to place tile. Sherry and I were 99% sure we wanted to do a brick-layer pattern with our 20″ x 20″ square tiles. But we weren’t quite sure where we wanted to start the pattern and whether or not we wanted some sort of a border. So we broke open a box or two and started playing around.
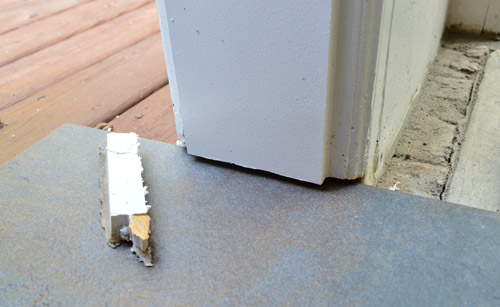
The first thing that the exercise confirmed is that we needed to cut out the bottoms of our door jambs. We did this for our wood floors inside too. It basically lets the flooring slide under the trim, saving you from having to intricately cut your tile around it and ultimately gives you a cleaner look. To determine the height I set my flat saw (aka Dremel Multimax) against a tile and a piece of cardboard (to protect the tile from the saw and to adjust for thinset height).
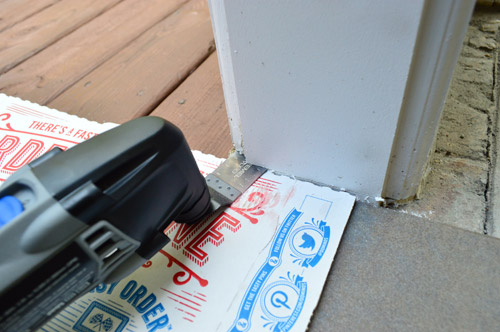
See? You end up with a much cleaner edge once that chunk of trim is gone. And once the thinset raises the tile a smidge more it should be a nice tight fit (which we’ll then seal with clear exterior caulk to protect the wood from any moisture/rot).
The other thing this exercise confirmed for us is that we definitely want a border. It not only helps to define the edge more crisply (and ended up looking a lot more high end to us) we realized it would also make the tiling job a lot easier when it came to cutting tiles around the posts (instead of notching things out, I could make the border the same width as the posts and just lay them down to create that outside edge which squared off everything so that interior rectangle of tiles would require fewer cuts). So after a lot of moving and cutting and shifting and more cutting, this is the final pattern that we came up with:
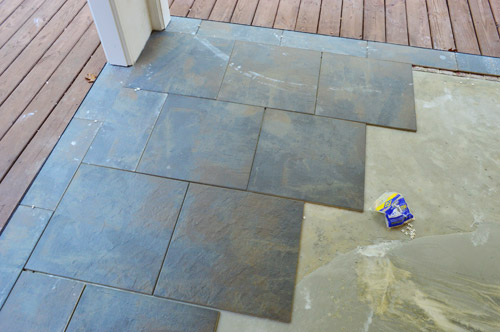
I had to create the border pieces myself by cutting the square tiles on the wet saw. But luckily I was able to get three border pieces out of one tile, so we didn’t have to sacrifice too much scrap to this cause!
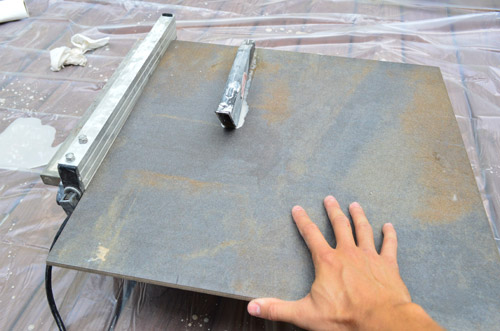
It wasn’t the most fun task to slice up eight tiles this way (to make 24 border tiles to complete the perimeter) but we think it was a huge improvement over the unbordered look. It defines the edge nicely (which is helpful because there is a slight step up from the deck into the sunroom) and, by doing all of these cuts during my prep stage, it’ll hopefully make my day(s) of tile-laying go a lot faster. Oh yeah, and forgive the hazy water mark from the hose in the shot below, it wiped right off.
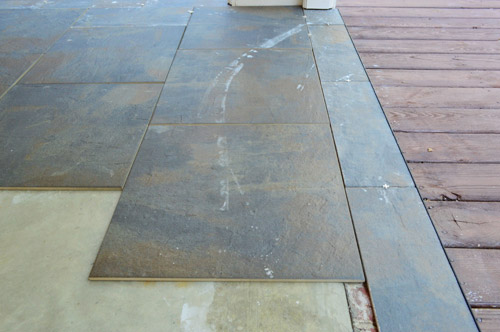
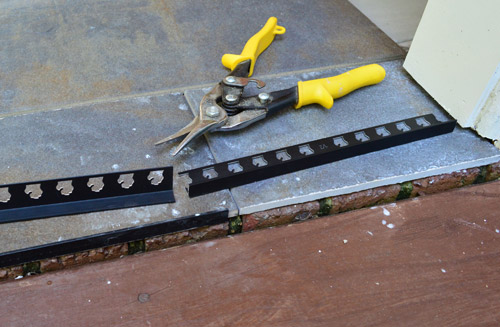
But before I leave the topic of edges, one thing we were concerned about was how the exposed edge of the tiles would look from the deck (and if it would get beat-up over time). So we bought these metal edging pieces (that can be easily cut to size with some metal snips) to give our edges a finished look. I realize they look very in-your-face in this photo below (they’re more of a matte charcoal tone, but for some reason they look shiny and black below) but if you look at the photo above you can see it actually blends pretty nicely with the tile to create a thin charcoal rule around the border that looks clean and finished (without exposing the chalky cut edge of the tile).
My goal is to get all of the tile set by the end of the day tomorrow and then it just needs to be grouted and clean up for us to share those big before and after pics with you guys – hopefully by the beginning of next week. And fan enthusiasts – fret not. I’ll be back with a pretty detailed post about how we installed them (turns out they weren’t as bad as we feared). What did you guys do this weekend?

Jenn says
John and Sherry,
Can the self level be used by itself or does it have to be under tile? Can it be used outdoor? We have a outdoor concrete deck that has sink in the middle so when it rains (or snows) we have a little swimming pool for the bugs. Been trying to think of a cost effective (and easy) way to fix it. Hiring someone to level (add more concrete) or replace it cost several $$. Thanks.
YoungHouseLove says
I’m not sure. I’d give a quick call to The Tile Shop to ask (it’s free and they know what they’re doing!).
xo
s
Jenn says
Thanks Sherry!
Emily @ Life on Food says
I have some funky smelling parts of our new house too. I am totally going to try the icky poo
Louisa T. says
I know I’m late on my question, but, how far does a gallon of the Anti Icky Poo go? As in how many square feet do you think you can get out of a gallon? We are needing to do a basement (about 1000 sq ft) and I’m about to order it.
It’s amazing how many of our home projects parallel you guys. I think my DH is beginning to think that all my ideas come from y’all. (Shhhhhh, he doesn’t need to know just how close to the truth this actually is. He should be thankful your newest project [i.e. the baby] is no longer possible! Teehee.)
YoungHouseLove says
Maybe check their website if they indicate square footage? We have a lot left over and we did the sunroom and the foyer/bathroom (some of the slate had some lingering mustiness).
xo
s
lex says
Did you guys ever get your stair runner? Been waiting on the edge of my seat over here!!
YoungHouseLove says
It finally came! It was back-ordered until the end of this month but then when I emailed to check in on it somehow things sped up and it came! So we just have to paint the walls leading up the stairs first (definitely don’t want to do that after the runner’s down) and then it’s runner time, baby!).
xo
s
Nina says
Hey guys, how smooth did the self-leveling end up getting? Would you say it became smooth enough to be a counter top?
YoungHouseLove says
Hmm, that’s a good question. It laid pretty smooth, but the coloring wasn’t perfectly uniform (some parts were whiter and other parts were darker gray). I think they sell stuff meant for counters now (it’s a concrete mix, I think by Ardex that you smoother over counters?). Little Green Notebook just did her laundry room with it! Looked cool!
xo
s
Nina says
Thanks for the info. It would be brand new counters, not over existing ones. And I’d like to cast them in place as well (hence wanting to use the self-leveling concrete!).
YoungHouseLove says
Smart! Anyone ever used self leveling for counters cast in place? Seems like they could work as long as the color was somewhat consistent.
xo
s
Cathy says
I have a question on the paddle mixer. Did you have to use a 1/2 inch drill, or are there paddle mixers that are compatible with a 3/8 inch drill? I am working on something very similar and I would rather not have to buy a 1/2 inch drill for this one job. Thanks!
YoungHouseLove says
The paddle mixer we had required a half inch drill, but we had one on hand. Maybe you can rent one from Home Depot? Try to get one that’s heavier duty – like 9 amps or more – so it doesn’t burn out. Good luck!
-John
Nora says
Hi Sherry & John,
I don’t know if you guys check old comment threads or not but I was just doing some big time lurking on the site and found myself rereading this post from early October. I was intrigued by the self leveling compound you used.
My husband and I just purchased laundry machines and upon installation discovered our laundry room’s cheap-o laminate flooring is extremely uneven. When I say extremely uneven, picture our stacked washer and drier literally waddling out of the laundry room like a penguin when the machines are running. I love my new machines and would prefer they stick around awhile and not make a run for it every load.
Long story short, do you think that concrete could be used and would work indoors? I am not sure what kind of subfloor we got going on. I just keep picturing that Alex Mack liquid seeping through the floors into my basement which is a scary thought.
Appreciate your advise!
YoungHouseLove says
Yes, I think people use it inside a lot, so I would peek to see what sub flooring you have and then just google around to find a tutorial or DIY message board about it! I bet someone else has done it and hopefully can be of help!
xo
s