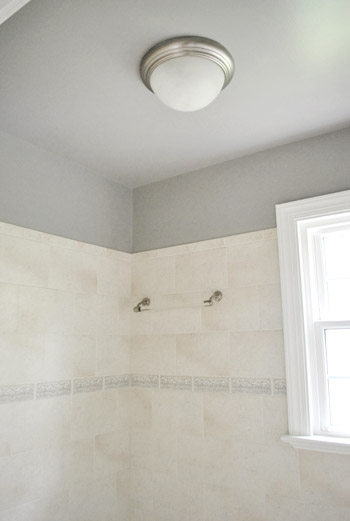
Yup, our formerly beige-on-beige master bathroom is officially rocking Rockport Gray. And we love it as much as we did when we saw it in this kitchen. Here she blows without the shower curtain hung back up yet (we snapped some pics with it up as well, which we’ll get to in a second):
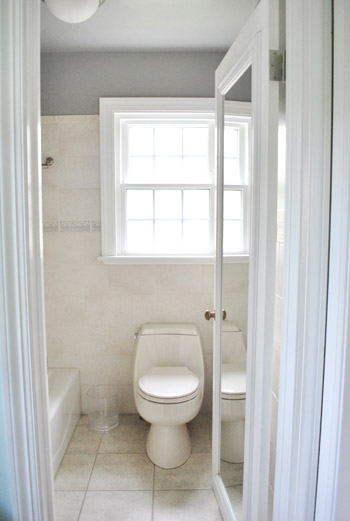
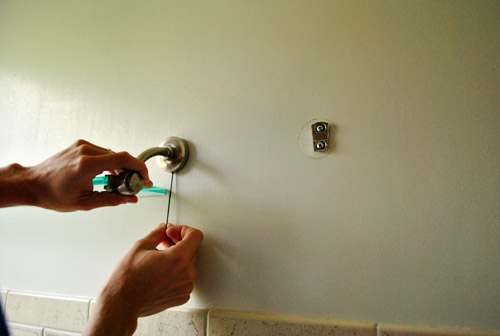
But let’s back up. Before applying two coats of paint to our bathroom (we shared our little mood board for the room yesterday) first we had to remove that unused-shelf-and-towel-bar (read why we didn’t use them here)…
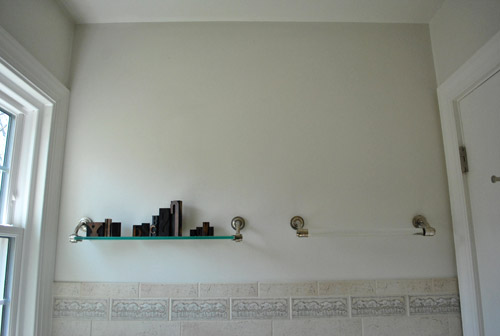
…to make way for some art on the only wall that isn’t tiled nearly all the way to the ceiling. So we did (using an allen wrench kit like this).
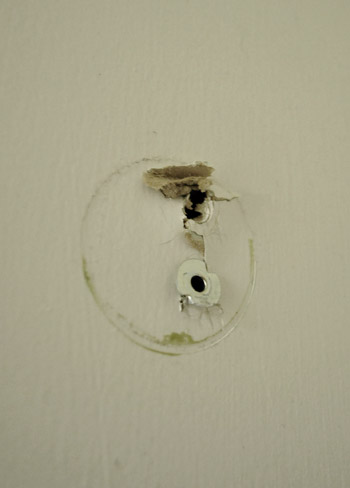
And then we hit some metal anchors that were ripping the drywall apart when we removed them (the bathroom is part of an addition from the seventies, so the walls are drywall instead of plaster, which would have crumbled even more probably).
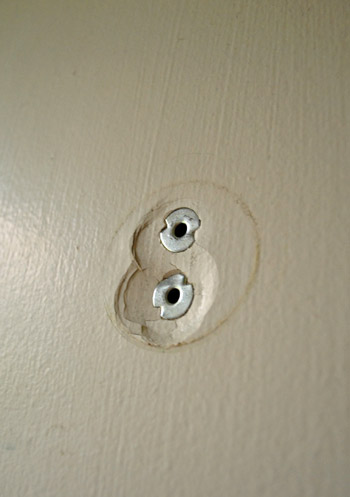
So after learning our lesson with one, we decided to do this instead:
Yup, I banged them into the wall a bit with a hammer and just spackled right over them for a nice seamless look. Here’s what it looked like before I sanded it smooth (pardon the super blown out picture, I forgot to white balance).
See how it’s sort of rough in the middle of this picture? After using a sanding block it was good to go (that’s my tip, since a sanding block stays nice and flat like the wall, instead of being floppy like a loose piece of sandpaper). The spackle we used was Dap Crackshot (with the blue lid), but we hear stores sell low-VOC spackle now so we’re itching to try that out soon.
Once the walls were spackled and sanded it was time for paint (note: priming after spackling isn’t a bad idea but we’ve skipped that step on a few occasions without any issue, so perhaps paint formulas are getting good enough to cover well on their own these days?). Anyway, on went Rockport Gray by Benjamin Moore (we first saw it in person in Portland when we House Crashed this casa and totally fell in love). We only needed a quart of semi-gloss, and we bought Natura paint (since that’s BM’s no-VOC line). The room needed two coats since it’s semi-gloss paint in there (which is so slick that painting over it almost always results in a terrible looking first coat…
… but then the second coat looks great.
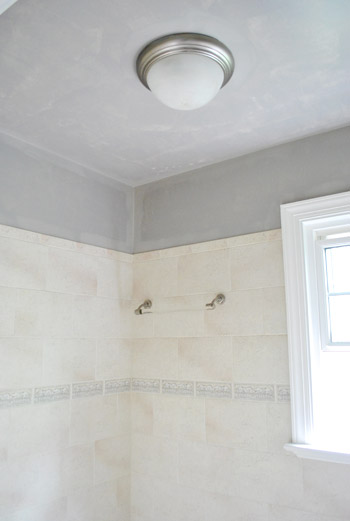
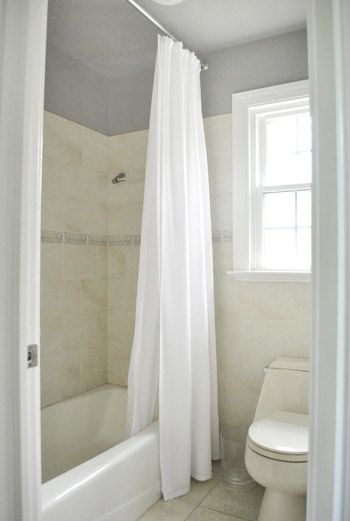
So here’s the room all painted with the shower curtain back up. Of course I didn’t get to make the cream trim bright white before painting the walls, but I’ll do that soon enough (I’ve painted walls and then trim a bunch of times so it’s not too bad of an order for a painting fool like me):
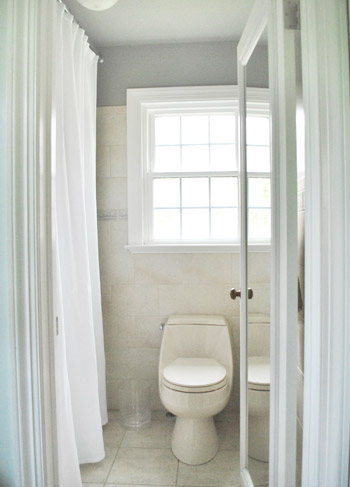
Here’s a flashback “before shot” just to show the contrast and crispness that the less monochromatic color brings to the room.
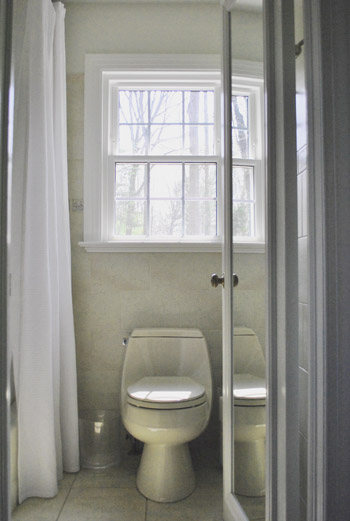
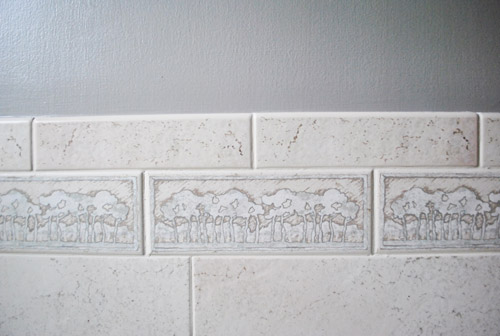
The gray in the tiles is so pretty next to the darker toned wall color. And the funny thing is that the gray in our little tree accent tiles looks nice with the new paint on the walls. We can picture the room looking even more like us with soft frosted gray glass subway tile as the accent someday, but it’s nice that the trees work better with the new wall color in the meantime.
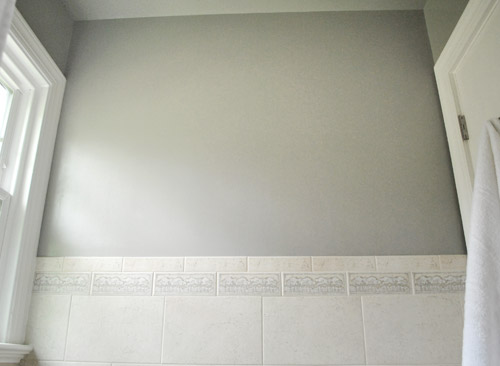
This freshly painted wall is just begging for some art (scroll up see the “before” perspective from this POV). And the room actually feels more open, even though the wall color is darker because there aren’t shelves and bars that feel like they’re all up in your area when you walk to the john.
You can see how the slice of white in the curtain looks with the tan and gray tones. Can’t wait to make the trim in the room a true glossy white color along with the toilet and some other accents to tie that color in more consistently.
So now our bathroom to-do list looks a little something like this:
- paint the cream trim white <– it looks white in the pics, but the bright white light switch next to the cream door trim makes it painfully obvious in person
paint the walls so they have some contrast- craigslist the toilet and replace it with a classic white one
- replace the boob light
- hang some bathroom-friendly art
- do something to add privacy to the window
- replace the border tile around the room (maybe in phase 2?)
- replace the floor tile down the road (just to break things up since there’s so much of it)
The good news for anyone putting off painting a small bathroom is that it doesn’t actually take that long. Each coat probably took us less than an hour (I cut in and then John rolls, and then we repeat that process for coat two). John’s mom once painted her entire bathroom with a paint brush. I remember thinking how amazing that was (and still think about how amazing that is, actually). Must’ve taken forever, but it was only one thing to wash at the end of it all. Haha.


Kristen @ Popcorn on the Stove says
That grey is a great color! I love that you painted the ceilings, too. It looks a lot better already! Any ideas for what kind of art you’ll hang (something bright and fun or maybe a calm and neutral image)??
YoungHouseLove says
Oh yes, check out the mood board from yesterday for that!
xo,
s
John@Our Home From Scratch says
Looks great!! Complements the tile nicely. You guys have an eye for paint color! Did you mull over the selection long or was it a quick decision?
YoungHouseLove says
We loved that color when we saw it in Portland when we were House Crashing so we were hoping to use it in the bathroom but weren’t sure it would work (might be too dark, too light, etc) so we taped it up on the wall with a bunch of other swatches (lighter, browner, creamier, darker, etc) and were psyched when it was still the one we preferred most. I think we just got lucky because a lot of times our favorite going into things doesn’t end up getting picked once things are taped on the wall. Haha.
xo,
s
Ainhoa@ALittleBite says
I love how the color turned out! The tiles are starting to look okay, although I can see how you’d rather have something you guys love. And you can’t really tell that the trim isn’t white from the pics!
YoungHouseLove says
Isn’t that funny? In person the trim (especially around the door) is really clearly cream since right next to it is a white light switch cover that’s bright white by comparison.
xo,
s
Seriously Sassy Mama says
I love grey!
Lori says
Looking good! Love the contrast it brings to the room and how it ties into the tile.
Melanie @ Mailbox Journey says
The bathroom looks so much brighter!
annabelvita says
My mum (who did all the painting at our house) never uses rollers, just a brush all the way! I guess it’s partly because our house was a 17th century cottage so none of the walls are even?
Anyway, bathroom is looking grand already.
YoungHouseLove says
Wow- that’s serious dedication!
xo,
s
annabelvita says
I think she has it stuck in her head that rollers make for extra clean up (because of the tray and everything?) – I don’t know… crazytown.
Hillary says
So I have kinda of a weird question…
Do you guys wash your paint rollers since you paint so much or do you use a new one each time? I'[ve tried it before and it was such a horrible experience that I haven’t tried it since (unless you painting pros–haha–have a great way to do it). And what do you do in between coats if it’s more than a day? I’ve tried the plastic wrap and fridge thing with some success. Sorry if you’ve talked about this before!
YoungHouseLove says
Oh yes, we do the plastic wrap (giant gallon ziplock bags can work) but we don’t do the fridge, we just leave them out wrapped up and they’re ok for 24 hours. We do try to wash rollers whenever we can to reuse them (foam rollers are especially easy to wash) just to save money. But if the roller isn’t in good enough shape to be used another time (they do tend to wear out over time) we’ll replace it since we want the walls to look their best and don’t want to sabotage that with an old roller that’s past its prime!
xo,
s
Sus says
I put the roller, paint tray, and brush in a garbage bag and tie it tightly. Everything stays nice and wet for up to 24 hours!
YoungHouseLove says
Great tip!
xo,
s
Shannon says
Good morning Sherry (and John)! Wow… already such an improvement! Love the color choice. Looking forward to seeing it continue to improve and excited to see how it turns out once you’re done!
Brandi @ His Shabby Her Chic says
I didn’t realize until the walls were a different color juts how high up the tile goes.
It’s look great so far!
YoungHouseLove says
Aw thanks you guys!
xo,
s
Melissa @ HOUSEography says
Love the color!!! Definitely makes the tile so much better. Is that a bathroom fan boob light? If not, do you think you need one? We’ve had a lot of issues with mildew in our old bathroom before got a fan.
YoungHouseLove says
We actually moved in expecting to really want a fan but haven’t had a need for it in over a year! No mildew on the curtain or ceiling or anything. We do keep the door cracked and sometimes crack the window just for some ventilation since it’s such a small room though, so maybe that helps!
xo,
s
Vidya @ Whats Ur Home Story says
Yup, the grey on the walls bring out the grey in the border tiles. Definitely a big improvement from the washed out look earlier with all beige. Liking it…..
Loren says
I TOTALLY get wanting to paint over the beige, I’m a renter and that ‘renter beige’ is starting to drive me insane. The grey was a really great choice. It really pulls the accent tiles in nicely.
I kind of think the beige toilet is adorable, but I can’t wait to see what you guys have in store for the art & lighting choices.
keri says
Any chance we can get a pic in a future post seeing how this looks with the paint in the bedroom/sink area?? :) :)
YoungHouseLove says
Oh yes, we have that on the list! Once we get more blue in there (in the art and hopefully that glass fixture) we’ll take some panned out shots to show how it all relates!
xo,
s
Jess @ Little House. Big Heart. says
Gray makes everything better.
Heidi P. says
Haha. Ditto. Looks a ton better already. :)
Julia @ Chris loves Julia says
Lovely to look at!! I love your tip about painting the ceiling, too. I have never done that in bathrooms, but it does make so much sense!
Maureen @ This (Kinda) Old HOuse says
The paint really makes this room look so different already. And the tiles look so much better already! And the trim already looks white, so I can’t wait to see how crisp everything looks once it’s all finished. I think your artwork will look awesome in this room.
LauraCinIndy says
My mom recently told me that my grandma used to paint her ENTIRE house with only a paintbrush. With five little girls running around! Superwoman:)
YoungHouseLove says
That’s amazing!
xo,
s
Megan says
Would you consider Rockport grey a true grey? no blue/purple undertones?
YoungHouseLove says
If it has any undertones it’s more of a putty color (sort of taupey under the gray, so it’s more of a warm gray-tan color depending on the light). Hope it helps!
xo,
s
Megan says
Thanks!
Heather says
I love the color!
This may have already been asked, but have you considered recoloring your tiles, DIY-style? I know you tend to avoid tons of chemicals, but it may be a cheaper way to brighten the tiles?
YoungHouseLove says
We’ve heard from a bunch of people that professional reglazing is the best option for recoloring tiles (you can’t just paint them or they’ll peel and crack). Experts are definitely best at handling serious chemicals like that and safely ventilating a room though- we actually hired a pro to reglaze the tub in our last house and loved it!
xo,
s
Kelly M says
We painted almost our whole house rockport gray and I LOVE it. I picked it from a tiny swatch and just decided to go nuts and buy 3 gallons of it. That’s very unlike me as I usually need to paint a square on the wall and stare at it for days and days driving my husband nuts. Not the rockport though, I just had a feeling it would be great, and it was. Depending on the light it can look really gray or it can feel more beige. I hope you are happy with it – it will look fantastic with some gray subway tile.
YoungHouseLove says
That’s amazing! We love it so far!
xo,
s
hollyloo says
love the new color!!
so last night i had a dream that i ran into sherry on the street. we stopped to chat and the entire time she was holding that old toilet on her hip like a baby. strange!!
YoungHouseLove says
Bwahahahahahahahahahahaah. I love it. And I wish I were strong enough to be randomly walking around carrying a toilet like that.
xo,
s
Laura says
It’s so amazing what a little bit of paint can do to a room. Already a huge improvement!
Sarah says
Is the trim around the window cream? It reads sparkly white in the pics. The back of the door and trim on that side does look a bit creamy however.
YoungHouseLove says
Oh yes, it’s all cream but looks white in some shots. The white light switch next to the door trim makes it really obvious, and when you get close enough to the window trim you can tell it’s all the same off-white creamy color.
xo,
s
Allyn says
HA! I somehow missed the tree tiles on the last post! I mean, because really, who doesn’t want scenic tiles?!
taetae says
Is it possible to knock out just the tree tiles while leaving the rest in tact?
i have an awful row of floral tiles in my kitchen backsplash, and i thought we’d have to replace the whole thing rather than just the flowered tiles!
can’t wait to see that transformation!
YoungHouseLove says
We believe it is. We hear a certain bit for the dremel can cut the grout and hopefully get them out cleanly- we’ll keep you posted!
xo,
s
angel p says
We used a diamond-something dremel bit just last weekend to cut tile that was already laid. While ripping out the carpet tack right next to the tile floor I accidentally broke one of the tiles. Rather than replacing an entire tile and trying to match the grout we went to Lowes and purchased a dremel (happy dance) and the diamond tip blade. We just cut all 3 tiles in that doorway shorter using the dremel and then moved the threshold over that 1 1/2 inches. Sooooo much easier than I thought it would be. Good luck!
YoungHouseLove says
Wow- so smart!
xo,
s
The Mrs @ Success Along the Weigh says
Ahh that’s the color we’re painting our bathroom! I’m having a horrible time trying to figure out complimentary colors for towels. Any ideas? Our current ones are light yellow and I don’t think they would look right.
I can’t wait to see more and thanks for the spackle tips!
YoungHouseLove says
If you check out our mood board from yesterday we have white, gray, tan, and a variety of soft blues (sort of like sea glass colors). It looks pretty good on the board, so we’ll have to see how it looks in real life! Haha.
xo,
s
Krystle @ ColorTansformedFamily says
This is already a huge improvement! The name Rockport Grey cracks me up though. It makes me think of my grandfather who used to wear Rockport brand shoes that were grey and beige!
YoungHouseLove says
Haha, too funny!
xo,
s
Lizzy says
Funny how a darker color opens the room up. I love it! Thanks for pointing out that the first coat of semi gloss looks crappy…I just started painting the crown moulding that we installed over our kitchen cabinets and was slightly horrified by it’s appearance after the first coat. Now I’m more optimistic about going home tonight and applying coat #2!
Oh, and I think we might have chosen your brackets for our open shelving. Did you get yours at Home Depot? I’m still waiting for the last coat to fully dry on our shelves before installing but we’re loving them so far! :) (pics of progress here: http://anexcellentadventure.blogspot.com/)
YoungHouseLove says
Yes! Those are the same brackets! Good luck with everything! And that coat #2 will probably look a lot better than the first!
xo,
s
Chelsea says
Wow! What a difference a few coats of paint make! We have just one bathroom in our little house and I’ve been putting off making any changes to it because I’m afraid of not being able to use it for any period of time! haha! But I supposed adding a layer of paint is less intrusive than replacing the floors, toilet, and vanity… so maybe that should be my first course of action!
Reenie says
What a diff a lil paint can do :)
Ashley@AttemptsAtDomestication says
I love that color! It looks really good against the tiles! And thanks for the inspiration this week! After reading your post yesterday and then reading the post about your homemade art, I decided to make some of my own! :)
YoungHouseLove says
So glad! Send pics!
xo,
s
courtney says
Great color….love the ceiling painted the same color as well…I too have been in love with a taupy grey lately…I painted my daughter’s nursery in it and added some cream stencil leaves!
Lindsey@Lindeyletsgo says
I’m currently in the middle of renovations so I turned to you guys a lot for ideas. I noticed you are craigslisting your toilet, have you guys done this before? Do people really buy used toilets on there? I’m love to craigslist mine but was skewed out by the idea! What would a decent toilet go for on there? Thanks!
YoungHouseLove says
We always give it the ol’ college try. And if someone doesn’t but it we’ll put it on Freecycle! There are definitely folks out there who would appreciate a working Kohler toilet (of european design, haha). We’ll definitely keep you posted if it works!
xo,
s
Angela says
Looks great. I can’t believe you’d even consider taking that tile down. Love it all!
jana says
I rocked the Rockport Gray in my bathroom too! Sounds like the makings of a support group…I painted my aggresive (aka, ugly)oak vanity in it and love it. Looks crisp and elegant with all of our existing white tile. So interesting how the cool gray can look so great with your warm tiles. It’s a magical color!
YoungHouseLove says
Sounds awesome!
xo,
s
Emily W. says
We just tiled our shower in gray subway tile (not glass, just ceramic). We LOVE it.
http://im1.shutterfly.com/media/47a2dd04b3127cceffe7cc0bac3d00000030O19Acs27hs0cg9vPho/cC/f%3D0/ps%3D50/r%3D1/rx%3D550/ry%3D400/
YoungHouseLove says
WOW- THAT’S GORGEOUS!
xo,
s
Missy says
I love that shower. A shower for two is on my dream house wish list!
Lauren says
That’s beautiful. I was leaning towards carrara marble subway tile in the shower surround… but that gray looks great, and it’s less pricy. I’m pinning that for later :)
Emily W. says
Thanks, y’all! We paired it with marble from Home Depot (I think they call it Grecian marble?) on the floors–Carrera was too pricey for our bathroom. I will have a full bathroom run-down on my own little blog once our upstairs is finally finished. It is moving sooooo slow–we are so not John and Sherry over here.
P.S. The gray subway is from Dal-tile, available through special order at HD or through Dal-tile stores.
Chrissie says
Hmm, that looks good, but I think it could use some more beige… Just kidding! It’s amazing how that lovely paint makes the rest of the room look totally different.
I was thinking of doing a similar thing with painting the top of our bathroom a different colour to the rest, so it’s good to see that it looks so nice in your bathroom!
Kate says
I just noticed an odd sponsored link at the bottom of this post (the part where it says “like this post? Then we might suggest these:”). Usually they are links to previous posts of yours, but the thumbnail image of a couple intimately kissing caught my eye since they were clearly not you & John. I clicked on it, and it brought me to a healthguru.com where the video article was called “What you don’t know about orgasms.” It’s not the worst thing in the world, but I thought I’d bring it to your attention since this type of advertising clashes with the G-rated style of your blog. Here’s the direct link to the site: http://sex.healthguru.com/video/what-you-dont-know-about-orgasms?hgref=nrelate
YoungHouseLove says
Weird! Thanks for the heads up Kate! Sometimes they mix in a link that’s “on topic” but they’re supposed to be craft/home improvement focused! Will email them about that!
xo,
s
Sarah says
Amazing colour, I didn’t think it would look as good as it turned out – room definitely doesn’t look as washed out as it did. I think a white toilet would just make the room perfect.
Ginny @ Goofy Monkeys says
It looks great – beige/gray as a color combination is really growing on me. I can’t wait to see what it looks like with a white toilet.
You totally did the right thing with those wall anchors. We had them all over the place in our house when we moved in. I used a lag bolt as a nail set and a hammer to bang them all into the walls here.
Erin @ WriteTasty says
The gray looks so much nicer! The contrast in that space really works wonders. Is the toilet off white/ cream as well as the trim?
YoungHouseLove says
Yes, it’s a beige toilet! That’s on the list to be replaced with a bright shiny white toilet that looks nice and clean!
xo,
s
Theresa says
Looks fab! Quick question. Is there a rule about using semi gloss in bathrooms and kitchens? I will be painting some bathrooms soon and would like to know what is recommended. Thanks!
YoungHouseLove says
It’s usually what they recommend. We use it in those spaces and appreciate the wipe-ability.
xo,
s
Linda says
I did my hall bathroom (which has a shower/tub in it) and wanted to use Aura by Benjamin Moore – they have a bathroom formulation (http://store.benjaminmoore.com/storefront/primers-specialty/aura-bath-spa/prodPRM29.html) that leaves a matte finish. I love it….it’s not quite as low VOC as Natura, but I did mine at Thanksgiving, with just the fan going, and even my kitties didn’t seem to notice any paint odor – nor did company the next day.
You might want to chat with your BM guy and see if that’s a possibility for you if you like the flat finish look. It’s holding up very well to showers, etc.
YoungHouseLove says
Ooh that formula sounds cool! I love that it looks matte but works in a bathroom!
xo,
s
Crystal @ 29 Rue House says
Nice color! I always try to get my hubby to do the rolling after I do the cutting in too. I do like how the brushes are reusable but I always throw out the rollers when I’m done with that color or it’s been several days and I notice it isn’t rolling on nicely. I have washed out and reused rollers before – have you ever? I wouldn’t do this anymore though.
YoungHouseLove says
We have the best luck washing and reusing foam rollers but we occasionally wash regular ones too!
xo,
s
Crystal @ 29 Rue House says
If you can do it so can I. Except I still won’t wash the furry rollers :) but I should make an effort on my foam ones – I’ve gone through so many of those and they are expensive!
YoungHouseLove says
Good luck!
xo,
s
Lindsay @ Me, Ed and Pea says
Ha! I just posted today about shoving anchors into the wall instead of pulling them out :) Definitely the way to go.
Shelley says
Wow – I can’t believe what a difference the paint made! Amazing.
laxsupermom says
Love the new color! It really makes the tile look so much nicer. Thanks for sharing.
Marie says
Ahhh I can’t believe I’ve never thought to just bang those metal anchors into the wall a little bit and spackle over them!!
My new house is a 1960, and we have them everywhere. I try to get them out of the wall, but there are a few that just wouldn’t come out and ended up being painted over. Someone’s going around the house with a hammer after work today.
Rachael@LovelyCraftyHome says
Love Rockport Gray! It’s perfect for that space-looks awesome!
Sarah says
what a fabulous color! And I have to say, it really makes the “boob light” pop!
YoungHouseLove says
Haha, totally the goal!
xo,
s