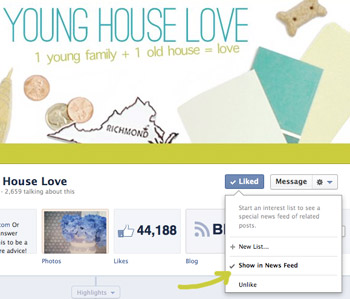
First a little Facebook diatribe: we’ve been hearing from folks who no longer see our posts or Instagram pics hitting their Facebook feed and have learned that FB made a few changes, so if you’d still like to see our posts in your feed again, just take a second to do this:
- Click over to our Facebook page
- Hover over the button that says “Liked”
- Make sure the box next to “show in news feed” is checked. If it isn’t, just check it. Then everything should permanently show up in your feed again. Sorry for the trouble!
And now back to our regularly scheduled blogging…
In case you missed the post where the tale of “removing the dated tree border that makes us sing that song from The Lion King in our bathroom” began (more on that here), we thought we’d share a few refresher pics. Exhibit A: the aforementioned tree-tile border that encircles the entire room, on all four walls – over and over again.
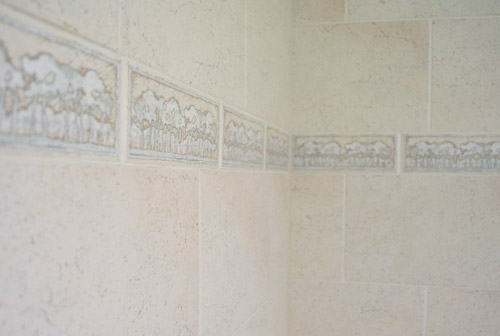
Exhibit B: The scene after a bit of Dremel-ing and prying with a screwdriver.
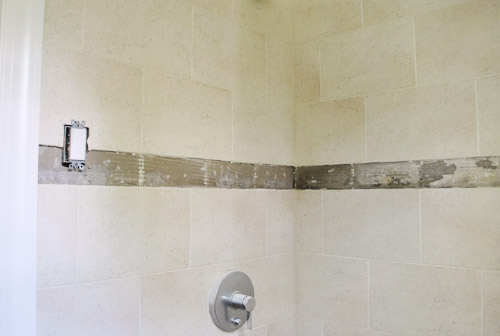
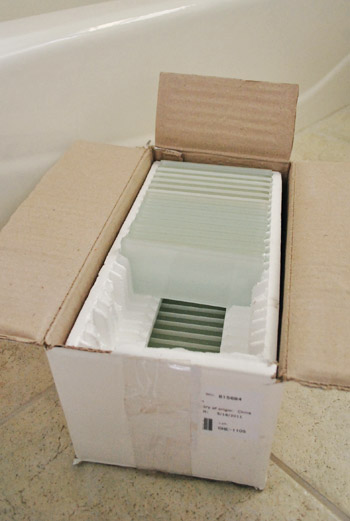
Exhibit C: The $50-ish box of clear glass subway tiles (called “Glass Snow” from The Tile Shop) that we’ll be installing in its place. You can read more about the tile we chose, and how Clara enjoyed lying on the floor of the store here.
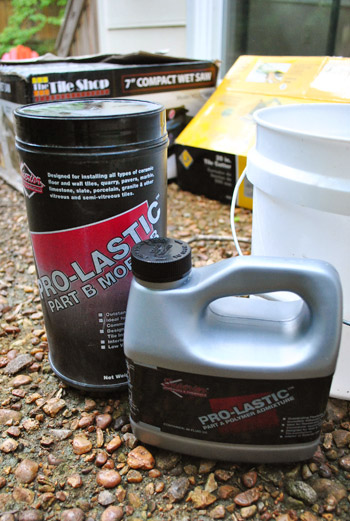
This isn’t our first trip to the tile rodeo, so this task promised to be pretty straightforward. Plus, by now we’ve accrued a pretty complete collection of tiling accessories, so one of our only purchases for this task was a new container of thinset mortar (the adhesive that keeps tiles stuck to the wall) and thinset admixture (the liquid that turns the thinset powder into its final cake-batter-y form). We got both of these at The Tile Shop for about $28 along with our tile.
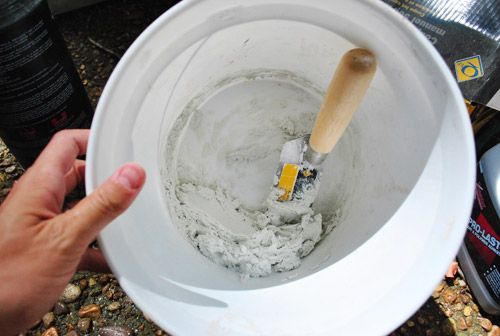
We mixed a small amount of mortar and admixture in a bucket using a trowel until we got it to the right consistency. Looking back at this photo, it appears a bit thicker than we usually like it (we snapped the photo prematurely, but kept mixing things to get it to the right consistency). In the end we like it to be spackle-like – like thick pancake batter.
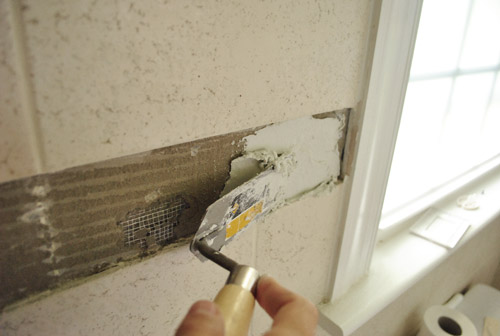
Since our to-be-tiled area was so narrow, we actually used the same trowel that we used to mix it all to spread the thinset on the wall.
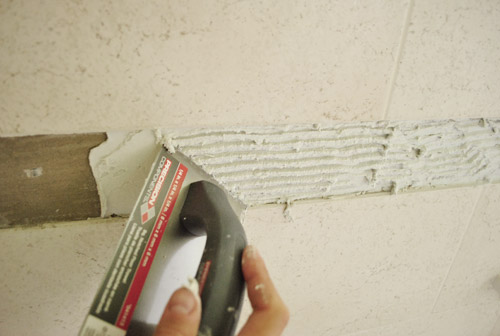
Then we went back over it with the grooved end of a small notched trowel that we picked up (the smallest one that Home Depot sold, for about $3) so we got that ridged surface that’s ideal for sticking tiles to the wall.
Actually placing the tiles was a cinch, since there was no leveling or anything needed. We just sort of plopped them in place (using some 1/8″ rubber spacers to maintain a gap for the grout). Some glass tile is completely translucent, so you have to be careful because your thinset lines can show right through it. Thankfully our glass tile is actually backed with an opaque film so you don’t see the thinset through it but it still looks completely glassy and clear (not frosted or anything).
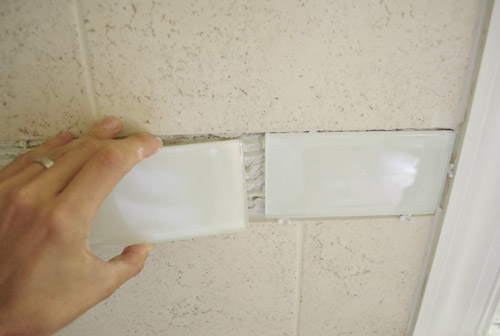
We just repeated that process around all four walls, mixing up more thinset as needed.
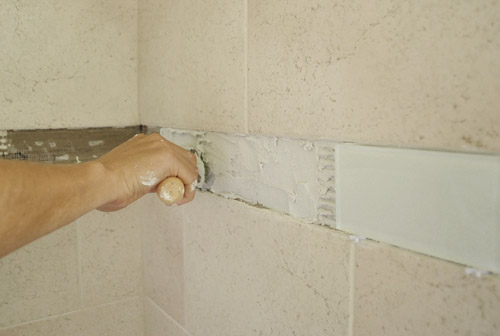
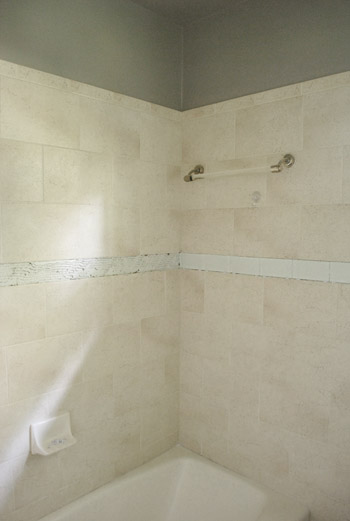
Here you can see the first section tiled (on the wall to the right) and the next side all thinsetted and ready for tiling.
We did run into a few spots that required cutting (in a couple of the corners) so for that we broke out this tile cutter that we used back when we did the subway tile in our last bathroom. It’s a pretty cool tool (which sadly didn’t work when cutting our penny tile backsplash). You place your tile with your cut line aligned with the small raised ridge on its platform (the yellow stripe between the black rubber). Then with light pressure, you score your line by rolling the blade back and forth a few times. You can actually see my score line in the glass below.
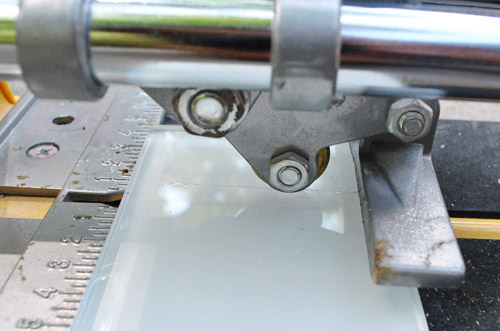
Once scored, you move the angled metal pad atop the tile and press down until it snaps right along your score line (if all goes well). For us it’s the fastest, cleanest, and easiest way to get a straight cut on tiles like these.
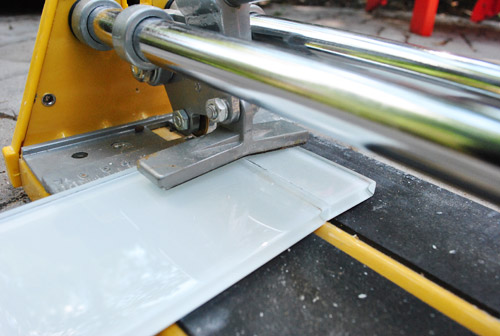
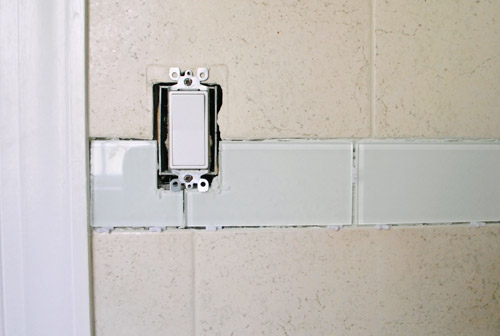
Unfortunately we did have one spot where we needed to notch out just the corner of a tile (around the light switch) which meant we had to use a wet saw. It stunk that we had to set up the saw for such small cuts, but it just had to be done.
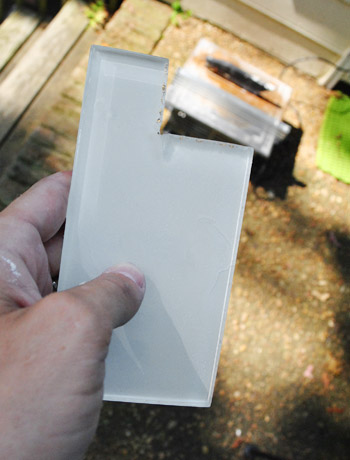
Here you can see the two tiles that got the wet saw treatment. The cuts aren’t 100% perfect, but the light switch cover will hide the imperfections at the corners.
All in all the whole process – from getting all of our supplies out to tiling and finally cleaning everything up again – took us all of Clara’s two hour nap. Not bad at all. One nap for demo. And another for re-tiling. This is our kind of project.
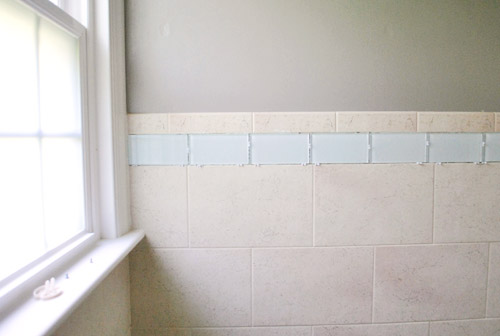
Of course, we weren’t completely done yet. Our new tiles still needed to be grouted and sealed, but all of that would have to wait for another day since we needed the thinset to cure completely.
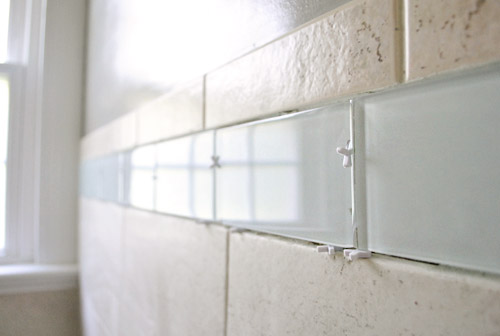
But the next day came before we knew what hit us, and it was time to grout. At first we debated what color grout to do in order to try to get the best match to what we already had in there, but then we discovered that the previous owners had left us some of the grout they had used in the basement. It’s “Antique White” colored, which wouldn’t be our first choice against sleek glass tiles (we’d probably go with pure white or soft gray), but in this instance it was more important to match the grout in the rest of the room, so we sucked it up and proceeded.
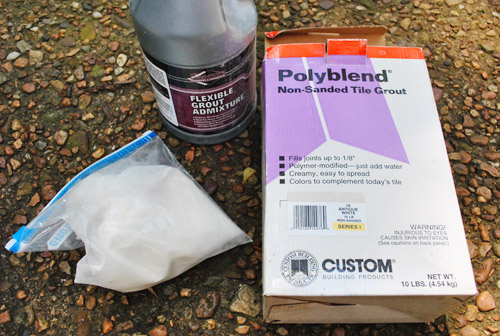
Having mixed up our free leftover grout with some free leftover grout admixture (a bottle we didn’t quite use up during our kitchen project), we went to town spreading the toothpaste-y stuff onto the tile surface using a grout float.
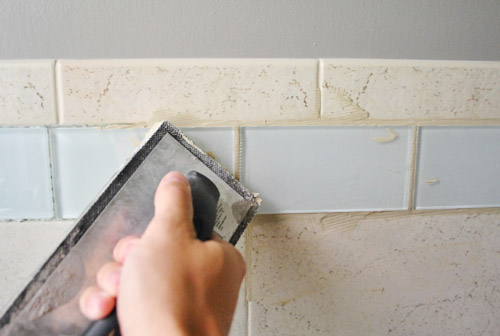
Once we had worked the grout into all of the grooves, we gave it a couple of minutes to set and then used a damp sponge to wipe away all of the excess from the surface of the tiles. The whole grouting process took just about 45 minutes. We’ll call that 1/3rd of a Clara nap.
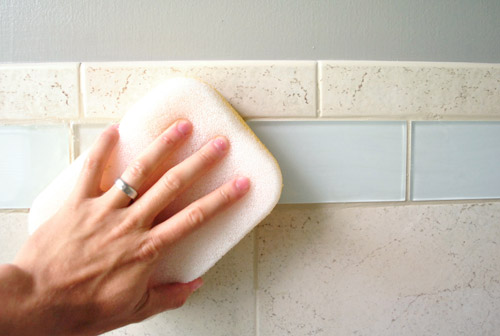
The last step – which we did the day after grouting so it all had time to dry – was sealing the grout lines so that they’ll stand up better to moisture and stain less easily. We had some sealer leftover from the kitchen, so we followed the instructions on the back and applied it generously with a sponge – then wiped off any excess a few moments later. This step took so little time that I did it while Clara was awake and playing in the other room. I know, I truly live life on the edge.
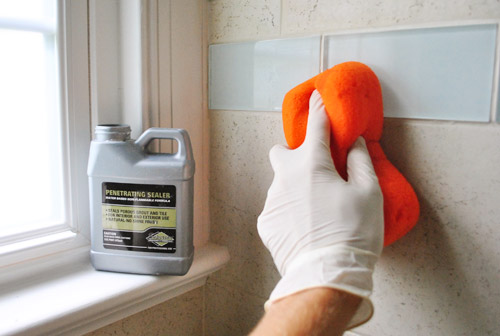
Sealing (plus putting a bit of caulk in the corners of the shower) was our last step to this whole project, meaning it took us just about 2.5 Clara naps (aka 6 hours-ish) to demo, tile, grout, and seal it. Not too bad at all. You can see in this picture below (on the left of the border) how the glass tile gleams as it reflects light around the room. It really makes the room feel fresher and more updated.
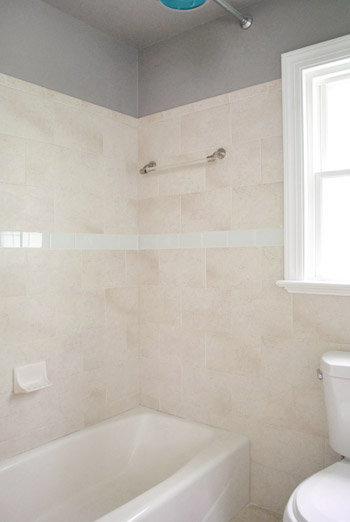
Admittedly we’re not always border-tile people, but the modern glass tile is a definite improvement from the trees, and for $50 in tile, it was an update worth making (we’ll get to the full budget breakdown in a minute). Reminder: that light switch isn’t really in our shower, this is just a really weird angle without the shower curtain in place – but it’s actually located outside of the shower curtain (so it doesn’t get wet).
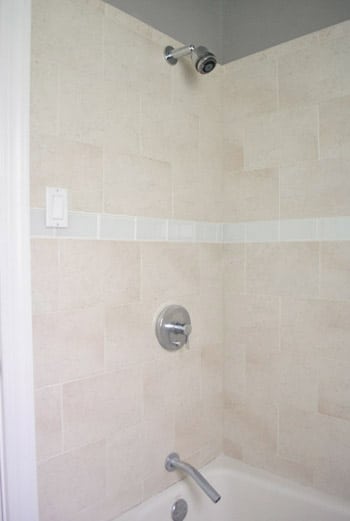
It’s definitely one of those annoying these-photos-don’t-do-it-justice projects, so feel free to come over and use our bathroom to really see these guys in all of their glory.
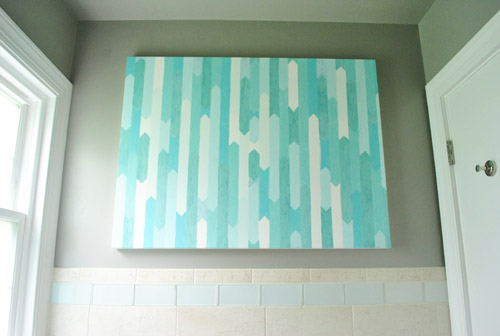
It just feels simpler and less busy than the tree-drawings that used to encircle the room:
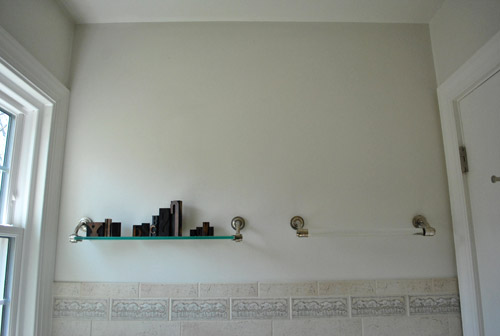
It definitely has come a long way from this shot that we took of the room before we started any updates (you can see links to all of our bathroom updates in order at the bottom of this post):
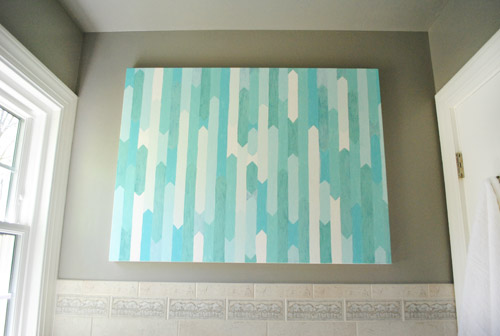
And although the tile is completely clear and shiny, it picks up the subtle tones in the art and the blue glass pendant light, so it brings sort of a cool tone to a previously very warm and beigey room. So even though those beige tiles certainly wouldn’t have been our first pick, they feel kind of balanced out by the new border tile.
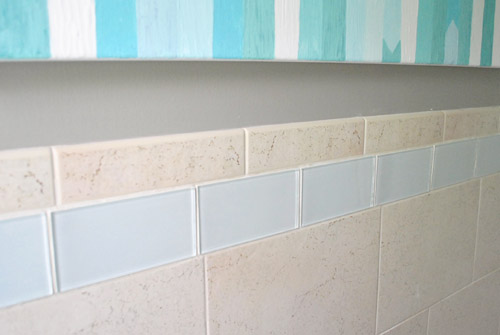
We’re so glad we were able to use the same grout that the previous owners used to install everything originally – it really looks like this border has always been here, which is a lot better of an outcome than a new-border-installed-with-old-tiles look. Whew.
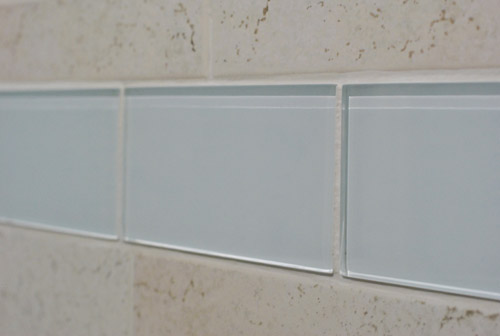
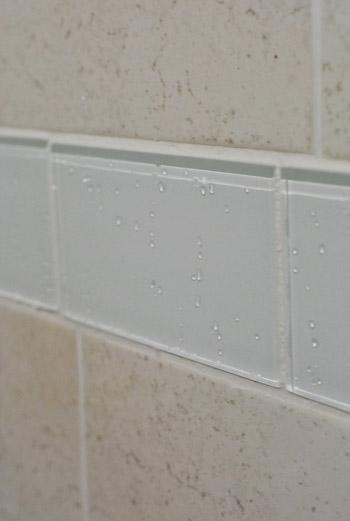
It looks especially glassy and sleek when it’s wet. We love how little drops of water collect on the glass surface and sort of reflect through the tile since it’s clear.
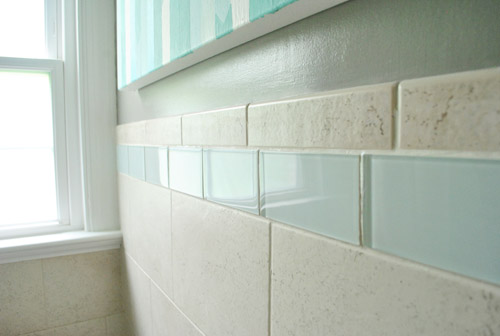
Here’s a shot that shows how it picks up some of the tones in the room even though it’s a clear glass tile – see how in this shot they look a little blue-green just because they’re picking up the art above them?
As for a budget breakdown, here we go:
- Clear glass subway tile (called Glass Snow) from The Tile Shop: $50
- Thinset mortar and Thinset Admixture from The Tile Shop: $28
- Small trowel and tile spacers from Home Depot: $6
- TOTAL COST: $84
Well, technically we also bought a Dremel Multimax (more on that here) which was $130 with the special grout head that we used, so the real total for this project is $214 if you count that, but our new Dremel has already come in handy for a bunch of other projects (we’ve used it on the deck and plan to use it on another project in the bedroom) so it’s definitely handy to have in our tool arsenal.
Oh and some folks seemed surprised that we were taking on another semi-big project like this along with our slow-going deck, but because we can only work on the deck one or two days a week (and it really demands full days of time, or at least chunks of 4+ hours) it could literally be a month or two until it’s completed. And this project was something we could tackle during Clara-naps, so we were excited to get ‘er done. So that’s what we’ve been up to in the bathroom. Wait, that sounded weird. Any bathroom projects going on at your house? Or are some tiling endeavors going on in another room, like the kitchen?
Psst- To follow this bathroom sprucing project from the start, check out this planning post, this painting post, this light-swapping post, this art and trim-painting post, this toilet-updating post, this window frosting and shampoo wrangling post, this toilet selling/buying and door-cutting-down post, and this pre-tiling post.

Madeleine says
Two questions — 1. The Tile Shop YHL code works in person as well as online? 2. I’ve heard that glass tiles don’t do as well (i.e., more prone to shattering/chipping) with non-wetsaw cutting methods as ceramic tiles. Did you guys have any issues other than needing the wetsaw to cut the corner? Do you have any sense on whether having a biggish tile might have helped? Thanks!
YoungHouseLove says
We actually didn’t have much trouble cutting them (they were much easier than penny tile and we didn’t lose a single tile to a bad cut- granted we didn’t make that many cuts). Not sure if a bigger tile would be more or less complicated but these guys weren’t bad at all. We do believe that code should work in person as well as in stores. We heard the corporate store sent a reminder out to each individual store to honor it in store as well and we hear that it seems to work for most people that way! Hope it helps!
xo,
s
Emma says
Looks great!
Mike@Glass Tiles says
You made this look easy! Who would have thought you could replace an old, outdated border like that. I think it is a gret way to update. One question….Why is there an switch in the shower?
YoungHouseLove says
It’s just an odd angle- it looks like it’s in the shower but it’s really outside of the shower curtain on the wall near the door- so it never gets wet and you can’t even reach it in the shower with the curtain closed!
xo,
s
Stephanie says
Wow! I wasn’t really sure how those gorgeous tiles were going to work with the beige tile but it looks amazing. Such a great update.
You guys have me thinking of how to update my bathrooms now. The main floor one I’d love to totally redo but it will have to wait time-wise (and money-wise.) Just another reason to spend lots of timing thinking about it!
And I finally bought a rug for my new place. I can’t wait to get it. (I bought the light blue color) http://www.overstock.com/Home-Garden/Alexa-Chevron-Vibe-Zebra-Rug-8-x-10/5725628/product.html
YoungHouseLove says
So cute! I love it. Send pics!
xo,
s
Linday says
Everything just looks awesome!!! Love it all!!! Question for you…I want to get my husband a myrte saw for Father’s Day. Can you make me a recomendation?? Nothing too expensive but still a good product. Thanks so much!!!
YoungHouseLove says
Ours is a Craftsman from Sears and we love it! Not sure the exact model but probably middle of the road. I’d just go there and see what they have and figure out what’s in the budget.
xo,
s
steph says
What a fantastic improvement to something so seemingly insignificant – definitely worthwhile!!! Great job!
Sara says
Thank you! Our bathroom has the the same situation going on where the trim tile is *ehhh* OK, but doesn’t fit my taste. It never occurred to me to just take out the trim tile and replace it until now. This is the perfect solution!
Lynette says
Fabulous! What a huge difference for a little money. It serves as a great reminder that you don’t always have to rip everything out to make it a little more ‘you.’
stephanie says
first off- this looks gorgeous! What a facelift!
Second- I am SO excited to see you guys do a tutorial with the glass subway tiles from the tile shop! A few days ago I ordered a few samples from there (we don’t have a local shop). We are considering a glass subway tile kitchen backsplash! Seeing you guys use the same exact tiles in your tutorial takes a lot of the guesswork out of it for us! Thank you!!!!
YoungHouseLove says
Aw, you’re welcome! They’re so much prettier in person!
xo,
s
Brenda says
You make it all look so easy! The new tiles do look great. :)
Maureen @ The Parkland Project says
Sometimes you make things look too easy. Totally not fair.
Shelley @ Green Eggs and Hamlet says
Great job. The new tile looks beautiful and definitely updates the old beige guys. It even looks intentional so I’d say that’s the sign of a successful update.
Kim says
As I read thru the comments I am always amazed that people ask the same questions over and over or question the light switch placement. You always write very thoroughly about your projects. Haha. I enjoy reading your blog each morning with my cup of coffee. Thank you for blogging so regularly.
Amanda says
It looks fantastic! I love the glimmer the tiles have – it feels very sparkly and posh! :)
Crystal @ 29 Rue House says
I love the tiles and the paint – it really spiffed up the place! And you guys are really making me want to retile our bathroom and kitchen but if such a tiny project costs so much I’m afraid what a whole bathroom would be like! For some reason I deceive myself into thinking that DIY is cheap because you do it yourself. lol
Krissy says
Looks SO much better :) Love that tile.
We are planning our master bath project at the moment. A trip to the tile shop is planned for Father’s Day. (Luckily, my SO and I both like that sort of stuff. We went to Home Depot on our date night this week to look at a gas range..)
The tile in our bathroom is the same as the larger tile on your wall. Except, it’s everywhere. Floor, walls, and the whole first floor of our house. I need cool tones, and STAT!
Ally says
FANTASTIC, Youngsters! What a difference, at such a reasonable price-point, too :)
I can just picture little Clara standing on her tippy-tippy-toes trying to touch the new tile, and cooing:
Oooooh! SHINY! :)
xox
YoungHouseLove says
Haha, she does like it! She calls it “new titles” instead of new tiles. Haha. So funny when they change things in plural to be something so random!
xo,
s
Sherry from BC says
Such a great update for not to much cash. I love how the tile changes colour and picks up the blue of the painting. I am sure you smile every time you are in there now. I don’t know how you do it. With a huge project of the deck on the go, a toddler to wrangle and nurture, a book to edit and get ready for publication and a busy blog you still manage to do little extra projects. I know you are young and healthy but your time management skills are truly amazing. It is especially impressive as you are self employed. I doubt that I could keep up the motivation to produce every day the way the two of you do. And you make all of your posts truly readable and fun. Give yourselves a few virtual pats on the back.
YoungHouseLove says
Aw thanks Sherry! I think we feel like sometimes we’re flying along and other times we’re as slow and molasses- just seems to be the DIY way! And of course the fact that we have to keep going since this feeds our family helps with momentum- haha.
xo,
s
Wendy says
I had no idea that changing the tile would make such a dramatic difference. I hate my bathroom even more now!
YoungHouseLove says
Aw, don’t hate your bathroom! You’d be surprised what a few quick projects (paint, new shower curtain and towels, etc) can do for a room!
xo,
s
Meg @ Revamp Homegoods says
Love it! What a beautiful (and simple) transformation!
Jan says
Love the tile.
May I ask…..what’s the deal with the light switch in the shower?
YoungHouseLove says
That’s just a weird angle- it’s actually outside the shower (the curtain covers it so you can’t reach it in there and it doesn’t get wet).
xo,
s
Heather - Diapers&Divas says
Love the new tile border. I’ve had the re-tile itch for a while… we have these awful blue tiles on the floor in our master bath that desperately need to be redone. I also want to do a tile backsplash in the kitchen, and hey, while we’re at it, retile our guest bath too. My problem is deciding on what tile… I’ve always loved those glass tiles. And combine it with subway size and style, I think I’m sold!
Amy says
so fresh & so clean, clean!
YoungHouseLove says
Thanks Amy!
xo,
s
Kate says
Totally unrelated to this post…this is a request:
I wasn’t sure where to put this so it’s just going on your comment section. You guys are always saying at the beginning of a post “we were asked to talk about”. So this is one of those requests. You seem to do a lot of research when kicking off your big projects and really cover all the bases. My husband and I decided recently that we are going to put a pool in our backyard next year and don’t even know where to start getting info and what to do or what to budget, just that we want one. Since this is definitely not a DIY task, and not on your future project list so I can just copy, can you explain what your process is at the start of a big unknown project like this for gathering info, finding sources and vetting out contractors?
Thanks!
YoungHouseLove says
Oh yes, here’s a post about negotiating with people to get the best deals and here’s a post about trying to get as many estimates as possible (they really can vary!). Hope it helps!
xo,
s
Kathy says
The new tile looks so much better. It’s clean and matches the style of your home. You guy are on a roll lately. I am loving everything you are doing even the happy accidents! I can’t wait to see the before and after pictures of the bathroom especially after you have moved the light fixture. That will be a room changer, as much as the new bathroom tile. Things are looking great!
YoungHouseLove says
Thanks so much Kathy! We can’t wait either!
xo,
s
Sharon says
I just put extremely similar tile on our bathroom floor, but in 1″ squares. I completely love it. Much better than brownish old linoleum from the previous owners.
YoungHouseLove says
Sounds so pretty!
xo,
s
Jen @ Domesticated Nomad says
Did you actually invite us all over to use your bathroom? :)
Looks great!
YoungHouseLove says
Haha, yes! Come on over! Exclusively for that reason. Haha.
xo,
s
Eve says
Oooh! So pretty and subtle, but it makes a big change – much more modern. I like the juxtaposition of the sleek glass next to the stony/rougher appearance of the wall tile, and it’s not really something I would have thought of doing. Do you like the wall tiles better now too? (not that I minded them before, they just didn’t really pop like they do now.)
YoungHouseLove says
Yes, I think we like them a lot more because they feel sort of basic and neutral and the rest of the room isn’t beige so it doesn’t feel as overwhelming!
xo,
s
KathyG says
I think I personally would have preferred a darker taupe glass tile, but it’s not MY bathroom! Nice upgrade, no matter what.
I assume that’s the light switch for the room, correct? Could you have just flipped it to the outside wall if you wanted to? (not that you don’t have enough to do!) Or is something in the way there?
YoungHouseLove says
There’s some plumbing in that wall so it’s best to leave it where it is, but thankfully it doesn’t bother us at all (it never gets wet since it’s on the other side of the shower curtain).
xo,
s
Sonya says
I have a totally unrelated story to tell you – a couple days ago I was driving to work and realized that the car in front of me had an almost perfectly personalized license plate for Sherry – it read 5HER609. No joke. It’s just a standard CA license plate, but I looked at it and my brain said “$herdog!”. Which is kind of embarrassing, but I figured I’d pass it along.
YoungHouseLove says
Bwahahahahahhaaha- that’s awesome!
xo,
s
Megan Circelli says
Love the tiles! Looks so much better! What on earth will you do when Clara doesn’t nap anymore?! :)
YoungHouseLove says
Let’s not speak of such a time. It makes me shiver.
-John
Lisa says
The tile looks great! Especially in those close up photos. It looks like its always been there.
Completely unrelated but i got an email from amazon today, like i do everyday, and it suggested i pre-order your book! It had the a picture of the cover and everything! I thought it was kind of funny that they suggested it since I have only ever bought novels for my kindle on amazon. I got excited since i have been reading about the book process here and I thought “oh my gosh there’s their book with a cover and everything!! how exciting for them!” haha!
YoungHouseLove says
No way! That’s so exciting! Haha. Amazon must know you! Haha. So cool.
xo,
s
Amanda K says
this looks great. the tiles are a great example of something i would have never picked, but they look SO good!
i have that problem with clothes, too :)
Naomi says
It looks so much more modern! That was a great pick of tile :)
-Naomi {Starry Eyes + Coffee Cups}
jillian says
I think this upgrade looks GREAT! And very you. Is it an option to use a glaze over the current tile to refinish it and make it more your style? Or would you have to replace the tile altogether?
YoungHouseLove says
Oh yes, we have thought that we could reglaze it down the road or even replace it someday, but thanks to our little tile border update we don’t mind it at all for now!
xo,
s
Lisa in Seattle says
The Facebook thing isn’t working – I followed the steps yesterday and double-checked again today but you aren’t showing up in my feed anymore. I am pretty sure every department in that company has a daily meeting in which the topic is always “What can we eff up TODAY???”
Anyhoodle, your tile looks great, but then was there ever any doubt?
YoungHouseLove says
Oh man, what the heck. That’s so annoying! We have heard when you comment and like posts on a fan page that you enjoy, Facebook puts that into your feed more since you interact with it, so maybe that will help?
xo,
s
Stacey says
Do you have any tips for caulking a bathtub/shower? What kind do you use and how do you clean it? We get the “tub and tile” stuff but it seems to get moldy so quickly. We seem to have to replace our caulking pretty often and I HATE that chore! Or maybe it’s normal to replace it so frequently? Or maybe I’m not doing something right? Thanks!
YoungHouseLove says
We always use the kind that says it’s meant for showers and baths (usually clear, white, or off-white silicone caulk by Dap). It’s definitely an annoying chore, and we probably need to do it every 5 years or so to keep it looking really fresh?
xo,
s
Emma says
A tip I learned from This Old House on caulking your tub is it fill up your tub with water and then caulk. You’ll want to let it dry before draining. The weight of the water weighs down tub so that when you fill it later the caulk won’t separate or crack.
YoungHouseLove says
So smart!
xo,
s
heather says
If it’s getting moldy very regularly, I’d be more concerned with the underlying issue causing it to get moldy so frequently, one thought being how good (or not good) the ventilation is in the bathroom.
Also, you can use a firm toothbrush and a scrub (a baking powder paste can work) once a week or so it doesn’t build up to begin with. I’d still look into underlying issues.
heather says
BTW – everyone has mold spores in their homes, it just depends how active they are. Bathrooms are the perfect environment for them. You can buy a relative humidity meter to track how high your bathroom is. If you see it above 60% (30-50 is ideal) this might be part of your problem. I wouldn’t be concerned if it happened over a long period of time, but the frequency would concern me where else mold was hiding. For now, if you shut the door when you shower, live in a humid climate so you can’t open the window, and don’t have great light and/or ventilation I would suggest a dehumidifier at least to help draw some of the moisture out of the air. Also wiping down surfaces after you shower will help.
YoungHouseLove says
So interesting!
xo
s
Stephanie @ Legally Blinde says
This came out so well! I’m really impressed that you were able to cut out the tree tiles and leave all of the other tiles intact. Definitely worth the effort! I’m amazed at how nice the new tiles look after you grouted them – makes a world of difference. Great job!
YoungHouseLove says
Thanks Stephanie!
xo,
s
Vanessa says
What a quick and beautiful update in the bathroom!
Did you two ever paint the exterior of the house? Wasn’t sure if I missed it or not!
YoungHouseLove says
Not yet! It got too cold in the winter and then we got into kitchen stuff and now we’re doing deck stuff- someday we’d love to get back to that though!
xo,
s
Rebecca says
It looks beautiful!
Jill @ missiondecorate.com says
Great tile! I love that my very first thought was “do they have a light switch in their shower!” Thanks for clearing that up :)
Gabriella @ Our Life in Action says
So pretty – I thought the tile was more blue in your last post. I can’t believe how one row of tiles can change the whole look and feel of a room. Great work!
Lee says
Looks like you guys did some good work! Nice job!
My personal opinion, though, I don’t like the mix of the modern clear glass tile with the beige natural-looking tiles. I think they clash. But different strokes for different folks!
I think I would have rather waited until I could redo all the tiles or do a glaze over top of them. If it were my bathroom, I’d probably take out the tile on the walls that are not in the shower and maybe do some beadboard instead or just paint.
I think the “pipe” faucet in the tub is pretty cool! Did you guys put that in?
YoungHouseLove says
That actually came with the house! As for reglazing, we had that done in our first house so we knew we could always do that down the road, we’re just taking it one step at a time in here since we’re doing bigger (pricier) things like the deck, but wanted a quick update over a few Clara naps in the meantime! We definitely love how it looks in person (harder to capture on film for sure!).
xo,
s
The Mrs @ Success Along the Weigh says
That looks amazing! It makes me wish we had a tile redo to tackle! I’m sure that’ll come when we move some decade!
Heidi P. says
Way to bust out a new project so fast! I’m working on my first pouf. Thanks to you – you make me feel like I can do anything!
YoungHouseLove says
Aw, you can! Good luck Heidi!
xo,
s
Jimmy says
I have to confess, I am terrified of tiling. We had to patch a hole in our ceramic floor recently, and I opted to use some old laminate wood floor instead. http://www.thebookofjimmy.com/patching-the-hull/
The end result looks cool, but obviously I’d rather go with the tile if I weren’t such a chicken about it.
I’ve also been under the impression that I would need a wet saw to get it done, but it looks like that isn’t the case. I’ll be studying this post, trying to get my confidence up.
Vicki says
Wow!! What a difference a little glass tile makes. So much bang for dat buck!
Lindsey says
Love the tile, it looks amazing !!! By the way, just preordered your book on amazon- SO excited !!! :)
YoungHouseLove says
Aw thanks Lindsey!
xo,
s
Jillian {Her Split Ends} says
Looking good kids! I love the more modern edge the tiles give the room…what a difference!! Nicely done.
Cheers
~ Jillian
http://www.hersplitends.com
YoungHouseLove says
Thanks Jillian!
xo,
s
Amber says
Thanks for posting about that Dremel tool for removing grout. I was so impressed that in the time I was away for a conference you removed the old tile and finished the new ones! I got to see the whole project at once! So much better than when my husband completely retiled our upstairs bathroom in our new house. We want to redo the grout and replace some broken tiles in our downstairs bathroom (which is original to the house, from 1971, and an awesome avocado color), and this tool should do the job nicely. Great job!
YoungHouseLove says
Aw, thanks Amber!
xo,
s