Woo to the hoo. Our bedroom horse art arrived, so we’re back to share the whole how-to-affix-them-to-canvas adventure. The title might have already given it away, but even though they arrived on Monday afternoon (spoiler alert) it took two attempts to get ‘er done in this instance.
First I went with the ol’ spray adhesive route (for $4 from JoAnn with a coupon), since I used this for anything and everything back in my art school days (it was like the duct tape of our world). It’s usually a great candidate since it’s acid free (which means it’s good for not ruining prints) and it’s listed as “all purpose” and “permanent” right on the label.
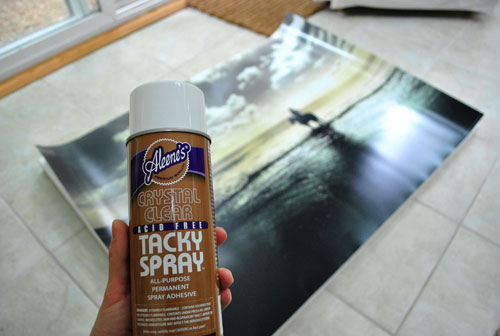
It was as simple as spraying the back of the poster (while it was upside down) along with the front of the canvas and then starting at one side of the canvas and lining up the corners and sort of rolling the print down to adhere it as I went. I was able to do it all myself (without any John help) and even snapped this pic midway through. Girl power.
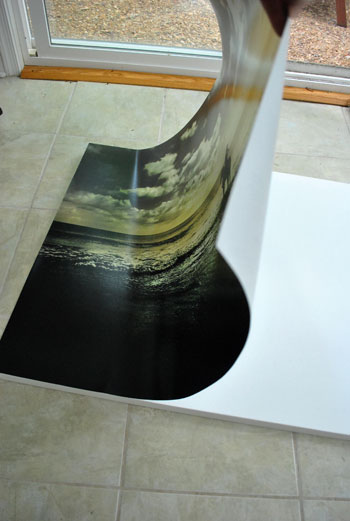
Oh and I did this in the sunroom since I could seal off the fumes from the rest of the house while wearing my mask and opening the doors and windows to the outside world and running the fan (it’s stinky stuff). So if you ever dabble in spray mounting it’s great to do it outside or in a highly ventilatable space like a sunroom or screened in porch.
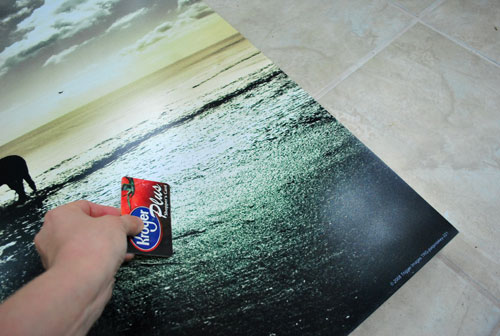
But back to my method. After laying my poster in place, I gently used a credit card my Kroger card to smooth things out (gentle is the key word, you don’t want to end up with scratches or dents):
Then I did the same thing with the other guy:
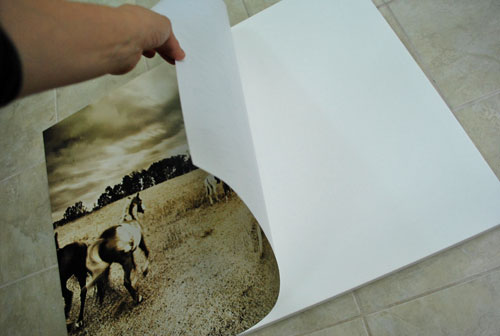
Wham, bam thank you ma’am. Or so I thought. I hung them with pride and marveled that it only took about twenty minutes to attach my prints to my canvases. I may have even done that thing where you clasp your hands together and shake them on either side of your head in a victory dance of sorts. Can’t confirm or deny that.
And then tragedy struck. Ok that’s a little dramatic. More like things slowly became un-stuck. Boo hiss (my dad always says that and I crack up). I noticed that they were looking a little wiggly and less taut before bed, and within about 12 hours (by early Tuesday morning) there were actually big speed bump looking separations between the print and the canvas. I should have taken a picture but I was too worried/annoyed/bummed to remember to document it. It was the butt crack of dawn and I kinda thought all was lost. Oh well, I did mention at the end of my horse art post on Monday that I could royally mess this project up. Do I know thyself or what? Maybe it just wasn’t meant to be. But I gave a little tug at the corner of one print and happily learned that it was actually really easy to peel the prints right off of the canvas so I could essentially start all over again. The horse photography gods must have been smiling down on me.
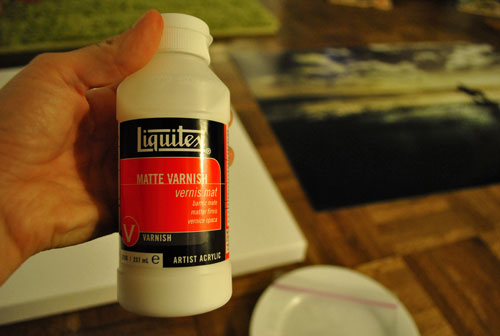
So next it was on to method numero dos. This time I googled around for a more “heavy duty” technique that was a bit more reliable and commonly recommended. I found this and this, which both suggested using acrylic medium as glue. The kind that I grabbed was Liquitex Matte Varnish from Michael’s (for $3 with a coupon):
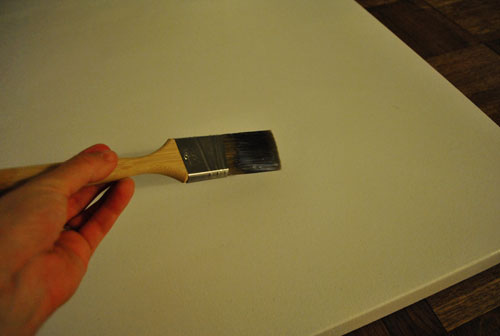
I brushed a thin and even coat onto the surface of the canvas…
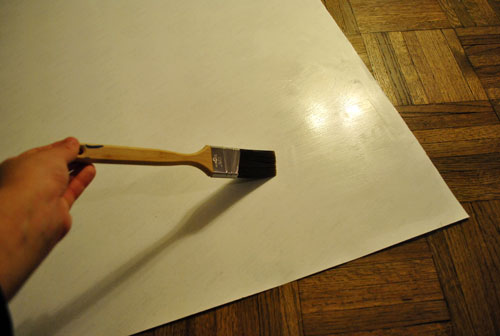
… along with the back of the poster…
… and then stuck them together using the same method as I did with my spray mount, although for some reason I needed John’s help this time. So maybe have an extra person on hand to help you line up corners and keep your print from folding or getting crinkled as you go. Specifically I had two corners and John had two corners and we placed my two corners down first and sort of rolled the rest of the print down (like the second pic of this post while using the spray adhesive) and that seemed to be a great way to avoid bubbles or crinkles. Some small air pockets did occur, but I was able to work them out from the middle of the canvas towards the edges (gently with the palm of my hand). Oh and some folks can have a reaction to acrylic medium (we didn’t, but noticed it said that on the container) so wearing thin latex gloves while touching the corners and placing the print might be a good idea.
Sorry we didn’t snap any photos of this step (all of our hands were in use) but here’s the finished – and very secure – result after we adhered both prints with the Liquitex varnish and then laid them flat for a full 24 hours to cure (I didn’t want them to buckle or slide off the wall while they were drying). We’ve both taken a few steamy showers in the adjoined bathroom over the last few days and they really appear to be stuck for the long haul this time (after spray mounting I could tell they might be a bit wiggly, but they felt a lot more cured and hardened about 12 hours after I used the acrylic medium). Sweet. Of course I’ll keep you posted if it all comes crumbling down. But so far, so good.
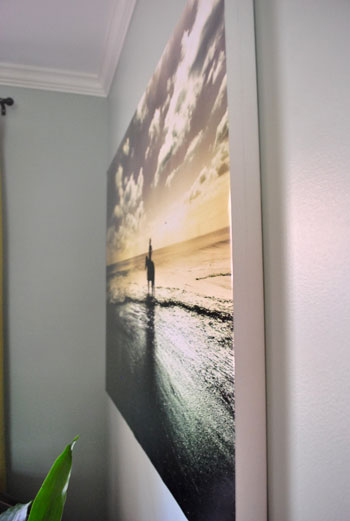
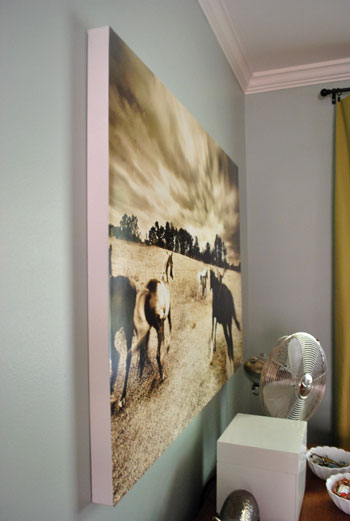
As for the sides of the canvases, I debated painting them charcoal or deep brown or even using some metallic paint, but opted to just leave them white for now. The clean look works for us (it ties into the white trim and the mirror hanging above the sink between them). And as for covering the front with something (like acrylic medium or Mod Podge) we decided that we liked the smooth print-like finish for now too. But if anyone at home is planning to use something like acrylic medium over your print or poster I’d recommend testing it out on a tiny area first, just to make sure it doesn’t make anything cloudy or runny (although I’ve heard it’s usually great – just call me Captain Careful).
We did switch the sides that we hung them on (from my original photoshop rendering), since J liked the one on my side more and I liked the one on his side more. Now we can each wake up and see our favorite prints from our side of the bed (J’s is the beach one and mine is the wild horses one). Sidenote: We realized that we switched “sides” when we moved, and finally figured out why. No matter where we live, I subconsciously prefer to be on the side furthest from the door. I guess I feel more cozy and nestled that way. Weird, huh?
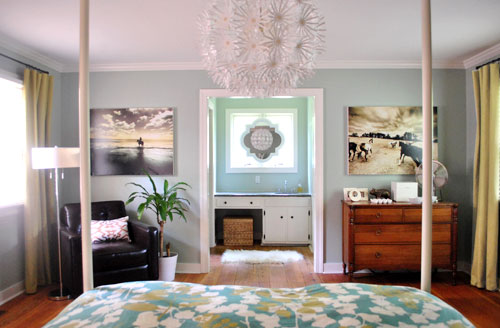
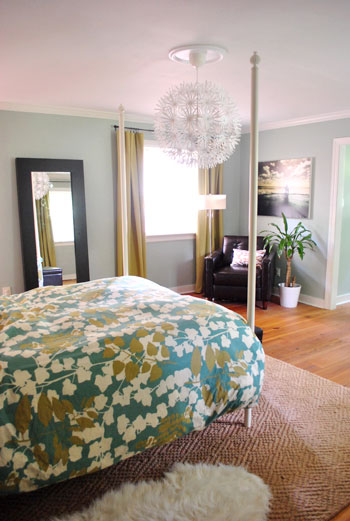
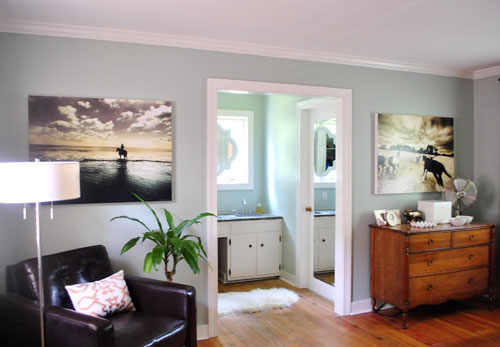
One of my favorite things about the prints is how luminescent they are. That soft glow is definitely something that our rough little photoshop rendering didn’t account for, which is why some people might have been turned off by how much harsher they looked in that “guestimate.” Or they might just think horse art is weird. Which is valid (I know not everyone is on the Equine Train with me). I’ve always had a strange animal fascination – I just graduated from My Little Ponies and Popples (remember those?) to ceramic and photographic versions.
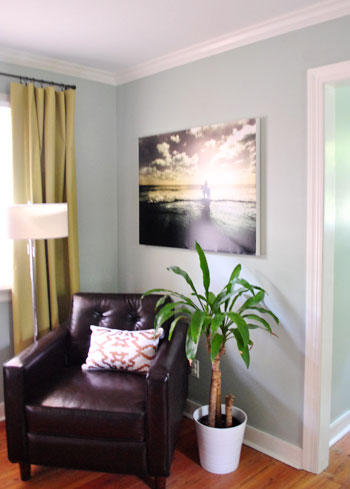
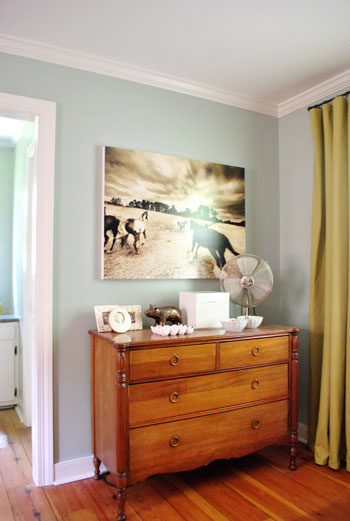
In money news, each poster (found here and here) would have been $169 to get ‘em printed on canvas to the size that I wanted and I was able to DIY each one for just $64 a pop (including the poster and the large canvas). So I saved over $200 bucks. Here’s hoping it sticks.
And now for a money shot of the sink nook. My least-favorite-to-favorite place in the house. We really like that the light & airy nook is a nice counterpart to the moody horse photos (we thought lighter/softer art might be a little too sweet and matchy-matchy for our tastes, so we went for something a little wild to contrast the big white mirror).
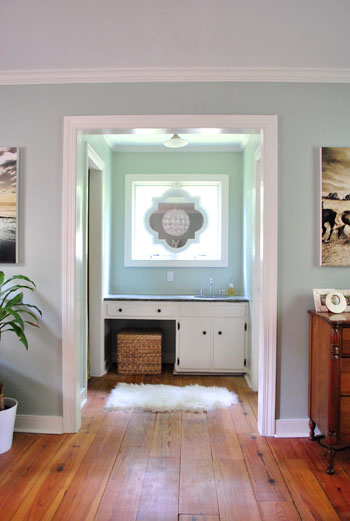
As we mentioned in the original poster post on Monday, we know these prints are a bit of a departure from our first house’s beachy, light, and airy (and sometimes very “safe”) style. And that art is definitely one of those in-the-eye-of-the-beholder things. In general, we’re having a lot more fun taking risks in this house (although every time I think I’m going to shock & repulse my mom she ends up liking it, which is totally throwing me off). Embracing the Just Gotta Do You School Of Decorating (which is taught by Queen Latifah in my mind) has allowed us to be more true to ourselves, and our house already feels more special and more like us.
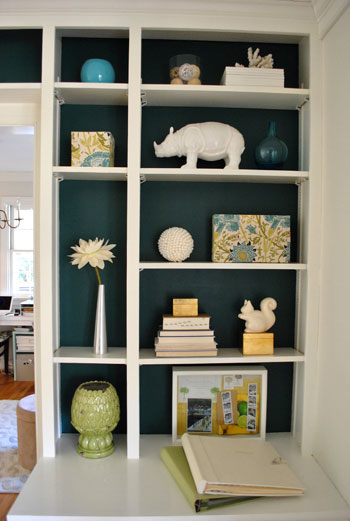
One brave-for-prudes-like-us choice seems to somehow fit right in with the next one, and it gets easier to trust ourselves as we go. All with minimal nail biting and second guessing, which was a constant occurrence at our first house. I’m not going to say that we’re never nervous (just the idea of saying that makes me nervous), but lately we’ve had some luck doing the whole “what’s the worst that can happen?” exercise and it has always been something not-that-bad (ex: we’ll get new art, we’ll repaint, we’ll return something, etc). Which are all things worthy of ending up with a house that we love – so we get all Thelma & Louise and hold hands and drive off the cliff together. Oh and one more I’m-kinda-freaking-out tip: it’s always nice to look back on other bold-ish choices that we’ve made since moving here when we need a slap of it’ll-hopefully-be-worth-it confidence, like the painted backs of the built-ins in the dining room (which were so much more of a visual payoff than leaving them white)…
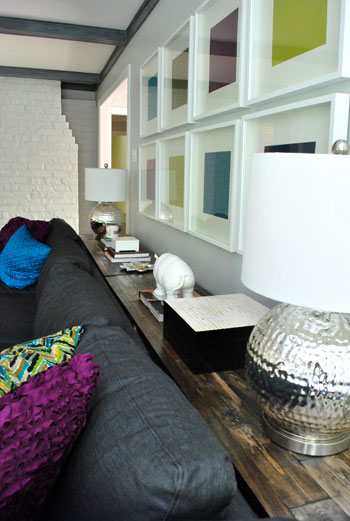
… and the still-in-progress contrast-y dark-beamed and dark-sectionaled living room (we were ready to try something beyond the white beams and the white slipcovered sofa in our first house’s den)…
… and the deeply saturated guest room (which is kind of moody but still happy and fun)…
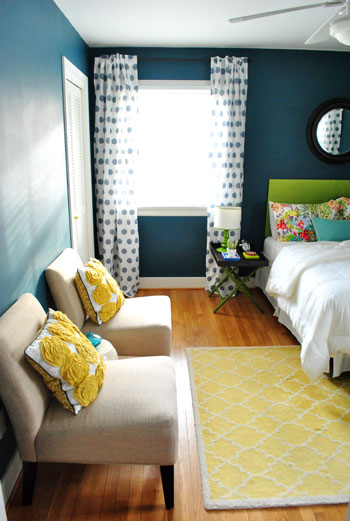
To us, our little ponies in the bedroom just seem to fit right in with the photos above. It feels like home.


And it’s so crazy to think that it looked like this five months ago:
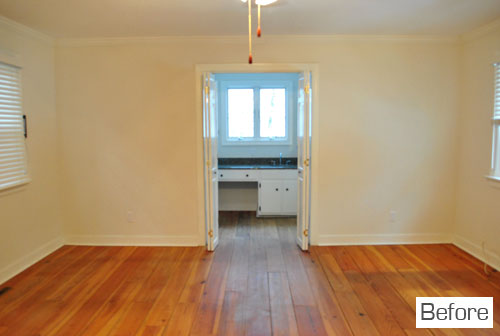
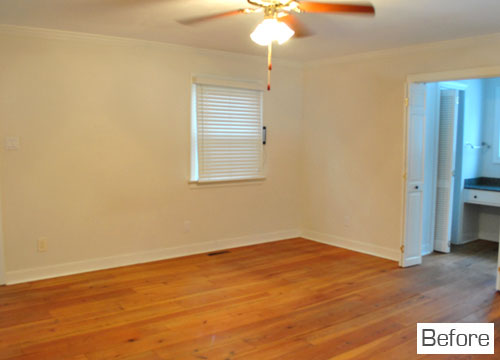
You thought I’d wrap things up with those before shots, right? Nope. Still babbling. Because the other day I had this thought that I wanted to share with you guys: although all of the risky-bid-ness that we’ve been experimenting with is definitely fun, one thing that we never expected was that it would work so well with the softer and more calm “moments” in our house, like the serene white-framed hall art gallery:
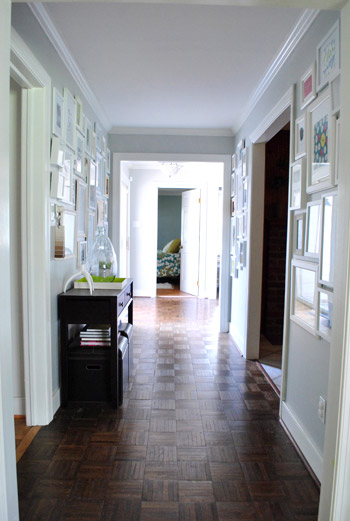
We’re learning that it’s not all or nothing. Areas of color and contrast seem to go well with (and balance out) the less bright and saturated spaces. So going bold in one spot doesn’t mean your whole house necessarily needs to be saturated and stimulating. It’s as if those quieter zones seem to temper things (like our white-on-gray frame gallery which leads to our more colorful and contrasty bedroom). A little of Column A, a little of Column B if you will.
In short, we’re definitely still “students” who are just figuring things out as we go. Wax on, wax off. Diving in and having fun and embracing the whole trial-and-error and why-the-heck-not approach seems to work when it comes to inching towards a place that feels like us. Yes, this is another one of those yay-you moments where I encourage you to go for it and play around and be brave and have fun – all in the name of landing on something that you couldn’t love more. After all, it’s only paint/art/bedding etc – so it’s likely something that you can semi-easily undo if you hate it. So quit horsing around (aww yeeeeah, a last-line-of-the-post horse pun) and just go for it. Can I get a yeehaw? No? Alrighty then.
Psst- Here’s an awesome post all about taking risks from The Nesting Place. She says it a lot better than I do, so… what she said.
Psssst- Is anyone else in total denial that Oprah is over? I can’t bring myself to delete her last episode from our DVR, so I guess it’ll sit there a while. Maybe for twenty fiiiiiive years.

Lindsey says
I have been ‘craving’ some family photos on canvas for our LR and just can’t bring myself to spend the $ on them. Now I think I’m going to try your much more economical method!! Thanks for sharing! BTW, I think the look great in your BR!
And I loved Popples too!!
audrey govekar says
bummer. i’ll post pictures on your facebook page :)
Sara says
I’m a ‘sleep farthest from the door’ gal myself. But it’s not because of coziness or anything sweet. When an ax murderer comes through the door I don’t want to be killed first. HA! I’m such a selfish wife. ;P
Vanessa L says
I have always slept furthest from the door, and when I talk to friends and family about that, they all have too! My mom heard one time that it’s a subconscious thing for the men to be close to the door to protect the women in case of an emergency. Very interesting!
And I LOVE the art- and not just the art itself, but the creative way you hung it! I’ll have to try that next time.
Karen says
I have to know, are the prints thin like a poster or the same weight as an actual photo? I really love photo canvases but they are every expensive. I want to do a display of 12×12 photos and prints and plain art canvases would be much more affordable but I am wondering if the photography will stick to the canvas….
YoungHouseLove says
They’re about as thick as a photo, so I think it should work for ya. Especially if you use the same acrylic medium.
xo,
s
Mrs. Wonder says
We always used photo mount in school (I had a class where all photos had to be matted) and it sticks great! I don’t know if it would work in an unframed print, but worth looking into.
Sarah Ehret says
I totally love that you switched sides of the bed when you moved, because the same exact thing just happened to my husband and I. The first night, I was like this is not going to work, I cannot be that close to the door.
On a side note, my new neighbor came over the other day to check out everything we have done(we moved in Jan.) She walked in, looked into the first room and said, “do you follow a blog called Young House Love?” I said, “umm, ya, can ya tell?” My house was transformed and it looked very “Young House Love” (whatever that means:))
I LOVE what you do, and your site has TRULY changed my thoughts on decorating. Thank goodness I found it about a month before I moved!! I will have to send before/after pics:)
Sarah
YoungHouseLove says
Oh my gosh that’s too funny. Love that you YHLed your house. Haha. We’d love to see before & after pics (feel free to post them on our Facebook page for all to see if you’d like).
xo,
s
Dan says
I’m currently working on a painting project inspired by your most recent post about painting on canvas. Found great Michael’s coupons online which I’ve printed and used at Jo-Ann’s…at least by me, Michael’s seems far more expensive than Jo-Ann’s. I do prefer the white crisp edges that frame your prints. Great job!
YoungHouseLove says
Michael’s was having a 50% off sale on canvases and we used a 25% off coupon from their website on top of that (our 40×30″ canvases were only $23 each) so they were a pretty great deal, but we’ll have to check out JoAnn prices!
xo,
s
Torrie @ a place to share... says
Wow. So many little gems nestled into one post.
Love the way the prints turned out, and I am in total awe that this is something that I can do MYSELF- I would have paid so much more to have my projects (future projects) done, had I not read this! So, sincerely- thank you.
And, I know I’ve said it before, but I love the level of detail that you include in your posts- all of the way from the point of inspiration to conception to creation. Paints the whole story for us, which is extremely helpful =).
Blair says
I really want to try this but feel nervous. I just ordered 4 8×10 photos turned into posters of one of my boyfriend’s trips that he took and would like to do something more than just frame them. I can’t tell from the photos but, did your posters come out with a granulated texture to them because of the canvas? I do not typically like photos on canvas because of the granular effect. Did you have to re-order the posters from the first to the second time working with the various adhesives? This is what makes me the most nervous….Any help with these questions would be most helpful! Thanks in advance!
YoungHouseLove says
Nope, the texture is just like a photo! Glossy and smooth. They’re just glued to canvas so it didn’t change the front. And we used one set of prints. They peeled right off the first time so I could try again with acrylic medium. I would definitely suggest using that off the bat for the best results. Good luck!
xo,
s
Jill says
Focusing just on the comforter in your bedroom (for example), I’d never have chosen the horse artwork. I just wouldn’t have thought it’d be something you’d like or that would go with the feel of the room. Yet…it fits perfectly?!! I’m okay with the horses…you’ve actually got me thinking about them. I am from Kentucky, after all :) And it’d be nice to bring some “horsey” feel into the house without looking like I ripped off images from the KY Derby or something, ha.
Jenny says
LOVE everything about your room! Fantastic color combos! Quick question: did you print the posters out yourself? If not, where did you have them done?
YoungHouseLove says
We ordered ’em online. You can see where by clicking back to the original post (we linked to that in the top paragraph) or by finding the paragraph that starts with “in money news” here in this post (there are two links over to the prints). Hope it helps!
xo,
s
Christine says
It’s a psychology thing from our cave dwelling days. John being the male of the house sleeps nearer the door so he can tackle any stray sabre tooth tigers that come strolling in…
YoungHouseLove says
Haha. Now THAT I would love to see.
xo,
s
Rebekka says
looks great! do you think this would work with photos ( printed from cvs/target) as well?
Rebekka says
nevermind, i just read up a bit and it seems like it should work!
Roxy says
Your DIY horse art is already all over Pinterest! (among millions of other #younghouselove images).
I did something similar for mounting my sign at a wedding show booth — but rather than canvas (which can be fairly expensive without a handy-dandy Michael’s coupon), I used 1.5″ styrofoam insulation from Home Depot. It’s nice and light, so it was easy to transport and super easy to hang (no drywall anchors required!)
YoungHouseLove says
Love it! Such a great alternative.
xo,
s
Kate says
HA! I laughed so hard when I read your comment about switching sides. We’ve moved four times it was during our last move that we finally realized that I ALWAYS choose the side furthest from the door. It’d be an interesting study to see how many women do it. Possible programming from caveman days??
Love the pictures by the way!!
Cristina says
I may have missed this but how large/what are the dimensions of the prints? I love the size you picked!
YoungHouseLove says
They’re 40″ x 30″. Hope it helps!
xo,
s
Emma says
Hi John and Sherry – I finally got around to posting some photos of our lounge room which features our massive horse artwork. You can see it here: http://www.ellaatbella.com/2011/05/lounge-room.html I’m loving your dramatic black and white pieces though :)
YoungHouseLove says
OK, that is amazing. I LOVE it! What a sophisticated and welcoming space. Thanks for sharing the eye candy!
xo,
s
Courtney Rutledge says
ok random question. is there somewhere i can find a list of your paint colors? i especially like the living room dark grey and your bedroom. also love your newly painted dining room.
YoungHouseLove says
We have yet to make a master list of colors used in this house, but any of the gray walls (in the living room, dining room, hallway) are Moonshine by Benjamin Moore. And the bedroom is Carolina Inn Club Aqua by Valspar (we color match all of our paint to Olympic No-VOC paint though). Hope it helps!
xo,
s
Cassie says
I absolutely LOVE the canvas art! How did you hang the art? Did you put something on the backside?
YoungHouseLove says
The canvases have thick chunky wood framing in the back, so I just hammered two nails into the wall that were level and rested the top of the wood frame on the back of each canvas on them. Hope it helps!
xo,
s
Kristi says
I know you talked all about it in a post awhile ago but I can’t seem to find it. What color paint did you put on your bedroom walls?!! I love it! Great job on all the risk taking.
YoungHouseLove says
It’s Carolina Inn Club Aqua by Valspar (color matched to Olympic Premium No-VOC paint.
xo,
s
Yvette Kelley says
Super mad props for being soooooo incredibly on-task at responding to so many comments left on here. I can’t imagine how perky and full of life you both must be to be so on top of things…even with a toddler scurrin’ about! Love it! Mad motivation to get some more things done to our house. Unfortunately, the hubs has a crazy work schedule that doesn’t allow him to help me decorate… but he’s a bonafide chef…so gotta love AND forgive him. ;) I’ll keep him anyway. Great job.. great house.. great life! Ya’ll are hysterical..we could totally be friends. ;)
elizabeth says
so, question – does using the card to smooth it down add any of the canvas texture to the poster? i am so glad i saw this post because i bought an awesome print today, and was trying to figure out the best way to mount/frame it!
YoungHouseLove says
Don’t apply much pressure at all or you’ll get lines and maybe some texture. I just used it very very softly (the pads of your finger could probably do the same thing without the scratching risk). Good luck!
xo,
s
Karina says
Great idea for making affordable art! They look great in your room, too. Have y’all thought about adding fabric or something of the like to the top of your bed like you showed in this Mar 29, 2010 post: https://www.younghouselove.com/2010/03/look-learn-bedroom-building-blocks/
YoungHouseLove says
We love the idea of framing fabric and actually have plans to do that with the yard of fabric that we recently got in Charlotte (just not in the bedroom). Details as soon as we get there!
xo,
s
Carolyn says
I was inspired by this post and tried a similar technique to make a cute canvas sign for my sister’s bridal shower. The tacky spray worked perfectly on fabric to canvas so I bet it was the material of the poster that may not have worked as well. Thanks for the inspiration!
Erinn says
Does this work for pictures if you print them off of your computer onto photo paper? We just did a photo shoot and I’d like to do something other than frames for our foyer. Thanks!
YoungHouseLove says
I think it should. Just use the same acrylic medium that actually worked for us and keep the photos + canvas flat for 24-48 hours so it cures instead of curling if it’s hung too soon. Good luck!
xo,
s
Karin says
I am not sure if you mentioned this, but what company did you do your printing through? Thanks!!
YoungHouseLove says
We actually ordered those prints online. Just click the link in the first sentence for more info! Hope it helps.
xo,
s
Liz says
Saw this horse-lamp post and thought of you and your horse art! Maybe you can squeeze ‘er in somewhere?
http://designenvy.aiga.org/horse-lamp-moooi/
YoungHouseLove says
I’m in love. I should totally make room for that baby.
xo,
s
Kate says
I assume this is still holding up nicely? I purchased 2 large prints earlier this year(you can see them in this LGN post: http://littlegreennotebook.blogspot.com/2010/01/leaf-prints.html), and they’ve been hanging out in a closet for far too long as I search for an economical way to frame them. At 60×36 inches, custom framing is out of the question.
I’m seriouisly considering mounting them to canvas but worry about ruining the prints. They are out of print now so if something goes wrong I’m SOL. I’ve also considered making a frame for them and forgetting about the glass since that’s the expensive part of framing these, but I’m having a hard time invisioning the final product.
Any advice?
YoungHouseLove says
Ours still look great (no peeling or bubbling or anything). It was pretty nerve-wracking though! Maybe having a second person around so you have four hands to place them when they’re covered with acrylic medium will help? Or you can always frame them if you’re worried about ruining them and they’re sold out. Good luck!
xo,
s
Kris says
Hey –
Love your blog! I was wondering how the Liquitex is holding up?
Kris
YoungHouseLove says
Still holding as strong as the day we applied it! Hope it helps.
xo,
s
Erica in SF says
Hi Sherry, I tried this technique tonight 3 times and mine look very bubbly. I tried to go slow even and push out the bubbles. Especially the thicker poster one on canvas (the other 2 were paper and on those white board kind from Michaels). Also, when I washed my brush I didn’t wear gloves and the skin is peeling off my fingers! Yikes! So just a note to others not to touch this stuff with bare hands. Also, it may be harder than it looks!
YoungHouseLove says
So sorry for the trouble! Did you use the same exact acrylic medium (same brand and everything)? And did you have another person there to help you place them and work from one side to the other like the pic? That really was the key for me (I had two corners and John had two corners and we put mine down first and then sort of rolled it over to his so it was nice and smooth. Definitely a good idea to wear gloves though! I’ll add that tip right now!
xo,
s
Erica in Sf says
Here my update: yes I used the same exact kind, I do have sensitive skin, so maybe I was allergic, not painful tho! So, the bubbles went away on the canvas when it dried completely, yay! Makes sense that it would tighten as it dries. The wrinkles stayed a bit on the board but that makes sense cause its wood (or fake wood)… still looks great- they’re maps and make the wrinkles hard to see. I think I want to put a skinny wood frame around the edge of the canvas. Mounting on canvas is great for the kids room because its lightweight and no glass!!
YoungHouseLove says
Wahoo! Thanks for the update! So glad it worked out so well in the end. They sound really cool!
xo,
s
Diane Clayton says
Hi, Sherry-
I had to poke around and find this post again b/c I am about to try this with some posters I had made of some black and white shots I took in Central Park. I had a bad experience with some Mod podge and photo adherance (!?!) recently, but will try your suggestions. I’ll post the results to you somehow! thank you!
diane c.
YoungHouseLove says
Good luck! Definitely try to have someone else on hand to help you place the corners! That’s my best tip! And just take your time.
xo,
s
Diane says
With your technique of adhering the print to the canvas, does the end result show the canvas texture, or is it smooth (as it would have been mounted on a wood or MDF panel)?
YoungHouseLove says
Smooth, like it’s on wood – assuming the print isn’t tissue paper thin or anything. Hope it helps!
xo,
s
Danielle says
Diane not sure what kind of texture you are looking for but I am in the process of doing this as well but I wanted my picture to have the canvas appearance so I went to Hobby Lobby and bought the white card stock paper out of the scrapbooking section that looks like canvas. So far I have printed off the pictures from my computer on that paper and it turned out great…looks just like canvas. Just haven’t finished the whole glueing process…sure hope it turns out like these did!
laura says
Where did you find the long rustic wooden shelf? I love it and I can’t find one that long. I have those 2 hammered silver lamps – LOVE THEM – therefore I need that shelf to hold them too. :D (Your rooms are beautiful!)
YoungHouseLove says
We actually made that console table! Here’s the link. And the lamps are from Marshall’s.
xo,
s
Danielle says
Looks great….Did you by chance spray the top of the picture once you got it on the canvas or do anything to the top?!? I have seen a couple of these DIY picture to canvas but just wondering if I needed to use that spray adhesive on the top of the picture once I finished the project
YoungHouseLove says
Nope, I just left it the same sort of thick glossy finish that it was from the print store (I worried spraying the top might fog it up or add a splattered texture). Hope it helps!
xo,
s
Annie says
I found you through pinterest & LOVE your guest room!!! Can you tell me where you found those polka dot curtains and the yellow & white pillows on the chairs?
YoungHouseLove says
The curtains are Ikea and the yellow pillows are from Target!
-John
Ami says
Hi! Love your blog! I was just wondering how these are holding up? I’m thinking of doing the same for a print I have. Thanks!
YoungHouseLove says
Still holding up well! Hope it helps!
xo,
s
Andrea says
I just came across your blog and love it! I am going to try this canvas idea out but I am pregnant – is the varnish very smelly and bad to do when pregnant?
YoungHouseLove says
Hmm, I would see if you could have someone else do that part or wear one of those breathing masks they sell at Home Depot to stay safe!
xo,
s
Mireille says
Thanks for the transfer tips. Now…. paint on walls: gorgeous! What is the color of the bedroom walls -thank you in advance. I also like the “deep” white frames, where did you get them? I’ll stop there. For now….
Thanks,
Mireille
YoungHouseLove says
Thanks! They’re from Ikea (the frames) and the walls are Valspar’s Carolina Inn Club Aqua. Hope it helps!
xo,
s
Jessica says
I am interested to know where you got your bedspread!!!! I’ve been searching for a new one and I LOVE YOURS!
YoungHouseLove says
Aw thanks! It was from West Elm about a year ago. Maybe try ebay?
xo,
s
Jolene says
I’m not sure if this was mentioned yet but I’ve read that men subconsciously pick the spot closest to the door to protect their families in case of an intruder. How bizarre is that! Great post :)
YoungHouseLove says
So interesting!!
xo,
s
Helen B. @ Blue Eyed Beauty Blog says
These are beautiful pictures! You have a wonderful bedroom!
Helen
Blue Eyed Beauty Blog
Erin says
Im curious if the varnish stuff has warped or discolored the photos at all over time?
I’m nervous to use something that strong that’s not acid free on the photos.
YoungHouseLove says
Still going strong after almost a year! Nothing appears to have changed, although the prints are dark/moody so I don’t know how an all white print would hold up. Hope it helps!
xo
s
Jessica says
Sorry if this has been asked before, don’t have time to read all the comments ; ) Were did you get your artwork from?
YoungHouseLove says
That info’s in this post for ya: https://www.younghouselove.com/2011/05/my-little-ponies/
xo
s
Lorie P says
I tried the matte varnish & it didn’t work at all. Did I do something wrong? I ended using Arlene’s glue. I also used a canvas board instead because I wanted to frame my photography. Then I used a thin coat of Matte Mod Podge. This give it that “oil painting” look. Love your home.
YoungHouseLove says
Sounds like your method worked! Not sure what could have gone wrong but perhaps using a different surface changed how it held?
xo,
s
Katharine says
HI there! I’m so sorry if you’ve already answered this or have it written in your posts. I may be overlooking it… but what printing company did you guys use for printing the pictures?
Katharine says
Nevermind! Sorry… I thought you took those pictures. I see now you ordered them. My bad!
YoungHouseLove says
No worries!
xo
s
Kelley Hidalgo says
I am sorry. I may never ever do this. I hope to, but the point is you should write a book. The writing was enough to keep me entertained. Fun stuff Maynard.