The transformation of $6 hotel nightstands into a built-in-wall-to-wall-desk-for-two continues. If you recall, we last removed the hardware, sanded, and primed them all in preparation for painting them white.
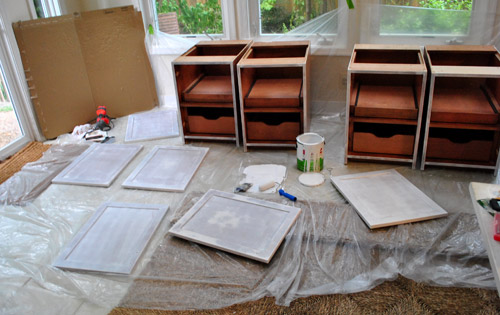
But before painting, we had to do a bit of construction (we needed to attach them in pairs and built them up about four inches so they’d be desk-height). And before doing any construction we decided we ought to look at them in the space first…
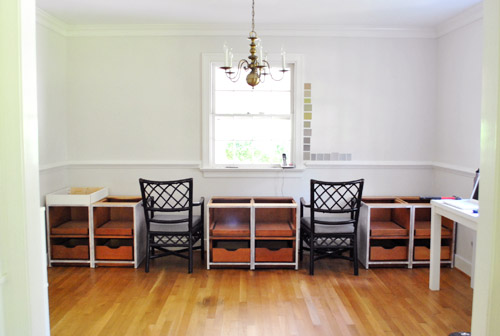
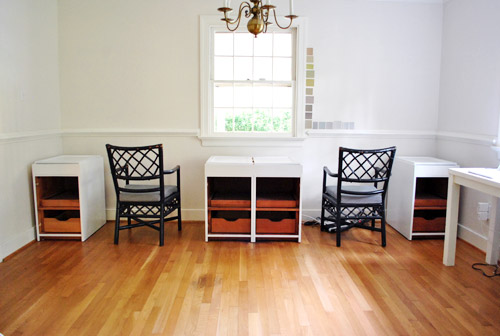
… which is clearly something that we should’ve done sooner (but they’re darn heavy, so moving them back-and-forth isn’t fun – which is why we plopped them down in the sunroom and moved on to sanding and priming). Oh well, better late than never. Once we had them in place we realized that it was a bit more cramped than we expected; the three pairs of two cabinets left hardly any wiggle room for our chairs. And things just looked, well, a bit tight. (Ignore the beginnings of construction on the cabinet on the far left. Our original photo of this got deleted by accident so we had to retake after I had already altered a cabinet. And while you’re ignoring things, pay no attention to the paint swatches on the wall. Not sure we like any of ’em so we’re still at square one with that).
This little space planning exercise inspired us to take out two of the cabinets and look at the wall with four of them instead (two in the middle and two on each side). MUCH better. We loved this configuration a lot more, because not only would it look less crowded, we’d actually feel like we were sitting at desks (which usually have more breathing room than a few inches on each side of the chair). And there’s still more than enough storage space between the four remaining cabinets and our double wide two-tier file cabinet on the other side of the room.
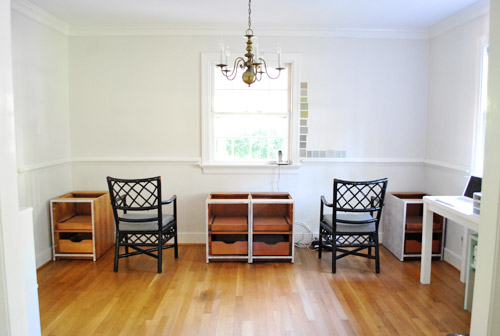
Had we spent more than $6.30 on all six cabinets, it might’ve been a harder decision to ditch two of them, but I think we can handle eating the $2 (and the wasted time spent priming and sanding the extras). And who knows, maybe we’ll even figure out how to repurpose them (Sherry has been yacking about making a play kitchen for Clara for a while, so I’m sure she’ll fill you in if that happens).
Now on to the construction part of this process. The goal was to (1) visually connect the two cabinets in the middle so they’d look like one large two-doored cabinet instead of two cabinets randomly parked next to each other and (2) build the cabinets up four inches so that they’d be standard desk height (around 30″ tall with a counter) so our existing chairs could easily slide under the counter. I debated all sorts of fancy versions of this process, like:
- “I’ll build a drawer!… which would be about 2″ thick… and therefore totally not worth the trouble/expense… so never mind“
- “I’ll build them up from the base so the things in the cabinets are easier to access… by a few inches… wait, it’s a lot easier to build up the top since the bottoms have legs and a few inches won’t make a difference… never mind”
Finally I opted for a simple budget-friendly solution: I just picked up a bunch of 1 x 4″ boards at Home Depot (including some that were pre-primed, hooray for convenience) and cut them to size to create a nice little built-on frame to raise them up four inches.
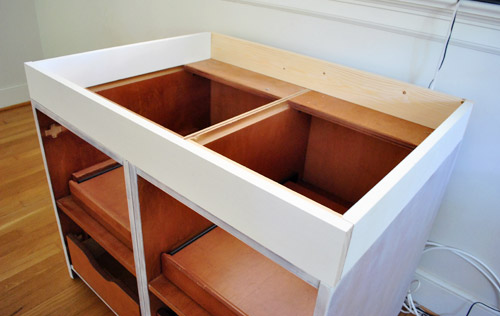
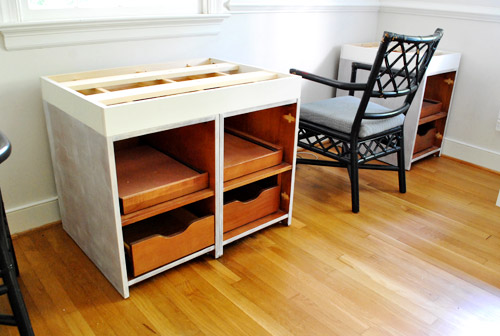
Then using my Kreg jig I drilled some pocket holes to attach the front and side together, and then screwed them into the top of the cabinet. You can see it more easily on one of the single side cabinets in this shot:
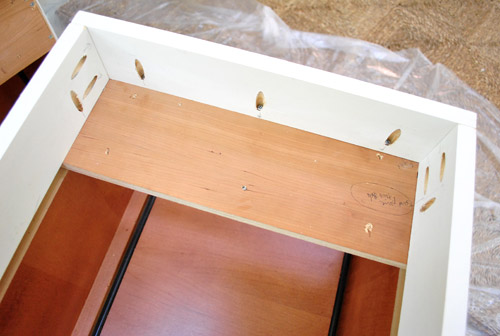
Then I attached the back piece which is where I used an un-primed 1 x 4″ (because it won’t be visible at all against the wall and under the countertop). Why? Because an 8ft piece of primed 1 x 4″ was about $1 more, so using unprimed boards wherever they weren’t visible saved me a few bucks. Sure, I could have saved $3.50 more by just using unprimed wood everywhere and priming the visible parts afterwards, but since we already primed all the cabinets we lazily decided that it was worth spending $3.50 for primed wood in the visible spots so we wouldn’t have to break out the primer and do all that clean-up again. We figure finding six dollar cabinets makes small luxuries like an extra $3.50 spent on pre-primed wood ok in our cheapskate hearts.
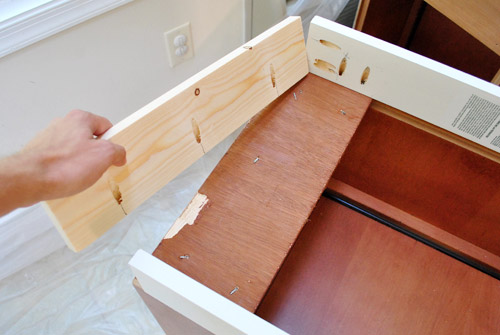
That simple frame accomplished exactly what I needed in terms of building things up and connecting the two center pieces, but the cabinets weren’t thoroughly prepared to handle a counter top quite yet. That’s where some 1 x 3″ boards came into play. I cut a few pieces that would span the inside of my new frame and drilled them into the top of the cabinet. This added even more strength/stability, just because I’m Captain Careful.
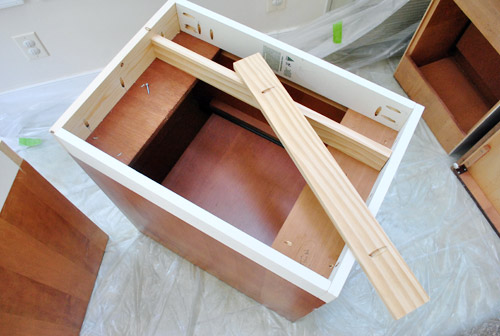
Then I topped that with some leftover 1 x 4″ slats that lay flat – which created a platform for me to screw the counter top into when it comes time. They’re not attached in this pic below, so you can see that they don’t sit level with the frame at this point – but I’m going to add some washers to raise them up a smidge when it comes time to actually screw them in (so it’s all one big level plane):
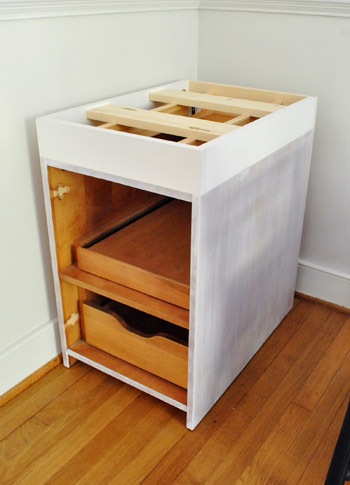
With that, the construction portion of the project was largely over – well except for the counter of course, which we’re still working on and will cover in a few days. We’re doing something similar to the top of our living room console table… sort of (more details as soon as we’re a little further along). Once that’s all said and done, we’re also planning to add some baseboard trim around the bottom of the cabinets (where they meet the floor on the sides and front) to make them look even more “built in.” So yeah, I guess maybe the construction portion isn’t completely over. But we’re good for now.
So let’s move on to painting the cabinets. As we’ve mentioned, we’re painting them white for a nice clean look (which will tie into the white built-ins that are visible in the adjoining dining room, don’t wanna get to crazy with colored built-ins near white ones- we just want these to look like they’ve always been here).
We decided this was a perfect opportunity to try Benjamin Moore Advance paint, which a number of you guys have raved about recently. It’s self-leveling, which means it helps coat more evenly for a smoother finish (something that’s perfect for a cabinet project) and it’s a high quality alkyd formula (so it should be nice and durable) and it’s also water based and extremely low-VOC (even after the colorants are added) which is always a plus for us – and is extremely rare for cabinet paint.
The only drawback is that it’s expensive, at least for cheap-os like us (it’s around $45 a can). But as a thrifty reader named Heather suggested, Sherry told the Benjamin Moore guy about a 30% off sale at Sherwin Williams and asked if he could match it. He said he couldn’t do 30%, but offered 10% off on the spot – without so much as a coupon. So she saved around $5 by asking a quick question at the register.
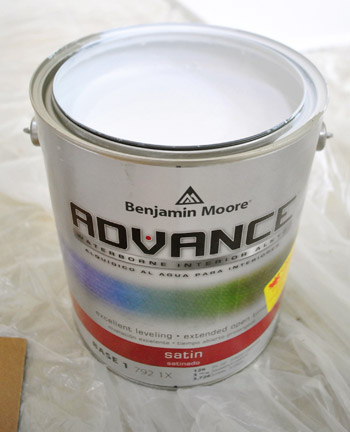
We got the paint in Decorators White (a bestselling color by Benjamin Moore), which is pretty much the perfect white tone according to the lady wife. You could hold fifteen swatches of white paint up and they’d all look the same to me, but apparently Sherry can see all sorts of variations and likes Decorators White the best. Oh and we got it in a satin finish because they only offered that or high-gloss (which I worried would show more imperfections).
Interesting side note – the pic above is taken after we were done painting all of our cabinets. So you can see the insanely small amount of paint we used for this project (it was nice and thick, so it covered really well). This means we definitely could have gotten by with a quart (for around $25) but we’re glad we got a gallon since we plan to use the rest of the gallon to paint the cabinets in the kitchen down the road. Which might further take the burn out of a $40 gallon of paint. Haha.
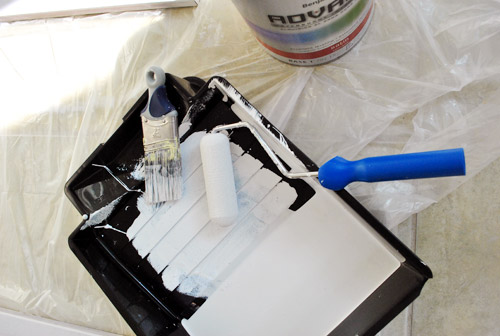
Sherry’s tools for the painting task were both a brush (to get in cracks and corners) and a small foam roller (for a quick, smooth brushstroke-free finish on large surfaces).
You can (hopefully, although it depends on your monitor) see the slight difference between one coat (on the door on the left) and two (on the door on the right). Two coats probably would’ve been fine, but we did a third just to be safe – and to make sure there wasn’t a difference between the areas that we primed and painted and the pre-primed 1 x 4″ boards that we only painted (which were much lighter than anything else to begin with). Three thin and even coats (remember, this is Sherry’s mantra) definitely did the trick, and as seen from the photo of the paint can above, we hardly used any paint. Which is nice since we initially wondered how far it would go.
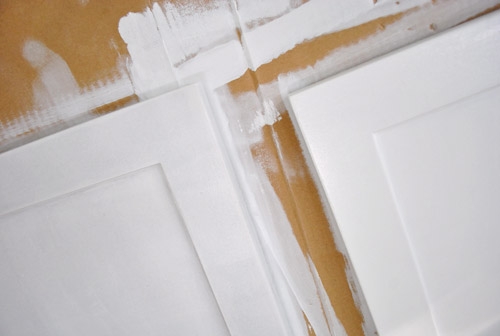
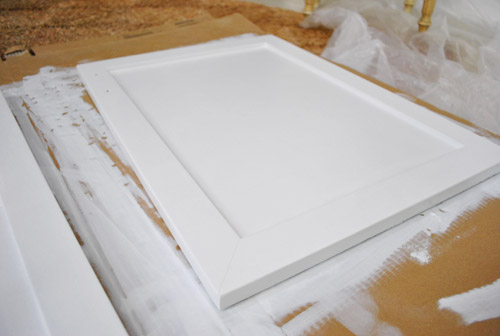
Here’s a finished door after three full coats. Each coat took Sherry about 30 minutes, which wasn’t bad at all. Except that the can called for over 16 hours of drying time between coats, so instead of finishing this process in an afternoon it was a bit more drawn out over the course of a few days. But everything cured up nice and strong and looks great. As for Sherry’s review of the Advance paint: “I want to marry it.” So yeah, she loves it.
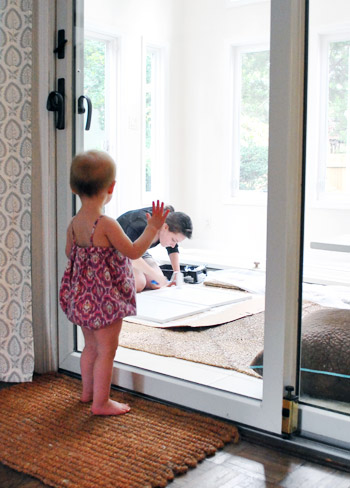
And of course, a few consecutive days of painting is made much easier when you’ve got a fan club watching you intently (as some of you already saw on Young House Life). Here’s the wife in the sealed sunroom sporting her inside-out painting clothes with the bean looking on. You can see that we just used some leftover cardboard (from old Ikea purchases like the file cabinet) to paint on.
Even though the Benjamin Moore Advance paint is low-VOC, it’s not no-VOC. Which is why Sherry painted all of the doors in the much-ventilated / Clara-and Burger-free sunroom (also to avoid baby hand-print and puppy paw-print mishaps). We had to paint the cabinet bases in place in the office (the big middle section was too heavy to lift once the two cabinets were built up and connected), so we just kept Clara out of the room and opened all of the windows and ran some fans (Sherry painted during her nap, so by the time she woke up things were aired out and then we just kept her out of the room so we didn’t get little fingerprints going on). Thanks to a little flat-cereal-box-under-the-spot-being-painted trick (to keep paint off the floor), we got to avoid putting down drop cloths. Oh yeah, we’re rebels.
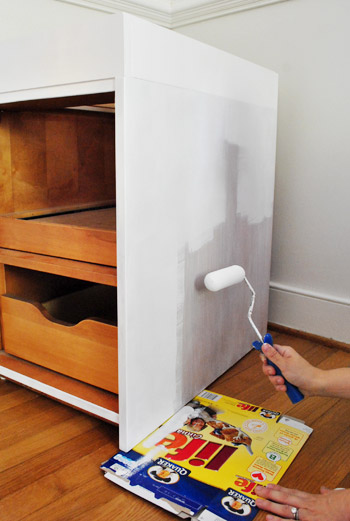
Oh and the shot above demonstrates how nice the BM Advance paint coverage was for us. This is just the first coat going on over the coat of primer that Sherry added a few days ago. That’s a really good showing for a first coat according to my paints-everything wife.
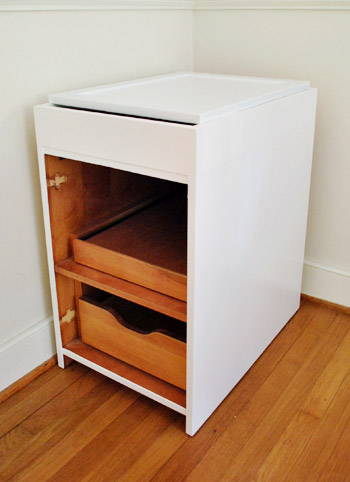
So here’s the finished piece all painted (and with the cabinet door just laying on top – we later moved that out of the sunroom to make way for countertop progress).
Oh and as for why we didn’t paint the inside of the cabinets, here’s an excerpt from our initial post about that for anyone who missed it:
As for the backs of the doors and the cabinet interiors, from day one we decided that we wanted a nice clean glossy front for our wall to wall built-ins, but to keep the backs and the interiors (and slide out interior fittings) of the cabinets the same natural wood tone that they were to begin with. We certainly know that not everyone would go that route, but the new KraftMaid drawers that we installed in our first house’s kitchen renovation had wood interiors and we really liked them (you can actually see some of them here full of tools):
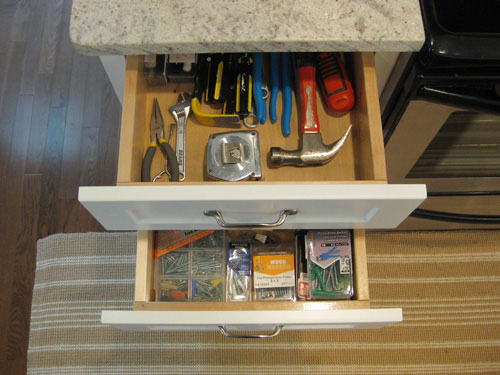
They had glossy white drawer fronts, but inside they held up a lot better to natural wear and tear than anything painted (since we’re weirdos who will stash hammers and screwdrivers almost anywhere). And we actually don’t mind the whole wood + white look (sort of like the dresser we refinished for Clara). Although in this case we decided from the outside that the cabinets would look entirely crisp and white (no contrasting color in the door front or anything), and only when you swing them open will you see the wood tone.
But back to our freshly painted cabinets. The white paint was a big help in making the middle pair seem like one piece. We contemplated adding some caulk or wood putty in the slight crack down the center, but we held off since we thought it might be less obvious once the doors were reattached.
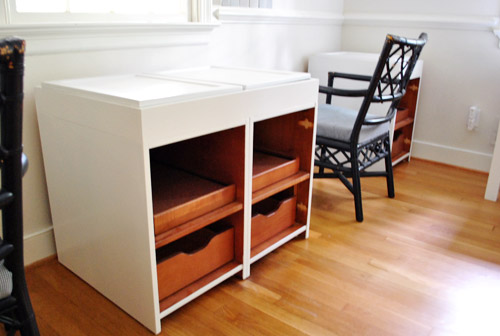
And sure enough, they were. So here’s everything built up four inches and fully painted. We just needed to wait a few days to attach the cabinet doors…
… which looked pretty darn good once we added those:
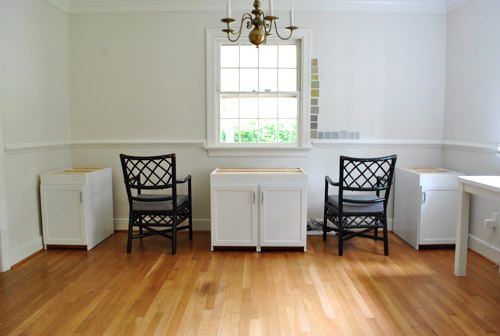
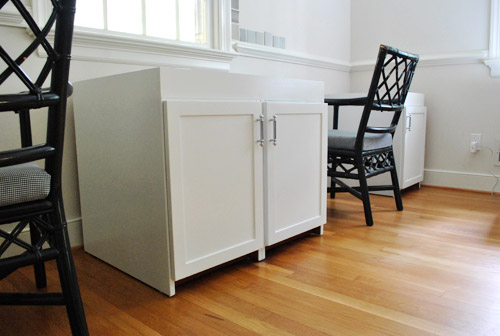
Of course we still have to add molding around the base of them all (so they look even more built-in), which will hide any areas down by the legs that still appear to be wood toned. And we’re going to trim out the sides as well (so they appear to attach to the walls on either end). We’ll hopefully be back with those details soon. But in the meantime, you know we love a budget breakdown, so here’s the wall-to-wall desk tally so far:
- Cabinets (from Habitat For Humanity ReStore): $6.30
- Kilz Clean Start No-VOC Primer$0 (leftover from painting the kitchen paneling, but it would be around $20 to buy for those wondering)
- Electric sander & sandpaper: $0 (already owned, but would be around $25 to buy)
- Benjamin Moore Advance paint (in Decorators White, satin): $40 (thanks to 10% off haggling/begging)
- Pre-primed & unprimed wood to build up cabinets (from Home Depot): $51
- TOTAL: $97.50 (which was about the cost of one unfinished base cabinet at Home Depot or Lowe’s)
We’ll also be back with all of our countertop details soon- just gotta make enough progress to snap some pics and share that stuff. One thing is for sure: we can’t wait to use our new double desk. And yes, Sherry has been walking around saying “double desk” like Robert DeNiro says “double dose” in the Little Fockers trailer (not sure how I feel about this weird club mix of it below though):
What did you guys do over the long weekend? Any building? Painting? DeNiro impersonating?
Psst- To follow our cabinet makeover process from the beginning, here’s the post about finding our $6 cabinets, the one about other places we looked, and the post about sanding and priming the cabinets to prep them for paint.
Pssssst- I just shared one of the coolest dresser makeovers we’ve ever seen on BabyCenter (and it’s not just for kids).

Rachel says
Looking great!!! I can’t believe how perfectly they fit along that wall!
John@OurHomefromScratch says
This project is coming out great! Lot to learn from this, especially with the painting process. I’ve never had a lot of luck with painting over varnish. Happy to see you’re a fan of the Kreg Jig. That little blue thing makes the world go round!
katharine says
looks great!! I see those paint chips on the walls – can’t wait to see the pick there. . .
annabelvita says
Looking good! Definitely a good idea to nix the extra two cabinets. I’m guessing they’re not right for Ed’s night tables? Play kitchen could be awesome (one as a fridge!). Clara also needs a little workbench one day… :)
If the “like the console top but sized for a desk” is anything like I’m imagining (and seen on the old pinterest) then this will be my favourite thing in your house.
YoungHouseLove says
Yeah, John didn’t like the idea of them being night tables since we’ve been dying for easy-to-open-and-close-from-bed drawers. I guess since they were nightstands from a hotel we’re holding out for slightly less cabinet-y nightstands for our bedroom. Haha.
xo,
s
annabelvita says
Yeah, nobody should have a carbon copy of their desk beside their bed, even if their desk is lovely!
YoungHouseLove says
Haha, that’s true. It might do psychological damage. Haha.
xo,
s
Ashley @ DesignBuildLove.co says
LOL! definitely a useful idea, but I totally agree… KEEP THE WORK OUTTA THE BEDROOM! :) Got to get your “Z’s” in without reminders of work (aka cabinets)… even if you love your work!
mariela says
I see that you guys have some paint chips in place! Can’t wait for the final product :-) And Clara looks so cute in that picture!!
Melanie @ Mailbox Journey says
I was sick all of last week, so I missed all of last weeks posts, I feel like I’ve missed so much! The cabinets are starting to look AMAZING! and that picture of Clara looking out the door is so adorable. :)
Kristin @ everythingZamora says
Good choice excluding two of the cabinets. It looks so much better, and you two should still have enough storage space. Can’t wait to see the project completed!
Amber Kanady says
The cabinets look great so far guys. I know the finished product will be absolutely fabulous!!!
Our weekend was filled with picking out a backsplash, fixing cracks in the walls and scavenging around in my parents garage for “hidden treasures” actually found a pair of roman shades and HUGE picture frame. You guys have def inspired me to look EVERYWHERE for usable items that can be remixed into something chic, modern and stylish.
Thanks : )
Amanda @ Our Humble A{Bowe}d says
Wow! Amazing change up! I do like the space better with 4 cabinets, too. More breathing room. And, that’s crazy good coverage, especially for white. I’m excited to see what everything looks like with the top, too. Great work, guys!
Elizabeth says
Wonderful project! We now have stolen your dog-dishes-and-tray-from-Target idea – very cute. And moving ahead with our YHL-inspired laundry room makeover.
AarthiD says
Oh, wow. The office looks great! I think taking away two of the cabinets was totally the right choice; the legroom is much better. Them being white really gives the space a nice sense of openness!
Can I ask about the hardware? It’s not the original-to-the-cabinet hardware is it?
YoungHouseLove says
Yes- how crazy is that?! It’s what came with them!
xo,
s
AarthiD says
That’s awesome! No orb this time, though? ;)
Stefanie says
LOVE this. I cannot wait to see the finished product. Any plans to paint the walls in the office to make the white furniture pop?
Also..the “Two Become One” in the title had me having serious Spice Girls flashbacks. Thank you. =)
YoungHouseLove says
Oh yes, see all those paint swatches. Haha. We definitely have wall-painting on our to do list.
As for the Spice Girl reference in John’s title, is it weird that I love him more for that? Haha.
xo,
s
Julia @ Chris loves Julia says
Totally had the same flashback of my sisters and I making up dance routines and lip-syncing. I was always Sporty Spice!
YoungHouseLove says
Me tooooooo!!!! Although now I wish I had been posh. Not fancy enough though. Haha. My friend Whitney was always Posh because she was, well, posh.
xo,
s
Julia @ Chris loves Julia says
It’s coming together so nicely! We are almost ready to build a corner desk in our guest room/office and I am anxious to see how you work the countertops.
Stefanie says
Disregard the the comment about the painting of the room…after scrolling back up I realize that I completely missed that some how!
YoungHouseLove says
Haha, no worries! John and I just skim each other’s posts so it’s totally understandable. Haha.
xo,
s
Ade@fortheloveofpainting says
Love them, I also noticed you are choosing a wall color…or thinking about it:) Can’t wAit to see the finished product!
Laura says
You guys freaking ROCK. You have NO idea how you inspire me. And seriously, how pretty does Sherry look in her painting clothes! (Sorry John, girl crush.) You guys are flipping amazing.
YoungHouseLove says
Aw shucks, you’re sweet. That shot was far enough away to hide the not-so-pretty stuff. Haha.
xo,
s
Stephanie Phillips says
Woo! Progress! I’ve been so excited about this project. Excerpt of my conversation with my mom this weekend:
Mom: What do you think John and Sherry are working on this weekend?
Me: The built-in desk!
Mom: Oh, yes! How could I forget? Exciting!
Mildly obsessed, maybe.
YoungHouseLove says
Haha, for some reason the idea of anyone talking about us with their parents = hilarious.
xo,
s
Michelle says
Haha, I’m 28 and meet my parents once a week for dinner. Almost every time, the topic of “what John and Sherry are doing” comes up between my mom and me! Pretty sure my dad thinks we’re nuts!
YoungHouseLove says
Haha, I love it!
xo,
s
Kristen @ Popcorn on the Stove says
They look great (I like it much more without those two extra cabinets – Maybe you can use them in a bathroom renovation or something)! I can’t wait to see what kind of top you’re going to put on them!!
Pip says
Looking very nice indeed! Four = much better than six. I am also weirdly impressed with the Kreg jigged pocket holes.
It was Father’s Day on Sunday here in Australia so hubs got the weekend off – a trip to Lesmurdie Falls and the museum instead (http://www.toptrails.com.au/index.php/trails/trail/lesmurdie-falls/).
YoungHouseLove says
Woah- that looks awesome!
xo,
s
Denise says
Wow!Clara is really growing she looks so tall!
YoungHouseLove says
She’s tall like her daddy! Haha. Can you tell her short mom is super proud?
xo,
s
LaMadre says
These look great! Can’t wait to try the paint. Have you considered using the two remaining cabinets for bedside tables in your bedroom. I’m certain two clever people like yourselves could easily make the look completely different.
YoungHouseLove says
We did think about that for a second, but would really prefer easy-to-open-from-bed drawers over cabinets. Who knows where we’ll end up though!
xo,
s
Nikki says
You guys are so thrifty…could you take off the doors, remove the bottom drawer and then do a contractings paint treatment so they don’t look the way they do now? I mean they are already partly primed!
YoungHouseLove says
I definitely plan to reuse them! Stay tuned for that info soon hopefully.
xo,
s
Tyra says
loving the built ins! can’t wait to see what you do with the extra two! over the long weekend my hubs and i bought a W/D (i think the same as yours–but we didn’t get as good of a deal, :( , and refinished a table! wahoo on being productive!!
Claire says
I’m looking to do built-ins in my own house but I haven’t been so lucky as you with those cabinets!
I see some gray paint swatches and I just painted my dining room gray and it turned out great!
KathyL says
Have you thought of putting 3 in the middle and one on each end? Possibly with a trash/shredder in the middle?
YoungHouseLove says
We did mess around with adding a third in the middle (didn’t snap pics though, darn) but it looked too unbalanced for us (the ones on the sides started to look piddly with three hulking middle ones). And we were oddly far apart that way, so we opted for two.
xo,
s
Dixie Redmond says
Wow! I’m loving your room. I’m so glad you guys found those hotel stands. Yay!
Diana says
You guys constantly amaze me, thank you so much for sharing all this! And everytime I see the Kreg jig in action I want one. Wondering if you’ll switch the doors around on the center cabinets for easier access from the chairs?
YoungHouseLove says
We thought about it and decided that since our desk chairs have arms we’ll likely get up to get stuff from the cabinets anyway (and just bend down like we do in the kitchen to get stuff out of lower cabinets). So since we like how they visually look more balanced this way (like a classic two-doored base cabinet) we’ll most likely keep them this way.
xo,
s
Amy says
I wondered the same thing.
Trisha D. says
Looking good so far! I was super excited to read this post after all the setbacks er- natural disasters.
Momlady says
I’m sooo with Sherry about the Ben Moore paint! Yes, I do want to marry it!!! Their paint is amazing. I was shopping for paint awhile back and was asking around about the different brands… one guy remarked that Benjamin Moore must be really proud of their paint considering what they charge for it. Well, I’ve gotta tell you they have every reson to be proud..this stuff is MAGIC! Seriously.
Paige @ Final Clothes-Out says
I love a Spice Girls reference first thing in the morning!
Over the weekend we did a little work in our bathroom. We had big plans, but after it took us 2 hours to change the light fixture (the old one was installed incorrectly by the previous owners), we had to manage our expectations. So it wasn’t so much a renovation as a face lift. Ha ha.
Allyn says
Great
Thanks to your post title, I’ll now have Spice Girls two become one stuck in my head all day.
Thanks guys.
YoungHouseLove says
Haha- I love that it was all John’s idea. That man cracks me up.
xo,
s
Stephanie says
I love the post title too! As a result, I’ve been alternating between singing in my head the Spice Girls 2 Become 1 and the Lazy Song (‘Today I don’t feel like doing anything’) because of the weather!
Corie says
Those cabinets look fantastic!
Over the weekend my husband and I put a bid in on a house – and it was accepted!!! If all goes well we’ll be closing by mid October! I’ve been going back through your old posts for some ideas already : )
YoungHouseLove says
Wahoo! Congrats Corie! That’s so exciting!
xo,
s
Sarah says
Similarly, When I moved into a new apartment this past month, the move-in posts from last December were especially comforting. Moving is stressful and it takes time to feel at home (which is finally starting to happen now). Best of luck on the new house!
Jess @ Little House. Big Heart. says
They look great! I can’t wait to see them with the counter top!
The hubs has tool envy… what do you use to do the vertical pilot holes? I remember reading about it at some point in the past, but haven’t looked for it.
YoungHouseLove says
That’s a Kreg Jig. John loves that thing.
xo,
s
Robin @ Our Semi Organic Life says
Wow they look great! Are you going to ORB the handles to match the filing cabinets and everything else ORB around there?
YoungHouseLove says
For now I think we’re happy to leave them as-is (since the drawer pulls on the file cabinet are black glass we didn’t want it to get too matchy) but who knows where we’ll end up when the room comes together more. You know I love me some ORB…
xo,
s
nicole says
Hey Sherry,
What kind of paint did you use for your kitchen cabinets (in your first home)? I started my kitchen remodel, and the paint is comming out a bit, thick…and left lines…and some bubbles. I’m thinking it’s the paint. I’m going to sand them down a bit and add another coat. Hope you can help me, because they are not coming out as i hoped!
Thank you.
YoungHouseLove says
I used Kilz oil-based primer and Glidden latex semi-gloss paint. It could be the way you’re applying it though (a small foam roller cuts down on bubbles and lines). Remember thin and even coats with ample drying time are key! Good luck!
xo,
s
Ashley@Design Build Love says
The cabinets look fantastic and it is even better that you guys got rid of 2 of them because you will have so much more breathing room! If Eric and I ever have to combine offices then we will definitely have to go with something like this!
PS- Clara is getting so tall! Look at that girl grow!
tracylee says
used a Kreg jig for the first time this weekend – looooved it!
Chrissie says
I love how this is shaping up! I had to show the part about white paint to my better half, because it reminded me so much of us. Maybe the ability to tell shades of white apart is a girl thing!
YoungHouseLove says
Seriously, maybe it’s connected to having more estrogen. And testosterone makes all white look the same. Haha.
xo,
s
Momlady says
As to seeing more colors many women—perhaps over fifty percent—possess a fourth photopigment. A few men have it too..but it’s predominantly a female thing.
YoungHouseLove says
No way. I love it!
xo,
s
Chrissie says
Whoa, that is crazy! It makes total sense though. Thanks for enlightening me Momlady!
GretchenF says
We are going steady with our Benjamin Moore Advance paint, too. Our paint store did a custom color match and it is out of this world. We paid more than $45, but it’s still worth it.
Staci @ My Friend Staci says
Did we do any painting? Did we do any painting?! This weekend we painted our new living room and dining room, ceilings included, and hallway, and touched up two bedrooms. Yikes. Had the in-laws helping which was nice. I am feeling the burn from cutting in around the edges–twice (white takes so many coats to cover!)
We’ve got the John-Sherry division of labor going on–I cut in and Doug rolls. We are both very sore, but in different places!
YoungHouseLove says
Holy cow, you were busy! And hilarious about being sore in different places. John and I laugh about that too since he’s the roller and I’m the cutter-inner.
xo,
s
Amy in Pittsburgh says
I didn’t know about the BM Advance paint, so I’m furiously thinking of something I can paint next just to try it out!
Not sure what your initial thoughts were, but we used Decorators White to paint our living room fireplace and we were pretty scared at first because the color is SERIOUS WHITE. I didn’t realize how super-duper bright white it was from the tiny swatch. I almost repainted with Simply White but decided to give it a few days, and it grew on us, fortunately!
Also–how do you like the satin finish?
YoungHouseLove says
I actually really like the satin finish! I used to go with semi-gloss for cabinets, but they only make Advance paint in high gloss or satin. So I picked satin just to hide any imperfections of my paint job (since high gloss doesn’t hide a thing) and it’s really great. I’m a satin cabinet convert. Haha.
xo,
s
Liz says
You guys – it looks incredible! I had the same office image with the green trellis valances pinned on my Pinterest page, and I’m so excited to see it come to life in your home. Beau-ti-ful!
Lindsay says
This looks SO good. I love the hardware you’ve chosen for this project and for the Efektiv cabinet project.
I’m also very relieved I’m not the only that immediately got the Spice Girls reference.
Kahlia says
It’s midnight in Adelaide, Aus and I can’t believe I’m staying up to read this eagerly anticipated cabinet/built-in desk update. Love, love, love, it. Those cabs are gonna look wicked against a contrasting paint on the walls. Can’t wait!
Alina says
Cabinets look awesome!
Just saw Clara and Burger in their halloween costumes on people.com! So cute!
YoungHouseLove says
Isn’t that so funny! My babies!
xo,
s
Meredith @ La Buena Vida says
We painted our kitchen cabinets with virtually the same paint, but Ace Hardware’s brand. I went with it both because it’s low VOC, and also because it finishes as more of an enamel. Like Sherry, I love the end result, but HOLY COW as far as the drying time goes! It really made it feel like the never-ending project!
Still, worth it, because those cabinets look 1,000 times better!
Stephanie says
It looks awesome so far! Quick question: Why did you go with satin finish instead of semi-gloss? Paint finishes and when/why to use a particular one is like one of life’s great mysteries to me! Thanks!
YoungHouseLove says
They didn’t offer it in semi-gloss, so the choice was satin or high gloss (which I worried would show any imperfections a lot more than satin).
xo,
s
Lindsay says
Question – I’m planning on painting my kitchen cabinets soon. They are an ugly wood color and am going to paint them white. Some things online have said that when you put primer on, to paint right after to help the paint stick. I saw on here you primed, and painted a few days later…..what are your thoughts on this? I am using all Benjamin Moore paint and Zinsser 123 primer -which was recommended. Thanx!
Cabinets look great too! My hubby is worried about our cabinets looking “cheap” after I repaint them but your pics are good encouragement.
YoungHouseLove says
We have heard that primer only stays “open” for about a week (so we never wait more than a few days, just to be safe- and always feel it to make sure it feels kind of tacky and not all hard and “cured”). The theory is that if it’s still open it will provide a better foundation to grab paint (as opposed to being all cured and hard, and therefore less accepting/grabby). Hope it helps!
xo,
s
Ashley W says
The “double desk” reminded me of Dwight’s “mega desk” on an episode of The Office.
YoungHouseLove says
Haha, ah Dwight. Perfect.
xo,
s
Erin C says
I too adore BM paint! No disrespect to Walmart but we used their paint once (thinking all paint is created equal) and were so upset at how it looked. A year later we got BM paint to re-do the entire room and couldn’t be happier. I’ll have to try the Advance paint on my next project!
ktmade says
Ooh, it’s going to look so great! At first I thought, hey it’s not that tight. But then when I saw it with the other two taken out, I realized you guys were totally right. Big shocker. I’m intrigued to see what the top is going to look like. :) And I’m sure I’ll be pinning the final photo to add to my inspiration board for one day having my own office/art studio.