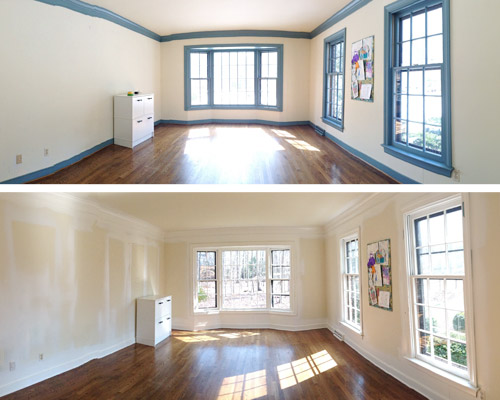
Whilst discussing office plans last week, a few of your comments about the blue trim situation in that room were the push that we needed. We were fooling ourselves to think we should paint all that trim by hand (we’re talking baseboards, crown molding, and five windows totaling 66 individual panes). So we decided to bite the bullet, break out the paint sprayer, tape everything off, cross our fingers and toes that we didn’t get any bleed-through on those wood floors, and say hasta la vista to some more blue trim this weekend.
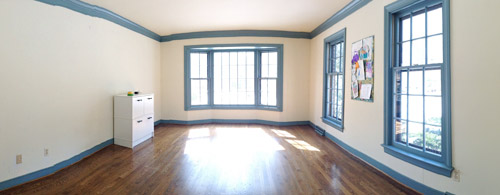
We had painted all of the upstairs trim with the sprayer before we moved in and before the new floors went down, which was an easy no-brainer decision (nothing to worry about ruining). But for the downstairs trim that we’ve tackled (just in the kitchen and foyer so far) we’ve worked by hand – mainly because those rooms needed to remain functional during painting, so we didn’t want to cover them with paper, plastic, and tape while a fog of paint-spray flew through the air. The office, however, didn’t have much furniture to move out, and could easily be sectioned off in a paint quarantine for a few days. So we went for it.
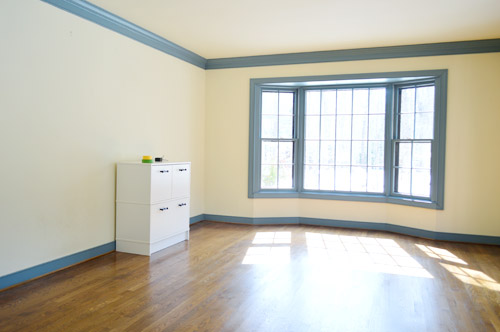
Last Thursday morning we emptied the room (except for the file cabinet, which was heavy enough that we decided just to cover it) and basically took over the dining room and foyer with all of the displaced items. Good thing we’re comfortable with chaos by now.
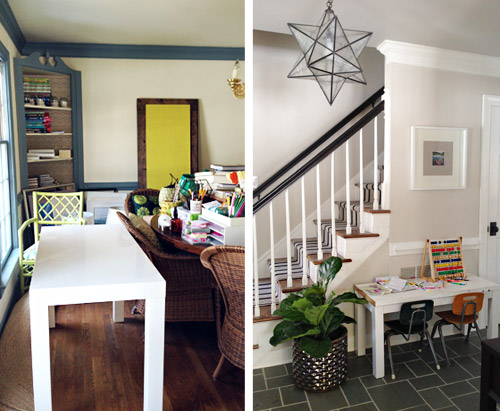
As excited as we were to attack this blue trim using a new method (we’ve never taped off a room to spray it before) we were both curious to determine if we felt like it was ultimately much of a time saver, since the prep is obviously a lot more intense. Although some things – like wiping down the to-be-painted surfaces and taping off the floor – would’ve happened anyways.
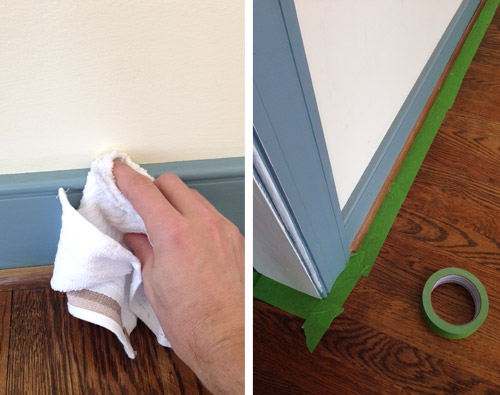
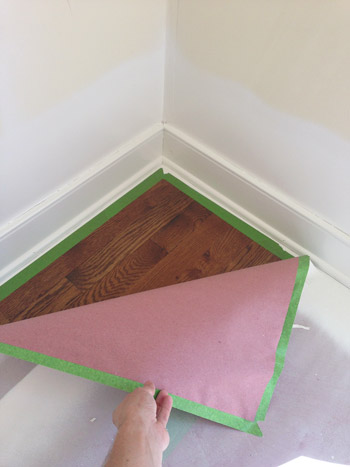
Next we rolled rosin paper out all over the floor since we’ve learned that paint mist gets EVERYWHERE from our particular brand of sprayer (which I’ll admit I’m growing less enamored with – we’ve since switched to this one). We did our tape edging and our rosin paper as separate steps, just so we could focus on getting the taped edges nice and secure (paint on the hardwoods = our nightmare) before shifting our focus to taping each row of paper down. It meant that we ended up using more painter’s tape than we probably needed to, but the extra precaution felt like good nervous-first-timer insurance.
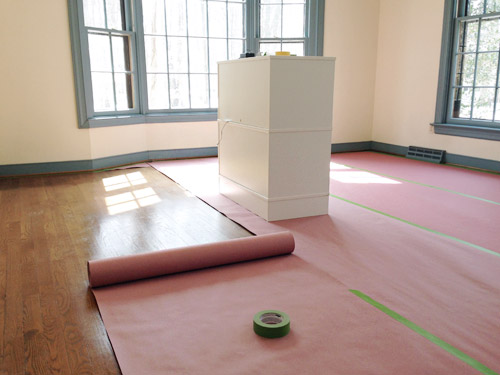
So here’s the room with the floors all taped over. Clara thought it was the coolest thing ever, especially when we let her come draw on the floors while we worked on the next prep step: windows.
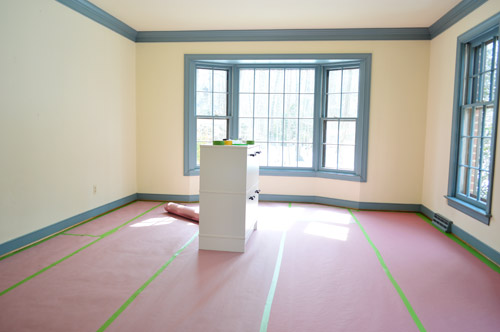
I’ll admit I was a bit perplexed about what to do with the windows. I’ve heard lots of talk about “liquid masking film” that you can paint on your windows before spraying, which helps the dried paint just peel off seamlessly afterwards. It sounded awesome, but after reading some message boards it started to feel too good to be true. Lots of pro painters complained that it took 2 or 3 coats of it to work, so most recommended just doing the old fashion scrape technique anyways.
Wanting to save ourselves a bit of trouble, Sherry came up with the idea to roughly cut some rosin paper squares and tape them to the center of each pane. We didn’t meticulously cover every edge, but figured this would at least save us time on the back-end from scraping the entirety of each of those 66 panes. I left one empty just to test if the paper was a waste of time (spoiler: it wasn’t – that uncovered pane was a giant pain!). Oh and that big paper-covered thing between the windows is Sherry’s overflowing bulletin board full of Clara-art that we decided to just cover instead of removing (it was nailed right into the wall at the four corners as opposed to hanging on a hook).
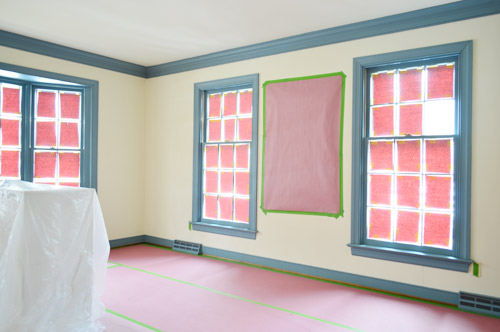
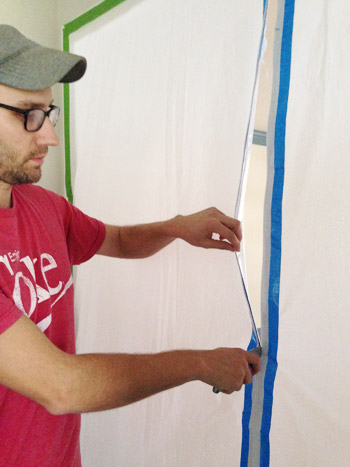
With furniture out (or covered), floors protected, and windows “dressed” our last prep step was to seal off the office from the rest of the house. We carefully taped up a tarp across the doorway (on both the inside and outside of the door frame) and then used this handy instant zipper thing we found at Home Depot (it basically sticks to any tarp and then you slice an opening as you unzip it, giving you a resealable doorway in your tarp. Best $10 we spent on this whole project. That thing was airtight, which meant it single-handedly kept all of that swirling primer and paint dust from sneaking out into the foyer (while still allowing me to enter and exit the room between coats for a lot less hassle than a taped off tarp would provide).
Next, Sherry saluted me and wished me luck as I loaded in all of my supplies: paint sprayer (lately we’ve been using this Wagner sprayer), extension cord, and a can of primer (we used Kilz Premium). I also got dressed in the painters suit and booties that I bought and told Sherry to send reinforcements if I didn’t emerge in a few hours. I don’t know why, but I was actually kinda nervous about how this would go.
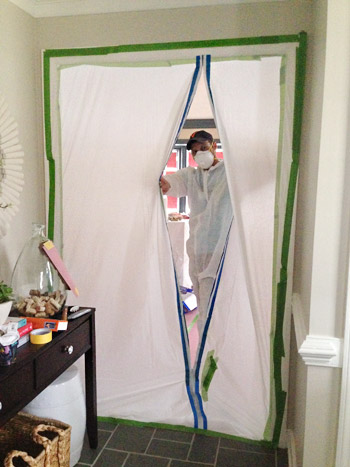
Well, it didn’t go great. At least it got off to a rocky start. For starters, my paint sprayer immediately got clogged, so before I could aim it at any blue trim, my hands were covered in primer and my sprayer was sputtering and leaking. About 30 minutes later, I was finally spraying. By this time it was about 4pm, and between clouds rolling in and all the paper on the windows, the room was suddenly pretty dark. And it only got darker as I sprayed the windows with primer. I’m so used to this room being crazy bright that I hadn’t even thought about needing a work light. Oops.
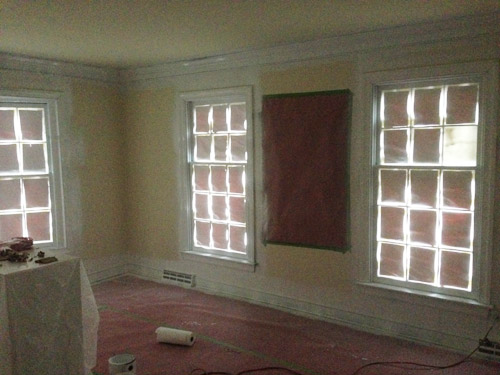
I actually didn’t own any work lights that we didn’t mind getting misted with paint spray (between this and just recently buying a dolly, you guys are probably questioning our preparedness) so I ran out to Home Depot after I was done with the primer coat and bought a couple, along with the trim paint that I’d need the next morning (Simply White in semi-gloss by Ben Moore – but here are some other top white paints you could use instead). The lights revealed that my priming wasn’t perfect, but it’d do the trick.
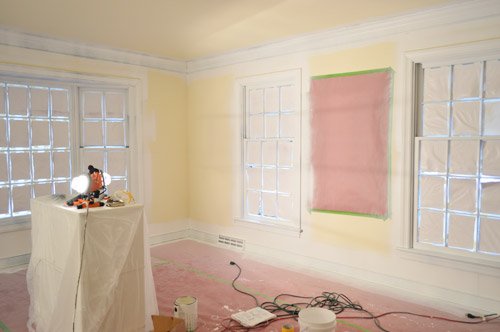
After letting the primer dry overnight (and thoroughly cleaning and de-clogging the sprayer) I woke up early the next morning (Friday) ready for my first coat of paint. This is the room right after I finished that coat. Note the paint fog.
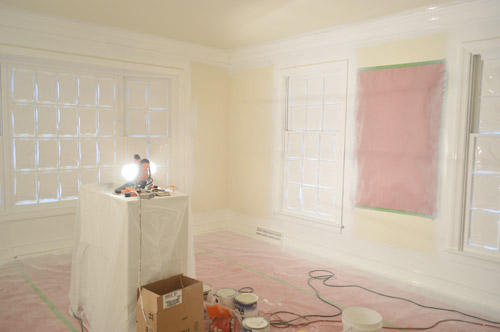
After cleaning the sprayer once again, I let that coat dry the entire day since we had showhouse stuff to do that afternoon in Northern Virginia. I was hoping the next morning (Saturday) would just be a clean up day, but we weren’t entirely satisfied with that single coat of paint. It did a great job covering, but it didn’t get all of the various nooks and crannies of the trim.
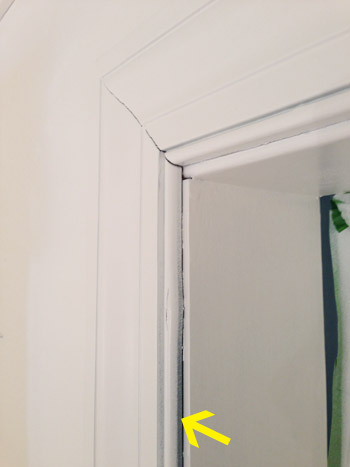
This was one of my fears about spraying this room because it’s virtually impossible to get all of the angles and sides of the trim in one swoop, and you can’t just go back right away and spray from a new angle because you’ll apply too much paint and get drips. So instead of getting to dive into clean-up with Sherry on Saturday, I did a second coat of paint in an effort to get those spots that the first coat missed.
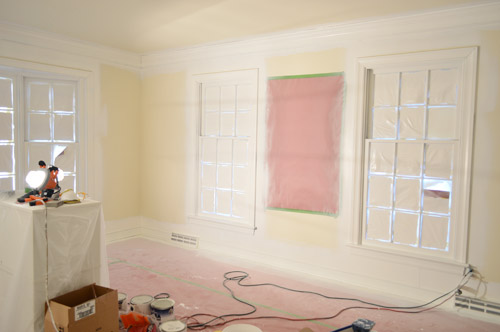
So now we were on Day 3 of paint quarantine in our office, which was also looking not so pretty from the outside. Luckily by now I think the neighbors are used to us always being the middle of a project, so it doesn’t really raise many eyebrows anymore.
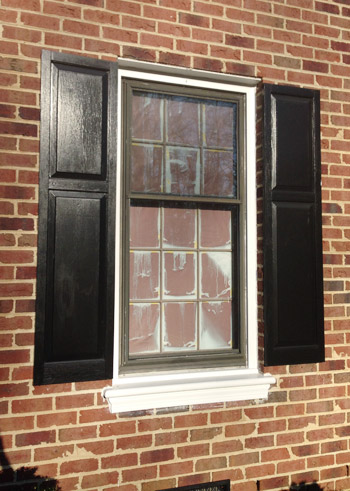
We let the second coat dry all day Saturday, and started the clean-up process yesterday morning. You can tell by the photo above that our homemade window coverings were far from perfect. We learned just how imperfect they were as we started to peel them off… leaving chunks of rosin paper stuck behind in various places. I was ready to curse our decision, and the time we had invested, in those quick little coverings.
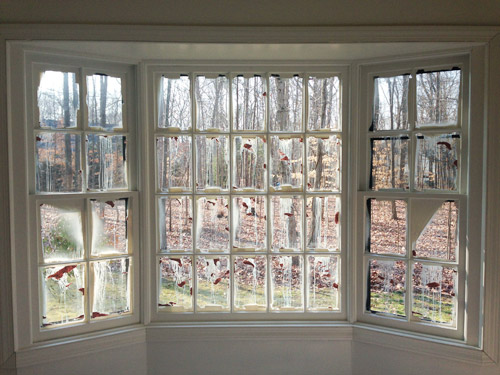
Sherry and I tag-teamed window scraping, since neither of us had the stamina (or the hand strength) to scrape 66 windows clean ourselves. The coverage was so thick (one coat of primer, two of paint) that it took lots of effort to peel it off, but some serious scraping did the trick. In the end, the best method we found was using straight razors to get most of the windows clean, and then going back to scrape the corners with an exacto (we also tried using a putty knife for those corners, which was a little bigger and harder to control, but also worked semi-well).
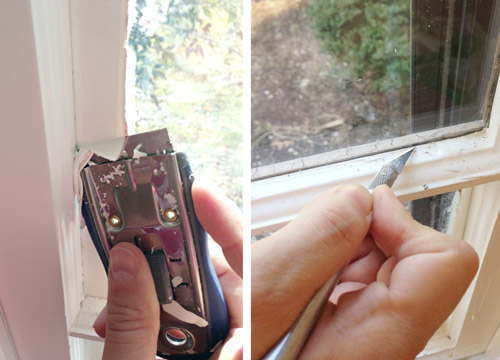
This basically ate up half of our Sunday (with breaks to feed Clara, hand her a few new activities, take bathroom breaks, etc). It sucked. I won’t lie. The whole time I was brainstorming what I’d do differently and it mostly boiled down to not owning windows, which I don’t think is a great solution.
But I said above that we don’t regret the rosin squares. That’s because the pane that we’d left completely uncovered was ten times worse. Maybe even a hundred times worse. My fantasies of this one magically peeling off in one giant sheet were far from reality. It was hard and grippy, so we could only chip it off slowly. It took Sherry a good 30 minutes to do just this one pane.
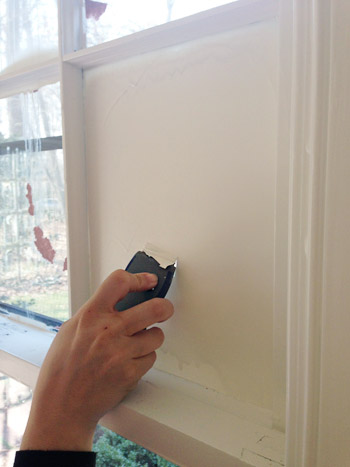
But by around one in the afternoon we had them all cleaned and enjoyed a nice celebratory lunch. It was glorious to have our bright office back (and even brighter).
We considered calling it quits from here (our hands were both aching) and we thought it might be nice to leave the paper down while we painted the rest of the room (walls & ceiling), but I was getting paranoid that our rosin paper on the floor had only performed as well as it had on the windows (I was picturing giant blobs of paint having leaked through) so we went ahead and peeled it up. And it was PERFECT. Phew!
So here’s the room as of now (Sunday afternoon, when I’m writing this). It’s looking a bit gnarly with all of the over-spray beyond the trim on the walls and ceiling… but there’s no blue in sight!
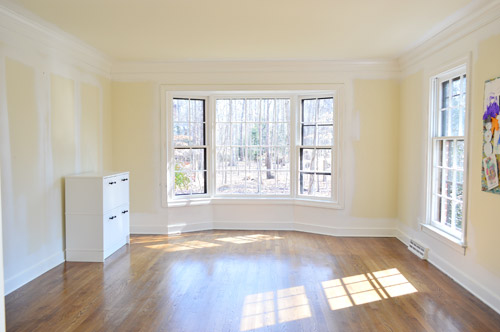
We’re excited to go ahead and paint the ceiling and walls, since we figure it’ll be easier with all of the furniture still out. And we’re used to painting without the floors being completely covered, so there was no harm done by pulling up all that rosin paper.
But our trim-painting task isn’t quite over. For some reason my second coat of paint was especially drippy (once again, I’m less enamored with our sprayer than ever – we now use this Wagner sprayer), so we had to sand down a bunch of spots that are still in need of some paint touch ups by hand.
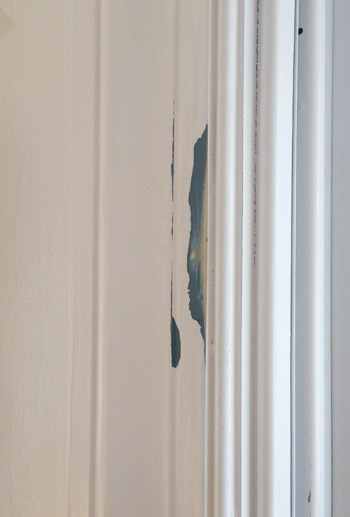
But before I break out the touch-up paint, we still need to do some caulking. I didn’t realize how rough some of our trim was looking until it was all painted white. So there are a bunch of spots where the moldings and walls meet that need some filling.
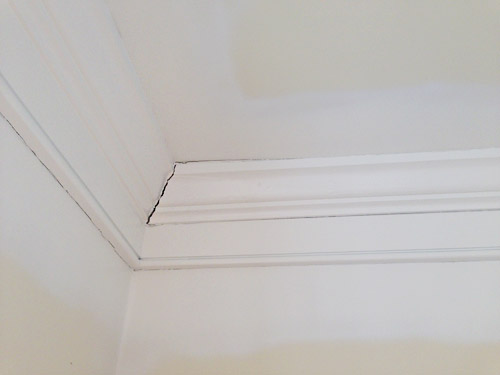
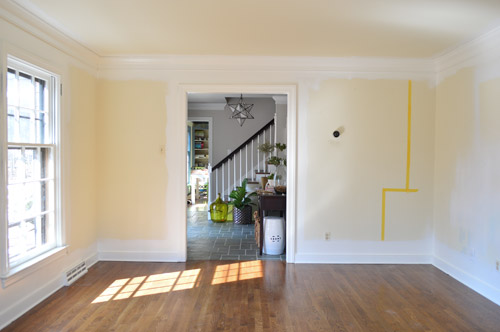
I also never noticed how yellow the paint was in there until now. Sherry and I are still debating colors. We’re both thinking of something nice and light, but not white – and maybe with a hint of color. Not sure yet. Though you can see below that we’re starting to tape off where things like the built-ins might go, just to try to picture everything and make a final call on layout/placement.
Oh, but the verdict on spraying vs. painting by hand? I’m not totally sure yet. Spraying was definitely WAAAAY faster when you just measure the time spent painting. It took me just about 30 minutes to do a single coat, so one primer coat and two paint coats were a total of just 1.5 hours spent spraying – versus a single coat probably taking around 4+ hours by hand. But we’ve still got some kinks to work out in our prep/clean-up system before I’m convinced it’s less trouble overall (for example, when we paint by hand, we don’t get nearly as much on the windows so it’s a lot easier to scrape, and we don’t have drips in the trim that we later have to sand and touch up).
I’d love any tips or suggestions from those of you who are more well-practiced in the art of paint spraying. We plan to spray the dining room when the time comes since, like the office, it has little furniture and can easily be sectioned off. So I’d love to work out some kinks before taking that room for a spin – and then share all the “this worked better” tips when we get ‘er done. Can you believe that room is our last room with blue trim?! It’ll be a big day when it’s done.

Redkimba says
While it is a lot of trim and an interesting experiment, I’m wondering if you would have saved time and sanity by breaking the room down and doing one wall or window at a time in small discrete increments. Taping off the room itself looks like a time consuming pain in the ass. I can understand the desire to just get it over with but it looks like this method was more trouble than it was worth with little in the way of additional cost-benefit.
YoungHouseLove says
Agreed, it was a complete pain. Painting by hand still would have taken longer (we estimate 16 hours of painting to do four coats) but it felt like we hit a lot of snags. We’re hoping that the tips in the comments make it a lot smoother next time…
xo
s
Nan says
We (myself and brothers) have professionally painted for years and every time we sprayed a house the overspray mist would set off the smoke detectors. Once it even set off the security alarm… nothing like siren alarms going off in a townhouse subdivision at 8:30 in the morning. As for the windows… Perhaps next time you could try using wet (water) newspaper. You would apply it to the window like you would if you were decoupaging the windows. When you are ready to remove the newspaper from the individual panes you would just spray and remove. And, one last tip – it’s cheaper/easier to drop out cheap plastic drop cloths on the floor.
YoungHouseLove says
Love the pro painter tips!
xo
s
Steph Nelson says
Congrats on taking the sprayer plunge!! :)
Sometimes spraying the glass with window cleaner makes scraping the window easier. I think maybe the primer made it a little harder to scrape (??) It looks so much better regardless. It is amazing how cracks and crevices open up on trim when you paint it white. I’ve been going through that with dark brown trim.
YoungHouseLove says
Thanks Steph!
xo
s
Jamie says
I don’t know if anyone has mentioned this, but when we bought an old house in SC, circa 1920s with original hardwoods, someone had gone in and not bothered to tape things off or use drop clop clothes when they painted. There were drips and splatters everywhere on the wood. I went through with rubbing alcohol and and a rag and got ALL the old paint off. No need to refinish any of the floors. I don’t think this would work with oil paint but it was great for latex.
YoungHouseLove says
Love that tip!!
xo
s
kim says
For the painted window pane – I’ve used a blow dryer to heat the paint on a very old glass pane of a French door. The paint peeled off easily in the center for the most part.
YoungHouseLove says
That’s smart!
xo
s
Viviana says
looks great but a lot of work! Room color recommendation: BM Rodeo. It took me months to decide on what color to pain the bulk of our home with our vaulted ceiling and open floor plan. We also had a stone fireplace that was also vaulted and took time to compare in all different lights. I finally decided on Rodeo which appeared much darker as the swatch but ended up being this light airy grey which keeps my home nice and bright while still having a warmth to it. Good luck!
YoungHouseLove says
Sounds really pretty!
xo
s
Jeri says
Annoying idea. If you spray the trim in the dining room, maybe you could try out several of the suggested methods in there? Like cover one pane with press and seal, one with vaseline, one totally taped/papered off, one with windex, one with that roll on stuff, etc..? Kind of like how you tested out the various wallpaper removal methods. Probably a pain for you guys, but great info for us readers.
YoungHouseLove says
We’re totally down. John and I were just talking about how much fun that would be. A battle of methods (and wits) to see what works best!
xo
s
Mindy says
I have an idea for testing. Why not buy some cheap frames from a thrift store, then test different methods. That way you don’t have to worry about clean up, but you can find a few methods that you like and then try them when you actually paint the dining room.
YoungHouseLove says
That would be fun! I think we are getting so many “this worked for me” tips that we’re confident enough to test them out in the dining room when we get over to that room. It’ll be like a DIY science experiment. Haha!
Julie F. says
I consider my motivation to be part of the deal whenever I want to start a new DIY project. After all, my willingness to undertake such project should be considered a ressource just as well!
Generally, it goes like this: material cost – (fun x hours) > hiring costs. Hehe.
Edit: Maybe you should add a special variable if the project brings novelty to the blog… (I’ll leave your brain with that…)
YoungHouseLove says
So funny! I like that!
xo
s
Stacy says
Your Home Depot sells Ben Moore? I have to go 10 miles to an Ace or local Hardware store to get it. It’s such a pain! I wish I could get it at Home Depot!
We just had all of our Golden Oak trim in our new house painted in Decorator White, and it made such a difference! The walls were a similar color to this, and we used Ben More Bunny Gray. It’s like the walls are taking a fresh breath. Its a wonderful color!
YoungHouseLove says
Nope, we have a local paint store nearby so we swing through. We can hit them both in one errand though!
xo
s
michelle@decorandthedog says
It’s crazy how bright that room looks now! We really love our Graco spray station and the price was great! http://decorandthedog.net/decorandthedog/2013/11/3/how-to-paint-chairs-the-easy-way
YoungHouseLove says
Great tip Michelle!
xo
s
V@Sproutshouse says
Wow! What an amazing difference! You are so winning the ‘blue trim’ battle. Only one more room to go!! xox
Jackie says
The photo of John in the painter’s suit and mask getting taped into the room is a really cool photo/memory to capture. :)
Congrats on getting such a major item crossed off the list.
Best,
Jackie
Debbie says
Hey guys, I have a question about the caulking you mentioned you needed to do for places where gaps have developed between the molding and the walls. I don’t know if you are planning to do a separate post on that topic, or if you already have one, but I would love to hear how you are going to tackle it. We just noticed that almost all of the molding in our house cracked away from the wall this winter. We aren’t sure if we have to sand the paint down before caulking, priming and reprinting, or if we can just caulk over existing paint (though the former definitely feels more right…). Also, since we weren’t in the house when the molding was painted and the previous owners didn’t leave the leftover molding paint, we are nervous we will have to re-paint everything to make sure the paint matches. Our house has crown and baseboard almost everywhere so we are obviously hoping to not have to reprint it all if not necessary!! Anyway, would be great to hear more about how you will tackle this problem, though I know you won’t have the same paint color issue we do!
Thanks!!!
YoungHouseLove says
We’d love to cover the caulking process for you, and for color matching you can bring a piece of trim to the store to get it matched, but if you can’t get anything down you can bring home swatches and hold them up to hopefully find one super close.
xo
s
Debra says
Tinted caulk!
Sarah Murphy says
What a difference several hours and some slight numbness in your appendages can make! Sounds like it was quite the job but the latest picture shows such a difference. I love keeping up with your projects. You guys are so talented!
Lauren says
Looks great! So do the windows still open or did the primer and painting coats seal them shut?
YoungHouseLove says
When you paint them by hand sometimes you have to cut them open, but oddly when spraying they seen to slide open easily (we opened them all as we scraped so we didn’t need to crouch down).
xo
s
Carolyn says
Hi,
I’m not sure if this stuff would work…I think they used it on rehab addict…
It’s called strippable coating…
Hope it’s helpful
YoungHouseLove says
Thanks Carolyn!
xo
s
Jenn says
I have to say that this post has been the most informative and interesting that I’ve read from you both in a while. :) I appreciate that you told us what did and didn’t work, your whole process, complete with how many days it took, and what you were and weren’t happy with. I feel like there were a lot of honest feelings in this post, and that makes you guys more relatable to someone like me. I also feel like the writing style was more grown up, with less “cutesy” words/terms, which I also appreciate, as it makes it easier to read, at least for me. So thank you for that! I hope you continue to write posts of this nature.
I was wondering though, since you mentioned twice not being happy with your sprayer, could you update the post with which model it is? Also, could you tell us what primer you used with it? It seems like good information for those of us in the market for a sprayer, so we know what to avoid, or if we just need to avoid a certain primer/paint while working with that model.
Looking forward to more office updates!
YoungHouseLove says
Thanks Jenn, so glad you enjoyed it! We were over at the showhouse, so we’re just getting back to comments (sorry yours sat for a while, we just wanted to keep it pending to remind us to update the post with the info you suggested). We’re adding the brand of the sprayer and the primer in there right now!
xo
s
Jenn says
No problem at all! I would hope you were getting stuff done / going about your lives and not only approving comments. :) I just thought I may have somehow offended you, which was not my intent, and I thought I saw comments posted after when I wrote mine, and thought perhaps it wasn’t approved. I hope you deleted the second posting of my comment. Hope all is going well!
YoungHouseLove says
Thanks Jenn, you’re so sweet!
xo
s
Rachel says
Love reading your posts!
My husband and I use our sprayer for everything. When we have windows, we cut up the plastic tarp and use frog tape to tape it to the window. This allows you to have light come in and it will not stick to the window. Also, the tape goes up against the edge just like covering your flooring. It takes a little bit longer to tape but we have very little clean up to do. We did our living room and dining room in 2 days start to finish (tape, ceiling, walls, trim and clean up). The key for us was thinner coats (this helps with the clogging of your sprayer).
Hope this helps.
YoungHouseLove says
Great info! Thanks!
xo
s
Jennifer says
Hi Sherry & John!
It never ceases to amaze me what freshly painted white trim can do for a room! It looks fantastic!
I was wondering what kind of shape your trim was in before you painted it? My house was built in the mid 60’s and when redoing each room, I’ve struggled with deciding to either paint it or tear it off and install new. Some rooms were a no brainer to rip off and install new. Some of the remaining trim around doorways and up the stairs I really don’t want to tear off but it looks pretty beat up. The previous owners did not prime before they painted it and in some places it’s a chippy hot mess! Have you encountered that? What are your thoughts?
Someone also mentioned above about tips on caulking which I would love to hear as well!
I love reading your blog and seeing your rooms transform! Thanks!
YoungHouseLove says
We have been lucky in enough in all of our previous houses that the trim has been in good shape for panting. Much of it has only been wood or just painted once when the house was built (like this blue stuff, which was done well by who we assume was the builder). It sounds really exciting to replace old beat up trim though, so it’s probably completely worth the trouble if it can’t be saved!
xo
s
Leila says
Ohhhhh I do not envy you the time and effort it took to get all those window panes completed, but I do envy those now-even-more-gorgeous windows and all the lovely light streaming through them!
I know you’re leaning more towards cooler tones throughout this house, but I think a good pop of coral (a strong coral, not a pastel) would be lovely with all your shades of gray. Maybe not a whole room, but a little something! Love the floor plan you have up with as well, this is going to be a great place to go to work each day!
YoungHouseLove says
I love that! Like the door in Clara’s room – maybe on the back of the built ins or between the desks or something. Just have to get John on board…
xo
s
Valentina says
In my experience, the best way to cover window panes is to cut aluminum foil to size and attach it to the glass with plain water (if that’s not strong enough, then soapy water will definitely do). Even after the water dries, foil will still stay there, until pulled off. It will never bleed through, but will make for a very easy clean up afterwards.
YoungHouseLove says
That’s amazing! Never heard that before!
xo
s
Debra says
I always use Flotrol when painting trim. It gives me an awesome smooth result with no brush marks and a ‘sprayed look’. Some people also like Xim Latex Extender. I have never used a sprayer though but have through about it! I have the brown/orange pine-panel wainscoting and trim in our ‘colonial’ den to prime and paint but will probably use a brush and sponge roller on the wide board part. Your room is looking great! I think the Virginia colonial I live in used to have dark taupe trim and it is now bright white upstairs. That was the colonial style with all matte white walls (to look whitewashed) and a colored trim. I am repainting it all with Pot of Cream (a Behr shade). It is a white that is not ultra white but not yellow. Still has a nice ‘clean’ look. Enjoying your transformation very much.
YoungHouseLove says
Sounds so pretty!
xo
s
Lexi says
This is a weird thought, but I was thinking that using press and seal wrap (by glad) on the windows and using an exacto knife for a nice clean edge….I wonder if that would be easier clean up on the windows? Thoughts?
YoungHouseLove says
That could be awesome too! Thanks for the tips everyone!
xo
s
Jordan says
I haven’t read through every single comment, but I wondered if you’ve looked at the Wagner Flexio 590? I have one that I purchased after what seemed like eons of review reading and research. It had almost unanimously great reviews. I DO really like ours for almost anything and it is SUPER easy to clean. I think maybe 10 minutes. Not bad at all. That being said, I’ve used it on multiple projects now with everything from outdoor paint to paint-and-primer in one and didn’t have any issues until using Ben Moore’s Advance. It was so disheartening since I was thinking that I was doing the right thing to get the smoothest finish for our six panel doors and cabinets but it just couldn’t get it to spray like it had for every other application if used it for. It was a bummer, but overall, I do love my sprayer!
YoungHouseLove says
We hear good things about that one! So strange about advance… maybe it’s thicker?
xo
s
Stephanie says
A couple years ago we sprayed all the windows and trim at work and then had to scrape all the overspray. The best solution was found is to soak the window pane with windex and then use the straight edge razor to scrape it. Works like magic! Good luck, it’s looking great!
YoungHouseLove says
Love that tip!
xo
s
lisa says
Great job, as usual John and Sherry! Kind of an unrelated question, but where did you get the lucite desk (I think it’s Sherry’s desk?). Looking for a small desk for my teen daughter’s room…thanks!
YoungHouseLove says
It was from West Elm about 7 years ago. Was a wedding present from my bestie. I love that thing!
xo
s
lisa says
Thanks so much for the response! This is why you guys are the best! Guess, what? WestElm still has a very similar, if not exact, desk. So excited!
YoungHouseLove says
So glad!
xo
s
Kay says
Hey Sherry,
I wanted to tell you that I talked with the paint guy at our local Benj’ Moore the other day, and he told me that while the can of untinted paint you purchase can be “no VOC” that does not insure that the concentrated tint that you add is also without VOC colorants, which he said can off-gas for around 20 days. I know that the new BM tint machines for their Natura line is without VOC colorants . . . I mean, that’s what he told me . . . I haven’t done much research but thought I’d let you know. I was surprised and wondered if y’all would be, too — I know your not involved in the painting but just wanted to give you my “semi-informed” fyi, for what it’s worth . . .
I absolutely love your new home. Y’all do such a fantastic job —
YoungHouseLove says
Wow, thanks for the tip! I have asked at our place and they said the Natura colorants don’t add VOCs but Auras do. Similarly at Home Depot they were advertising Olympic Premium as being free of VOCs even when colorants are added. Maybe it depends on the equipment each store has?
xo
s
Kelly says
Have you heard of the Cricket sprayer? I have heard really great things through other blogs and DIYer. http://www.amazon.com/Critter-Spray-Products-22032-Siphon/dp/B00006FRPJ
You can google extensive reviews yourself, but a lot of the blogs I’ve read rave about it’s easy cleanup and really simple parts (AKA less things to go wrong!). It runs off of an air compressor, so I think it gets a little more power than the plugged in or battery operated variety. It’s also super affordable, especially if you already have an air compressor. I plan on purchasing one this summer to do our kitchen cabinets!
YoungHouseLove says
Yes we heard such good things about it! A few commenters here said they didn’t have much luck with it though, which stinks!
xo
so
stacy says
Looks awesome! I am looking forward to spring so I can paint the trim in my daughters room and my bedroom. I’m so intimidated by the process since I’ve never done it before so I keep putting it off, but it has to be done. Any suggestions for the best type of paint to use on trim? What’s currently there gives it the look of laminate so I plan on using a primer but unsure what I actually should use otherwise.
YoungHouseLove says
I would use Kilz Premium primer and semi-gloss paint in the brand/color of your choice. Good luck!
xo
s
Jane says
Trim painting question you guys – I have whitish trim in my house , but they are not as white as I would like them to be. I think they have just sort of yellowed through the years. If I was going to repaint the trim to nice fresh white , Can I just paint on top of my existing trim paint(Since its almost white) or do I have to sand/prime and then paint?
YoungHouseLove says
If it’s shiny you should sand and prime and paint. If it’s full and chalky you can just prime and paint. That just makes for the best adhesion :)
xo
s
Barcy says
I am amazed at how much bigger the room looks with the trim painted white! I’ve been debating what to do with the ugly brown trim in our house, I think I just found my answer. Paint it white! Luckily we have picture windows, so I won’t have all of those little panes (or ‘pains’ if we want to be punny) to deal with.
Audrey says
Looks great!
I do have a quick question, do you not sand trim prior to painting it? We are tackling some big painting jobs at our house, and our trim is in pretty rough shape in some rooms, so we’ve been sanding, caulking, wood-puttying, sanding again, cleaning and then painting. Is that overkill?
YoungHouseLove says
If it’s glossy or has any shine I’d sand, wipe it down with liquid deglosser, and then prime and paint. Our paint is all really flat and chalky, so we go right to primer.
xo
s
Shauna says
Wowza! Good for you guys! Hope your hands (and heads!) recover from the strain. What a difference!
Carly says
I would like more info on this bulletin board. I have my dauther’s artwork and I can’t decide how to display it.
YoungHouseLove says
Here’s how I made it (it used to be in my closet) although John and I are thinking of making a bigger framed out one for that wall in the office: https://www.younghouselove.com/2012/03/time-for-a-board-meeting/
xo
s
Tiffany @ This Whole House says
I bet you got some serious arm muscles after all of that scraping! Looks great y’all.
YoungHouseLove says
The weirdest thing is a mystery bruise in the center of both of our palms. We think from jamming the scraper over and over again.
xo
s
Laurel says
When we first moved into our home the walls, trim and ceiling were all robin’s egg blue and so my husband sprayed all of it. We have wood trim in that room and carpet and 36 extra large window panes as well. I just carefully cut paper and sealed painter’s tape right up to the edge of each pane and then brushed paint against the tape to make a seal. We had no problems on any of them. The quarantine lasted about 3 days here too, but was worth it. Thanks for all that you share. The good, the bad and the drippy! :)
YoungHouseLove says
Love that tip!
xo
s
Jen says
Looks great and so much bigger! I once taped off and painted 14 paneled doors (both sides) each with 9 panes in the top half (in a commercial bldg.) It took me almost a month to do a coat of primer and 2 coats of paint! I wish spraying was an option! I probably would have been too nervous to do it though. In the end you probably would have spent more time painting than you did scraping those window panes. Six of one half dozen of another! Can’t wait to see the finished room.
Emma clayden says
I wonder about cheap margarine on the windows prior to spraying, would be easy to wipe on and should clean off easy enough with hot soapy water once everything is really dry. Have recently discovered your blog and it has totally inspired me, thanks guys.
YoungHouseLove says
Thanks so much Emma!
xo
s
Karen says
This room looks amazing! I can’t believe your whole house was blue trim a short time ago.
I noticed a lot of people in the comments suggesting using masking tape on the rosin paper for the floors in the dining room if you go the spray route again. I would be wary if I were you and just stick to frog tape. I used masking tape on a door in my baby girl’s room, and it pulled off the coat of poly. (It wasn’t a very nice door to begin with, but that caused it to go from something I could live with for awhile to something that bothers me every time I go in her room.)
YoungHouseLove says
Eeks, thanks for the tip!
xo
s
Susan says
We have a big, expensive commercial sprayer that we use sometimes, but to be honest it has just about all the same problems that yours does (uses a lot of paint, it’s a pain to clean, can cause drips, can clog us which may involve stopping in the middle of a project to take the thing apart – which is VERY MESSY – and of course it takes forever to prep). We really only use the sprayer for big jobs, like when a rental house needs painting and we’re going to paint pretty much the whole house all in the same color. For single rooms and trim work, I usually paint by hand. I think of painting by hand kind of like taking the long way to work by the backroads rather than the shorter way to work on the traffic-filled freeway. They both end up taking about the same amount of time, but pretty backroads and hand painting are less annoying than traffic and boring prep work. I don’t love prep work, and I HATE having to stop in the middle of spraying to unclog the head and/or the filter. But in the right circumstances, the sprayer is useful.
YoungHouseLove says
I loved that comment, you’re so right about one being like the scenic route. Haha! And it’s oddly comforting that a fancy pro sprayer clogs sometimes too.
xo
s
erin @ dfmi designs says
Nice work! My husband and I rehab houses in our spare time, so I KNOW all the work involved! Not a party! We bought a paint sprayer a while back and of course it only worked for a little bit before constantly getting clogged. So we are back to painting by hand. We have fallen in love with Kilz spray primer. (If it gets chilled it does get drippy, but does a fantastic job.)Then usually just needs one coat of paint. Looking forward to seeing your color choice!
YoungHouseLove says
Love that tip!
xo
s
Christine says
Well done, guys!! That is a huge hurtle to get over! Looks great. Can’t wait to see what color you choose for the walls. Something glowy would look cool with the gray in the foyer.
Kelsey says
When my husband and I bought our house a few years ago, literally every surface in our 2400 sq. ft. home needed paint. Walls, trim, and ceilings. So we purchased a paint sprayer to do the ceilings, and a majority of the walls. We could do the entire downstairs ceilings in a matter of an hour vs. days if we did it by hand. We covered the floors with rosin paper and enclosed different rooms with plastic drop clothes. We did all the trim by hand, so I have to suggestions there, but I would definitely try another brand of sprayer if you are wanting to continue using one. Our paint sprayer is fantastic, and while the cleanup of the machine, and the prep of the rooms was very time consuming, we were not aching in pain after hours and hours of rolling. We own the Graco Magnum LTS 15 Paint Sprayer.
YoungHouseLove says
Thanks Kelsey!
xo
s
Carli says
Way to go you guys! That window scraping looked like a nightmare! I don’t blame you for feeling a little down at that point in the project. Buuuut the glorious white trim in your office was totally worth it. Just the transformation from blue to white, without wall paint added, is remarkable. Can’t wait to see this room come together :)
Amanda says
We’ve painted 2 sets of french doors (inside and out) with ORB spray paint and then brushed on a few coats of poly for longevity.
We painstakingly taped every pane (60) by cutting rosin paper shorter and narrower to edge with painting tape. We used an exacto knife to make sure the tape didn’t cover anything that needed to be painted. It took a few hours, but worked well for us.
YoungHouseLove says
That sounds awesome!
xo
s
Liz says
We have the same sprayer and love it! The key is a new spray tip or nozzle to use after every three or so uses. For our windows, I used vinyl window cling sheets (purchased at a dollar store). I just didn’t push out the shapes and cut it into squares that fit. I then took a toothbrush with a teeny tiny bit of Vaseline and went around the edges of the cling. I ended up with no bleed through and a little Vaseline isn’t so hard to get off. I also used the sprayer to do the walls, just using a new tip and only spraying the middle to skip using a roller. I love your blog and your house!
YoungHouseLove says
Awesome tips. Thanks Liz!
xo
s
Ashley@Biggerthanthethreeofus says
Love this post! That paper on the floor is a new product to me, so thanks for all the information on it. We have a 400 sq ft sunroom (enclosed) and it’s a dingy cream/yellow. We have been brainstorming how to spray it all and I think we are just in for a tough road ahead. Will definitely be buying the floor covering though. =)
HK says
There are arguments for and against contractor-paint-sprayer window film over the windows. The film lets in light and all the time scraping would have been used to paint carefully each mullion. But if you hate painting mullions, then doing it your way might have been the best too. I am a sprayer fan and also lucky that our windows have the fake mullions inside the glass. Live and learn every day. Thank you for the life lessons on spray painting. Invaluable!
YoungHouseLove says
Love that info HK! Thanks for sharing both sides of the argument!
xo
s
Kim says
Looks great! Silly question, but…I wonder what would happen if you tried to smear each window with butter or olive oil instead of covering with paper? The coverage would be controlled using a folded paper towel. I don’t own a paint sprayer — can someone try this out? :)
YoungHouseLove says
Sounds delicious. I want to try a whole bunch of things and see what works!
xo
s