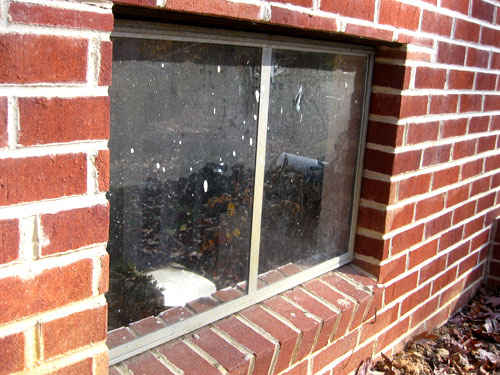
We’re back to share a quick and easy window-frosting tutorial as promised last week. We knew our basement windows were completely devoid of privacy and therefore could use a bit of cover, but we didn’t want to hang heavy blinds that we kept perpetually closed since that would definitely rob the room of tons of light. Enter the idea of window film. We actually used it to frost our original bathroom window after we moved in. Then we later replaced all of our windows and realized our private backyard didn’t provide a good view of the bathroom since it’s up so high, so we opted not to redo the frosting treatment afterwards. But the basement is certainly a lot easier to peer into than the bathroom, so out came the idea of window frosting film again.
We snagged a roll of it at Home Depot for $18.98 (we needed just one to do both windows and the large pane of glass in the door). Oh and the brand was called Gila if that helps anyone. We also grabbed a spray bottle of film adhesive along with a a tool kit complete with a squeegie-ish device and a knife to help with the application for seven more bucks. So for $26 we added privacy without blocking all the light that filters into the room and makes it feel less cave-like and dungeon-esque.
But before we got to the frosting fun we had some seriously dirty windows to deal with. Not only were they coated with dust and grime, they actually had Drylok spatters all over them (both inside and out- go figure!) so first we had to get them cleaned up and ready for their close up.
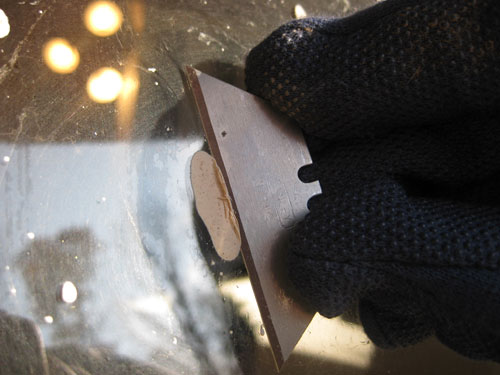
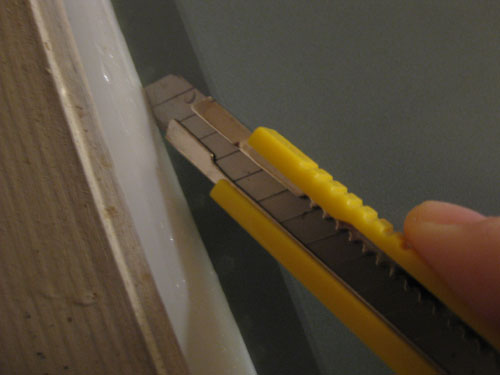
All the splatters were no match for a straight edge razor, which we always recommend using with extreme caution. Fingers are kind of important when you’re as obsessed with painting and projects as we are, so we guard ours with our life. Grippy gloves can help as long as they’re tight enough to feel snug and not cumbersome, and the best approach is always slow and steady. Of course you can grab a utility knife holder for even more control (which we recommend for your safety- this photo is just a pic of our process, not our suggested approach for others). So be extra safe, take a deep breath, channel the tortoise (as opposed to the hare), and watch that paint come peeling off!
You should be left with pretty darn clean windows, and following your little razor session with a glass cleaner wipedown should be all the prep you need. Basically you know you’re ready to frost your windows when they look so sparkly that it almost seems wrong to cover them up with anything. They’ll gleam like diamonds I tell ya.
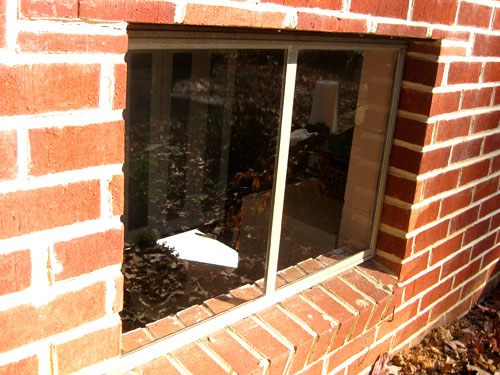
But frost them you must (well you don’t have to, but in our case it was definitely the way to go). So the next step is to carefully measure each pane of glass that you want to frost. This is important because you’re not measuring the entire window if it’s made up of two side by side panes (like ours is above), so be sure to measure each glass pane individually, no matter how many there are in each window.
Then add an inch on each side of those measurements, so if your window is 15″ wide by 20″ tall you will write down 17″ by 22″ (an inch on each side means adding two inches to each measurement). Then it’s time to whip out the roll of frosting film from the box. It’ll look like a long roll of white wrapping paper with a shiny clear side and a more matte frosted side. Now’s the cutting and measuring part. Grab a ruler (or a t-square if you have one on hand) and measure and cut boxes out of the film that meet the measurements that you recorded (the ones with extra inches on each side, not the exact measurements of the windows). You can either use a pencil to trace each box out onto the matte frosted side and then cut them out OR just cut without drawing anything out (being sure you end up with a box that’s pretty close to the larger measurements you recorded).
After you cut out a slightly oversized square of window film for each pane you’re ready to separate the film from the glossy plastic backing, which can easily be done by placing a piece of tape on each side of a corner (being careful not to let the tops touch or they’ll just stick together completely). They should each adhere to their respective side so you’ll be able to use them to separate the frosting film (seen below on the left) from the clear plastic protective backing (seen on the right) which won’t be applied to the window in the end.
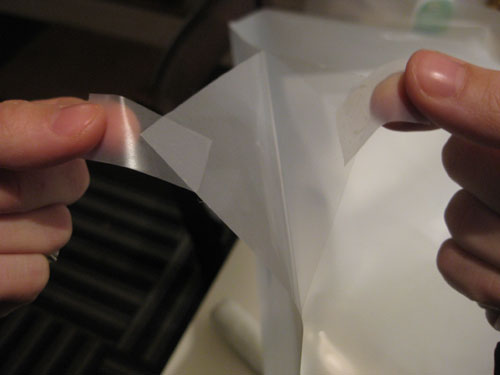
So go ahead and pull those two layers apart about halfway down the square until it looks a little something like this:
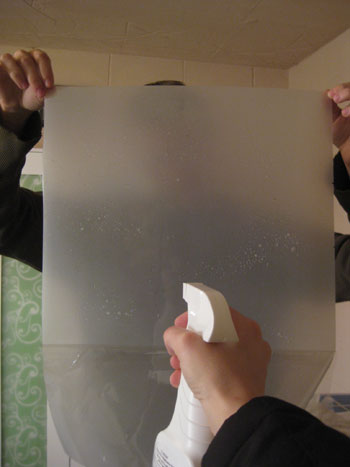
It definitely helps to have two people for this job by the way. That way one person can hold the half-peeled film up while the other sprays the window and then both sides of the frosted part of the film with the application solution (ours was called Gila Window Film Application Solution by the way). Note: we’ve heard you can forgo buying the application spray and just fill a spray bottle with water and a drop of dishwashing liquid, but since we didn’t have an empty spray bottle and use eco-detergent (which we weren’t sure would work since it’s plant based) we opted to just buy the Glia solution for $3.50 since it was cheaper than buying a spray bottle and more mainstream dish detergent). We have also heard that some frosting films only require water to adhere them, so be sure to read the directions included with yours.
Once the window and half of the back side of the frosting film (as shown in the image above) is adequately misted (along with the entire front part) it’s time to apply it to the window pane. Thanks to the inch of leeway on each side of the film there’s no worry about placing it perfectly and you can easily trim things down to a perfectly snug fit once you get them more securely in place.
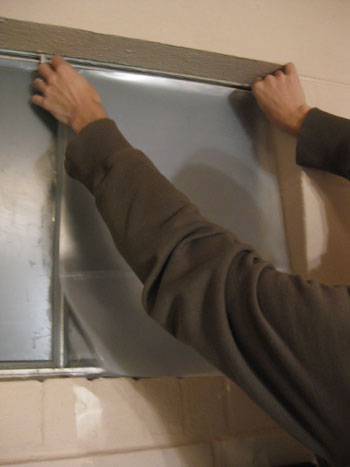
The film should stick pretty well to your window, but won’t look seamless at all at this point. Oh and you can pull off the other half of the clear plastic film (while someone else holds the frosted piece in place from the top two corners of the window). Now the only layer on the window is the frosted film with about an inch of overlap on each side. You’ll see tons of bubbles and streaks but fret not.
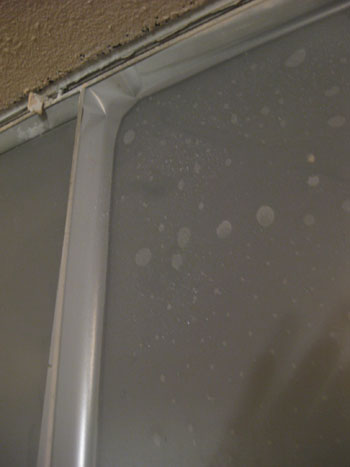
Here’s where the fun plastic squeegie-thing comes in handy. Just glide it across the window film to push all those dastardly bubbles out to the edges of the film (where they’ll magically disappear). Do this for as long as it takes to remove all the bubbles for a near-perfect and seamless look (except for that extra inch of film around the edge of the pane). It’s worth noting that the edges of the film might look a bit bubbled and won’t form a tight seal on the window until they’re trimmed down to fit, so don’t worry about a little imperfections around the perimeter of the pane, just get the rest of the window looking great.
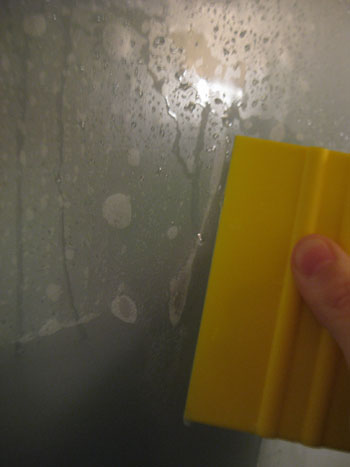
Then take an exacto knife and carefully place it firmly between the edge of the window pane and the window trim (our exacto came in the kit with the plastic squeegie thing that we grabbed for $4- so worth it just for that yellow squeegie thing). Hug the window frame tightly as you slowly pull the knife, using the edge as a guide for a perfectly trimmed piece of frosted film that ends right where the window frame begins.
And that my friends is how it’s done. Really, it’s easy! As long as you have an extra person on hand (and aren’t trying to cut your frosted film exactly to the size of your windows- the inch overlap and trimming method really results in the best fit) it should be relatively straightforward.
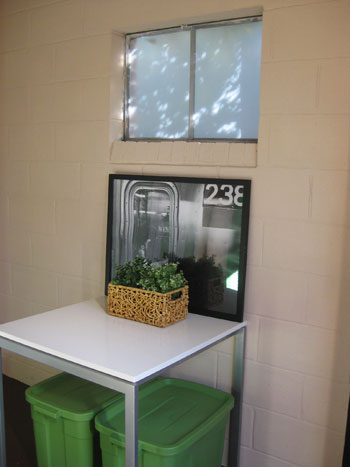
It probably took us less than eight minutes per pane, so we did the entire basement in under 40 minutes. And for $26 we were left with a soft frosted look that gives us privacy without blocking all that pretty daylight that comes in handy when we’re down there looking for something (or, let’s be honest, just standing there admiring our new room).
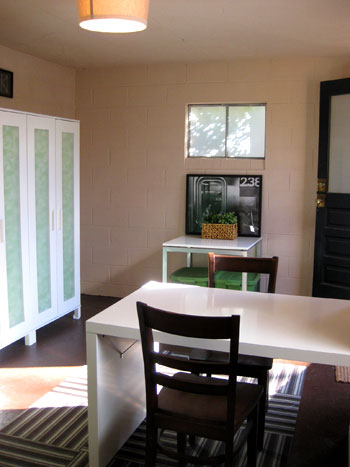
Oh and it bears mentioning that the frosted film is 100% privacy effective. As in, no matter the time of day or the light level inside or outside, you can’t see through it. Which is definitely nice (how annoying would all that work be if it was only semi-effective?). But as you can see from the photo below, the light still streams into the room right through the film.
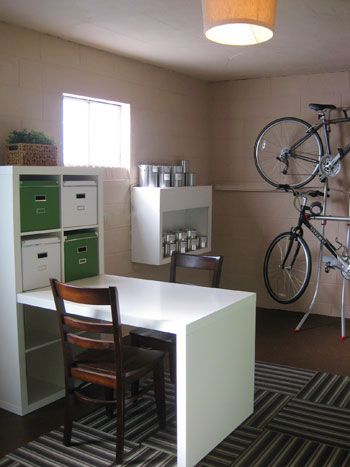
Which is really quite amazing since we worried that it might get dark and spooky down there with the addition of the frosted film. Not the case! So we can still easily admire all the other projects that we’ve completed along with our new “privacy please” windows. Like the paint storage station, the vertical bike rack, the carpet square area rug…
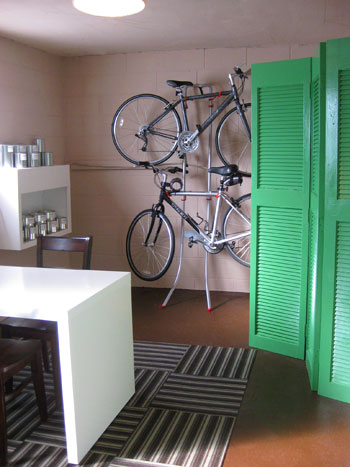
… the new overhead light fixture, the DIY screen, the see-through armoires that we obscured with wrapping paper, and all the other undertakings we’ve slowly accomplished over the last one and a half months.
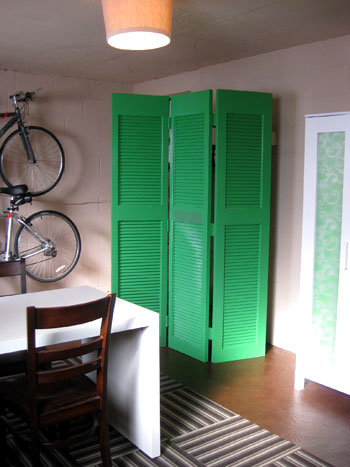
So that closes the door (har-har) on the window-frosting tutorial and the room’s overhaul as a whole.
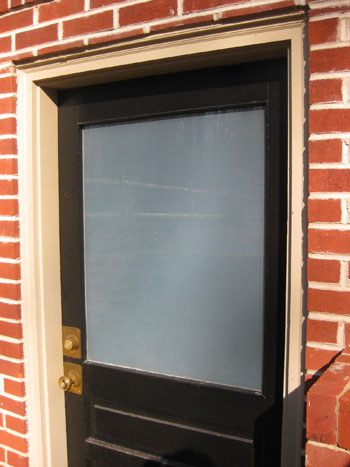
All that’s left is a little basement roundup post full of photos from start to finish and an always-fun budget breakdown that details the entire cost of our latest major makeover. So as we say so often around here, stay tuned…
Oh and we’d love to hear what window-related projects you guys have recently taken on or put on your to-do list. Any fellow frosting film fans out there? Do tell.
Psst- Want to look back on our big basement makeover from start to almost-finished? Here’s the first post, the second post, the third post, the forth post, the fifth post, the sixth post, and the seventh post and the eigth post. Good times.

Hilary says
We got the same kind of film from home depot to frost our Victorian doors without harming the old glass. The instructions on our film specifically said to only use water. We’ve had it up for 2 years now, without any issues.
Emily @ Waldo Bungie says
That is so exciting that you are DONE with your basement! Quick side note though – I saw your tweet that your West Elm store is closing – ours in Kansas City is closing too and I am totally distraught about it! What will I ever do????
Lindsay says
This is a great tutorial! I’ve often thought about doing this in our bathroom since it just seems so dark with blinds, so I’ll have to use this as ammunition for the hubs.
Good stuff!
Lindsay
Kim Hannemann says
Nice.
But I can’t believe you are holding that utility blade with your fingers. When you use a razor blade to scrape, get one of these for $3 or less:
http://www.factsfacts.com/MyHomeRepair/images/RazorBladeScraper.jpg
Jana says
Oooh, I have been waiting for this post. I need to frost a window in my closet (??) but I wonder if this would work.
It’s a circular, port-hole type window, but it is broken up by grids, so the remaining glass pieces are pretty small. Do you think that would be too time intensive to do a whole bunch of oddly-shaped pieces? I wondered if the spray frost might be easier.
Also, does it come off easily? Thanks!! Great work!
Rosie says
Great idea with the window coverings guys!
I think it makes everything look more streamlined and still lets the light come on in.
I have used this type of window film also….on an entertainment center. It was made out of wood and had two glass doors. I didn’t really like the idea of having all the videos, games, etc. being seen and didn’t want to put some type of curtain. So, the window film came to the rescue. It looks great, you can’t tell it’s not textured glass and everything is out of sight.
Keep up the good work. Can’t wait to see what comes up next!
YoungHouseLove says
Rosie- We love the idea of using frosted window film on entertainment doors to obscure video games and consoles. I bet it looks just like true frosted or textured glass!
Jana- If you were diligent we bet you could still do a circular window with lots of panes since you follow along the edge of each pane with the knife so once you cut your frosting pieces down to size they should look seamless- no matter how many there are. As for how long it lasts- basically as long as you want it to. Even in a moist basement or bathroom you’re talking about decades if you’d like it there. Since you push out all the air bubbles and the film has some self-adhesive qualities, there’s no reason for it to peel off unless you scrape at the corners and tug on it when you want to remove it. Hope it helps!
Kim- Yeah I blame my art school days. We used all sorts of razors and exactos (we even used them to sharpen our pencils) so I’m a bit less traditional when it comes to all those holders since back in school we were actually taught how to use them with our hands. Crazy artists! But we definitely recommend following any and all extra precautions (and picking up a razor holder) for anyone who wants that added control and security.
Emily- I know we’re so sad! We hope it doesn’t mean bad things for the company as a whole (we’ll die if they fold) so we’re crossing our fingers that they’re just cutting back locations but will still have online ordering and other further-away stores for us to rely on.
Hilary- It’s great to hear that your film is still holding strong years later! It really is super durable stuff. It’s also interesting that the directions on your film kit expressly said to use water to apply it. We definitely recommend that everyone read the instructions on the specific film they buy before following our tutorial to the letter- just in case there are a few alterations they should make (like substituting the adhesive spray for water). Thanks for the tip!
xo,
s
Leigh says
This is a great idea for keeping privacy AND light. I have a guest bathroom with a small, high window that allows our neighbors to see right in from their second story. I was thinking of using some kind of semi-opaque paint in the window, but this might be a solution instead.
Amanda Wright says
I used this film on our bathroom windows and it looks so much better than mini blinds!
My parents used the spray window frost on one of their windows and it does not look as even. You can see frostier parts of the window where they sprayed more and less frosty parts where they sprayed less. I’d say the film is definitely better than the spray!
Kerry says
Great post – completely relevant to me as we have some plans to frost some french doors around the house. (the previous owner was french door crazy). Just wondering why you picked the film. I’ve heard about some other methods for frosting, like a cream sort of substance you rub on the glass. I was just wondering if you’d looked into other methods, and why you picked the film? Your insight could be helpful when we finally move forward with our frosting project! Thanks! :)
Carly says
You can use Windex as well.
Carly says
We put window tinting on our bedroom window. The huge arch let in so much heat in the summer. It really make a difference. It cuts down on the temperature almost immediately and helps our electric bill!
YoungHouseLove says
Hey Amanda and Kerry,
Thanks for your comments! Amanda’s comment actually explains the answer to Kerry’s question (the reason we go with the film over the spray or the etching cream is because the film is guaranteed to look 100% even while the cream or the spray can get splotchy looking if you don’t apply exactly the same amount to the entire pane). Hope it helps!
xo,
s
Erin T. says
Fabulous job! I guess the next step for the basement is your house tour page? :)
YoungHouseLove says
Erin- Yup, we’ll have to get our before and after pics up on our House Tour page after we publish our last little basement round-up post (with the full budget and timeline so we can link to that from the House Tour page for all the basement details in one fell swoop). Stay tuned…
Carly- Wow! We never thought about the fact that window film could cut down on heat in the summer and save you money on your electric bill! Frosted windows just got even more awesome. Thanks for sharing!
xo,
s
Anna S. says
It’s great to see this room completed! You and John are also relieved I’m sure. I know how big of an undertaking our basement fix-up has been, so kudos to you!
BTW, do you have special plans for use of this room now? With the 2 person desk and storage areas, it looks almost like an office/ consultation room… so I wonder if you thought about using it as such.
YoungHouseLove says
Hey Anna,
Good question! We thought long and hard about the function-factor in the basement and since it’s full of bins and boxes we knew if we were going through them for something we wouldn’t want to have to squat on the floor to sift through things. By adding the desk area we can place things up at counter height and go through them more comfortably. Plus down the line we picture the room transforming into a messy arts and craft room for our future bambinos (since everything is so wipeable it’s the perfect place for finger painting!) so the desk will also come in handy then. And as for the chairs, we’re just storing them down there, but we tucked them under the desk because they look more deliberate there. We probably won’t use them much until our kids use the room as an art area, but chair storage never looked so good. Haha. Hope it helps!
xo,
s
Nicole RJ says
I’m glad to see just how easy that film is to apply… once we’re finally finished painting I plan to do all the little windows in our basement door!
Colette says
Plus, now you can admire your basement in the buff and no one will be the wiser…
YoungHouseLove says
Haha, so true.
xo,
s
Sharon says
You can also get window frosting in a spray can. I used it on the door into my garage and on a kitchen door that looks at a wall. … really easy to use.
Loren says
I am speaking from ‘spray can frosting’ experience, it is hard to get on even, scratches easily and is a PAIN to remove. I washed and scraped for hours and still had some on the window when I tried to remove it. Also it smells awful… I would not recommend the spray frostings.
I’m just guessing here, but this film seems like it would be easy to remove if you ever changed your mind about the way it looked. It also seems like slightly more trouble, to begin with but looks SO much better than the spray on stuff I used.
YoungHouseLove says
Hey Loren & Sharon,
Thanks for sharing your experiences! Hopefully they’ll help other people decide between the spray can frosting alternatives and the film.
xo,
s
tricia says
Your frosted window and door project turned out great! The wheels are turning now that you mentioned putting this on the bathroom windows. I used this same window film on our back doors. The instructions suggested you could use water mixed with a small amount of dish soap instead of the store-bought solution. It has held up for over 5 years now with no problem. I’m so glad I don’t have to clean finger prints and other toddler and doggy grime from our french doors every other day. Here’s a photo of one of our doors with the Gila frosted film.
http://www.flickr.com/photos/44022801@N04/4190528670/
Janell Beals says
What a great solution, I’d definitely would have been concerned it would make the space feel too closed in, being a basement, but still seems to let the light in well.
Janell
Heather says
Hey Guys! We put film on our back door for the same reason, privacy without loosing the light! And we have a really pretty stained glass film in our living room because we had a small window that was used for an air conditioner before we moved in! Now it is a great conversation starter!
Erin S. says
Thanks for the great tutorial. I plan to refer to it in the future when we build our new bathroom. We took a door (it was actually the door to a bedroom, but the bedroom had been an addition so originally it was a door to a patio) that has five glass panels in it from my grandmother’s house. Of course since this is to be a bathroom a mostly glass door isn’t optimal, so my plan is to use the frosted film. That way we should still get plenty of light in that hallway, and I’m a sucker for light.
Leigh says
We used the exact same kit on the sidelights around our front door– super super easy.
Christin says
Looks great!
We have a window in our kitcehn and on the back door that leads out of the kitchen and down the back steps of the building (apt building). The previous people had blinds handing on the door and the window. I’m really againt blinds in the kitchen because they get REALLY gross with stuff from all the cooking. These ones were nasty! So we took them down and we used a spray frost on the windows. We get light (though not much only because of the stairs and it’s the back way so not lots of light gets in) and we have privacy from any neighbors walking up or down the steps past our door. The spray was super easy! All we did was tape off what we didn’t want sprayed, like prepping to pant. Then spray – and air out the room. Voila!
Christin says
I just saw the post of the person who didn’t have a good experience with the spray frosting. That’s too bad! Maybe it depends on the kind. I don’t know, but our experience with it has been great.
Lisa says
It looks great! Here’s a crazy question for you. My husband and I are considering a similar project. Although ours would be for a window that’s in our bathroom shower(what were the builders thinking?!) Not to mention, we’re in a built up community where the houses are big and the yards are small, so there’s little room for error. The window is currently sporting some dingy (and wet) blinds so as to prevent us from flashing the neighbors and we’re pretty desperate for an alternative but don’t have the budget to replace the window or remodel the bathroom. Is the film obscuring enough for a bathroom shower or would we risk being risque?
YoungHouseLove says
Lisa- Our Gila film says “100% privacy” and definitely isn’t the least bit sheer on our windows so we’d venture to guess that you’d be totally covered in there! Of course it’s worth testing (while fully clothed) just to be sure!
Nicole- Wow! That’s a real DIY solution you whipped up. As for the film, it’s totally removable but it won’t come loose over time unless you’re digging at the corners and trying to peel it off so it’s the best of both worlds (secure for the long haul, but not scary-permanent). Hope it helps!
xo,
s
Nicole B. says
Looks great! Is the film removable? It looks like it could be…
We are in a flat and the back door has windows so you could see straight through our home. I was tired of the neighbors getting a looky in the morning while on their way to work (uh, not a good way for them to start their day… haha!). I used contact paper and a white out pen… works similarly but at a fraction of the cost since we are renting. I don’t think it would hold up as well on a window like your basement or in a bath, however, since it gets a lot of moisture in those locations.
Here… take a look… http://thelittlestmonster.blogspot.com/2009/08/new-look.html
Amanda says
I like! I did glass block in my shower for privacy, but it was such a pain I should have just installed a regular window and frosted it!
Amanda says
I just saw Lisa’s comment- I’m with you in the shower in the window- WHY??? I did a lot of research before deciding to go with glass block (and by the way, when you do get to the point of replacing it I highly recommend it even though it was quite a feat. But it’s awesome for all that water- no tracks and mold to worry about). I saw all kinds of things online about people who made a small shower curtain to hang over the window, etc. I spent many hours googling “shower window” so you may get some ideas from doing that. And if you want to see my new glass window and my moldy old wood one it’s over at my blog! ;-)
Melissa Arlena says
For our wedding we asked for Lowes giftcards to replace the old wooden 6 panel glass windows in our home. My grandparents thought we were so responsible to be putting money into our home. We replaced all 8 windows start to finish on our own! We saved at least $1600 by installing them ourselves and any questions we had were answered by a quick call to my Dad who has been in construction for over 25 years. I think that is why I have no fear tackling projects around our home and why all the power tools are mine ;)
Caitlin says
Looks great! I’m also surprised how much light it lets in; that’s great!
Jamie says
I have a window in my bathroom that I wanted to use this film on- it’s right in the shower, so not ideal! My Dad applied the film without any problems and we have a lot left over incase any other windows need covering! I’d recommend this method to anyone who wants to let light in but keep their privacy intact!
Juliet Robinson says
It looks great! I love this idea. I used window film on my basement apartment door and it turned out really nice. I tried using it on a 100-year old window and learned that it is REALLY important to get every speck of dirt and dust off the window, especially at the edge where the glass meets the frame. When you get the window wet, any dust that is in that crack gets pulled out onto the glass and impedes adhesion.
I also had a really hard time getting the 1″ overlap of the film cut away cleanly. I used a razor blade and a ruler as a guide but the cut edge was sort of rippled and jagged in places. Any idea why that might have happened?
Keep up the good work, the basement looks fantastic!
YoungHouseLove says
Hey Juliet,
Good question! We actually think it may have been your use of the ruler as a guide when you were cutting the edge. Since the window might not have been perfectly straight (or your ruler might not have been perfectly level) we just suggest following the edge of the window snugly and slowly with the razor without a ruler or straight edge. The exacto can actually tuck into the frame of the window and the window pane and hug that edge for a perfect cut every time. Hope it helps!
xo,
s
Katrina says
I love froted windows! When we first bought our house the glas in the door was broken so we replaced it with frosted glass it lets so much light in while remailing private
heather s. says
I applied film to my back door this summer (http://athomewithh.blogspot.com/2009/07/film-it.html) as well. It is great for privacy and there are some great patterns available if you want something a little more fancy.
I know with my brand, you were instructed to use water as someone previously mentioned. It should also be noted that you spray water on the film once it is on your window so that your squeegee can glide across the surface easier to remove bubbles. I didn’t see that mentioned in your steps above.
YoungHouseLove says
Hey Heather S,
We actually did mention spraying both sides of the frosted film (just before applying it instead of after) to help the squeegie glide. But spraying it after it’s on the window would also definitely work! As for the water tip, that’s so interesting to us since both of our window frosting experiences suggested either soapy water or the application spray. It’s another good reminder for people to read directions for their specific film and not blindly follow our tutorial if it contradicts the manufacturing instructions! We’ll even put a little note about some frosting products just calling for water in the post. Hope it helps!
xo,
s
Robyn says
You two are always so busy! It inspires me to get more done around my house to make it mine. :) Love the idea & I think I might apply it to my basement windows too! Thanks for all the tips. -Robyn
Amanda Sevall says
Love how your basement turned out!! So glad you showed all the different steps and projects. We just frosted our garage door windows and love how it looks from the inside and out. :)
Alan says
Cleanest. Basement. Ever. Wow!
Amanda G says
Great post once again Youngsters! My question is really for the people above who mentioned using the film in their shower window. My bathroom currently has a window in the shower (awful!) and we don’t really want to get rid of it since it lets in so much light. We are about to retile the shower and tile around the window so we don’t have a moldy wood casing any more. Does the water in the shower affect the film in any way? I assumed that it would just peel off with the moisture in there but would love some real world input! This would be an ideal solution for me!
YoungHouseLove says
Hey Amanda G,
Our frosted bathroom window definitely got its fair share of condensation and moisture but it held up perfectly! Of course it wasn’t actually in our shower so that’s a good question for anyone out there with that situation. Anyone have advice for Amanda?
xo,
s
Lisa says
Random question – When you painted with the fumey Drylock, did you shut off your water heater? I guess I should ask if your water heater gas or electric. I am wanting to Drylock my basement foundation as well, but my hot water heater is gas and I was wondering if it would be dangerous with all the fumes down there…I am paranoid I know! Thanks! Love your projects!
YoungHouseLove says
Hey Lisa,
Our water heater is actually electric so we didn’t shut it off but we have heard that severe fumes (and Drylok certainly qualifies) can make old gas water heaters ignite and even explode so it’s probably a good idea to be safe! Hope it helps.
xo,
s
oana says
That looks like a lot of work! We wanted our bathroom windows to be more private, so we just bought some fake glass etching spray (it just sprays a very light, foggy sort of white stuff) and applied it to the window carefully. It can be scraped off with a blade, like all paint, but it works very well.
April says
We turned a room with no purpose into our bedroom, the only problem was that it was right beside the living room with french doors! The people who lived there before had put up lace curtains. Not for me. So I put up the film too! Now mine aren’t 100% private. If the lights are on in the bedroom and you’re changing right in front of the door, you can kind of see. Or if you are my husband and stick your bottom directly on the doors you can see it…but normal people don’t do that.
jbhat says
You guys are so handy, so clever, so tasteful, so thrifty, so helpful, so inspiring. Love this project and its outcome, Youngsters. You guys are great.
Ursula Graham says
Oh nice!! We have film in our bathroom from the previous owners but it’s a stained glass design and doesn’t let much light in, I think I might be taking it off and switching it to this soon. :)
Emily @ Waldo Bungie says
I talked to a manager at West Elm and she said that they are closing three stores in the U.S. (unlucky for us they are in our towns!) and opening a flagship store in Chicago. So, it sounds like they aren’t doing too badly, it still stinks though that they are closing. Our store was just in a bad location and most people in KC didn’t even know it existed! :(
YoungHouseLove says
Hey Emily,
Thanks for looking into that for us! We’re beyond relieved. We love WE!
xo,
s
Ann says
Great idea about frosting the entertainment center doors. I’m going to try that as well as on my built-in kitchen china cabinet since my dishes really aren’t pretty enough to be displayed. Also will put it on the bottom half of my 2nd floor bathroom windows. (Yes, people on the ground can see up and in!)
I also like the idea of using in on glass that constantly needs cleaning. In my case, we replaced the door to our basement with a glass paned door which brings light to the stairwell and makes it feel as if the finished basement is more a part of the house. Cleaning all of those panes of fingerprints and nose prints is, however, getting old. Thanks YHL and everyone else!
Addie says
I’m actually a little disappointed… I thought you would cut out a little shape (like a branch with berries or something) before putting up the film. That’s what I imagined when you said you’d be doing a little window-film project. Oh well. I guess I’ll have to frost my own basement windows! :)
YoungHouseLove says
Hey Addie,
We debated using thin pinstripe tape to create a pretty little frame around each pane, but in the end we just thought 100% privacy was the way to go (since the windows are at ground level, so if we left any areas of unfrosted glass someone could put their peeper up to that spot and peer in). Hope that helps to explain our end result. And we’d love to see pics of your berry-branch frosting project! Good luck with it!
xo,
s
Sarah says
Love the Gila window film! Over years of apartment living we’ve used it on front and back doors that had windows to shared spaces and now we having in the window that’s IN our shower. The previous tenants had two shower curtains, one over the window and then a normal one, but it blocked out all of the light and gave you the feeling of showering in a plastic bag, gross. Now we have tons of light and plently of privacy, but it’s easily removed later if the next tenants don’t like it. We also really like it for people that live in garden level apartments or the bottom half of first floor windows! Love your blog & can’t wait to see the bathroom!
Jacci says
It looks really great, guys! I wonder how easily it comes off again (?), I assume fairly easily – but, do you know for sure? We’re planning on putting a french door in the family room, but it will be the door leading to SpareOom (which is a disaster area work room right now). We don’t want to be looking at a circular saw through the french door, you know? BUT, we definitely want to be able to see clearly through the french door after SpareOom gets its makeover. This post might be just the answer as long as that film comes off clearly. Thoughts?
XO,
Jacci
YoungHouseLove says
Hey Jacci,
Good question! It stays on really well when you want it to (we’re talking decades) but if you’re interested in removing it just pick at the corners and pull it off. And of course you can take a straight-edged razor to the window to further remove any adhesive or spots of stubborn frosting but it should be pretty easy to undo whenever you want to!
xo,
s
katie says
we replaced our bathroom door (it was louvered… yikes) with one that we found at an architectural salvage place. i wanted one with glass because both the bathroom and the hallway it is off of are small and i wanted more light in both areas. we ended up frosting both sides of the glass for extra privacy – i also might cut some letters (bath, or wc, or something like that) into the film. i love how it turned out! here are some photos:
before: http://five2eight.blogspot.com/2009/08/come-and-knock-on-my-door.html
after: http://five2eight.blogspot.com/2009/09/bathroom-door-98-done.html and http://five2eight.blogspot.com/2009/10/done-with-hallway.html
we also used the film on our basement windows last year and it has held up great.
YoungHouseLove says
That turned out awesome Katie! We wish out tiny bathroom had a frosted glass door. So great!
xo,
s
kelly@TearingUpHouses says
your windows turned out great! and so much less expensive than replacing the glass.
i’d thought about doing this before, with doors that needed more privacy, but wasn’t sure how it would turn out. i’ve seen others do the spray, and it looked really uneven and cheap.
i’ll have to keep this film in mind.
kelly