We’re back to share a quick and easy window-frosting tutorial as promised last week. We knew our basement windows were completely devoid of privacy and therefore could use a bit of cover, but we didn’t want to hang heavy blinds that we kept perpetually closed since that would definitely rob the room of tons of light. Enter the idea of window film. We actually used it to frost our original bathroom window after we moved in. Then we later replaced all of our windows and realized our private backyard didn’t provide a good view of the bathroom since it’s up so high, so we opted not to redo the frosting treatment afterwards. But the basement is certainly a lot easier to peer into than the bathroom, so out came the idea of window frosting film again.
We snagged a roll of it at Home Depot for $18.98 (we needed just one to do both windows and the large pane of glass in the door). Oh and the brand was called Gila if that helps anyone. We also grabbed a spray bottle of film adhesive along with a a tool kit complete with a squeegie-ish device and a knife to help with the application for seven more bucks. So for $26 we added privacy without blocking all the light that filters into the room and makes it feel less cave-like and dungeon-esque.
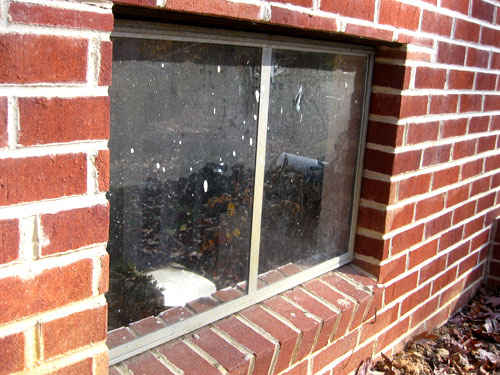
But before we got to the frosting fun we had some seriously dirty windows to deal with. Not only were they coated with dust and grime, they actually had Drylok spatters all over them (both inside and out- go figure!) so first we had to get them cleaned up and ready for their close up.
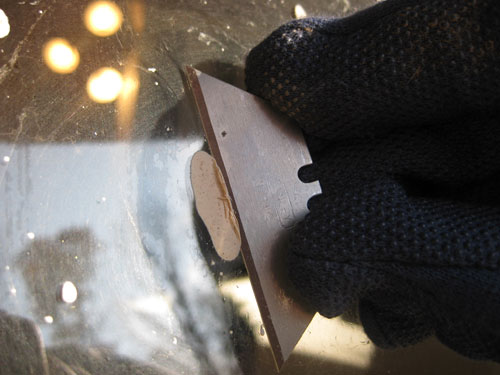
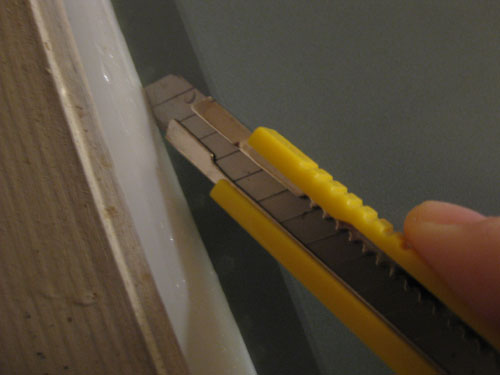
All the splatters were no match for a straight edge razor, which we always recommend using with extreme caution. Fingers are kind of important when you’re as obsessed with painting and projects as we are, so we guard ours with our life. Grippy gloves can help as long as they’re tight enough to feel snug and not cumbersome, and the best approach is always slow and steady. Of course you can grab a utility knife holder for even more control (which we recommend for your safety- this photo is just a pic of our process, not our suggested approach for others). So be extra safe, take a deep breath, channel the tortoise (as opposed to the hare), and watch that paint come peeling off!
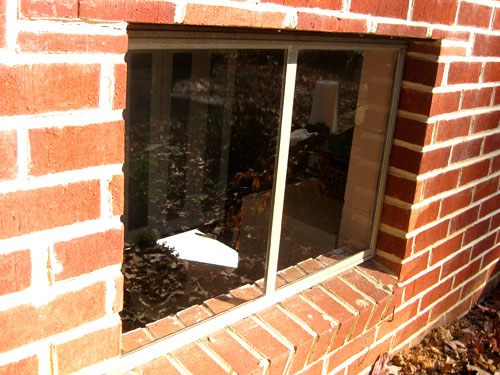
You should be left with pretty darn clean windows, and following your little razor session with a glass cleaner wipedown should be all the prep you need. Basically you know you’re ready to frost your windows when they look so sparkly that it almost seems wrong to cover them up with anything. They’ll gleam like diamonds I tell ya.
But frost them you must (well you don’t have to, but in our case it was definitely the way to go). So the next step is to carefully measure each pane of glass that you want to frost. This is important because you’re not measuring the entire window if it’s made up of two side by side panes (like ours is above), so be sure to measure each glass pane individually, no matter how many there are in each window.
Then add an inch on each side of those measurements, so if your window is 15″ wide by 20″ tall you will write down 17″ by 22″ (an inch on each side means adding two inches to each measurement). Then it’s time to whip out the roll of frosting film from the box. It’ll look like a long roll of white wrapping paper with a shiny clear side and a more matte frosted side. Now’s the cutting and measuring part. Grab a ruler (or a t-square if you have one on hand) and measure and cut boxes out of the film that meet the measurements that you recorded (the ones with extra inches on each side, not the exact measurements of the windows). You can either use a pencil to trace each box out onto the matte frosted side and then cut them out OR just cut without drawing anything out (being sure you end up with a box that’s pretty close to the larger measurements you recorded).
After you cut out a slightly oversized square of window film for each pane you’re ready to separate the film from the glossy plastic backing, which can easily be done by placing a piece of tape on each side of a corner (being careful not to let the tops touch or they’ll just stick together completely). They should each adhere to their respective side so you’ll be able to use them to separate the frosting film (seen below on the left) from the clear plastic protective backing (seen on the right) which won’t be applied to the window in the end.
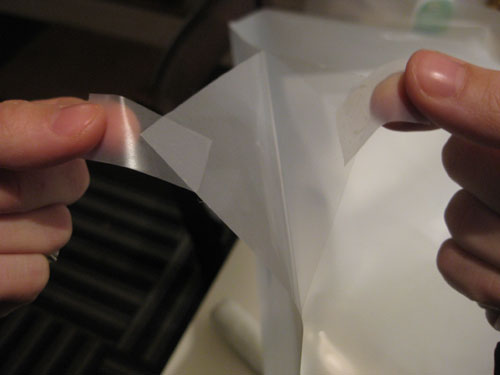
So go ahead and pull those two layers apart about halfway down the square until it looks a little something like this:
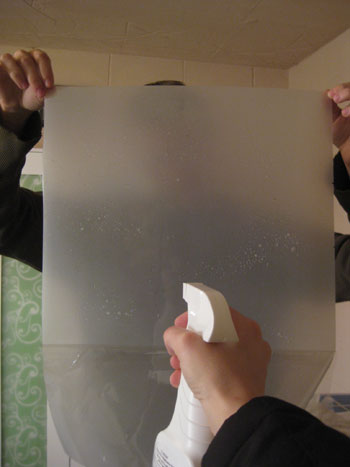
It definitely helps to have two people for this job by the way. That way one person can hold the half-peeled film up while the other sprays the window and then both sides of the frosted part of the film with the application solution (ours was called Gila Window Film Application Solution by the way). Note: we’ve heard you can forgo buying the application spray and just fill a spray bottle with water and a drop of dishwashing liquid, but since we didn’t have an empty spray bottle and use eco-detergent (which we weren’t sure would work since it’s plant based) we opted to just buy the Glia solution for $3.50 since it was cheaper than buying a spray bottle and more mainstream dish detergent). We have also heard that some frosting films only require water to adhere them, so be sure to read the directions included with yours.
Once the window and half of the back side of the frosting film (as shown in the image above) is adequately misted (along with the entire front part) it’s time to apply it to the window pane. Thanks to the inch of leeway on each side of the film there’s no worry about placing it perfectly and you can easily trim things down to a perfectly snug fit once you get them more securely in place.
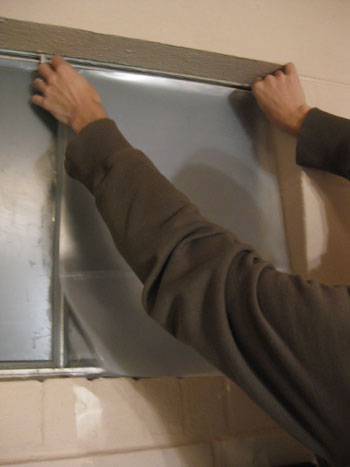
The film should stick pretty well to your window, but won’t look seamless at all at this point. Oh and you can pull off the other half of the clear plastic film (while someone else holds the frosted piece in place from the top two corners of the window). Now the only layer on the window is the frosted film with about an inch of overlap on each side. You’ll see tons of bubbles and streaks but fret not.
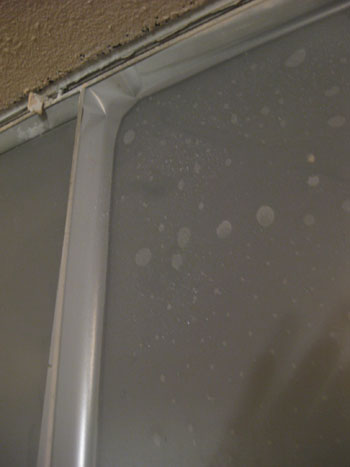
Here’s where the fun plastic squeegie-thing comes in handy. Just glide it across the window film to push all those dastardly bubbles out to the edges of the film (where they’ll magically disappear). Do this for as long as it takes to remove all the bubbles for a near-perfect and seamless look (except for that extra inch of film around the edge of the pane). It’s worth noting that the edges of the film might look a bit bubbled and won’t form a tight seal on the window until they’re trimmed down to fit, so don’t worry about a little imperfections around the perimeter of the pane, just get the rest of the window looking great.
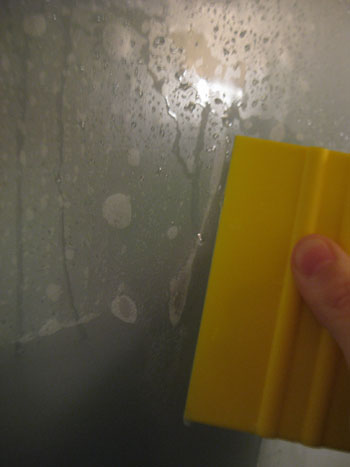
Then take an exacto knife and carefully place it firmly between the edge of the window pane and the window trim (our exacto came in the kit with the plastic squeegie thing that we grabbed for $4- so worth it just for that yellow squeegie thing). Hug the window frame tightly as you slowly pull the knife, using the edge as a guide for a perfectly trimmed piece of frosted film that ends right where the window frame begins.
And that my friends is how it’s done. Really, it’s easy! As long as you have an extra person on hand (and aren’t trying to cut your frosted film exactly to the size of your windows- the inch overlap and trimming method really results in the best fit) it should be relatively straightforward.
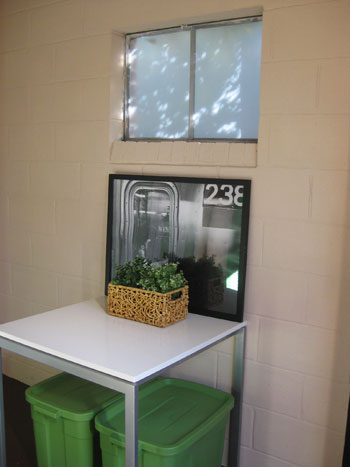
It probably took us less than eight minutes per pane, so we did the entire basement in under 40 minutes. And for $26 we were left with a soft frosted look that gives us privacy without blocking all that pretty daylight that comes in handy when we’re down there looking for something (or, let’s be honest, just standing there admiring our new room).
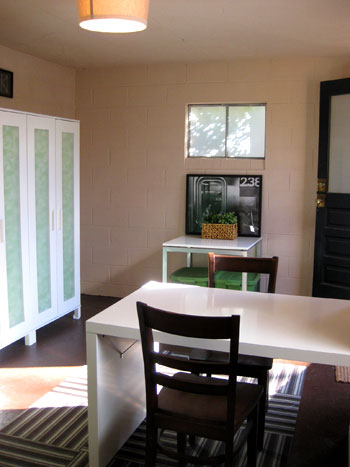
Oh and it bears mentioning that the frosted film is 100% privacy effective. As in, no matter the time of day or the light level inside or outside, you can’t see through it. Which is definitely nice (how annoying would all that work be if it was only semi-effective?). But as you can see from the photo below, the light still streams into the room right through the film.
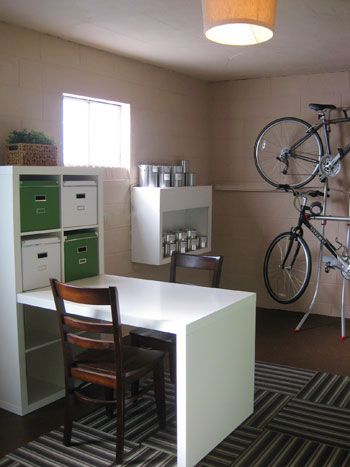
Which is really quite amazing since we worried that it might get dark and spooky down there with the addition of the frosted film. Not the case! So we can still easily admire all the other projects that we’ve completed along with our new “privacy please” windows. Like the paint storage station, the vertical bike rack, the carpet square area rug…
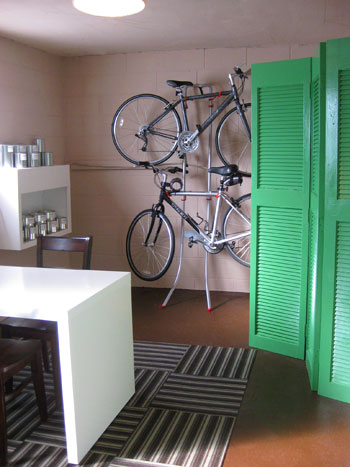
… the new overhead light fixture, the DIY screen, the see-through armoires that we obscured with wrapping paper, and all the other undertakings we’ve slowly accomplished over the last one and a half months.
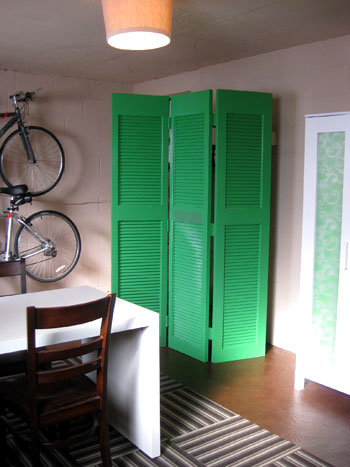
So that closes the door (har-har) on the window-frosting tutorial and the room’s overhaul as a whole.
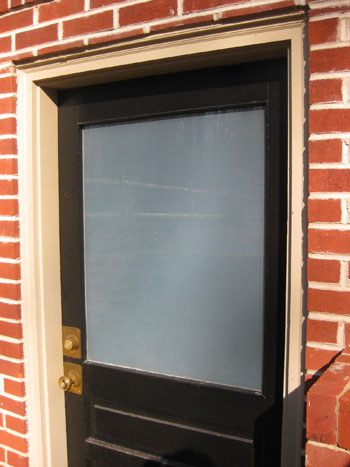
All that’s left is a little basement roundup post full of photos from start to finish and an always-fun budget breakdown that details the entire cost of our latest major makeover. So as we say so often around here, stay tuned…
Oh and we’d love to hear what window-related projects you guys have recently taken on or put on your to-do list. Any fellow frosting film fans out there? Do tell.
Psst- Want to look back on our big basement makeover from start to almost-finished? Here’s the first post, the second post, the third post, the forth post, the fifth post, the sixth post, and the seventh post and the eigth post. Good times.

Kara says
It looks great! You guys make this look way to easy. I can’t believe what a difference you guys made in the basement without spending big bucks.
Leanne Diggett says
I have a question, and you may have already answered it. Is that just a lamp shade that you hung on the ceiling. I want to do something very similar because I have too low of ceilings in my living room for a pendant but I want a shade pendant look.
YoungHouseLove says
Hey Leanne,
Yup, we just hung a table lamp shade on a ceiling bulb (the bulb holds it up in place). Here’s the post about it: https://www.younghouselove.com/2009/11/tackling-the-basement-chapter-five/
Hope it helps!
xo,
s
Denise says
Sherry,
This is a question about your glass cleaning technique. Many thermal window manufacturers warn against scraping windows. Is it safe to do so as long as you wet the glass well before scraping with a razor? I can’t think of any other way to remove specks of paint and other compounds except with a blade. I guess the concern is scratching the glass with a razor. Do you and John have a tutorial or post on window cleaning?
Your basement looks awesome and I love the green accent color!
YoungHouseLove says
Hey Denise,
Eeks, we don’t know! We haven’t scraped our new Low-E windows with a razor (although we thought the tinting was inside of them, not on the outside panes). We’ve just done it on the old basement ones that we didn’t replace. Hmm, I think it’s best to call your window manufacturer and heed their advice. Definitely don’t take a razor to them if they don’t recommend it! As for how we clean windows, there’s a great homemade window cleaning formula that we love in this post: https://www.younghouselove.com/2009/10/clean-up-your-act-all-natural-homemade-cleaners/
Hope it helps!
xo,
s
Greg Smith says
Timely post, I need to add some of this material for my master bathroom’s transparent window.
Also, glad to read a post that does not describe the product as “super”.
YoungHouseLove says
How did I not get a super in there? I must be having an off day.
xo,
s
erin says
I can tell you that even after 4+ years of direct sunlight, the film still comes off pretty easily although sticky on the backside. I put up the sunlight-blocking window tint that Gila makes on the west-facing slider doors in our old apartment so we didn’t have to run the AC 24/7 during the 100′ summers. It instantly felt about 15′ cooler in that room, and when we moved out I just grabbed a squirt bottle of water (or you can use the remaining solution) and started peeling and then cleaned the window with glass cleaner. Our apartment manager was none the wiser of our “remodeling” project. :)
YoungHouseLove says
Hey Erin,
That’s great news for Jacci! Thanks so much for sharing. It’s nice to know when something can easily be “undone” when you’re over it!
xo,
s
Pilar says
Did you consider Ikea’s AMORF Frost window decoration? It is so much cheaper than the Home Depot version, but I do want privacy in my bathrooms! Your basement looks great, and I love the green accents!
YoungHouseLove says
Hey Pilar,
We actually didn’t consider Ikea’s window frost because the closest one is about 2 hours away. So unless we’re going there for a major furniture piece it’s not really a spot where we grab things like accessories (unless we happen to be in the area). But it’s great to know that they have window frosting film for anyone looking for an alternative to the stuff at home improvement stores. Thanks for the tip!
xo,
s
Melissa says
Wow! I’ve been waiting for this post for forever! Ikea also sells window frost (but it is much narrower) called Amorf Frost! I used it for my kitchen window. Just a couple of tips for people who are thinking about frosting: don’t use a ruler… it will mess the whole thing up and this is ALWAYS a two person job, no matter how small (it always helps when taking the film off of the liner).
J & S, you guys did a fantastic job!
Rocio @ Casa Haus says
Hi guys! I love the way you transformed your basement. Really looking forward to the nursery now. By the way, congratulations on the baby! I’m so excited for you!
Hilary says
I’ll second the spray etch – about $2 and I have covered the lower half of all of the windows on the front of my house (only 3 window) really quickly. Each window has the small panes with wood dividers (old windows)and it would have taken forever to put film on them. I probably wouldn’t use it in a bathroom because I think it would become transparent again with water but otherwise it’s super fast and can be scraped off with a razor as well.
And speaking of razors, they make these nice little plastic straight edge holders that make using a razor like you did much easier to hold as well. Well worth the couple of bucks there. “Stanley 28-100 1-3/16-inch High Visibility Mini-Razor Blade Scraper” Might be other brands out there but at least you can tell what I’m talking about with this one.
Dana says
Way to go! The diffused light shining through is really appealing. We haven’t tackled any window frosting in our home; however, I did customize some ready-made roman shades from JCPenney by adding a thick ribbon border. I was trying to mimic the ones at PB that I couldn’t afford. They turned out great and I did 5 of them in our sunroom for HALF the cost of ONE at PB!
Eric says
Hey! I did the same thing this summer to an inconvenient window that was located in our shower. Same kit, same store, same deal. Before, the window was covered with the equally hazardous and hideous ivory blinds.
It wasn’t a lot of work to do, but make sure that you do it all in one stint. The packaging says that it can stay on for an hour and still be moved, but it didn’t work out that way.
Elisa @ whatthevita says
I’m reading this post and thinking, wow. They’ve completed a whole room in what seems like a few days. I’ve been living in my house since March and I haven’t completed ONE room. At least I completed my first furniture project. Baby steps, right? :) You guys are great role models. Awesome basement. And loved loved your response to the comment about the “super” – bigtime LOL.
Sarah says
We recently used a similar product to frost the annoying window next to our front door! We have an open plan living space, and anyone visiting our front door could see straight into the lounge room, and possibly me sitting on the couch in my pjs! It was tricky trying to get a perfect result, but I am so happy we did it as we now dont have to answer the door to salespeople!
Leanne says
Thanks for the tip!! I am off today to purchase a table lamp shade for my living room :)
hishouse;herhelp. says
this is a great tutorial, thanks! the house i am renovating w/ my boyfriend currently has several windows that look like they’ve been straypainted over with some sorta of frosty-looking spraypaint. it’s all uneven, splotchy, hideous! i wish they had done something like this. we’re going to have to scrape it off… aughhhhhhh!
Holly says
Hey guys, we own a window cleaning business out here is Arizona so we deal with a lot of construction cleanup (things like paint, concrete and slag can work a number on your windows!) I just wanted to leave a note about using razors one windows:
Usually the uv protective film on (especially on) newer windows is on the outside, despite the fact that it is supposed to be on the inside of double-paned windows. This is a defect in the window that is rarely caught by inspectors or homeowners, but razorblades can leave nasty scratches as you scrape your windows. Another way to clean them that is safer for the film is to use soapy water and very VERY fine steel wool. It might take a little longer, but you don’t run the risk of damaging your windows!
If that fails you really are better off calling a licensed and bonded professional window cleaning–they money you spend on having a pro help you is always cheaper than replacing windows you damaged with razorblades!
YoungHouseLove says
Hey Holly,
Thanks so much for the tip! That should definitely help anyone with newer UV protected windows (us included, just not in the basement)!
xo,
s
Annie says
I love this! After reading your post on Carrie’s Design Dilemma, I quickly recognized her apartment as the same complex I live in in the DC area. I live in the sunroom of our place too and covered the sliding glass doors with the window film. It stretches nearly to the top, which still allows light to come into our living room area AND it creates a very calming effect in the room.
YoungHouseLove says
We love frosted window film! What a great idea!
xo,
s
caitlin says
so, uh, did your film come with any detailed instructions on getting it OFF The window? I moved into a place that has some less pretty privacy film on many windows… It’s really on there! I can’t find too much info on how to remove it except to scrape it off. Any other suggestions? I might try some enviro-friendly paint remover.
YoungHouseLove says
Hey Caitlin,
Your windows might be covered in spray frosting, which is a lot harder to remove. The frosted film can just be sprayed with soapy water and peeled off from one of the corners. According to others who have removed it, it’s actually really simple. But yours might actually call for paint stripper or even a razor if your windows were sprayed. Hope it helps!
xo,
s
Tammy says
A fellow Richmonder here. I was at the newly re-opened InfuZion for lunch yesterday (awesome restaurant, highly recommend!) and noticed they have this treatment on the windows on the Roseneath side, I guess to hide the otherwise ugly few. They looked great. I have a pair of french doors leading to my deck where the condensation barrier is breached, so the windows always look dirty. I was going to use the spray frosting, but this looks so much better. Can’t wait to try it! Thanks!
Tammy says
Ugh, typing too fast — I meant to say that the restaurant used the stuff to hide the VIEW, not the FEW! Engage brain next time, Tammy!
Kelly G says
I too have used the Ikea frosting film in my bathroom. It easily applies with only water and has stayed on for over a year now without peeling or bubbling. At a mere $5 I can’t complain at the price either! I highly recommend using a frosting film. It has certainly given a very clean and modern look to our bathroom without sacrificing privacy or much needed natural light.
YoungHouseLove says
Great to know Kelly! Thanks!
xo,
s
The Fabric Floozie says
Awesome!
Our latest window project was taking a weirdly small, and way-to-high-up-the-wall kitchen window and making a larger window, by cutting down the wall, framing it out, and installing a whole new window
http://www.thefabricfloozie.com/?p=131
Colleen says
Oh my goodness thank you for this post! I actually have a roll of the same stuff sitting next to my front door to return because I chickened out after reading the instructions and didn’t think I could do it. We have a front and back apartment door with 6 panes each that need something for privacy but we hated covering them up with curtains or mini-blinds. I’m feeling much more confident now, and will grab the application kit at Lowe’s this weekend. Thanks again, guys! :)
Elizabeth says
I love the basement makeover. I’m curious, what are you looking to use the room for? I notice the desk, are you going to use the space for design consulting?
YoungHouseLove says
Hey Elizabeth,
Good question! We thought long and hard about the function-factor in the basement and since it’s full of bins and boxes we knew if we were going through them for something we wouldn’t want to have to squat on the floor to sift through things. By adding the desk area we can place things up at counter height and go through them more comfortably. Plus down the line we picture the room transforming into a messy arts and craft room for our future bambinos (since everything is so wipeable it’s the perfect place for finger painting!) so the desk will also come in handy then. And as for the chairs, we’re just storing them down there, but we tucked them under the desk because they look more deliberate there. We probably won’t use them much until our kids use the room as an art area, but chair storage never looked so good. Haha. Hope it helps!
xo,
s
Sally says
Thanks for the tutorial. I’m going to try this out for my half-bath, whose small window faces the street.
In my former home I had windows like this at ground level. I live in an urban area and was concerned about how easy it was to break in, especially since the basement had stairs up to the house. In fact, the previous owner had boarded up two of the three windows for this reason. I had custom glass block windows made for $99 each. I then paid to have it installed, but in retrospect could have DIY’ed it. I got glass that was difficult to see through (privacy…check) and and felt the windows were no longer my weak spot (security…check). Thought I’d mention it for others in less secure neighborhoods!
YoungHouseLove says
Great tip Sally! Thanks for mentioning it!
xo,
s
Coline Bettson says
Beauty ! Thank you for easy, clear step by step instructions.
I will try window film too – saw some ” Tiffany” stained glass film – lovely stuff.
Coline in Canada
Jenney says
Thanks so much for putting up this tutorial!! I decided to frost the windows in my upstairs bathrooms (no more cheap plastic blinds, yay!) and your blog really helped with picking the materials and getting started. And now my windows look great :)
Your blog is definitely educational and inspirational. Keep up the good work!
YoungHouseLove says
Hey Jenney,
We’re so glad to hear that our little window frosting tutorial came in handy! We excited that you’re enjoying your “new” windows and we’re so glad you were able to DIY them with our help!
xo,
s
Christina says
I frosted the window on our front door. I made certain there was no excess paint on the window before positioning the film. However, because the paint around the glass on our door is old, when we put the film up, some paint flakes made there way onto the glass and under the film. I would suggest either sanding down flaking paint or re-painting the door before frosting the window.
YoungHouseLove says
Great tip Christina! Thanks for sharing.
xo,
s
Basement Windows says
Thank you for posting these tutorials. They will come in very handy on my basement window project :)
antonia says
I have a translucent vinyl curtain hanging in my first floor bathtub window. I’d like to take that curtain and cut it to fit the window panes, and adhere it to the glass. Maybe spray adhesive? Can you suggest a product that would stand up to humidity and steam? Thanks!
YoungHouseLove says
No idea! Maybe visit a craft store or home improvement store to see what they have. We don’t think spray adhesive will stand up to the humidity in there. Good luck!
xo,
s
suzie dyer says
Hi:
I was hoping this was the post I was looking for, but it wasn’t! Bummer. I am looking for the tutorial you had on etching glass. Didn’t you etch just about every glass bottle and jar in your house? Would you please direct me to that post?
Thanks
Suzie
YoungHouseLove says
Hi Suzie,
Perhaps you’re thinking of someone else? We haven’t actually tackled an etching project yet (although it’s on our list!). Sorry we can’t point you in the right direction here on YHL, but maybe you’ll have luck googling around for something? Happy hunting…
xo,
s
Abby says
Hello,
Do you know whether frosting film can be removed from windows? I’d like to add some to my basement windows, but my condo board is responsible for window maintenance and may not like any permanent changes.
Any thoughts?
Abby
YoungHouseLove says
Hey Abby,
Yup, the stuff we used can be removed by peeling it back and using warm soapy water to get rid of any haze or stickiness. Just be sure to read the package for the stuff you get to be sure it’s removable too!
xo,
s
Karoline says
Hi Jon & Sherry,
I have recently used window frosting film on my front door window and the sidelight. I found that it is nearly impossible to get all the bubbles out of the edges. I trimmed it with the exacto knife after it was up, pushing along the edge, but some places just wouldn’t stick unless I trimmed them a little more. Once trimmed a little more, the bubbles were gone, but I was left with an uneven look on the edges. As well, little pieces of trim/dust would get stuck underneath the film when I cut it with the knife, so I would have to lift it up which resulted in bubbles that are nearly impossible to get rid of with the squeegee.
Your job looks perfect, but perhaps that is because you didn’t highlight the imperfections. Would you say that your frosting film actually looks seamless?
What suggestions do you have for me? Do you think there is a product (such as quarter-round for floors) for windows that is very thin and non-permanent that I can use to hide the messy edges?
YoungHouseLove says
Hmm, we didn’t seem to have that problem. Maybe try making sure the edges are wet from the spray so they hopefully stick better? Otherwise your idea of trimming things out for a clean look could work. Maybe you could use a dab of caulk to hold some thin wood trim on (caulk is rubbery and peelable or cuttable with an exacto when it comes time to remove it). Good luck!
xo,
s
Adrienne says
Just wanted to thank you for writing this up so carefully! I’m planning on frosting the lower halves of our MASSIVE bedroom windows, which face the side of the house, and three years later I couldn’t be more grateful to have found this! You are doing something amazing :)
YoungHouseLove says
Aw thanks Adrienne! Good luck!
xo,
s