So the basement has made it known that it’s not going to cooperate without a fight. The current score is something like this. Basement: 3. John and Sherry: 1. Good thing we love a challenge. Here’s where we are when it comes to our big underground overhaul…
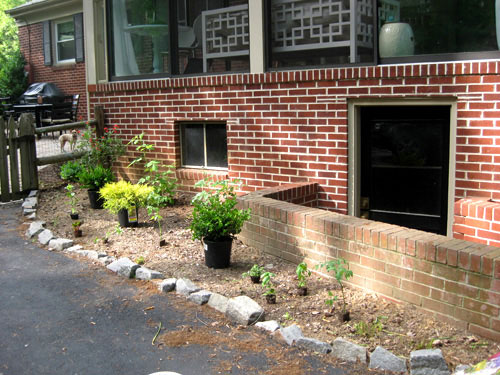
Many people requested more nitty gritty details about how we go from before to after. Not just a source list and a budget breakdown, but our actual thought process when it comes to figuring out what functions are most important to us, brainstorming a workable floor plan, detailing the pitfalls that we encountered along the way, etc. So we’re not planning to spare a single detail when it comes to transforming our bleak cobweb filled basement into a more finished and functional storage room fit for a king (or at least our beloved extra furnishings, bikes, accessories, and seasonal decor that we wouldn’t want covered in spiders and mold). First the details about where our basement is actually located: it’s directly below the sunroom off the back of our house (accessible by descending a little brick staircase which you can sort of see here in this old photo from when we planted our edible garden).
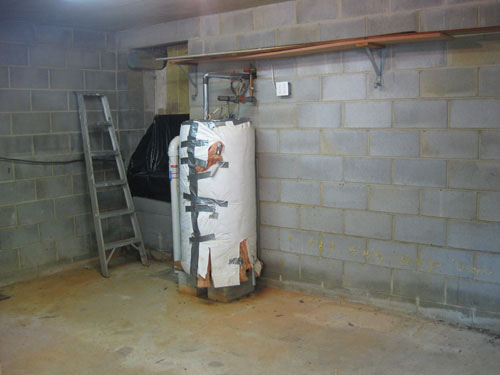
At 19′ x 13′, it’s a generously sized room (actually the biggest in our house, along with the sunroom above it of course). But that’s about where the positives stop. The challenges in this room far outweigh any other space that we’ve tackled, from the flooding issue (we’ve seen inch-deep puddles down there after a raging storm) to the insane spider situation (webs galore doesn’t even begin to describe it). And then there’s the mildew problem- it’s on the walls, the floor and anything we store down there (we tossed two extra wood chairs down there and were horrified to notice them covered in gross mildew a few weeks later). We also have a giant unsightly water heater in the middle of the room…
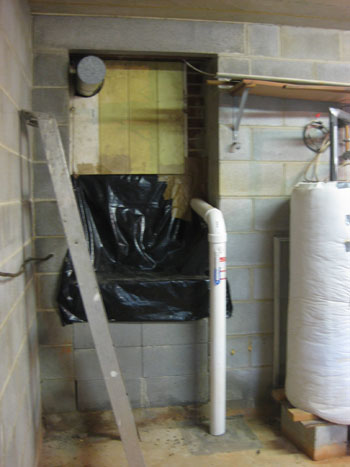
…a radon mitigation system to work around (that white pipe to the left of the water heater in the photo below), a strange trap-door in the wall that leads to the crawl space…
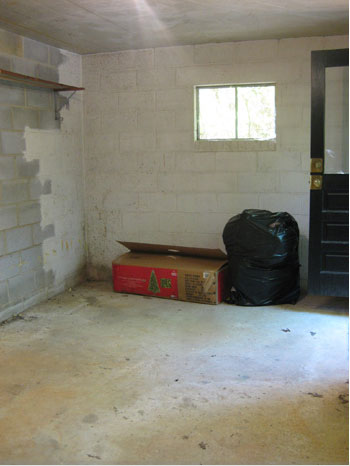
…and just two tiny windows to let light into the cavernous cinder block dungeon of a room. Not such a good starting point.
But we’re determined to turn all of those cons into pros- or at least minimize them while gaining a lot more function and form from the soon-to-be spruced space. As we mentioned, because the room has a separate entry from the rest of the house, it will probably never be an area that we use as actual living space, but we’re psyched to turn it into a massively convenient storage room where we can stash things without a second thought… and we have higher expectations than unsightly wire shelves and bowed wooden boards so stay tuned for a room that we hope has more of a built-in look than a tossed together hodge podge of shelving systems. But before we move onto sharing our layout ideas and storage solutions, we had to tackle the issues that made the room completely unworkable. The wetness problem and the mildew invasion, which are actually stemming from the same issue: nasty moisture that gets trapped in our little underground lair.
After a bit of research we learned that there were three major things we had to do to address the water/mildew issue:
- kill the mildew for good
- seal the cinder block walls and the cement floor so the raw stone could no longer absorb up to an inch of water in a bad storm
- keep moisture and mildew from coming back by bringing in a dehumidifier to keep things nice and stable down there (preferable something Energy Star rated so we don’t have to spend an arm and a leg running it during the moister months).
After a bit more research (thanks google!) we learned that the most often recommended way to seal cinder and concrete basements is Drylok, a thick milkshake-like paint of sorts that goes on slowly and stinkily, but after two heavy coats it really does the job. As in no more moisture seeping through the cement and the cinder for at least ten years or more. It even claims on the can that it can stand up to a 22 foot high wall of water. Is that not downright heroic?
But the stuff isn’t cheap. Thank goodness for our spot on the True Value DIY Blog Squad.
Remember we promised we’d be blogging about a series of DIY projects that we would undertake over the next few months using a $1000 gift card courtesy of True Value? Well, their generousity really came in handy when we realized we needed to purchase at least nine (count them, nine!) gallons of $25 a pop Drylok just to seal everything up down there. Yup, that’s at least $225 spent just to solve the seepage problem alone. But doing the work ourselves really saved us a lot more cash-money. By filling any cracks beforehand with exterior caulk and cement crack filler and then rolling the two thick coats of stinky stuff on ourselves, we probably saved at least 1K and up to 3K (based on the estimates we got when we called around for basement experts who come in, caulk, and roll on the Drylok for ya). Not bad for a few days of sticky messy work, eh?
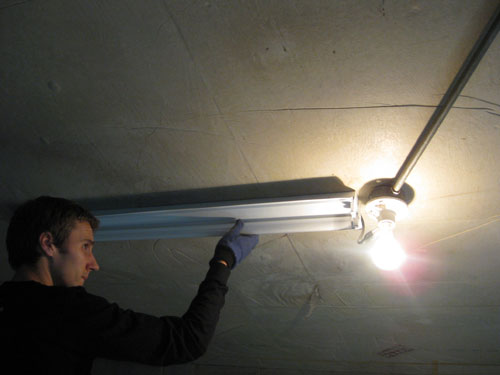
But first we had to prep the room and remove anything we didn’t want in the space so we could Drylok behind it for a seamless look. This meant removing the strange extra light fixture on the ceiling that looked a bit less than symmetrical…
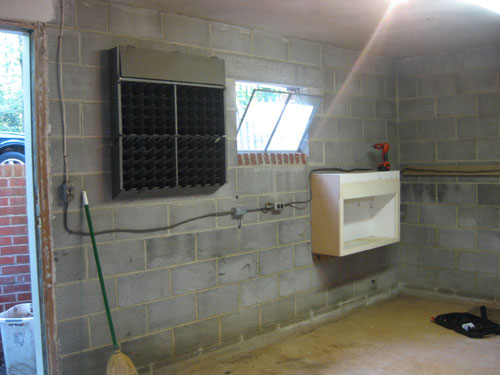
… and taking down the quirky little metal time-card-slot thingie that the previous owner used as a tool organizer (which we freecycled- we have bigger plans for maximizing that wall)…
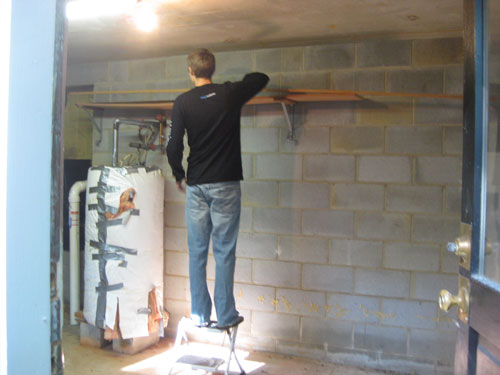
… and pulling down the old brackets that ran across the opposite wall with a few ancient pieces of bowed wood resting on them…
Then it was time for sealing up any and all cracks with concrete filler and exterior caulk and moving on to the messy Dryloking process. And in working with Drylok we learned a few things. It actually comes in two different varieties, one that’s oil-based and one that’s latex-based. It also comes in a range of colors if you select the oil-based option (white, beige, blue and gray) while the latex-based one is only available in white.
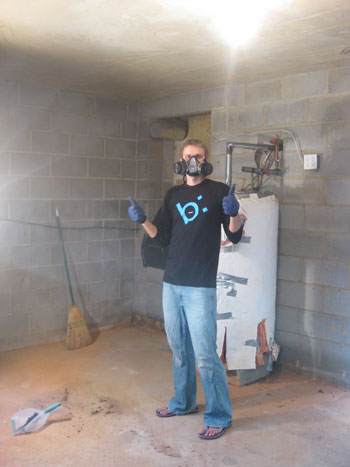
The oil-based stuff is muuuuch muuuuuuch stinkier (with all sorts of crazy warnings about brain damage and death on the label) while the latex-based stuff is supposedly just as good (although some skeptics aren’t convinced) and even though it also stinks to high heaven it’s about half as bad as the crazy oil-based fumes. We actually did our first coat in the latex-based stuff, and even though it’s the lower odor option of the two it still had us nervous so we actually threw in $30 a pop for our health and purchased high-grade gas masks to block 100% of the fumes and toxins from entering our lungs and brains. Thank goodness we did! That stuff would have brought King Kong to his knees. And we just can’t bear to spare any more brain cells, especially when we’ll need them to overcome the rest of our issues in the basement after we have this moisture/mildew thing under control…
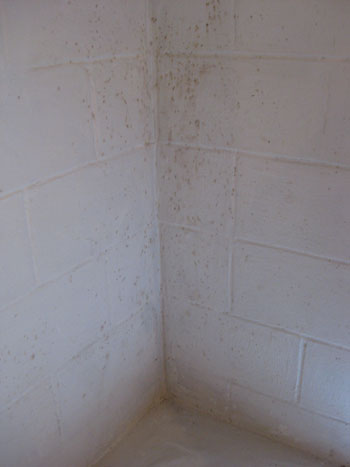
Now here’s where the basement earned its “won’t cooperate without a fight” reputation. No sooner had we brushed on our first coat of white latex-based Drylok (to the tune of $125) when we noticed little tan dots slowly coming through our snowy white finish. It was mildew and it was popping up in every corner and even along some expanses of wall even though we had sprayed it down with a 2-parts-water-1-part-bleach homemade spray beforehand (which seemed to kill it for a while, but then we added the Drylok and bam, it was back). Needless to say it was a bit demoralizing to realize that our über expensive paint job was blocking exterior water seepage but not quite solving the mildew problem (and we know getting a dehumidifier will also help, but we were intent on killing off all the mildew before finishing our paint job).
So then it was time to pull out the big guns. We decided to do the necessary second coat of Drylok with the oil-based beige option instead of the white latex-based version. We learned that painting Drylok is not recommended since you can’t re-Drylok over it ever in the future (so if in 20 more years we wanted to reseal the basement, Drylok wouldn’t work if we had painted the walls down there). This made us opt for the tinted version since it’ll hide more dirt and the occasional singular spiderweb better than a blindingly white backdrop… it’s sort of like paint and Drylok in one step.
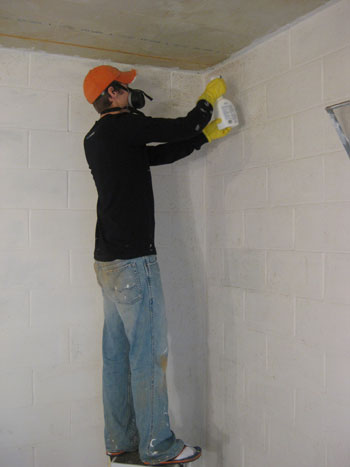
And everyone knows we don’t have a white wall in the house (hey, how else would all our white ceramic animals and painted pedestal tables pop?). Plus one of the experts at True Value recommended the oil-based variety since it may even block more mildew and create an even stronger barrier against moisture and future mildew growth, especially when paired with a dehumidifier. We’re planning to get that last coat on the walls tonight and tomorrow night (gas masks in tow of course- we’re prepared for quite a stink-fest) and then we’ll be back to share the hopefully mildew-free and much-more-polished-looking results. ‘Cause the leopard print look just isn’t doing it for us. And we’ve even sprayed down the mildew one more time with our homemade watered down bleach cocktail and given it a good ol’ scrub to be extra thorough before our second coat goes on later today (note: check out John’s patented socks-with-flip-flops approach, which protects him from spatter without causing him to sacrifice a pair of shoes that he actually likes).
Oh and for those who wondered how we chose beige as our color among the other options (blue and gray), we thought gray would just make the room look like a cinder block fortress (which it is, but we’re trying to play that down) and the blue was just a bit too pastel for our tastes- meanwhile the beige is a nice neutral color that will really work with the white storage systems we’ll be bringing in for a light and airy look. So that’s how we made that call. And the ceiling will also go beige for a seamless look while the floor gets a nice coat of chocolate floor paint (leftover from this project) for a bit of definition. Here’s hoping we’re on the right track…
What about you guys. Any basement projects looming on your to-do list? Any previous experience with nasty mold and mildew or moisture issues like flooding? Let’s commiserate. And of course we’re open to any and all basement conquering advice as we charge ahead. Fingers crossed that we can score a few points in the next round…


elizabeth says
my parents have a dehumidifier in their beach house, and since it runs while they are not there they had installed so that the water flows outside through a pipe.
Nadia says
What are you doing on the outside to keep moisture from the base of your home? It seems like that is a vital piece to a long term moisture solution. Are your rain-gutter down spouts moving the water far enough away from your foundation? Do you have positive drainage for at least 20 feet? Without these measures, all your hard work inside may be futile.
YoungHouseLove says
Hey Nadia,
No worries, we know that our water seepage issue is just due to unsealed cinder block walls (which are like sponges, they absorb a bit of water) since we’ve had ranging storms for weeks in the past and only seen moist spots on the walls and about an inch of water just puddling in a few spots on the floor. Most of the basement is completely underground, so it would take on feet of water if there was actually an issue with proper water drainage. We’re thankful that great drainage was taken into account when the basement was built (as an addition in the 70s) so the water from the gutters actually travels all the way to the back of our property via large plastic underground tubing (the nearby driveway and garden are also graded in a way that pulls water away from the foundation). Very handy indeed! Hope it helps!
xo,
s
Laura@JourneyChic says
We don’t have a basement, which is a bummer when it comes to storage. But truthfully, your description of your basement’s spider problems made me a wee bit glad that we don’t have one!
KKM says
It sounds like y’all have studied your basement situation and are doing the right things. My word of advice is to never leave anything valuable or irreplaceable down there just in case….
We used to live in an older house in Richmond, and well, with the high water table around here, during heavy rains etc. water trickled in between the walls and the floor (not to mention hurricane Gaston a few yrs ago–everyone in our neighborhood had several feet of water in their basement–we only had a foot or so). Part of the basement had been beautifully finished (but never waterproofed by the previous owners)…not all was lost because by that time I knew about the water risk and had moved a lot of things up, but it was still a bad experience!!
We don’t have a basement in our house now and I no longer get nervous when it rains. But my philosophy is that in older houses basements should be waterproofed and even then, better to use them for storage/utility functions the way y’all are planning…good luck, I’m sure it’ll turn out great!
Carey says
My basement is in need of help too. 1930s house with 3/4s full concrete basement, 1/4 crawlspace with DIRT floor. Ugh. Part of the walls were painted at some point with who knows what, and there are plenty of crumbly spots. Plenty of mildew on the walls as well (and on whatever we put down there). The dehumidifier has worked wonders, but I still can’t put anything fabric or precious down there to store. One plus is that we have never had any standing water problems! I’d imagine we’ll have to somehow get all the old paint off first before we can Drylok anything though – ugh. (And there’s no drain in the floor, so powerwashing would be out.)
Beth says
I’m so happy I get to see how your basement project unfolds! We have a basement project coming up in the future and Drylok is on the top of our list of things to buy to get started! But we first have to put in some French drains and reroute the existing gutters to not drain water in the direction of our home. It will eventually be a finished basement so we have to be sure everything is sealed up properly before we finish it, so it won’t be a quick project, unfortunately. Good luck!!
Shane says
Using the Drylok works great, but if… erm, when… your foundation cracks, it will let the moisture right back in. I don’t know of many solutions around this other than having your walls foam insulated as they’ll be able to handle the contraction/expansion of the cement. We found this out the hard way in our 80 year old home that had been Drylok’d previously, but a crack opened up behind the drywall and fiberglass insulation. Can you say mold?
Virginia @ Where You Hang Your Hat says
I really appreciate you sharing your work on a project like this!
Stancie @ Fig+Sage says
I loathe our dark and damp cinder block wall basement! I’m so glad you’re tackling this project because ours has many of the same issues yours does. Yours doesn’t look nearly as scary or dark as ours, but we had/have almost the EXACT same leaking/Drylok/mildew re-appearing issue that you did. We always get water in the basement after it rains (and the worse was when it flooded with 3 inches of water last year which we ShopVac-ed out by hand (no sump pump = good times), we have a dehumidifier (that helps some), and after consulting with someone at our local hardware store…we did the spray-on bleach/water mixture (almost passed out from the fumes), Dryloked the walls – but mildew popped up almost immediately just like yours (brown spots). Definitely discouraging :/
We’re in a avoid-it-and-maybe-it-will-go-away denial phase at the moment. So glad to see you are tackling yours – perhaps it will gives us some inspiration to get back down there or maybe just face reality and call in the experts! (LOL!) Good luck to you and can’t wait to see what you do with the place :)
Kerry says
This winter we’ll start to work on our basement – so I’ll be sure to follow your adventures! :) Our house is 50+ years old and definitely has some issues with dampness (we got a dehumidifier with our house as part of the deal) and we have to redo some duct work… as well as get a new furnace and water heater! Ours is a liveable space that we’ll be turning into a utility room, bathroom, bedroom and living area. I’m sure we’ll be able to take a lot of great tips away from your adventure. Best of luck :)
Lauryn says
Little story about mildew and mold in the basement. When we went looking for a house and we were in the basement of the house we actually bought, we noticed that one wall was completely covered in boxes, however we were so estatic about the thought of this house we didnt really think about it, the house had other bigger problems to think about. Fast forward to the day after our first summer storm in our home and that wall is completely red-mold. The previous owner had quite the creative hand in covering it up, eh?
YoungHouseLove says
Eeks Lauryn! That doesn’t seem fair at all. What a mean trick! Maybe karma got them?
xo,
s
Chelsey says
Reading this, it struck me that a gas mask would make a great gift for my husband. Aren’t I romantic? He is a bit of a worry-wart (for good reason!) when working around fumes. Where did you get yours and what kind is it?
YoungHouseLove says
Hey Chelsey,
We got ours at True Value of course! The brand is MSA and it ran around $30 or so. Hope it helps!
xo,
s
Kati says
We’re in the process of re-doing our house, and one level is below grade. When we bought the house, the downstairs had gross wood paneling on the walls, and taking that down was one of the first things we did, even before we moved in. Well, when we took it down, we found MOLDY drywall and when my husband took down the drywall, we found rotted studs and moldy insulation. We ended up basically ripping everything out, bleaching and then Drylok-ing the walls, redoing the insulation, vapor barrier and studs. Then after I got the wallpaper completely stripped in another room downstairs, we realized those walls were moldy too, and we had to rebuild them as well, At the time, my husband said, “Remember when Karate Kid had to paint the fence and wax the car (wax on, wax off)? Well, Mister Miyagi could have just as easily told him to Drylok a basement.” Anyway, best of luck with your basement adventure! That mold is nasty stuff! At least it’s not a main living area, and at least you’re not pregnant like I was! (By the way, you can see photos of our mold and Drylok fun here: http://www.andbabymakeseight.com/blog/archives/164
Sandra says
I am so excited about this post! We have very similar problems in our basement, but going through a company to do it is just not, financially, an option right now. Your posting is perfect and I am definitely forwarding this to my husband! Thanks and I’ll keep you posted!
Sandra
Anya says
wow…this post couldn’t have come at a better time for me! my husband and i purchased our first home last year, complete with 1/2 finished basement area and 1/2 unfinished basement area – used for laundry and such. Both sides, even the unfinished side – didn’t have anything on our list of “don’t want to deal with’s” – what a blessing. Boy, were we naive and very much wrong. Apparently, the finished side, complete with drywall and new carpet hadn’t been sealed AT ALL, not the floor, not the walls, nothing. We own a 1940’s home, in Michigan, and while we both feel blessed that we haven’t had any standing water in the basement or any water at all for that matter, we have had dampness seep up from the floor, seal itself into the carpet padding and wha-la! wet dog (sorry Burger) and damp smell in the carpet and very unhappy new homeowners. Sigh. We’ve also had mild mold problems (knock on virtual wood) down there and have JUST started to look into tackling this project. The worst part, at least for us, is that we paid a big price tag (for us) for this home, thinking that they had done such a wonderful job and we could just move in and enjoy – for the most part anyway, I mean, we weren’t that naive in thinking that we’d never have to do anything. But, to have to redo what someone else already did and received payment for (via us purchasing the home), kills us. I’ve been in tears the last two weeks from frustration and disappointment. I know that seems a little dramatic, but the basement issue has been the icing on the cake for us, I won’t even begin to get into the other issues we’ve had since we’ve moved in. Sooooo….after all that, thank you for posting this project, and for all the other commentors who have posted their stories, they’ve given me hope! xo
Heather says
Hey there! So excited to hear about the start of your basement project! My husband and I just started our basement project this week as well! We have 1/4 of our basement that is unfinished, where we are putting our new washer and dryer. We just bought the house and the floor was nasty! There was dirt everywhere, so after a lot of shop vaccing and scrubbing, we decided to paint the basement floor. Rustoleum makes a basement floor epoxy paint that is great! It gives a nice smooth finish to walk on, and there are these chips that u sprinkle on the paint as you are painting. I unfortunately wasnt able to parttake in the floor painting project as I am expecting and the warnings on the labels were about as bad as that on the drylock. We also had to turn off the hot water heater and furnace to ensure nothing ignited from the fumes! Anyway, our next project is to drylock the walls in the room, although I dont think I can go without heat or hot water again this season so we may have to wait on that. We are getting the washer and dryer installed soon. I can’t wait! Bot sure what your plans are for the basement floor but you may want to look into the paint we got. It also resists water. Good luck with the rest of your project! can’t wait to hear more about it!
Kari @ Foreclosure 2 Fabulous says
Ugh basements! Good luck with the upcoming renovations, one of the most important things to consider with basement moisture is are there any drainage issues outside that are contributing to the wet earth. When we bought our house one of the downspouts was pointed directly at the side of the house causing mold and mildew on one of our exterior walls. Getting a longer downspout extender, sealing, and pointing it towards the downhill grade and not our wall did the trick!
YoungHouseLove says
Hey Kari,
No worries, we know that our water seepage issue is just due to unsealed cinder block walls (which are like sponges, they absorb a bit of water) since we’ve had ranging storms for weeks in the past and only seen moist spots on the walls and about an inch of water just puddling in a few spots on the floor. Most of the basement is completely underground, so it would take on feet of water if there was actually an issue with proper water drainage. We’re thankful that great drainage was taken into account when the basement was built (as an addition in the 70s) so the water from the gutters actually travels all the way to the back of our property via large plastic underground tubing (the nearby driveway and garden are also graded in a way that pulls water away from the foundation). Very handy indeed! Yu’re totally right that redirecting water and downspouts can totally make the difference!
Alexis says
We are also in the process of redoing our basement! Last week, old asbestos tiles were professionally removed revealing a very unlevel and bumpy floor beneath. We are now wondering how to go about leveling and smoothing the floor ourselves (can’t afford another pro!). We hope to be able to paint it once it’s done. Any tips???
YoungHouseLove says
Hey Alexis,
We don’t have any direct experience with a bumpy basement floor, but our first thought is that you could mix up some concrete and pour it and try to level things out that way (working your way out of the room with a flat trowel to tamp things down). Then for a more polished look you can paint it or stain it. Good luck with everything!
xo,
Sherry
Donita says
@ALEXIS….there is a leveling compound you can buy, to level out the floors. My husband has done alot of carpentry work, he said it works great. You can get it at a lumber store, or Home Depot. Good Luck!!!
YoungHouseLove says
Thanks for the help Donita!
xo,
s
LauraC says
Curious, John and Sherry, when you finish with the “painted” drylock (sounds like a nice color!) how you will know if the mildew has returned or not, since it sounds like the same color as the drylock? Would feel really bad if you did all that work and it still came through the walls.
YoungHouseLove says
Hey LauraC,
Good news! Tonight at 11:41pm we finished our second coat on the walls with the beige oil-based Drylok (we still have to do the ceilings and the floor tomorrow) and nothing is coming through! We would definitely see differentiation in the corners (clusters of darker dots) since the mildew is more tan than beige but… so far so good! With the first coat before we even completed each wall things were popping through and tonight we worked on all four walls with nothing showing, even after four hours of drying time so we think we might just be in the clear! We’re thinking the combination of the oil-based Drylok and the bleach treatment we applied before each coat might have just got ‘er done. Fingers crossed…
xo,
s
LauraC says
Good for you J+S! Now go to bed! I saw you were up so late with your last comment, but phew, I know you’re exhausted. It’s just after 9PM here in WA state! ‘nite
Tina says
I have to tell you, your basement is actually nicer than mine was when we bought our ranch. My husband and some friends dug up the whole foundation (which you know is huge on a ranch) and waterproofed and put in new french drains. It took almost a whole week, sun up to sun down!
I wish I had before pictures of the basement, but I don’t. I will have to send some afters though, it turned out really nice. I think you’d appreciate it! Good luck!!
Dusa says
I’m still stuck back at ‘spiders’. *shudder* Were you worried about getting bitten?
YoungHouseLove says
Hey Dusa,
It was mostly spider webs, not actually swarmes of spiders- and by using long handled brooms it was pretty easy to sweep the webs and the occasional spider right out the door. Nothing got near us. Thank goodness.
xo,
s
Ezra says
For your sake, I hope you’re not going to have to waterproof the outside basement walls. I recently did this myself and it wasn’t fun. http://projectfirsthouse.com/2009/07/basement-water-proofing/
YoungHouseLove says
Hey Ezra,
It’s looking like we’re in the clear. In fact after just the first coat we got about a week of rain and nothing came through so we’re totally thanking our lucky stars! Waterproofing the outside would definitely not have been fun…
xo,
s
caitlin says
This is awesome!
Congratulations on tackling the basement, which, for me, is very intimidating. One of the best purchases I made as soon as I bought my house 2 months ago was a dehumidifier for the basement and I love it for the most part. I am interested in getting a better energy star one though, and haven’t started researching it yet (one thing–dehumidifiers are loud! It rattles a lot and you can hear it sometimes in the dining room)
i hope to add more function to the basement soon, but more like next year soon… fortunately, in Pittsburgh, many basements come equipped with a “pittsburgh toilet”–a lone john in the basement often not even surrounded by walls—that you can easily build a bathroom around. I guess it is a vestige of the mill days when people came home, and left their mill clothes in the basement and showered, etc down there?
Anyway–I’ll be following your basement trials and triumphs.. thanks for blogging them!
Kelly says
I love the amount of detail you’ve provided here! We’ve had a bit of a moisture problem in our dungeon of a basement as well, and I’m definitely going to forward this posting on to my boyfriend to get his thoughts on using Drylok!
Here’s a couple of fun basement stories from my adventures in my OLD house –
Finding a dead cat in the crawlspace (oh, ew): http://9-oh-6.blogspot.com/2009/07/we-should-have-named-it-manda.html
And something much more fun – clearing out said crawlspace and finding an entire wall covered in old newspapers! Reminded me of your stories about old stuff you’ve found in your house: http://9-oh-6.blogspot.com/2009/10/clearing-out-graveyard.html
stacyfrompgh says
Enough about Drylock and mold ! My helpful hint is the blanket on the water heater. I just got a new water heater. (right after the dropped a ton on tree removal and my dryer is about to die–it never rains…) Anyhoo, my plumber said that the new water heaters should not have or need blankets because of the new type of construction. If the vents on the water heater are blocked by a blanket or something else, the heater will shut off automatically and cannot be turned on again! This has something to do with new safety regulations on water heaters. Love your site and your city !
Viv says
A dehumidifier will help your problem, but good ventilation will be a less expensive fix for most of the year. You can buy a humistat, which is like a thermostat, and hook it up to an exhaust fan. This will turn on the exhaust fan whenever the humidity goes above a certain level.
Our new house has a digital fan control that does something similar. We can set it on “random,” which just starts the fan up for about an hour a day, or put it on a program so that it runs for short periods at set times. This allows air to circulate and will do a lot to deter mildew regrowth without the expense of a dehumidifier running constantly.
Carla says
When we drylocked out basement we were told to do the floor also. Because the moisture comes up through the ground and floor. I was surprised that you were just painting the floor with floor paint. You may want to look into that. We run a humidifier all the time in ours and it makes a world of difference you deffiently want it to just be able to drain into a floor drain because they fill up fast , and since its not a place you will be every day. We don’t have mold or mildew growing in our basement and in rainy seasons we have to empty it every day, sometimes twice.
We put in a sump pump and it made a world of difference.
We have battled a basement that gets wet in heavy rain for 10 years it is not an easy task.
YoungHouseLove says
Hey Carla,
We’re actually painting our floor with two coats of Drylok followed by porch and floor paint just for that deep chocolate color so it’s not one big tan box in there (plus the deeper color on the floor hides dirt). Hope it helps!
xo,
s
holly says
Terrific post guys! A basement overhaul is in our very near future and we have a corner of wall where water seeps in. we think we fixed the source but I imagine some moisture is still getting in. Our big difference though is the basement will be the den/hobby room and because the drylok can’t be painted that will prove challenging.
In your post above you say you are doing 2 drylok layers on the floor but it’ll be covered with brown paint. Is it because the paint is floor/porch paint that you’re going to be able to cover the drylok?
YoungHouseLove says
Hey Holly,
Good question! Since the moisture seepage was weeping in through the cinder block walls and not the concrete floor we Dryloked the floor just to be thorough but we’re sure that it’s permanently sealed from those two thick coats (since it’s a lot less sponge-like and absorptive than the cinder). This means we’re confident that it won’t need to be re-Dryloked ever- whereas cinder blocks are so porous that the Drylok can warns that they may need to be re-Dryloked every 10+ years or so, so painting the walls would be short-sighted. Hope it helps!
xo,
s
Pamela says
Thank you for this timely and informative post. We are about to replace an ancient poured concrete basement entranceway with one using cinderblock (poured floor). If I hadn’t read your post I would not have known to quiz the contractor about waterproofing. He assures me that they treat from the outside and that Drylock will not be necessary. Do you know if your basement walls were waterproofed from the outside?
YoungHouseLove says
Hey Pamela,
Our cinder blocks were not waterproofed from the outside, hence the bit of seepage they demonstrated, but because the drainage of water was addressed from the outide (downspouts were redirected and things were graded in a way that the basement didn’t get much runoff) it was only a smidge of moisture in our almost entirely undergound basement (which could have taken on feet of water if those outside measures weren’t taken. Now that we’ve slapped on two coats of Drylok on the inside, there’s not a drop of moisture to be seen, which is amazing! Good luck with your basement!
xo,
s
Jamie says
Are there any restrictions of using oil based DryLock over the water based? Will there be an adhesion problem, like you would with paint?
Good Luck!
YoungHouseLove says
Hey Jamie,
Nope, as a general rule oil-based anything can go right over anything oil-based or latex/water-based without a problem, it’s putting oil-based PAINT over latex PAINT where you’ll have a problem with adhesion. We’re happy to say that our second coat went on smoothly and amazingly there’s no more mildew to speak of! Not one single solitary spot! Yes, there was a happy dance that ensued at the end of that loooong process.
xo,
s
Joel says
Thanks for the great information. I absolutely love your site/house. Did you consider other paint treatments to the basement floor? The previous owner of my house did a decent job finishing my basement but the floor is still the concrete slab. I’ve considered doing Behr semi-transparent concrete stain since I want a very “natural” look rather than a painted look. I see you used that in your sunroom with mixed results. Thoughts?
Thanks,
Joel
Amanda says
Man, my sympathies! After we bought our house, we decided to remodel our finished basement. We were moving some walls around, so we figured we’d pull up the carpet and Drylok the floors. It was messy, smelly, and such a pain.
We ended up doing our basement, laundry room (separate room in the basement), and garage (attached to the basement) and haven’t had any issues with the Drylok and moisture, except for one instance. We live in an older home as well (built in the late 50s, early 60s) that has older pipes. We had started getting some flooding in our laundry room and discovered that water was coming up out of the drain in that area. Several days and several grand later, we had jacked up the concrete floor in our laundry room to discover a pipe that was no longer a pipe and had it replaced.
Anyway, the point of that story is that we repainted the Drylok in that area after the repair and it has since flaked off in the repainted area. So, I will suggest that, if you ever have an issue that requires that you do repairs in an area, go ahead and repaint the entire thing. Otherwise, it might not adhere like it once did.
Cheers!
Amanda
Max10 says
WOW! Drylock, or any interior waterproofing sealant, is the last thing you want to apply to your foundation walls. Why do you think it blisters? It blisters or bubbles-up because the wall has deteriorated and theres nothing for the paint to adhere to. Trapping moisture in a block foundation wall leads to very costly foundation repair bills. I say this because I inspect 25-30 foundations per week. When I see interior sealant on the walls, I know theres going to be structural repairs involved in the waterproofing process. I can usually rub out the mortar joints with my fingernail because of the damage caused by trapping moisture for several years with the interior sealants. If your having water problems in your basement you have 2 options: excavate and seal the walls from the OUTSIDE, or, control it from the inside with a properly installed drainage system. I don’t say this to be a drag on your blog, but I would be curious to see your post in a few years about the repair costs for your foundation walls thanks to that “amazing paint”. All Drylock does is generate higher profits for foundation repair contractors. Remember, if it sounds too good to be true, well…
YoungHouseLove says
Hey Max10,
Not to worry! We actually already have heavy duty drainage systems in place around the entire exterior of the house! Water is directed away from the foundation with drains and the ground is graded so no water runs towards the house, which is why our basement was never full of water! It just absorbed a bit of moisture- just “sweating” if you will- so we talked to multiple experts who said in combination with our exterior grading and drainage systems, Drylok was the right solution for us! Hope it helps! We definitely don’t think it’s a cure-all for a space without proper drainage and grading, but if a basement just “sweats” a bit instead of filling up with inches of water it could be a great solution!
xo,
Sherry
Sarah says
Someone mentioned a dehumidifier– fyi, for a little more money (from what I hear it’s well worth it) they make ones that drain themselves and you don’t ever have to mess with them!
kyurgo says
How in the world did you “roll” drylok on ? I had to use a brush. That stuff is like tar. I put on one coat on a wall in my basement yesterday. My arms are aching today.
YoungHouseLove says
Hey Kyurgo,
The water based stuff is easier to roll (ie: thinner) but we later learned that the oil-based stuff was far superior so we switched over to that for the second coat (here’s a post with more info on that). Oh and here’s a tip for rolling on the oil-based stuff (which may have just been easier to roll on since we already had one coat of Drylok on the wall so it wasn’t as crazy-porous) stir it like crazy. John stirred and stirred it (after pouring it onto a paint tray) so it was a bit more roll-able. Hope it helps!
xo,
s
Kristy says
Hello! I love what you are doing to the basement it looks amazing. I’m currently having the same promblem in my basement in one area. I first used the drylok on not a clean block it was already painted. Which I later learned that it needed to be applied to a paint free service. So after a lot of reserch i discovered to paint my will cold press adhesive( it is actually stuff you put on roofs) It took awhile to do that. Now I’m ready to add the oil-based dry lok. I was told this should work. I will keep you posted.
I love your blogs. And Congrats on the Baby bump!
You guys are adorable.
Kristy
Barb says
Please don’t wear flip-flops or stocking feet when doing home improvement projects. “Safety First” – isn’t that what you guys say?
YoungHouseLove says
Hey Barb,
We do try to be the safety patrol and are sure to wear sneakers whenever we do anything that involves heavy lifting or something else that could potentially hurt our feet. But during this simple rolling process (Dryloking is just like painting) John’s feet weren’t in much danger and the name of the game was to avoid permanently ruining his shoes with Drylok. So old hard-bottomed (not rubber bottomed) flip flops did the job- and the socks were actually to prevent Drylok from getting on John’s ankles and feet since the stuff is so toxic and stinky. We should mention that this isn’t a choice that we recommend for others but one that worked for us at the time. We encourage everyone to take whatever precautions they deem necessary when they tackle their own projects. Hope it helps!
xo,
s
Icon Enterprises says
Icon construction chemicals are a Manufacturers and Suppliers of Construction Chemicals and Water Proofing contractors in Bangalore India.
Nickie says
I am not sure where you guys live, but my question to you guys are is your basement cold. I am in the process of moving to Va and I would like to do something similar to my unfinished basement and I’m a little worried about the temperature.
Thank you.
YoungHouseLove says
Oh yeah it gets cold in the winter! But it stays pretty cool in the summer too, which is nice. It’s not meant for living, just storage (not heated or cooled) but if you wanted a basement for living here in VA, you would have to heat it and cool it for it to be livable. Hope it helps!
xo,
s
Jill says
Heyo,
If you can still remember, what research did you put in to your gas masks, and what brand/type did you end up choosing?
Thanks!
YoungHouseLove says
We just grabbed them from the home improvement store (don’t remember the brand) – they all are forced to meet certain safety standards so just read the packaging to be sure they’ll “block” whatever you’re using (ex: some can’t block oil-based fumes while other can). We got the most protective ones we could find (which meant they were a bit more moolah, but so worth it since they work for a variety of projects).
xo,
s
tim says
We had several home inspectors tell us the worst thing you can do to an area susceptible to moisture is use a dehumidifier. It causes the walls to act like a sponge, bring in moisture from the outside, and causes mold/mildew to form behind finishes.
We opted out of a home after inspection found tons of mold behind some type of sealant in the basement that couldn’t be seen via the eye. Just an fyi!
Love your work!
YoungHouseLove says
Thanks for the info Tim! If you read through to the big reveal post we actually never went with a dehumidifier after all. After we sealed our walls with Drylok we didn’t have any moisture or mildew issues anymore!
xo,
s
Alexis says
Hi S and J!
We are about to tackle our moldy and dungeon basement and looked to your site as starting point because your basement woes seemed similar to ours. Except, our walls are painted. I know that drylok is a no go with painted walls. Do you know of another waterproofing option that would mesh with our walls? Thank you!! Congratulations on officially putting your house up for sale. I’d be shocked if it is on the market for long.
YoungHouseLove says
Hmm, we’re not really experts in that arena. Maybe try asking around at your local home improvement center? Good luck!
xo,
s
Sarah says
Oregon vs. the basement!
Just wondering if the sealant is still holding out the water and mildew? And if in all your research they said anything about it being used as a permanent room (bedroom) rather than just a basement that is used every now and again?
Thanks and hope you are feeling better!
YoungHouseLove says
We moved about a year ago but it held up great up through them! I do think people use it on permanent rooms so as long as it’s not a bigger drainage issue (ex: you need french drains installed) you should be good!
xo,
s
lorraine says
Hi there,
Thanks so much for all the info! I have a 1-2″ deep pond in my basement when it’s really bad rain or snow melting. i live in a 100 year old house. The basement isn’t too scary and we have identified the front porch as the place (we think) where the water is coming into the basement since it’s right below. We don’t have cinder block walls. here’s what i was going to do:
1. Have a dehumidifier installed on the system
2. Fix the porch up above
3. Scrub walls/floors and let dry
4. Fill in any cracks with ext caulk
5. Drylok walls, 2 coats, oil based, with masks:-0
6. Etch and paint the concrete floor
7. I do have a sump pump
I think the house has made my husband sick so i am having mold companies come out today to see if there is mold or not. But how can there not be since the basement has had lots of water in it in the past. Do you think i need to to do all of the above? I figured it can’t hurt. It is a huge a amount of work though!! :-) Would love to hear your advice?
YoungHouseLove says
Eeks, it sounds good to us! We’ve never had that exact situation so we’re not experts or anything, but it does sound like a good plan. Good luck!
xo
s