After my tile laying extravaganza, the tasks of grouting and sealing seemed tiny by comparison – especially considering I had taken off the entire week between Christmas and New Year’s and had several days to accomplish them. But for some reason, I really dreaded grouting. From my dad calling it “the pits” to Katie Bower admitting it’s the hardest part of tiling for her and Jeremy, it really had me nervous. Even the guy at a the home improvement store kinda hinted that it wouldn’t be pleasant. Couldn’t we just leave it like this?
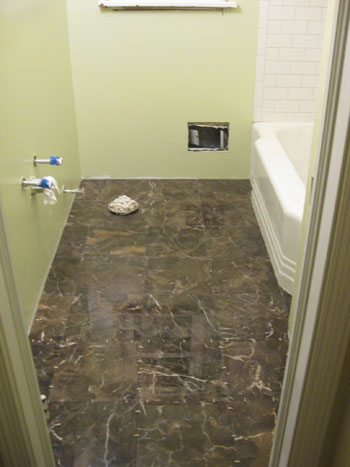
Unfortunately, it had to be done. And I had already put it off twice. Once when I mixed the grout wrong (I read “3 cups/1.4 Liters” of water as “3 Liters” – oops) and a snowstorm kept us from getting more. Then the next day, I picked up a replacement box with plans to grout after work, but then an accident (train + SUV = bad back up, but no injuries) got me home too late to tackle it before bed. The funny thing is that in the end these two twists of fate ended up being a lifesavers.
See, long before we even demo’d our first wall we had purchased our grout – nonsanded Polyblend grout from Home Depot. We opted to use nonsanded grout on both the shower walls and floor because it’s recommended for 1/16th” grout lines and because sanded grout can scratch marble. So we had had our box of “bright white” (for the shower) and our box of “nutmeg” grout (for the floor) all ready to go from almost day one… even though the nutmeg was a little redder than we would’ve liked. But sometime over Christmas break we got the tip that we should check out a specialty store like The Tile Shop for better grout that would last longer and was more mildew and mold resistant – plus they offered a wider color selection. Why didn’t we think of that?
We can’t speak to the quality yet (it’s supposed to be more durable and mold/mildew resistant according to the label) but our tipster was dead-on about the color selection. Not to mention they had a handy color guide that allowed us to hold up our tile against real grout (not just a colored label) to see how they’d look together:
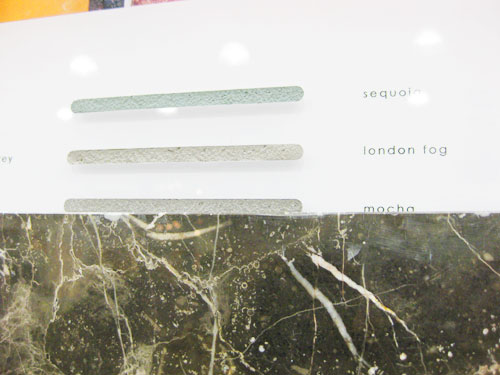
So thanks to this trip we scored a batch of “standard white” (a more subtle white, which is much closer to our actual tile color than the “bright white” from Home Depot) and “mocha” (a much browner version of nutmeg without the garish red undertones). And it was the same price as the Home Depot stuff! Not bad. We’d later count our blessings that we hadn’t used the previous grout that would’ve made our shower lines look like over-whitened teeth and our floor ones look like bad auburn streaks, but first we had to actually get down to business and grout everything. So with better grout in our possession (and after allowing all of the tile in the room at least two full days to set) I couldn’t put off the dreaded project any longer. I semi-enthusiastically gathered my supplies, almost all of which were inherited from my dad’s previous bathroom projects (most of which were purchased at The Tile Shop), and this is what my little arsenal of grouting tools included:
- A grout float
- Sponges
- Buckets (at least one for grout, one for water)
- Paper towels & rags
- Flexible Grout Admixture
- Grout Release
- Marble Sealer
The first step was actually to use the last two items to prep the surfaces. The grout release acts as the “Pam” of the process (to borrow a baking analogy we once heard) when it comes to protecting your tiles. By applying it beforehand, it makes it easier to clean the excess grout off of your tiles later. The marble sealer did the same thing for our marble floors (oh and it’s the same product we would later use to seal the grout too- gotta love a multitasker).
Once the release had been applied to the shower walls and the sealer had been applied to the floor in advance of grouting, it was time to mix the grout. This go-round we were determined to follow the instructions on the box quite carefully (which had been a challenge to me in my previous attempt). Luckily this time I mixed the correct amount of liquid and grout powder to form some nice toothpaste-like grout. You can opt to mix powdered grout with water (like we did in our previous attempt) but after talking with the tile specialists we decided to use Flexible Grout Admixture since it was recommended with the grout that we bought and we already had some leftover from my dad’s bathroom projects. The perks? It’s supposed to help reduce shrinking, cracking and the discoloration of your grout in the long run. Always a plus, right?
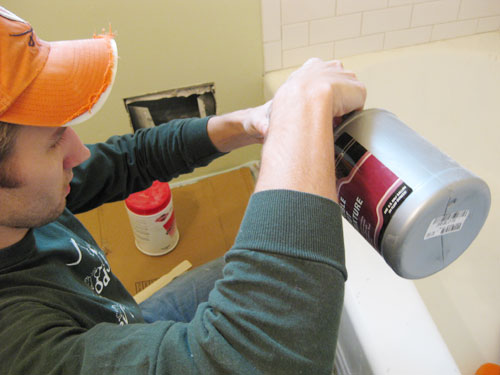
More than one person had warned me that mixing grout sucked – especially by hand (which I was doing because I didn’t want to buy a special tool for the little amount of grout that I was going to be using). So I trepidatiously measured out as much grout as I thought I could use in a 25-minute span (since more time than that could cause it to dry out) and added the corresponding amount of Flexible Grout Admixture. Then I began mixing with a simple paint stir stick and, well, it really wasn’t that bad.
It took a little bit of arm power (okay, and one broken stick) to get all the lumps worked out and achieve what appeared to be the correct consistency- I’d read it should be somewhere in the neighborhood of a cream cheese, cake batter, peanut butter or toothpaste. I personally don’t consider all of those to be the same thickness, so I figured there was room for interpretation. The key is just to avoid anything too gooey/drippy or anything too dry and non-spreadable. Below is a shot of the mocha floor grout at what I deemed to be an acceptable take on toothpaste-cream-butter-batter. So after letting it set for ten minutes in the pail as instructed, I mixed everything up again and armed myself with the grout float.
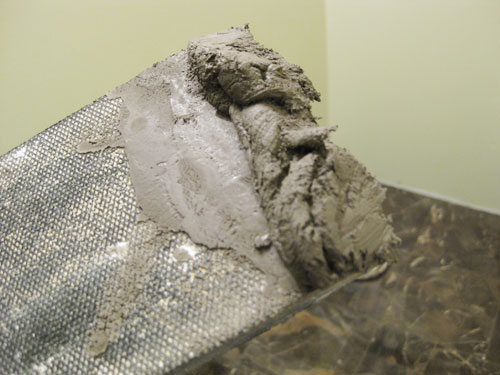
The grout float is like a rubber trowel. I like to think of it as the notched trowel’s friendlier, less ornery cousin. As I anxiously awaited impending disaster, I followed everyone’s instructions of using the float to pick up a small glop of grout and firmly press it against the tile. Holding the grout float nearly flat against the tile, I spread the glop back and forth against the lines between the tiles letting it generously fill all of the cracks. With such small grout lines, this took little time and effort (although you should apply firm pressure to be sure to really pack those cracks). Then it took just a few scrapes of the float – this time at a 45 degree angle- to swipe away excess grout from the faces of the tile. Nothing too difficult yet. I started to wonder if I was doing it wrong.
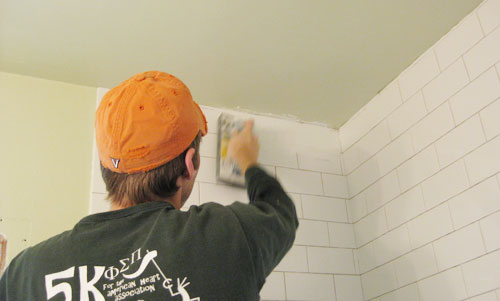
Even after using the float to remove excess grout, there’s still going to be some left hanging around on the faces of the tile (remember, you just want it in the cracks). This is where the damp sponge comes in after you’ve done about eight to ten minutes of grouting (you don’t want to wait over 15 minutes since the grout is harder to wipe off once it starts to set). Using another bucket filled with water, I lightly dampened a big yellow sponge (lightly is key, I learned). Then with a few light passes (again, light is key) I was able to not only lift most of the remaining grout from the faces of the tiles, but also to smooth the grout lines in the process. Seriously, the ease of this step amazed me. As long as I kept my sponge clean (which involved freshening my water bucket a couple of times) and didn’t get too water-happy, the process was remarkably effective. Maybe it was the Pam-like Grout Release that I applied beforehand? Either way this project was a lot less miserable than I thought it would be.
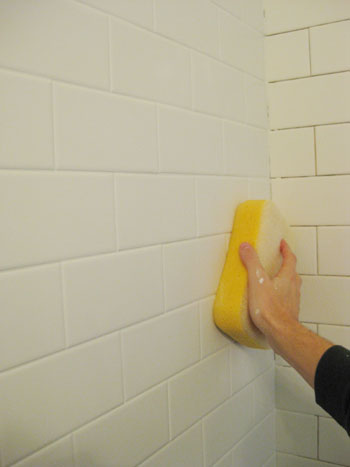
Now before I make this sound like a walk in the park, I’ll admit that it was a bit tiring and boring to do this across the entire shower. Not to mention having to stop a couple of times to clean my bucket and mix new grout (in the end, I used about 3lbs of a 5lb container for the tub/shower surround). But when I was done, the effect was AMAZING. It actually looked like a place people could shower! And all the dark negative spaces between the tiles were filled with clean white grout which promptly shifted the emphasis away from the lines between the tiles and back where it belonged: to the tiles themselves.
When I managed to stop admiring my own handiwork on the subway tile long enough to repeat the process I turned my attention to the floor. Although mixing this batch was a bit more challenging (darker color = more powder to mix and more color consistency concerns to worry about), the actual grouting was much faster. I barely used 1.5lbs to cover the minimal amount of grout lines (since they were only 1/16th” wide and much less abundant than in the shower since the tile was a lot bigger). Once again, the difference was incredible.
That was, at least, until the haze started to make itself visible. No matter how awesome your sponge skills are, you’re bound to leave some degree of grout film on your tiles that may only show its ugly face once things start to dry.
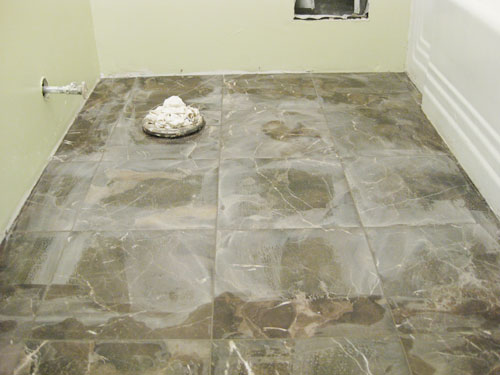
But this is where that previously applied Marble Sealer is supposed to make your life easier. Whew. I used a damp sponge a few more times to wipe away the haze, which helped but still moved the haze around more than actually removing it. Hmm.
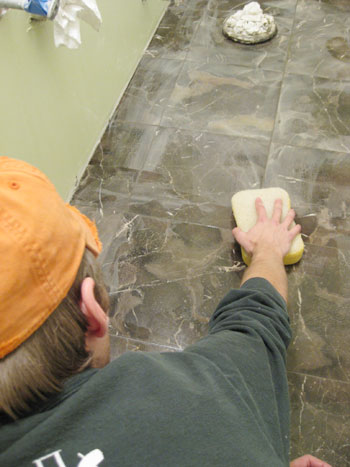
We did have a bottle of Haze Remover borrowed from my dad, but I was hesitant to apply yet another chemical to our marble floors so I tried another pass with a dry paper towel instead of a moist sponge. Voila. It took a bit of elbow grease and quite a few passes, but the dry towel technique did the trick on both the floor and wall when it came to removing the slight haze that was left behind after multiple spongings. Both surfaces even passed the white glove test (okay, we didn’t really use white gloves, but I didn’t have any haze left on my bare finger after dragging it across the shower walls or the floor). Victory!
After 48 hours of curing, the last step was to seal the grout. It actually ended up being 72 hours later for us, since about 12 hours in we had a minor “water incident.” Explanation: while I managed to work in the bathroom for weeks on end without this happening, Sherry joined me for about three hours to caulk and paint trim (more on that later) and somehow her posterior came into contact with the water valve for the sink, turning it on and sending a jet of water shooting up onto the ceiling (and therefore some heavy drips of h20 back onto the floor). She then ran screaming out of the room while I fought to turn off the valve. Needless to say, we thought an extra day of curing time couldn’t hurt.
But back to the sealing process: that was also a super simple and straightforward job, and I applied a few extra coats to both the floor and the shower wall to keep our grout protected and hopefully mildew & stain free for the long haul (we also plan to reseal things every few years for added security). Note: after sealing the grout it was slightly darker, so it blended in with the mocha tones in the tiles even more than it appears to in the pic below- score).
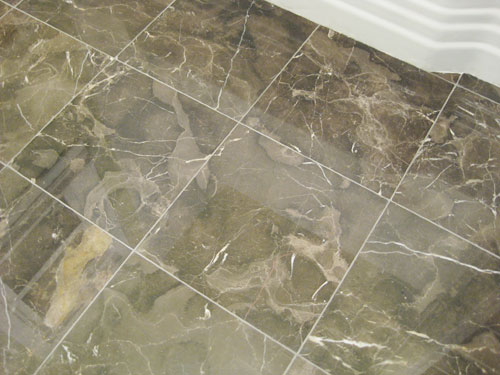
So as I wondered what all the fuss about grouting was – maybe working with super thin grout lines in a small room made our experience easy? – I finished applying a couple coats of grout sealer (the same Marble Sealer on the floor, and a product called SurfaceGard on the tub/shower surround). Believe it or not, the room could almost be called showerable again. We just needed to install the fixtures and caulk some of the edges first. Hello light at the end of the tunnel, it’s nice to see you.
Psst- Wanna read about the first few chapters of the big bathroom makeover? Check out Chapter One, Chapter Two, Chapter Three, a little teaser post, and Chapter Four right here.

micaela @ hishouse;herhelp. says
i helped tile, mostly grout, the living room, dining room, kitchen, and hallway at our friends lake house. trust me… it’s sooo time consuming and painful (back, knees). people who are fussing about grouting are probably not grouting a tiny bathroom like this. it took about 6 of us 2 days!
Laura says
Looks great! I can’t wait to see it when it’s finished!
Just a question off the bathroom subject…What color/brand of paint did you use on the trim in your house? We’re working on finishing our basement and the trim is next! Thanks!
YoungHouseLove says
Hey Laura,
We originally used Benjamin Moore’s Decorators White (always in semi-gloss) on all of our trim, but we’re slowly moving to no and low-VOC paint so we’ve since done touch ups and painted new trim (like in the bathroom) with Home Depot’s Freshaire paint (in their stock unmixed white color, also semi-gloss). Miraculously, it blends right in! We’d definitely recommend both of those colors/brands. Hope it helps!
xo,
s
Katharine says
That looks great! It’s really coming along – I can’t wait to see the finished product!
Becka @Studio222 says
I’ve been having house fever. (like baby fever, but about houses) and reading your blog makes me thing we could buy almost anything and turn it into something fabulous. Except I’m not gonna lie, I would never be able to envision some of the stuff you guys dream up. I may need to fly you down to be our designers ;)
Mrs. Money says
Oh my goodness, it looks GORGEOUS! Great job you two!
xoxo
Lindsay says
I think it’s funny that so many people said such terrible things about grouting. In my experience after laying down 500sq feet of tile, and all that entails, the grout was a walk in the park!
Your bathroom looks gorgeous! Can’t wait to see what sink and faucets you picked.
Carmen says
Looks great. Just a tip on getting rid of the haze if you ever find yourself tiling again, use cheesecloth (found at at any home improvement store) and just rub in a circular motion. It acts as a very mild sandpaper and takes off all of the grime in one sitting.
kelly says
nice job! i gotta agree with you, the grouting isn’t that bad. i like it way better than laying the tiles! it’s so rewarding to see the tiles start looking like they’re supposed to as you grout!
and MAN! our timing SUCKS! we just did two bathroom floors and could have used your tips (and taste in tiles!) that stacking the three tiles trick–gold!
can’t wait to see the rest.
jen says
LOL… My hubby wears his fraternity shirts for home projects too… Most of them are circa 1994 ;-)
christine says
Looking great! Cant wait to see the finished product! I am also doing my bathroom over, any suggestions on where to go for a vanity? We are looking for a double sink vanity. Thanks!!
YoungHouseLove says
Hey Christine,
You might want to try places like Lowe’s, Home Depot and even overstock.com. Of course you can also find a gorgeous chest of drawers (on ebay, craigslist or even at a thrift store) and turn it into a vanity by retrofitting it with a sink. Hope it helps!
xo,
s
Danielle says
Nice work! Any reason on the green walls? Why not the blue from your kitchen? Looks great, just curious as to how genius decorating minds work :)
YoungHouseLove says
Hey Danielle,
Good question! The blue walls from the kitchen are actually also in the nearby master bedroom (which is just steps away from the bathroom, connected by a soft creamy-neutral colored hallway) so instead of three of our house’s rooms going the same color (or a similar tone) of blue, we opted to introduce a subtle muddy taupey-green tone (since we plan to bring in a less taupey & neutral green for the nursery so it’ll relate to that). Plus we have lots of green plants and pillows throughout the house- and even a bright green headboard in our guest bedroom. So we’re confident the soft dose of green will still feel cohesive with the tans and muddy gray-blues that already exist. We feel like our house has sort of a sea glass palette now (muddy gray-blues, soft taupey-greens, and lots of gentle neutrals to keep things classic). Hope it helps!
xo,
s
Benita says
I’ve tiled a LOT in our house (kitchen walls, almost all basement floors, shelves, worktops etc) and whilst tiling is ok the grouting is the FUN part! It’s like magic when you start wiping it with the sponge, isn’t it?! I love, love, love it! :)
Marisa Fedele says
John, just gotta say that I noticed the Phi Sigma Pi 5K shirt you’re sporting in these pictures. PSP love! :)
adhocmom says
Just the word GROUT is bad enough. . really. Congrats on getting it done.
Paula
http://www.adhocmom.com
amy says
Can’t believe how greenish the BM Dune Grass is showing up on my monitor! We’re in the process of selecting a paint for our master bath update/mini redo, and I’ve been looking at BM samples and picked up one of Dune Grass. With a masterbedroom a Sherwin Williams Aquasphere with an accent wall of Valspar Swiss Chocolate, I’m looking for a nice tan/brown to to compliment in the bathroom.
YoungHouseLove says
Hey Amy,
Yeah, someone else mentioned that our Dune Grass walls looked really green on their monitor, but as you’ve seen when you grab a swatch it’s actually a neutral taupe or khaki color with a hint of green. Just a slight taupey-green undertone. We’ll do our best to color correct the final after photos of the bathroom once we snap those in the end, and of course even with the white trim and the toilet and the shower curtain and all the other accessories it won’t be “all walls” in there so the color will appear to be a lot less powerful when the room is polished and ready-to-use. Hope it helps!
xo,
s
Laurie says
I don’t know what the big fuss about grouting is either, I’ve done floors, walls – the only tile that I find to be really icky to grout is glass tile, did that in my kitchen, it was a nightmare!
Your bathroom floor is so yummy, I love the color. Great job John! Can’t wait to see the finished project :)
Diane says
It’s gorgeous!
You guys are amazing… I can just see me starting a project like this and then never being able to finish it properly.
Tiffany says
Just a note to anyone else who doesn’t have The Tile Shop in their area. We recently installed the same subway tile in our bathroom (from Home Depot) and used the grout mentioned here. It does sound/look scary on the box, but it isn’t at all when you put it on and after it’s dried and sealed. It looks fantastic, so don’t worry about using it. I am extremely picky and even went back to look at it after this post to see if it stood out too much and it doesn’t. Just go with what looks best for you.
Great job on the reno guys. Can’t wait to see the final.
YoungHouseLove says
Thanks for the tip Tiffany! So glad to hear that the Home Depot grout did the trick!
xo,
s
Charise says
A couple years ago we put ceramic tile down in our kitchen and master bath. I thought the grout part was boring but EASY after the rest of the process. I have allergies and spent half a day kicking up all the dust from sanding the old linoleum adhesive off the backerboard. And then I kept somehow getting mortar all. over. myself. in the process and ended up with red splotches all over my hands and arms. Yep, the grouting was a BREEZE after that!
K @ Prudent and Practical says
Your bathroom’s looking great! I thought the whole process of grouting our kitchen backsplash was fairly easy, but time consuming. My favorite part was sponging it down and seeing the mess become art :-)
Britten says
We are starting work on our new master bathroom and have also decided on a dark brown marble floor. Since we live in Washington and do not have access to the tile store you used, would you mind telling me what brand of grout you used? Thanks,
Britten Carlson
Wenatchee, WA
YoungHouseLove says
Hey Britten,
The brand is called Superior and the name of the product is “Pro Grout” (we got ours in the color mocha). Hope it helps!
xo,
s
Eileen says
I know I am late, but I have yet another question about the paint color… I’ve been wanting to do something to spice up our guest bathroom, and was thinking about painting the walls a fun color. But I heard somewhere to be careful when picking out bathroom wall colors because the wrong one can make your face look weirdly colored in the mirror (ie, dark green room = greenish face.. not so pretty to see first thing in the morning!) It seems you went with a pretty neutral color – any thoughts on this?
The tile looks great – this room is really coming together! Makes me want to tackle our bathroom even more :)
YoungHouseLove says
Yup, you definitely don’t want anything too bold in the bathroom if you’ll be doing make-up or evaluating your skin tone since it can cast colors onto your complexion in the mirror while you get ready (especially bright yellows and greens). You’re right to go with something soft and neutral (anything in the subtle green, blue, tan, gray, mocha, lavender or cream category should work really well). Hope it helps!
xo,
s
Nancy says
Wow – so happy to find this! I found just the right amount of marble tile on Craigslist for $2/sq and it’s dark brown. (Is your’s St. Laurent?) I’ve been hesitating to buy it b/c I wasn’t sure what to do with the shower walls and tub surround. I like subway tile, and it’s so great to see it all together. I think you sealed the deal on my marble find!
YoungHouseLove says
Yup, it’s the St Laurent marble from Lowe’s. Hope it helps!
xo,
s
Paul says
Hi,
I’m so glad I found your post. I’ve laid the same St. Laurent polished marble tile from Lowes. I’m worried about the possibility of losing the shine of the polished marble by using a wrong sealer. What sealer did you use? Were you able to keep the shine, even after grouting?
Thanks,
Paul
YoungHouseLove says
Hey Paul,
We used The Tile Shop brand marble sealer on our floor. I believe it was called “Gold Standard” or something similar, and we haven’t noticed any loss of shine – even after applying a second coat a few weeks after the project was complete (just to be safe). Hope that helps and congrats on your beautiful tile!
-John
Shelley says
I just scrubbed the floor tile grout in my entire kitchen and am ready to seal it. Any suggestions for kitchen floor grout sealer. Any low VOC ones out there? How long should we stay off the floor afterwards? Thanks!
YoungHouseLove says
Check out greendepot.com for amazing no and low VOC options. Then just follow the directions on the label (they’re all different). Hope it helps!
xo,
s
Shelley says
Thanks for the advice about greendepot.com! I forgot, I had just ordered something from them recently. Anyway, fyi – they carry a grout sealer called Acrisoy which is low VOC. I actually called the Acrisoy company with questions and they called me back with a lot of helpful advice like to apply 2 coats and to not get the grout wet for 5-7 days after applying. The man was very helpful so we will see how it works! Thanks again for the advice!
Kelly says
Hi guys – quick question after you have lived in your bathroom for a few months now… Is there any issue of the marble floor being too slippery in the bathroom? We are considering granite for the floor of our full bath but someone said that polished granite and marble might be too slippery when wet. We plan to have a bath mat outside the tub anyway but still curious on your take based on your research/experience. Thanks!
YoungHouseLove says
Nope no issues whatsoever! Of course we step out onto a bath mat and don’t really ever get a running start in there since it’s such a small room, but if you’re designing a larger space there are sealants made especially for polished marble that can add a bit of “grip” to the tile by subtly etching it, so that’s always an option for you. Hope it helps!
xo,
s
Jen says
We are needing to do something to our kitchen floor. It is a VERY high traffic area (leads outside) and gets dirty very easily (with nasty GA Red Clay). Our tiles are an off-white/cream color. Not the prettiest, but they are mostly in good shape and pretty easy to keep clean. The problem is the grout. It is a nasty brownish color (the counters are blackish-gray) and it looks just dirty. It is not the best quality grout. The grout in some places has come up/off and there is none. I am wanting to re-grout with black grout.
Should I replace all the kitchen grout and re-grout?
Or just grout the places that need it and then stain (I saw the Tile Shop has a stain for grout) the old grout and seal it?
YoungHouseLove says
Definitely scrape out all of that old grout and regrout. It actually will only take a smidge more time than a patch job since you’ll then have to stain everything and it’ll be a far superior result. Good luck!
xo,
s
Jamie says
Hi there! We just had these exact same tiles installed in our bathroom remodel. We hand picked them, but after tiling our shower, we decided we wanted to have someone else tile the floor. Day 1: they laid the tile and all was well. Day 2: they grouted the floor with non-sanded grout and also managed to somehow really, really scratch up almost the whole floor. Not only right around all the grout lines are there smallish scratches, but there are huge long scratches that go from one tile to the next in some places.
The person we hired seems just as dumbfounded as we are and I can’t imagine how this happened. He said he’s never had this problem before, and we bought the grout ourselves so I know it was not sanded. How have your tiles held up? Any ideas on how this might have happened? Thanks in advance for any ideas/advice you might have.
YoungHouseLove says
Hey Jamie,
We’re stumped. Did you personally see that he used the grout you bought? Maybe he used something he had on hand instead? We knew if we used something sanded it would definitely scratch so we used unsanded grout and we don’t have one scratch on our tiles. Perhaps it was his grout spreading tool? If that had old crusty grout stuck to it I would imagine that could scrape the tile as it was slid across it. Or maybe he wore shoes with rocks or other hard things stuck to the bottoms (like crusty thinset) which could scratch the tile as he walked back and forth across the room? As for the wear and tear of our bathroom, our tiles still look mint (even though we occasionally drop things they have held up amazingly, probably because we set them in a nice thick bed of mortar so they have a lot of support from the base – and no “give” to facilitate any cracking or bowing). So sorry to hear about your scratches- our advice would be to run to a tile shop and talk to experts there. Maybe you can apply an etching cream or a sealant to make them less noticeable. Good luck!
xo,
s
Jamie says
Thank you so much for your thoughtful response. You guys are too awesome with such a popular website and still responding to all your commenters and so quickly. You guys are definitely an inspiration!
Our tile guy came by yesterday and was trying to figure out how to fix it. He even went to our local tile store, as you suggested, to see what they had to say. He’s as stumped as the rest of us. So for now, we’ll have to just live with it I think.
Thank you again so much!
Lesley L says
Hi S&J! Stumbled upon your blog just a few weeks ago & it was timely since we have decided to DIY our only bathroom ourselves since the cost of having a pro doing it: approx $4000. Your tips & pictures have been a beacon of hope to us that we can do it too. I emailed all 5 chapters to my man so he can get the same “rah-rah, we can do it!” vibe that your blog has given me.
Emily says
I know this comment seems way too late but I just used this entry as an instruction manual for grouting and sealing my bathroom. You tips were so much more valuable than the simple instructions on the bottle. Thank you for all the wonderful posts that are instructional, inspirational and incredible. Thank you!!!
Emily says
Just wanted to thank you guys for giving my husband and I the courage to do our own tiling in our entryway!! I was going to just find someone to do it, but after I read this I knew we could do it!! My husband is grouting it as I type this, and it seems to be 1,000,000,000,000x easier than tiling! Looks beautiful!!
YoungHouseLove says
Wahoo! So excited for you. Congrats!
xo,
s
Ruth says
Just used SurfaceGard. My once white grout is now yellowish. You didn’t experience this did you?
YoungHouseLove says
Oh no! We didn’t have any issues. Maybe try calling the number on the package to see what they recommend?
xo,
s
Gigidy Gigidy says
Sorry to comment on an older post, but i plan on doing a complete reno of our bathroom as well – in fact, very similar to what you’ve done with this bathroom (great work by the way – extremely impressive). Quick question – how do you apply the grout release? wouldn’t getting the liquid in the grout lines have the same effect of releasing grout on the lines as they would on the tiles themselves?
I my have a ton more questions for you once i begin my project, but this one popped up as i was reading through the bathroom renovation posts.
thanks.
YoungHouseLove says
You just wipe the release lightly over the face of the tiles (since there’s no grout in the cracks yet, they’re such deep crannies that it doesn’t settle into them and just sits on the face of the tile). Hope that makes sense.
xo,
s
Susan says
J&S – Thank you so much for the amazing grouting tips!! My husband and I just re-grouted our master bathroom shower this weekend and I used your guide, plus the Tile Shop’s directions for re-grouting. I’m up in Northern Virginia and I never knew about the Tile Shop before reading your blog. I’m happy to report that we went there for all of our supplies and they were so helpful! They were even generous enough to give us your 10% off special in the store. Thanks again for all your help! :)
Susan (and Jesse … our initials are J&S too! :))
YoungHouseLove says
Aw, so glad! They’re so nice, right? Congrats on getting it done!
xo,
s
Jen says
Hello, I am glad I came across your post. We are having a hard time deciding on grout color and since I have seen your comment about the Home Depot Bright White color being too bright, I think that helps us make a decision, so thank you! How would you rate the durability and look of your grout now?
YoungHouseLove says
So glad to help! We really liked the durability look until we moved (and as far as we know it’s still going strong).
xo
s