It’s no mystery that a lot of work went into our now completed bathroom renovation (check out the big reveal and all the cost details right here).
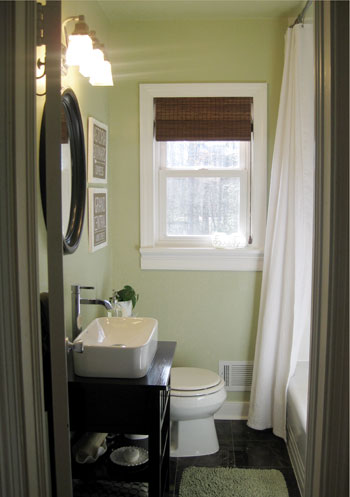
After all, you guys got to read the play-by-play of nearly everything that happened. Yes, I said nearly everything. In the spirit of reminding us all that every big project has its fair share of little hiccups, here are five behind-the-scenes challenges that our bathroom threw our way. Luckily none of them were that hard to overcome in the end. Dear bathroom, thanks for keeping us on our toes.
Speedbump #1: What’s that honking noise coming from the ceiling?
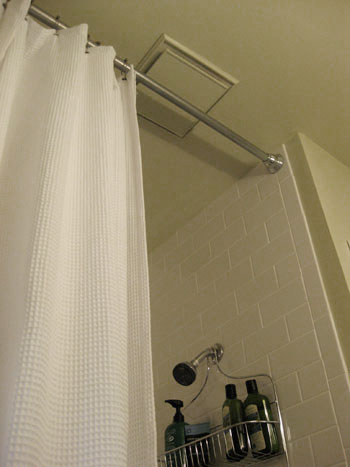
As the bathroom was coming back together, we flipped on our exhaust fan at one point to discover it was making a terrible screeching whine (not to mention it wasn’t drawing in much air). Who knows exactly what happened to cause the malfunction, but we think it might have something to do with the fan getting accidentally turned on (the switch sits right above the bathroom’s light switch) while the whole thing was taped over with a plastic bag to prevent demo dust from getting sucked in. Somewhere along the way it sounded like the motor broke and we’d found ourselves in need of a new exhaust fan. Sigh.
The fateful evening that “replace exhaust fan” made it to the top of our list, I decided to make one last ditch attempt to fix the broken one before going through the hassle of installing something new (since the existing one was so old and not a standard size, putting in a new model would most likely have involved some drywall patching). Since I have about zero knowledge of motor-repair, my tactic was to clean out as much dust and debris that I could and let WD-40 do the rest (isn’t that how you always fix squeaky screechy stuff?). Lucky for us, it worked like a charm. After two or three rounds of cleaning, shaking, and wiping down the motor (with the power off of course) we sprayed on some WD-40 and the whiny noise was gone. We also noticed an amazing increase in intake so not only were we back to being 100% operational, our little “tune up” probably left us in better shape than we were going into the reno. Insert big sigh of relief here.
Speedbump #2: Why does that pipe feel wet?
We mentioned during the vanity installation post that we like to employ a highly technical “put a paper towel under freshly installed pipes to see if any water droplets appear” technique to ensure that our plumbing works sans any spillage. Well, what we didn’t really detail in that vanity-building breakdown was that one of our pipes didn’t pass the paper towel test on the first try. The leak was actually right next to the wall where two old pipes had be welded together (meaning we never took them apart in the first place and just taped over them during demo). But something about jostling them around when we removed the old vanity and cleared out the rest of the room must have made for a slow leak. Boo.
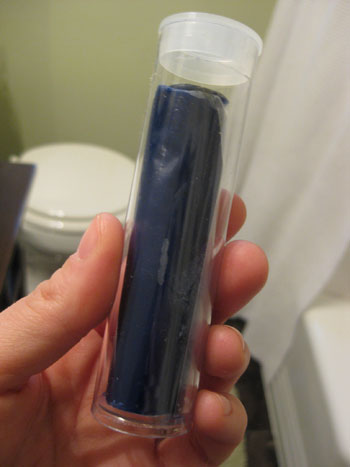
Our usual tighten-things-or-use-plumber’s-tape tricks weren’t possible in this instance (since the pipes were fused so they couldn’t be disconnected or screwed more securely together). We debated replacing the whole thing, but that meant dismantling the rest of the newly installed vanity piping (which was otherwise working great). So since the leak was suuuuuper slow (we’re talking one drop per ten minutes of running water) we did a bit of research and opted to pick up some “Loctite” putty from the home improvement store. It reminded me a bit of that Might Putty that Billy Mays used to hawk, only this kind was blue. I was skeptical, but the guy at the store said it’d do the trick. And… drumroll please… it did. It took just a few minutes to press the putty around the leaky joint (a process that turns it from blue to white) and another few to let it dry. Just to be safe we actually didn’t run the water until the next morning and we’ve been enjoying leak free sink-usage ever since. Note: we would not recommend this method for anything other than a painfully slow oozing leak as it would probably not work long term for anything that drips more quickly or consistently.
Speedbump #3: Is this seriously the shortest towel bar that Target sells?
We knew we wanted to install a towel bar to the left of the sink for easy hand-drying. So we picked up the shortest towel bar Target had in stock (20 inches, in the style that matched our new toilet paper holder). Annoyingly enough, we came home to discover that it was too long for the space. Way too long (we needed something in the 15″ range). Oh well. We headed back to Target to return it thinking “they must have a smaller version” but they didn’t. Darn. Guess it was time to improvise.
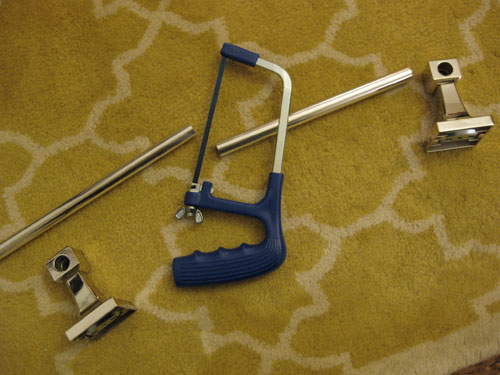
Since the bar is actually three pieces (two ends and a hollow metal rod held in between them) we realized we could easily cut the rod to whatever length we wanted. So I broke out our handy dandy hacksaw and was through the sucker in a matter of seconds, giving us the “custom” sized towel bar we apparently needed. And it still looked completely finished since the cut rod slips into the two end thingies so no one will ever be the wiser that we shaved off a few inches. Except that we told the world right here.
Speedbump #4: Well, I guess we’re gonna need a new threshold.
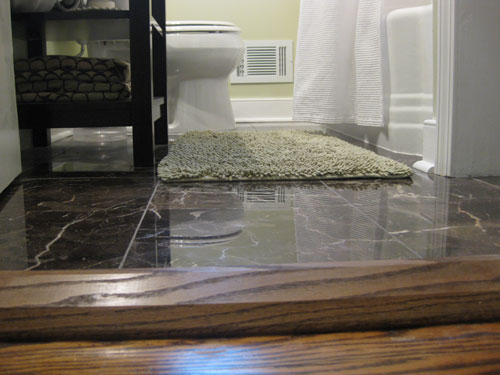
Just as I had attempted (in vain) to save as much trim during demo as possible (total trim saved = none) we also tried desperately to salvage and reuse the original wooden threshold at the bathroom door. Sadly it was nailed and glued so thoroughly that it couldn’t be done (read: it took almost an hour to pry it out and it was in over 10 pieces by the time we finally got it removed). The missing piece not only exposed some less than attractive hardwood under it, but also called attention to the slightly unfinished edge of tile AND the fact that our bathroom floor was about 1/2″ inch taller than the rest of the house (not ideal, obviously – but it’s how the old floor was and we couldn’t solve it this time around for reasons I won’t bore you with).
To replace it we just picked up a simple unfinished oak threshold at Lowe’s (they sell a bunch of options in various sizes). Then we used a circular saw to cut it to fit perfectly into our threshold (it ended up being just under 24″ wide). Once we confirmed that it fit nice and snugly, it was time to take it outside and stain it. Knowing that matching the custom color of our refinished floors wasn’t possible, we just picked a standard stain color (Dark Walnut) that was closest to the threshold scrap that we brought with us. After staining we applied two thin coats of polyurethane to seal it (and left it outside to dry so the house wouldn’t be all fumey). The next morning the new piece was easily nailed into place with the same finishing nails that we used on all of the trim– and it actually looked like it had been there all along.
Speedbump #5: What happened to all the screws for the light fixture?
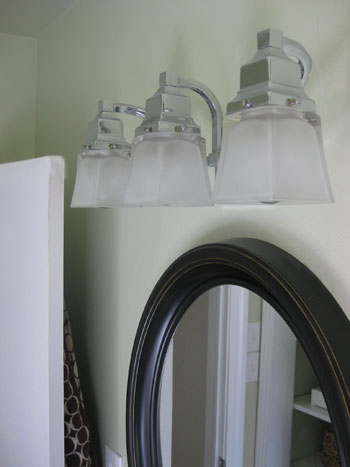
Before demo started, we removed all three of the glass covers on our light fixture to ensure that none of them broke while I was swinging and knocking things down. And you know those little flat screws that hold those types of covers in place? Well, I brilliantly decided to leave them in the fixture so they wouldn’t get lost. I say “brilliant” because I neglected to foresee that all of that shaking and banging during demo would somehow manage to slowly and stealthily unscrew 7 of the 12 screws out of the light fixture and into my pile of rubble (and therefore into the trash without my knowledge). So when it came time to simply reinstall the glass covers, we barely had enough screws to hold even one of them in place. Oops.
Sherry was confident that the home improvement store would sell replacement screws. I, playing Debbie Downer in the moment, was certain we’d be replacing the entire light fixture. Ho hum. Fortunately, my wife is often right (how many points do I get for that public admission?) and we were able to pick up two packs of replacement screws in the lighting section for under $3. Disaster averted. Now those glass shades are held securely in place and I’ll know better next time (removing them all and storing them in a ziploc bag or taping them to the side of the glass covers themselves would be the smarter way to go).
So those were five of the little curveballs that the bathroom project pitched our way. What about you guys? Have you ever dealt with any of these little issues? Have you experienced any other minor hiccups during a recent project? In the scheme of things these little hiccups are often forgotten but we wanted to share ours, if for no reason other than to remind ourselves what we did in case they happen again in our next DIY undertaking.
Wanna read each detailed post about the big bathroom makeover? Check out Chapter One (Planning), Chapter Two (Demo), Chapter Three (Wall Reconstruction), a little teaser post, Chapter Four (Tiling), Chapter Five (Grouting), Chapter Six (Trim), Chapter Seven (Building The Vanity) and the big reveal right here.

Teresa says
Thank you for solving the exact same towel rod problem. I feel a bit dumb for not coming up with it myself. Do you know the correct height for the TP holder? Or is there one? Thanks!
YoungHouseLove says
The way we determined the height of the toilet paper holder was to sit on the toilet (fully clothed with the lid down) and hold it up at varying heights until it felt right. You might be able to google around for standard toilet paper dispenser heights, but our move-it-around-til-it-feels-best method worked for us. Hope it helps!
xo,
s
kristin says
And I meant to say earlier, I love how your reno job came out — gorgeous! Thanks for sharing all the details, time and costs.
I am now considering bathroom reno phase 2: new tile, replacing the toilet, and reglazing the tub. I also need to learn how to fix the dripping faucet.
Thanks for keeping it real with the little annoyances!!! Glad to know it’s not just me.
Denise says
John,
Thanks for the information on the exhaust fan. We are converting a half bath next to our kitchen to a pantry and during the remodeling process our exhaust fan has started misbehaving. Leaving it in place will spare us a sheetrock patch. We’ll try to fix it ourselves using your technique. Did you remove the motor to clean it or leave it in place?
Great post!
YoungHouseLove says
Hey Denise,
I actually did both. When the motor was unplugged it just took a couple of screws to take it out (I left the wires connected – with power off – to save that extra trouble), but having it out of the motor casing helped me clean out all the nooks. Plus I was able to get some WD-40 in places I couldn’t have reached othewise. But once it was screwed back in place I did a little extra WD-40ing to get it to the point where it was squeak-less.
Good luck! We’ve got our fingers crossed for ya.
-John
Nina says
We did a bathroom reno last year and ended up having to redo the plumbing throughout the house. Not too bad since I have plumbers in the family. The one DIY tip I learned the hard way is that caulking goes bad! We had some left over and I used it in the bathroom. It never set. We had to wipe up a ton of goopy caulking, clean it with a caulking remover and re-caulk the whole thing. I think I read (after the fact) that it only lasts about a year.
31everything says
Gorgeous marble tiles :)
heather s. says
I’m having new tile installed in my bath this week so I’m trying to figure out what kind of threshold to go with. I didn’t consider wood (although that’s what goes between my dining room and kitchen)so maybe I’ll give it a glance today at HD. I’m leaning towards white marble since it will blend in with the door casings and trim in the room.
YoungHouseLove says
Either would probably be great! Good luck!
xo,
s
Lori says
Quick question for you two. My husband and I are pondering a tub/shower area remodel (we’ve done as much as we can with the other side of the bathroom). The primary reason for this remodel is that we inherited a horribly awful GOLD framed shower door.
What made you guys go with a shower curtain as opposed to a door? Cost? Installation?
I’d really appreciate your thoughts.
YoungHouseLove says
Hey Lori,
We actually did consider hanging a seamless glass shower door instead of a curtain to allow the space to feel even bigger and more open, but with a little one on the way we thought something softer and less shatter-prone might be a smarter choice for our growing family. Plus it was easy on the budget!
Tammy says
My husband and I replaced our vanity top with a new one-piece unit we ordered from a big box store. We realized two things after we had installed the new top. It would have been easier to adjust the angle of the new faucet handles before the vanity top was set into place–my husband had to do it from inside the cramped, dark vanity. We also realized that the new top had no overflow drainage in the sink. It’s in a guest bath, so I’m nervous that it has more of a chance of overflowing since we don’t check it all the time.
karisa says
I was wondering if you have a light above your bathtub? My upstairs bath only has a light above the vanity and right now I have a semi-sheer white curtain so it allows light into the tub area; however, I really like your shower curtain and the idea to hang it high, but I’m worried that it will make the tub area extremely dark. Any suggestions on how to add more light to the tub area without hardwiring something? The bathroom has no windows :(
YoungHouseLove says
We don’t have a light above our tub or anything, but we have one over the sink along with a window so it keeps things nice and light. Maybe getting a sheer or clear shower curtain will help let more light in?
xo,
s
Bia Silveira says
Great work with the whole house (both old and new). And with the kids (both 2 and 4 legged). Love getting your posts on my google reader. And just to be the annoying designer, (and in my case, the one who can never remember the proper name for things and is always upset about it) those “And it still looked completely finished since the cut rod slips into the two end thingies” are called finials. How I remembered that while reading is beyond me, but yey for my crazy memory! Keep up the good work, the world needs the eye candy!
Nicole Rubio says
Hi kids, great bathroom, well done. Where did you get the vanity and sink?
YoungHouseLove says
We made it (here’s the link: https://www.younghouselove.com/2010/01/tackling-the-bathroom-chapter-seven/).
xo,
s