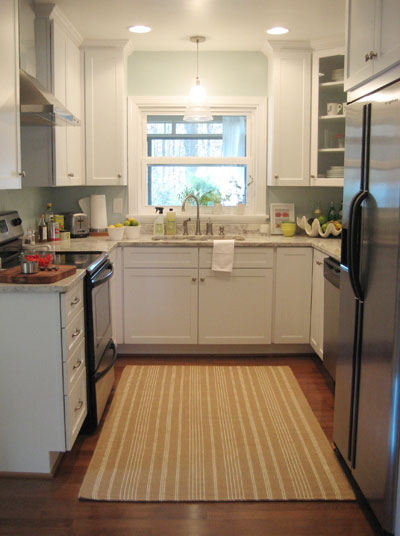
Ok, we’re calling it. The kitchen is officially done!
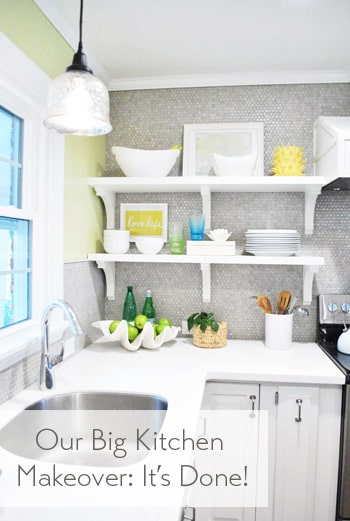
Of course that’s a lie and we still have a bunch of little things to complete, like:
- adding decorative molding to the back of the peninsula
- adding a message center/chalk board to the side of the pantry
- adding the last of the transitions/reducers to finish the floors (and that rectangle of fireplace tile)
- replacing the broken light in the fireplace area – most likely with a spotlight that washes down the fireplace wall
- adding some sort of window treatment (colorful roman shade?) over the sink
And of course we dream of refinishing the surrounding oak floors to match the dark mocha cork in the kitchen so our whole house is more seamless (more on that here) but that’s a down-the-line thing. Thankfully all of the big stuff and most of the small stuff in the kitchen is checked off the list and we’re so excited to see how this room has transformed in the last five months. Can you believe we’ve been slowly chipping away at this renovation since October?! Things have definitely come a long way…
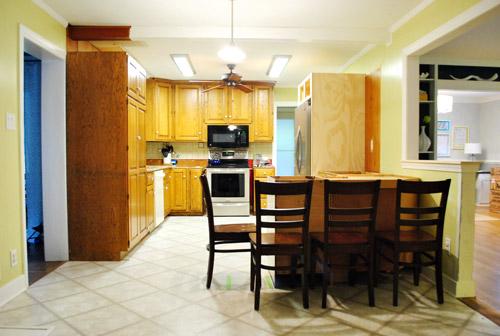
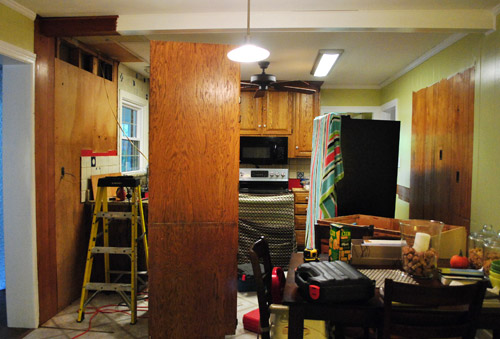
Just to save you from scrolling back, here’s the before again for comparison’s sake.
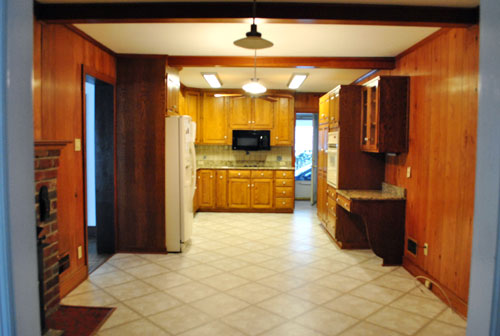
It really doesn’t even feel like the same room anymore. We can hardly remember the dark paneled kitchen that we lived with for almost a year while we planned our remodel and saved our pennies.
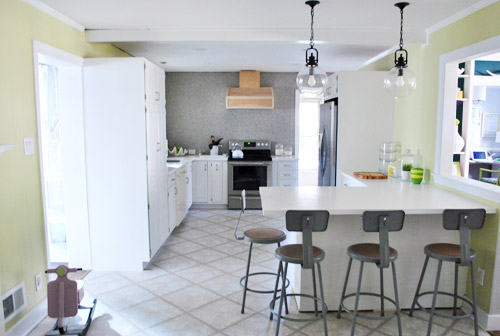
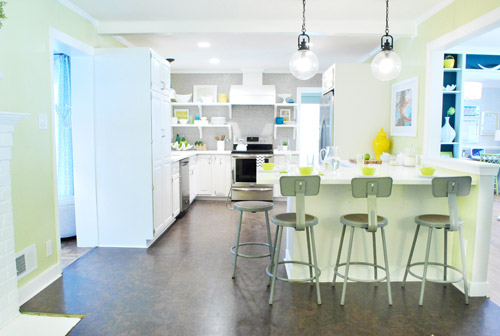
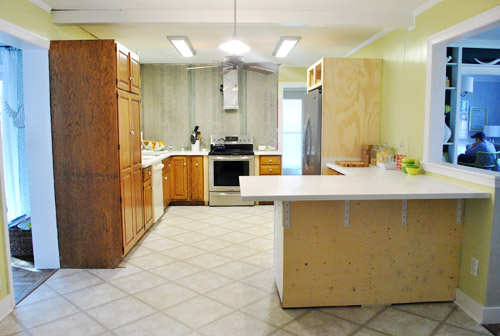
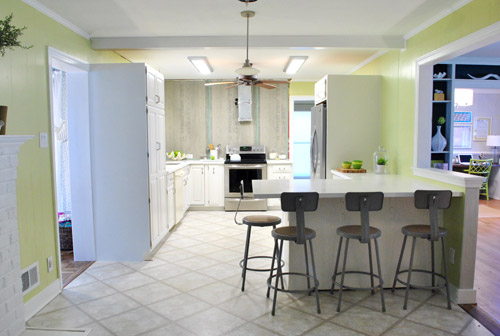
Here’s the makeover from the other side of the room:
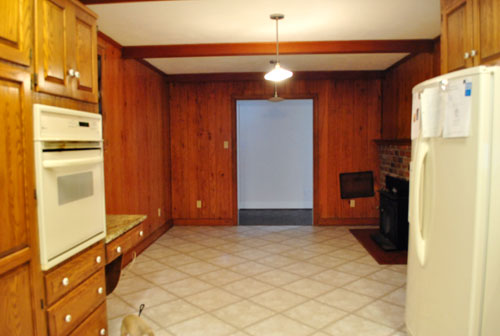
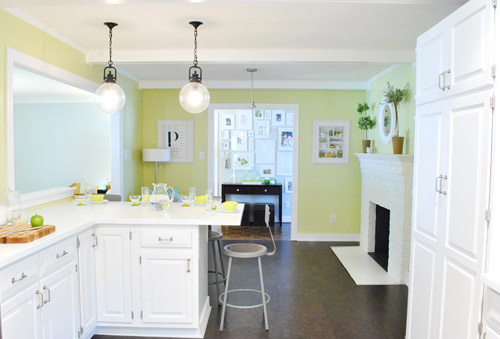
And here’s a before and after shot from a similar angle where we opened up the wall to create a nice big doorway between the kitchen and the dining room:
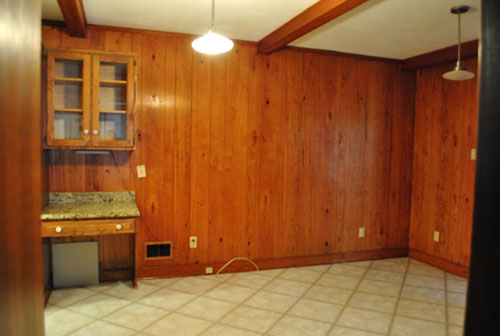
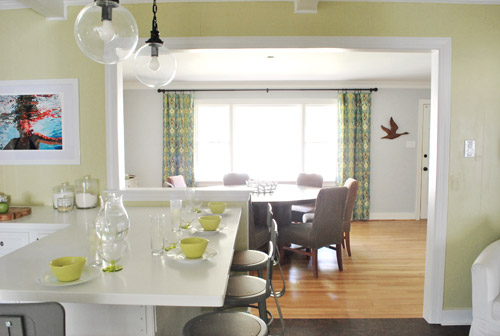
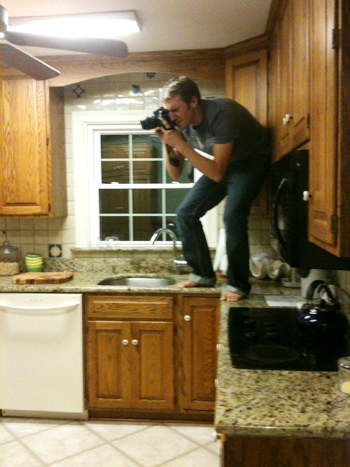
Oh and here’s another fun before and after comparison (from the doorway of the office that leads into the kitchen):
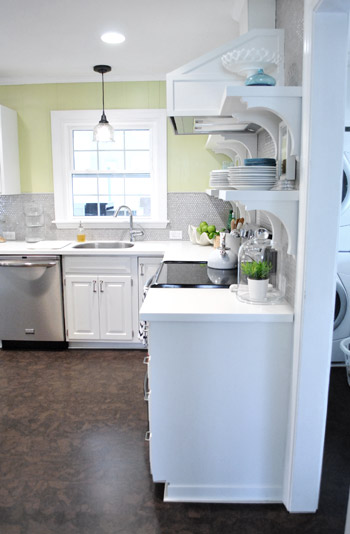
Here are a few more POVs of the room as it looks now:
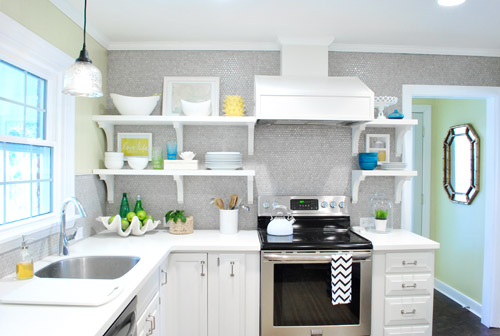
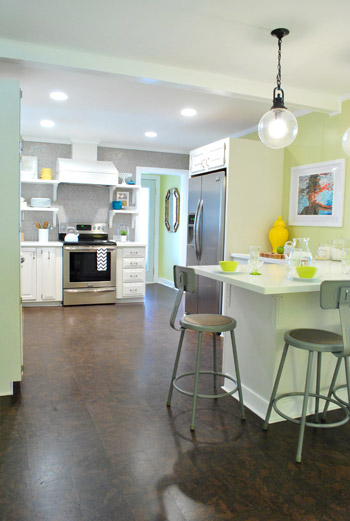
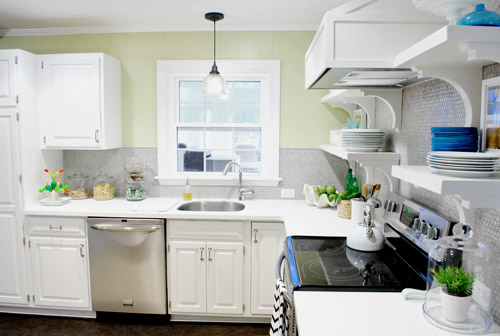
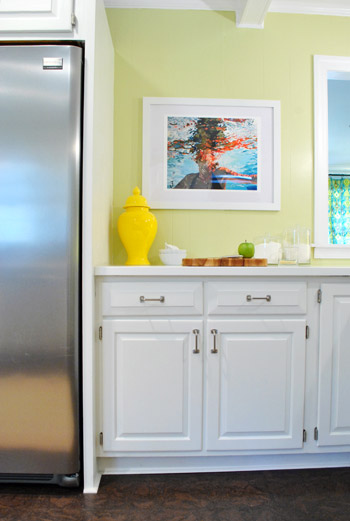
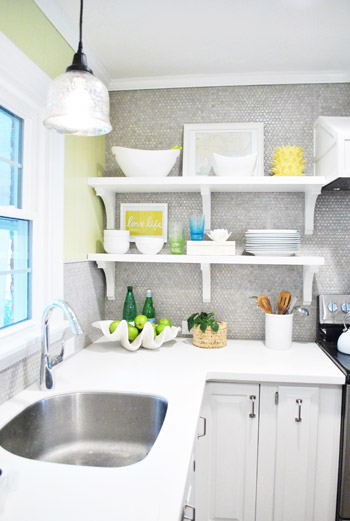
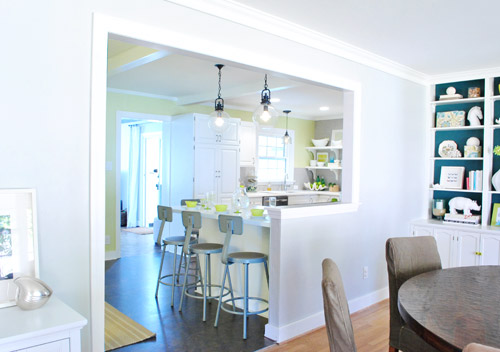
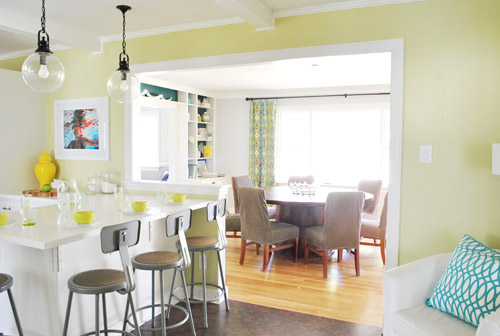
Lots of things are still in flux (items on the counters and shelves will definitely rotate in and out, which is fun for a kook like me). And these two 4 x 6′ rugs from our first house’s kitchen and third bedroom aren’t permanent…
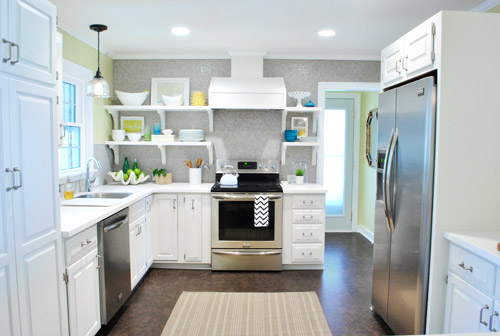
… we just tossed them down for a few shots, but we envision getting something new to help define those areas (they’re old and stained and not as soft underfoot as a few other options, so we’ll keep you posted).
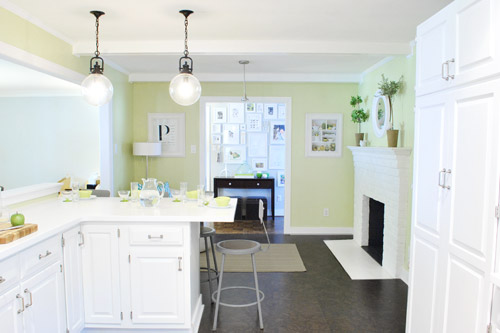
Oh and when it comes to the bar stools that we debated spray painting anything from a bright color to oil-rubbed bronze, now that the floor is so dark the silver color ties into the stainless appliances and looks nice and balanced in person. So we might live with them a while before we decide to defile them with spray paint or anything. Of course we’ll keep you posted.

And we actually have one more tweak that we’re seriously thinking about ever since a reader sent us a photoshopped picture of our hood with the top as wide as the bottom part (thanks Brooke!). She actually sent the pic on the 15th of February, but we decided to wait to finish up the kitchen (add the flooring, etc) before making any rash decisions…
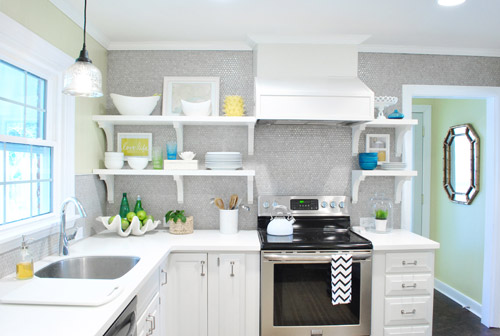
The good news is that we’re still smitten with the idea, so all signs point to beefing up the neck of the range hood someday! Of course we’ll keep you posted on that too.
But back to the overview of our big kitchen makeover. We definitely got really hands-on with this transformation (especially when compared to our first kitchen reno, which we managed but mostly outsourced, my how things change). It just goes to show you that over time you can learn as you go and five years later you might be way more comfortable doing a lot more than you did the first time around. Here are some of the things we did in our current kitchen to save money:
- doing all of the drywalling and trim on our wall opening into the dining room
- relocating things like our fridge, pantry, and stove to make a better work triangle by ourselves
- refinishing our original cabinets and reusing our faucet and sink
- getting additional base cabinets from the Habitat For Humanity ReStore to create a peninsula
- reselling things on Craigslist (our old granite, dishwasher, over the range microwave, wall oven, dining table, and fireplace insert)
- going with Corian over pricier granite or marble
- buying on-sale appliances over a tax-free weekend with Energy Star discounts stacked on top of that
- building our own cabinet around the fridge
- scoring our $350 range hood for just $60 on craigslist
- doing all of our own tile installation with on-sale penny tile
- building our own range hood cover and shelves
- buying inexpensive metal lab stools from a school supply website
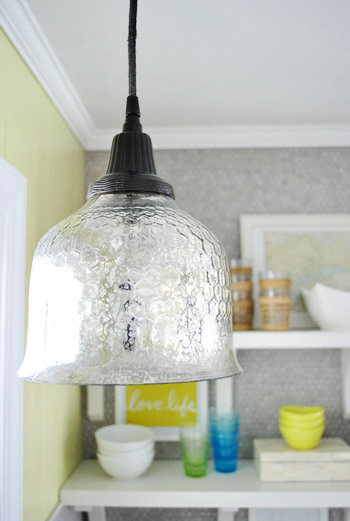
- getting pendant lamps for over the peninsula on the cheap from a local outlet
- spray painting an old $29 Pottery Barn outlet pendant to match the others for over the sink
- getting clearanced-out cork for the floors that we laid ourselves

And here’s an actual budget breakdown:
- New cork floor + underlayment from Lumber Liquidators (including the cork in the laundry room too): $848
- All new stainless appliances (originally priced at $3,776): $2,129 (we originally spent $2,384, but later switched the microwave)
- Opening the doorway into the dining room, which was done by a local contractor and then finished by us: $790 (which includes $90 of materials that we bought to drywall and trim it out)
- Additional base cabinets from the Habitat For Humanity ReStore to create peninsula: $88 (they would have been $500+ new)
- New pendants over island and sink: $149 ($60 for each globe pendant and $29 for the one over the sink)
- The cabinet we built around the fridge so it looks built-in: $90
- All electrical work (done by local pros over three visits): $711
- Wood filler, primer, and paint for refinishing the cabinets: $69
- JennAir range hood scored on craigslist (worth $350): $60
- Wood and brackets to hang/frame out hood: $115
- Wood & brackets & all hanging materials to make shelves: $141
- Corian counters in Glacier White from Home Depot ($33 a square foot): $1,700
- All new cabinet hardware and hinges: $173
- Backsplash (penny tile from The Tile Shop): $280
- Four industrial lab stools (from a school supply store): $168 (they were just $33 each plus shipping)
- Miscellaneous (screws, nails, glue, little cords/connectors for appliances, flooring & tiling supplies like grout and sealer, shoe molding, etc): $194
- Items we sold on craigslist to get money back to put into our reno: old black microwave: +$90, old fireplace insert: +$60, old dining table and chairs: +$120, old bisque dishwasher: +$90, old granite: +$350, old bisque wall oven: +$40 (total back: +$750)
- TOTAL SPENT: $6,955
Not bad since a large kitchen renovation of this scale (our room is 24′ x 12′), if outsourced would probably be around 30K (for a giant new doorway that leads to the dining room, an accent wall of penny tile to the ceiling, all new cork floors, all new appliances, refacing oak cabinets and adding a peninsula to match the original cabinets, all new Corian counters including a giant 3 x 5′ slab for the peninsula, an entirely new lighting plan, a built-in hood with custom built shelves, a relocated pantry, stove, and built-in fridge, etc). We originally budgeted 10K for the job, so we’re really happy to come in under!
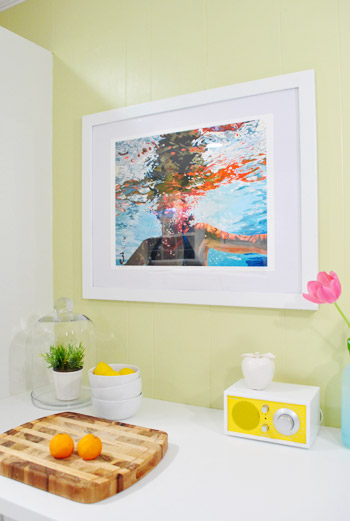
By contrast, our first kitchen renovation (from back when we both made bank working in advertising, haha) involved pricey granite, a lot more professional help, and all new cabinets.
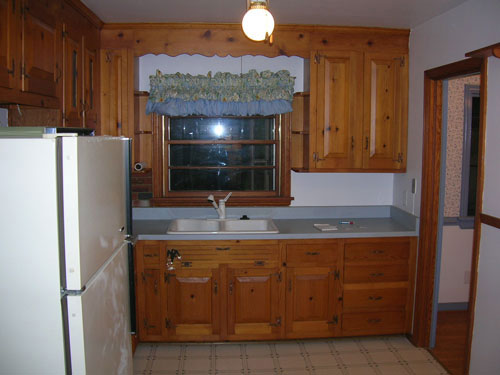
It actually came to $20,500 (including the purchase of a fridge and stove that weren’t included in this breakdown since we bought them a year prior). And that room was only 13′ x 10′!
So although this second kitchen reno took us tons of time (we started this project back in October, and have probably put 5-10 hours a week into it since then – for a total of around 155 hours) it was definitely something that we loved doing – mostly on nights and during weekend Clara-naps. We almost never worked on it during the day on weekdays (when the blog is active and the bean’s awake one of us is a stay at home parent and one of us is on blog duty) so that might help those of you with a day job who wonder if you can pull off a major kitchen remodel like this on nights and weekends.
You can! It might just span across five months or so, but as long as you take things one small project at a time (it’s waaaay less intimidating than thinking of it as one big project when you break things down into bite-sized chunks) you’ll most likely live to tell the tale. And all the love and sweat that you put into your “new” kitchen will be totally worth it in the end.

Who’s excited to call this turkey done? Is anyone else out there about to start a big kitchen reno? What have you guys done when it comes to being hands on and saving some money by doing things yourself? We’d love for everyone to share tips about how they renovated their kitchen on a budget so this post can become an awesome resource for anyone out there who is thinking about getting started and would love to peruse a bunch of what-worked-for-me tips! And now we just owe Clara and Burger a big thank you: for sleeping through all the hammering and drilling and just generally being such great little DIY enthusiasts (Clara still loves to measure the cabinets with her tape measure since she remembers us doing it months ago).
A five month long kitchen reno can definitely “interrupt” daily life, but our little ones are such troopers, so we’re sending them both a big virtual kiss for their patience and excitement throughout the loooong and not-always-easy process! Our tip is to try to maintain as many working appliances as possible (which is easier when you’re working with your existing cabinets, but nearly impossible when it’s a full gut job). We only had a few days without most of them, if that, which was no sweat! In fact it totally paled in comparison to the 113 days that we were without our first house’s kitchen during that reno. Thank goodness for extension cords to keep the fridge running and the fact that moving our stove across the room didn’t mean losing the function of it!
Psst- To check out virtually every post about our kitchen renovation, click here, here, here, here, and here (hooray for monthly breakdown posts that have 20+ links in one place!).

Molly K says
WOW! It looks awesome you guys!! Job well done! It doesn’t seem like it’s even the same room from the before shots. You are my kitchen renovation heroes! :)
Laura says
Bravo! Looks fantastic & so that $$$ is absolutely incredible. Hats off!
Amie says
Wonderful! I am glad to see it all from a big step back. The budget breakdown and where to save are helpful too.
Lindsay@Tell'er All About It says
It’s awesome-sauce, kids!!! Congrats!! My favorite piece is the lighting. I think that really makes the room!!! And kudos for saving the cabinetry! It looks great painted!!
Lauren says
Amazing job!! Love the end result of all of your hard work!
Kristen says
You guys did an amazing job! The kitchen seems to perfectly suit your taste.
Debbie @ My Little Mess says
It’s amazing how you were able to do a complete transformation of your kitchen for $7,000! Maybe I can use this to convince the hubby to let me paint our kitchen cabinets…
Dianna says
Amazing and inspirational! Congratulations. I wish I could get my husband on board to tackle DIY at this level. Alas, that will probably never happen.
Karen F says
I don’t have any kitchen tips (we completely outsourced ours, before I discovered your blog) but I just wanted to chime in that your kitchen is so gorgeous. It would be an amazing makeover if it was contracted out, but the fact that you guys did 99% of it yourselves just pushes it into another league. You guys should be very proud! I hope you all enjoy your new kitchen for a long, long time.
I also wanted to add that I like the bulked up range hood (it’s always seemed a little “off” to me, but I could never put my finger on what it was about it). Also, (not to be critical, this is just a suggestion) I would love to see what it would look like if you hung something on the wall below the hood/above the stove. Maybe a cool clock. I just feel like that one spot needs something!
Karen F says
and I forgot to add that I am obsessed with your penny tile, to the point that I am seriously considering ripping out our relatively brand-new backsplash to redo it. My husband will never let me do that, but a girl can dream!
YoungHouseLove says
Aw thanks Karen!
xo,
s
YoungHouseLove says
Oh yes, I think about that too! Love the idea of a clock. Maybe I can find a sweet little yellow or teal one!
xo,
s
KC says
BY FAR the best and most cheerful renovation I have ever seen!! I absolutely love it. The ‘old’ kitchen totally reminds me of the one in our first brick ranch in Richmond (BonAir area). Seriously…it’s amazing what you guys did on your own. We had ours done by others and for a lot more $$ than I’m willing to admit…and it didn’t turn out nearly as nice. congrats! :)
anna see says
wow! i am so impressed. all of your hard work and VISION paid off! xo
YoungHouseLove says
Thanks so much Anna See! You’re so sweet.
xo,
s
Lilly says
Its gorgeous I love it its such a breath of fresh air just looking at it. I really can’t believe how cheap this reno came out to be in comparison to ur first wow wow wow. U guys have learned so much and I’m happy u’ve worked ur but off n u guys deserve it (the outcome of ur kitchen). Clara will be very proud of u guys in the future just as ur parents should be now. Enjoy. By the way did u include all the take-out in the first reno budget? U guys also had a full functioning kitchen this time around. Thats money in the bank for ya.
YoungHouseLove says
Haha- so true! Eating out and scraping by with hot pockets for the first renovation was pricey (and we were dyyying for a home cooked meal by the end).
xo,
s
Crissy Woolever says
So Beautiful!!!!! I LOVE it!!! It really makes me more anxious to get a house so that I can start renovating…..someday :)
Ashley @ sunnysideshlee.com says
Looks great! Are you guys planning to do anything for the space in front of the fireplace?
YoungHouseLove says
We realized that we didn’t get any good pics of that zone, but it’s a chair with a lamp and an ottoman and a rug. We also have a basket of Clara’s toys in the fireplace most days, so it’s a great place for her to play while we cook or even for me to relax and read to her in that chair while John cooks. Haha. We’ll have to get better pics of that zone!
xo,
s
Amelia @ House Pretty says
Congratulations – the kitchen looks amazing and I’m sure it was worth every moment of hard work you put in! My husband and I are getting ready to take on our first major kitchen reno (we’re still in the saving and planning stage) and we’re hoping to do it in stages, so watching how you broke the job apart has been super helpful and inspiring. We have our first baby on the way and don’t plan to tackle the kitchen until after he or she arrives, so it’s nice to know that even big stuff can be managed around naps, evenings, etc.
Emily says
that is amazing! you guys were so thrifty this time around, but i love the outcome! great inspiration :)
Shelley says
Your kitchen looks stunning! I love all the happy colors too. You must feel great walking in there every day!
-Shelley
Janet @ door251.blogspot says
This is amazing! We are currently about to start our kitchen, tons of ideas now.
Thanks!
Emily V. says
The kitchen looks fantastic!
Where did you get the yellow ginger jar thats on your counter by the artwork? I’ve been looking for one that color for a while.
YoungHouseLove says
That was from HomeGoods! I also see similar ones on jossandmain.com sometimes!
xo,
s
Kate R says
I am totally digging how the tile backsplash goes along that entire back wall, it’s like an accent wall of teeny tiny tiles! Where did you come up with that idea? L-O-V-E I-T!
YoungHouseLove says
A lot of the kitchens that we pinned on Pinterest or tucked away in my binder of inspiration from ripped out magazine pages had a wall of accent tile to the ceiling (although it was usually subway tile or some sort of small glass mosaic tile). Of course we couldn’t afford the fancy glass tile at the store, but then we saw the penny tile and decided to go for it. So glad we did!
xo,
s
Cindy@Cinsarah says
I LOVE LOVE LOVE THIS!! I shared this on my FB page: https://www.facebook.com/Cinsarah?ref=tn_tnmn
You guys are such an inspiration!! You are one of my FAVORITE BLOGS!! :)
YoungHouseLove says
Aw, thanks Cindy!
xo,
s
Kelley says
Looks great, kiddos! I always am impressed (still!) by how much difference a little paint can make. By far, I think the biggest improvement was busting through that wall. You guys have any plans to invite the previous owners over to show them what you’ve done? That would be so fun!
YoungHouseLove says
That would be fun! They live far away, but we’d love to have them back over!
xo,
s
Kelley says
Also, I’m an idiot. Maybe they follow your blog. Why didn’t that occur to me before? haha.
YoungHouseLove says
Haha, they actually do read! They’re sweet and seem to like watching. They say they get a kick out of us doing all the work while they sit back and read! They’re such a sweet family. But seeing them see it in person would still be so much fun!
xo,
s
Michelle says
Love the finished product! So bright and sunny. I have to go back and find out where you got the paint for this room. So impressed at your savings too!
Michelle says
Found it- Sesame by Benjamin Moore. It looks much brighter in your room than it does on their site. Our living room is bright green(Asparagus by Behr) and I would love to soften it up a bit. Might check out this color.
YoungHouseLove says
Yes, it’s one of those swatches that almost looks beige but if you get a tester and put it on the wall it’s this golden yellow-green color! Sort of like the inside of an avocado- but very soft in person (it usually photographs a little brighter than real life).
xo,
s
Carrie @DreamGreenDIY says
Perfection – It’s astounding how much you got done and for such a low final cost. Kudos to you!!!
We recently started our own kitchen overhaul at the beginning of the year. So far we’ve painted the cabinets – Still planning on a DIY backsplash treatment. I’m thinking “faux tile” using painters tape and paint. We’ll see how it goes!
http://dreamgreendiy.com/2012/01/18/kitchen-overhaul-day-9-finishing-touchesfinal-reveal/
P.S. Thank you for always encouraging us to post our own links =) It’s nice to know that you care!!
YoungHouseLove says
Wow- your kitchen looks great!
xo
s
Johanna says
So I wasn’t sure if this was *anything* along your line, but now that you are considering changing your range hood I thought I’d send you this link after all:
http://www.schoener-wohnen.de/einrichten/wohnwelten/kueche/30103-aesthetische-kueche-fuer-geniesser.html?enum=4618
This is a kitchen that was featured in a German magazine – and I absolutely adore the built-ins, color scheme and especially clever range hood treatment. Bold, yes, but beautiful! :)
YoungHouseLove says
What a gorgeous room! LOVE the light too!
xo,
s
Lanie says
Bravo! You two are rockstars! That is a fantastic price for that size kitchen. I really love how it all came together.
I love the underwater photo too, how fun! Is that you?
My husband and I both work full time and we renovated our kitchen ourselves in about a month during weeknights and weekends (ALL the weeknights and weekends, sometimes until midnight). It came to about 12,000 with appliances, so glad to have done it ourselves, and I appreciate it so much more. To this day we are still doing tweaks, for instance I just fixed up my breakfast nook with some updated chairs.
http://www.unruffledlanie.blogspot.com/2012/03/breakfast-nook.html
Thinking I might need some rugs now though that I see yours! Don’t know if they’d get too messy in the kitchen. I like just sweeping up whenever.
Anyway, GREAT job! Love your house!
YoungHouseLove says
Wow, your kitchen looks gorgeous! And as for the art, we got it from an awesome Etsy artist! I wish it was me! Here’s more on that: https://www.younghouselove.com/2012/02/its-a-lady/
xo,
s
Anna Lisa says
1. I am seriously impressed with how far under budget you guys came in.
2. Love the idea of beefing up the stove hood a little. You have the chunky (ok, boxy) refrigerator on one side and pantry on the other, so a chunkier stove hood would look nice and balanced.
3. Can I offer a suggestion without sounding critical? Obviously this is just personal taste – I love the warmth the cork floors bring to the room but since the rest of the room is so much cooler-toned, I feel like adding some warm wood things (like the wooden cutting board I see you have) to your counters or open shelves might help bring that warmth up off the floor and into the rest of the room if that makes sense. I think using the same wall color on the ceiling could make it feel warmer too but that might be too much since it’s a pretty bright color.
YoungHouseLove says
Love the suggestions! We definitely keep rotating out what’s on the counter and shelves, so some warmer wood items could definitely make their way in there! Not sure if our wall color would make everyone look greeny yellow if it’s on the ceiling (you know how a color on the ceiling can cast down on people’s faces?) but you never know where we’ll end up!
xo,
s
Joelle says
LOVE IT! Wish i had the guts…we are currently renting our home and have an older kitchen and sometimes i think about just doing some things to it to get practice…it could really only improve it!
Question…have you thought about doing white hinges on the cabinets, or using ones that go on the inside? The silver hinges just stick out a bit to me, but wasn’t sure that was an option. I noticed in your first kitchen that the hinges don’t show so wasn’t sure if they were white, or just on the inside? (FYI, i’ve never done anything with cabinets so no idea what the options are).
YoungHouseLove says
We wished we could have done hinges that go inside but the way our doors are made (they’re half sunk so they have a bevel around the whole inside edge) it wouldn’t work for us. But in the end we don’t mind the stainless hinges since they match the hardware and the appliances and even the stools!
xo,
s
JP says
I’ve got chalkboard contact paper, like that mentioned above and I love it. Especially since it’s easy to remove if we want to sell. I use chalkboard markers with it.
I think my favorite part is the pendants. And the penny tile.
And I second the motions to beef up the hood (my husband said just that when I showed him the pictures) and to upgrade the stools.
Actually, my favorite part is that you tackled transforming things on the scale that you did. It’s lovely.
Mary says
Too bad you tore down all that wood paneling.
According to Apartment Therapy, the 60’s favorite is back: http://www.apartmenttherapy.com/wood-paneling-the-60s-favorite-is-back-167828
Time to get started on a second renovation! Hope you saved all that paneling!
;)
YoungHouseLove says
Haha, the good news is we kept it! we just painted it. We actually like the subtle texture of those lines- sort of like beadboard.
xo,
s
Lauren says
Amazing? I have to ask – no more microwave? Or did you figure a way to hide it?
YoungHouseLove says
Oh yes we hid it away! More on that here: https://www.younghouselove.com/2011/12/goodbye-microwave-hello-microwave-cabinet/
xo,
s
Maria says
This room just screams happy! I would probably walk in it every day with a big goofy grin on my face! Congrats on finishing!
Brenda says
I really like that photoshopped range hood. And I can’t believe how little you spend on such a huge transformation!
Elizabeth says
Hooray Hooray Hoorah!!! Looks awesome. Glad to follow it every step of the way!
Ty Lee says
I will admit that during the process of your kitchen reno, there were times was I was a bit unsure of what I would think of it. But seeing it all come together, it looks great and definitely reflects your personality!
My house is a new construction that is being built right now, but looking at their list of “upgrades” and the ridiculous amounts they want to charge me for them, I have decided that I’m going to just have their default cabinets, default laminate counters, and default vinyl flooring in my kitchen (I know, yuck!).
You know what that means: complete kitchen remodel.
But my husband used to do plumbing, my recently-retired-and-bored father in law does woodworking and has an electrician’s license, and I tiled floors in my roommate’s house in college in exchange for free rent. I think between the three of us, we can get this done for cheap! (well, relatively cheap for a kitchen remodel that is!)
I have kids too, so I can completely understand having to do projects at night and on weekends. It’s nice to see a realistic timeline!
And as always, thanks for sharing :)
YoungHouseLove says
Oh yes, I bet it’ll look gorgeous! Send us before and after pics for sure!
xo,
s
Tara says
Absolutely AAAAHHHHHHH-MAZING!!! I can’t believe it’s the same kitchen! It must be so fun to be (almost) completely finished with this project:) congrats to you guys – I’m so excited to see what’s next!
denise says
Just lovely work, as always. You continue to serve as both my “Miyagi” (http://en.wikipedia.org/wiki/Keisuke_Miyagi) and long-distance inspiration. We’re in home stretch of re-doing our kitchen as well. We started the week in between XMAS and New Year’s–but other than that week it’s been all evenings and weekend work (I do have one of those pesky day jobs). We’ve replaced the countertops, refaced the cabinets, added pulls, changed hinges (much harder than I would have thought), tweaked some cabinetry, changed task lighting, and changed the backsplash. It would have been much easier had our tile countertop been installed properly (grrr). Thanks again for serving as our unwitting teachers!
YoungHouseLove says
Aw, you’re welcome Denise! It sounds like you guys have made so much progress! Good luck!
xo,
s
Laurie says
Speaking of step-by-step renos on nights and weekends… Thanks to your blog post about changing th wax ring on the toilet, we decided to do that and put in a new toilet. Turns out our waste line was cracked, so this simple change-out became a “jackhammer the slab floor, new waste line, new tiles, and paint the vanity while we’re at it” nights-and-weekends with two full time jobs and two full time babies. My husband blames you guys ;) lol.
YoungHouseLove says
Woah- that sounds like a lot of work! So glad you made it through (most husbands blame us, actually, haha).
xo,
s
Chris says
Where is your microwave now?
YoungHouseLove says
See the cabinet to the left of the sink! Surprise, it’s hiding in there. Here’s that post for ya: https://www.younghouselove.com/2011/12/goodbye-microwave-hello-microwave-cabinet/
xo,
s
Jennifer in VA says
One tip about the message board/chalkboard center on the side of your pantry – I’ve done it – will try to email you a pic but do NOT, repeat DO NOT waste your time with magnetic primer – 4 coats later and a strong magnet will barely hold up one sheet of paper.
I would recommend- assuming you want magnetic properties on your msg ctr – that you have a piece of sheet metal cut to whatever size you want – I would go for the whole side of your pantry. And then paint the chalkboard paint over the metal.
Have fun with it no matter what.
Jennifer
YoungHouseLove says
Great tip Jennifer!
xo,
s
LARY @ Inspiration Nook says
Great project. Great outcome. Great total cost. AMAZING!
So inspiring!
bfish says
Very nice and effective photo journey of your entire process — it certainly is a major improvement! For me the best change is the large opening between kitchen and front (dining) room; the extra light and openness make a huge difference.
And I agree that (1) stools look good as-is; painting anything too bright would be OTT; and (2) the reader’s suggestion for the change to the hood will look a lot better. (Sorry, no offense but your hood-covering design looks DIY and not in a good way, while your many other projects are very professional-looking.)
I can understand that you want to integrate your flooring materials through use of a uniform color (dark brown), but hope you’ll give thought to leaving the wood natural in parts of your house that don’t flow together (e.g. MBR). We considered dark-staining our wood floors in several houses we’ve lived in, but didn’t do it, and I’m very happy with the lighter, more natural shade. Dark floors (unless it’s a naturally dark wood species) go in and out of style; natural wood is timeless. Just my 2 cents . . . .
YoungHouseLove says
Thanks Bfish! We definitely give everything lots of thought before doing big projects like staining the floor, so there’s still a lot of time for us to think it over! The floors in the master bedroom are deeply stained in some areas (it looks like they lost their seal and then some dark stain was dropped on them in some places), so something has to be done! We had darker floors in our first house (for 5-ish years) and loved them. I believe dark floors can be as classic as lighter oak (my mom’s house has always had dark wood floors, and it was built in the 20s) so there’s definitely some degree of personal preference I think! But we’ll definitely give it lots of thought before pulling the trigger.
xo,
s
Sarah says
Wow! Your new kitchen is so bright, light, and happy! I am curious to know if the people you bought this house from know about your blog. Do you know?
YoungHouseLove says
Yes, they actually read! They’re very cute about it. They say they love watching us do all the work – hahah.
xo,
s
heather says
Whew! Seeing these made me realize that renovations are totally worth crazyness for.
partyofsix says
WOWIE WOW WOW! You guys are my inspiration for how to think outside the box and transform an ugly duckling into a swan. We’re breaking ground on a new house in July and will be on a tight budget so I’ve been reading your kitchen makeover with interest to see how I can use cabinets from our local SecondUse (http://www.seconduse.com/) to build the dream kitchen. We’re also planning on putting cork floors in the playroom, so I was very glad to read your tutorial on that too.
Anyway, what do you think about painting the bar stools the same blue that’s on the back of the bookshelf wall in the dining room? You’ve accessorized the kitchen a wee bit with some blue bowls, etc so I think it would tie in the colors between the two rooms nicely. Staining the seat to match the floors would be good too. Just a thought….
YoungHouseLove says
That’s definitely one color we keep coming back to if we do decide to paint them! Love me some deep teal!
xo,
s
Thao says
The kitchen looks incredible!!!
You guys did an amazing job.
Ariana says
i love that gold mirror in the laundry room!! maybe he would get more glory hanging horizontally over the guest room bed? the shiny silver penny tile/appliances are stealing his vintage thunder. love it either way!!!
YoungHouseLove says
I’m thinking of playing around with some rub n buff to go oil-rubbed bronze with it to work with all the kitchen lighting actually! It’s so nice to have a place to check your face/clothes for cream cheese/stickers before leaving! Haha.
xo,
s
Ericka says
Love how bright and cheery it looks! What a difference! GREAT job guys!
Kelly says
There. Are. No. Words. You guys are amazing! It looks fantastic! Kudos for your thrift-minded hard work, patience and dedication!
WOW!!!!!!! So inspiring!
:-)
YoungHouseLove says
Aw thanks so much Kelly!
xo,
s
Jill says
It looks great! I am soo glad someone said something about the hood! I’ve been wanting to say something for the longest time, but didn’t want to be rude. It is your kitchen. But I COMPLETLTY agree, it looks better wider!