That’s right. I broke out the word dastardly. And I know we should be hard at work on our office cabinets, but that’s a big job (aka: a weekend job – maybe even a two-weekend job) and I have been giving this rocker the stink eye since November (yes, even before we moved). For anyone who can’t even remember that far back (me), here’s a recap: I originally picked it up off of Craigslist for $25 because I really liked the simple lines of it. Then it sat untouched for over nine months until this weekend.
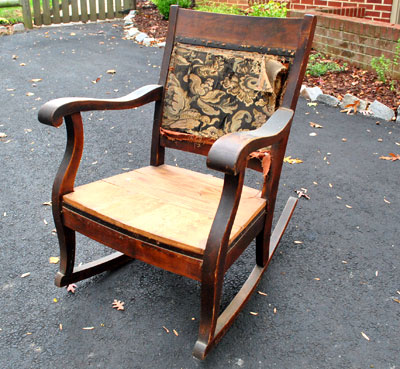
Why? Well, no sooner had I gotten it home than I realized I had no earthly idea how to reupholster it. At all. I mean I knew how to do the bottom (I’ve redone seats before) but the hole at the top completely confounded me because it had to look finished on both sides. Le yikes.
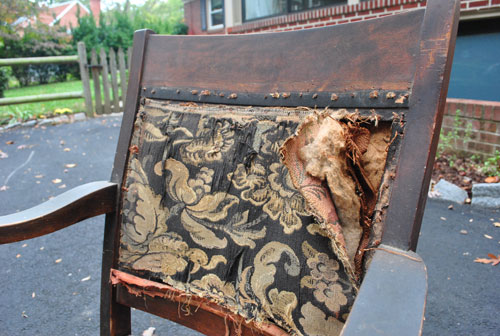
But I posted this call for help a while back and a bunch of you guys were awesome! I definitely learned that there were probably about ten ways to skin that cat (gross expression, sorry – but it was comforting to hear that even some very experienced folks described many different ways I could “go”). So it gave me the confidence to tackle it right away put it off for nine months and begrudgingly give it the old college try over the last few days.
I will disclaimer this entire process much like when aliens took over my body and I made a quilt for Clara, which is to say: I went rogue. I took in all the advice from you guys along with some google tips and some suggestions from a reupholstering-fiend friend of mine… and just played it by ear and did what seemed to work as I went along. So with that out of the way, allow me to share the madness that is Me vs. Rocker. Which is not to be confused with Man vs. Wild (Bear Grylls I’m not).
Oh and because this process was so involved, it actually took me a few days of work. Which meant it was a multi-phase thing involving lots o’ pics. So I broke it right down the middle for ya (since 40 pics in one long rambling post = madness that even we can’t endorse). So here’s the first half. And the second half is in the hopper for tomorrow (still have to snap some after pics for ya, but it’s almost all set).
Anyway, here’s how it all went down: First I gave my rocker the stink eye one last time. You know for old time’s sake. Then I got to work pulling staples and nails out of the frame along with the ratty old upholstery to see what I was dealing with.
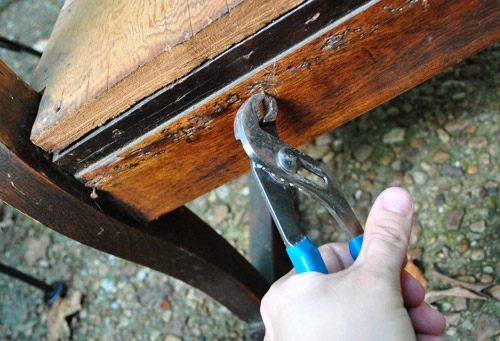
Oh and my tip would be to use a small channel lock pliers to pull things out. It was much easier than the back of a hammer or a needle-nosed pliers for me (although I still had to pull like crazy, this gripped better so I didn’t go flying backwards after tool slippage).
After about an hour I had a nice little pile going on. But I was only about 30% done.
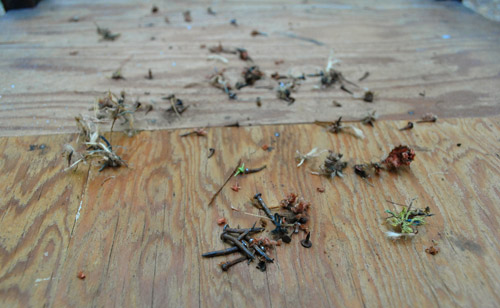
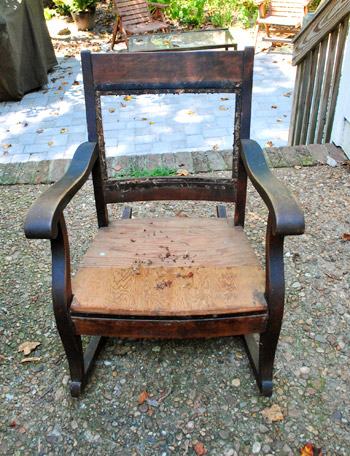
So I kept pulling old nails and tacks for a few more hours, and then removed the two wood seat slats and was left with this:
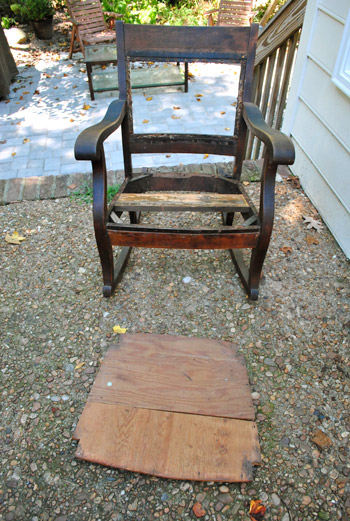
It was a pretty ugly sight for three-ish hours of work. And I knew I had some serious wood puttying and sanding to do when it came to the frame (to get it ready for some rich dark stain). But I was tired. So I decided to move onto a less strenuous step that I figured I couldn’t mess up. Upholstering the weird little two-pieces-of-wood seat. First I decided to tape them together so I could upholster it as all one thing (as opposed to two with a weird little seam). I just used some delicate surface painting tape because it didn’t need to be super heavy duty stuff (like sticky duct tape) because I knew once the batting and fabric were in place they’d hold it together for the long haul.
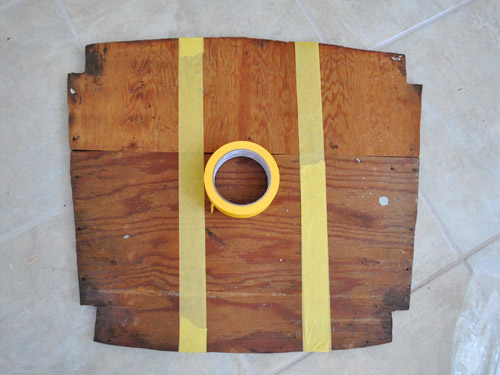
Then it was time for a bunch of layers of extra-loft batting. I used “Soft N Crafty” from JoAnn, which I purchased back in November when I thought I was going to tackle my chair (kind of embarrassing that I then just packed it up and moved it and it continued to sit around untouched for 8+ months, but whatever). I knew I could have used a big piece of foam for the seat, but I actually prefer wood seated rockers like this (John’s mom has the most comfortable one ever) so I decided I didn’t want too much cushion goin’ on. But I also knew that staple gunning one layer of extra loft batting around the back wasn’t going to do much…
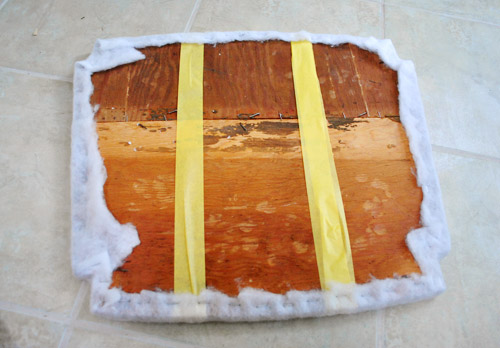
… so I applied a second layer…
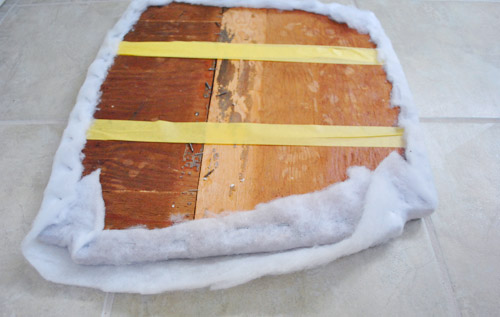
… and then a third, fourth, and fifth. By the end it was plush without being super sink-in squishy, which I liked. Nice and firm with a bit of softness.
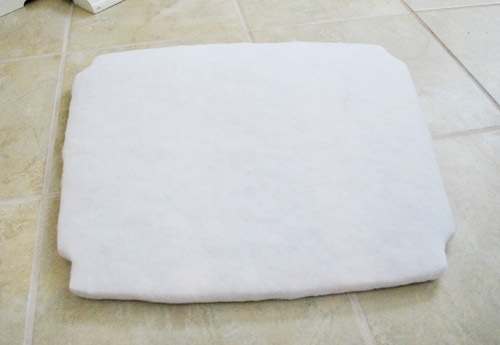
Here’s the point where I wanted to throw everything out the window. Yup, after five layers of batting applied staple by staple, I realized that the seat needed to be able to bend to fit past the arms and legs and actually lay flat on the base.
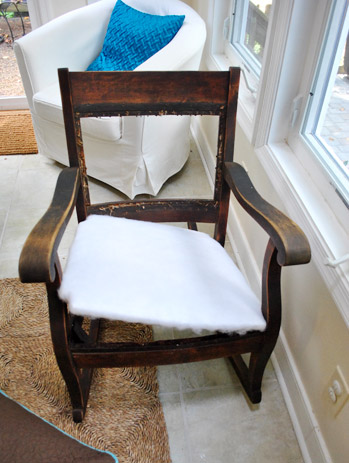
So I nearly broke down with visions of having to restaple five layers o’ batting after separating the two pieces of wood so they could hinge forward for just a second to be slid into place. Thankfully my sweet husband (who I always describe as the brains of this operation) pointed out that I didn’t have to unstaple anything and could just turn the seat over and cut the yellow tape that was running across the back and the batting should be flexible enough to fold forward (it wasn’t like I was trying to stretch it backwards or anything).
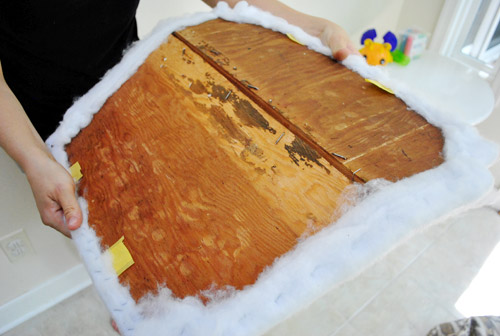
Worked like a charm. And apparently I was so excited I took this completely crooked picture in celebration:
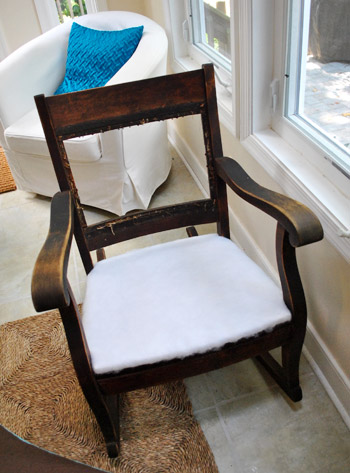
Then it was time to reupholster my seat. I was super excited about the “Kravet Design” remnant fabric that I found on clearance at JoAnn for… wait for it… $2 a yard (I got two yards for $4). At the time that I grabbed it I had no idea what I’d use it for, but after woefully glancing up at my biggest failure (Mr Rocker, sitting untouched in the sunroom for nearly a year) I realized that the fabric would look really pretty on it (with some rich dark stain to set it off). The pattern of my fabric meant that I would have to take the time to center it before stapling anything, so here I am roughly folding it around the seat to try to find a center line and see how it might look in place:
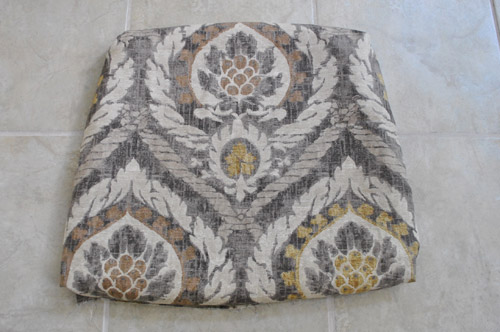
Then I flipped everything over and just shot one staple into the top middle and one staple into the bottom middle (while pulling things tight). This way I could flip it back over and ensure that I was indeed still centered (and if I wasn’t I just had two staples to pop out with a flat head screwdriver.
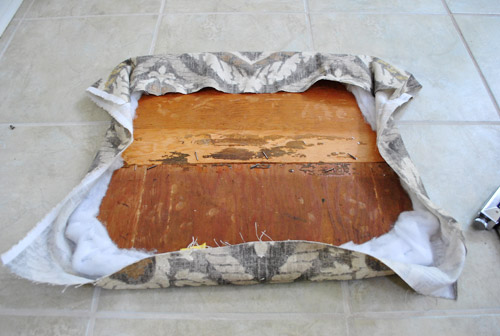
Happily, I was right on track, so I pulled things tight and shot another staple through the middle of each side of the seat, just so it was being held firmly at the noon, three o’ clock, six o’ clock, and nine o’ clock positions. Then I kept the fabric firmly pulled and continued to staple all around the rest of the perimeter. When it came to the carved-out corners, I just folded the fabric like I was wrapping a present – again being sure to pull things taut and use a few staples to hold my folds in place (so it would look nice and smooth from the front).
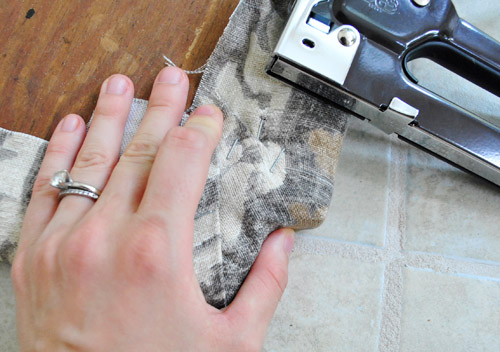
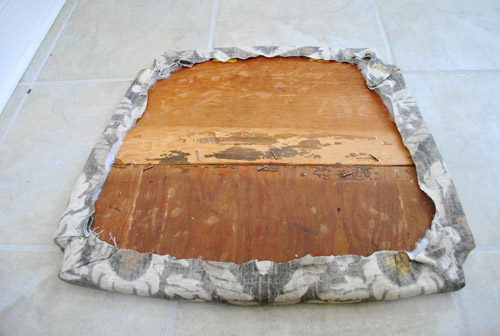
Here’s what it looked like from the back when I was all done with my staple job:
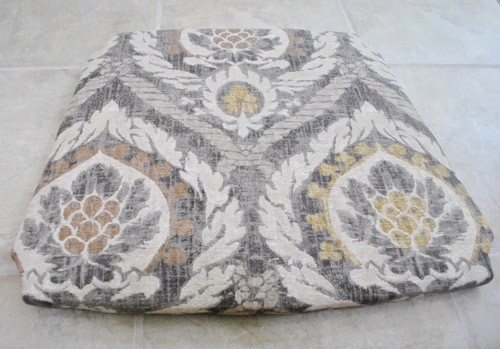
And here’s what it looked like from the front. Purty, right?
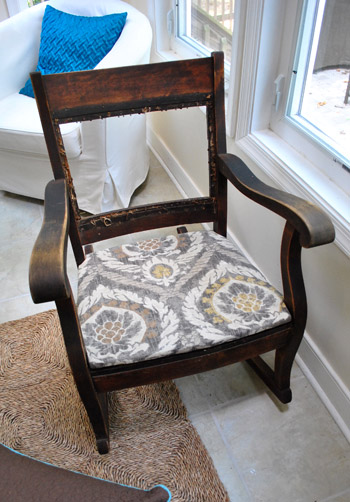
Then I shoved it back into the seat to make sure the batting and fabric still allowed the seat to hinge forward a little bit to squeeze in. Whew, it still worked. And in the distance I heard angels singing.
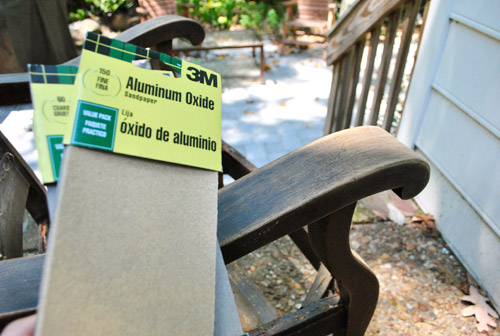
Then it was time for the strenuous frame-readying step. I used wood putty to fill some of the holes that might be visible (like the ones under the seat along the front of the chair’s framing) and sanded everything to rough it up and ready it for some rich dark stain. Since I had some liquid deglosser on hand I gently swiped that over the entire chair after some rigorous sanding (I used low grit paper followed by higher grit paper to smooth everything out).
This is when I was forced to face the music: stain, even dark stain, wouldn’t make this chair look as flawless and something opaque like a rich deep coat of paint. Because even after all that putty, sanding, and deglossing, it was looking so inconsistent in certain areas that I knew it wouldn’t soak up stain evenly. Boo. And although some folks wouldn’t dream of painting wood, we’re definitely ok with it (especially since this is just a $25 cragislist find and not a family heirloom). So I threw my rich dark stain idea out the window and ran to the arms of an old friend. You guessed it: ORB.
I’m telling you, my name is Sherry and I’m addicted to oil-rubbed bronze spray paint. But thanks to having a nice built-in primer and applying three very thin and even coats, it actually took on the look of a rich dark wood (and had more dimension than plain old chocolate paint thanks to the subtle metallic quality of the finish). Here’s a picture that I snapped after two coats (you can see that it’s not completely seamless and even yet- but the third coat did the trick).
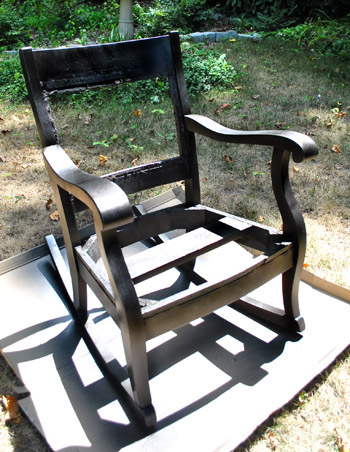
Oh and you can find more general spray painting tips here (lightly misting it while keeping your arm moving all the time is key).
And because I hate to end on that poorly shot, blown out, two-coats-out-of-three spray painting pic, I thought I’d fast forward a little to give you a glance at Part Two of The Glee Project The Rocker Project. Here she is (not completely finished, but getting there). I’ll be back with more details of that whole shebang (and some final after shots) for ya tomorrow.
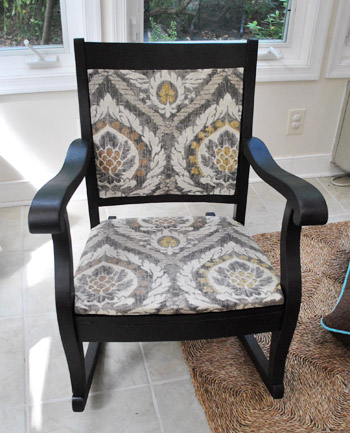
Update: A sweet commenter (thanks Laura!) just told us that our chair fabric was actually on the cover of the Ballard Designs catalog, so we hopped over there and learned they actually sell a chair that’s upholstered in exactly the same fabric for $600-800 (depending on the finish of the chair) and the fabric is being sold on its own for $32 a yard!
What about you guys. Do you have any projects that you’ve put off for an epically long time? Is there something that intimidates you, like two-sided upholstery does to me? Are you completely unsurprised that I basically try to solve every problem in my life with ORB? Can you believe that darn seat wouldn’t fit on the chair after five layers of batting-stapling? At that point I truly wanted to set the entire thing on fire.
Reference: https://www.productexpert.com/best-ergonomic-office-chairs/.

Kate says
What a great idea! It looks happy to be given a new life.
Are you guys in any danger from that hurricane? The weather channel sounds like it could get pretty bad.
YoungHouseLove says
Yeah, there are warnings. We’re crossing our fingers that it curves back out to sea and doesn’t get us that bad.
xo
s
Sharin @ Modern~Farm Baby says
I have an antique chair that has been sitting in the in process stage in my living room for about 4 months. Not real motivated to get to it. Springs falling out the bottom, stain needing touching up. yep I feel your pain, and it def gets the stink eye from me.
Cara says
So fab! Did you know your $2/yd clearance fabric is on the cover of the Sept Ballard Designs catalog?!
YoungHouseLove says
How crazy is that? We learned that this morning. Such a small world!
xo,
s
S. Jones says
The chair looks fab! Can I ask what made you decide to use spray paint instead of hand painting it? It turned out awesome but I struggle with this question myself and was hoping to know your secret between when to spray paint and when to hand paint?!
YoungHouseLove says
I always recommend hand painting it (with primer first) if you’re a beginner. After years of spraying I finally have the courage to spray things of this size without worrying about drips and uneven results (which is a common issue if you’re less experienced). But anything bigger (like an armoire, dresser with drawers, etc) is still nothing I’d have the guts to spray. Angled brush and small foam roller = a lot easier to control!
xo,
s
elvinawilliam says
Wow excellent
Christina C says
Awesome job so far! My severely put-off project is also a reupholstery one. I bought two antique ottomans on Craigslist and they’ve been sitting in my basement for about 8 months. I just haven’t had time away from my crazy 1 year-old to work on them. Your project is definitely inspiring me and I hope I can get cracking soon!
Zsa Zsa says
Wow, awesome transformation! Looking forward to more transformations like this. :)
Lea says
This chair looks lovely and also worth 500 $! With all the work (and all the stink eying) you put in, it probably even is worth that much!
This is a dream rocker! The fabric and the paint go perfectly together!
If you ever get sick of it I’d take it ;)
Oh, and I also got a spray painting problem (black matt it is). It just works too good!
Monique says
I love how your chair turned out. Beautiful! Looking forward to learn how you upholstered the back of your chair. I have five kitchen chairs that have backs similar to yours and I’m not sure how to tackle and there aren’t many tutorials on the Internet on how to upholster the back of chairs.
Katie says
That looks amazing! And you got a great deal on that fabric! My husband works for Kravet and their fabrics are so expensive!
Amy says
I think your ORB spray paint addiction is contagious in a two-fold kind of way. We’ve been updating a lot of our fitures in our new house with ORB and we’ve been spray painting the heck out of a ton of things. (Although I think I will break down and ORB our seen-better-days brass door knocker)
Yesterday my hubs and two of his brave friends took down the crazy wall-o-mirrors. That was entertaining.
ToTheMoonandBack says
Amazing transformation! i love that fabric.
Nora says
I’m so excited to see how you did the top. I grabbed two chairs off the side of the road and they have a plush panel on the top too and I am too scared to refinish them!
lounytoon says
I’m in the process of reupholstering my own dining room chairs and the only component that I have left to buy is the foam. would love to hear everyones’ thoughts on using upholstery foam vs several layers of batting as shown in this post.
Thanks!
Emily says
I believe you meant today you sanded first with a low grit, followed by a high grit sandpaper and not the other way around.
YoungHouseLove says
Yes I did! Thanks for catching that! Off to fix it.
xo,
s
alg says
Loookin’ goood! (You have to do it with a Rob Schneider-in-an-Adam-Sandler-movie voice.)
$herdog — where do you get your ORB? I looked but couldn’t find. (Of course, this may be thanks to my lovely shopping “assistant” Sonia — she’s not long on patience…) It’s probably available somewhere totally predictable & I just missed it, but I figured I’d ask since I’m having a totally stupid level of nervous breakdown over my inability to get a “fix” of the good stuff ;->
YoungHouseLove says
We usually get ours at Home Depot (it’s on the top row with all of the trigger finger Rustoleum stuff. Hope it helps!
xo,
s
Kristen says
Can’t wait to see more pics! This chair rocks! (Sorry I couldn’t help it!)
Kim Bir says
I have a desk chair needing some TLC. I have batting and material, maybe ORB spray paint is all I need to finish it off. Thanks for the push to stop thinking and just do it.
Kat says
Sherry,
I have almost exactly the SAME project sitting on hold at my house, and if you think 9 months is embarrassing, how do you feel about two years?!?!? YOu’ve inspired me – once aghain – and I am going to hit that bad boy with the pliers this weekend!
My chair is a little more involved than yours, which is why it’s been left untouched, because the seat bottom doesn’t come off for an easy re-wrap.
Maybe I will photograph and send you pics if it turns out well!
Cheers to No Fears when it comes to these things:)
paige says
I’m going to pick up a $10 chair from a facebook sale that looks almost like this. I have no idea how to upholster, so THANK YOU, THANK YOU, for the detailed instructions on how to do it and make it great! :)
Jen says
There are a lot of comments so I apologize if this has been already asked- how did you tackle removing the old fabric? I have a chair I want to reupholster and after the quotes I had I’m thinking DIY is the way to go.
Also, how did you choose your fabric? Are you too busy for email? [email protected]
Thanks!
YoungHouseLove says
I just pulled out the little nails and tacks holding the upholstery in. As for choosing the fabric, I just liked it and it was a good price, so I snatched it up. Hope it helps!
xo,
s
Elizabeth says
LOVE, LOVE, LOVE your blog! And love love love these posts! I have 6 similar chairs (double sided backs) in my basement that I’ve been scared to tackle! You have given me the confidence to go for it!!!
Mary @ stylefyles says
wow! Not gonna lie…I was totally not sold on the fabric at first. But seeing it on the finished(ish) version of the chair (I guess what I mean, is the last photo of this post, since there’s more to come) – totally sold me on it! Honestly, I think the paint (rather than a stain) really did the trick in creating a contrast with the fabric that makes it look awesome. Of course, I prob would’ve loved the stain too. But since this is what I’m seeing…..I’m glad you chose to paint! Okay, on to part 2!!
Robyn says
It looks absolutely amazing. I’m sure you have a charmed life to come across so many bargains.
What does the chair look like from behind?
YoungHouseLove says
Check out part two (the post right after this one) for those details!
xo,
s
jessica a. says
I have this rocker. It must have been a staple, way back when. Mine came from an estate sale here in TN, but I think I paid $95 bucks for it at least 10 years ago. It is in great need as yours was, but still has the original horsehair/straw seat. I didn’t want to compromise the value by taking that out and refinishing it, but I’m not sure how to save it??…I’m somewhat scared of what I may get myself into, if I were to remove the fabric, and does saving the original seat really keep the value of the chair??…Any ideas?
YoungHouseLove says
Hmm, I’m so not sure about these things. Anyone know? Maybe try googling around for more info on it?
xo,
s
Hollie @ I'm Busy Procrastinating says
I too am intimidated by the idea of upholstering both sides of a back of a chair, but I dream of reupholstering a fully upholstered chair someday. Looking forward to your next post!
lounytoon says
love how the chair turned out. Most videos online suggest using upholstery foam and batting vs just batting. What are your thoughts on the former vs the latter?
Am in the middle of reupholstering my dining room chairs, would love to know before I get too far!
YoungHouseLove says
I just didn’t want anything too cushy since I prefer firm wood rockers, but it’s definitely a personal preference thing I think. Good luck!
xo,
s
Melissa says
That really looks great! Makes me want to scour Craigslist now to find old furniture to refinish!
My big procrastination – now recently finished – was the Master Suite project. Now that it’s done, we’re happy to share the results: http://9adventures.wordpress.com/2011/08/05/master-suite-revealed/
YoungHouseLove says
Wow- looks great!
xo,
s
Phoebe says
When you guys saw the rocker on craigslist, how did you know the wood would be good enough/sturdy enough? I guess in general how do you know if something made out of wood is recoverable or so out of shape that it’s not worth fixing up? Do you guys ever go check out a craigslist item in person and decide not to get it because something is too out of shape? Sorry if you’ve answered this question before but I’m super curious since you guys recover a lot of stuff. :)
YoungHouseLove says
We just hoped it was in good enough shape to save, and went out there preparing to walk away if it wasn’t. We figure lots of people selling something that looks more shoddy in person than it does in the pics/description shouldn’t mind if someone doesn’t buy something if they get there and it looks a little too far gone – at least we hope they’d understand that. Thankfully lots of solid wood older furnishings are built much better than anything is made now, so we’ve never gone to look at something and not come home with it!
xo,
s
Steph says
Oh my word. What a freaking GORGEOUS chair. I would have never batted an eyelash at that crappy rocker and now look what you’ve done. I am officially in girl love with you, Sherry!
Hilary says
Does this fabric look familiar?? I am using it on our window seat cushion. I just had to link back to you. LOVE IT!
http://diariesofdoers.blogspot.com/2011/09/high-density-foam-high-dollars.html
YoungHouseLove says
Love it!!
xo,
s
Melody S. says
too funny…I JUST picked up a can of ORB tonight!! Love that stuff!! Going to paint some FUGLY brass door knobs…they are already toast, and need to be replaced…this is a 4$ expierment to see how well they hold up.
So, how exactly was the seat back finished? My best friend has her grandmothers rocker like this and wants to change it up a bit, but is afraid of getting too far into it, and not being able to repair it!!
YoungHouseLove says
Just check out part two of this post for those details! Hope it helps!
xo,
s
FranM says
Great job! I think I am now in love with ORB just from seeing your projects. I am getting rid of my out-dated natural stained butcher block kitchen table in favor of a refinished antique farm table. I was thinking I had to purchase new chairs, but after reading your blog, I am thinking of painting the existing chairs with the ORB.
Thanks for the inspiration!
Nay Nay says
Wow! I love this chair. I found a mission style chair last year sometime at a yard sale for $15 for a FIRST TIMER DIY project. I stripped it last year and just painted it yesterday, so I can completely relate to the letting it sit for 9 months. I am also a math teacher and I got a little excited myself when I saw your use of the word “equidistant” as your dad may have. Your tutorial is great and just what I needed to help me finish the final details on my chair. Can’t wait to hit Joanne’s Fabric tomorrow. I will definitely be keeping my eyes open for some awesome clearance fabric like you found. I did get the fabric for my chair from Joannes for 50% off, which still left it at $10 a yard.
Amber Umphrey says
Your rocking chair is so beautiful! I’m actually redoing my Hubby’s Great Grandmother’s right now. Mine looks just like yours! I was wondering how you did the back of it? When I tore mine apart there was a bunch of old moss and batting in it.I was wondering if you used a thin wood piece then some batting and a new fabric on it?
YoungHouseLove says
Here’s that post for ya: https://www.younghouselove.com/2011/08/the-dastardly-rocking-chair-part-two/
xo
s