Ok, we have a fun little craft for you guys, complete with an easy how-to, and some festive photos.
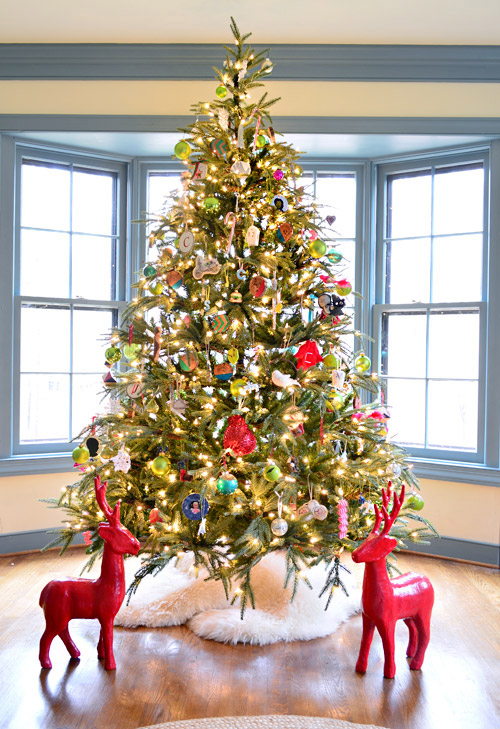
But first of all, we finally got our tree decorated this weekend…
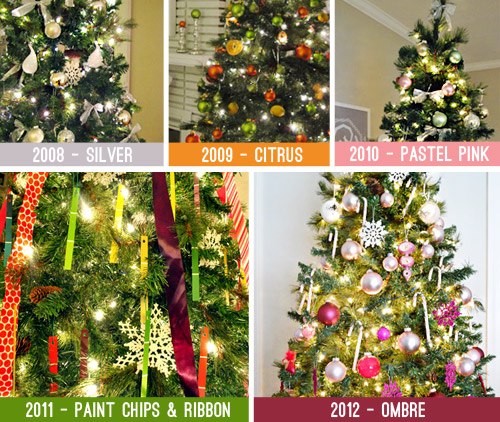
We’ve shared a bunch of different trees with you guys over the years, and each year it has been fun to switch a few things up with a new “theme” like classic silver and white, citrus inspired lemons and real dried oranges, pastel pink and soft green with silver bows, crafty paint strip ornaments and ribbons, and a fun white to pink to to red gradient tree from last year.
But this year there was a new theme in town: family. We just wanted to fill our tree with meaningful ornaments. Things that were one of a kind, homemade, personalized, given to us by someone special, and otherwise memorable to us. It was actually the first year that we had enough to fill a big tree (we usually relegate them to a smaller tabletop tree), which was good timing since we have a big girl around who’s really into helping these days.
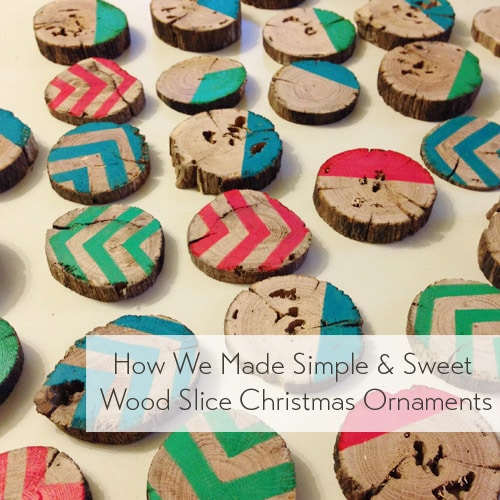
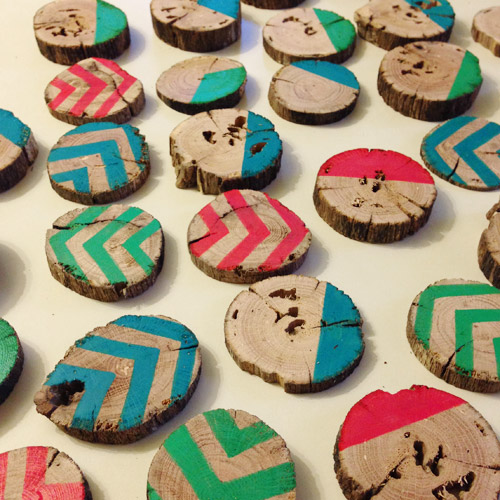
And since handmade ornaments were a big part of the mix, I couldn’t resist the opportunity to try my hand at making three dozen new ones, all with a woodsy yet colorful spin.
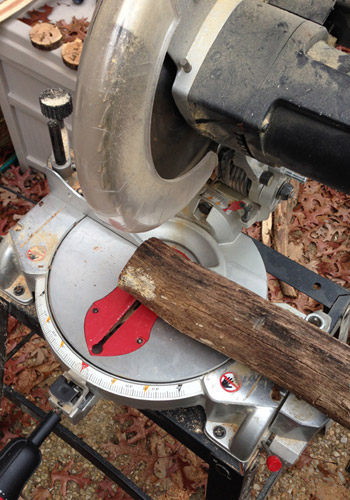
The first step was trudging around outside looking for a fallen branch that was about 3″ in diameter. After finding it and yelling “eureka” (true story) I brought it into the garage and fired up the miter saw (picture me grinning like a fool while whispering “don’t cut your fingers off”). It was actually pretty simple to keep the blade straight and make a bunch of vertical cuts, so I was able to slice the whole branch up to make nearly three dozen little round slices.
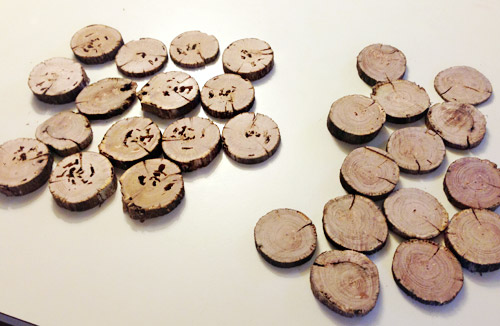
One half of the branch was a little more gnarled on the inside than the other, so it was funny that around half of them had cool weathered holes in the middle while the others were smoother and less holey. The next step was letting them sit/dry out for a while (I actually made these slices about two weeks ago) because I didn’t want to paint or seal damp wood for fear that it would become a crumbly rotten mess. So if you don’t have time to do that, maybe try hunting down pre-cut wood slices, or see if there’s some method for speed-drying them (maybe sitting them in a box of rice or something?).
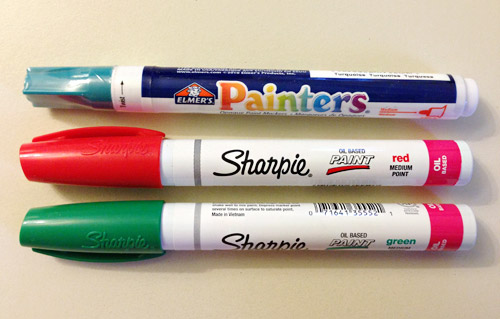
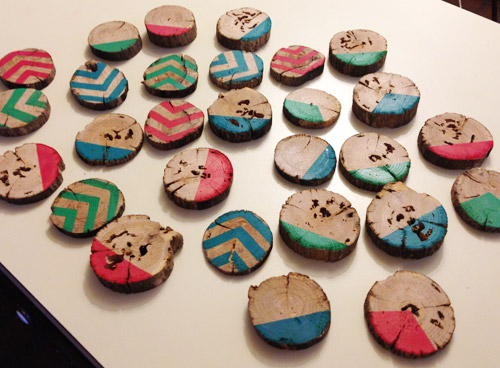
Late last week I couldn’t stand waiting anymore, so I sanded them all just to make them extra smooth, and finally broke out three paint pens. I tried my hand at three different designs. We’ll call the one on the left “arrow” (I started by drawing the one in the middle and then just added two others flanking it). The one in the middle can be called “fraction” (I just made a wide-ish pizza slice on each one and colored it in). And the one on the right can go by “dipped” (I experimented with thinner or thicker “dippings” on different angles, just to change things up).
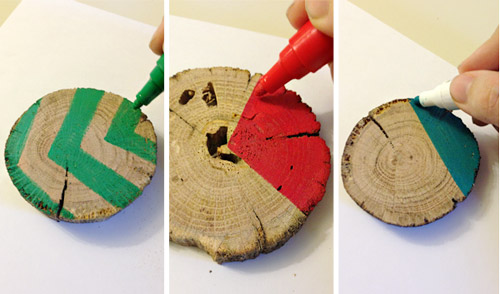
I really liked the idea of letting a lot of the wood grain show through (as opposed to painting or coloring the entire front) but the little pop of color is really fun – and super simple. As for the exact paint pens I used, I had luck with a red and green Sharpie paint pen, and a turquoise Elmer’s Painters pen (they’re a few bucks each at places like Michael’s or JoAnn).
About twenty minutes later, I had this collection of lovelies.
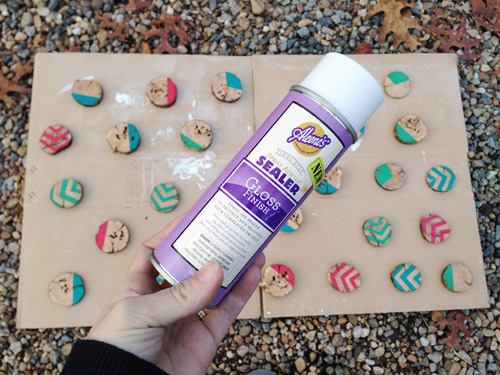
Then I took them outside and said “remember when you guys lived out here?” and gave them a good spray coat of Aileen’s Gloss Finish Sealer (on the front and the sides, and later on the back when they were dry). Sealing wood slices can help to keep them from flaking and it also gives them a nice little polished look, which is a cool juxtaposition to their rugged edges and gnarled centers.
After they had fully dried for 24 hours out in the garage, I brought them back in and drilled tiny pilot holes into the top of each one (I strategically chose what part should be the top so all the arrows would be straight, but some of the fractions and dipped ones would be slightly off-kilter since I liked the interest that those angles would bring to the tree). Then it was as simple as sticking eye-hooks into each of those pre-drilled pilot holes at the top and screwing them by hand.
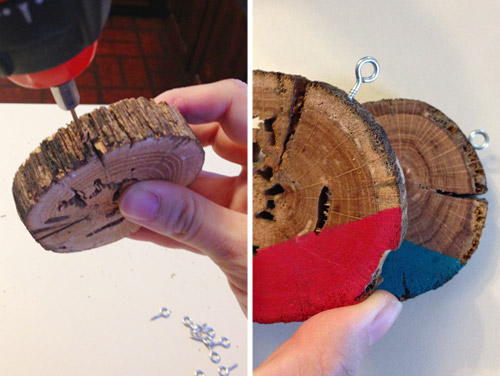
I already had some old metal ornament hooks to slip through those eye-hooks, so that was all they needed to finally find their way onto the tree.
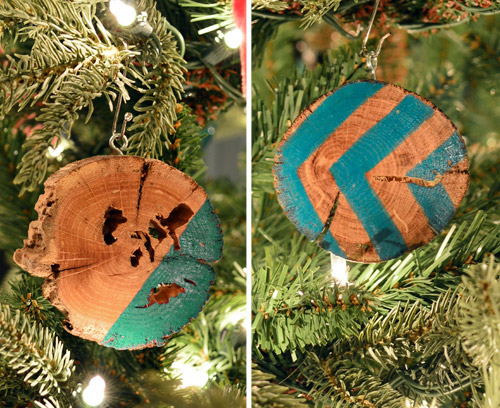
I think the red ones are my favorite. They really pop with the green background. And the total cost for three dozen wood slice ornaments = $11, which breaks down to around 30 cents each (that total includes all three paint pens, the spray sealer, and the eye hooks). Psst- You can check out a bunch of other wood slice ornaments here.
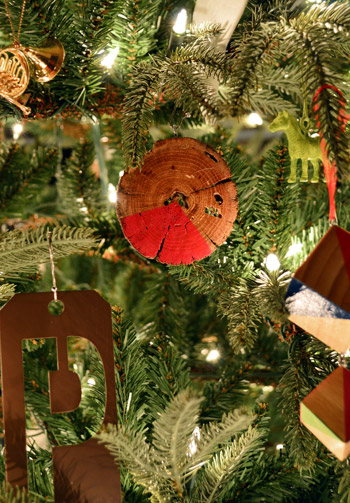
These new guys are in good company with a bunch of other ornaments that we’ve made over the years (like the green zebra you can see in the top right of that shot above) so that gives us the warm fuzzies. In fact, it’s probably a good time to toss out some links to those other homemade ornaments:
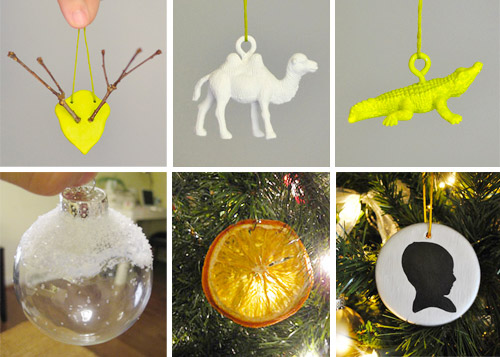
- Here are some faux antler ornaments along with a bunch of colorful “ceramic” animals (and some swirl-painted glass bulbs) from 2011
- Here are a few “snow” covered and feather filled glass ornaments from 2008
- Here are some real dried orange slice ornamets from 2009
- Here are a few baby’s first Christmas ornaments from 2010 (with Clara’s silhouette and hand prints on them)
Oh and a bunch of people saw a peek at the tree on Instagram and Facebook before it was decorated, noticed that it was new, and asked if it was real and where we got it (we got it up about a week before we added ornaments and just gazed at it naked for a while. The tree was naked. We were fully clothed. Except for Burger).
Anyway, back to where we got the tree. It was a hand-me-down from my mom (the box is long gone and we didn’t see any brand markings on it though – so if anyone has something similar and knows the brand we’d love that info to pass along) and we’re completely enamored with it. In fact, we’ve already donated our old tree, which we faithfully enjoyed since 2008. It’s hard to tell in photos, but this one is pretty real looking and sort of droopy-in-a-good-way (it’s feathery on the ends, which makes for a nice effect). Especially all lit up in that bay window of ours. Just ignore the blue trim – I’m waiting for Santa to come paint that for me.
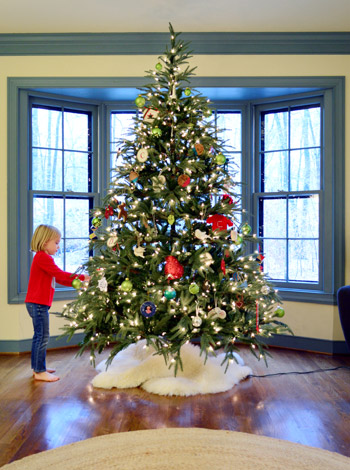
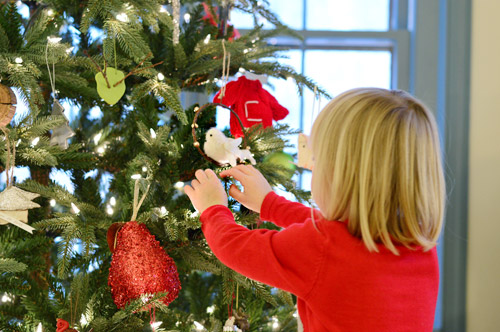
But back to the decorating process. It was the first year that Clara had a real active interest in helping us the entire time, and she was even able to hang the breakable ornaments since she’s a careful steady-handed gal (zero ornaments were harmed in the making of this tree, although I did have about five mini-heart attacks, but I was so glad I let the bean do her thing in the end).
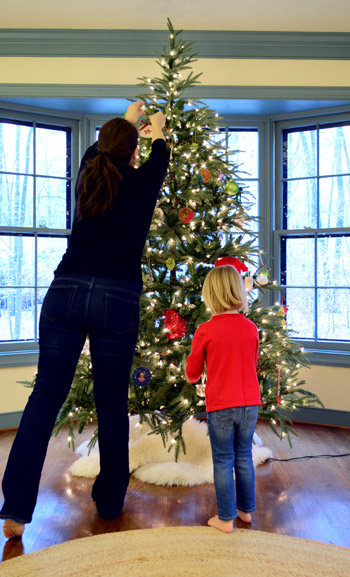
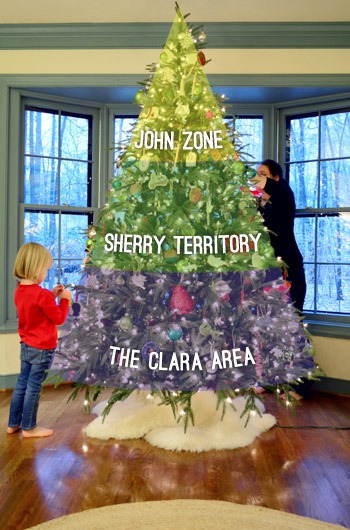
It pretty much worked out to be broken down into three rough zones. Clara took the bottom, I took the middle, and John got the top thanks to his long legs and added wingspan.
As for what went where, it was really just a free-for-all. I placed all of the ornaments out on a little white pedestal table off to the side of the tree, and we all just took turns grabbing whichever one caught our eye. We taught Clara just to do one per branch, but that was really the only direction we gave her – along with “don’t forget the sides and the back.” As we hung them, Clara would ask us where each one came from, so we had fun telling her about one that came from our honeymoon, one that we got in Hawaii with her, a few that were made by readers and given to us last year during our book tour, some that we had made in past years, some that were given to us by family members, etc.
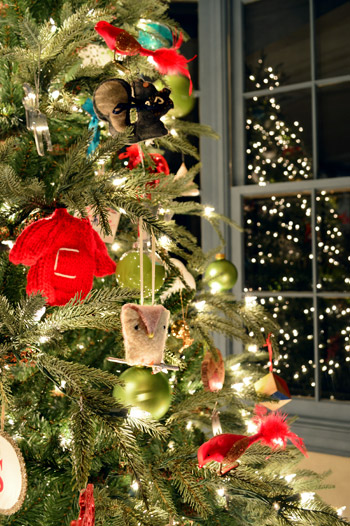
I worried I’d forget a bunch of their origins, but when the entire table had been cleared and the whole tree was full, I don’t think there was a single ornament origin that we couldn’t recall. It’s funny how that stuff sticks with you.
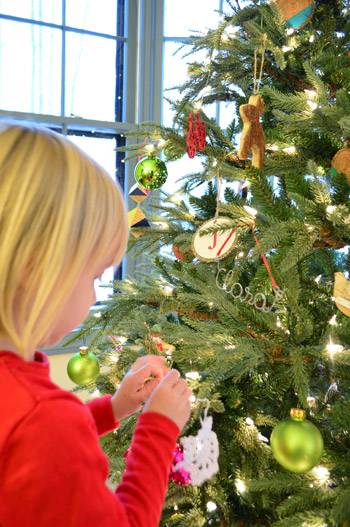
And someone was VERY PROUD of herself.
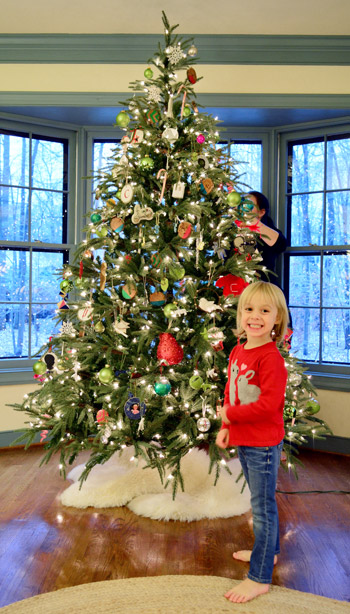
Here she is posing in front of “her tree.”
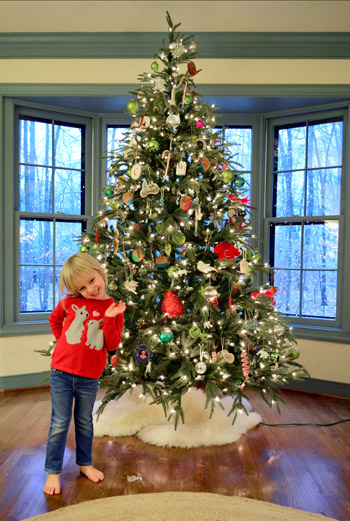
And here’s the tree at night in all of its reflecting-in-the-bay-windows glory. The funny thing is that the old owners of the house must have put their tree right in this spot when they lived here. I never would have known that except when we moved in and I redid the floors, I remember finding a bunch of faux pine needles in that corner when I swept things up.
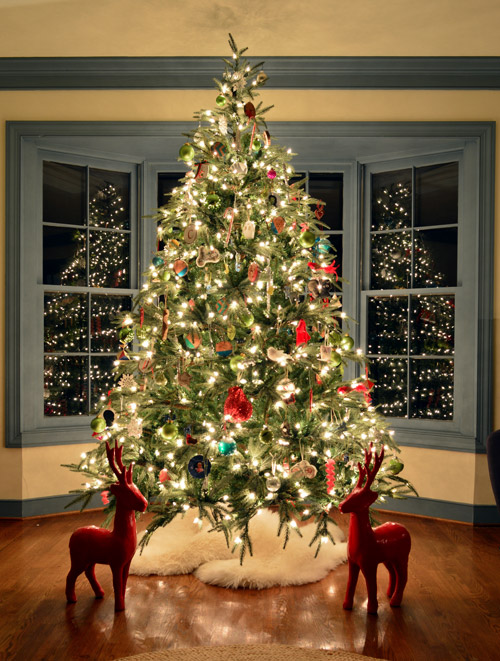
Oh and here’s the 411 on those festive reindeer – they were such an easy project back in 2011. And the tree skirt is just two faux sheepskin rugs from Ikea that we steal from other places in the house and shove under there each December.
So there you have it. A tree without a theme, except for a sweet memorable/handmade hodge-podge. Complete with a tiny tin hamburger.
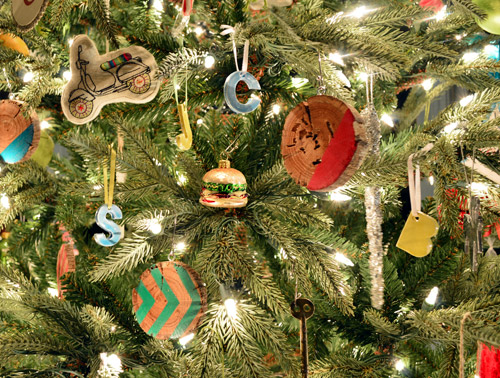
What are your trees looking like this year? Any fun themes or color schemes? Do you go real or faux with them? Did anyone else make any ornaments? I’d love to get Clara in on the fun next year, so I’m already thinking about some baked ones (either clay or even gingerbread ones) that we could seal/paint/hang together. Could be fun…
Psst – You can peruse a ton of other holiday projects right here.
Update – Wanna know where we got something in our house or what paint color we used? Just click on this button:
Update Number 2: Plus you can check out all of our favorite holiday decor finds here – many of which are under $15!


Laurie says
Gorgeous! What a beautiful space for your tree, too!
Charlsie says
This year a tree my great grandfather planted in 1912 was damaged in a storm. We pulled up the tree, but I just could not part with it. I knew I could make something out of it. Yes, I have a 100 year old tree carcass in my yard! Thanks for the idea. I will make ornaments to tie to all my gifts this year. All my family can have a part of the old tree for many Christmas’s to come. Thanks!
Quiana says
LOVE how you zoned the tree! I’m 5’6″ and with my husband at 6’8″ and our 3 year old daughter over half my height with a 9′ tall tree this exactly how our zones look.
Katie G says
“Remember when you guys used to live out here” made me actually lol. You are a weirdo, but I mean that as a compliment :)
YoungHouseLove says
Ha, thanks Katie! I once got voted “weirdest family” unanimously at a party. I wore that title proud.
xo
s
Leah H says
I love this post! Growing up, we always made our tree a hodgepodge of personal ornaments – no theme – my favorite kind. And yes, we remember where each one is from! I always love the homemade ones the best.
PS, tonight I totally copied your lantern idea and stuck some white Christmas lights in a vase to make a festive modern ‘installation’ to brighten our NY apartment – hopefully my husband won’t hate it!
PPS – I was wondering if you watched the Sound of Music Live with Clara? I was in it – Nun #16 baby! – and kept up with you guys on my phone during rehearsal downtime :). If you missed it, it’s re-airing on Saturday!
YoungHouseLove says
YES! She loves it! In fact this morning she woke up and the first words out of her mouth were the entire chorus to Doe a deer! So cool that you were in it!
xo
s
susanbetweennapsontheporch says
Beautiful! ?
Maggie says
I was sort of lamenting not doing a “designed” tree this year but it does feel more homey and “warm and fuzzy” with our family ornaments. This year we got married AND moved to California, so we did two 2013 ornaments – a beautiful glass one shaped like our new state, and I looped a hook around the arm of the tiny bride of our vintage cake topper for the second!
Loving the suggestions of your readers who buy ornaments for their kids each year – thinking we’ll have to do the same when we have a bun/bean of our own!
Brandyn | Southern Distinctions says
This is my favorite year to date! There’s nothing like a tree full of family memories.
Nicki says
For the second year, we have a real tree. Tonight I was planning on finishing up my Christmas decorating. The tree has been up and finished for over a week now. I went to plug in the lights and the tree feel down!! My husband was at work, so it was jut the kids and I trying to get the darn tree upright and stable. All of the ornaments fell off, one special one broke ( I am surprised it wasn’t more) Needless to say, I spent the evening redecorating the tree instead of other parts of the house. It was awesome! If it falls again, I am going to die! The day after Christmas, I am going to Target and buying a fake tree!
Rachel H. says
Gorgeous! That tree does look very real, too. Quick question: did you paint both sides of the tree rings, or just one?
YoungHouseLove says
I just did a front, but you could do a different pattern or something on the back to make them double sided! I liked leaving the back blank in case I messed up (extra chance back there, haha!).
xo
s
@ESWTerry says
I love the little knit sweater with Clara’s initial! <3 So sweet. I've never done a themed tree. Maybe someday, but for now I'm happy with my annual family tree. By the way, what type of tree is that? It's very pretty. Blessing to you, all.
YoungHouseLove says
It’s a hand-me-down faux tree from my mom, but I’m not sure where it’s from (there’s no more box or markings on it) although some other folks have found one on Home Depot that looks really similar, so those links are in the comments here if that helps!
xo
s
Jen in Texas says
This year we have a no ornament tree. My husband is in the military and is in Honduras for the year (yes we have a base in Honduras, and no I didn’t know that either before this year!) My daughter and I are going to visit him for Christmas, but aren’t leaving until the 22nd.
We have a family tree every year and each of our ornaments has some meaning to it. My daughter requested that we not put the ornaments out as that would be to difficult without daddy, but my young nephew will be house-sitting here over Christmas break with his parents and we definitely wanted a tree for them to put presents under, so we now have an ornament-less tree.
We are so blessed to have the opportunity to spend Christmas with daddy. There are so many other military families that don’t have that chance!
YoungHouseLove says
So sweet!
xo
s
Colleen says
While I have always loved your Christmas trees, this year’s tree is so sweet and fantastic. I love that you guys have a hodge podge of ornaments that tell your story. Merry Christmas!
Christeen says
Sorry Sherry but unless you start putting a brick on Clara’s head to stop her growing I fear that your section of next years tree will be gone.
YoungHouseLove says
Haha! I know, she’s going to be as tall as me in a few years!
xo
s
Sarah Stäbler says
I love your tree this year! Well, it’s awesome every year, but this year it’s great the whole family got in on it! Looks fantastic!
Cathy says
Love love love it!!
Laloe_H says
Wow! I absolutely adore the tree! Huge fan of your blog. So inspirational as I’ve been renovating over the past 2 years as well. Can’t wait to see the nursery makeover!
Erin Tompkins says
I’ve been reading and enjoying your blog for a while now, but I just want to say that today I realized that Clara is BIG, like yesterday she was still a baby but now she’s a BIG GIRL! She’s growing like a weed!!
YoungHouseLove says
Isn’t it crazy?! Sniffle.
xo
s
Shannon says
I’ve been wanting to do this for a while! The compound miter saw boss in our family is afraid cutting a raw log will affect the machine (I’m wanting to cut a limb with larger diameter). I’ll be sending this post off to him! Thank you!
Rebeccca says
We have a tree full of memories too and I wouldn’t have it any other way! We buy an ornament on every vacation or special place we visit. Also one of our favorite traditions is my husband and I exchange an ornament each year that has a special meaning to that year and our plan is to one day have a tree in our bedroom filled with just “our” ornaments! We have only been married for 6 years so 12 ornaments would not fill a tree yet but one day :)
dimondjack says
A great speed drying method is to microwave the cut logs. It drys the wood from “within”, steaming the moisture out. This also helps to prevent the wood from cracking. The method I’ve used is to heat the equivalent of 4 slices for about 2 minutes, let them cool for 10 minutes on a drying rack (conveniently you can be cooking 5 more batches), and then repeat until the weight of the wood stays constant, probably around 6-8 times through the microwave. You’ll see the log steaming after the first several times through, which is good! You’re removing the moisture.
I made 120 wood coasters for a wedding just this year using a green birch log using this method. I was able to cut, dry, and poly on the same day!
YoungHouseLove says
Thanks for the tip!
xo
s
Nicky says
Guys, I LOVE your tree! My boyfriend and I are currently shopping for houses and somehow it’s made me focus on christmas trees more than usual – I guess it’s because of the realisation that I will be decorating my OWN Christmas tree next year… And yours really pops – it’s not too cliché or anything while still standing out. And the idea that you can tell a story for each ornament just sounds amazing…
Ginner says
Hi There! I’m just wondering if you’ll be posting gift ideas like you did last year. I bought my dad and brother-in-law gyro screwdriver from you A Few Holiday Fella-Gifts post and it was a huge hit (not easy to do when buying for the guys)! Just curious :)
ps. This blog has been such an inspiration to me! I just bought my first house and it’s been the best decision of my life. I love seeing how you transform your home and how the simple things make all the difference!
YoungHouseLove says
Thanks Ginner! We’ve got that planned for tomorrow morning, so hopefully it’ll help! We also have a favorite tools button on our sidebar of things John actually uses and loves if that helps!
xo
s
mary | millay vintage says
Too cute, and I love that you added those sherpa rugs at the foot of the tree — so cozy looking and definitely evokes thoughts of snow — what a good idea! xoxo
andrea says
beautiful tree! I love a tree full of memorable ornaments. my mom bought us a new ornament every year when we were kids, and when we moved out, we got to take our own ornaments with us to start our own tree. now that she’s gone, I cherish pulling out all my old ornaments and putting them on the tree each year. it’s a tradition that I’ll definitely continue when my husband & I have our own baby :)
Robyn says
In the summer we took a holiday with the small children and grandparents to Vancouver Island’s huge and lonely beaches where we found many beautiful treasures. We hot-glued those treasures of moss and seashells onto huge pinecones, and added twine as tree-hooks to sand dollars and small pieces of drift wood. Then we stuck a big branch that had broken off our neighbour’s tree into a pot outside the front door and hung our beach treasures on it. Yesterday it was covered in snow. It’s beautiful!
Susan says
I love the tree- my favorites are always the homey family themed trees (I am Jewish and don’t get to do my own tree, but if I did it would be an eclectic one.)
My real question is this: how is it your hands always look so clean and lovely when you are crafting and painting, etc.? Mine always look like a holy mess when I get near paint, glue, etc! ;)
YoungHouseLove says
You’re so funny because in almost every picture I have so much dirt under my nails! I literally curl my fingers to try to hide it! Ha!
xo
s
Meagan Bryant says
This August we both gave birth to and lost our 2nd son, he was here 7 days and 14 hours. Before he was born and after, I saw SO MANY RAINBOWS. Seriously…everywhere. And I started to feel a real connection between them and our baby boy. So this Christmas, not feeling much of the spirit…we stumbled upon a package of ornaments at Target, just plastic balls in 4 finishes, blue, green, yellow, orange and red. I feel like we’re missing purple, that it’s not a real rainbow without it but we started at the bottom with blue and worked our way up and then grabbed other years ornaments that weren’t the same but fit into those color catagories, along with a few special ornaments for both him and our 3 year old son and filled in the blanks. I let the 3 year old put some rainbow candy canes on as well :) Now I just wish we had a purple start to put on top or something like that. Or a purple tree skirt.
YoungHouseLove says
Really sweet!
xo
s
Tirsa says
Love love love the night shot of your tree. It must be a delight to drive up to the house and see it through the window.
Meanwhile we have yet to put up our tree. DS keeps asking when. Soon is the answer. (Hangs head in shame.)
Christy Niebaum says
We’ve had a Kansas State Wildcats themed tree for the last 7 or 8 years. The first few years, it was just plain purple/white/silver ornaments, but we’ve collected enough ornaments over the years that most branches have a special, unique ornament that works with our theme. It’s either a KSU ornament or a sentimental ornament that still works with the KSU color scheme (like the glass winter gloves ornament we picked up in Tahoe on our honeymoon). I think next year I’d like to have a smaller table top tree to house sentimental ornaments that don’t fit in with our KSU theme. More of a “family” tree like you guys have done this year.
Katie says
I love the wood ornaments! When we get our tree I ask for the little end slice they cut off and write the year and if anything important happened that year (this is our first married Christmas!) and make it into an ornament. The eye hooks are a good idea since I’ve just been using ribbon. Your tree looks great!
Jennifer says
I’m a relatively new follower of your blog, and I have to say I am hooked! I really appreciate how you put links to what you have done in the past, because it makes me feel like I’m in the “know” and haven’t missed out on anything!
YoungHouseLove says
Thanks so much Jennifer!
xo
s
Sara says
If you are looking for an easy homemade gingerbread ornament, you can always make one out cinnamon, applesauce and glue. We decorate ours with puffy paint or craft paint. They will smell like cinnamon for years.
YoungHouseLove says
Mmm, sounds awesome!
xo
s
Claire @ Claire K Creations says
Love the tree! It’s really quite spectacular with the lights on especially with the reflection. Love the pic of Clara posing with it too. So proud!
We are in our new house this year so upgraded to a 7.5″ tree and I am in love. It has a few different branch styles for a more ‘realistic’ look and we went with all baubles this year in red, white and silver. I could just sit and gaze at it while Mariah Carey Christmas plays in the background.
mp says
What’s the history of the moped ornament? Is it lurking in YHL’s vehicular past?
YoungHouseLove says
John has a love of bikes, and Target sold two stuffed little two wheeled vehicles (a bike and a moped) either last year or the year before. I couldn’t resist grabbing them both for John, so there she blows!
xo
s
Julie says
Thank you for posting this! We have saved a cut from each christmas tree and were trying to decide how to preserve them.
Tricia S in Iowa says
Fabulous way to decorate the tree. I did the same thing and gradually built a small collection of ornaments for each of my kids. I would generally buy an ornament after Christmas and then hold it as a surprise for the following year. I also saved the ornaments the kids made at school, Scouts, etc. I am an empty nester now and don’t celebrate Christmas any more. Last year I carefully boxed up all of my son’s ornaments and sent them across country so he can put them on the tree in his home. My daughter’s are also packed in case her life lands her in a place where she wants them.
donita says
Beautiful tree! Love your handmade ornaments.
Your tree looks like the one we just threw away, when we moved. Ours was ten years old. I bought it on sale at Kmart. Mine was a Martha Stewart, Frost Hill Pine tree. It looked so real, my BIL asked my husband two or three years in a row, where he had cut it . The ends of the branches were sort of fuzzy looking. It was so real. I’m sad we had to part with her, but. she had seen better days. The best part, it was a $180.00 tree and I got it for $79.00. Merry Christmas! !!
YoungHouseLove says
Aw I love that! Sounds like it was awesome for many years!
xo
s
Seaweed & Raine says
The new decorations are super cool. I have a cool new tree this year – its quirky. I WAS going for a red/pink/white/gold theme this year, but the Little Bits were so keen to decorate it I thought I’d just let them go for it.
Sheree
P.S. I think I’ll have to have a look at what you did with your reindeer – they are cute!
Bethany @ Dwellings By DeVore says
I love handmade ornaments and those are just beautiful! I love the texture of the wood. I’ll be keeping this in mind for next year! I made some salt dough ornaments this year with my daughter this year and it was so fun. I think we’ll make it a new tradition!
Kate says
Hi Sherry, I think the tree is from Joann’s. I got an online flyer this morning that this particular tree is 70% today only with 12 cent shipping. Check it out:
http://www.joann.com/75-ft-noble-fir-pine-tree-white-lights/12682266.html#utm_source=Joann&utm_medium=Email&utm_term=slot11&utm_content=HTML&utm_campaign=20131212E0&rId=20131212E0&start=2
YoungHouseLove says
That does look like it! Thanks for sharing the link!
xo
s
Cara says
Love the tree! Totally off topic, but I’m in the same boat as far as ages of children – what are you planning on doing for a stroller? Are you keeping the jogger or going for a double? I am having a hard time deciding!
YoungHouseLove says
We’re not sure yet! We’re hoping to research that a little closer to having the baby (Clara will be four, so we’re not sure if buying a double would make sense only for her to immediately outgrow it). I think no matter what John will keep the jogging stroller for solo trips with the baby or Clara though.
xo
s
Jennifer says
I noticed all the pictures of Sherry shes hiding her belly..is that on purpose? LOL
YoungHouseLove says
I’m a little shy about it, but it does come out occasionally! I think it’ll be on blast in the hospital video next week! Haha!
xo
s
Trude says
It looks beautiful! My roommate and I got ours up this past weekend too. I just love having the glow of twinkle lights in our living room. We do the same thing, only ornaments that really mean something to us. :)
Chaney says
I’m such a huge fan of wood slice ornaments! I love the funky ones y’all made. I did some of those myself this year with a preppier spin (monogrammed!). They’re here if you want to see them :).
http://www.mayricherfullerbe.com/2013/12/monogrammed-wood-slice-ornaments.html
YoungHouseLove says
Love those so much!
xo
s
Elizabeth says
I think the family ornaments are SO important. My mother-in-law currently lives in a nursing home (she is blind and has been fighting Stage IV Lymphoma for 2 years). Anyway, she still owns her home and my family & I stay there when we visit her & the rest of the family at Christmas. My SIL bought a fake tree (since no one is there to water it) and we brought my MIL over to the house to be there while we let the girls decorate it, so that when my family wakes up Christmas morning there will be some decorations and it won’t be depressing. The tree would not win ANY contests, for sure, but being able to put the ornaments on and describe them to her, and her remembering them from before she lost her sight… priceless. Really.
We do a mix of handmade by kids and special ornaments that they purchase, and I will be excited to be able to start them off with a box of ornaments for their own trees! (Though I reserve the right to claim the ones they made for our tree, they can have all the store-bought ones they choose. :) )
YoungHouseLove says
Aw that is so sweet! Thank you guys for sharing all the stories and traditions.
xo
s
Heather says
Since I moved away from “home,” I’ve flown back every year for Christmas and haven’t really decorated my own home for the holidays. I intended to get a wreath this year and decorate it, but we ended up having a nasty sudden cold snap that most people in the northwest aren’t used to having and aren’t prepared for, so I bought warm stuff to hand out to homeless people instead. It felt like a much better use of the money.
My brother’s household has 3 cats who are evil and destructive little lovemuffins, and also a distinct lack of floor space. Every year they get a 6-foot-diameter wreath, hang it on the main wall of their living room and decorate it like a tree! I love that idea and was considering doing the same before I realized I have NONE of my christmas decorations–they’re all back at my mom’s because I never decorate out here! I think next summer/fall I’ll get them shipped out to me and maybe for Buy Nothing Day we can decorate a bit so I don’t feel quite so curmudgeonly. It doesn’t feel like Christmas until I help decorate the tree, so I just go back and help my parents with theirs. They always get a real tree.
Hollie @ I'm Busy Procrastinating says
I found some amazing black and white herringbone ribbon a few weeks ago, and it was the jumping off point for our holiday color scheme this year. Our living room is black/white/blue anyway, so that was our color scheme for the tree this year too. I didn’t have any black ornaments so I spray painted some simple ball ornaments black and made white polka dots on them. Totes adorbs, as the kids (or rather, the dorky pushing-40-year-olds) say.
http://www.imbusyprocrastinating.com/2013/12/holiday-home-tour-2013.html
YoungHouseLove says
Love the black and white polka dotted ornaments! The whole place looks so nice and festive!
xo
s
Annalea says
Just thinking a search function for the comments would be pretty darn useful . . . I’m curious to know if anyone found a tree similar to yours, as I’d love to find one. (I have this thing about not wanting to see Christmas light cords, and your tree is perfecto.
Merry Christmas, John, Sherry, Clara, Burger, and little guy!
YoungHouseLove says
Oh yes, someone linked to one on homedepot.com that’s so similar! I would just hop over to their site and peruse their options and hopefully you’ll see it! It’s the droopy one (the branches sort of feather down) so hopefully it’s easy to spot!
xo
s