Packing up our current house and new-house-floor-laying continues…
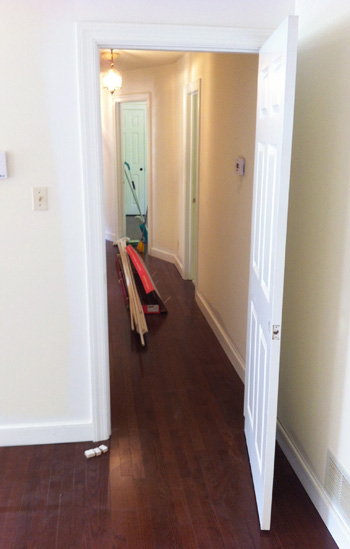
… but we didn’t want to scoot outta our beloved current house without one more updated Listy McListerson full of everything we’ve checked off and a few things we’d love to have done if we were staying here longer (those are bulleted at the bottom). #warningitslong
Just for fun, here’s the very first list that we shared for this house back in 2010. I love how plans seem to evolve as you live somewhere and figure out what we love/want as you go. It’s also really funny how quickly your eyes adjust and you forget what you started with, isn’t it? Seriously, a week after we knocked a big doorway between the dining room and the kitchen it felt like it had always been there.
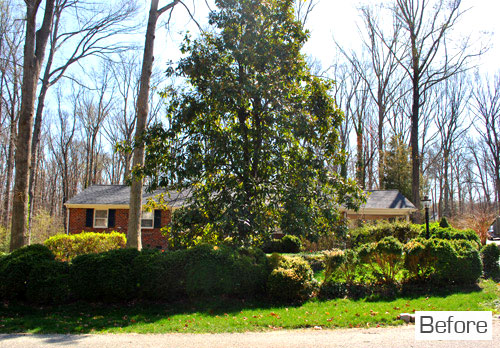
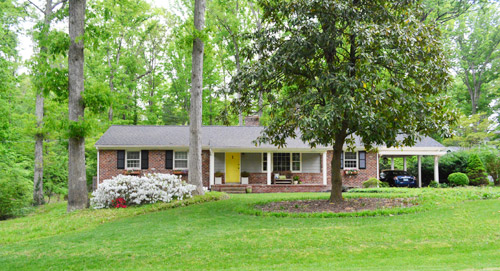
– The Front Yard: Complete! –
Done:
- limbed up the magnolia so it no longer blocks the house (more on that here)
- removed the bushes that hid the house (more on that here and here)
- planted grass in the bare patches where we moved bushes
– The Front Porch: Complete! –
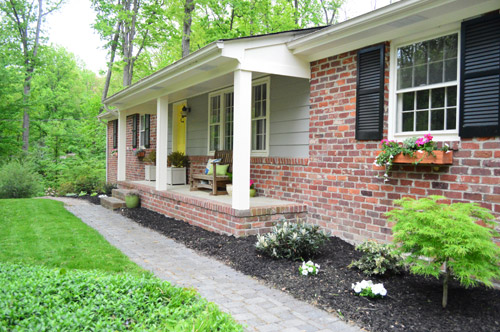
Done:
- furnished it with stuff we had from our first house’s porch
- planted some shrubs/flowers
- painted the front door yellow
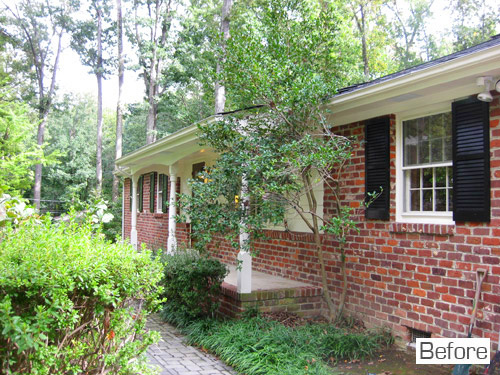
- framed out the porch columns so they’re chunky and square like the carport columns (instead of ornate, curvy, and un-ranch-like)
- added window boxes around the house and filled them with pretty plantings
- painted the siding on the porch to set it apart from the same-colored trim and help our yellow door pop
– The Carport: Complete! –
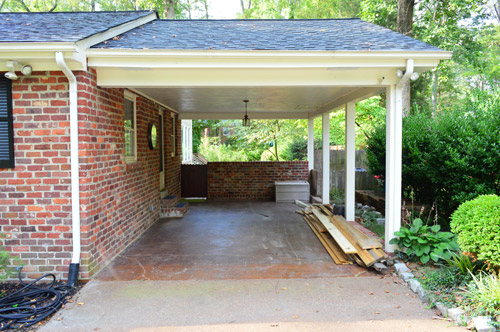
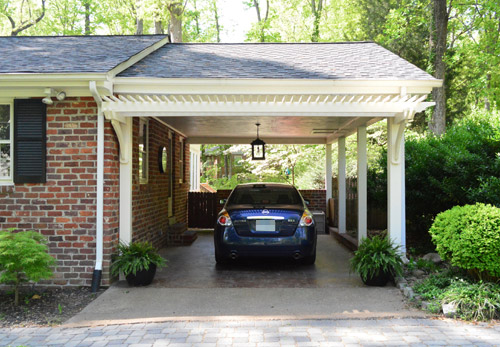
Done:
- replaced the itty bitty light fixture for a big black lantern
- added a column on the left for balance and built a pergola to add some dimension and interest to our flat little ranch
– The Living Room: Complete! –
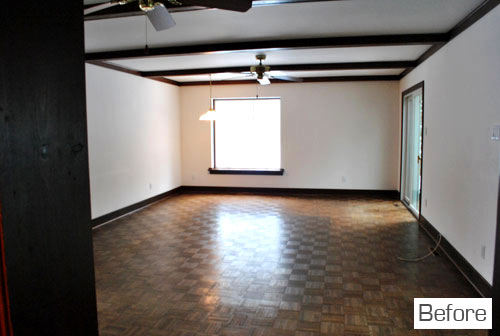
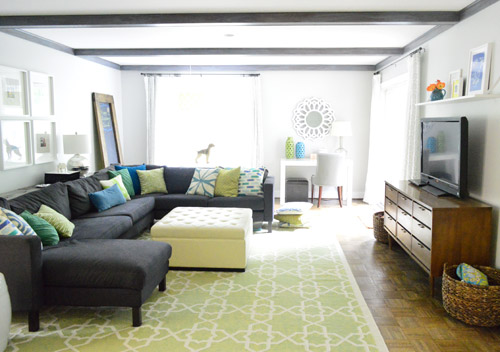
Done:
- painted the walls
- painted the trim (it was dark wood when we moved in)
- gray-washed the beams
- got a new sectional (we get asked a lot how we like our Karlstad – we LOVE him!)
- built a console for behind the sectional
- hung some subtle patterned curtains
- got a new rug, ottoman, and desk chair
- got a larger media cabinet (secondhand)
- built a leaning chalkboard over near the back of the room to balance out the tall slider
- added some overhead lighting since there’s none (a pendant centered over the table near the back window and some can lights)
- built a shelf for the awkward space above the TV
– The Office: Complete! –
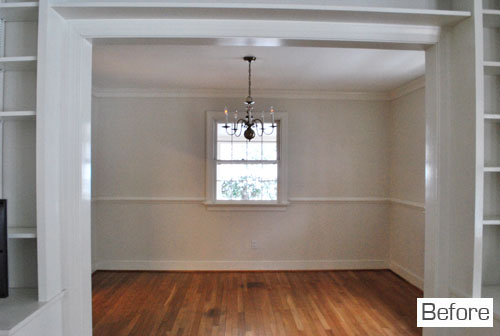
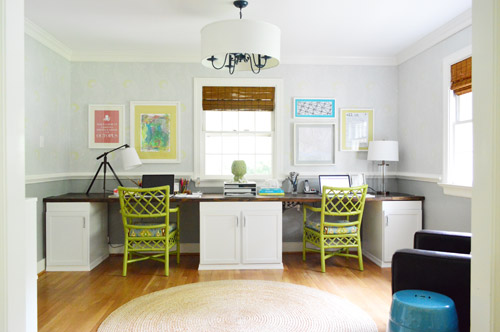
Done:
- made a built-in double desk
- painted and upholstered some secondhand chairs
- painted and stenciled the walls
- added some sentimental art
- updated the old brass chandelier with new color, bulbs, and a giant shade
- brought in an old chair and added a file cabinet for more function
- added some bamboo blinds for texture
– The Hall Bathroom: Complete! –
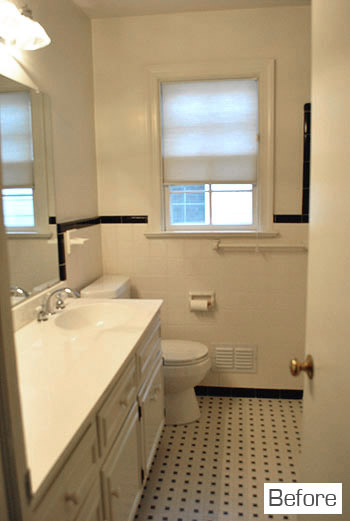
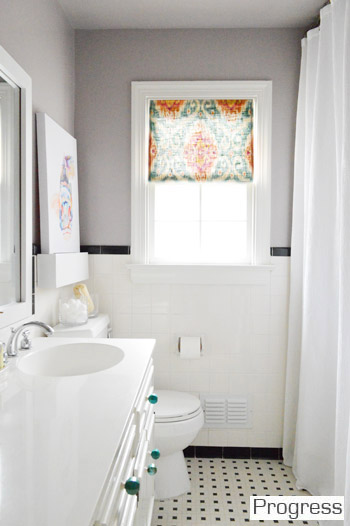
Done:
- hung the shower curtain higher
- added some new window trim for more balance (and to hide a demo hole)
- hung a new light fixture above the mirror
- painted the walls
- framed out the mirror
- hung art and made a chunky shelf
- updated the vanity knobs
- added a homemade window shade
– The Big Hallway: Complete! –
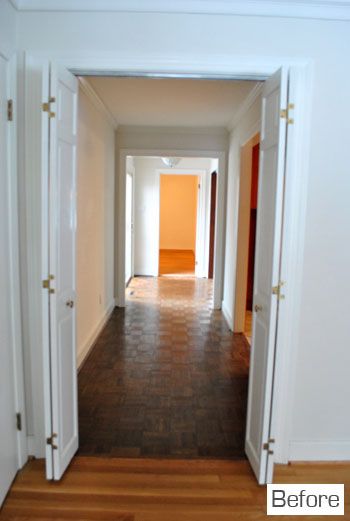
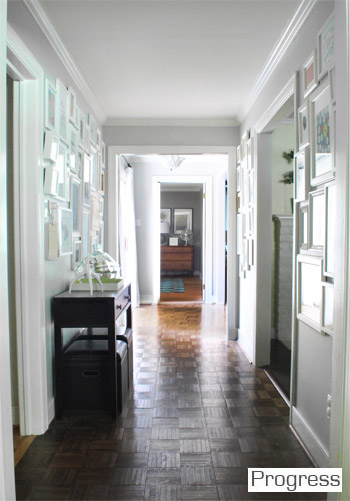
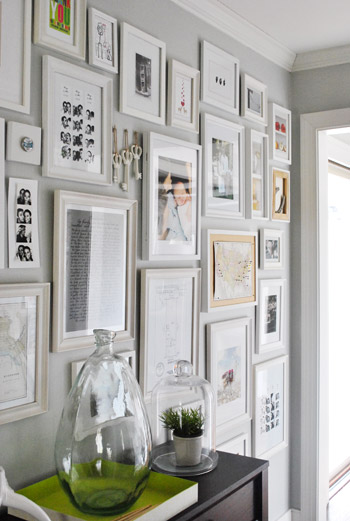
Done:
- we added a frame collage around the console table that lives in there, which made it one of our favorite spots in the whole house (and yes, I’m going to spackle and paint every last hole in this house for the new owners, which actually wasn’t too bad in our first house)
– The Small Hallway: Complete! –
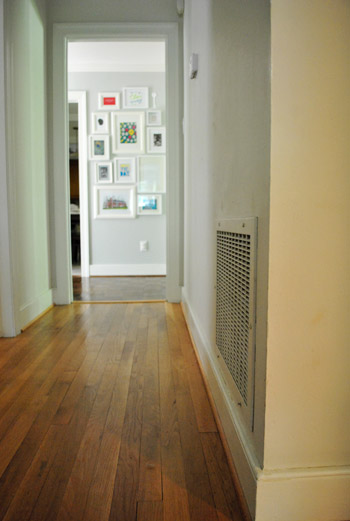
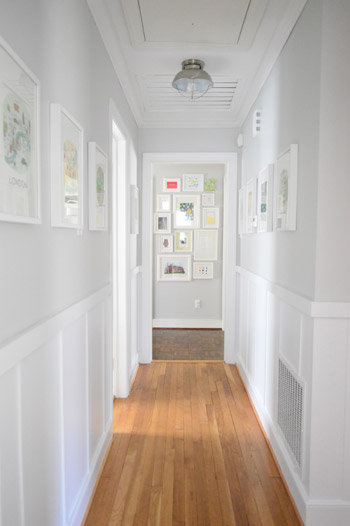
Done:
- spray painted the old door knobs for all the rooms off of the hallway in an oil-rubbed bronze finish (update: they’re still holding up great!)
- added board & batten and painted the walls
- switched out the old light and ancient gold and gaudy doorbell chime
- added crown molding
- hung some playful calendar art
– The Dining Room: Complete! –
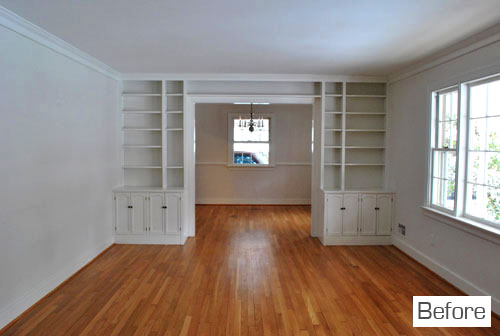
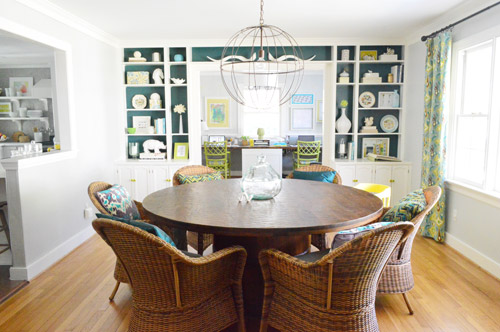
Done:
- painted the walls
- painted the back wall of the built-ins dark teal
- hung some homemade curtains
- got a large round dining table along with some chairs
- brought in a chippy old painted buffet (found on craigslist)
- hung some yard sale art that we personalized with painted lettering
- added a nice big light fixture over the table
– The Laundry Room: Complete! –
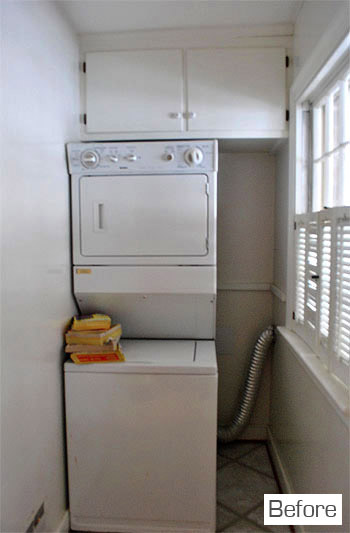
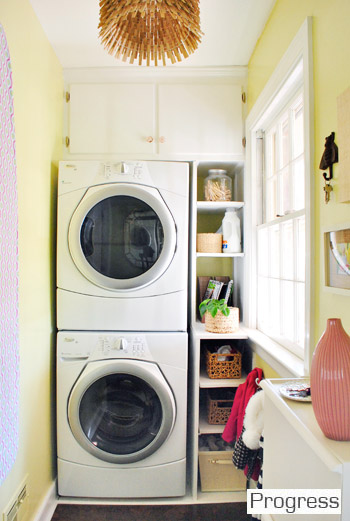
Done:
- painted the walls
- removed the old shutters from the window
- frosted the big glass side door
- painted the cabinets & replaced the hardware
- replaced the old washer & dryer for deeply discounted energy efficient ones (and craigslisted the old ones)
- built some custom shelves next to the washer & dryer
- replaced the laminate flooring with cork
- hung some art
- made a clothespin chandelier
- mounted our ironing board on the wall to save space
– The Kitchen: Complete! –
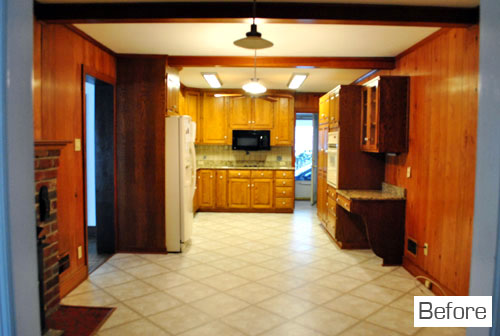
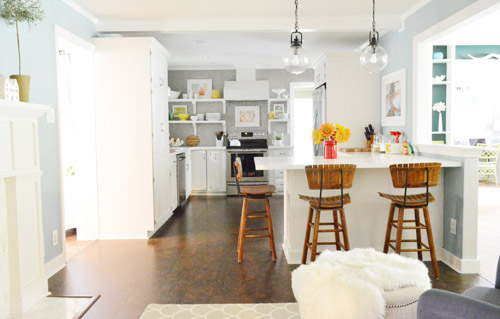
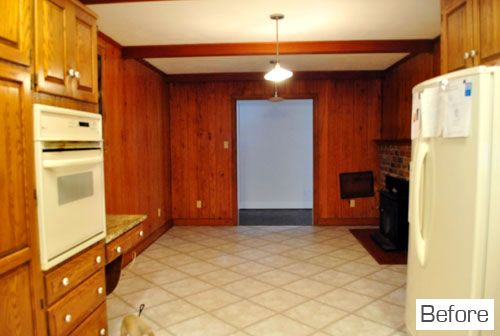
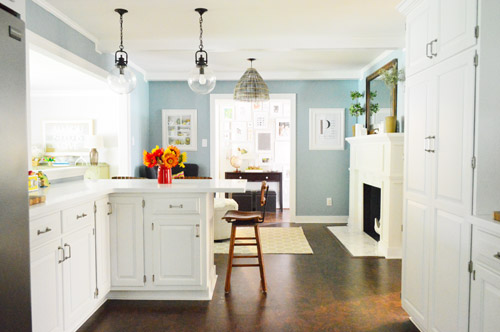
Done:
- painted the brick fireplace
- primed and painted the paneling
- replaced all the old mismatched appliances with energy efficient stainless ones (and craigslisted the old ones)
- knocked out a huge opening to connect the kitchen and dining room (more on that project here and here)
- redid the lighting (added can lights, glass pendants, etc)
- rearranged the cabinets (moved the pantry and the fridge, added a peninsula, etc)
- primed and painted the cabinets (and added new hardware)
- sold our old granite on craigslist and got new white Corian counters
- tiled the backsplash (all the way to the ceiling on one wall)
- added open shelves
- built a microwave cabinet with ventilation to hide it
- hung a new range hood found on craigslist and built a range hood cover
- replaced the old laminate with dark cork flooring
- got stools for the peninsula
- brought in a rug to define the sitting area by the fireplace
- made a fun fabric window shade for over the sink
- repainted the walls
- added molding to the top of the cabinets
- refaced the fireplace with a new wood mantel and a pretty herringbone marble tile hearth and surround
– The Playroom: Complete! –
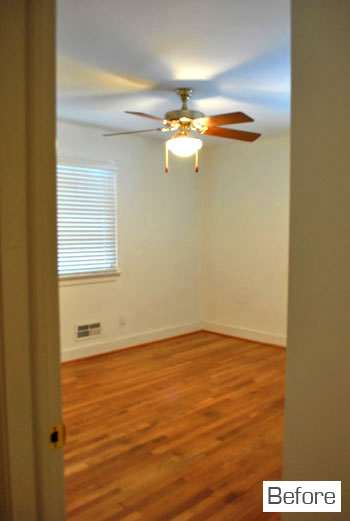
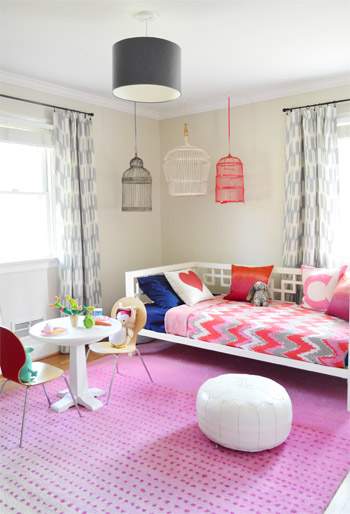
Done:
- finally cleared out all the clutter thanks to a yard sale, a charity book project auction, and some good old fashioned Goodwill donations
- painted the walls
- made and hung curtains
- got a rug
- brought in a kid-sized table and two chairs for coloring & tea parties (we painted the backs of them red)
- got a secondhand dresser with nine drawers for some pretty awesome storage
- switched out the old ceiling fan for a pendant light
- made a frame collage full of meaningful Clara-objects
- hung three big birdcages on the wall to make an off-centered window feel more balanced
- got all of the random clutter out of the closet so Clara can use it
- got a mattress pad & new sheets for the daybed & added more personalized art & toy baskets (more on that here)
- added crown molding
– Nursery: Complete! –
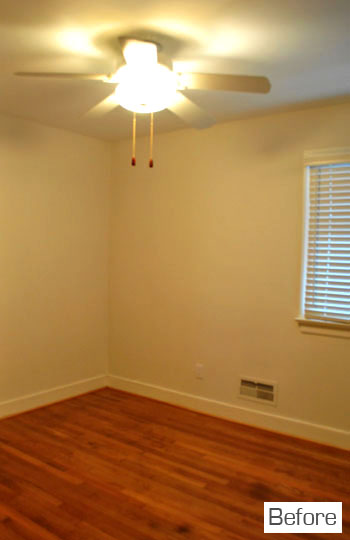
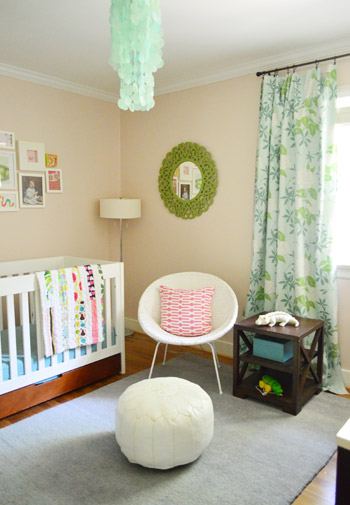
Done:
- painted the walls
- hung curtains
- moved in all of her existing furniture
- hung art and added baskets/toys
- replaced the light fixture with Clara’s capiz chandelier
- built a play kitchen & play fridge for Clara
- added crown molding
– Clara’s Closet: Complete! –
Done:
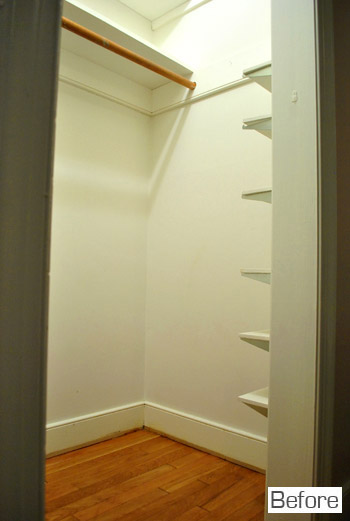
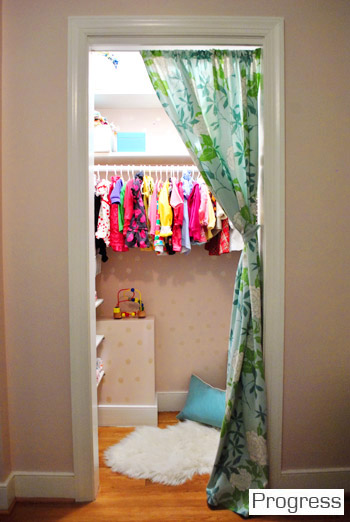
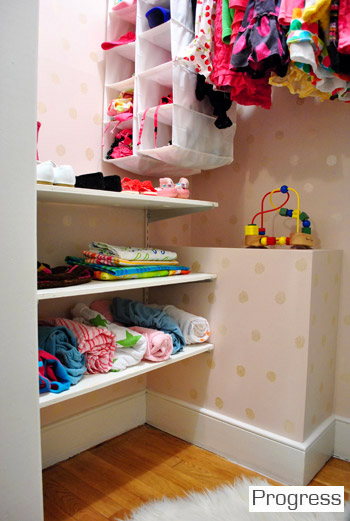
- removed the old bifold door and hung a curtain on the closet instead
- redid the closet by painting it and then stamping the walls
- sewed a beanbag to create a sweet little reading nook
– The Sunroom: Complete! –
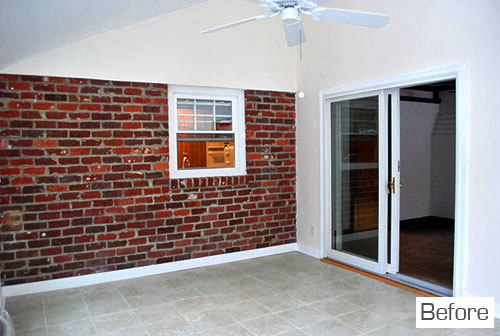
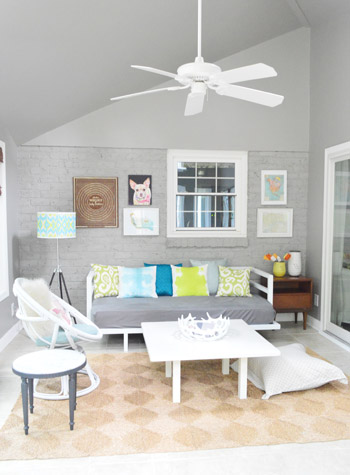
Done:
- spray painted the old slider handles and knobs in an oil rubbed bronze finish (update: they’re still holding up great!)
- painted the walls and the odd unbalanced box of brick
- furnished most of the room using what we had
- hung some art on the walls to make it feel more home-y
- brought in a bookcase for some functional storage
- added some window treatments
- painted the little marble table next to the egg chair (didn’t blog about that, but the color is Nightfall by Benjamin Moore and I had a test pot leftover from this)
– Our Bedroom: Complete! –
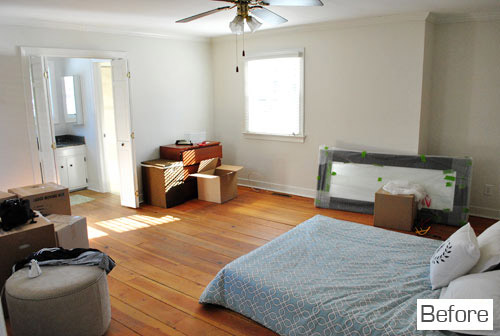
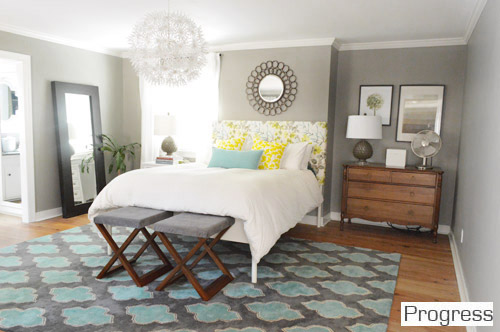
Done:
- got a new bed (we sold our first home with our bed since it was built into the sleeping nook)
- painted (and then repainted) the walls
- traded the old brown fan for a light and playful Ikea chandlier
- hung some art
- hung some curtains
- rearranged the furniture so the room finally made sense (only took us two years…)
- made an upholstered headboard
- finally brought in furniture for the bare wall across from the bed (never hooked up the TV though…)
– Our Sink Nook: Complete! –
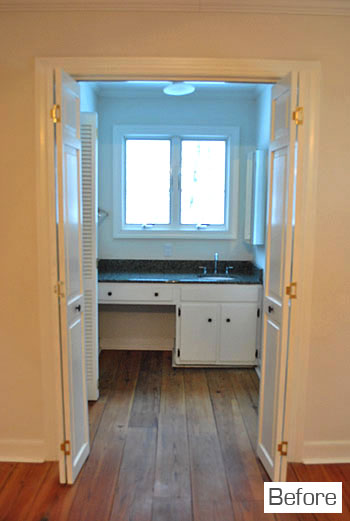
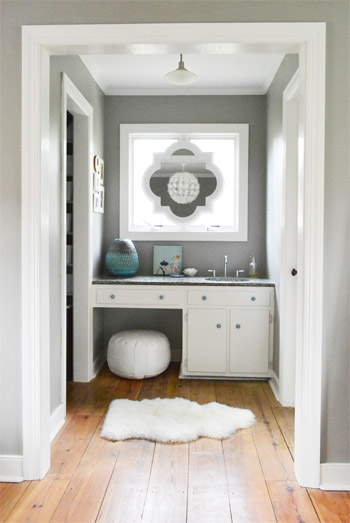
Done:
- took off the dated bifold doors between the sink nook and the room
- hung a mirror over the sink window (and removed an off-center medicine cabinet on the right wall)
- removed the granite backsplash on the sink to make it look more like a piece of furniture
- upgraded the knobs with $2 finds from Hobby Lobby
– Our Bathroom: Complete! –
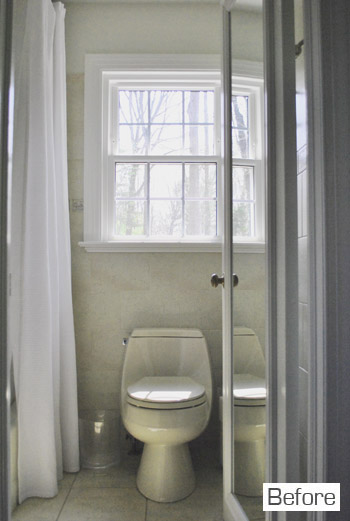
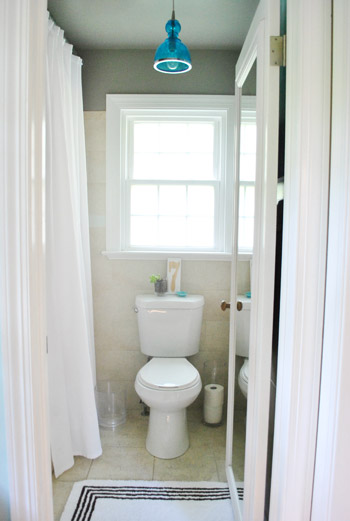
Done:
- hung the shower curtain at ceiling height
- painted the walls
- hung some art
- painted the off-white trim and door a glossy white
- added privacy to the window with frosting film
- replaced the toilet (and craigslisted the old one)
- replaced the boob light with a glass pendant (and centered it on the window and door)
- replaced the dated tree border tile with white frosted glass subway tile
– The Guest Bedroom: Complete! –
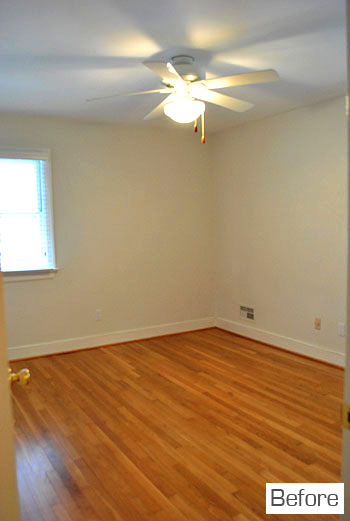
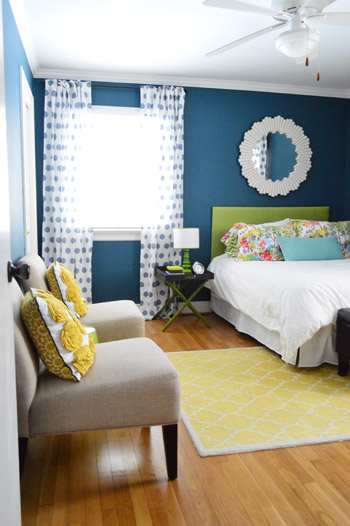
Done:
- primed and painted the walls (we use a primer when we’re going light to dark or dark to light on walls)
- furnished it (mostly with leftover stuff from other rooms)
- hung curtains and a mirror
- added crown molding
- hung a bigger mirror over the bed
- replaced some of the older just-using-what-we-have furnishings (more on that here)
– The Guest Bathroom: Complete! –
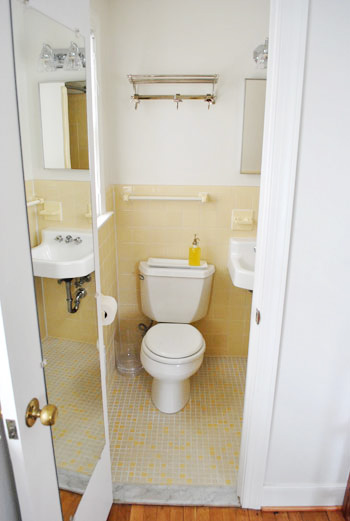
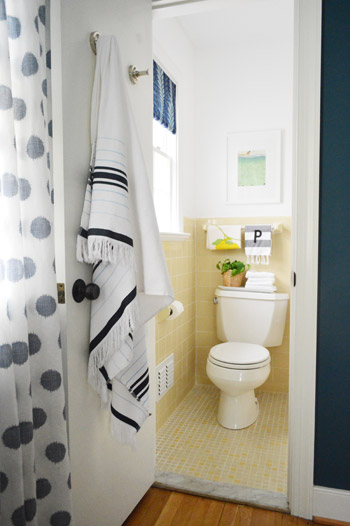
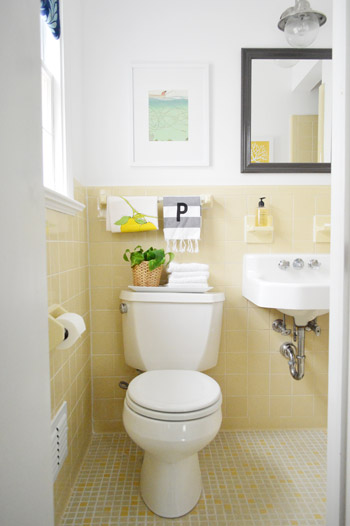
Done:
- removed the most awkward mirror in the world that hung on the back of the door (it reflected your whole body while on the toilet)
- hung a new shower curtain and added a bath mat
- hung some art and replaced the mirror over the sink
- replaced the light fixture
- painted the walls, trim, and ceiling
- frosted the window for privacy and added a fabric shade (more on that here)
- hung more art on all the bare walls, painted the mirror, and added accessories (here’s the big $50 reveal)
– The Basement Workshop: Complete! –
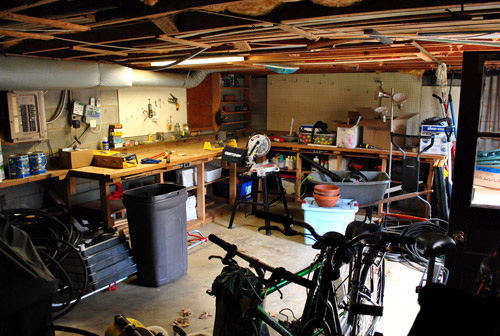
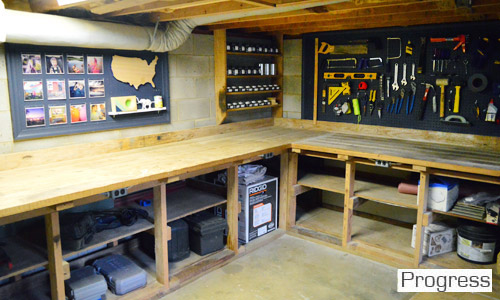
Done:
- cleaned the giant mess that had taken over by donating to Goodwill and using a Bagster
- organized all of the tools on pegboards and all of the paint on a built in cabinet
- framed out and painted all of the pegboards
- organized all of the screws and nails in jars that sit on a shelving system for easy access
- created some sawdust-proof art and a functional shelf over the main workspace counter
– The Side Lot: Complete! –
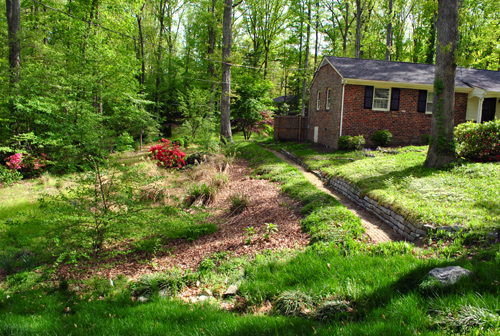
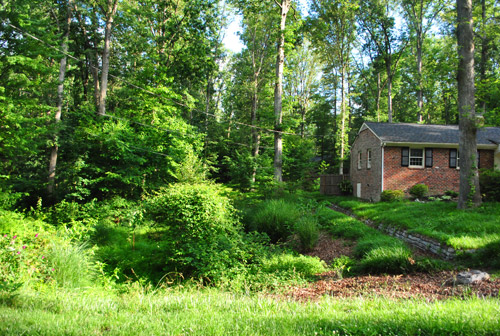
Done:
- Planted two trees and naturalized it a lot from the sparse leaf pit that we inherited so it looks woodsy and wild (which makes it awesomely zero-maintenance and provides more privacy from the neighboring house)
– The Deck: Complete! –
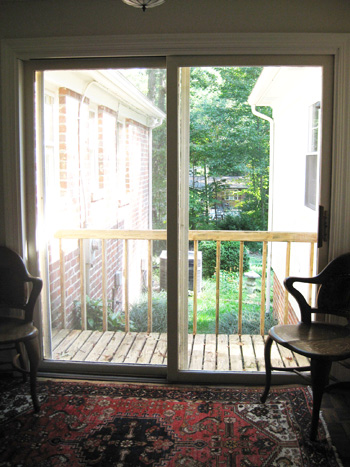
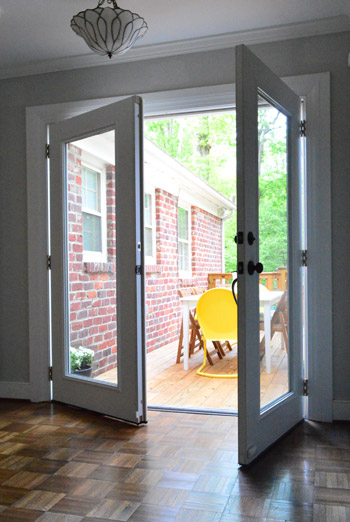
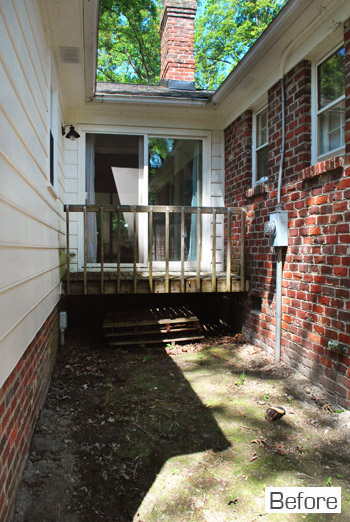
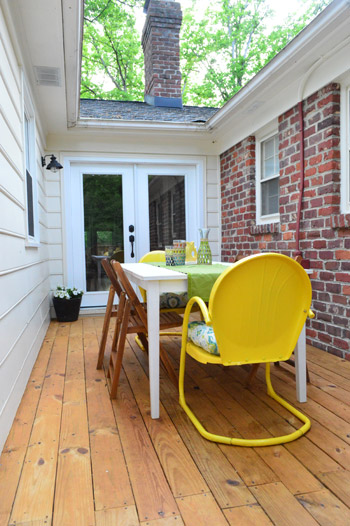
Done:
- cleared/transplanted the bushes and shrubs in the way
- mapped out a deck plan and got it approved by the county
- demo’d out the rickety old balcony
- dug our post holes
- failed our first inspection
- framed out the deck
- started adding deck boards
- completed the deck boards & the railing/steps
- furnished the deck (by adding a large dining table, chairs, etc)
- added a brand new french door to lead out there (the old door was rotten and broken)
- power-washed and then stained/sealed the deck
- camouflaged the utility box with some brick-colored paint (mentioned here)
– The Patio: Complete! –
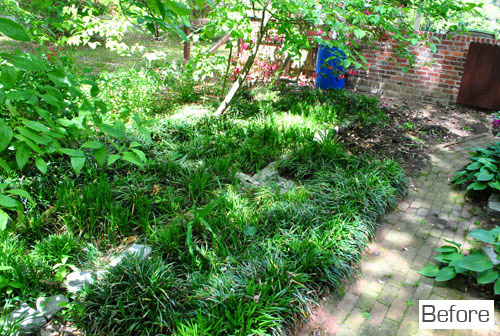
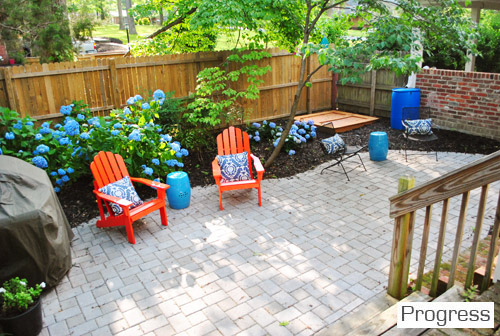
Done:
- cleared out all the weeds/bushes/dead trees to make a spot for a patio
- planned and purchased materials to build the patio
- leveled the ground, laid gravel and sand, and laid our pavers
- created a custom curved edge and landscaped the area around the patio
- built a rock box for Clara and added a rain barrel to save water
– The Backyard: Complete! –
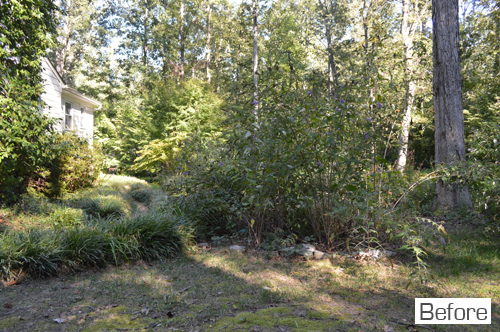
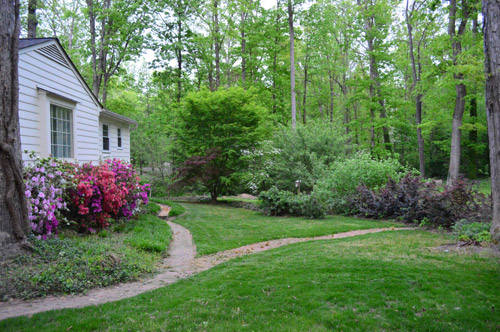
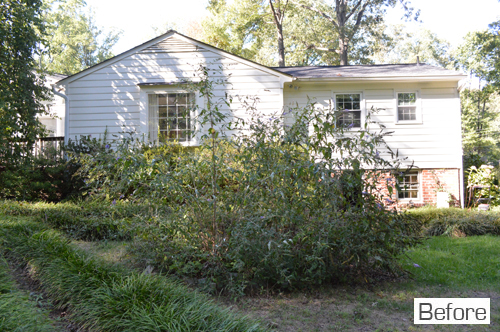
Done:
- built a compost bin
- cleared out a bunch of crazy overgrown beds so we could have more grass for dog/kid playing
- removed all the monkey grass that encroached on the charming brick paths
- transplanted a bunch of oddly placed bushes so they made more sense
- reseeded the grass
- removed the large vine on the tree near the upper patio
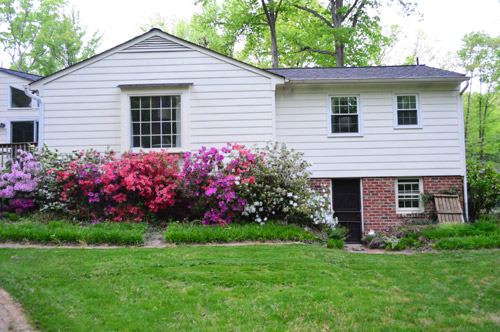
It’s so much fun to look back at all the completed bullets and reminisce. We’re going to miss the heck outta this house. And since a home is never really done, we thought it would be fun to include some things that could have been exciting to do down the line if we had stayed…
- turn the fireplace in the kitchen into a double-sided fireplace that also opens up into the living room (we needed a mason/architect since it would have been a load-bearing wall that we were altering)
- refinish the floors throughout the house in a richer mocha tone like the cork in the kitchen and laundry room for a more seamless effect (like our first house)
- paint the ceiling in the playroom a happy and playful color like soft teal
- redo the flooring in the sunroom (the beige tile was neutral and in good condition, but it wasn’t our favorite)
- convert our bedroom window that looks out onto the deck into a french door
- possibly tile the entire back wall of our bedroom sink nook with something dreamy and gleaming (we couldn’t decide if it would look too bathroomy in the bedroom so we went back and forth on this)
- retile our bathroom floor (maybe with gray hex tiles) and possibly reglaze the beige wall tile so it’s bright white (or add beadboard over it?)
- add raised bed gardens for vegetables, fruits, and herbs and build Clara a swingset (this is one of those bullets that we want to “bring with us” to the new house)
Here’s hoping the next owners pick up where we left off and we can house crash them someday!

Autumn Beach says
WOW! What an amazing feeling to look back on all of these beautiful transformations! Congratulations on such an awesome accomplishment!! I only regret not joining the journey sooner. Which is probably one reason why I’m super excited for your new adventure! I get to be here from the very beginning…of house #3, that is. SO exciting!
RBC says
Wow. That is really incredible! I just love it and can’t wait to see you transform your new house! I love your style.
A while back you were talking about working on your work-life balance – I know I have appreciated your responses to how-to questions I have posted in the comments but generally I feel like you could cut back significantly on replying to comments and save yourself HOURS! You guys are so busy and I wonder how many people even see your hard-work-replies? Maybe you could do a poll to see if people read replies to the comments-? Anyway, just a thought. And seriously-don’t reply to this comment! I’ll never see it!!:-)
Anyway keep up the awesome work! Love your blog!
Karen says
Wow, the kitchen is definitely my favorite transformation! I’m sad to see you leave your beautiful house, but I know your new one will look just as great before too long! And the people who bought your old house can just sit back and relax since you guys already put in all the work to make it awesome…
Beth says
I loved your 2nd (and 1st) house, so I am really looking forward to what you guys do with your 3rd home!
We’re getting ready to sell our first home, and I have a question that you probably already covered somewhere but I couldn’t find it: When you move out of a home, do you leave the curtain panels? I was planning on leaving the shades and the hardware/curtain rods, but wasn’t sure if it’s customary to take the curtain panels?
YoungHouseLove says
I think that varies by region so I’d ask a realtor or two. In our area the curtains usually convey with the rods (since they’re all attached) but oddly enough the shower curtains don’t!
xo
s
Béa says
waow. compost bins…among many other things……this got me thinking :
your post about the first composting system you’ve make dates back from….2008.
and it was my first encounter with your blog…. thank G–gle for that!
But most of all thank YOU guys for keeping me interested ever since! I’ve loved following each project!
Can’t wait to see what your new house is going to be!
Elizabeth (@Eliza_Do_Lots) says
Man I love your house. It’s just the bestest thing on the internet.
I want to walk around it, stroking things and rubbing my face against them.
That’s not weird, right?
Ok – it’s a bit weird…
But it’s just beautiful.
My favourite part is the gloomy, brown hallway that you turn into the most beautiful place on earth with all the framed pictures.
decoratica says
The improvement you’ve done to taht house it’s amazing and I can’t wait to see how the new one evolves over time!
I’m diying to know the names of the bushes you planted on your backyard. I’ve read the original post and haven’t found them… Will you be so kind to tell me? I’m planning my garden and want to add some colour with beautiful bushes with flowers and I love yours!
Thanks!
XO
YoungHouseLove says
Those are actually azaleas and they were there all along! They just grew and blossomed. They’re really easy to care for too!
xo
s
decoratica says
Thanks so much Sherry! Either way, they look stunning right now!! :))
KBella says
Oh you guys. Is it weird that I’m getting all verklempt about you leaving this house?! I howled like a banshee when I moved into my own first home- I just get emotional about moving. Even with my virtual bloggy friends. ;)
YoungHouseLove says
Hilarious. I just love the visual of you howling.
xo
s
Chris says
Wow! This post really showed how amazing you guys are and why I love your blog so much! What a transformation. While its trendy to talk about potential in older homes, this is just so good. The new owners are so lucky. I look forward to the next chapter. :)
Tina W. says
i can’t help but wonder…to what extent will you be bringing light fixtures with you? i mean, there are so many beautiful ones that you love around the house. do you pack and re purpose or leave to the lucky buyers?
YoungHouseLove says
All of the light fixtures stay with the house (they’re attached, so in our area that means they convey) but we’re excited to make/find new ones that fit each room of the new house!
xo
s
KErry says
Hey Sher-dog!
I was wondering what the name of those beautiful blue flowered bushes are on your patio.
I’m planting my front garden and would like to see if these would be a nice addition.
Thanks,
Kerry
YoungHouseLove says
Hydrangea! Love those! They get big really fast (like doubling in size each year).
xo
s
Nikki H says
I love everything y’all have done to your home. I especially love looking at the before and after pictures with the lists!
Katie says
Does it make you sad to think the future owners could/would paint over your hard stencil work in the office? I’ve stenciled a few walls in my place and it’s SUCH tedious (but worth it) work!
YoungHouseLove says
I think they like it! They’ve asked us to leave all of the wall paint behind so they can do touch ups over the years so we think that’s a good sign. But if they do paint over it, we’re cool with that. Goodness knows we like to make a house ours, so we hope they make it theirs!
xo
s
alg says
Love this post — I started to really follow your blog right as you moved into this house. Seeing it all “done” is kind of bittersweet. Big Head Todd keeps running through my head… ;)
Kudos on all the great work. Can’t wait to follow the next leg of the YHL journey!
Tess says
Wow oh wow! What a huge accomplishment! Congratulations! I hope that we can make our soon to be new-to-us home as gorgeous as yours. It has been great fun to read along with you on all those projects, I’m so looking forward to seeing your new projects in your new house, whilst we are working on some projects in our place!
Brittany says
Is it funny I got a little teary eyed looking at all you have accomplished? I started following you guys right after you moved in to this house! So amazing the work you have done! btw Love your book:)
YoungHouseLove says
Aw thanks Brittany!
xo
s
Kate says
AMAZING! And how wonderful that you’ve got the keepsake of all those great shots, and the memory shared through the blog. Now that I’m processing my house-grief, I can’t wait to see what happens as you settle in to your new home :) xx
Molly says
I don’t want to bring up any bad memories but I have to ask…about the hall bathroom towel rod. I have the exact same style hall bathroom with the black and white tile and the weird (and weirdly placed) towel rods. My husband wanted to knock them off until I showed him Sherry’s blog post about it! We genuinely can’t tell whether they are on top like you thought, or embedded like yours turned out to be. So what did you do with that broken off spot inside the shower? The window trim covers the one spot perfectly, but did you end up replacing the other tile? My bathroom needs to know!
YoungHouseLove says
Haha! We just sanded that one spot as smooth as possible and used white tile touch up paint from Home Depot to blend it in. Since it’s right where the shower curtain falls it’s not noticeable in the shower or outside of it. As for the paint, I think they sell it at Lowe’s too- it’s for scratches in tile or in tubs to help them blend in and sort of looks like a white-out bottle. Hope it helps!
xo
s
Tyra says
totally random…but i think y’all should include the side by side before and after of the fireplace from the reveal post into the 2nd house house tour. it was such an amazing transformation and i feel like you cant see it “straight on” in any of the pictures!
what y’all do is amazing!!! cant wait for house #3
YoungHouseLove says
Aw thanks Tyra! I’d love to add that to the B&A page!
xo
s
abby says
I really hope you showed the new home owners the before/after pictures. It’s quite amazing how you transformed this house!!
YoungHouseLove says
We left some magazines on the counter with a few before and afters in them. They seemed to love seeing that!
xo,
s
Kelly says
Love your blog. Read it daily. Your house looks great! imho, I think it would have been nice to paint the downspout by the carport like you did the electrical box on the back deck.
YoungHouseLove says
Totally agree! If we were staying I’d have loved to do that. Just didn’t know if the new buyer wanted a painted spout :)
xo
s
laurie says
My daughter passed on your blog & I love it! We are currently completely redoing a flip home and I’m wanting to move into it. I can relate with everything you have written cause we’ve been there. Keep up the good work and check out her blog rejennaration.org (actually blogged about our latest flip recently)
Jordan Lamb says
I am just absolutely astonished by all of the work you guys do. Going through all of your projects makes me wish I could hire you guys to come help me do some designing – inside and out!