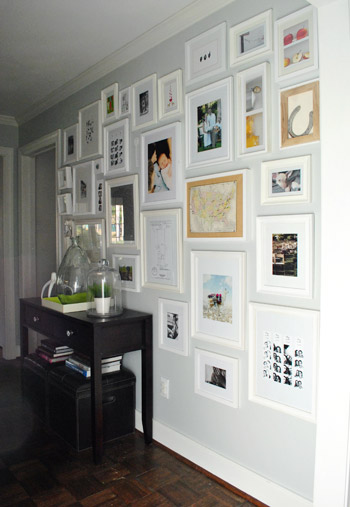
We’re back with pics of our hallway that we “wallpapered with frames” for lack of a better description. We think it created some pretty quick dimension and interest that’s sure to be fun for the whole family. Literally. We love that we can work in drawings by Clara, class pictures, and photos of favorite vacations for the whole family to enjoy.
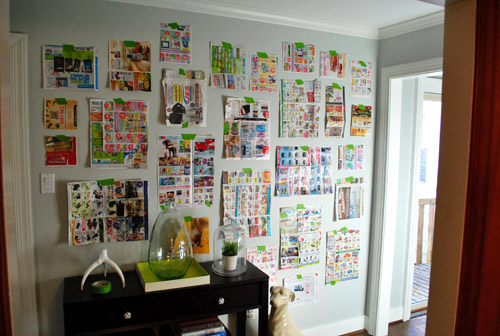
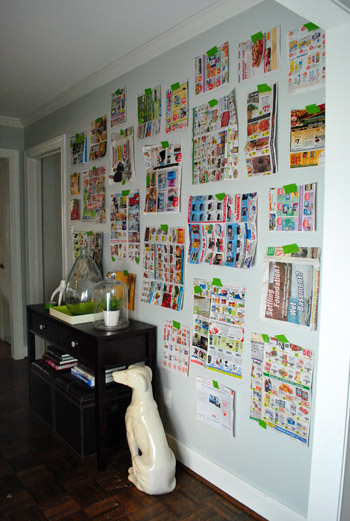
As for how we did it, you saw how I cut out little newspaper templates for all of the frames that we already owned (we actually had a lot of them from various arrangements in our first house, seen here, and even had a few unused ones snagged on sale a while back that were begging for some action). So we just taped up all of our pre-cut templates with a few of the larger ones staggered in the middle (to ground things) and built things out from there, placing most of the smaller frames around the perimeter for some subtle balance. We shifted things around a little, stepped back, went back in and moved stuff around, and stepped back to look at everything again. This happened about ten times with smaller and smaller tweaks until we decided we liked it. But we still wanted to sleep on it and study it one more time the next morning before breaking out the hammer (hence this post about that first phase of the project).
Yesterday we mentioned that The Washington Post scooped us by sharing this shot of our frame-riddled hallway here:
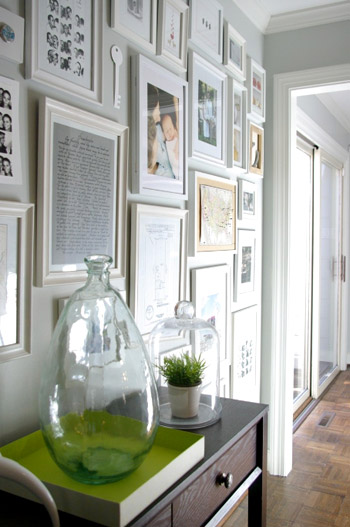
We try to stay as real-time as possible, but we also like to take a ton of after pics and write a big wordy post for ya, so it can take a few days from project completion to post publishing. If only we had a live camera feed going 24/7. Just kidding, my nightmare is to get caught picking a wedgie on camera. It’s why I never auditioned for the Real World (side tangent: John actually sent in an audition tape once when he was 19).
Anyway, so when we woke up the next day and agreed that we still liked the proposed frame placement, it was time to lay out all of our frames on the floor of the dining room in the same arrangement, just to check if some of the actual frames conflicted (since all we were looking at on the wall were their outlines and not their actual styles). Of course we ignored the art since most of it would be switched out anyway.
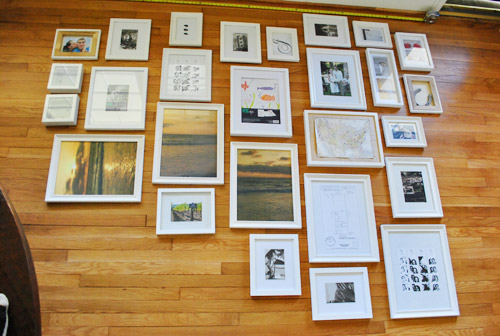
The frames all looked just fine together, so we decided to bite the bullet and grab the hammer. It was hangin’ time (here’s where a lot of MC Hammer was sung). Since our newspaper templates were still up on the wall, it was actually really easy to hang stuff. We just measured how far down from the edge of the frame that our wire, hook, or other hanging device was and just marked a centered “x” right on each template (the horizontal line is the measured center of the template, and the x below it is the spot where the nail should actually go to catch the wire or hook so the frame hangs in the right place).
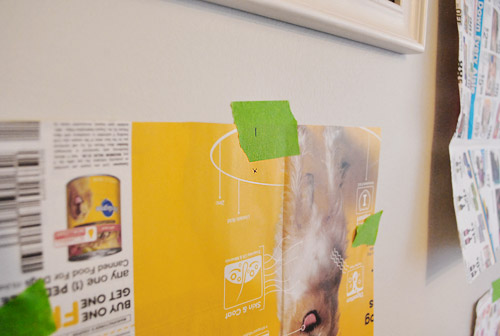
Then we just hammered directly into the “x” in the template…
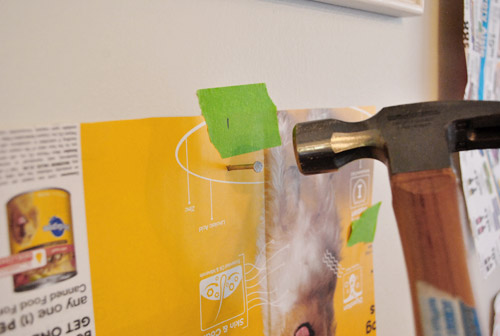
… and pulled the template off the wall to reveal a lone nail waiting for a frame (even though it looks like a jacked up hole, that’s just a tiny bit of paper caught above the nail that we easily removed with a finger flick).
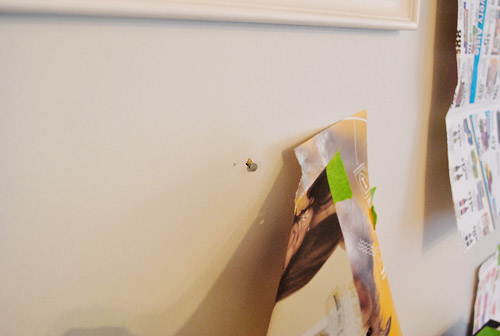
We slowly worked our way around the wall using this method. It probably took an hour or so.
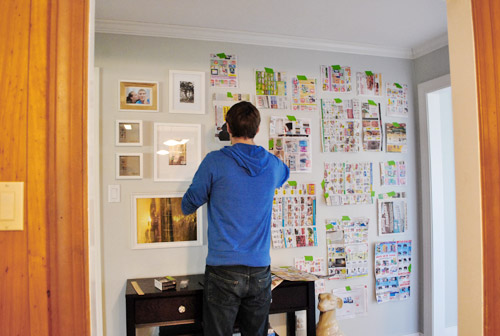
Sadly our old plaster walls don’t work with 3M Command hooks or velcro alone (since that’s always an easy way to create a frame collage without making any holes) but we do plan to add heavy duty Command velcro to the lower frames that may be within Clara’s reach when she starts toddling around. She’s a pretty docile girl who definitely seems to listen when we ask her to be gentle (when petting Burger for example) so our plan is to sweetly request that she be nice to the frames and “look with her eyes” and we might even try the “you can only touch them with one finger” technique that an awesome varsity mom shared with us a few days ago (she said it actually works!). But of course if we think those few low frames ever start to pose a safety hazard, or even just become too high maintenance for the way we live, we’ll definitely just get rid of them until the bean is a little older. Clara first!
But back to our process. After following our templates and hanging every frame we stepped back for a little look-see and frowned. Somehow they seemed a little tighter in the top right corner (which we actually really liked) and a bit too loosey goosey everywhere else…
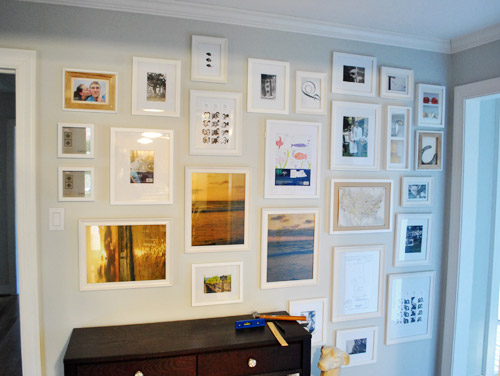
… so we adjusted some of the frames on the left and added in a few little “filler” items to get the same full look that we had on the top right corner going on everywhere else.
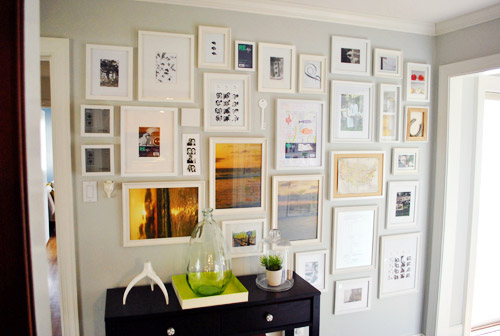
So yes, there are probably ten extra holes in the walls hiding behind those frames from fine tuning them an inch one way or the other. Our bad. But they’re all out of sight so we’re at peace with it. They can just be our little secret. Oops, I just told The Interweb.
Once everything was hung we scavenger hunted the house to find things to display (since many of the existing items in the frames were horizontal images that were now hanging vertically or the frames were completely empty to begin with since we hadn’t used a few of them yet). Which puts the cost of the entire frame wall plus all of the “art” that you see (since that was also already owned) at 100% f-r-e-e. Except for this cool $16 frame from Target that we splurged on because we adored it’s “special capabilities” to store and easily showcase lots of kid art. We love that we don’t have to take it off the walls to change things out. Come on Clara, don’t you feel like drawing mommy a picture or two?
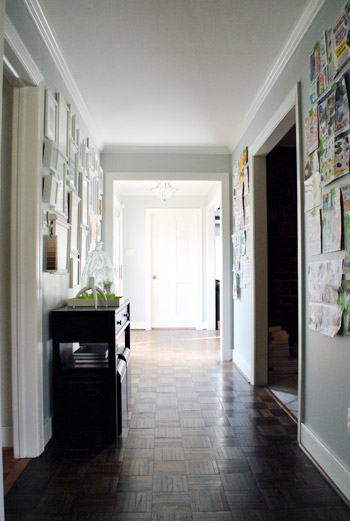
So this is our current arrangement with all of the just-for-now stuff that we found around the house. First here’s the view from the kitchen (which is why we placed the console table there, so it looks centered through the doorway:
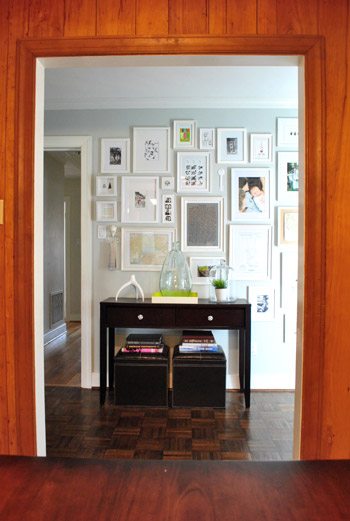
And here are a bunch of other angles:
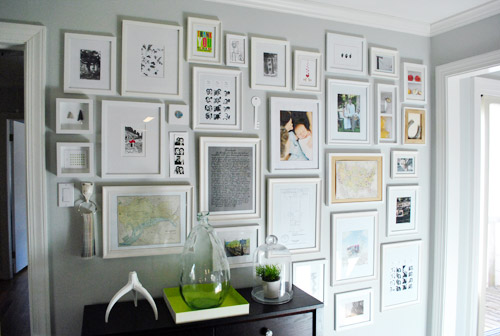
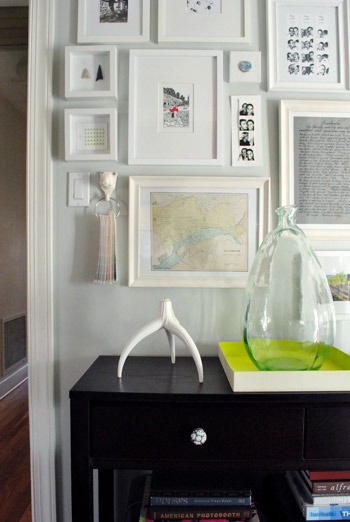
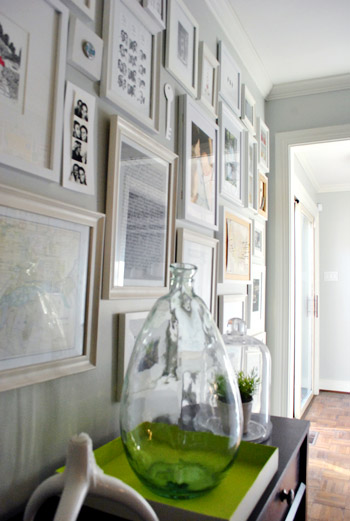
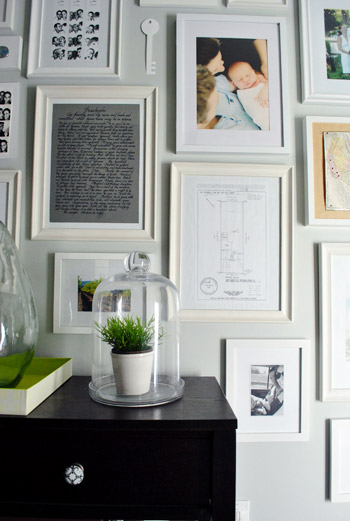
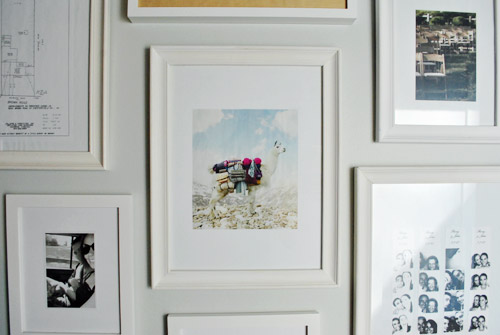
From an old Banana Republic ad with a llama (or is it an alpaca?) carrying sweaters…
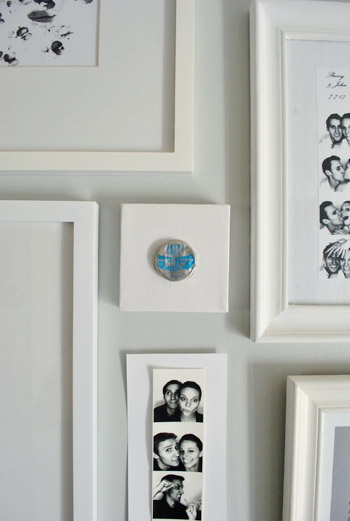
… to a vintage milk cap that we found at our first house glued to a small square canvas…
….and a white paper key that I cut out of card stock (which I hope to replace with a DIYed ceramic-looking one)…

… it’s definitely a smorgasbord. And there are probably way too many photostrips, but they’ll do for now.
We’re actually planning a post later with more detailed shots of various items and directions for making your own stuff, like an arrowhead shadowbox for example. Or a long skinny wooden pinboard (still have to make that, for now we have a placeholder piece of card stock with a photostrip taped to it). We also thought it would be fun to take a picture of the wall every few months just to see what comes and goes (new Clara art? updated family pics?) and what always stays (the sketch of our first house’s lot? a favorite photobooth strip of the whole fam?).
We anticipate that at least 25% of the wall will be changing pretty regularly as new things steal our hearts – like a particularly good (or bad) fortune cookie fortune and Will Bower’s first birthday invitation. You know, the important stuff. We definitely feel like this gallery will be the most personal, eclectic, and fun display spot in the house. So while I’ve already asked for some awesome art prints for my birthday (which is this Saturday- woot!) we also want to frame everyday objects that hold meaning to us. From Clara scribbles to little love notes and even particularly funny greeting cards with chihuahuas on the front.
In short: We are so in love with the whole hallway frame gallery. It took a spot that was just a way to get from A to B and made it feel like a bonafide destination. We both keep finding ourselves being drawn to that wall like magnets, just standing there gazing at all the frames. Even Clara loves to stare at it. Ah gallery wall. How can you make us so happy? We’re nerds.
And surprise. We’re so enamored that we’re planning to “wallpaper” the other two walls on the other side of the hallway with frames too.
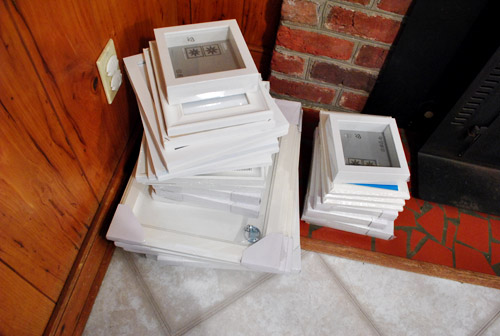
Here’s the pile that we grabbed from Ikea (feast your eyes on that pretty shattered fireplace tile).
Should be good times.
Psst- We announced this week’s giveaway winners. Click here to see if you’re one of them.

Amy Purehome says
Beautifully done. I am frightened to take on a project of this stature. I’m not the handiest and am always afraid I’ll end up tearing down walls! :)
Olivia says
Love your blog, I have to check it every day!!
I am in the middle of doing a similar wall in my new house, but I have been using needles and straight pins to hang my pictures. They are suprisingly strong and leave very little trace when you need to adjust the spot of the picture. They can be a little hard to get in the walls, sometimes I hammer in a super-strong needle and pull it out to replace it with a straight pin. You can also push them in with needlenose pliers. It is a little labor intensive but so gentle to the wall!!
YoungHouseLove says
Love it! I wonder i that would work for plaster. Sounds like the perfect drywall solution though!
xo,
s
Roeshel says
Everything is coming together so beautifully! I love your gallery wall (soon to be gallery hall)! Great job as usual, you two. :)
Happy Spring!
Suzanne says
I love the look of this and I’d love to do something similar, but with two small boys (3.5 and 1.5) I am wondering about the lower hanging ones? Are they somehow child-proofed? Or do you have a plan on how to address this later when Clara is a mover and shaker?
YoungHouseLove says
Yup, check the post for that info! We’re definitely all about Clara these days. Hope it helps!
xo,
s
sara miller says
do you think this would work in a not so wide hallway? We couldnt fit a table, but its a short wall cut off by our steps going up. I’ve been trying to think of what would be fun there, and this might work?
YoungHouseLove says
Sure! We’ve seen photos hung in pretty narrow spaces, just be sure they’re not extra deep and space them out so they have some breathing room and don’t feel too heavy/dense. Using paper templates beforehand (white paper would be less chaotic looking than newspaper) can help you land on the perfect arrangement. Hope it helps!
xo,
s
Sarah says
Love, love, love this wall! I’m going to have to convince the hubs to do this in our hallway. The first project is going to be a console table from Knock Off Wood, though! Thanks for the inspiration!
Oh, and I second wanting to see that Real World tape! :)
Suzanne says
Ahh. I see. I swear I can read. I must’ve skipped over it in my excitement to look at all the photos. I like the velcro idea. I’m currently looking to replace my bookshelves for ones that have doors. My youngest’s favorite pastime is removing everything on any shelf he can find… followed by a simple ‘uh-oh’ as if it were an accident. LOL.
YoungHouseLove says
No worries! We know we use a whole lotta words. Heck sometimes we skim our own posts! Haha.
xo,
s
Sarah says
It’s a llama :)
teres says
fab idea to get photos off tabletops, shelves and sideboards for a clutter free look! love! will do it when we move FOR SURE!!!!!
teres – winnipeg, manitoba canada
Stephanie says
I love the look of this but all I can think about is how much work it would be to dust! Do you have any dusting tips for a wall like this?
YoungHouseLove says
We’ve always had lots of frames on the wall and I just run a microfiber cloth or feather duster over them from time to time. Seems to work!
xo,
s
janie says
I love it. You guys have kicked my ass into gear and made me hang the frame wall I’ve been planning for months.
And, even being super careful with the layout, once it was frames on the wall it needed a LOT of tweaking. I think I have more hidden holes than you.
Farrah says
I put my gallery wall up again after a recent repaint, and I borrowed your all-white frame look… They used to be a gallery of black frames, but the white on white (on grey wall) look ends up seeming less visually cluttered in our stairway. It involved a lot of white spraypaint. A lot. But it allowed me to expand the gallery and add some more art. I arranged mine on a floor first and then went for it – the walls in question are above an open stairwell, so hanging the frames requires some makeshift scaffolding with planks and ladders. I’m not a fan of heights. However, the collection of art and photographs makes those walls a feature instead of a waste, so it was worth the tightrope walking. .
If anyone is looking for an extra pop of color or whimsy in a big gallery wall, there is free (lovely) downloadable artwork at the online Indiefixx free your soul art project. They have great stuff available!
YoungHouseLove says
Love it! Thanks for sharing Indiefixx, and I’m so glad to hear that your tightrope walking paid off!
xo,
s
Snickrsnack Katie says
Yay, that looks fantabulous!!!
Devon says
I LOVE LLAMAs! (probably on the same level as the white animal addiction at YHL) I also framed and displayed that llama BR ad. Such a great picture! Alpacas are much smaller. :)
YoungHouseLove says
I still can’t believe how many of us have framed that ad. Amazing! Haha.
xo,
s
Kristen says
Just saw these and thought of your key situation!
http://www5.jcpenney.com/jcp/X6.aspx?deptid=71371&catid=71784&grptyp=PRD&itemid=19ce55f&dep=HOME+D%c3%89COR&cat=Wall+D%c3%a9cor&refpagename=X2%252Easpx&refdeptid=71371&refcatid=71371&cmAMS_T=X2&cmAMS_C=FEATURE&cmAMS_V=X2V2&CmCatId=71371
YoungHouseLove says
Charming!
xo,
s
Jen says
Love the gallery (especially the inclusion of a random alpaca ad!). What is the paint colour in your hall? I love it, and tried to search for it on your site, but with no luck.
YoungHouseLove says
Hey Jen,
The color is Moonshine by Benjamin Moore, color matched to Olympic Premium No-VOC paint. It’s the same as what we used in the living room and plan to paint the dining room too.
-John
Lori Helms says
Your collage looks fantastic. May I ask where you found the glass terrarium?
YoungHouseLove says
That was actually $4 at a garage sale. But I’ve seen similar versions at Goodwill and other thrift shops. Hope it helps!
xo,
s
The Nester, Meagan says
what an awesome easy way to get frames up on the wall! I was doing our hallway the hard way (measuring/eyeballing it myself) and it was downright painful. The newspaper idea = marvelous! Thanks for sharing pictures!
Karen says
I just wanted to say that I LOVE this website…have already told numerous friends about it and they are all following you as well. :) I also wanted to thank you for the inspiration to get the pictures hung. My husband repainted our hall in October (the day before my niece’s bridal shower (I know…insane)and the pictures that were on the walls are in a pile in the hall (and have been there since that time except for a brief hiatus in the laundry room during Christmas.) I’m going to see what I’ve got using your method and even have my Sunday paper to the side (I wanted to change it out and just have been so overwhelmed with it that I didn’t know where to start.) Thanks again for a great website and for the encouragement for a person who can’t even paint…at ALL…to get fired up about trying to do some of the small things as confidence builders. :)
YoungHouseLove says
Aw thanks so much for the sweet note Karen. And congrats on the freshly painted hallway and good luck with the photo project. Have fun!
xo,
s
Adrianne says
I absolutely LOVE your gallery wall! You guys did a great job with sizing and balance. I bet it makes you smile every time you walk by it! The house is looking fabulous and thanks for letting us all be a part of your journey in making it a home.
julie says
what kind of hardware do you use on back of frames to support the nail to keep pictures from sway or bumps and shifts ?
YoungHouseLove says
Most of our frames are hung with picture wire over two nails to keep it stable. We also plan to use Command velcro to keep lower pictures secure on the wall for baby safety. Hope it helps!
xo,
s
Natalia says
I love this! It looks so great! My mind is now racing with ideas and my husband is hiding ;) Thanks for always giving us great inspiration!
Shannon says
Hi John & Sherry,
Do you remember where you got the picture frame in the top right hand corner? It’s the skinny, vertical, double picture guy…hope that was enough adjectives to describe it :)
Thanks!!
YoungHouseLove says
That’s from Target. Hope it helps!
xo,
s
Sarah says
Where did you get the Horseshoe artwork/print you have hanging on the wall? I love it!!
YoungHouseLove says
That’s actually just an old canvas that we hung backwards with a real horse-shoe leaning in the frame. Hope it helps!
xo,
s
Corsage @ A Dollop Of Me says
You guys have inspired me! You make it look so possible. Now I want to do this on our walls. I will send you pics if I do succeed! :)
Katy says
So I went to IKEA looking for small white 6×6″ frames and saw some of the “Ribba” ones but in black only… do I see in your pile of frames that you have them in white? When I was at the store I was thinking they probably didn’t make them in white, but I guess they do?! Please let me know!
YoungHouseLove says
Yep, we’ve got 4 of the small 6×6″ Ribba frames in white so they definitely make them. Sounds like maybe your Ikea was just out of stock at the time?
-John
Amy says
LOVE it!! You totally inspired me to re-vamp our stairwell, hopefully it’ll turn out as well since you see it going up and down and not straight on, I’m sure I’ll blog on it when I’m done! Thanks for the ideas! *Amy
Lindsey says
Great job with the frames! What’s the trick to getting normal photo sizes to work with Ikea’s frames? Most of their frames come in odd sizes and the photo openings of the Ikea frames don’t work with standard sized photos, like 5 x 7’s and 8 x 10’s. Did you make your own mats?
YoungHouseLove says
We usually used their mats (most of the ones we own have 4 x 6 or 5 x 7 or 8 x 10 openings). Sometimes I do remove the mat and put card stock behind whatever we’re framing and just float that item in the middle of the opening on top of the card stock “mat” behind it. Hope it helps!
xo,
s
tara says
hey sherry and john, the wall looks fabulous. as usual, thanks for all the inspiration. i just did a gallery wall myself. have you seen nester smith’s encouragement to just do it? i link to it in my post.
http://indecentorder.blogspot.com/2011/03/gallery-walls-are-all-rage.html
YoungHouseLove says
Amazing! So cool. You did a fantastic job and I love so many of the meaningful things you selected. And yes we love the whole take a risk and just do it anthem going on (thanks to Nester Smith!). We’re in!
xo,
s
lisa says
http://www.etsy.com/listing/62754532/bee-hive-8-x-10-print-on-vintage-book?ref=cat2_gallery_39
YoungHouseLove says
So sweet!
xo,
s
Jessica B. says
LOVE this! It would be perfect for one of the walls in my living room. However, I have a question – what kind of spray paint would you suggest using – glossy, semi-gloss, satin – for painting the frames? I haven’t decided what color I want to paint them all yet, but I do want to paint them because they are all different finishes/colors. Thanks so much – keep up the great work!
YoungHouseLove says
We’ve used semi-gloss and had awesome results. Good luck!
xo,
s
Visty says
Maybe someone already mentioned this in the comments, but Ook makes a safety hanger for kid areas. http://www.ooks.com/c-122-kidsafe-picture-hangers.aspx We used them in our littlest girl’s room for a picture above the bed. The style works great for frames hung with wire.
Karen says
how do you all think this would look behind a couch in a living room? we don’t have a great hallway or any other great wall space to do it on, but i worry that a living room might not be the right place for such a smorgasbord of activity. perhaps it’s hard to weigh in without actually seeing my LR….
YoungHouseLove says
Yeah, why not post a pic of your living room on our Facebook page so we can all weigh in?
xo,
s
ChristineMM says
Wow it looks great. Very inspirational. I want to move away from store bought wall art to using more of my own photos in frames, so this is a great idea.
Laura says
LOVE photo walls and yours came out great! I’m finally working up the nerve to do one myself. I’m using yours as inspiration and have used photos from your blog for my post– which I’ve linked back to you guys of course!
Laura says
How did you hang the seashell next to the light switch?
YoungHouseLove says
That’s actually a ceramic pig hook with a paint deck hanging off of it. The hook just attached with nails. Hope it helps!
xo,
s
Leslie says
I LOVE THE WALLS! I have been reading YHL for a few weeks now because of the fantastic gallery walls ya’ll are doing… and then I discovered that the gift I gave my husband on our wedding day I actually copied from Sherry before I even knew who you were! (Keys in the shadow box! He loves it!)
ANYWAY- I hate to ask…but would love to know… the frames you show on the floor, did you pick those up on sale at Ikea? What would you say in framing alone the wall would set a DIY-er back if they are starting fresh? (Cause I am ;))
YoungHouseLove says
We actually had a gift card to Ikea so that whole pile only cost us around twenty bucks but I think it was around 100 bucks for all of them (they were around 4-5 bucks each for most of them). Ikea stuff is really well priced to begin with. We also get frames from Target on clearance sometimes. Hope it helps! Oh and yard sales and thrift stores have $1 frames you can spray paint any color you’d like!
xo,
s
Julia A says
I thought you’d love this!
http://www.etsy.com/listing/67080849/bumble-bee-5×5-inch-petite-art-print-of
YoungHouseLove says
Love it!
xo,
s
Wendy says
I just wanted to share this in case you guys haven’t seen it: http://www.loc.gov/. It’s the library of congress website, and you can search EVERYTHING online. They have tons of old photos, newspapers and maps. Most of the stuff is so old there is no copyright on it so you can download high res images and print them out for personal use (for example – some of the cool old black and white photos of the Wright Bros first flight at Kittyhawk). You can search by location too for old time photos of your favorite places. I’m searching for stuff for my own collage wall. I also decided to print out song lyrics to a song that has meaning to me. Thanks for the inspiration!
YoungHouseLove says
Ooh love it- thanks for sharing!
xo,
s
Kait says
I’m SO in need of a console… and I love yours. Wherever did you find it?
YoungHouseLove says
That’s from Target a while back. Hope it helps!
xo,
s
Inspire Me Heather says
Great post and I linked it to my gallery walls post too, for inspiring projects!
Kathy says
This is one of my favorite gallery walls! Beautiful, subtle, and so personal. It looks like your walls are painted grey/blue? You’ve inspired me to do one but we have white walls (in a rental and can’t paint) and black frames make sense but aren’t my favorite – sort of stark. White frames are my fav but might just disappear. What would you do?
YoungHouseLove says
Yup our walls are a soft gray tone (Moonshine by Benjamin Moore) but you’re right about probably wanting at least some subtle differentiation between the wall color and the frames. Maybe find some cheap frames from a thrift store and spray them a soft gray color? Or black. Or any color you’d like! You can even respray them if you don’t like whatever you pick first. Good luck!
xo,
s
Kathy says
Thanks for your response. Good idea – I will try some soft muted colors and test it out. Maybe your BM Moonshine. I think I need a little kick in the pants sometimes to just do it and remember it can always be changed :)
YoungHouseLove says
Good luck!!
xo,
s
cynthia says
I really want to do this! Except I just need the help. Let me ask you … I’m hanging print work and so some are from the same artist (4 prints from 1 artist, another 6 prints from another and so on). So I wonder, if I did this, should I have the prints from the same artist stay together or spread them apart and make it vary??
YoungHouseLove says
I would spread them out and vary them so it feels balanced- that way if there are some bolder one or larger scale ones they’re sort of spaced out so it has a nice flow. Good luck!
xo,
s
j says
I just love the look of your gallery. I wanted to create one on a bare wall we have and since we don’t have $ to spend on frames, I gathered all the ones we had which were mostly silver (about 8) and 3 off white. First, I’m not sure if the combo looks nice. I mean it doesn’t look bad. Secondly, mostly all my frames are filled with pics of my kiddies. So here I am switching photos and putting in some family shots (of my nieces and nephews, etc). How do you decide what to put in the frames? Also, I feel that once I have these frames up I might want to add more frames to the gallery and I’m not sure if that’ll work. I guess it’s trial and error, i suppose. thanks!
YoungHouseLove says
I just play around- total trial and error! I find that most things behind glass look great!
xo,
s
Karen says
This is my one of my favorite posts!
Trisha says
I would love to know what color you painted the wall. It’s hard to choose a gray (at least for me) and the color you chose just makes the frames pop. Well done!
YoungHouseLove says
It’s Benjamin Moore’s Moonshine (color matched to Olympic No-VOC paint). Hope it helps!
xo,
s
Trisha says
Thanks! Glad I checked back in the comments. You were quick – love your site. Well organized information and well thought out methodical posts so we can follow you room by room.
Emily says
I just love reading your blog!! I wake up every morning looking forward to what you post for the day. I have two questions.. I am wanting to put some arrowheads in a shadowbox (similar to the one you did.) Just wondering how you got them to hold. I am worried about glueing them in fear that it will ruin the arrowhead. My dad gave them to me and I am going to put them in our babys nursery. Also, where did you get burgers silhouette? We have a chocolate lab and I would love to do the same thing in the babys room.. Thanks for the great ideas, keep them coming!!
thanks,
emily
YoungHouseLove says
We got Burger’s silhouette from etsy (I think if you search “cut arts” it should come up). It was by a guy. He was awesome.
As for the arrowheads, I used craft glue to glue them to heavy card stock, which I then let dry for a day before framing it (so it could lay flat and fully dry). Craft glue or even glue gun glue should peel off without any damage to the arrowheads. Hope it helps!
xo,
s
Erin says
What do you think of black frames with white/cream mats for the same effect? I LOVE this idea but am generally partial to the black gallery frame and already own many of them.
YoungHouseLove says
I think it would look awesome! We’ve seen many dark frame walls and loved them. Good luck!
xo,
s
Michelle says
What color did you paint the walls in your hallway? I love love love this photo arrangement! Going to do the same on a wall in our house!!
YoungHouseLove says
Thanks so much! It’s Moonshine by Benjamin Moore.
xo,
s