Adding a headboard to your bed is one of the best ways to add polish and coziness to your bedroom. And, lucky for you, making your own DIY upholstered headboard is super easy and affordable (ours only cost $66!). This means you can customize the fabric, size, and design to get exactly the look you want. Believe us, we’ve done A LOT of them over the years!
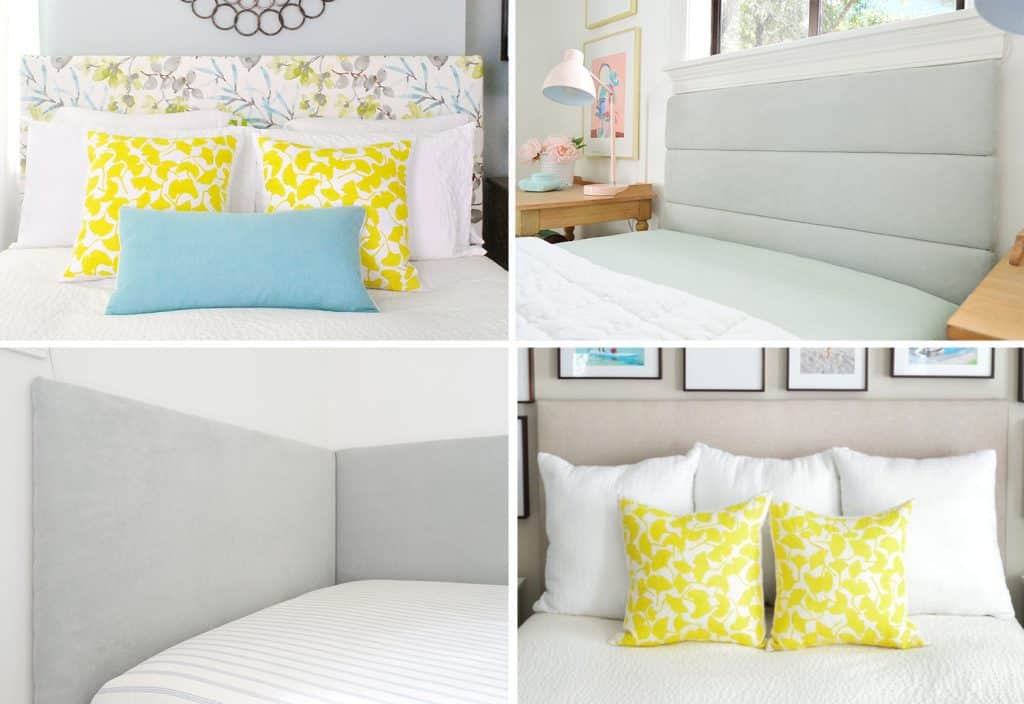
Today we’re going to take you through the step-by-step process to create the first headboard in the grid above (top left). It’s our favorite, classic headboard tutorial. But you can check out more headboard ideas below:
- How to make a channel-tufted headboard (top right)
- How to make a daybed-style headboard (bottom left)
- How to make a wall cleat to hang a headboard (bottom right)
Materials & Tools
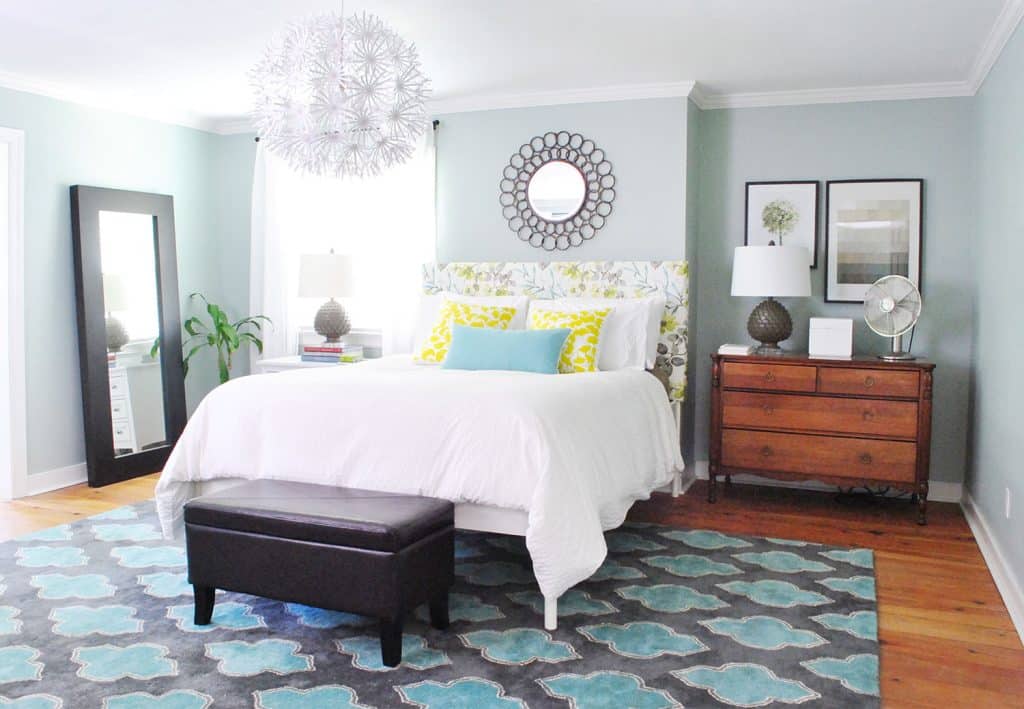
Your exact supply list may vary from ours, but generally, this is what you’ll need to make your own upholstered headboard for your bed:
- Fabric of your choosing (we used 2 yards)
- Extra loft batting (we used 4 yards)
- 5/8″ plywood or MDF
- Two or three 1×3″ whitewood boards
- Miter, table, or circular saw to cut your wood (optional)
- Heavy-duty staple gun & staples
- Screwdriver and screws
Why Add A Fabric Headboard?
We wanted to add a headboard because fell out of love with our 4-poster bed (so we cut off the posts!) and wanted something cozier instead. You know, something plush we could lean up against at night. And the short wood headboard that we currently had wasn’t cutting it.
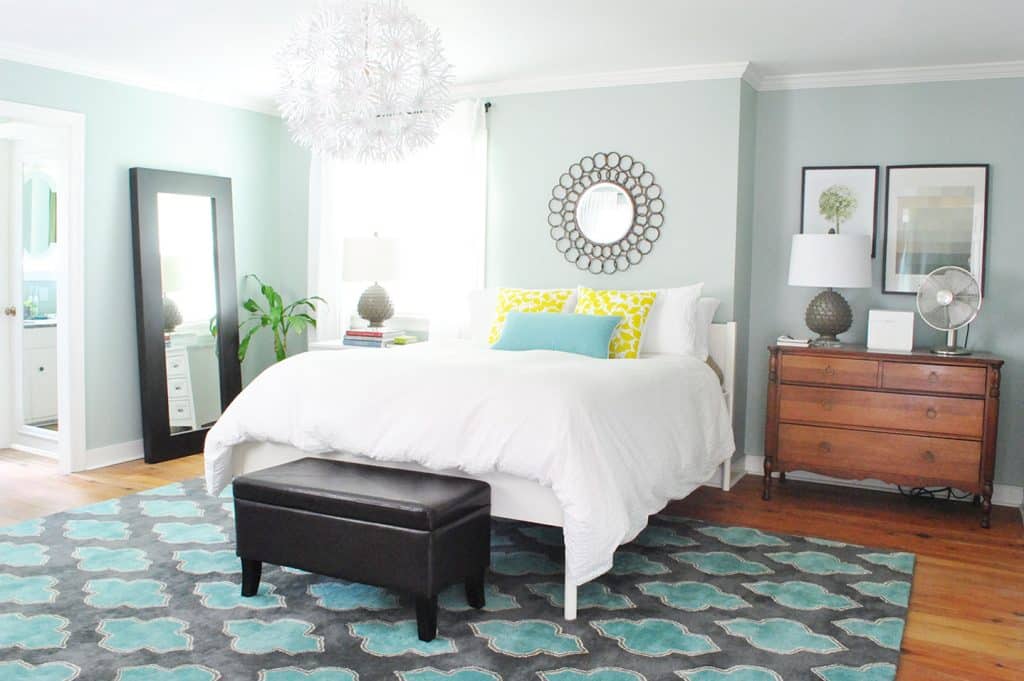
But generally, headboards can add a lot of personality and polish to a bedroom. Bedrooms without proper headboards can scream “college dorm” or “first apartment,” so adding one is a no-brainer upgrade. Plus, depending on the fabric you choose, it can add some bold color and pattern to a room OR add to the restful, zen space you’re trying to create.
Step 1: Build Your Wood Frame
There are a few ways to create the wood frame for your headboard (including this super lightweight option) but for this particular bed, we constructed a sturdy plywood frame. If you want a simple rectangular design, this step can be as simple as cutting your plywood sheet to size (or having them cut it for you at the home improvement store). For our queen-size bed, we ultimately decided on 65″ wide and 31″ tall. But you can easily customize your dimensions depending on the location or width of your bed.
Ours looked a little more complicated, and I’ll tell you why…
First of all, we were planning to place our DIY headboard around the existing headboard/posts leftover on our Ikea Edland bed. We concocted a plan that would sort of “wrap around” the existing posts, which we mocked up in Photoshop below. But this concept would also work if you wanted to create a popular “winged” headboard look as well.
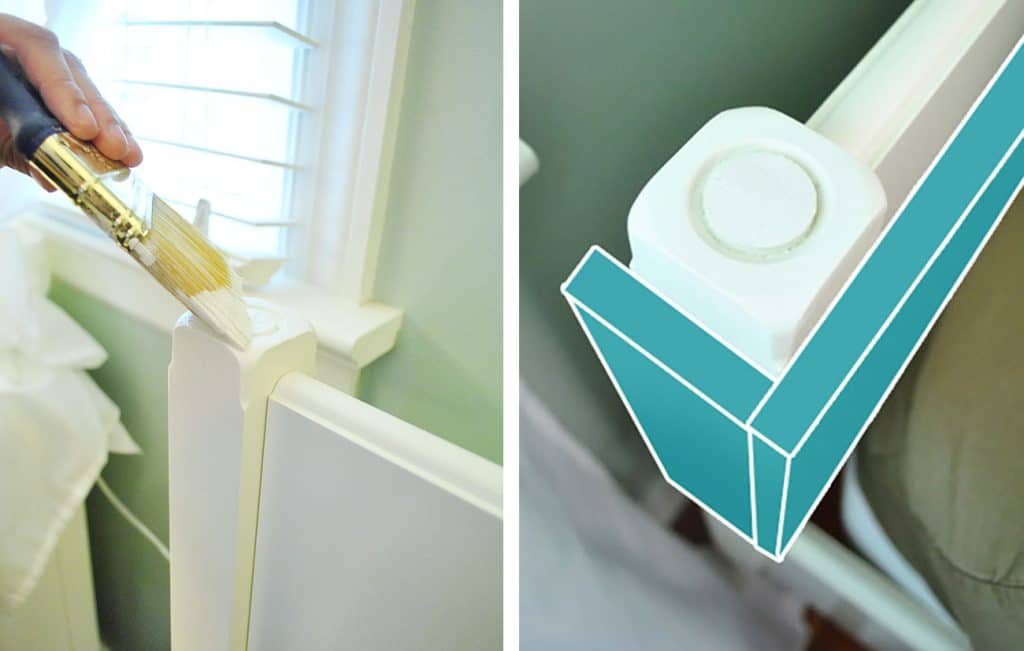
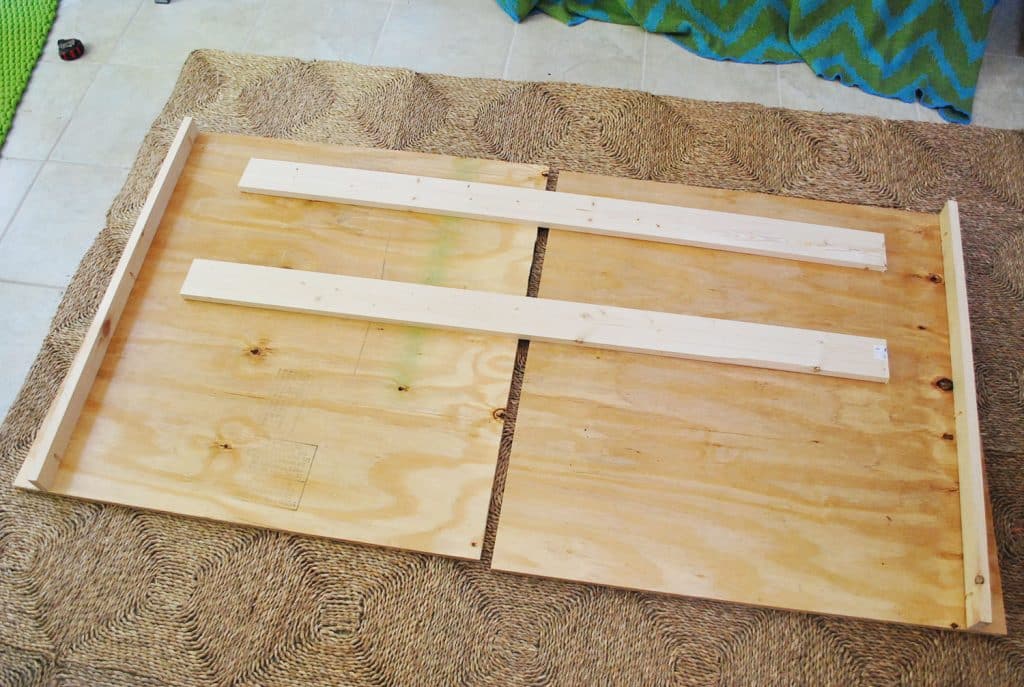
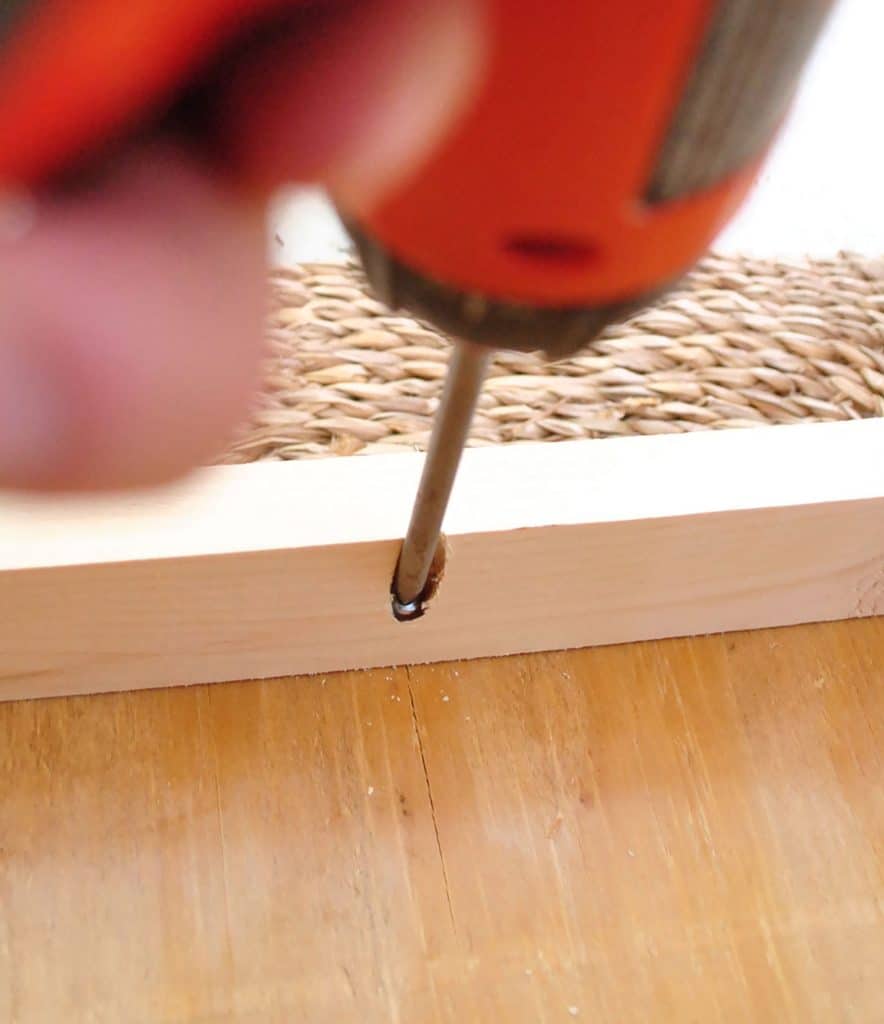
To add these small side pieces, we attached two 1×3 whiteboard boards to each edge using screws drilled into pocket holes we drill using our Kreg Jig. Alternatively we could’ve secured them with wood glue and nails.
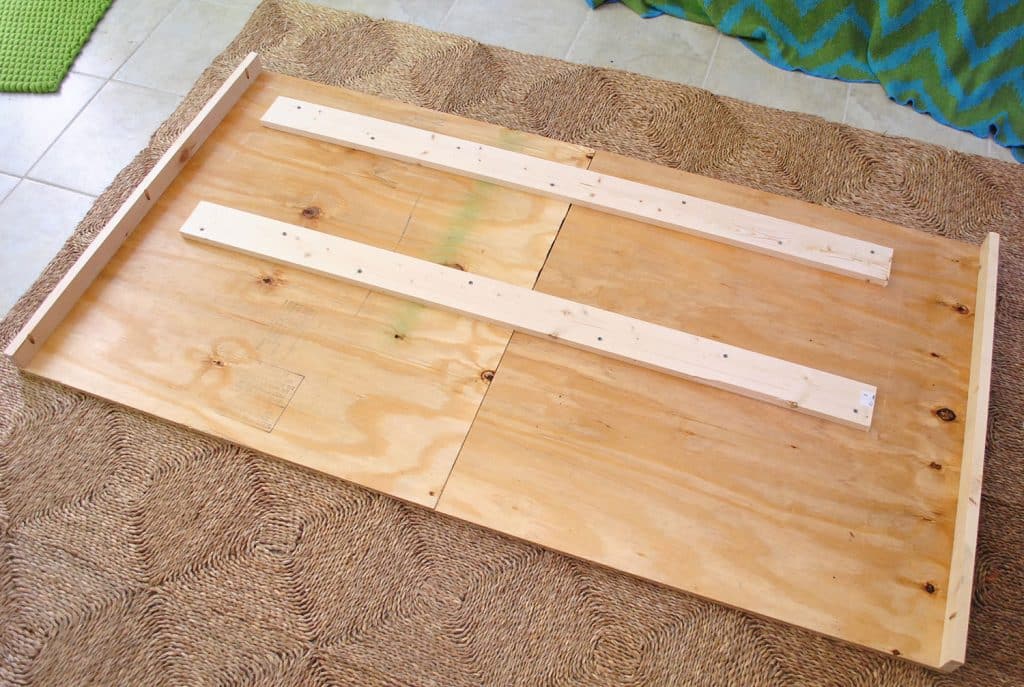
The other reason ours was more complicated than a solid sheet of plywood was that we couldn’t fit it in our little car (ha!). So at Home Depot we had them rip it in half, and we reconnected the two halves at home with scrap pieces of whitewood boards. We’re fancy like that!
Before proceeding we upholstery, we brought our frame in to make sure it fit around the existing bed frame like we planned. Phew – it did!
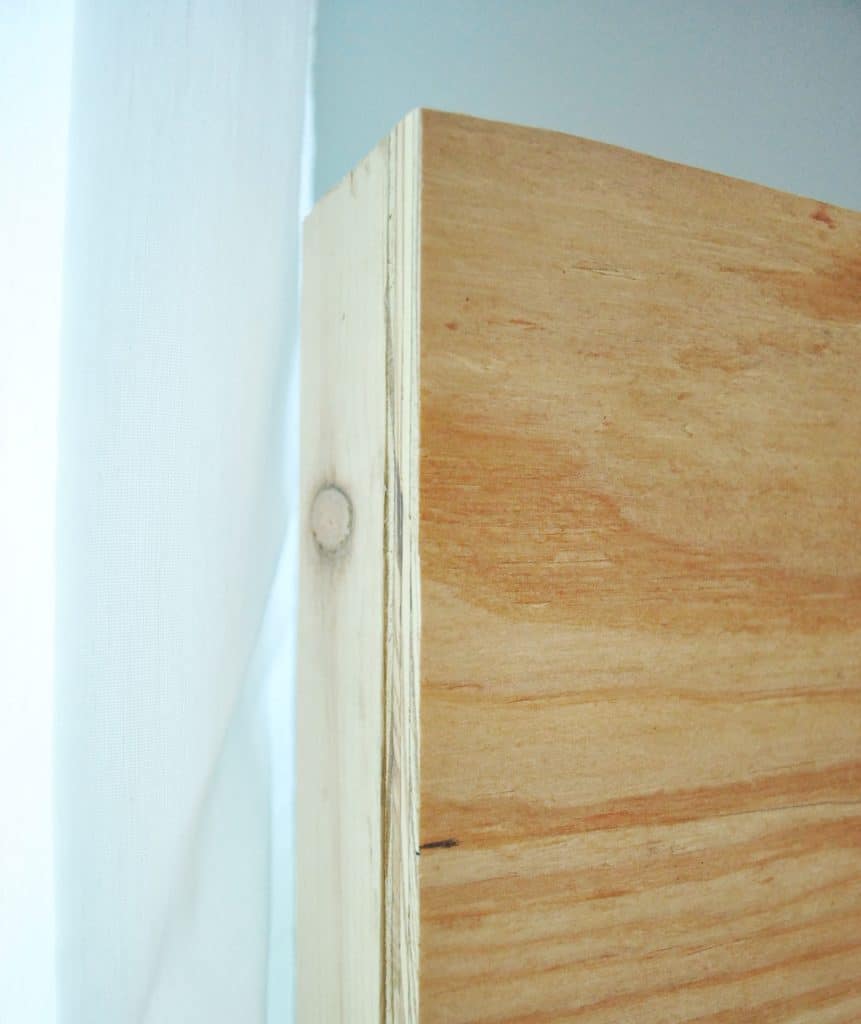
You can also now see what that wrap-around piece looks like, and how it hides the existing bedpost. And since we’d soon be upholstering it with fabric, it didn’t matter that the edges were a little raw looking.
Step 2: Add Your Batting Layer
If the carpenter in you trembles at the idea of upholstery, just remember: if you can wrap a present, you can upholster a headboard!
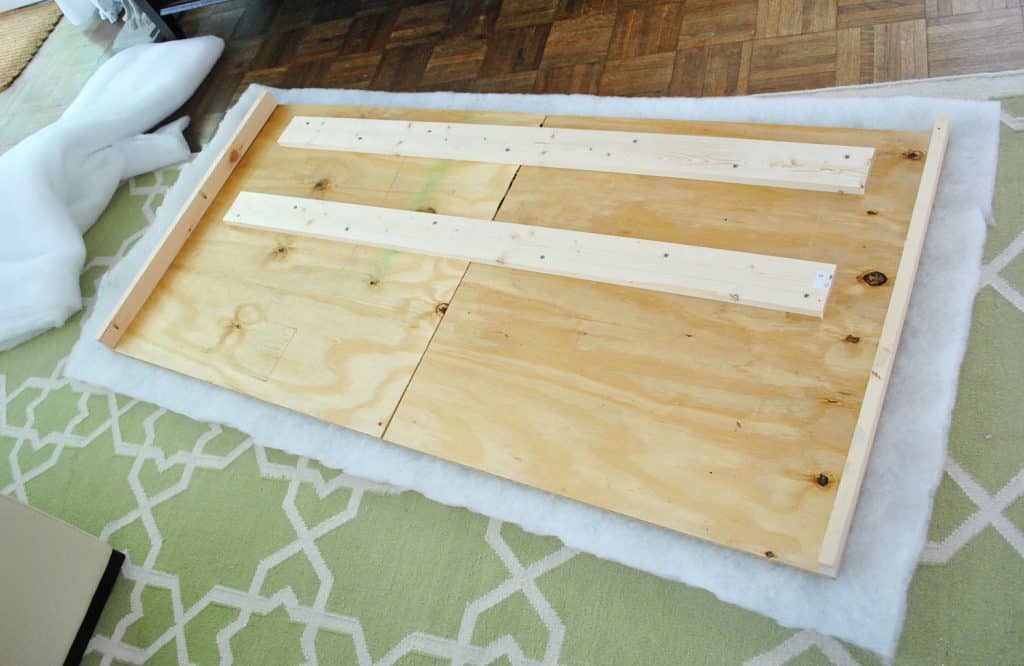
Before adding our fabric, we wanted to first add some padding in the form of extra loft batting. We decided to do two layers so it’d be plenty plush, but still not lose its shape. Sherry trimmed a 2-yard section of batting using regular scissors, laid it on the floor, and we placed our frame on top of it. You’ll want about a 2-3″ overhang on all sides.
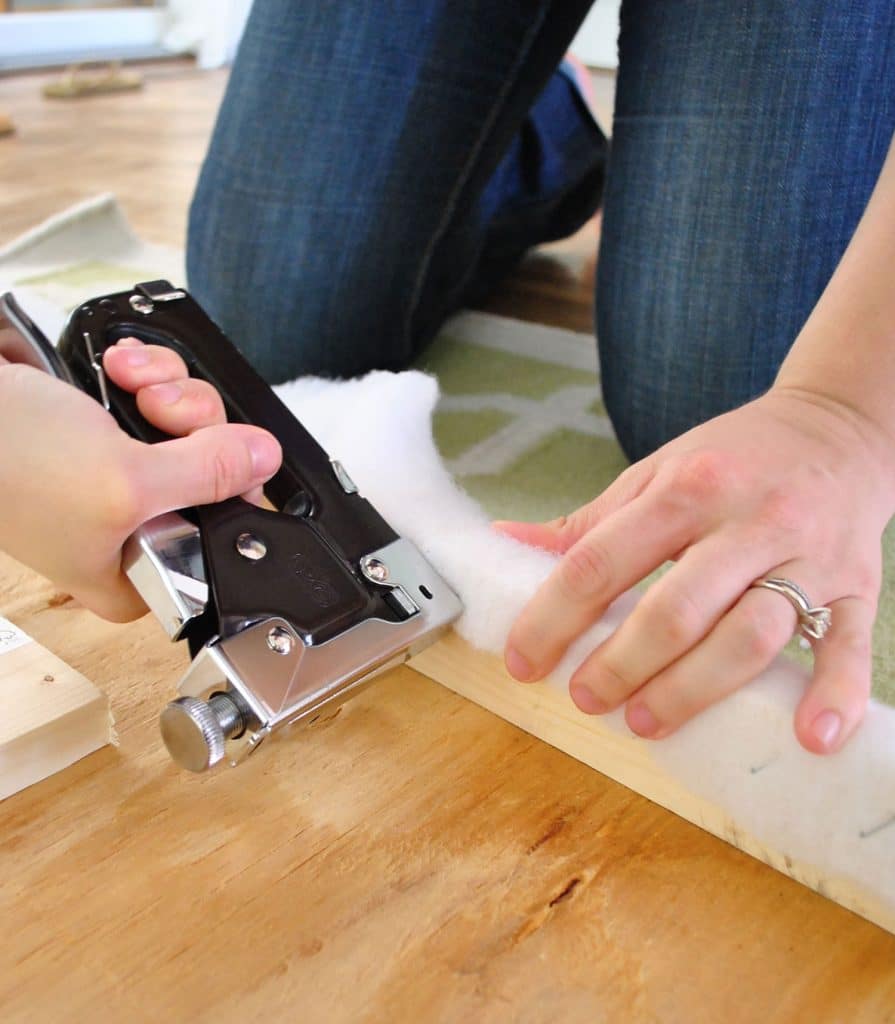
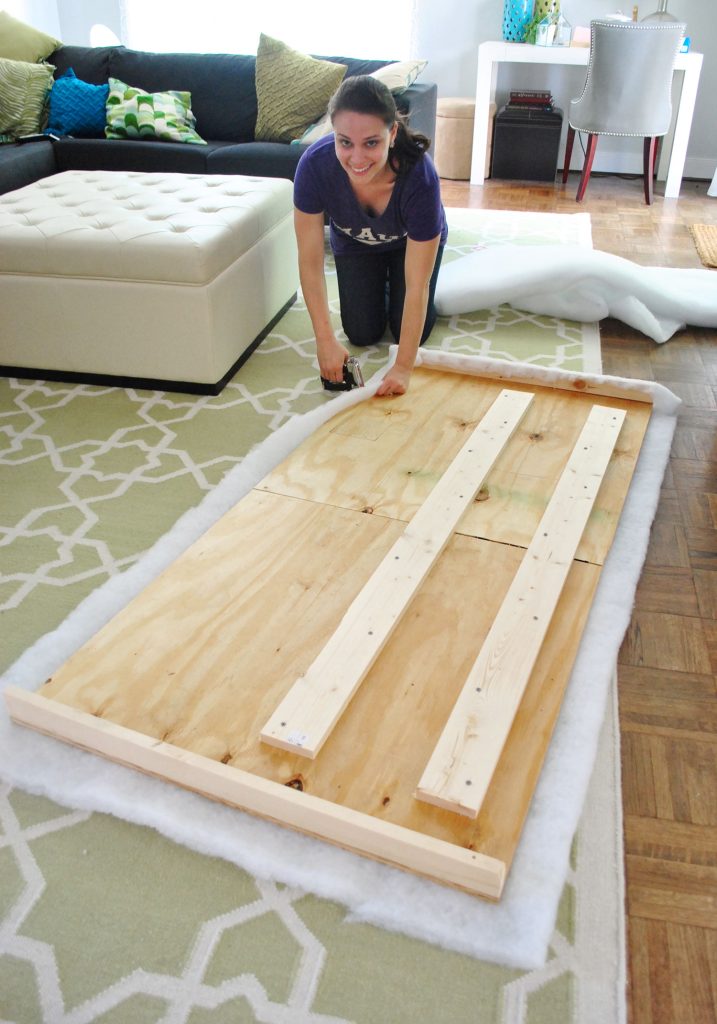
Then we used our staple gun to begin attaching the batting. We just wrapped the batting tightly around the edge and stapled it every few inches.
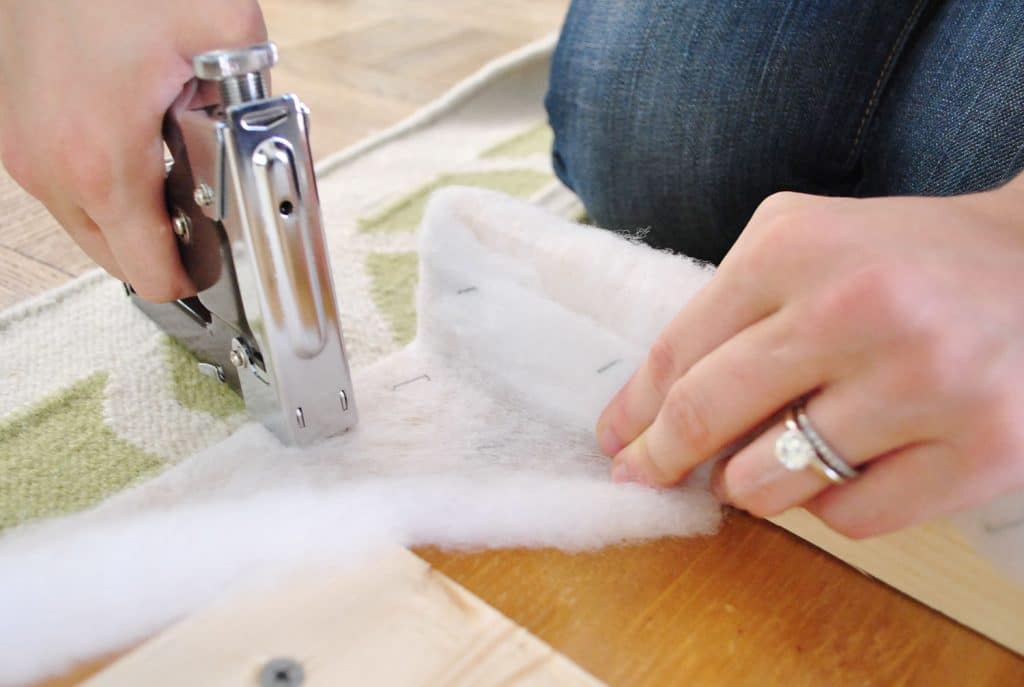
When we came to a corner, it was just like wrapping a present. You just fold it back and staple it so it all looks smooth from the front. Try to pull the batting tight so your corners don’t get too bulky. Bam, bam, bam – it’s done.
We just worked our way around the back of the headboard, stapling away. At some point John made me pose for this awkward photo too. Winning.
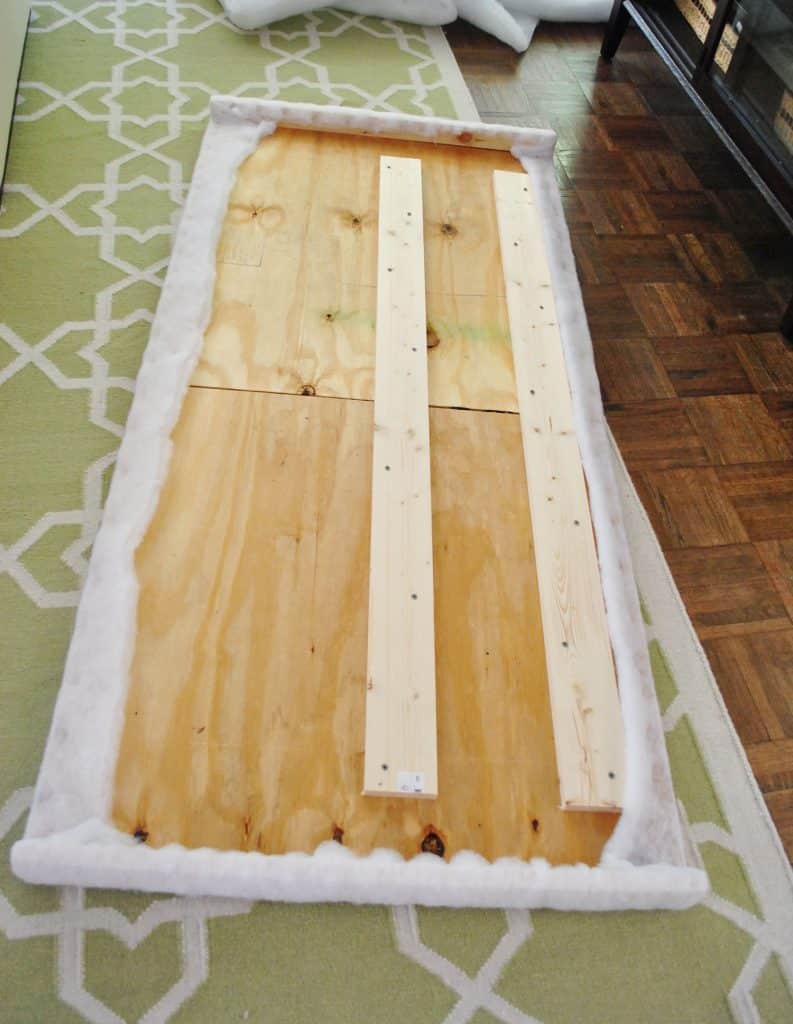
Eventually the whole thing was stapled nice and tightly around the back.
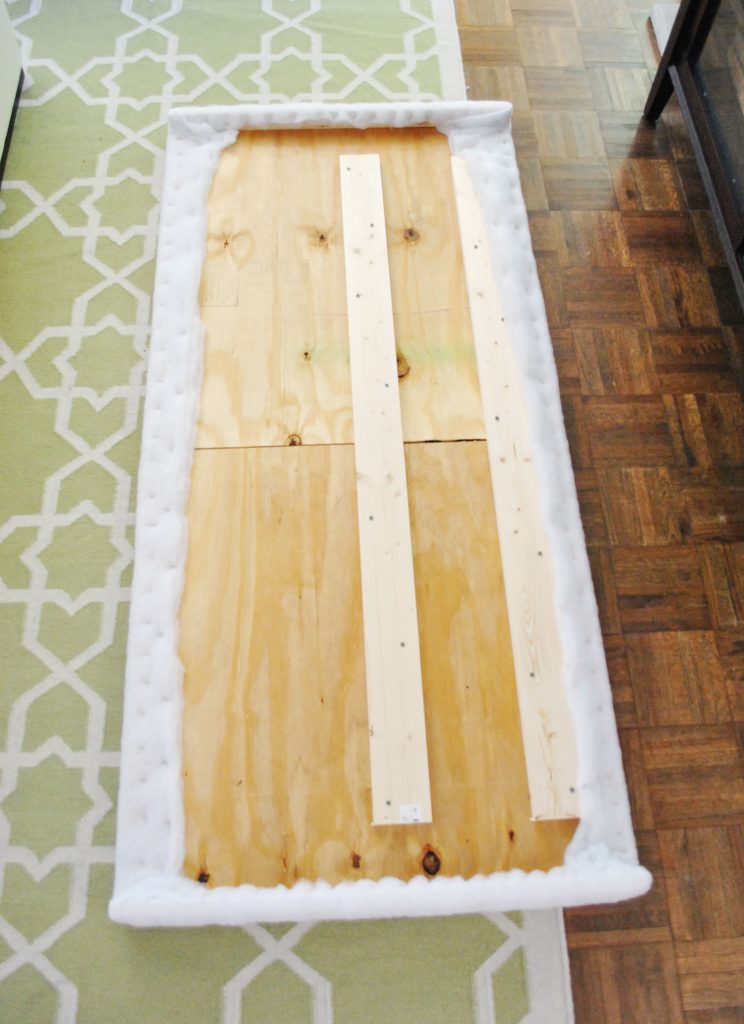
We decided to do a second layer of batting, just repeating this process. Here’ what it looked like with the double-thick batting!
Note: Another option is to use upholstery foam that you attach to your plywood with spray adhesive. We prefer the batting method since it’s easier to wrap around the edges. But if you’re looking for a much thicker, cushier feel – it may be faster to use foam, rather than wrap 4 or 5 layers of batting. Too many layers of batting can also make it difficult to staple into the wood.
Step 3: Staple On Your Fabric
Here’s where the fun really begins. Now you can repeat that process, but with your selected fabric! Just give it a good ironing first to make sure it’s free of creases or wrinkles before you start.
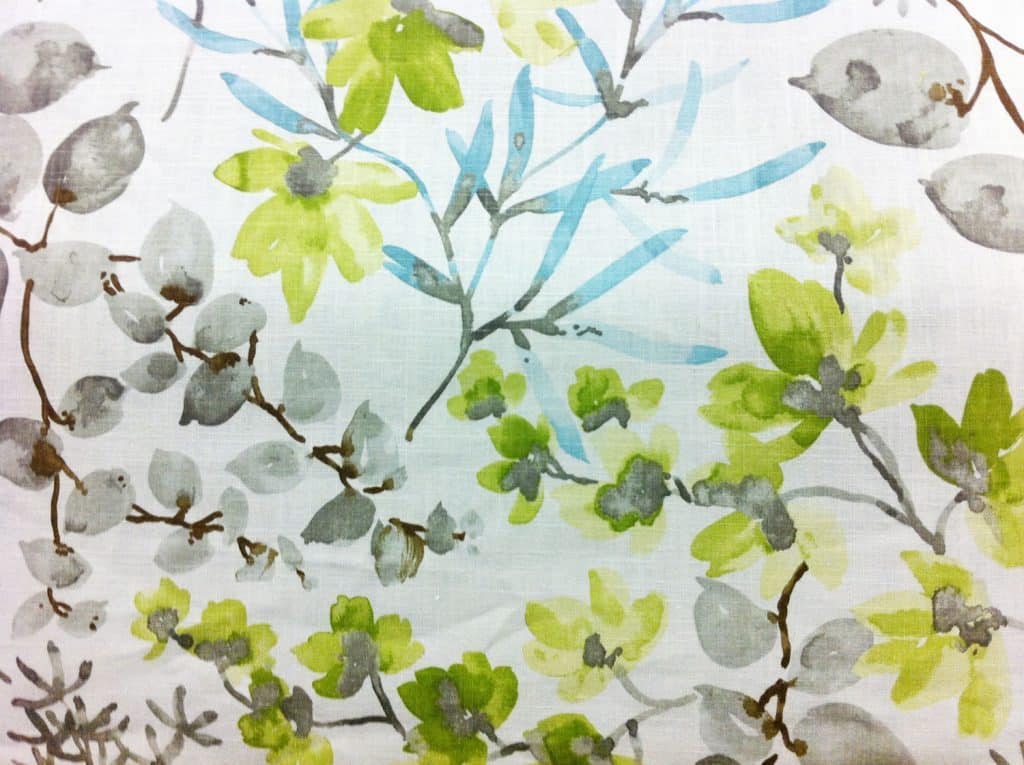
Just like with the batting, we laid it flat on the floor and placed our (now batting-covered) frame on top, making sure it was pulled taut underneath to avoid any wrinkles. Then I trimmed offthe excess fabric around the perimeter, leaving a few inches for it to be wrapped and stapled around the back, just as I had with the batting.
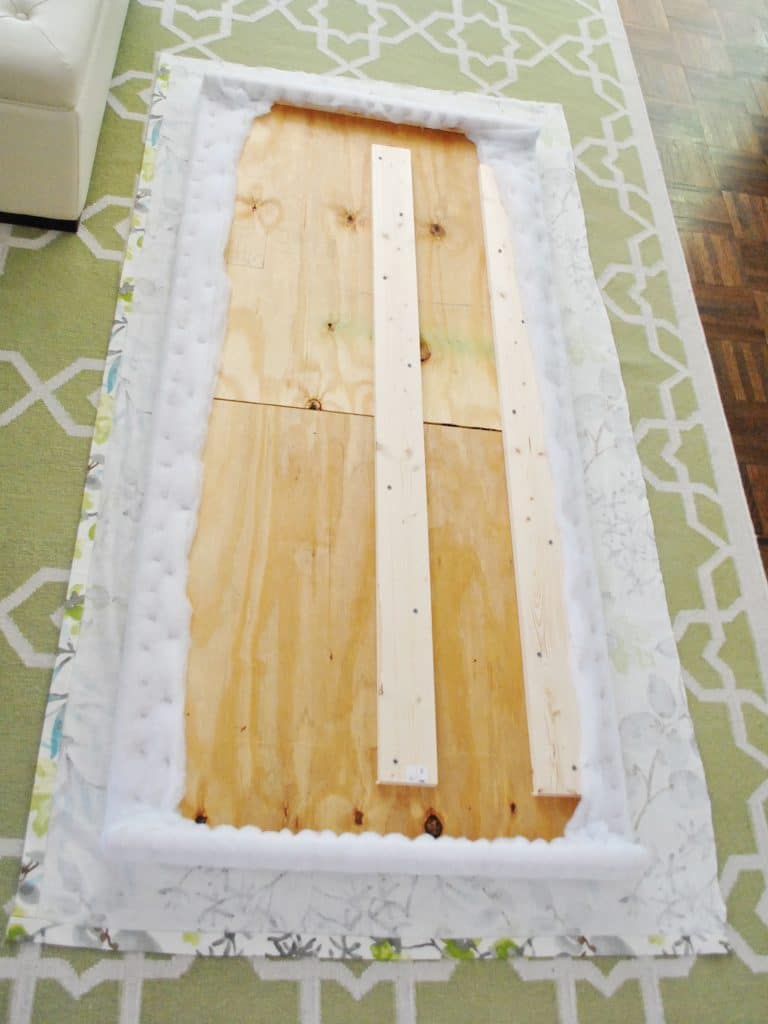
We started by stapling each side, being sure to pull it extra tight so it won’t end up all loose and baggy over time. I started with one side, pulling it all very tightly, then stapled along the opposite side, again pulling it nice and tight.
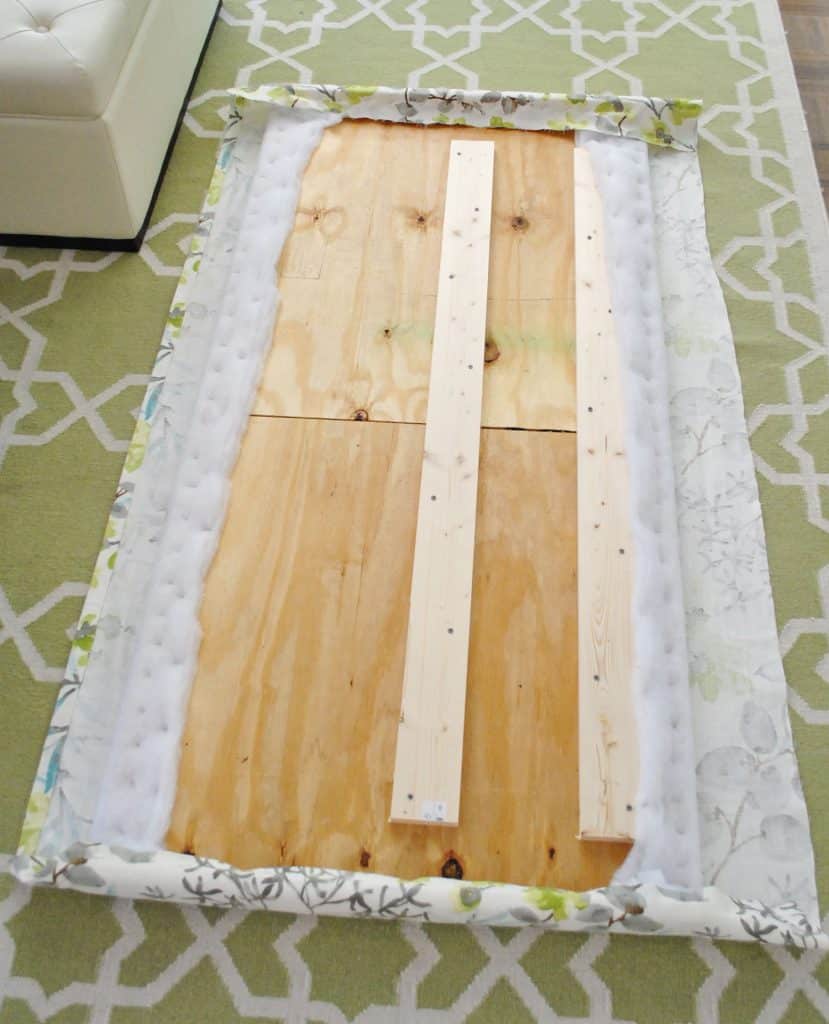
Once it was secured on those two sides, I did the same thing to keep it secured vertically, by pulling tightly and stapling the top side and pulling it tightly and stapling the bottom side as well.
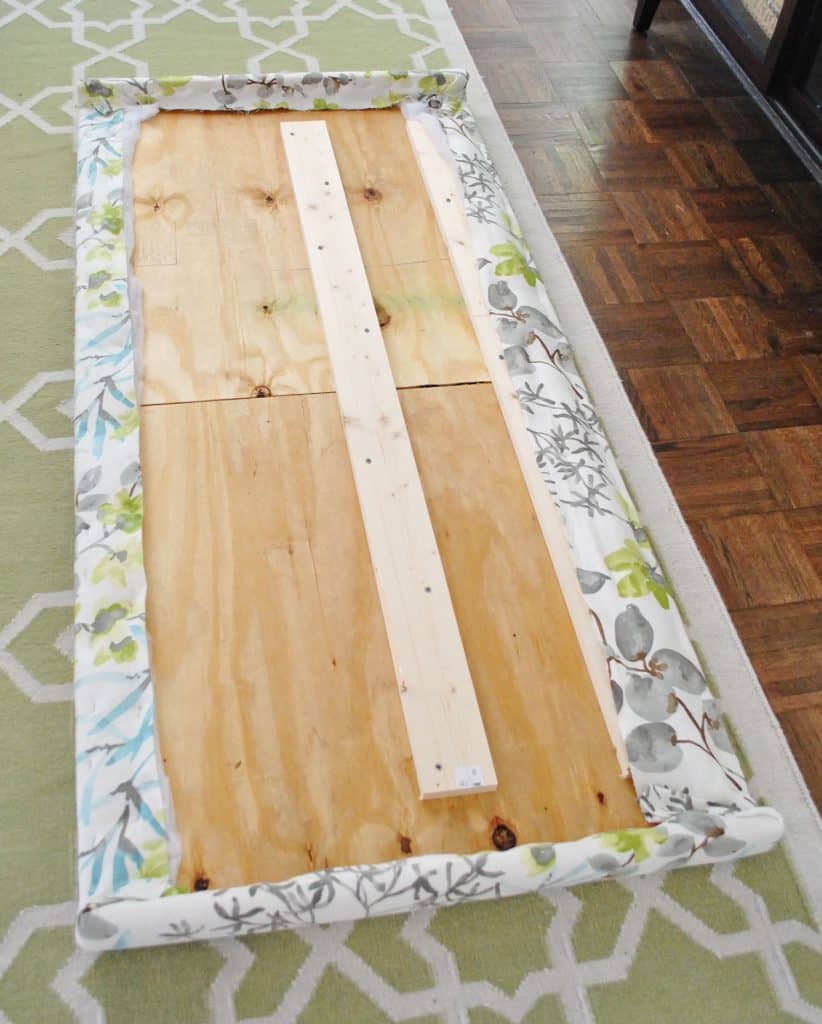
Then we flipped the headboard up to see it in all of it’s plush, tightly upholstered glory. Bing, bam, boom. The whole upholstery step took less than forty five minutes to complete. Is it weird to call it one of my favorite fabric projects to date? I just love love love the pattern.
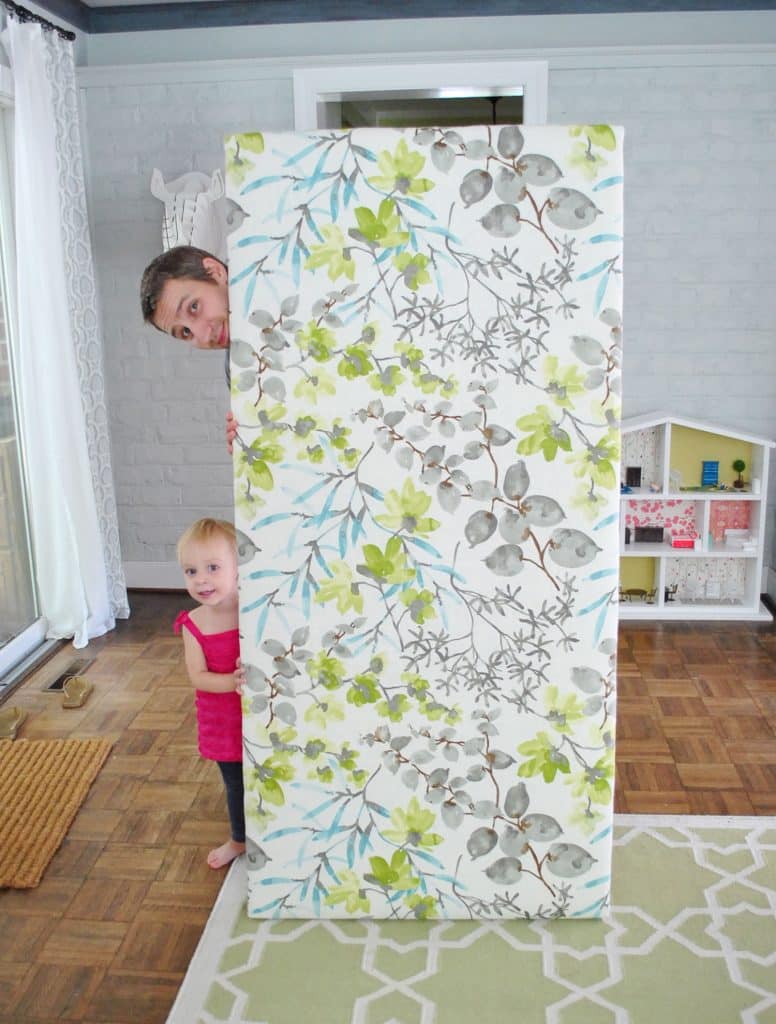
It’s hard to tell above, but in this angle you can get a sense of how plush it is. It’s cushy, but still tight – so we won’t worry about it getting baggy with everyday lounging against it.
Step 4: Hang Your New Headboard
Now you’re ready to attach your headboard to your bed. This can be done in a few ways, depending on your bedframe. When typically like to install a headboard directly into the wall, since it’s often sturdier than attaching it to the bedframe. To do that, usually a french cleat works great. We cover how to DIY a french cleat in this post.
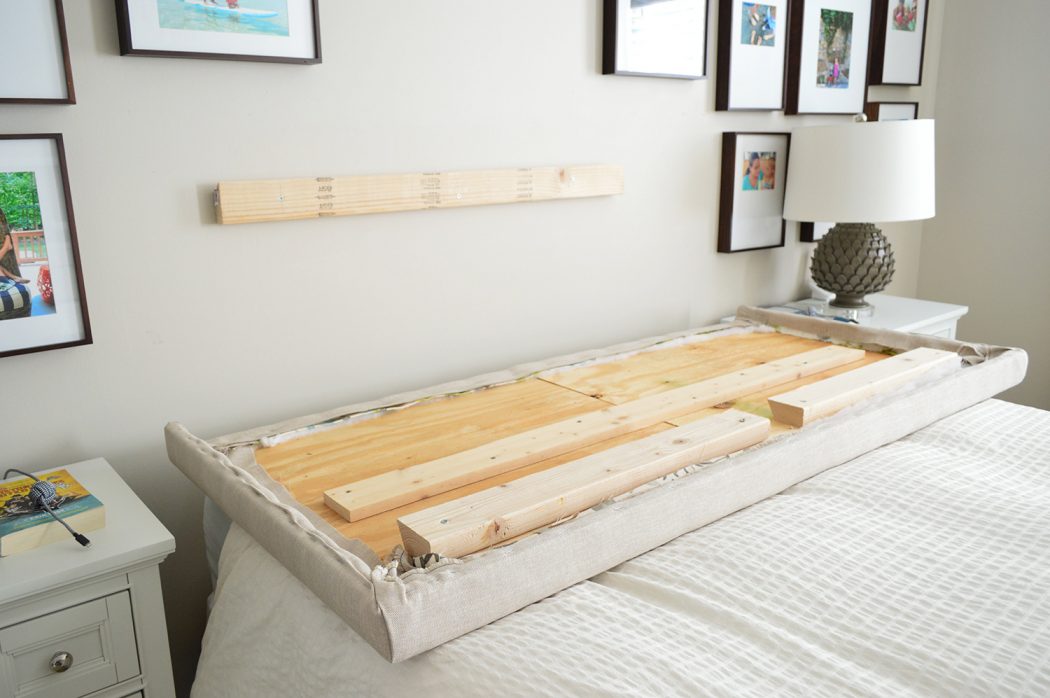
Actually, the headboard pictured above is the same one constructed during this tutorial – a few years later we just updated it for our new home with new fabric and a new top piece (just like we had added the sides pieces in this post). You can see the french cleat below, which is essentially two 2×4″ cut at an angle. One goes on the wall, the other on your headboard. You can also purchase pre-made metal cleats for just a few dollars.
TIP: Try to hang your headboard so it hits the top edge or slightly below the top edge of your mattress, that way there is no gap between the two.
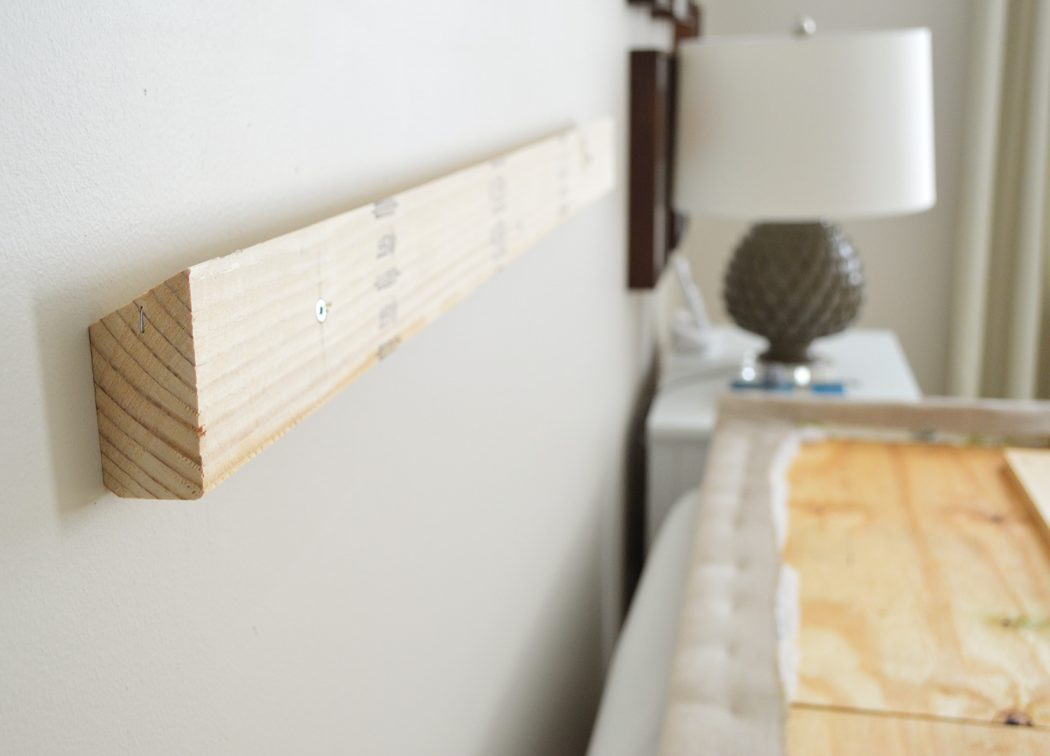
But in the case of our postless-four-poster bed, we chose to screw the new fabric headboard into old wooden one that was part of the existing bedframe, just careful to use screws that wouldn’t poke through the other side.
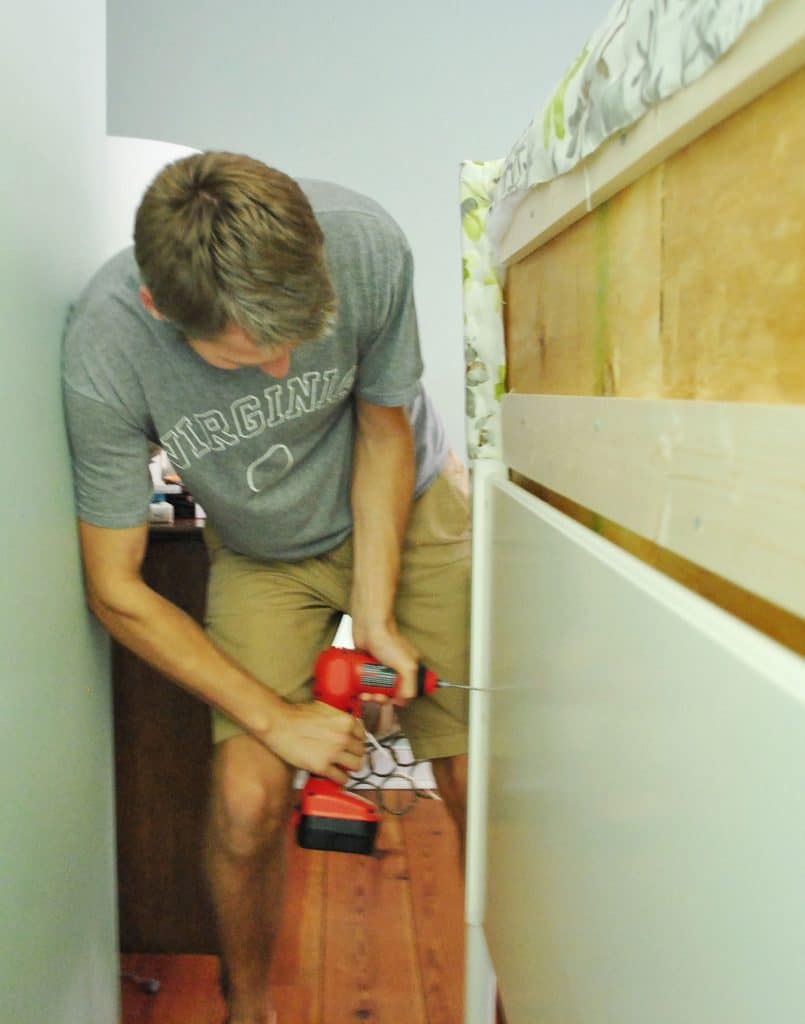
Here’s John putting the final screws in on the backside, pushing the new fabric headboard tight to the bedrame for a snug, secure fit.
Step 5: Enjoy Your Handiwork
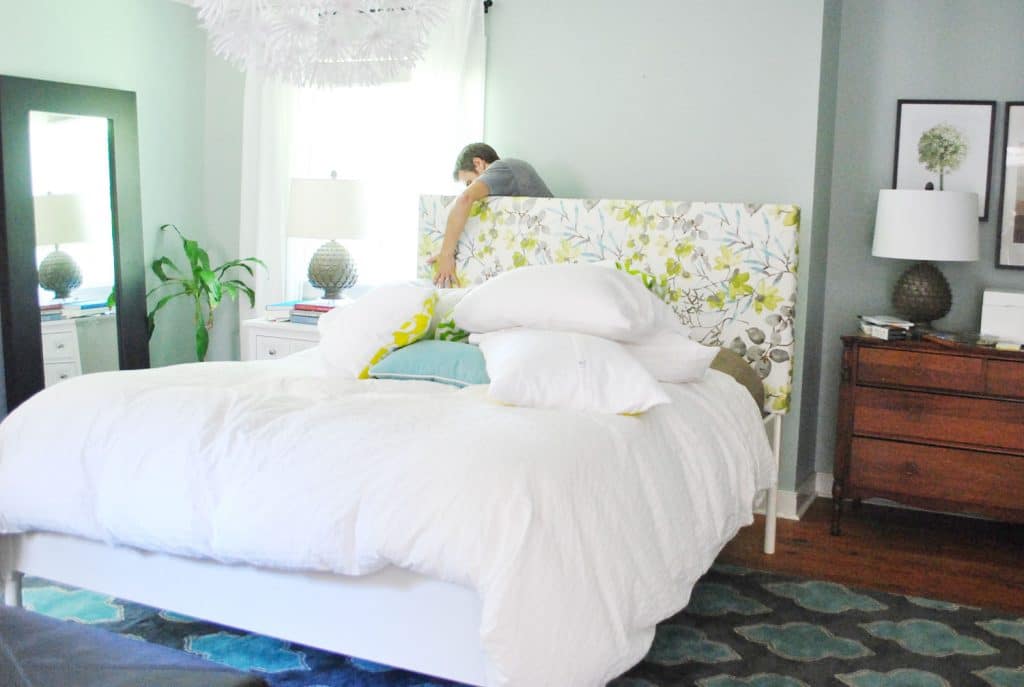
Once it was attached, we just pushed the bed back into place and beamed at it. If only it had been bedtime already that so we could immediately enjoy it’s plushness!

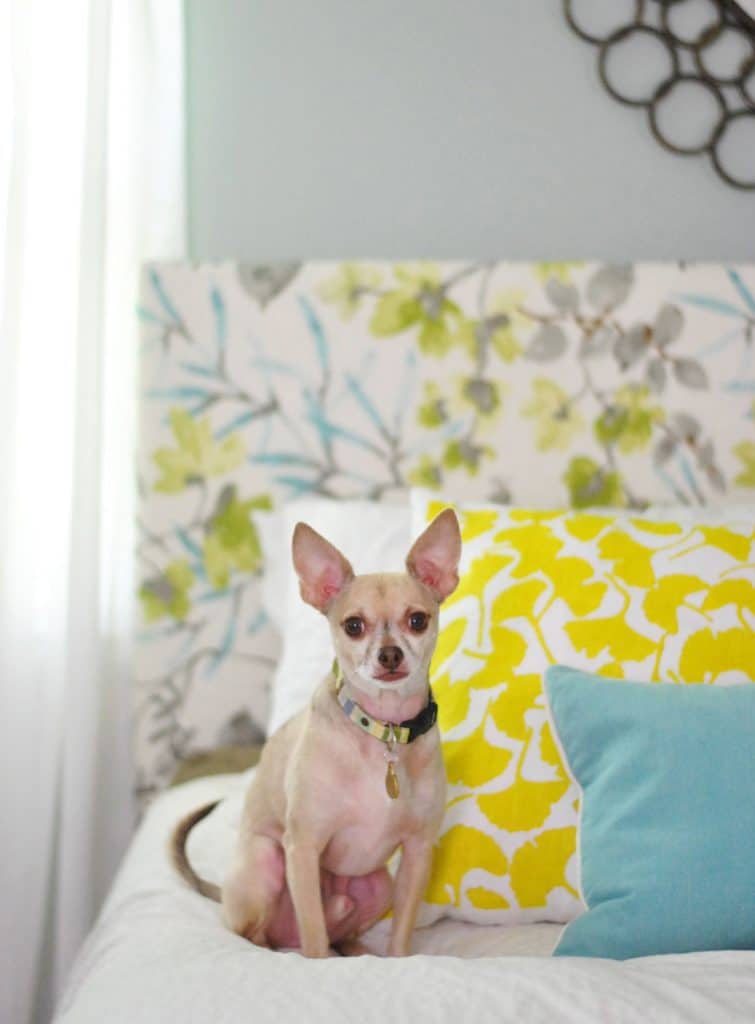
We loved how the fabric is sort of like the bridge between the yellow ginko pillows (since there are greeny-yellow flowers in the headboard fabric) and the turquoise in the rug (thanks to those subtle leafy sprigs of turquoise in the headboard).
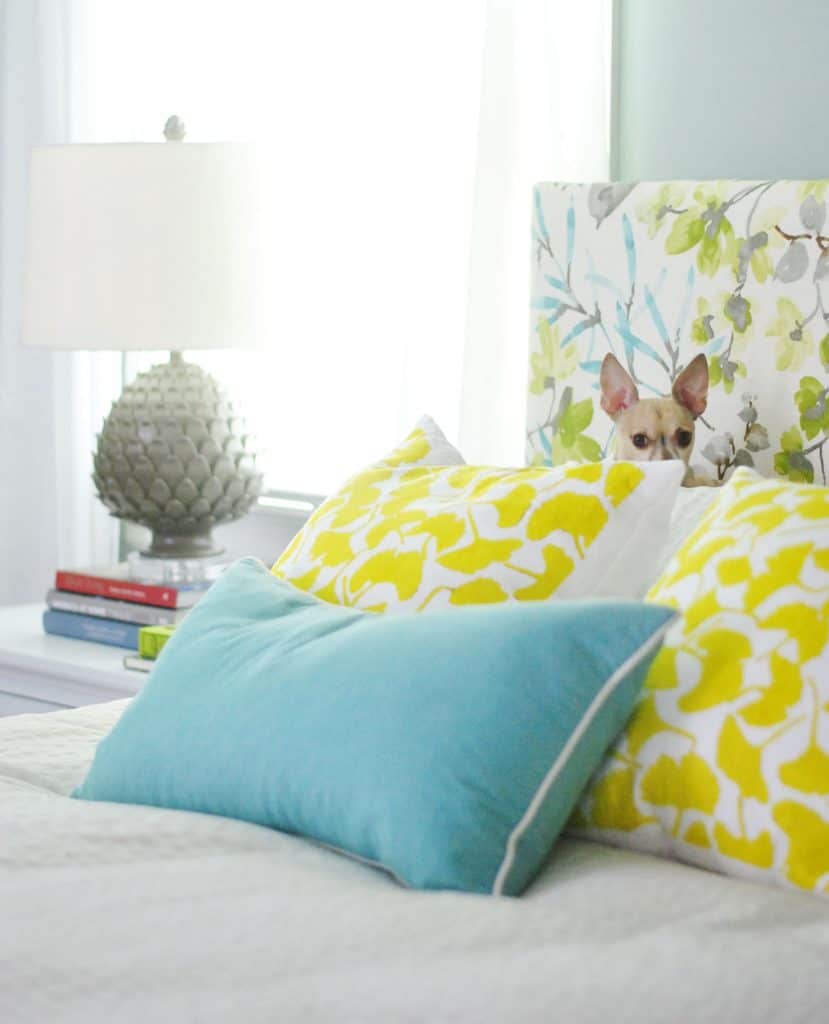
I even think Burger looks especially dapper in front of this new backdrop.
DIY Upholstered Headboard Cost
As for a budget breakdown here we go:
- Wood frame (plywood and some bracing boards from Home Depot): $22
- Two layers of extra loft batting (from JoAnn thanks to a 50% off coupon): $4
- Discount designer fabric (from a local fabric outlet called U-Fab): already owned – but it was originally $20/yard ($40 total)
- Total spent: $66 (if you add in the fabric we previously bought for a book project and reused for this)

Sixty six bucks isn’t pennies, but compared to upholstered headboards that are sold at places like Overstock, it’s at least $100-200 cheaper than even the most basic types. And considering places like Ballard Designs charge around $400-$700 for custom headboards (where you get to pick the fabric) it was awesome to get to choose the fabric and whip this up ourselves.
*This post contains affiliate links, so we may earn a small commission when you make a purchase through links on our site at no additional cost to you.

The Vintique Object says
Also, so happy to see you’ve pulled off the headboard without needing foam — just batting. I’ve been putting off a similar project because I haven’t wanted to cut or deal with the foam.
Camille
Maggie says
I love all the changes you’re making to the bedroom. While I thought it was good before, it really seems to be coming together in a very cohesive way now. I heard somewhere, although I have no idea where, that you should always place your bed on the wall that you see when you first enter the bedroom. I’m not sure on the reasoning behind that, but it really seems to have made a big difference in your room. That, and the awesome headboard…That’s definitely going to be my summer project now!
sarah says
love it. i did the exact same thing (minus the extra batting layer) for a set of three “headboards” that lean against a wall in our guest room. so glad the pros use the same method i did.
Jacqueline says
Love it! This room is really coming together!
Allison says
I know you’re probably not looking for votes, but I vote “no” to staining the dresser (and floors). I love LOVE the new arrangement and I think part of why it looks so cozy is because of the warm wood tones. Darkening the floors, dresser, and walls just makes the whole room look dark and cold instead of light and cozy that it is now. But it’s your house! I will still keep reading to see how it all turns out!
Deneen says
You guys were great at Haven. Loved hanging out with you and your precious energetic girl. It’s nice to see people in person away from the computer! I love the fabric on the headboard. It brightens the whole room. No wonder the puppy is so happy :)
Monica says
That headboard is beautiful! I love the fabric choice. I have to say your room has really come together the past few weeks. The only item (imo) that doesn’t work for me is the Ikea light fixture. Sorry, I’ve just never been into that particular style. To each their own though. :)
Koliti says
AWESOME! Sherry, you and John are a GREAT team – he’s got the power tools and you have the decorator eye. And together wonderful things happen.
What a lovely, Young House “Love Nest” you have.
(Did ya notice how the overall upward angle of the turquoise leaves on your headboard mimic the upward angles of the geometric shapes on your rug? Another overall pleasing element.)
Christine Witt (Brush Dance) says
These colors are great – they really go well with the rest of the room. Very nice. And Burger is adorable – as always!
Reva says
It’s like a party for my eyeballs! So pretty!
Jenny says
Hi there!
My hubby found you when he googled “how to seal grout” for me. We have a newly remodeled bathroom… that took about two years from start to (almost) finished! (need more funds and some trekking to stores to find stuff to decorate with– I figure that as I find stuff I love, it will get the finishing touches)
I am now totally addicted to your blog and inspired to get some stuff done around here!
Thanks for the smiles and the fun and for all of the ideas that I can’t wait to try out!
I love your new headboard! The colors you use in your house are my favorites! And that rug under your bed is fantastic!
Heather says
I just have to say that your bedroom updates had me rearranging my own room last week. My husband came home from work and was pleasantly surprised. Thanks for the continual inspiration! Also, I just have to ask. How do you keep your comforter so white with a 2 year old and a dog around? I would love to switch to a white bedspread but also have a 2 year old and fear the grubby-hand-dinginess over time.
YoungHouseLove says
My secret is that we don’t bleach things. We just wash them normally. They seem not to yellow or get beat up that way. They stay white!
xo,
s
Kim says
I LOVE that fabric! Thanks for sharing the name of it; I’m going to be on the lookout for some to make some throw pillows.
Beautiful job, by the way :)
Crystal says
I love how it turned out! Ive made around 10 or so upholstered headboards (started with my own, and grew from there!) but always use 2-3 inch foam under the batting. Never thought of doing it with just batting, kinda a really cool idea! Can’t wait to see all these headboards in the book!!
Nicole says
I am in LOVE with the new layout!!! Can I steal it please?? Haha
Summer says
I might have to take home that fabric, introduce it to my mother, and marry it, I love it so!
Laura says
Love the headboard! Can I ask where you got the white side table? I’ve been looking for something like that for a while.
YoungHouseLove says
That’s from jossandmain.com a few months back.
xo,
s
Ashley says
Looks great! Not sure if anyone else has mentioned this, you’ve got lots of comments already. Have you considered scotch guarding it? Not that I’m saying you guys have greasy heads, but since the fabric isn’t really removable it might be a good idea to help keep it looking good.
YoungHouseLove says
We have had another fabric headboard for 7+ years and it’s doing great so I don’t think I’ll scotchguard. I think mostly you lean back on pillows but get the support from the cushy headboard, if that makes sense.
xo
s
Alix says
I’m more of a lurker than a commenter, but I just wanted to pop in and say your bedroom looks amazing lately! I thought that just moving the bed made /such/ a difference, but now with the headboard, it looks so chic and well done. Good job YHLers.
Jen says
Oooh! LOVE that fabric so so much! The whole room is just coming together swimmingly, I am so giddy exited about your new layout as well!!
We just hacked the boys IKEA beds with new headboards that I am posting about later this week. We were totally on the same wavelength!! So cool!
xoxo!
Jen
Jan C. says
I think the headboard would look even more awesome against the darker wall John is lobbying for! And in answer to your question, I’ve got a DIY-ed fabric headboard too. We used plywood as the base, like you did. But because I had my heart set on a tufted headboard, my husband drilled holes in the plywood first. I then covered it with the padding and fabric and made matching fabric-covered buttons. Then, using a really long upholstery needle and some awkward contortions, I sewed the buttons on from front to back, through the drilled holes, creating the tufting. We only have a generic metal frame fro our king bed, so we attached our headboard to the wall by creating wood bracket of sorts on the wall and on the back of the upholstered board, then hooking the board over the homemade wall bracket. It looks pretty awesome, if I do say so myself.
Laurie says
This may have already been mentioned but are you planning to scotch guard the fabric since your (I’m sure very clean but still a) head will be resting on it regularly?
YoungHouseLove says
We have had another fabric headboard for 7+ years and it’s doing great so I don’t think I’ll scotchguard. I think mostly you lean back on pillows but get the support from the cushy headboard, if that makes sense.
xo,
s
amy says
i don’t know much but i LOVE the darker floors and darker paint on tbe walls, that’s a must do, IMO.
love the fabric. great job. wish u were my friend and i lived in VA :)
bfish says
Haven’t commented in awhile, but wanted to say I love the new room arrangement and the headboard is beautiful (I did note earlier that the rug is great). Your bedroom looks very homey and inviting now; before it was a bit stark. Though I’m very much a fan of dark colors, the light and airy feel you’re getting here fits the room very well. At the risk of sounding like a broken record — i.e. repeating things I’ve criticized before — the dark leatherette bench and dark mirror aren’t harmonious with the room, and I like the current wood color on the dresser and the floors (big NO to dark stain; please think long and hard before you change them!).
Sherri says
The headboard fabric is absolutely gorgeous. What a WOW factor in the bedroom now. The furniture arrangement is so much better. I also like the mirror above the bed… and that rug never ceases to make me have “rug envy!” I like the wall color as is but just like the opinions on that , the dresser, and flooring, just take it as it goes. One day, if and when the urge strikes to change anything, you’ll do it and fall in love with the room all over again!
Jennifer says
I’ve gotta say, I think staining the floors and dresser down the road is absolutely the way to go! It makes everything look more contemporary and the existing colors really pop! Can’t wait to see it when you decide to tackle it one day.
Emily says
Any plans for the old night stands? I absolutely love them – “scored” a similar pair at a thrift store not long after you, but paid double or triple what you did :\ Agree they were a little out of scale, but curious where their new home will be! (perhaps at my address?!)
YoungHouseLove says
Not sure if they’ll end up in the guest room, playroom, or on craigslist. Will keep you posted!
xo,
s
Haley says
Is it weird that I’m totally crushing on the change up in the bed location!? It makes it look like a whole new room! You guys are my constant inspiration! Can’t wait to hear about Haven and all the Bower/Petersik family fun!
Tarnya Cook says
Hi Guys
Looks awesome, love the fabric. Not sure if anyone else has pointed this out but its available on etsy and yours was a bargain compared to this…
http://www.etsy.com/listing/94387634/designer-upholstery-fabric-by-the-yard?ref=sr_gallery_5&ga_search_query=upholstery+fabric&ga_order=most_relevant&ga_view_type=gallery&ga_ship_to=AU&ga_min=0&ga_max=0&ga_page=2&ga_search_type=all&ga_facet=upholstery+fabric
Bedroom looks great in this new configuration too!
Tarnya xx
YoungHouseLove says
Wow- that makes me happy!
xo,
s
Wyndi Hills says
I love the mismatched bedside tables and I think you should leave the dresser unstained. Just my 2 cents!
Michelle says
Oooo I love the idea of the darker walls. It looks so luxe! Do you have a tutorial for making the frame for the headboard by chance?
YoungHouseLove says
Yup, it’s linked to in the first paragraph of this post!
xo,
s
Michelle says
I laughed out loud at the picture of John holding the headboard.
If I had a picture like that of my hubby, I’d have it on my bulletin board at work to cheer me up anytime I was having a bad day. Hilarious.
Bec says
I’m with John on the repainting – know it was just a photoshop, but the bed seemed to pop more against the darker background.
Thanks for the tutorial. Gonna buy a cheap bed from Ikea for my spare room and now I know how I’ll make it look more lush!
Kathy says
The bedroom is looking lovely. There was something about it that I was not happy with…don’t you just love that it was all about me? I must say that I do like others’ opinions sometimes…but here you are in the business of hearing opinions. Just for the record…I loved John’s idea of darker paint…and the photoshopped new paint. My immediate response to that picture was, “Wow! That’s it!”
Karah @ thespacebetweenblog says
I LOVE it!! So funny. I thought I liked your set up before … and now it’s like ‘oh snap, it’s perfect’. Love the fabric and the easy peasy headboard. Such an impact!!
I’m sure it was a whirlwind for you, but it was so fun to meet you guys at Haven. So inspired by your story. And I had to post an unflattering picture, because it’s the only one I had … http://www.thespacebetweenblog.net/2012/06/25/the-haven-lists-of-3/. And I referred to meeting Burger by the fried chicken lunch buffet a ‘monumental moment’ at Haven in part 2 of my recap. Not sure exactly what that says about me.
Karah
YoungHouseLove says
Aw, you’re so sweet! We both had a good laugh at that picture because John was joking that there must be a million terrible shots of us floating around! Haha. It was so nice to meet you!
xo,
s
Monica says
Looks so beautiful! I
I have a question about the pillows and duvet on your bed. I love to look, but have always found duvets a pain. The comforter never seems to stay put. And all those great pillows….maybe I am extremely lazy, but where do they all go at night and which ones do you sleep with.? Do you remove shams before retiring? Sorry if that question is too personal:)
YoungHouseLove says
The duvet cover actually has duvet clips in the corners to keep things in place! It never shifts anymore (got them from Bed Bath & Beyond!). As for the pillows, we just toss the three accent ones on our chair every night (we have an armchair about three steps from the bed) so it’s easy enough!
xo,
s
drew says
Have you thought about maybe just darkening the wall bumpout behind the bed? I did that to our choirloft at church and it was dramatic in a nice way.
YoungHouseLove says
That’s always another possibility! Will keep you posted!
xo,
s
Kali says
I love your living room rug! I almost bought it in another color from Joss & Main the last time it was offered. I resisted though because I have never owned a rug that was so thin before. Does it lay flat? Is it ever a tripping hazard? It’s is soft? Love the DIY headboard btw, it is fabulous!!
YoungHouseLove says
It’s great! It’s flat but with a plush rug pad under it, it stays in place and doesn’t make people trip. it’s not super soft like a wool rug, but it’s not as rough as jute. Maybe somewhere in the middle!
xo,
s
Erin says
Great job, Sherry! Love the fabric. I was looking at the close-up of the corner of the headboard attached to the bed…have you ever thought about painting the bedframe maybe a light gray? Or your fav ORB?
YoungHouseLove says
Always another possibility down the road! We’ll have to see where we end up!
xo,
s
Erin aka TheSavvySeeker says
Love the headboard! I’ve always wanted to make one for our guest room, but didn’t know how! Thanks for the helpful step-by-step!
cherise says
Ahhhh…I love it! Now when I look back at the pic of Ed before his haircut I feel claustrophobic! Amazing difference. And I’m totally with John on the slightly darker color. Adds some mood and depth. Good luck!
Kasandra says
Great changes to the bedroom! This look has a lot more personality and character. Have you thought of maybe adding some studding around the edge?
YoungHouseLove says
Always a possibility down the road. With other things in the room that demand attention (like our big chandelier and the mirror over the window by the sink) we didn’t want to go too detailed with the headboard just yet, so that’s why we opted to keep it simple for now!
xo,
s
Mandy S says
LOVE IT!!! I have been itching to do a headboard for our room, so here’s to hoping I can get it into the budget next month!
And don’t tempt me on the whole sleepover thing, I’m only a 2 hour car ride away…
YoungHouseLove says
Haha- come on over!
xo,
s
Robyn in Chicago says
Whoa!! Love, love, love the changes! Amazing how a few small switches make the room a totally different place. And call me crazy but I like the dresser/John’s side table that color. Gives character – with it dark then everything but the white nightstand is dark – although I know you will change out the end of the bed bench. Hmmm. Anyway, LOVE IT.
Marji says
Love your bedroom, peaceful and hip. I have a fabulous chair upholstered in the same Cloud fabric and cannot find a rug to love. . . until I saw this rug and if you go on vacation and come home and the only thing missing is the rug, you’ll know it was me. Did you get the rug recently? Did you find it online or locally? I need that rug, very badly, do you mind sharing your resource?
TIA
YoungHouseLove says
That was a local find from an outlet called The Decorating Outlet on major clearance since it had a hole. But maybe try Shades Of Light to see if they sell it?
xo,
s
Lindsey says
Someone probably already tipped you off to this, but incase not… :)
http://www.target.com/p/avington-upholstered-armless-accent-slipper-chair-gazebo-cloud-floral/-/A-13916598#?lnk=sc_qi_detailbutton
YoungHouseLove says
No way! I love that!
xo,
s
Laura says
What a gorgeous room. The funny thing is I just ordered drapes in that same fabric for my dining room. Its just the most wonderful fabric. I can hardly wait til they get here. I’ve been thinking a turquoise-ish rug would look wonderful with it, and there it is!! Can you tell me where or who its from?
Great job!
YoungHouseLove says
That’s from a local outlet called The Decorating Outlet, but I think shadesoflight.com sells it!
xo,
s
Tiana says
I love the new headboard. It’s so pretty and really brings everything together.
Nadeen says
Hey Ya’ll! I was just wondering if you could tell me what the curtains in the bedroom are? I know I saw something about Ikea but I cant seem to find it again. Thanks and sorry if this has been answered already!
YoungHouseLove says
They’re Vivan by Ikea.
xo,
s
Tasha says
I’ve decided you can’t post anymore pictures w/ your bedroom rug in them! I am way to jealous of it! ;)
YoungHouseLove says
Haha- sorry tasha! Hope one finds you soon!
xo
s