Yes, this is a post about how to run dryer duct work and reroute HVAC vents. Why would I make a horribly punny reference to a 22-year-old Disney hockey movie if it weren’t? But first, some background. By the time Monday’s post was going up, David the framer was here putting the finishing touches on our new laundry room by adding that fourth and final wall (the one that will have the door that leads to the hallway).
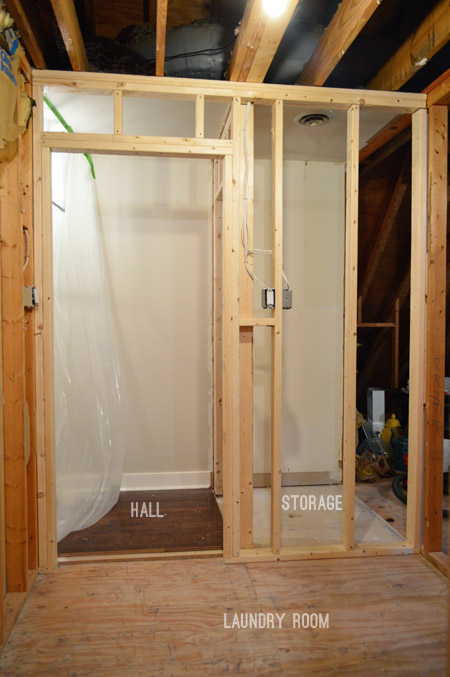
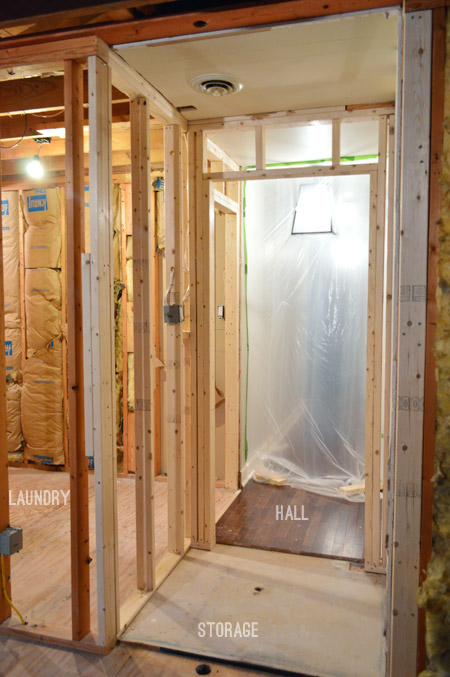
He also added the wall that will eventually house the frosted door to the current storage / future TV room. I took the picture from this side to get around that lovely plastic sheet, which helps us keep some of the attic heat at bay.
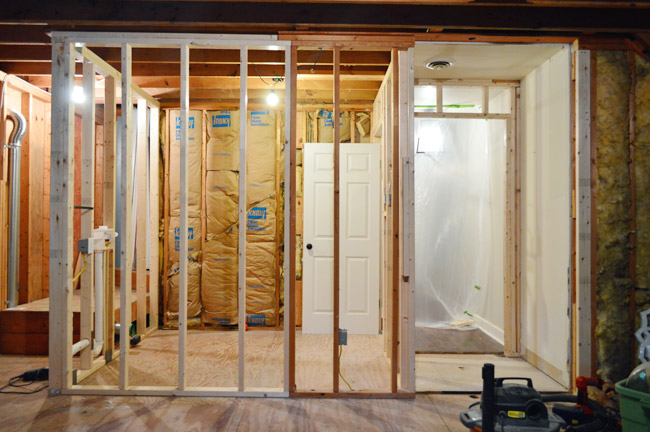
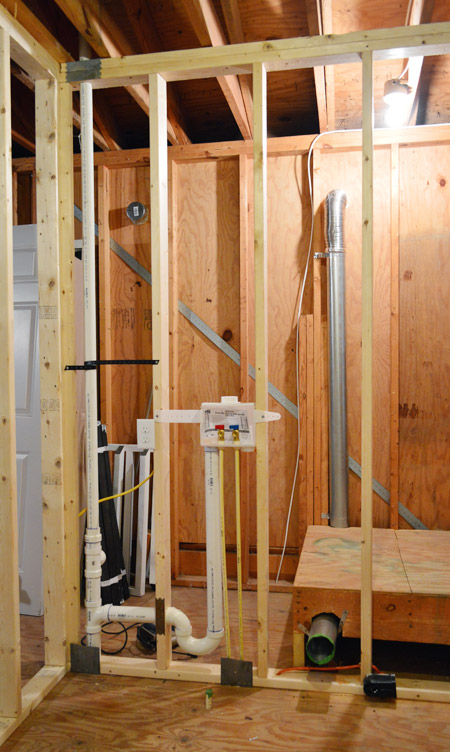
Here’s a full shot of the completed framing. I propped up the door just to give everyone an idea of how much it will swing into the room (it’s 8′ deep, so there’s plenty of room for that door to swing without interfering with our washer/dryer/cabinetry).
But this post isn’t really about framing, it’s about some of those little annoying tasks that you sometimes forget about in all of the excitement of a big project. Annoying, but no less important. So here are the three items we checked off our list before drywall could begin. They’re not the most exciting, but I hate to skip over them for anyone else facing similar projects… so prepare yourself for lots of photos coming your way.
Let’s start with the new dryer vent. I read that for proper function (i.e. getting clothes dry and not starting lint fires) a dryer vent pipe should be no longer than 25 feet and for every 90-degree turn, you should subtract 5 feet from your length. Here’s what our old set-up looked like, which I think was about 10 feet too long or had about 3 too many turns in it.
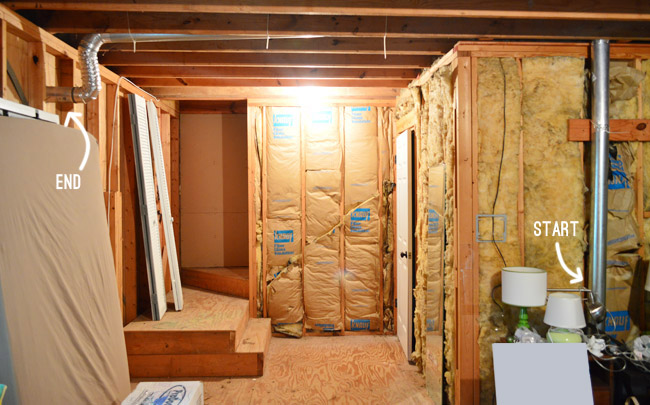
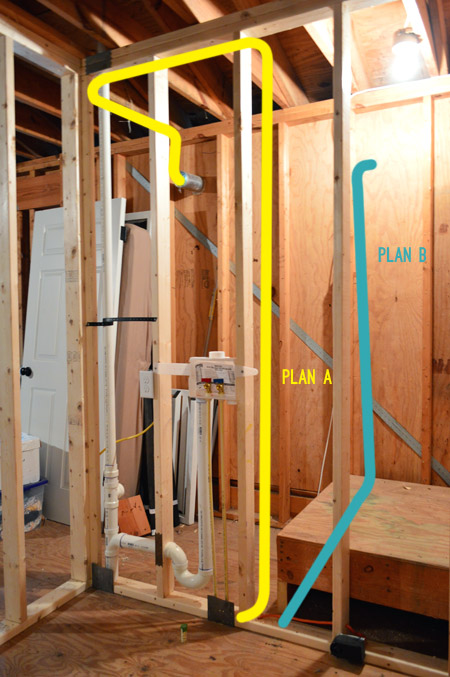
The good news is that by putting our dyer on the back wall of the new room, we were much closer to the exterior wall. But when we initially mapped out where the new vent could go (Plan A) it wasn’t faring much better. To keep the pipes up and out of the way, it took nearly as many turns and almost as much length. Boo. So we found a new path (Plan B) that was MUCH better and shorter by going under the attic steps… only it involved cutting a new hole in the exterior wall. That doesn’t top my list of fun activities, but it had to be done. And I’ll explain later why we chose to still take it up the wall rather than exiting the house under the stairs.
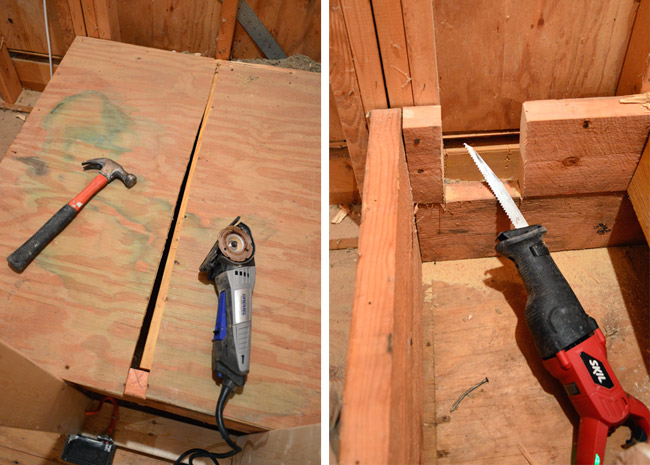
To start, I needed to make a path under the step for the 4″ vent pipe to go. I used my Dremel Sawmax to cut the plywood top along the step joist so that I could easily reattach it later. Then I used a reciprocating saw to cut a 4″ wide section out of the 2×6″ for the vent to rest in.
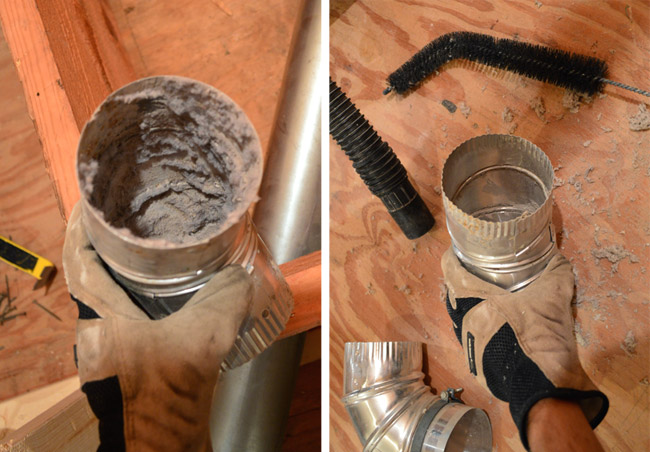
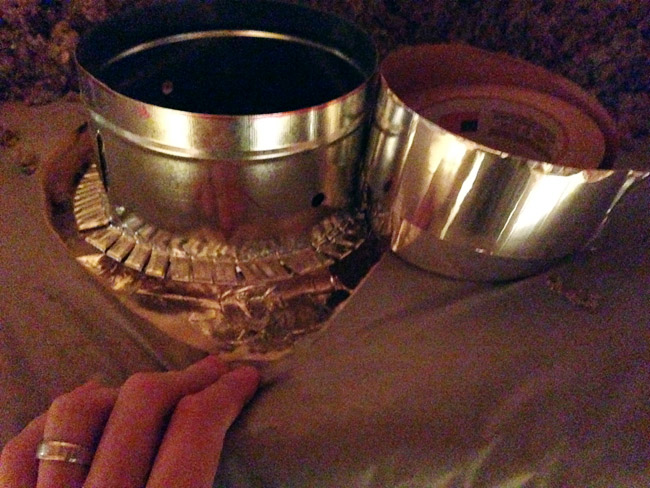
I was planning on reusing the existing metal vent pipes since they were in good enough condition and I had a lot of pieces to choose from. All they needed was a good cleaning first, which I did by taking them all apart and using a long bristled brush to scrape them clean along with my Shop Vac.
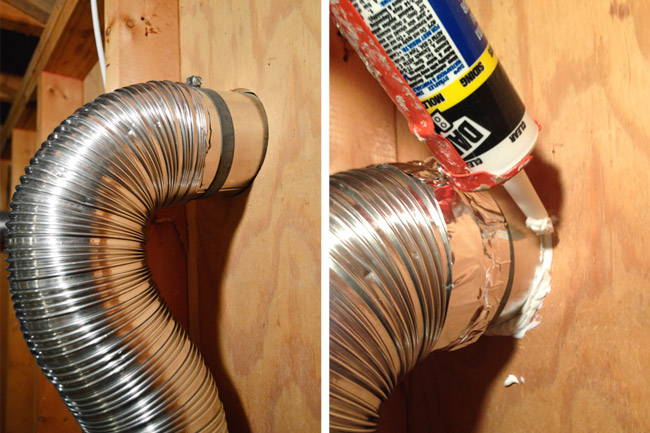
Then I started piecing them back together. Pipes like these have a crimped end that makes them easier to fit together. I read once that you want your crimped ends facing the same direction of the airflow so that air doesn’t escape around the crimping. Once fitted together, I sealed everything with metal-faced duct tape (note: not duck tape!).
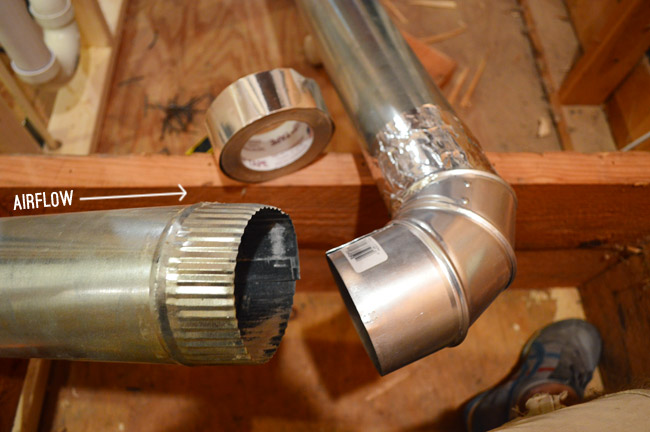
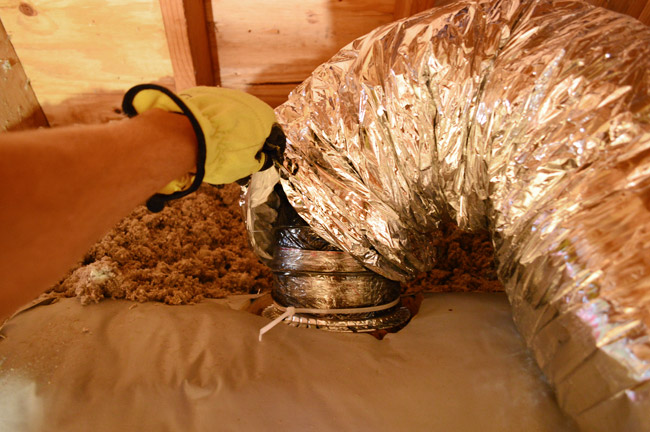
Once I had all of my pipes fitted together, I started to position them to run them under the stairs and up the back/exterior wall. You can see that I made an opening in the side of the step for the duct to pass through there, and I held everything in place with some steel hanger straps.
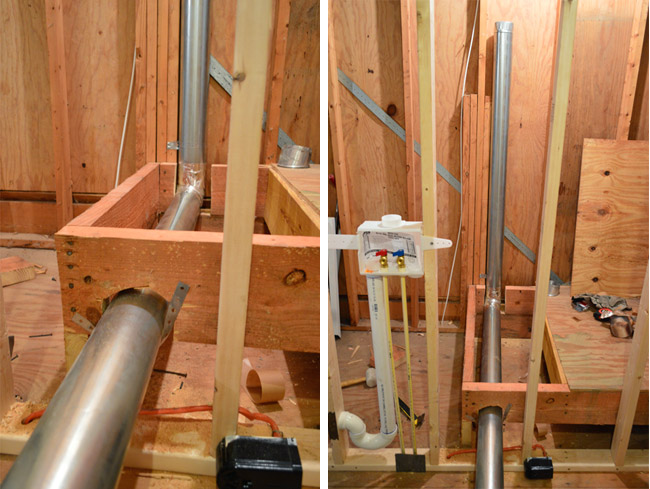
That bottom pipe extended way too far into the room, so I cut it down using my metal snips. I left it a little long so that I can cut it to its final size once the room is more finished. The green painters tape is just so we don’t cut ourselves on the raw edge while working.

Next up was putting the new hole in the exterior wall. Fun. I started off by drilling a pilot hole from the inside to mark roughly where the new vent hole needed to go. This was mainly to make sure I placed the hole directly above the pipe that I just installed.
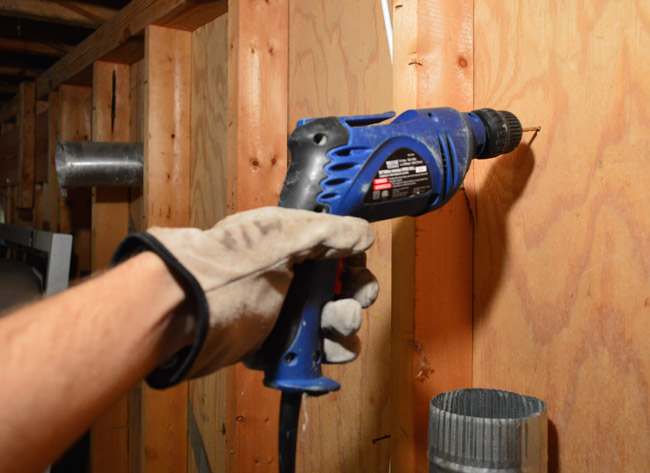
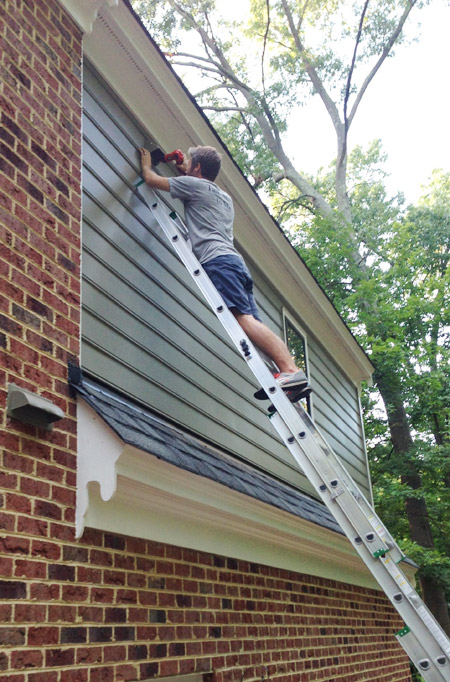
Then I headed outside to start making the big hole in the siding. More fun. Especially the ladder part. Yay. Anyways… I did this using a 4 1/8″ hole saw (which you’ll see closer in a moment). I wanted to start from the outside to make sure I was placing it in the middle of a siding board (and not awkwardly spanning two of them). The pilot hole I made from the inside helped me make sure I was drilling in the right spot.
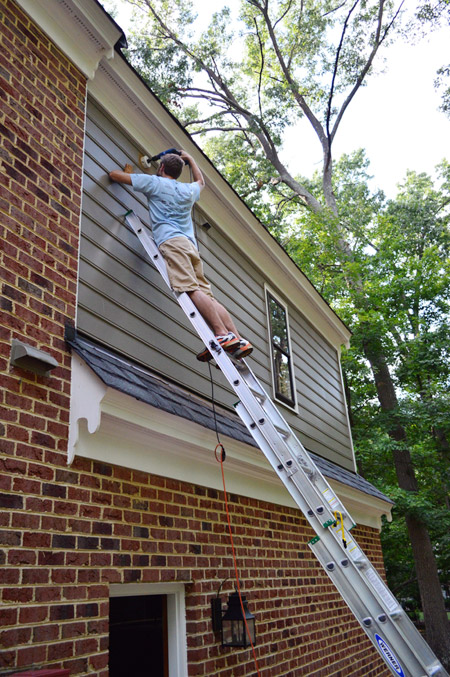
Outside I only made it through the hardboard siding (not the plywood beneath it). I didn’t want to spend any more time up on that ladder than I had to, so I came back inside to do the rest. The 4 1/8″ hole saw bit made a fresh pilot hole for me to follow so I could be sure everything lined up.
With the hole cut all the way through, I could install the new dryer vent on the outside. I bought one that resembled the original one, since they’ll both be living up there until we go through the trouble of removing the old one and patching the siding (we’ve just capped and sealed it from the inside for now). Oh and Sherry painted the new one to match the siding before I installed it so there’d be less work to do up on the ladder.
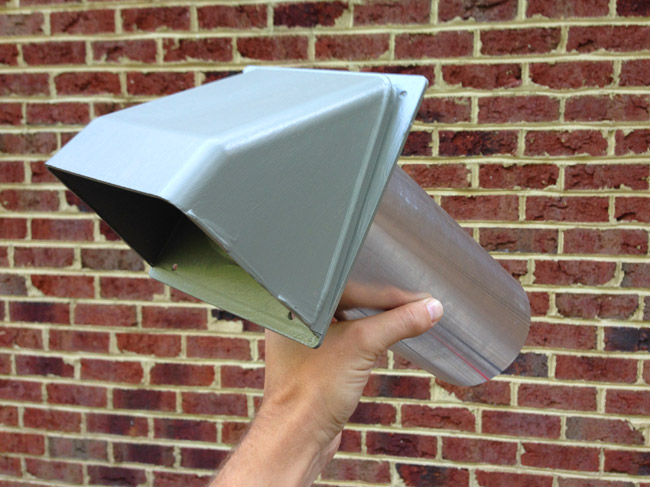
Before climbing up I put a ring of silicone caulk around the back of it, that way it’d have a nice weather tight seal from the get -go.
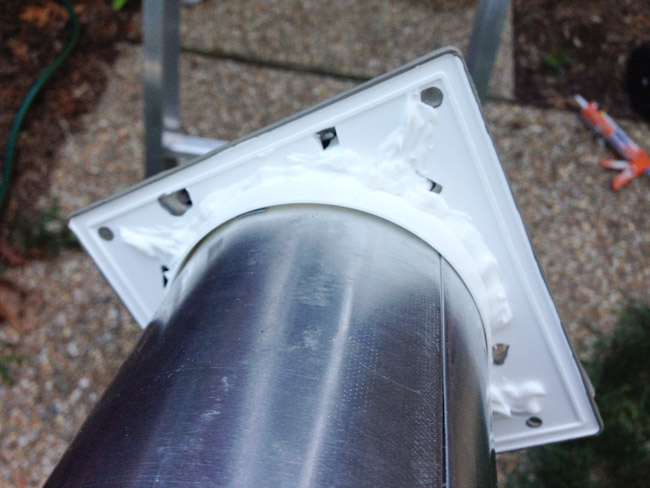
It took a bit of finagling to get it in (the 4 1/8″ hole took some sanding down to get the 4″ pipe through) but eventually it was in and I could screw it to the siding for a nice firm hold. And this photo shows why we chose to put the new vent as high as we did, rather than exiting the house under the attic stairs. That would’ve put the vent barely above that bit of roof below, meaning lint would’ve built up on the shingles. So because we had to take it higher no matter what, we figured we’d put it in line with the old vent, just so things would line up (and not look all diagonally janky until we patch that one down the line).
Back inside I trimmed off a bit of the vent pipe that stuck into the room and connected a semi-rigid vent pipe to it, complete with more metal faced duct tape and another ring of silicone caulk.
Then I just had to reattach the section of the stair that I had cut off and we were back in business. Well, I guess we need the dryer installed to truly be back in business – but you know what I mean.
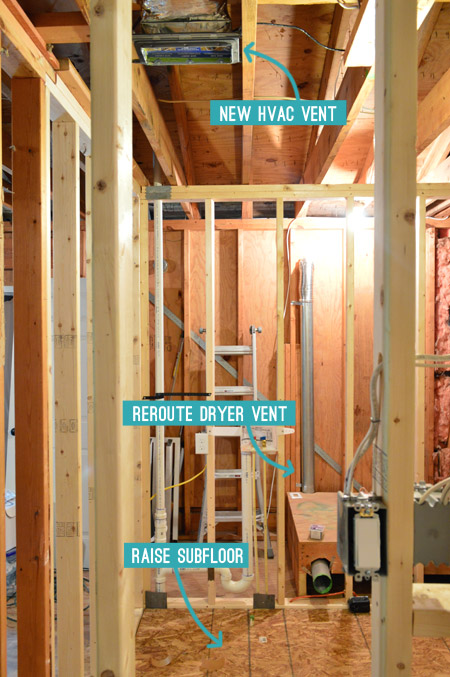
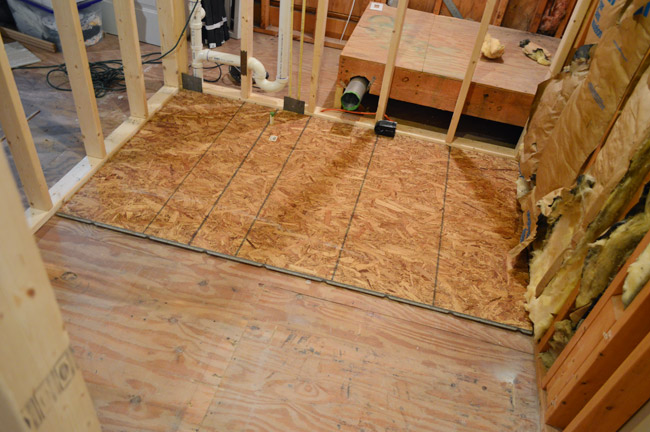
We’ll take a brief interlude from duct talk to address the floor for a second, which you’ll notice is quite a bit lower in the new laundry room at the moment. We want the tile that’s going in there to be as flush with the hardwoods as possible, so we needed to build up the subfloor a bit.
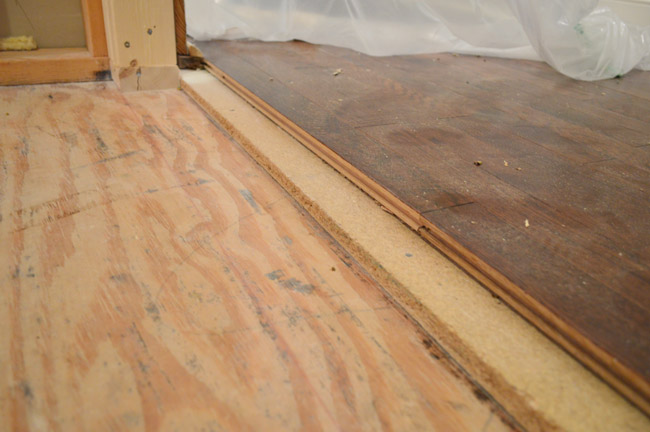
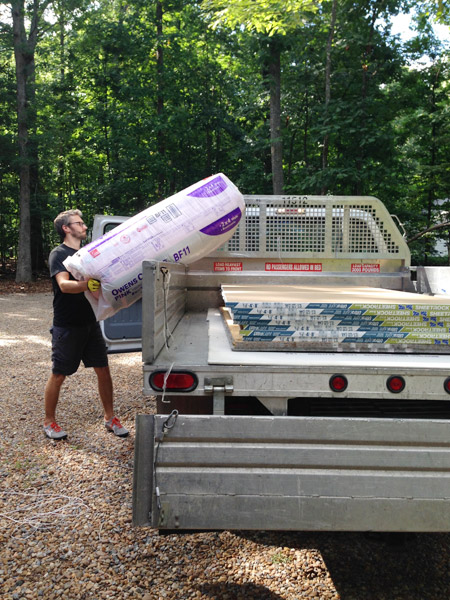
I did some math and figured I’d need a 3/4″ layer of subfloor, a 1/2″ concrete backer board (for tiling on), plus the height of the tile & thinset to get myself flush with the hardwood floor. Since I wasn’t going to fit two 4 x 8′ pieces of subfloor in our car, I took this as my cue to rent the $19 Home Depot truck and get lots of my big materials – including all the drywall and insulation.
The 4 x 8′ pieces of 1/2″ OSB subfloor took a bit of trimming with my circular saw before bringing them up to the room, but all things considered it wasn’t too hard to get the two sheets to fit nicely, and then I glued and screwed them down (gluing can help cut down on any creakiness down the line). Here’s the first one going down.
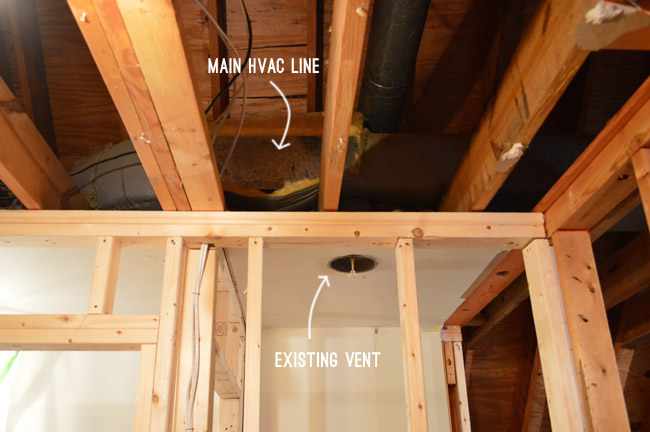
Now let’s get back to ducts. This time we’re talking about the HVAC variety, since this new laundry room has zero heating or cooling coming its way… despite the main trunk line being so close (and the old laundry nook having its own dedicated vent).
I’m certainly not a pro in this department and I had a bit of trouble finding help online in this arena – but eventually this series had enough explanation and photos to give me the confidence to tackle it. Also, I noticed that Home Depot sold this “Add A Vent” kit – complete with materials, a tool list, and instructions. Perhaps this would be less scary than I expected?
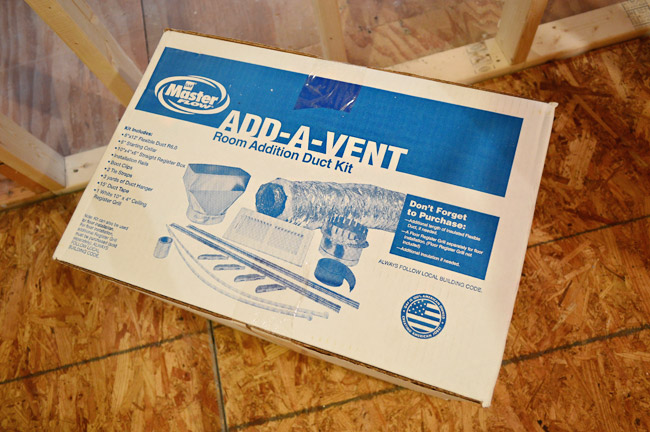
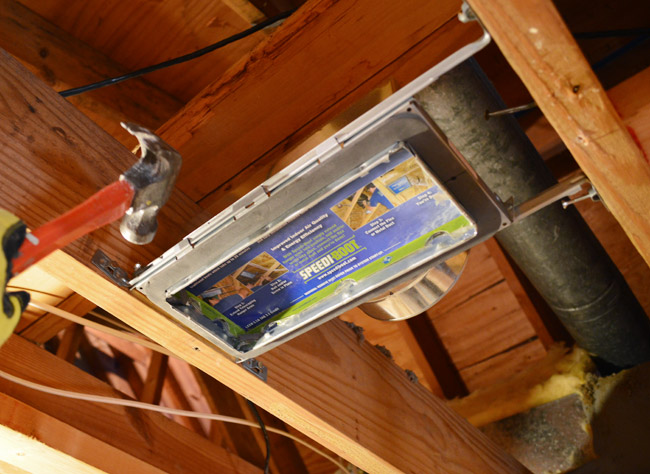
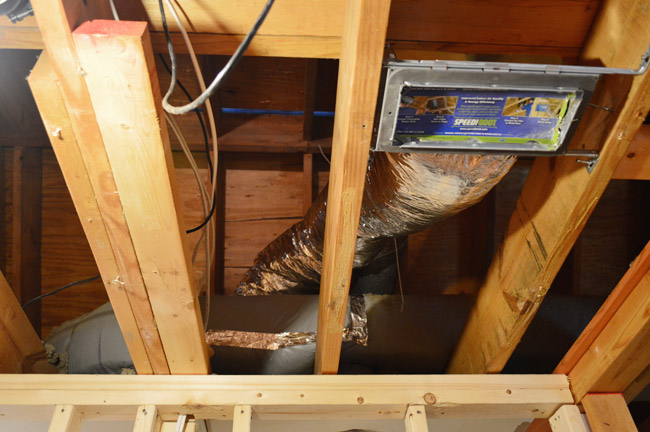
Buuuuut… I didn’t actually use the Add-A-Vent box. After purchasing it (it was $67) I realized I already owned some of the items that were included, and that I could buy the others for about $54 instead. One of those items being this “Speedi-Boot” that makes nailing in the new ceiling vent between two joists really easy. So I just returned the boxed set and used my a-la-cart purchases (but wanted to call out that kit here in case it helps someone else who might not have some of the supplies I already did).
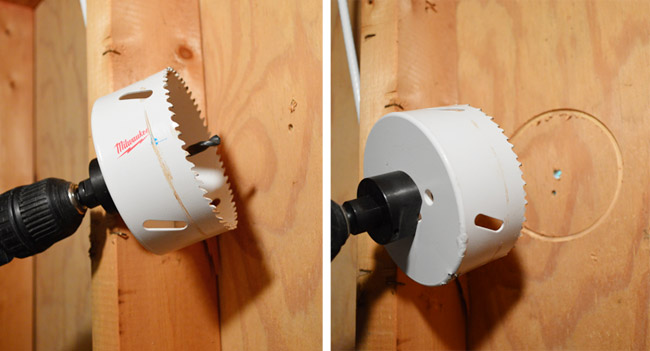
The part where I got nervous was cutting into my main HVAC trunk duct. But with some guidance from this post, I traced out where I wanted my new collar to attach…
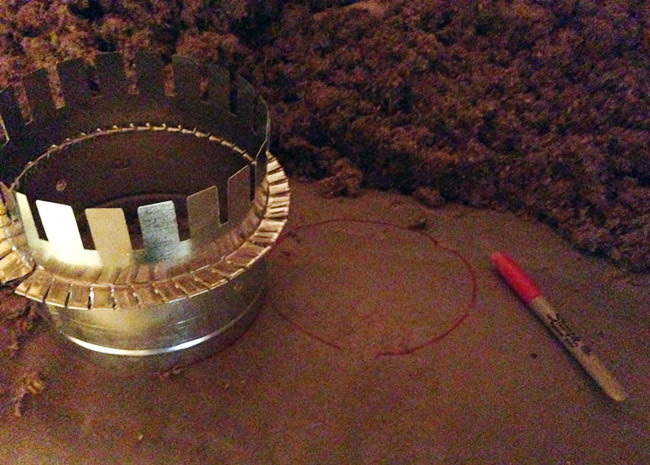
…and used a utility knife to cut out the insulation, exposing the metal vent beneath.
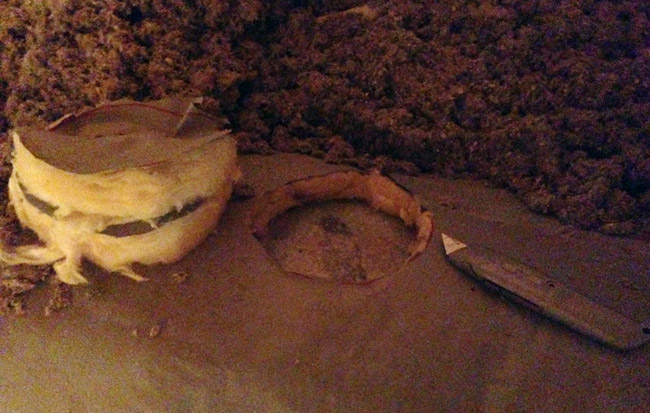
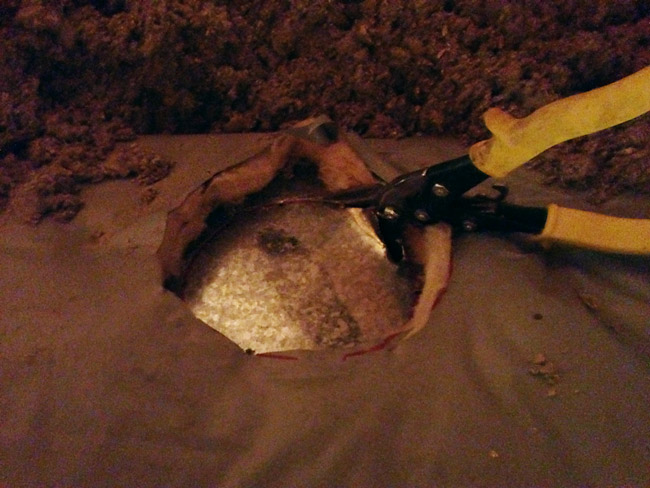
The tutorial I was following didn’t really help me when it came to cutting the hole in the metal, but this video did. Basically I hammered a flathead screwdriver in to puncture it, then used my metal cutters to go around the circle. There are probably better snips for cutting holes than mine, but they did the trick well enough.
The collar has a ring of tabs on it, half of which I bent outward (to rest on the outside of the vent) while bending the others inward (to go into the hole). Once I placed it in the hole, I reached through the top of the collar and bent the inward tabs the other way so they held snugly against the inside of the vent.
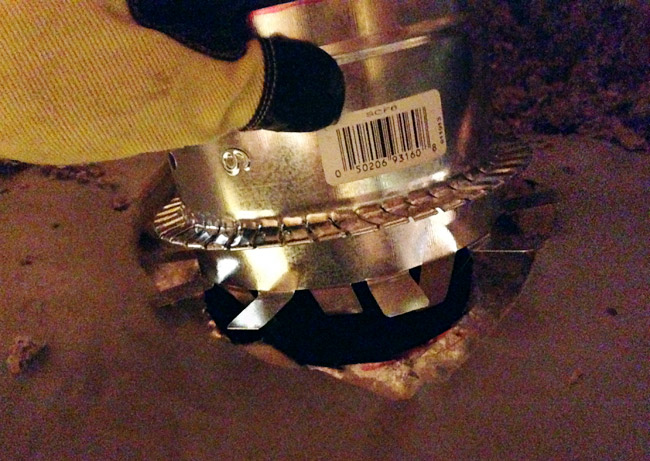
Then I pressed some foil duct tape firmly around the whole thing to create a tight seal.
Next up was attaching the insulated flexible duct that would connect the collar to the ceiling vent. It’s pretty easy to cut to length using a utility knife, but you will need wire cutters to get through the inner wire coil. I held it in place with a zip tie, followed by more duct tape.
I used more zip ties to hang the flexible duct from the ceiling a bit so that it didn’t have any kinks or anything, since I didn’t want anything that might restrict airflow.
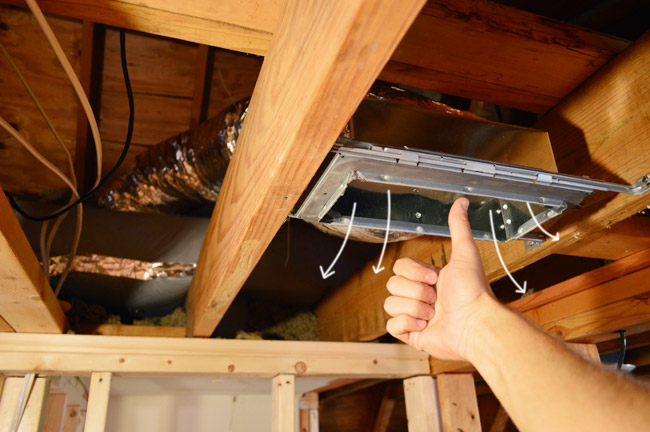
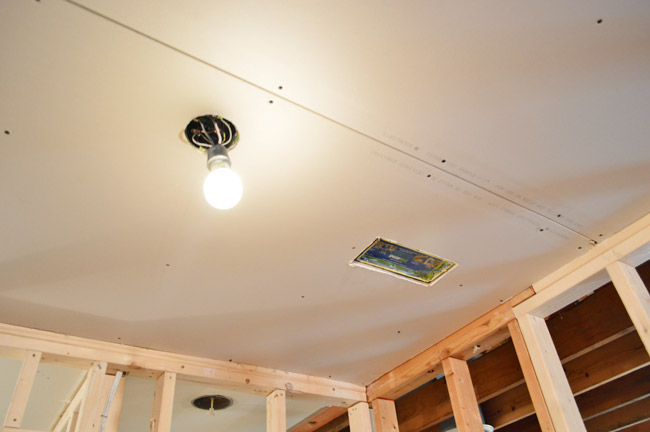
I’m gonna leave that cardboard “dust shield” (their words, not mine) in the ceiling vent until we’re ready to heat and cool this room, but I did quickly kick on the A/C just to make sure it worked. And in case you can’t tell by my thumbs up or cartoon air arrows, it did!
I realize that wasn’t the most fun post in the world, but I’m very glad to have gotten that stuff out of the way so this room can start to come together in more significant ways… like drywalling, which we have already started! It’s actually starting to look like a room in here.
But I’ll share all the drywall-hanging details when it’s done, which will hopefully be by Monday if all goes well. We’ve got book photoshoots today and tomorrow so we’re forced to switch our brains off Laundry Room Mode until Saturday, but at least we were able to get some laundry done at my parents house yesterday so we won’t be stinky for the photographer.

Leave a Reply