You may have seen the before & after bench pictures in our latest column for R. Home magazine. And we’re back to break down the process of completely transforming a cheap rickety ol’ bench with paint, fabric and a bit of elbow grease. Here’s the shoddy excuse for a bench that came home with us for $7 from Love of Jesus Thrift (yes, that’s really the name of one of our favorite local thrift stores):
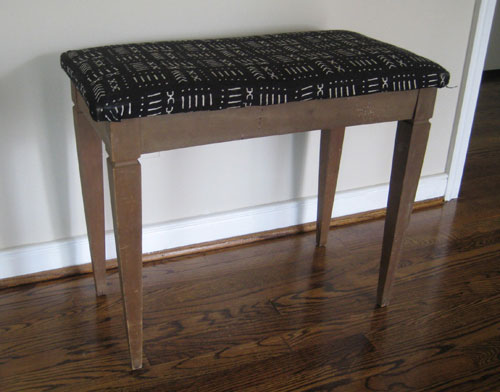
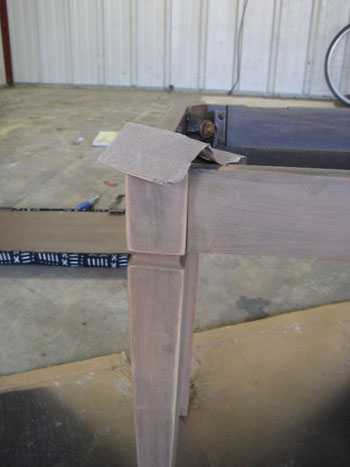
We looked beyond the dingy wood finish and the dated fabric to see something with true potential. The clean lines and easy-to-upholster seat cushion meant this baby was primed for a major makeover. We removed the seat cushion and tightened the interior bolts which immediately remedied the bench’s rickety nature. And we gently sanded the wood with 100 grit sandpaper and quickly got down to the bare wood (older pieces make this especially easy).
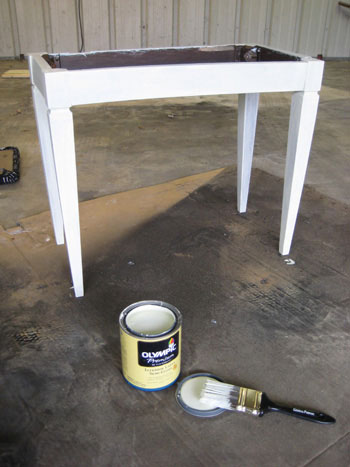
Sanding is a great way to help prepare a surface for paint, but we also followed this step with a thin coat of white oil-based primer since we were planning to paint the bench a light celery color and we didn’t want any old stains or sap marks bleeding through our brand new finish.
Then we followed our coat of primer with two coats of semi-gloss latex paint in a soft celery green (Lunar Tide by Valspar) applied with a brush for a smooth and bubble-free application. Many people think rollers are the way to a smooth finish… but only for walls. When painting furniture items, especially those with spindles or thin legs, even Benjamin Moore paint specialists agree that paint brushes offer a smoother finish (along with paint sprayers of course, but paint brushes are less messy, more accessible, easily affordable, and they offer you more control). Just remember that two thin coats are much better than one globby one- which will definitely show brush stokes and drip marks- ewww.
Then we let the bench dry for at least 24 hours while we tackled reupholstering the cushion. We purchased just half a yard of green and cream lattice William’s & Sherrill fabric for a mere $12 and couldn’t wait to give our sad little bench a fresh luxe look. It’s important to take the time to carefully place fabric with a pattern before you start stapling so it doesn’t seem off-center or crooked. We cut our piece of fabric with a few extra inches on each side so we could shift it and check it out from the front to be sure that the lines were straight and centered looking before we whipped out the $12 Home Depot staple gun.
We secured the fabric to the bench by pulling it tight and stapling it at the 12 o-clock, three o-clock, six o-clock and nine o-clock position. This keeps everything centered and in place (instead of stapling in a clockwise motion, which tends to allow fabric to rotate as you rotate, resulting in a bit of a twisted and unbalanced final product). We layered the new fabric right over the old fabric since the cushion underneath was in great shape and we didn’t want to tear out the old fabric and risk ruining the plush little form of batting underneath.
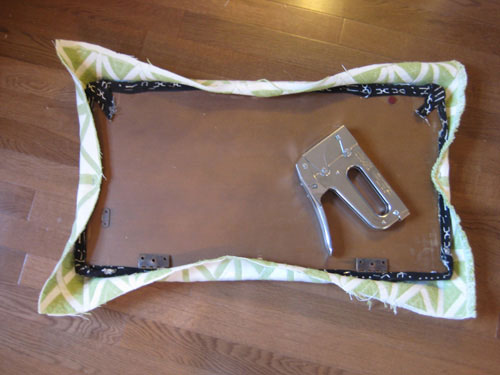
After securing your fabric in the middle of each side with one staple, going around the perimeter of the piece and adding more staples all the way around takes about five seconds. And you’re left with something that looks pretty darn good- and that’s just the back.
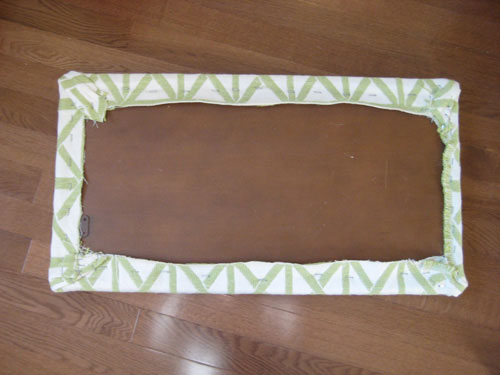
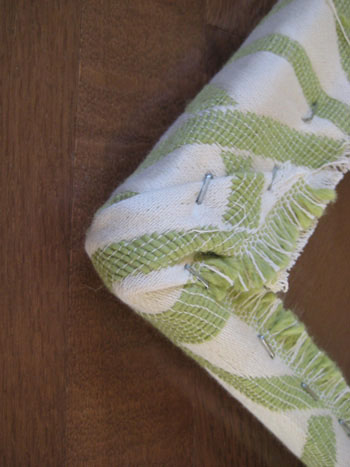
When it comes to the corners, folding them like you’re wrapping a present (and checking that it looks seamless from the front) is the way to go. It usually takes at least two darts and two staples, so don’t try to do it all at once. Slow and steady wins the corner-upholstery race. And the great thing about this process is that you can always pop a staple or two out with a flat head screwdriver if you want a do-over. Which practically guarantees a flawless finished product.
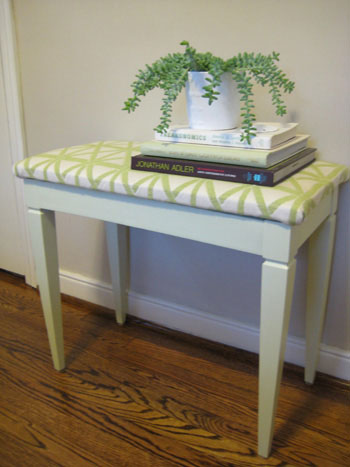
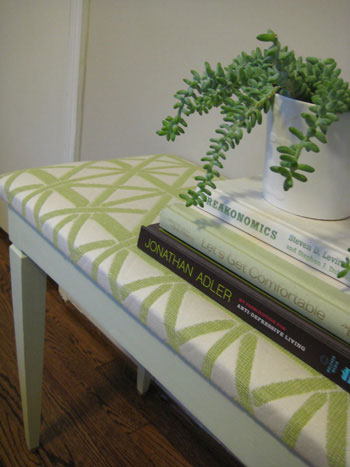
Here’s our bench all put back together. Isn’t she a beaut? I wonder how many people laughed at that pathetic little $7 thrift store bench before we rescued her!
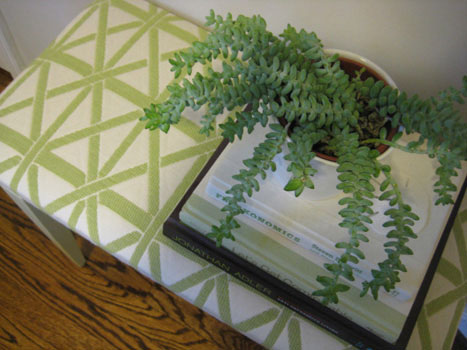
Here’s a top view to show how we did our best to center the fabric both left to right and top to bottom before stapling it in place. See the center line that runs down the center of the bench? And the stripes on each side that hit about a half inch away from each edge? It’s those little details that make it look clean and profession. Not at all like an afternoon project done on a serious budget.
If you can paint a wall and wrap a present you have all the skills you need to completely refinish a bench. And even if you can’t, you can now that we’ve given you the play by play. It’s easy and oh so rewarding. And every time a visitor stops to compliment your new addition you can offhandedly mention “oh this old thing, I picked it up for $7 at a thrift store”- priceless. Speaking of price, the entire cost of the whole bench project was $30 for the bench, the fabric and the paint. Not too shabby…
So go get benched! And tell us all about it.
Looking for another tutorial? Check out our How-To page for everything from cabinet-painting instructions to headboard-making advice.

Laura says
How did you reattach the upholstered seat to the bench frame?
YoungHouseLove says
There were hinges that we screwed out to reupholster it so we just screwed those hinges back in to reattach it. Hope it helps!
xo,
s
Foot says
Thank you for your wonderful website with full of love…..
what if you can use glass a top instead of fabric cover…
YoungHouseLove says
Hmm, good question! I bet you could get a piece of glass cut to size and use Liquid Nails to attach it to the bench (they you can paint the inside of the bench or even arrange photos under there as a sort of behind-glass display space. Awesome idea! Hope it helps.
xo,
s
Tana says
Hey, I’ve been to that thrift store! I’m in Richmond as well (southside)and always laugh at the name as I’m passing it on my way back from Family Thrift store, which is my favorite thrift store.
Thanks for the tutorial! I have a bench almost exactly like yours I’ve been meaning to redo. My sisters and I just discovered your blog, we’re huge fans!
Debra says
I absolutely love what you did with this bench! I remembered seeing it a few months ago and today I scored my very own bench at a yard sale for $7! It’s really sturdy, too. Thanks for sharing the paint and fabric information – that was nice of you. I can’t wait to get started on it. And thank you so much!!
Lindsay says
I have a piano bench that was passed down to me (along with the piano) from my grandmother. The top is not cushioned, but instead just a hard bench. Our piano is technically in our living room, but in its own “space”, and I would love to cushion and upholster the top so that we can pull over comfortable, additional seating into the living room if necessary. Do you think my best bet would be to mold the cushion using fiberfill? Any better ideas on how to create a cushion??
YoungHouseLove says
Pick up some foam rubber from your local fabric store to create a seat! That’s what couch cushions are made of. Hope it helps!
xo,
s
Jojo says
Just spotted this, really spooky as I’m just about to embark on my first refurb of a piece of furniture. I bought a dining chair and footstool from a local charity shop for £15, and am looking to reupholster & paint both in almost exactly the same colours as you! I’ve got my eye on a pretty green and white floral trail fabric that will tie the two together. Really excited to get going (people at work think I’m nuts getting all psyched about furniture), I just have to hope I don’t get too overzealous and forget to let the paint dry! I love looking at your finished pieces, they are just too lovely.
YoungHouseLove says
Aw thanks Jojo. Good luck with yours!
xo,
s
Kerry says
My fiancee and I just moved to Lynchburg and found a great used furniture place which we have basically used to furnish our entire loft. Before we continue on with the painting of al of these new pieces here is my question…the sales girl at Lowes was pretty confident that if you are painting an old piece of furniture that exterior paint and then a poly coat was the way to go. Have you heard this? I would assume it holds up better but the finish is very matte and now we’re not sure how we feel about it. Love your site by the way! Thanks for your time.
YoungHouseLove says
Exterior paint does have more enamel (and is therefore super durable) but we’ve heard that it’s not advised to have pieces indoors that are painted with exterior paint (since they’re full of toxic VOCs which can offgas into the air). Instead paint them with oil-based primer (which sets the base for a super durable piece) and then follow it with interior latex paint (in a semi-gloss finish). That way the fumey stinky stuff (the primer) still gives you great adhesion and durability, but it’s covered with semi-gloss paint so it doesn’t give off such an odor (and the semi-gloss paint will make it nice and wipeable). For extra credit you can use a poly, but be sure to pick the right one (since some can yellow or crack). This post is all about our furniture painting process and the only poly that we trust: https://www.younghouselove.com/2009/02/how-to-paint-furniture/
Hope it helps!
xo,
s
deana says
What type of plant is it that you used in the planter on the bench. I’ve noticed it in a few different posts and really like the texture that it adds. to the plain white planter that it is in.
YoungHouseLove says
It’s a burro tail (a type of succulent) from Home Depot in a cheap-o Ikea planter. Hope it helps!
xo,
s
andrea p says
You will never believe this, but just today I found an identical bench as this for an identical price of $7! I wanted to know which soft green color you prefer Lunar Tide by Valspar, or Glidden’s Zen Mist (that you used on your little shelf)?
Thank you :)
YoungHouseLove says
They’re both really sweet! It has to do with what you’re going for. Lunar Tide is more subtle. Almost like a creamy light pistachio. While Zen Mist is more obviously soft green. Just a bit darker and greener than creamy and subtle. You can’t go wrong with either. Hope it helps!
xo,
s
Julie says
Thank you thank you thank you! My kids demolished our piano bench within a month of getting it. It was used but still broke my heart… After 5 years I think it’s time to fix the shabby excuse for a bench. I LOVE what you did with this one. Way to go.
Lauren says
Love this bench. It inspired me to make one of my own: http://houseandhandyman.blogspot.com/2012/07/i-can-make-that.html
My in-laws got me your book for my birthday…loving it! It’s such a great coffee table book! Love your style!
YoungHouseLove says
Aw thanks so much! The bench looks awesome!
xo,
s