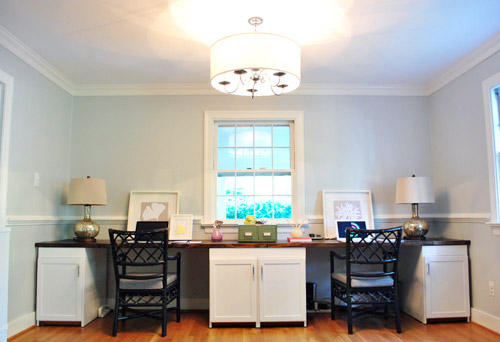
Alternate punny post title: The Updated Light Fixture Blues. That’s right, we’ve got the blues, but we’re far from sad about our “new” light fixture in the office. We just opted for indigo blue spray paint and added a giant drum shade to our old brass friend. Hence the blues joke. But you’ll get a closer look in a minute. Patience, grasshopper.
As a refresher, here’s what was there before (remember to ignore the lack of height due to the too-small frames leaning against the wall instead of proper hanging art and those we-probably-won’t-keep-them lamps on either side of our new desk). Our office was originally our house’s formal dining room, hence the whole formal dining room fixture feel.
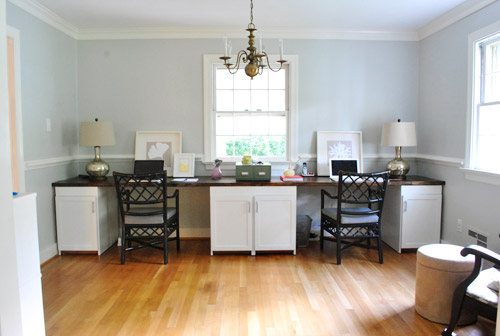
Speaking of its “feel.” Over the last nine months I’ve felt it a lot… with my head.

Though a more proper re-enactment of my many run-ins with the fixture would look something more like this. Just imagine a speech bubble with some expletives in it.

So even though the chandelier and I weren’t on speaking terms, after a brainstorming phone call with Katie B, Sherry convinced me that we should do our darndest to work with what we have. Again. See, we already spray painted a brass chandelier like this in our last dining room, so this time we wanted to do a bit more than just add a fresh coat of paint. So we decided to attempt to “modernize” it a bit by tweaking the silhouette, adding a big white drum shade around it, and bringing in some sophisticated-yet-kinda-unexpected color.
Luckily we had no trouble finding a jumbo shade at our first shopping stop, which is a local favorite of ours (The Decorating Outlet which we’ve probably mentioned ten million times – it’s also where we found Clara’s capiz chandelier and the shade for the pendant we made in our last office/guest room). The best part was that it was miraculously large enough (it had to be at least 24″ wide and it was exactly that).
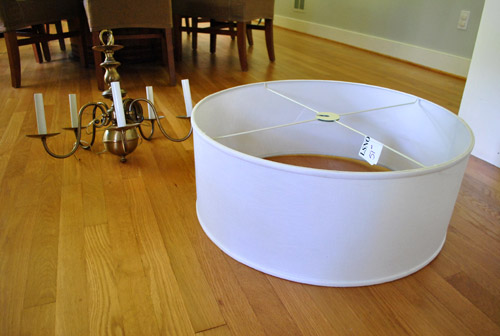
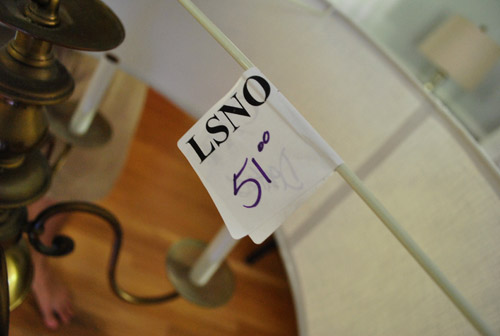
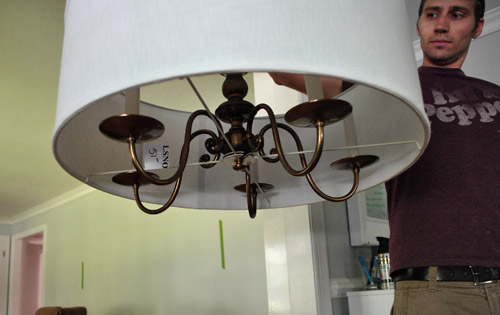
It was marked as $51, but after my better half sweetly pointed out a couple of subtle dents to the salesperson she was willing to sell it for $39. Score. I’ll point out the dents in a later picture – they’re not bad at all. But you know Sherry loves a deal. So even though $51 was a lot less than most 24″ drum shades like this $199 version that’s only 20″ wide (yes, ours is a full two feet wide), it never hurts to ask. And $39 was the magic number.
We also decided to eliminate the large ball on the bottom of the chandler since we felt like it would look funny sticking out of the drum shade (“like butt cheeks hanging out of a short skirt” as the wife so eloquently stated). Fortunately it just took a few twists of the bottom finial and the whole thing screwed right off (even the long rod that kept the ball part attached). We couldn’t believe it was hollow because we assumed it would be full of wiring or something.
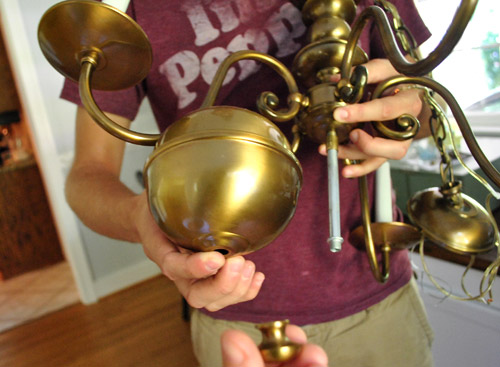
Here it is minus the ball (aka: with less junk in the trunk). We just reattached the finial to the shorter middle rod (since the extension rod that held the ball up screwed right off) and it was good to go.
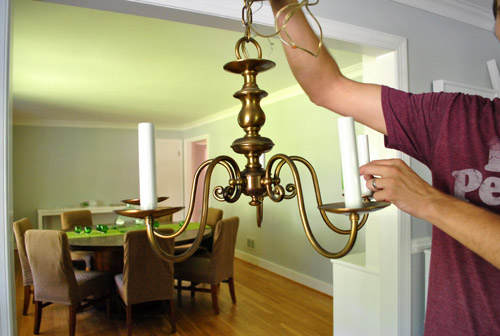
The next step was figuring out how to attach the drum shade, since it wasn’t exactly made for our old brass chandelier. The obvious choice was the bottom, since there was a nice little nub for the shade’s ring to slide on to (and the finial could be screwed back in to hold it up). It almost worked, but we didn’t like the idea of the shade’s straight & narrow crossbars being so in your face. They kinda messed with the original curves of the chandelier – ya know? So I gave it one of these faces and we moved on to the next idea:
The obvious alternative was to hang the shade from the top (so the cross bars would be in the background instead of the foreground). The only problem was that the shade’s top-attachment-thingie was too narrow to slide onto the top of the chandelier. Harumph.
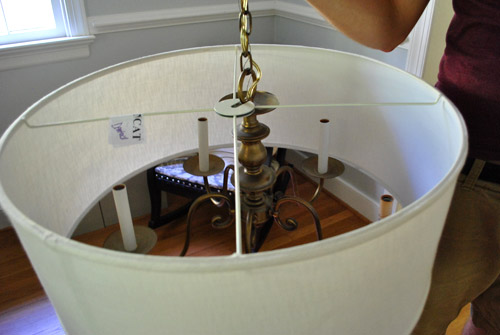
So we decided to improvise. The existing piece of notched metal had to go. Sherry was able to pry off half of it without a problem – just a little flick of the screw driver while steadying the “legs” so it didn’t tweak the shade.
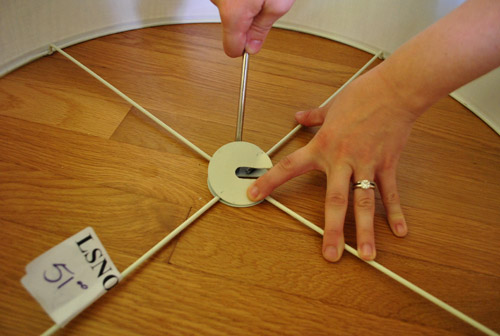
But the other half was more stubborn. We tried lots of tools, but it was requiring so much force that we started to get nervous about damaging the shape of the whole shade. (PS: You can see a couple of the small dents in the upper right of this picture – which are nearly impossible to detect from the outside of the shade).
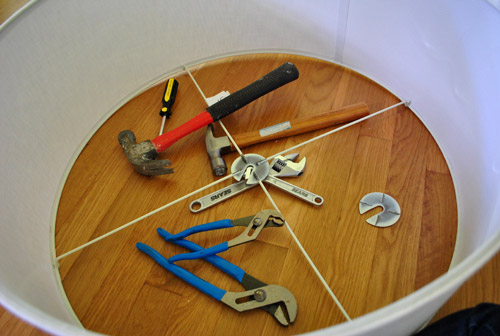
So we did what any demo-happy people would do. We broke out the hacksaw. Sherry was kind enough to photograph me looking like a sawing superhero, but it was actually she who did most of the sawing. Three out of four “legs” actually. She’s my hacksaw heroine.

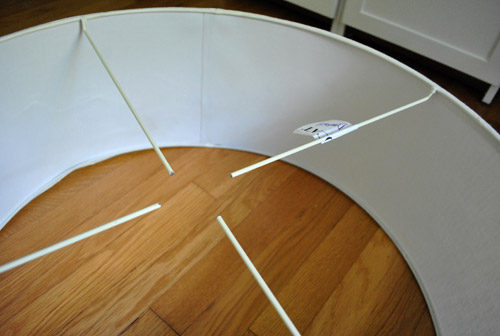
Removing the rest of that ring thing was just half of the battle. Okay, maybe a third of the battle. Because these four rods floating in mid-air certainly weren’t going to solve our problem. They needed to be stabilized by something, and that something needed to somehow fit onto our chandelier.
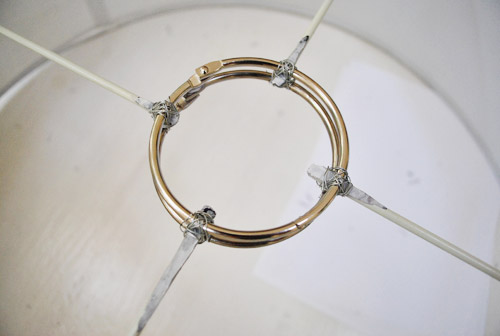
Luckily we found some spare 3″ binder rings in our office-supply drawer that were big enough to fit over the top of the chandelier. After a couple of attempts at super-gluing one to the four rods (and having the ring break off within seconds of trying to pick up the shade) I decided to try wiring it two of them together, thereby sandwiching the shade’s four rods. I just used some craft wire that we had around (pretty thin gauge stuff so it was easy to bend). The method was far from complicated. I just (messily) tied some wire round and round – sort of making a figure eight shape to secure things. I wouldn’t earn any merit badges for my wire knots, but they did the trick (and won’t be seen in the final assembly anyway, so… yay).
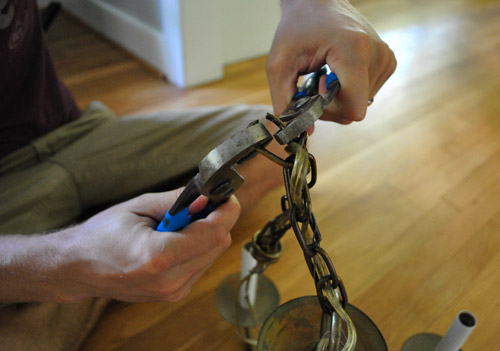
I can’t believe I haven’t mentioned one of the most important steps in our chandelier project: painting it raising it so I don’t hit my head anymore. This involved shortening the chain that it hung from and snipping the wiring to match the new height. Once we determined how many chain links we wanted to keep (by Sherry holding it up as I walked under it, a very scientific process) we just pried off the extraneous rings with two channel lock pliers. It was nice and easy – and a big step toward me (and my delicate man face) enjoying our final product.
Painting it was a pretty important step too. At first we thought about something smoky like an un-shiny charcoal grey (not quite black, but close – sort of like a matte gunmetal color). But we thought it might be fun to take a little subtle risk with a rich deep color. And while in the spray paint aisle evaluating our options (yellow, green, teal, and even orange – all of which we might bring in a few other ways with things like upholstery and art), a can of indigo blue spray (in a satin finish) caught our eyes. Perhaps a nice nod to the backs of the built-ins in the adjoined dining room?
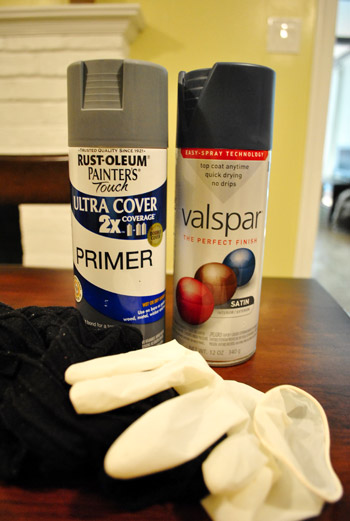
So Sherry gathered her supplies: spray primer, our freshly purchased indigo spray paint, rubber gloves, and some sexy black socks (you know, so she can impress all the neighbors with these legs). Because she needed to spray it while hanging (for the most easy-access) we decided to use the basement (with the door open and an equally-as-sexy-as-the-socks gas mask) where we could hang it from the ceiling and surround it with a drop cloth.
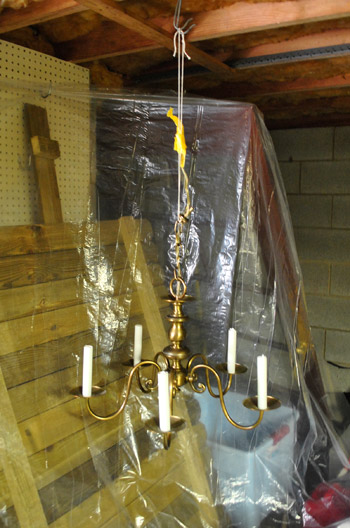
We were also sure to stuff some paper towels in the sockets to keep paint out of the interior part where the bulbs screw in (no sense in gumming up the works).
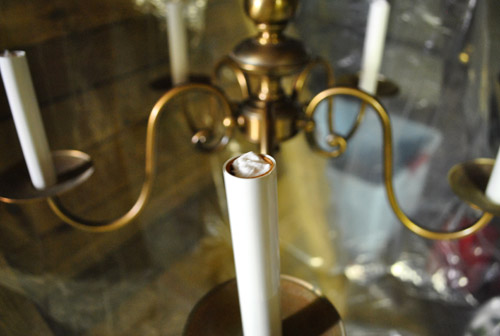
Sherry first did a coat of spray primer, which was a pretty cool color in itself. For a second we debated just leaving it…
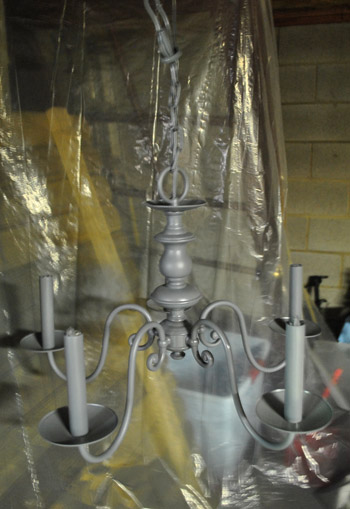
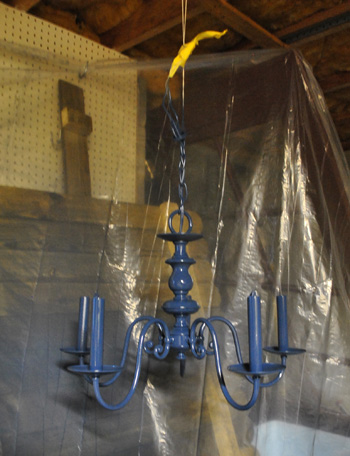
…but after going for the indigo we were immediately happy with the choice. It makes the whole thing look classic, but updated at the same time – at least in our humble what-the-heck-do-we-know opinion.
I don’t have many (okay, any) pictures of the process of re-installing it because it took all four of our hands (Clara’s hands were busy napping and Burger’s paws were probably partaking in a sleep-sesh too). But after sliding the shade down the chain so the rings rested on the top of the chandelier’s fluted center part (there’s a detailed pic of this coming up) Sherry held the whole thing up while I re-wired it to the ceiling in the same manner in which I had taken it down. That’s the extent of my electrician knowledge – just carefully redo what you undo. And I turn off the power to the entire house just in case things aren’t perfectly marked in the fuse box (they don’t call me John “Paranoid” Petersik for nothing).
And voila. The rich blue color is sort of hard to see in pictures but it’s nice and clear in person.
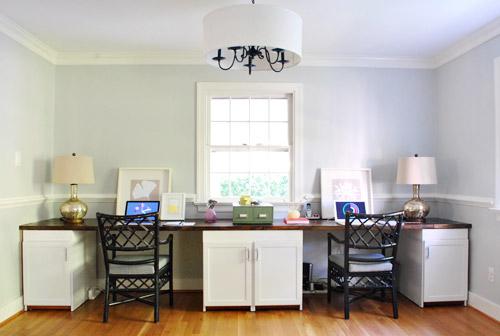
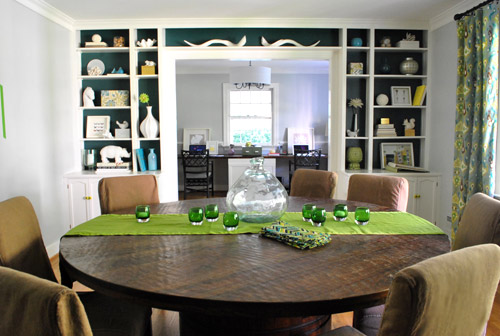
We love that it’s clean and understated from afar because we someday plan to drop a huge chandelier over the huge dining table (and didn’t want the office fixture to compete).
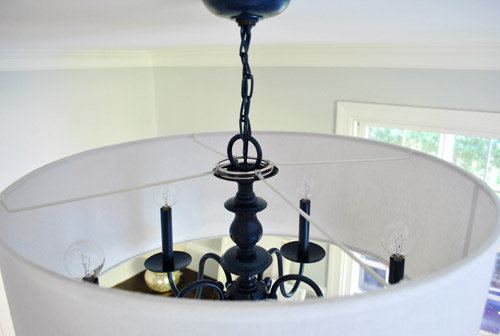
Here’s a shot from the top so you can see how the binder rings rest on top of the chandelier’s middle flute thing. Since the rings are smaller than the disk that they’re sitting on, they’re completely invisible from below. So only the flies on the ceiling get to enjoy this vantage point.
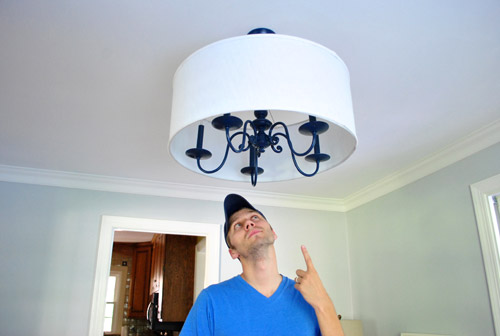
And of course, one of my favorite features of the new fixture is that I can walk right under it. Oh the simple pleasures in life. For you detail oriented folks, the bottom of the chandelier is 78″ from the floor.
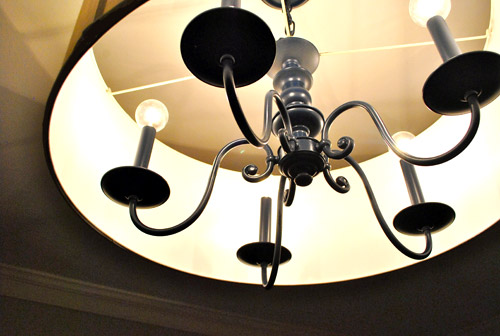
As much as we love the light off, it really comes alive when it’s on. The room feels light and bright and the shade diffuses the light much more evenly, meaning the chandelier no longer casts creepy five-legged shadows of itself on every wall.
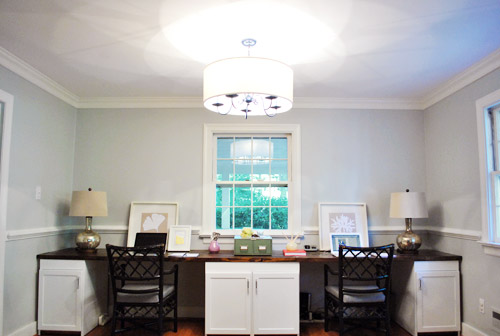
And we think the kaleidoscope pattern that it makes on the ceiling is pretty nifty.
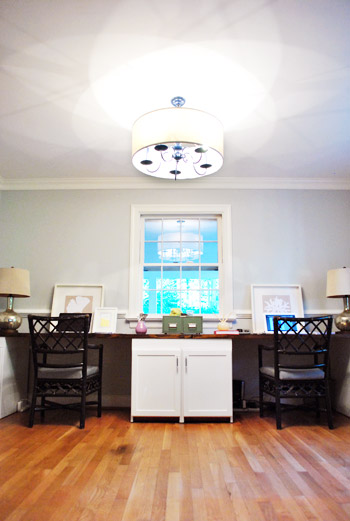
It’s also a really stellar size in person. The giant 13 foot desk could easily dwarf something smaller, but the light colored shade and clean lines keep it from feeling too heavy so it’s nice and airy – even with the deep blue tone on those ol’ brass legs.
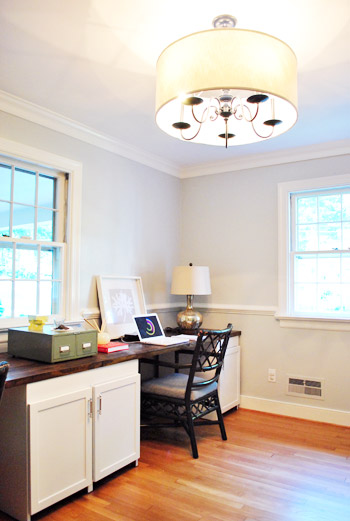
And oh yeah, we swapped out the traditional “flame” light bulbs for more modern globe-style bulbs (from Lowe’s). It’s a small detail, but we think it makes a big difference in crisping things up (we first fell in love with round bulbs around four years back when we used them on a similar dining chandelier in our first house that we spray painted white). We looked for CFL versions, but no dice- although we hear most things are going LED now, so here’s hoping they make little round chandelier ones soon.
In summary, we love it. Here’s the view from the floor (where Clara and Burger actually spend a fair amount of time). And speaking of the bean, she’s learning so many new words these days. It charmed us to no end when she woke up from her nap after we hung the “new” fixture and pointed right up at it and said “oooooh, light.”
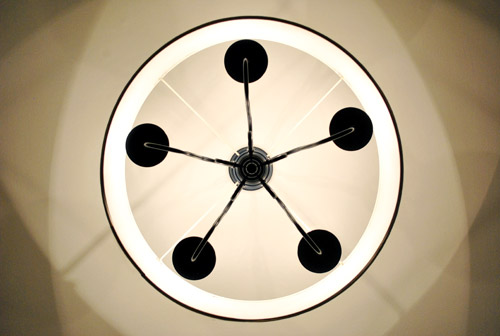
Even though the update wasn’t totally free, it certainly beats the price of paying for a whole new fixture. Especially anything that’s two feet wide. Here’s the breakdown:
- Chandelier: $0 (already owned, but we’ve seen them for under $10 at yard sales and thrift stores)
- Drum Shade: $39 (from The Decorating Outlet, negotiated down from the already discounted price of $51)
- Binder rings & wire: $0 (already owned, maybe $4 if you had to buy them?)
- Tinted spray primer: $0 (already owned, but it’s around $7.50 from Lowe’s if you need some)
- Indigo spray paint: $3 (from Lowe’s)
- New globe light bulbs: $9 (from Lowe’s)
- TOTAL: $51
Not bad considering a nearly identical version (minus the deep blue color) was recently sold by Pottery Barn for $299 (looks like it’s currently out of stock).
I’m sure we’re not the only ones who’ve updated a chandelier or other light fixture, so we’d love to hear your experiences and even see pictures if you’ve got a place to link to them (like Flickr or your blog). Has anyone else gone for a non-traditional-but-surprisingly classic color? Or found another way to make an old fixture feel fresher? Who else hit their head on a light at least five times a week for thirty six weeks straight? Why the heck did we wait so long on this update anyway?

Jessica says
WOW – love it!
Jadie says
Beautiful! This is quickly becoming my favorite room. Can’t wait to see how it evolves with the pops of color you bring in. Maybe this is just me and my laptop but I can’t see the pb version (the link doesn’t seem to be working for me). Looks great!!
YoungHouseLove says
Hmm, no idea why. It’s on a site called Kaboodle because it’s currently out of stock at Pottery Barn, but maybe your computer blocks Kabootle for some reason (if it thinks it’s spam or you’re at work and it’s blocked?). Here’s a direct link to the photo if that helps you see it: http://cn1.kaboodle.com/hi/img/2/0/0/3d/3/AAAAAvzwUwQAAAAAAD0wEQ.jpg?v=1175273562000
xo,
s
Jadie says
Ps gotta love your dr. pepper shirt! ;)
Sushmita says
thought of your post yesterday on the mid century modern nightstands when i read this:
http://www.apartmenttherapy.com/chicago/collections/5-ways-to-keep-vintage-collections-from-smelling-that-way-155984
sorry for posting it here…thought it might help:)
YoungHouseLove says
Love it! Thanks for sharing!
xo,
s
MoHole says
Brilliant! You light looks great and the tutorial is perfect timing. I have been on a mission to redo a truly terrible inherited light fixture but couldn’t find 3 small shades to replace the 3 frilly ones it came with. I never thought to cover the whole thing with one big shade. And the special bonus of this method is that it’ll cover the ceramic flowers that live all over the light fixture. Yeah…it’s hideous. :)
Laura D. says
I love this. I’m so glad my feedback the other day inspired you to fix the light fixture. ha ha. Seriously, looks really cool.
YoungHouseLove says
Haha, that light was probably the most hated thing in our house! Glad we could finally take care of it for you guys!
xo,
s
Colleen P. says
I love the color, it really takes something that you ordinarily don’t really even see and makes you take a second look, good job!
HOWEVER! LOL-I feel I must suggest a soldering iron and a few dabs of solder on the ring holding the whole thing up.
I’m going to be eyeing old brass home accessories now at the thrift stores-I can see some nice acqua candlesticks, or marine blue lamps!
YoungHouseLove says
We totally wished we had a soldering iron in the middle of wiring all that stuff together! Haha. Would have been much easier!
xo,
s
Crystal S says
I love it!! I’m contemplating using some lively colors in my mostly neutral home – that aren’t kid related. You guys are such an inspiration to me, thank you!! I love your yellow door, but I love my storm door. It allows me to open my front and let the breeze in, but I don’t know how it would work with a yellow door behind it. Should I paint the storm door too, any thoughts??
YoungHouseLove says
If we were going to keep the storm door I think I would either have painted that yellow too, or paint that a smoky charcoal color to complement the yellow. Hope it helps!
xo,
s
RVA Born and Raised says
Not sure if any other comments mentioned this, but right after reading about your light transformation, I saw this post on Apartment Therapy: http://www.apartmenttherapy.com/chicago/diy/a-running-stitch-can-add-luxury-to-your-lampshade-martha-stewart-155888
The colors and style made me think of your guys.
YoungHouseLove says
That’s so pretty! Thanks for sharing the link!
xo,
s
Bex Crowell says
We’ve got one almost just like that except that it has a light inside the bottom globe-y part, so we couldn’t take that off. But I love your idea and may try it one day.
That’s ours – in the dining room. We got it from an older house my in-laws bought 20 years ago and it was old then. Thanks for all your great information and know-how!
Bex Crowell says
I guess my HTML for the picture above didn’t work. Try clicking on this:
http://thumb8.webshots.net/t/85/85/7/26/48/2915726480025560968SWwIsX_th.jpg
Bex Crowell says
How in the heck do you put a picture in these comments?
http://inlinethumb51.webshots.com/47538/2915726480025560968S500x500Q85.jpg
YoungHouseLove says
It worked! Victory! Good luck with your light- it definitely looks similar. We’d love to see photos if you tweak anything someday!
xo,
s
Petra says
Lovely! I’ve noticed that most or all rooms have crown molding? I live in North Virginia, and was wondering if I should add some in my one floor home, to bring some personality in. Does crown molding bring together the room, or is it an artistic expression?
YoungHouseLove says
Oh yes! Add it! We added it to many rooms in our last house and plan to add it to the guest bedroom and Clara’s room and the playroom since it’s missing in there at this house. It brings in really nice architecture and personality!
xo,
s
Petra says
Ok, I’ll look into it. What is a reasonable price and material for crown molding? Is it easy to install it?
YoungHouseLove says
That was actually a present I gave John (I paid a handyman to install it). For materials and labor I think it was around $250 for three rooms? But this time we plan to DIY it together (and share all the steps as we go).
xo,
s
Petra says
Wonderful! Thank you!
abby says
I absolutely love it. When we moved into our house, we had one of those exact same brass chandeliers and I took it down and donated it asap and went and bought a new one. Now i’m kicking myself for not seeing the potential in it!
debbie says
Looks great!
Sandra T says
It looks great! Worth the wait! :)
ToTheMoonandBack says
Genius! What a difference it makes in the space.
Meagan says
I rent an outdated apartment and we have a similar chandelier in our dining room. I had never noticed the creepy shadows until this post…now it all I notice. Now I wish I had a huge drum shade to fix this problem. oh well at least the kitchen has cabinets without knobs…so I haven’t started seeing eyes everywhere.
YoungHouseLove says
Haha, at least there aren’t eyeballs!
xo,
s
Marie says
The light fixture fits more with the style of the room, awesome. Just to note when cutting crazy things like that I can’t tell you how many times I have used a cutting wheel on my first generation Dremel (I remember you mentioned in the past.) I’ve used it to cut shades, toilet bolts, crazy small pieces of cabinet molding, and I even used it to shorten a matchsticks blind without damaging a single stick. It’s good for some heavy duty stuff like metal piping I used to repair a chain link fence. There is nothing it can’t cut with a good dusk mask, goggles and a little patience. So try it sometime it much easier than a hack saw. Also there is a product called JB Weld which is a 2 part epoxy that is great for use on metals, always handy to keep in the project drawer.
YoungHouseLove says
Love that tip!
xo,
s
Jenny Murphy says
http://www.cb2.com/pendant-lamps/lighting/eden-pendant-lamp/f4773
had you seen this great, affordable (under $50) pendant lamp at CB2?? It looks a lot like the shade you found but comes with the complete install package!!
YoungHouseLove says
Oh yeah that one’s awesome! It wouldn’t have been wide enough for our chandy (we needed something 24″ wide or more) but we had that fixture in our last house over our dining table and loved it.
xo,
s
Deborah says
Brilliant! as the English say. In this case—it really is brilliant :) Tres Chic as the French say. It’s gorgeous, and creative—the perfect match of old and new. The drum shade was an inspired choice.
Cathy says
What an amazing and clever transformation! Bravo!!
I think my mom’s house has a similarly eye-sore of a light fixture that is in desperate need of a transformation…this inspires me to try adding a shade rather than replacing the whole thing. Thanks!! :)
faith says
Hey, love the light fixture updates that you guys do…this one and all the others prior. I was just wondering if you have done any “how to” posts on the wiring part of switching out or unhooking and repainting existing fixtures? Maybe you have and I’ve missed it somewhere, but I would love to redo a light but the wiring intimidates me. =)
YoungHouseLove says
We haven’t yet, but I think there are some awesome videos on youtube for ya. We generally just undo whatever’s there and redo it (connecting the same things that were connected before.
xo,
s
Lauren says
YOU GUYS ARE AMAZING!
Paige says
This might be my favorite project yet!
vtgdonna says
I love what you did with the chandelier and drum shade…what is funny to me is that I found the same chandelier at a Habitat for Humanity ReStore and got it for…$1.50. Couldn’t pass that up but wasn’t sure of what I wanted to do with it-Now I know! Thanks!
YoungHouseLove says
Amazing deal, wow!
xo,
s
Anna says
I keep expecting to see that beautiful purple color from sue boldly painted in your guys’ house, because of the post where ya’ll posted the color palate and said you were going to try to be more adventurous with color. But I can see you guys have an affinity for the clean, light, cheerful look. I love the way your laundry room came out though I wish I could fly you to Oregon so you can do mine :). Thanks guys, I love your blog.
YoungHouseLove says
We would love to bring some plum in with accessories I think! But we do have that deep teal color on the back of the built-ins in the dining room and our entire guest bedroom! So I guess in our minds we have used some bold paint in a few places (along with the bright greeny-yellow in the laundry room and kitchen) but we don’t want every room to be super bright so it competes or feels too high-energy. We’re dabbling with bold touches I guess. Haha.
xo,
s
Marian says
You guys are kinda spooking me out. I have been painting and polishing brass all week too. I am going the candlestick route. I bought these great colonial three arm sconces will a big ball on the end and have been holding off trying to decide whether to go with chinese red or shiney shiney black. I even considered ORB, but it doesn’t work for my purposes. Oh well. So thanks for the encouragement with the “off the beaten path” color support. The chandalier looks great.
Hannah says
Where did you buy the drum shade? The store says they don’t stock anything bigger than 20″
YoungHouseLove says
We bought it at The Decorating Outlet here in Richmond. We linked to it in the post. If that’s who you called I’m not sure why they’d say that since they had two last week – unless that one sold too and they currently only have 20″ ones on the showroom floor. Hope it helps!
xo,
s
Rae Ann says
I re-did a chandy last spring. I really like how it looks with the new black paint and fun shades:
Let There Be Light!
YoungHouseLove says
So cute!
xo,
s
Stephanie Montecalvo says
i love this!!! the last picture would be such a cool photo in your office on the wall.
Angie DeWitt says
Have you been watching Mike Meyers’ ‘The Cat in the Hat’ recently? You made two movie line quotes in this post. I know because my 2 year old wants to watch it EVERY DAY lately. Intentional or no?
YoungHouseLove says
Hilarious! No. We haven’t seen it. But now I’m dying to know which quotes they were so I can tell John!
xo,
s
Angie DeWitt says
“Harumph” and “gumming up the works”. Watch it! It’s hilarious!! And the set is beautiful. Very apropos with some house DIY at the end :)
Becky says
I love this re-use of your chandelier! I was just looking through the new Shades of Light catalog the other day, and my two favorite lights looked a lot like yours (but a lot more expensive)! I can’t wait to try something similar very soon!
Elizabeth says
it’s funny that people asked about the chairs because they have been irking me! I knew you had something in the works!
laura says
okay, just wanted to say thanks, because i have this SAME LIGHT hanging over my dining room table, and JUST bought a huge drum shade at an antique store (its not antique, but it was only 4$!). and now i have the option of just adding the shade…THANKS!! i love more ideas. despise the light in the dining room now, but love a new idea!
laura
kristin says
Just wanted to say thank you for this! I made my own drum shade about 2 months ago and we have had such a hard time trying to hang it over our old chandi. One of my readers sent me over I’m pinning this and hopefully can have a new shade that is hanging soon.
Take care
Kristin
YoungHouseLove says
Aw you’re welcome! Good luck!
xo,
s
Erica says
I love the round bulbs on the chandelier! I have a similar chandelier in my dining room that I painted a yummy Oil Rubbed Bronze. I wonder how it would look with those awesome round bulbs instead of the other regular bulbs?
I need to fix my chandelier so it goes over the table in the dining room instead of hanging in the middle of the room- otherwise somebody taller than my 5’1″ self might hit their head on it! It is currently hanging in the middle of the dining room, but the table isn’t located in the middle of the dining room so that is my only drawback. :-(
tess says
you delightful two have inspired me to finally tackle a similar thrift store chandy i’ve had in my garage for a while now. i’m almost finished painting, but am noticing a wee problem. the paint isn’t sticking so great to the plastic rods that hold the light bulbs. it’s not spray paint made for plastic, after all. what to do? it seems to drip more down these little buggers. i tried wiping up the drips while still wet, and now i’m afraid i might have myself in a pickle. (and yep, i’m sure i didn’t do my coats light enough for the plastic parts, but the metal seems to be doing well). so crap! any suggestions? pretty pretty please? :)
YoungHouseLove says
Hmm, I think what I would do it try to slide those candle parts off (they usually side up and off) and sand them to get them smooth/drip-free and then spray them with something made for plastic with primer built in. Hopefully it comes in the same color or something neutral or complementary. Hope it helps!
xo,
s
Liz Stine says
So I am actually up to date on your blog, having just read your ‘day in the life of’ post. And after reading that post, I am actually hesitant to comment because you guys get sooo many! But, I couldn’t help thinking of you all with this post from Urban Grace. Do you know this lovely woman? She was just featured in the most recent issue of better homes and gardens. Here is a photo of a built-in desk from Elle Decor. The bulletin board is pretty vast!!!
http://blog.urbangrace.com/2010/greetings-from-the-random-corners-of-my-brain/
Enjoy…I really like her blog, as I really like yours too! Definitely a daily check of mine. :)
YoungHouseLove says
Of course! I love her blog and read it regularly. She has the best taste!
xo,
s
Molly says
Okay, we are going to attempt our very first DIY on Saturday: painting our nasty brass chandelier (yes, nasty brass) to look like the one in your old home (white + round bulbs). You can go to our blog to see the chandelier (i posted my “to do list” today) but really…aren’t all those chandeliers pretty much the same? I have never done ANYTHING DIY except that one time I made some throw pillows…they are really uneven and I have to put them on the bed just so in order to hide their ugly. So CLEARLY the best move is to now graduate to painting and reinstalling a lighting fixture, no? Anyway, I wrote down what we need: Rustoleum Ultra Cover Primer and Valspar Satin (in white) spray paints. But can you give me some advice on how many coats of both primer and the paint? I’m telling you, I’ve NEVER done ANYTHING myself before. This could get dangerous. Also, any advice on how long to let it dry?
I’ll let you know how it goes on Monday if, you know, I haven’t electrocuted myself before then.
PS after reading Monday’s post, I feel guilty making you answer my questions and take up so much of your time. Hope you know how much I appreciate it!
YoungHouseLove says
Oh you’ll do great! It’s an easy-ish project so just take your time and cross your fingers. Haha. As for how many coats you want, spray paint is best when misted on very very thinly. We’re talking about three or four very super thin coats of primer and then three or four super thin coats of paint. You always want to keep your hand moving when you spray and about 8-10 inches away from the chandelier (you are not looking for thick drippy coverage, you want to mist it – slowly building up coverage so after three coats of primer it’s all one color and after three coats of paint it’s finally all covered with paint too). As for drying time just follow the can on that. Good luck!
xo,
s
SG says
Hi there –
So you inspired us to paint our brass chandelier but we are having a serious drip problem – only on the big round ball part of it. We primed it and then painted. We didn’t get any drips with the primer, but once we started using the satin spray paint, we’ve been combatting drips. I’ve been reading through your comment responses to see if we could get any more tips, and I know you spell out the number of coats in your response to Molly, but I’m wondering if you could spell out a little more how to get the thin coverage all around the ball part without drips happening. We’ve tried mopping up the drips as they happen, but then as it dries, more drips form and it just doesn’t look as fabulous/finished as it seems like it could. Any tips would be so very apprecited –
Thanks!
YoungHouseLove says
Aw man, so sorry to hear that! Our best tips are just to apply super thin coats with your arm around 8-10 inches away and always moving. You want to mist it! Drips happen when too much wet paint piles up, so you’re probably applying too much at once and not misting it, waiting for that to fully dry, and misting it again. So I would recommend more drying time and less paint. Super thin and even is really they key. Here’s a post with a photo of just how thin each of our spray coats are: https://www.younghouselove.com/2011/10/office-chair-makeover-in-progress/
Hope it helps!
xo,
s
SG says
Thanks for the response and pointing me to that link about how thin the coats should be – I think you’re right about the drying time being part of our problem – we were spray painting on the sidewalk (no good work space for us in the city) and were keenly aware that we didn’t have much time.
Molly says
You’re the best. I would have totally gone drippy. THANKS!
Bridget says
I LOVE your home office! My boyfriend and I both work at home and this is a fabulous idea that I never thought of before! We are SO going to copy this!! Thanks!
Pasc says
I have a question. I know you have painted the floor of the sunroom in your last house but have you ever painted wood floors?
Let’s say the floor in your office was in a very bad shape and wanted to try and pain it, what color would you pick?
I have kind of the same colors in my office and want to try and paint the floors but I’m hesitating as to which color?
Thanks!
YoungHouseLove says
We haven’t painted wood floors but we’ve seen amazing ones on places like Pinterest! With stencils or checkers or stripes. I think I’d paint mine with subtle tone on tone stripes if they were in really bad shape. Maybe the colors in slate (light muddy gray-blue and medium muddy gray-blue)?
xo,
s
Molly says
Our light looks so much better AND we didn’t electrocute ourselves either!!!! Thanks SO much for your advice…I would have completely screwed it up without your advice.
http://www.consideringcampbell.com/2011/09/d-i-why-didnt-we-do-this-sooner.html
YoungHouseLove says
So pretty! I love it!
xo,
s
Bethanne says
Hi Sherry, Your chandelier looks amazing Would you mind telling be what the brand of those little round bulbs are i want them and have been on the Lowe’s website with no luck thank you!! bethanne
YoungHouseLove says
They’re Sylvania Double Life bulbs. You should be able to find ’em in the store even if they’re not on the website.
-John
SusanL says
Great post, thanks for the tutorial! Question for you: In my dining room I have a horrible shiny gold chandelier with a boxy glass frame around it circa the 70s. (Why, oh why do so many things in our 1948 home come from the 70s?!) I’m thinking of removing the glass frame and following this post to change the color and add a lampshade. Did you have a hard time getting the spray paint to adhere? I can’t tell how dull the finish on yours was to start, but my chandelier is a fairly shiny gold brass color. Do you think the paint would stick? Thanks again, you two are the bees knees!
YoungHouseLove says
As long as you use the spray primer (like KILZ) to help with adhesion it should work out well. Good luck!
xo,
s
Tiffany says
I love how you re-used what you already had. I was wondering what type of chandelier globe-style bulbs you used, such as type A, B, C, and so on? I know it’s probably on odd question but I’m looking for globe-style bulbs type B for my chandelier but didn’not find them at Home Depot or Lowes. Thank you for any info!
YoungHouseLove says
Hmm, we didn’t know the letter- we just brought the old bulbs to the home improvement store and held up the tips to see which ends matched (with round tops instead of flame ones).
xo,
s
Madison@TheSeidlerFamily says
Thought I would let you know I loved your transformed chandelier and I gave it a go myself on our dining room chandelier, entry chandelier and 2 sconces that we have in our dining room! They turned out even cooler than I expected, so thanks for the awesome idea!
http://www.theseidlerfamily.com/let-there-be-light-prettier-light-that-is
YoungHouseLove says
Wahoo! They look great!
xo,
s
Abby says
Hey all @ YHL! Just wanted to stop by and thank you for this wonderful chandelier revamp diy! My sister has a similar fixture that was in desperate need of updating and with the help of your tut and the tut from the Keylor Family (http://thekeylorfamily.blogspot.com/2010/06/i-want-that-drum-pendant-light-tutorial.html) I was able to make it into a fabulous drum shade chandelier! What do you all think?
http://www.facebook.com/photo.php?fbid=2656465897310&set=a.1356165270607.2051303.1425726992&type=1&theater
Thanks again, I found you on Pinterest, am lovin’ your blog and am checking back quite often! :)
YoungHouseLove says
Wow- it looks awesome! Thanks for sharing the link!
xo,
s
Terry W. says
This is so creative and do-able! Thanks for sharing!