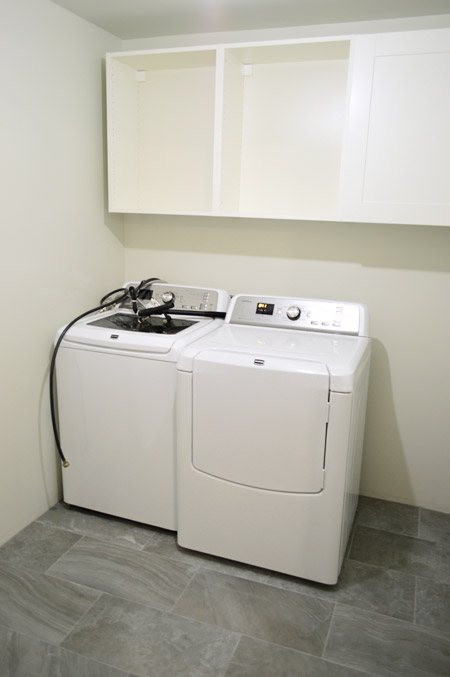
This post was shaping up to be a weird one (well, weirder than our baseline weird). We were simultaneously trying to hang Ikea cabinets in our laundry room and re-hook up the washer & dryer, but as of yesterday morning we were sort of stuck half-way through both projects and this was the best progress shot we thought we’d have for you today:
But thanks to some last minute pieces falling into place over the last 24 hours, we have working appliances that have been completely re-installed (picture Sherry dancing for no less than twenty minutes with an elated baby in her arms laughing at her) and doors on our all of our cabinets (more dancing – also singing). I’ll get into appliance installation details next week (getting the overflow drain and washer pan connected took some effort) but today is all about cabinets.
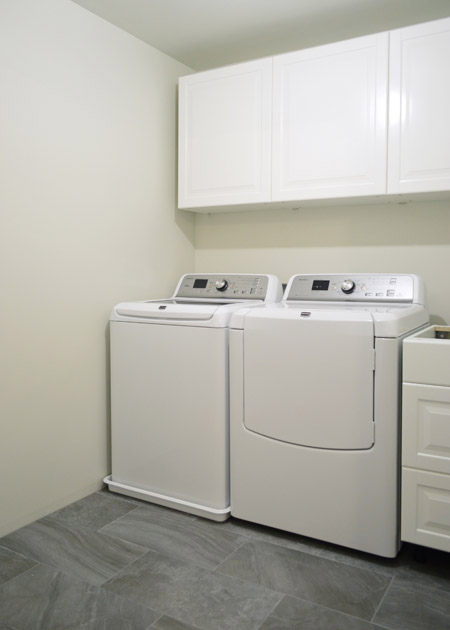
We’ve been wanting to take Ikea cabinets for a spin since we’re heavily considering them for our eventual kitchen remodel. We hear great things about them and pretty consistently see them popping up in high end homes thanks to magazines like Dwell, Domino, and House Beautiful, yet we’ve gone a bunch of other routes in the past. We’ve done the custom cabinet thing in our first house, and the second-hand / work-with-what-you’ve-got thing in our second house (we refinished our existing cabinets and added used ones from the Habitat ReStore). It’s funny that despite all of the Ikea in our life, we’ve never actually dabbled in their cabinetry. So the laundry room felt like a perfect lower-risk test space to learn the process and to help us determine if we want to go this route in the kitchen down the line.
We started by using their online Kitchen Planner to map out the space. We actually used it before to help envision our last kitchen, even though we weren’t purchasing their cabinets. In general it’s a pretty easy (and free!) online tool to play around with – although I did have to insert a dishwasher into my plan, since they don’t have a dryer option. Before long we had a plan and a shopping list that we could print out and bring to the store.
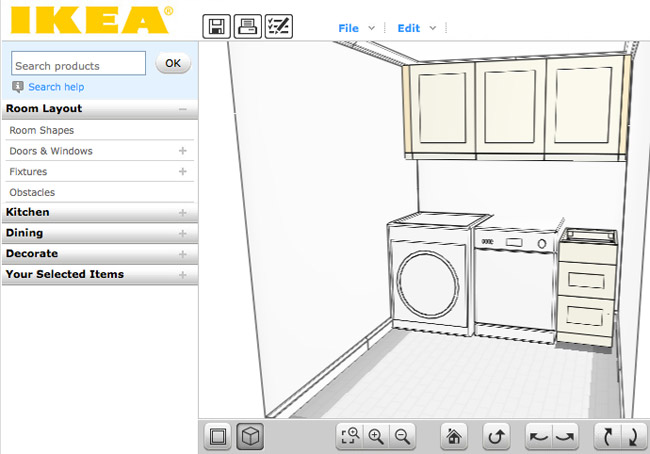
The above shot is the plan after the kitchen expert at Ikea helped us fine-tune things. I’m glad we arrived with an idea of what we wanted (it saved a ton of time!) but I’m also glad we consulted with one of their employees before our purchase (it saved some unnecessary purchases when she went through the list and explained that some things weren’t necessary for this type of installation). She also helped to point out some trim that we might want to add to hide our under cabinet lighting (last minute decision = under cabinet lighting, just to help us see & treat stains more easily).
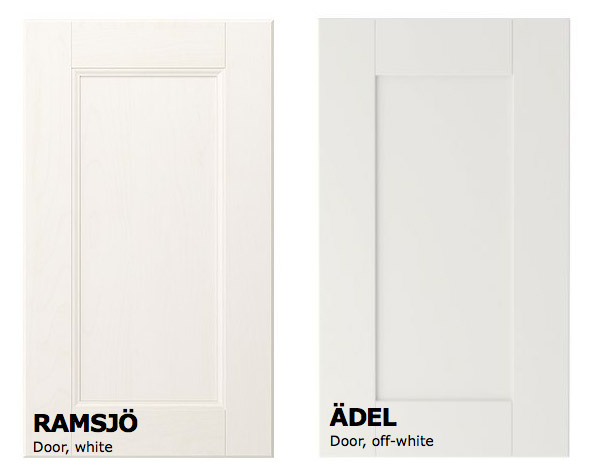
While we were there, we also made a change in our cabinet door decision. Online the Ramsjo looked closest to what we wanted, but in person it had more of a whitewashed wood look (with some pink undertones). The Adel, even though it was labeled “off-white” appeared to be a lot closer to the solid white look we wanted. It wasn’t perfectly white, but we’re used to Ikea stuff being ever so slightly creamy.
Everything was in stock, so about an hour (and 800-some-dollars) later we were packed up and back on the road. Which was a good thing since we were doing this on a Friday afternoon, which is pretty much the last time you should attempt traveling I-95 South near Ikea (we were doing a few other things in the area, so it definitely wouldn’t have been the time we’d pick if we were just hitting Ikea and returning home).
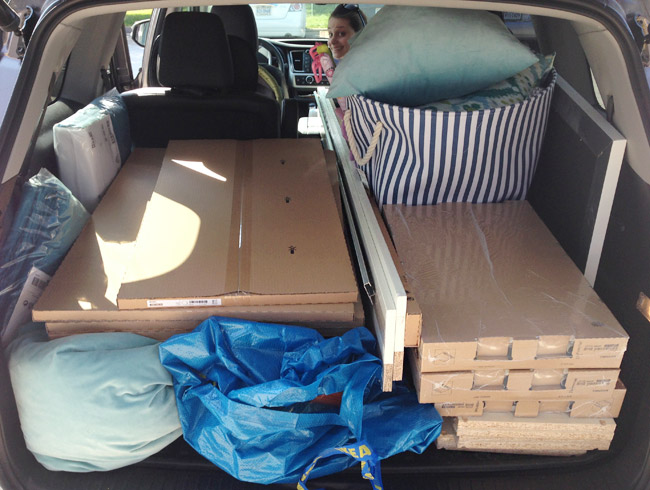
We gritted our teeth through the normal rush hour / summer Friday traffic. And just as we got through it… they closed the highway entirely because a truck spilled acid all over the road. Sooooo yeah. I trip that’s normally two hours took about three times that long.

Once we had them home, it was time to put them together, which we hear is the most dreaded part of an Ikea kitchen. It wasn’t so bad for us since we were only assembling three upper cabinets and one lower one. Plus, we did the three uppers assembly-line-style (not to be confused with Gangnam Style) so it went faster.
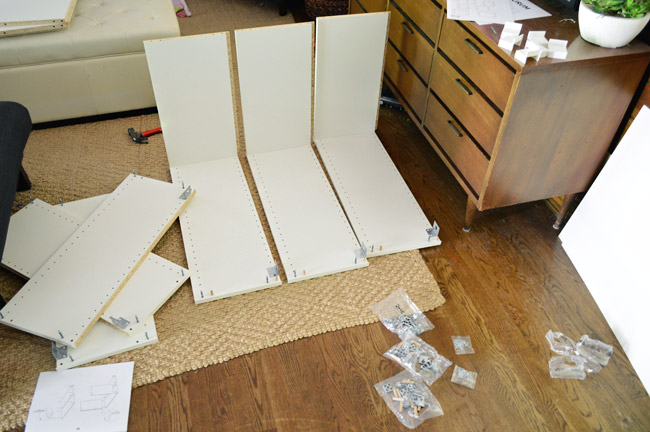
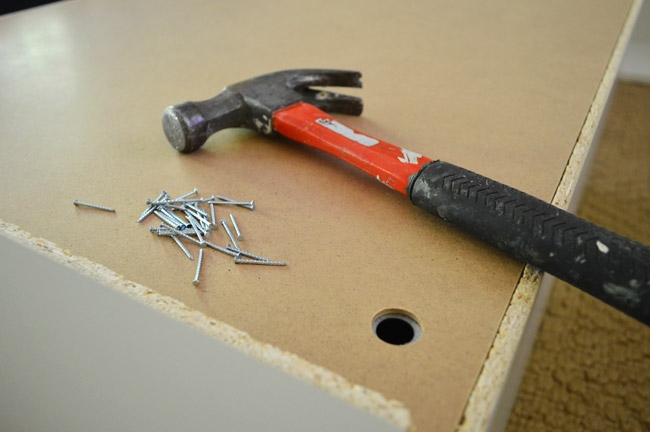
Actually, the most annoying part was nailing the panels on the back of each one, and that wasn’t even that bad (it just took a while since there were around 24 nails for each cabinet).
I have to say, we were both pretty impressed with the hanging system Ikea uses. In all of the Ikea kitchens we’ve seen online and in magazines, we never realized that the uppers aren’t screwed to the wall like traditional cabinets. Instead, they all hang from a metal rail that you install directly into the wall studs, which made hanging them ourselves (and keeping them aligned) a lot easier than other methods we’ve tried in the past.
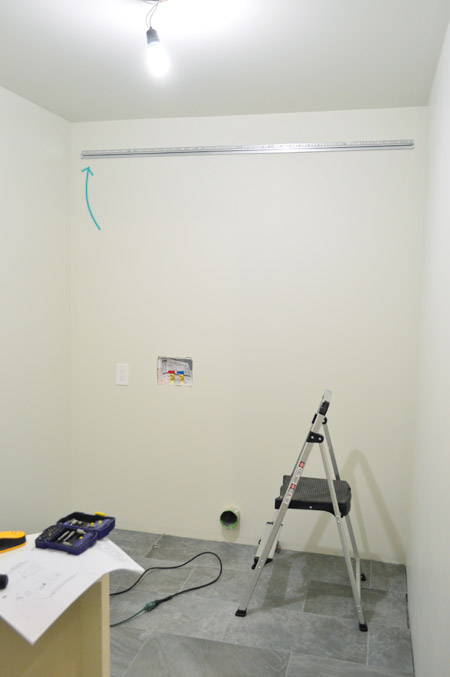
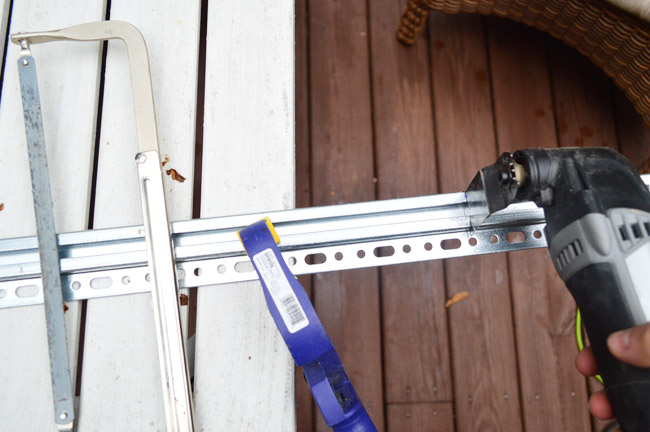
The metal hanging rail comes as one 80″ long piece, but we only needed ours wide enough for the three 24″ cabinets. The instructions suggested a hacksaw, but our Dremel made the job much faster.
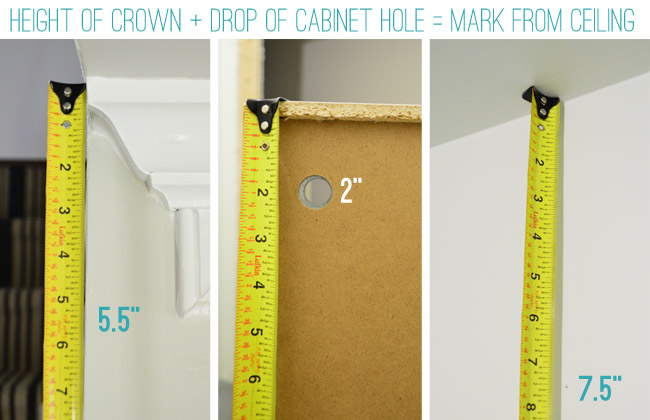
Determining how high to hang the rail took some planning. We’re going to finish off our cabinets with the same crown molding that matches the rest of the house, so we had to account for the height that would add, as well as the fact that the cabinets attach to the rail a few inches down from the top of the cabinet.
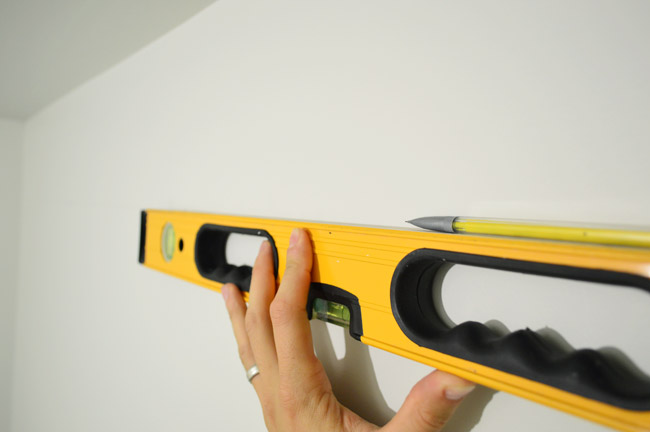
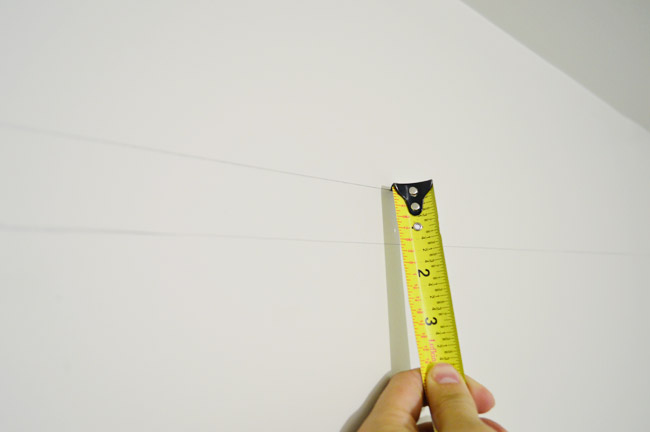
Once I had my mark (which I made in the center of that back wall) I drew a line across the rest of the wall with my level.
But I soon realized that the line I marked wasn’t very helpful since it would be impossible to see behind the solid metal strip that the cabinets hang from. So I noted how much higher I needed to mark the wall to give myself a more visible reference point.
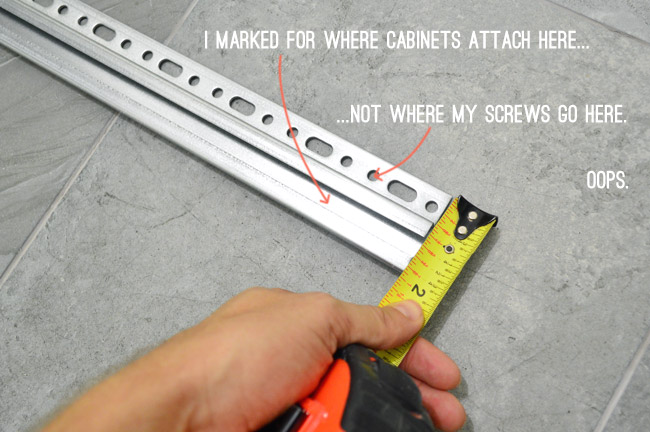
And so went the second line on my wall.
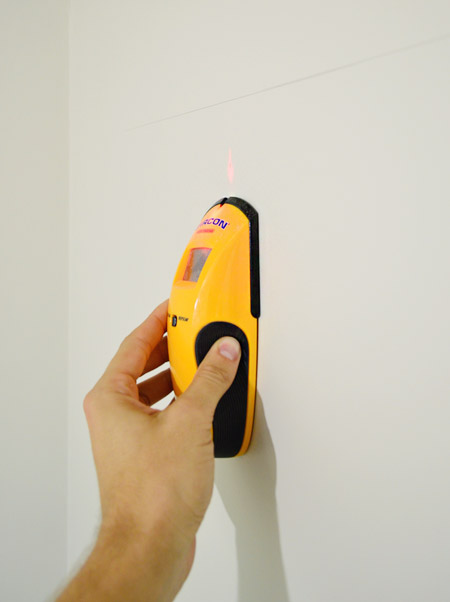
We also marked the studs so we were sure our screws would be going into something solid.
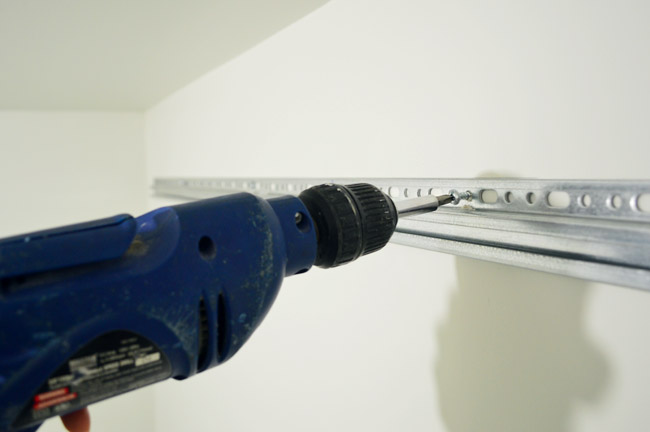
The wall is pretty flat (i.e. it doesn’t bow or dip anywhere) so we could just directly screw the metal rail into each of the studs. But according to the instructions, you might have to shim it if your wall is a little wavy.
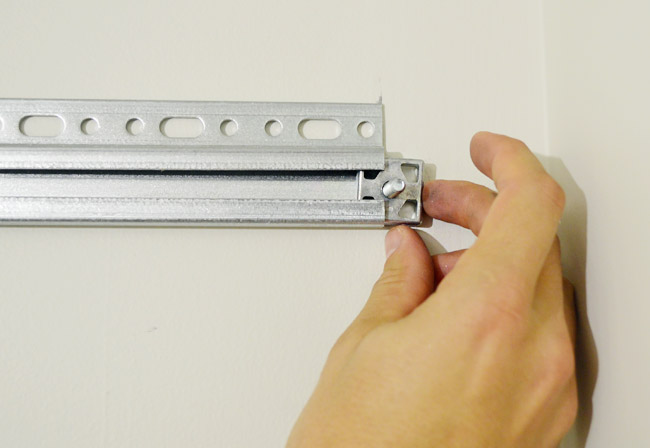
With the rail securely hung on the wall, we slid in the bolts that each cabinet frame would hang from.
The cabinet frames aren’t very heavy (at least without shelves or doors yet) so it was easy enough for one person to hoist them up and place them on the bolts (Sherry did one herself without any sweating or cursing). We secured them one at a time, so the first one to go up was that middle one, then I did the right one and Sherry did the left one.
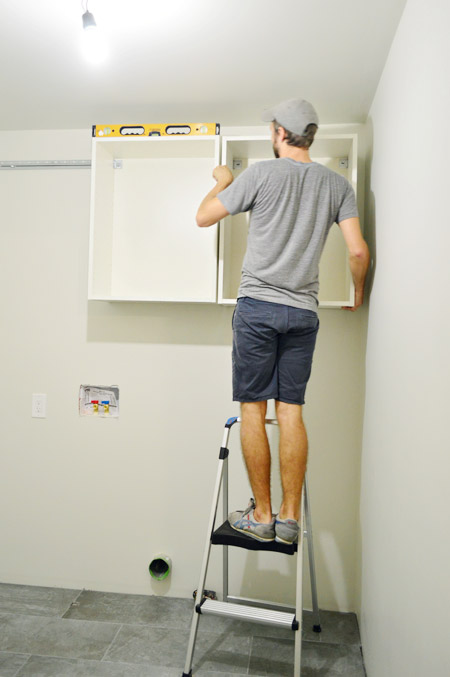
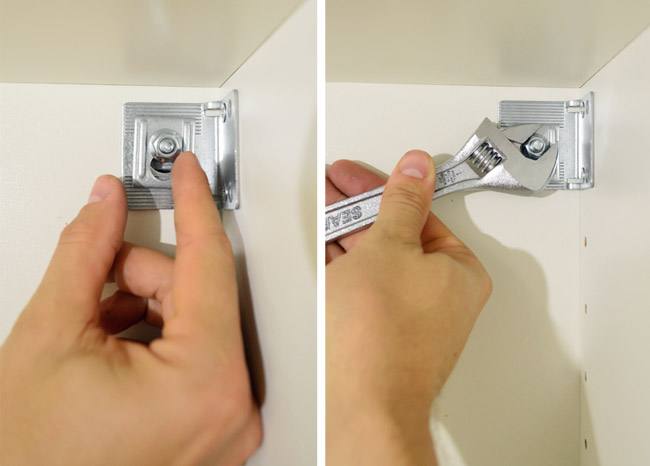
Once they’re resting on those two bolts, you add a metal clip and a nut – then tighten everything with a wrench. The clip allows you to adjust the placement slightly in case you need to level things a little. As you can see above, we rested a level on top to make sure each cabinet was straight as we went.
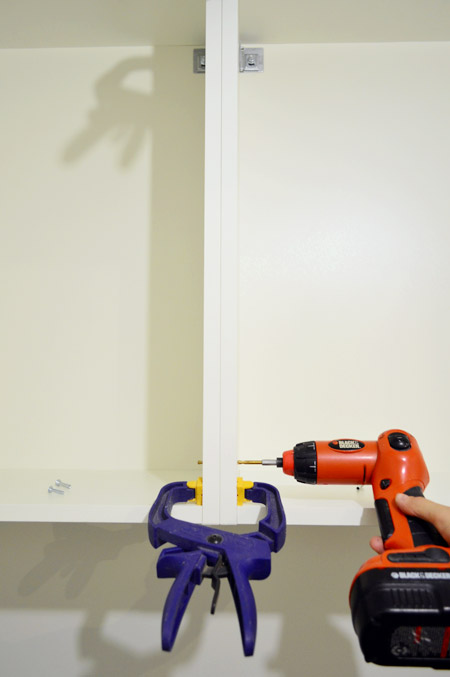
Once all three were up, we clamped them together at the edges so we could bolt all of them together to make one solid unit (this also eliminated any gaps between them). Once clamped, I drilled through one of the peg holes using a 3/16″ bit. NOTE: I realized afterwards that you should do the very bottom and very top hole, not the second one in – since those are used for the door hardware, but it was easy to correct – it just meant doing it twice.
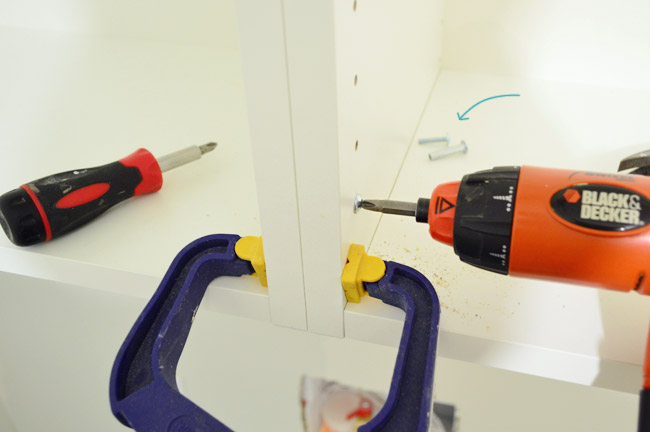
With a hole drilled through both cabinets, I used the supplied screws to make the connection tight.
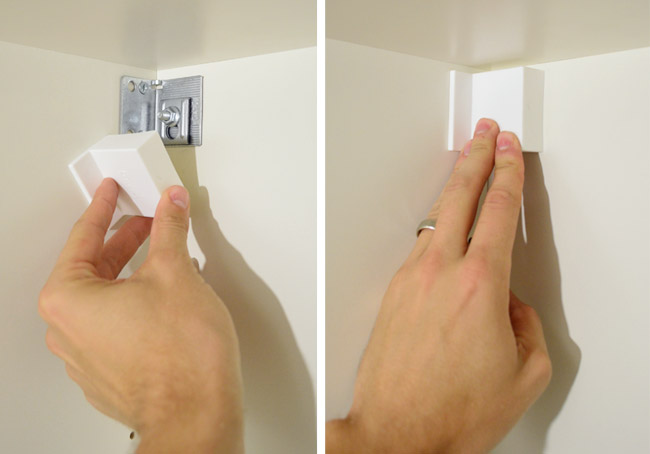
The final step was snapping on the white plastic caps to cover the hanging hardware on the back of the cabinet.
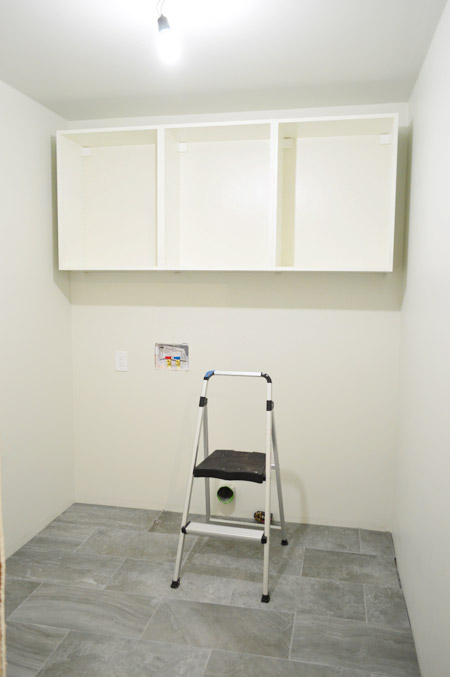
So here are our three uppers sitting pretty on the wall. Definitely an improvement when it comes to storage & function, but not super impressive looking since they still need some wood filler pieces on the sides and some crown on the top. Oh yeah and shelves and doors.
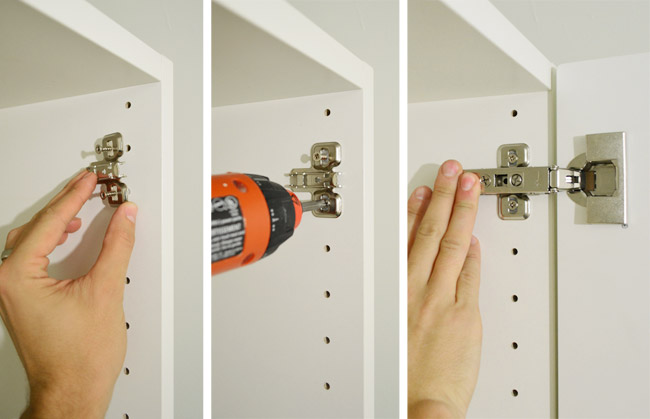
The doors were pretty easy to add, since the hardware that Ikea sells uses pressure to attach everything (there’s no drilling holes or anything). The various screws can help you adjust the placement, but our first one seemed to sit nicely against the frame without touching them at all.
What wasn’t so nice? The color. It’s harder to detect in photos than real life, but the Adel door front was looking a lot more cream than we hoped it would look (it’s a few shades darker than the other slightly cream Ikea furniture we have). It looked especially yellow next to a Simply White scrap piece of baseboard – which is what all of our home’s trim/baseboards/doors are painted.
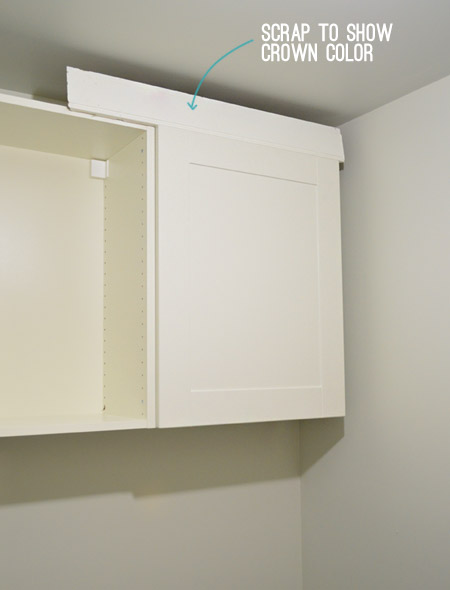
We didn’t expect it to match perfectly, but after some Googling (which we wish we’d done before our Ikea trip) we realized that Ikea sells a door style that people say matches Simply White almost perfectly (what are the odds, they actually shouted out our house’s exact trim/door color?!). Meanwhile the style we bought is said to match Benjamin Moore’s Paper Mache (which is notably less white). Oops. We sadly overlooked the Lidingo door style since the picture on Ikea’s website makes it look a lot darker/yellower, but here’s an example of how the matching paint swatches look SO DIFFERENT than the photos of the doors online:
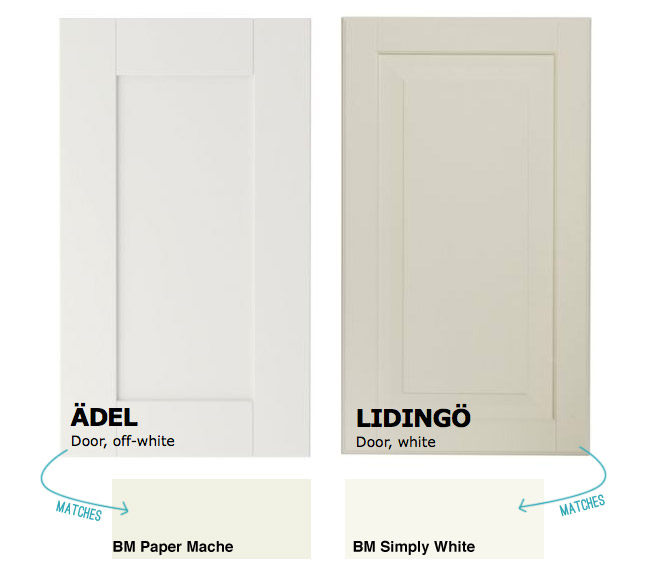
And while the Lidingo door style isn’t as clean-lined as the shaker style that we’re usually most attracted to, it definitely fits the style of our house and looks pretty great in other Ikea kitchens we’ve scoped online (we’ve always liked Dana’s over at HouseTweaking, so learning that she used them was definitely a selling point). But most selling of all was the fact that there was actually a door style that is said to match all of our house’s doors and trim. I know I’ve said what are the odds already, but really, what are the odds?!
So… we halted door installation and started planning a return trip to Ikea. Cue the eye twitch and flashbacks to highway closure traffic. But by some MIRACLE, it turns out my parents were visiting my sister and cousins in Northern Virginia on Tuesday and could swing by Ikea on their way home and get the new Lidingo doors for us. They are such an improvement over the Adels that we couldn’t wait to hang them last night after we got the kids to bed. We even tucked the base cabinet in there for kicks, although it still needs to be secured to the wall to be officially installed (along with needing trim pieces on the sides, hardware, a counter, and a toe kick).
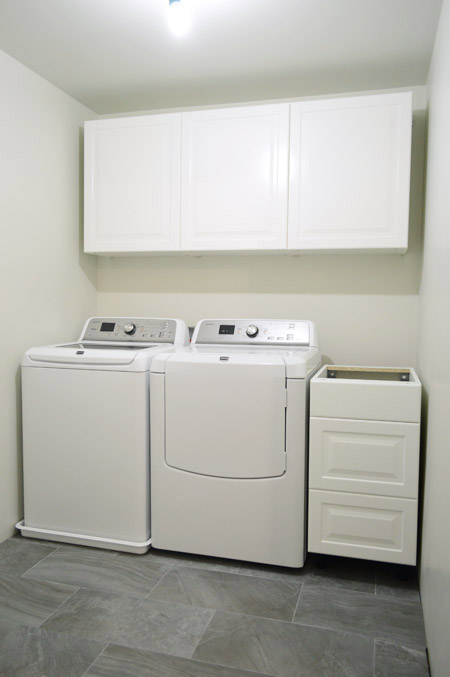
Actually, our to-do list is still pretty long in the cabinet department. But those little details are what makes it all come together, so we’re psyched to dive into them.
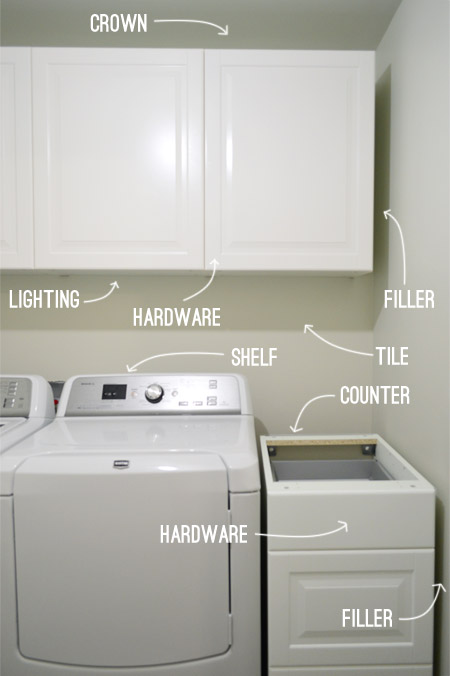
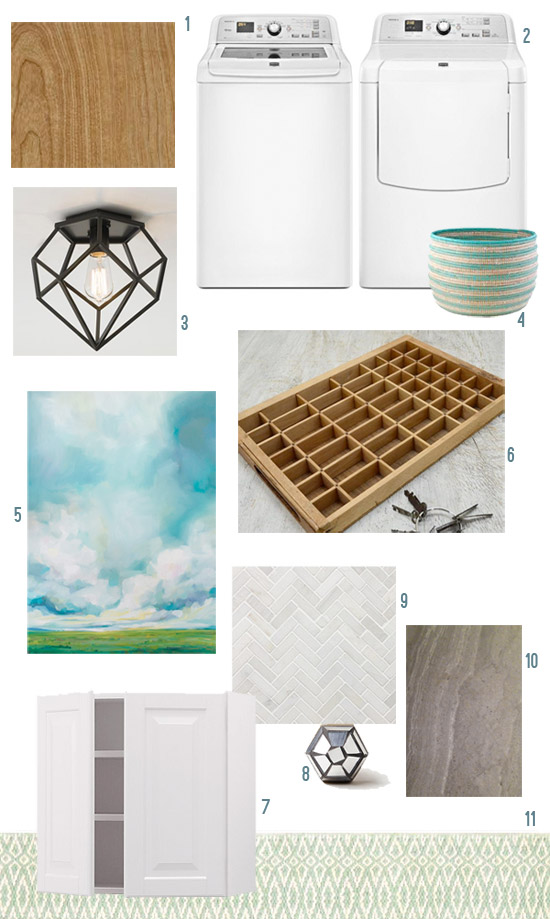
It’s definitely still more of a blank slate in here, so we’re especially excited to bring in some wood tones to break up all the white – in the form of a butcher block counter among a few other items (you can read about those plans here).
We still need to return the doors and drawer fronts in that first color (we only unboxed one), but we’ll be driving through that area again in a few weeks so it’s not too much of a pain to stop in and drop those off (he says while crossing all appendages that no unforeseen traffic issues arise). Also, here’s how I feel about being able to do laundry at home again:


Heather MacFeather says
Wow! I am so happy to hear you can do laundry at home again.
I bought a few IKEA cabinets recently and was really impressed by how easily they went together. I kept pausing to bow to the team that figured out how to make it that easy. Though I did run into the same problem when picking which holes to drill through to connect the cabinets together. The other one was leg placement two the toe kick can properly wrap around the sides when necessary.
To add further credit to IKEA kitchens, the cabinets in my kitchen came from a local outfit. Every single one is off by about 1-2 millimetres which makes the doors too wide and prone to rubbing. I to send a drawer back because it hardly closed.
I anticipate more great posts whether they are laundry related or not. Thanks for sharing.
H
YoungHouseLove says
Wow, it’s awesome to hear that about Ikea cabs!
xo
s
Kim says
I live 2 miles from the Ikea in Woodbridge, VA. Four hours to Richmond on a summer Friday isn’t so bad! lol
I really enjoy seeing how y’all plan and execute your renovations. I wish I had the time, inspiration and determination!
Denise says
I’ll be curious to see how convenient you find the cabinets hung where they are. We built 9 years ago and wanted cabinets as well. The kitchen designer didn’t allow for the depth of the washer/dryer which are on platforms (Whirlpool Duet) and she had the dimensions. Consequently I can barely reach the bottom shelf and have to bring in a stool for anything higher. If the cabinets had been brought forward OR if she specified bottom cabinets which are deeper, storage would be more convenient.
YoungHouseLove says
Since we have a top loader we didn’t want the lid to slam against the cabinet (it would have if we moved them forward). Thankfully they’re easy to access even for a shorty like me. We’ll have to share pics of us in there for scale ;)
xo
s
Audrey says
Hi! Where’d you get that snazzy washer pan? I have been looking for one of those. Thanks!!
YoungHouseLove says
Our plumber actually supplied it as part of his relocation fee, but maybe try Home Depot or an appliance shop near you?
xo
s
Kathleen says
Found out yesterday that Ikea now takes returns on any item – opened, assembled, etc. as long as you have a receipt (within a certain number days I’m sure). We are remodeling our bathroom and my husband bought the wrong vanity when he ventured to Ikea on his own, then I assembled it. The fact that it was the smaller version than the one he intended to buy was lost in translation. I called Ikea and they said they just changed their return policy and they took it back. Long story short, make sure you bring in the door that you already opened!
YoungHouseLove says
That’s awesome!
xo
s
Ali in Bon Air says
Dude, I hate I-95 driving in the summer. We went south on 95 a few weeks ago and spent 3 hours going less than 100 miles. Major bummer.
I think the cabinets look great…what a fab laundry room. I have thought about Ikea cabs in our next house and found out about a company that does handmade doors for Ikea cabinets, if you wanted to go a more custom route in your kitchen. You can do a google search and found other design blogs that have used them and liked them if you’re interested.
http://www.semihandmadedoors.com/products/shaker
YoungHouseLove says
So cool!
xo
s
LavandulaLady says
What about baseboards? Will you move the washer/dryer again when you add those? (assuming you will.)
YoungHouseLove says
Yes we’ll get those in soon!
xo
s
Annabode says
I went to the same Ikea that day (I assume you mean Woodbridge)! Traffic was unbelievable. Love the cabinets!
YoungHouseLove says
Yes! So bad!
xo
s
Jennifer says
Off topic but have you guys seen the two raps by these family. Musically, they seem like kindred spirits to you guys: http://www.today.com/parents/baby-got-class-viral-video-family-returns-back-school-song-1D80097346?cid=sm_t_main_1_20140821_30186556
Jennifer says
*this not these
YoungHouseLove says
So funny! We love them.
xo
s
Antonia says
Really jealous of the idea rail system. They don’t have that for the cabinets that they sell in Australia instead it’s just a bolt through each top corner into the wall.
Terry D. says
Speaking of laundry, in one of the show house laundry room pictures, there was a metal tin with laundry symbols on it. Do you remember where you got that little gem? I loved it and have been searching everywhere with no luck. So glad you opted to steal a little space and actually have a laundry room. You will be thrilled in the coming years and it is looking fab!
YoungHouseLove says
HomeGoods! So cute right?
xo
s
Angela says
Curious why you didn’t just paint and reuse the cabinets that were previously in the laundry nook. Can’t wait to see it all finished.
YoungHouseLove says
There weren’t enough of them so we thought reusing those in the garage for a workshop made more sense than trying to match them with others (they weren’t a standard size).
xo
s
Nicole @ Liberty Belles says
looks great. can’t wait to see it with all the finishing touches!
audra says
Love the cabinets! Did you go to Ikea this weekend? I ended up going to Baltimore on Saturday and noticed traffic on 95S at a stand still from Ashland all the way to Springfield! I kept on trying to convince my dad that the best place to stop while in traffic was at Ikea, but he didn’t go for it.
YoungHouseLove says
It was this past Friday! Baaaad timing.
xo
s
Megan says
You REALLY lucked out with the new doors matching your trim… I think it bears repeating AGAIN! :-) Seriously, I would’ve been on Cloud 9 as well. Now there is no stress with having to paint the originals or live with the annoying difference.
I have flat panel doors and am struggling with having them match our trim (which is pretty white-white) or painting them black. I’m afraid the white may make them look cheap (and they’re not, they’re solid core)… but will black be too harsh? This post heightened my indecision because I am not a fan of subtle differences – either match it or don’t! Ha!
YoungHouseLove says
I think black could be awesome! Maybe try checking out Pinterest or books/mags/Houzz for other spaces with black cabs to help you picture it?
xo
s
Megan says
Awe, thanks for your response! I meant black interior flat panel doors with white casing/baseboards… not cabinets! I have shaker cabs going from natural maple to revere pewter (w/black appliances… so black is already integrated in the decor a little!). And yes, have been stalking houzz nonstop, but it’s different when it’s in YOUR house. Feels drastic! Eeeek!
YoungHouseLove says
Oh yes!! Those sound gorgeous and I see dark doors a lot. So luxe.
xo
s
Sassafras says
Looks great…Now you’ve got me Jonesing to see the backsplash!!! How awesome to be able to do laundry at home again! wEE-HAAAAAAAAAAA!
LJ says
I couldn’t even finish reading this post the moment I saw the rubber washer hose I had to scroll do and post (I will go back and read though) Every plumber I have ever worked with says never ever use those, especially since your laundry room is on the second floor. Please get some of these so I can rest easy you won’t have a burst hose.
http://www.homedepot.com/p/GE-4-ft-Stainless-Steel-Universal-Washer-Hoses-2-Pack-PM14X10005DS/202049926
YoungHouseLove says
Thanks LJ! Maybe that’s the washer’s drain that you see? We have steel reinforced hoses. You’ll see a lot of those on Monday I think :)
xo
s
jordan says
love the progress of this room! any plans for teddy and LJ to meet soon?
YoungHouseLove says
We’d love that! Maybe later this fall when book craziness dies down!
xo
s
Reenie says
Looks great!!
Heidi S. says
Exciting! I’m curious to see how you are going to install the crown molding. I installed a similar layout at a friends house and I wished that I had nailed a nailer to the top of the cabinets before I installed them (since it is hard to add once they are in place).
Treana B says
We live in Colorado and were driving back from our wedding two weeks ago… the drive should have taken 2 hours and instead took 4.5. Several people missed their flights back home and so the day after we got married we had 5 FIVE 5 people staying at our house with us. SO ROMANTIC. I am sending all of the traffic god love I can muster your way.
YoungHouseLove says
Oh no!
xo
s
noel m says
I think everything looks great! Just curious, are you wishing now that you had gone with a front load washer so that you could have run counter the whole way? I know hindsight is 20-20 since you didn’t originally plan this relo!
YoungHouseLove says
We are weirdly in love with the top loader, so no regrets! We found when we had a big counter in our first house it got full of clutter and stuff. It was definitely nice for piles of laundry but we ended up folding those in our room most of the time anyway!
xo
s
Kate says
I’m in love with my top loader also after having the Maytag Neptune front loader. Therefore, it is NOT weird Sher! Ha!
Front loaders stink…literally.
xo K
Matt says
I have been following the Laundry Room Saga since the beginning and I am SO excited to see the finished product! Looks awesome so far. *Double Thumbs-Up emoji*
Megan says
We love our lidingo kitchen! The soft close and wipe-ability is awesome! glad to know about the paint match. we’ve struggled on finding that and happy to know about it!
YoungHouseLove says
Sounds awesome!
xo
s
Jan says
So nice and functional! But one question–no utility tub? I have one next to my washer, and it’s super handy for soaking things, filling buckets for floor mopping, drip-drying bathing suits (a wire shelf runs above it, so easy to hang hangers there). Of course, my laundry machines are on the ground floor. Our laundry/pantry/mudroom is 6×20 (it backs up to the garage), and was pretty empty when we moved in, so we added upper and lower cabinets and a counter along the same wall as the front-loader machines. So. Much. Storage :-D
YoungHouseLove says
We debated a sink for a while but knew it would have to be tiny and opted to skip it. Sounds so nice to have a big one though!
xo
s
Nicole says
We love our ikea kitchen! One additional thing we found out in the process was that you can use non-ikea cabinet fronts if you don’t find want your looking for- this opened a whole new world for us, We love the simplicity,cost, warranty/durability of the ikea system but wanted a more diverse selection pool for cabinet fronts…finding out you could put custom fronts on was a game changer!
YoungHouseLove says
Smart!
xo
s
Amy C. says
Lidingo FTW. Went through the exact same Lindigo/Adel drama with my kitchen reno. To my relief, Lindigo ended up looking a lot less formal than it did in the store, and the white really pops in sunlight. Love it!
Sarah @ Sarah's Daybook says
Yay! That looks awesome! Hahaha I love the Leslie Knope dance. Such a great show.
I have the exact same cabinets in my kitchen. They are amazing! Although the installers Ikea recommended sucked. They had to come out 3 times and they still don’t look perfect. Ugh.
I’m so excited to see what the finished product looks like! You guys are really knocking that to-do list out!
Sarah
Lee Ann says
These look great! This post is very timely; I’d love to use Ikea cabinets in a kitchen re-do. My concern regards the hanging system you showed above. Given the weight of dishes, glassware, canned items, etc., do you feel like the Ikea system would be sturdy enough for kitchen cabinets? Thanks.
YoungHouseLove says
Definitely! The rail is secured to studs with screws and then cabinets are screwed to the rail, so it’s just as sturdy as screwing cabinets into studs, just easier to hang them (and keep them aligned).
xo
s
Amy B. says
Laundry room is looking good, guys! Two questions for you guys: 1) why didn’t you install the tile first, then put the W/D back? and 2) did you guys ever discuss a utility sink in the laundry room instead of a set of drawers?
YoungHouseLove says
We did but opted to go sinkless. As for backsplash tile it’s usually one of the last things to go in (so it runs up against the counter and shelf above the washer and dryer perfectly, so those have to go in first, then the shelf and counter, then tile :)
xo
s
Matt says
We used Ikea cabinets for our family room bar and after it was done (and the soft close doors/drawers were hung, my wife instantly ask if we could do over our Kitchen cabinets. (The answer was.. let’s pay this room off first… maybe in 5-10 years). But we love it.
Which reminds me, so I have time to submit my Family room for the book? I forgot and was reminded by the Survey post.
YoungHouseLove says
Sadly we’re closed on those submissions, but maybe next book ;)
xo
s
Matt says
Booooo on me! I kept meaning too, but kept forgetting.
Here is what I would have sent you anyway, just to share.
https://www.flickr.com/photos/pecma/sets/72157642201779685/
YoungHouseLove says
Oh man so cool!!
xo
s
Mary says
Beautiful! Having a wonderful, functional laundry room is one of the best things ever. And yours is in the right place by the bedrooms.
I did my basement laundry room 2 years ago. I have the front loaders and wish that I would have elevated my cabinet that I also have on the right so the countertop is even and also pulled it away from the wall so that my fronts are closer to flush.
Can’t wait to see what you do for a drying rack because I’m still stuck on that one!
Wendy says
I have had IKEA in my kitchen for about 5 years, and we have had no issues. We have the Adel in the medium brown stain. We even did a wall of built-ins last year using other IDEA cabines (adding moulding and trim to remove the IKEA feel). We will soon do a bathroom and will probably have to go custom due to the bathroom size (so sad), but I highly recommend the IKEA – they have really been great (I have a 5 year old and dog….and we have no wear-and-tear).
YoungHouseLove says
So glad!
xo
s
Candy says
Oh, this is looking GREAT! And now you can do laundry again in your house hooray!!!!
We did our kitchen last summer with Ikea cabinets and love them. But yeah, nailing those backs on…what a pain. After just 1 I said to hubby there’s gotta be a better way – and there is! If you have a compressor (which we do), then buy an upholstery stapler attachment for it and staple the backs, easy peasy! (Now, we already had both – Hubby is very handy and we’ve installed lots of wood floors over the years, after using a rented NON-compressor floor nailer for the first one about 17 years ago, we bought a compressor for all sorts of projects. I have the upholstery nailer to help secure art quilts to stretcher bars, and it’s been awesome for the occasional upholstery project) Even if you had to rent everything for one day when doing all the cabinets for a big project I think it would be worth it.
Oh, Adel, how I love thee, how your creaminess has caused me stress! Before our reno last summer, I spent like 6 months googling and reading blog posts about Ikea kitchen installs, and especially Adel kitchens. I really wanted the shaker style door, and noticed that some folks while lots of folks used white subway tile with it (which is what I wanted to do) sometimes that tile realllly clashed with the Adel, so I was forwarned. Because we couldn’t spend very much money at all on the backsplash, custom ordered white subway tile to match the Adel was out for us. LONG story short, we found some grey limestone tile that was REALLY inexpensive at Lowes (after staring at their walls of tiles during MULTIPLE visits…our dream tiles were part of a larger, fancy schmancy install)
Here’s a blog post about the kitchen if you’re interested:
http://www.candiedfabrics.com/2013/08/05/kitchen-reno-allllllmost-done/
The different whites of the farmhouse sink, our old white appliances and the Adel white bother me a bit. We had wanted to stay with an all white kitchen, but now, when an appliance dies, I’ll be replacing it with stainless. The different whites aren’t that bad, but I know a non-matching white subway tile would have sent me over the edge!
Phew! THat was a long way to say “I feel your pain with the Adel, and how awesome that Lindigo matches your white AND the style of your house!!!! Enjoy doing laundry in your PJs! :-)
YoungHouseLove says
Aw thanks Candy!
xo
s
Jodie says
I just finished my second ikea kitchen- this one being a bigger kitchen and our hopefully forever kitchen. Once again, ikea has exceeded out expectations. While its tedious, it was worth it for the decrease is price and the modern look we wanted. I highly suggest looking into Semi- handmade, it is a company that makes higher end fronts for ikea cabinets. So it was still cheaper than custom, but our fronts were custom (which is the only part we really care about). It turned out amazing :)
YoungHouseLove says
Sounds amazing!
xo
s
Amy says
Are you not having a sink/laundry tub? Loving the room.
YoungHouseLove says
We thought about it but opted to go sinkless.
xo
s
Jana says
I know you said appliance installation details are coming next week but do you mind me asking where you found a washer pan? Moving into a new house next week with a 2nd floor laundry room and we wanted to buy an appliance pan when we bought the new washer but the store didn’t carry them and didn’t have any suggestions on where to buy them. Thanks!
YoungHouseLove says
That was provided by the plumber who moved our water line as part of his fee but maybe try Home Depot or a local appliance shop?
xo
s
Sherri with an 'i' says
This looks so good! I can’t wait to see the finished product!
I have one question for you: I’m getting ready to paint some dark living room built-ins with BM’s Simply White. I know you used semi-gloss on your kitchen cabinets, but can’t find a reference to whether you used a water-based paint or an oil-based.
Water-based would be easier, but I’ve heard that the finish isn’t nearly as hard or durable as oil-based and can actually peel off, so that has me a little freaked.
Can you tell me what you used?
Thanks so much!
YoungHouseLove says
Alkyd is the way to go! We love Ben Moore’s Advance paint.
xo
s
Aleah L. says
I love how this room is coming along! Great work!
Lynne says
You must be so excited to be able to do laundry again!
Friends of mine have IKEA kitchen cabinets, I think the Adel ones you tried first. They bought them in two batches, and the older ones (probably 10 years old at least) are starting to show some wear. Of course, they did get taken down and stored in a basement during a kitchen expansion, so they probably would be in better shape if they’d been left on the walls the whole time. Still, I read so much about how great IKEA cabinets are, and these haven’t lived up to the hype.
That hanging bar is genious. Those Swedes are so clever. Hanging custom cabinets with my dad was probably the toughest dyi job I’ve helped him with – worse even than building a two story porch!
Mary Anne says
Looking good! When we had our house built four years ago, we went with IKEA cabinets throughout. We saved a ton of money by doing the cabinet assembly ourselves, and then having the contractor do the install. We have IKEA in the large kitchen, laundry room, my studio, and both bathrooms.
Random thoughts:
Note that twice a year IKEA has a 20% off on all kitchen items, including appliances. I think the sales are in August and February.
We live about 2.5 hours away from our *local* IKEA. If I remember correctly, they charged somewhere between $150 and $300 to deliver ALL the large cabinet pieces (I brought home as much of the small parts as I could stuff in my Subaru wagon). At the time, IKEA charged something like $1.00 for each item (no matter the size) for delivery plus some kind of mileage cost. This may have changed since 2010 or might be different in your area.
If you DO decide to use IKEA in your kitchen or other parts of your house, I would highly recommend getting a small *finishing* nail gun to use on the cabinet backs. They are about 1/4 or 1/3 the size of a regular nail gun. Saves a TON of time.
YoungHouseLove says
Smart!
xo
s
Stacey says
You’ve been without washer and dryer for a while now! – are you cloth diapering Teddy yet? If so, how in the world did you manage diaper laundry?!
YoungHouseLove says
We went back to disposables during the reno so it’s exciting to have them back!
xo
s
leatitia says
my laundry ‘room’ is in the basement and I have ZERO storage there. This post gives me courage to buy IKEA cabinets and install them myself. Looks pretty straightforward! Thank you for all the details info.
Steph Reiner says
We’re 4 months into using our Ikea kitchen cabinets and I love them! Tips for the future if you do a full Ikea kitchen: buy an air pressure gun and staple the the backing on the cabinets. My husband is a contractor and he didn’t like the idea of nailing a million tiny nails into the backs of the cabinets so he came up with the staple idea. The plus side is it actually seems to hold the backing on better! Plus he was done in like 1/100th of the time.
We also did Adel and ran into that problem when we halfway installed bright white subway tile backsplash and realized the cabinets were noticeably off-white. *face palm* Luckily, Home Depot carried a creamier looking subway tile that was half the price so we actually saved $40 by returning the leftover too-white stuff and redoing it with the creamier tile, even though we had already tiled one wall. (Which meant ripping off the tile, cutting out drywall and reprepping the whole thing for a new tile job, so even factoring in new drywall, mud, texture, paint, etc.) And it still looks white since there’s nothing bright white that’s giving it away.
Anyway, loving the progress! Although it does bother my OCD a little bit to not see the drawers in between the washer and dryer… ;)
YoungHouseLove says
Great tips!!
xo
s
Michelle says
I work for a GC and we do 5 Star Hotels and when we were redoing our kitchen all of my boss’s talked major smack on Ikea and their cabinets until they helped install them and saw what a breeze it was. The hanging system for the uppers is great…we were a little worried about their legs for the bottom cabinets but so far so good.
Also, not sure if you have purchased your under cabinet lighting but we used http://inspiredled.com/ who designed it for us, drew up plans for SUPER cheap.
YoungHouseLove says
Thanks for the tip! We grabbed some from Ikea but haven’t tried them yet.
xo
s
Anne S says
Since you have the base cabinet next to the dryer, are you electing to forego a washtub/sink in the new space? Or maybe I missed a post discussing that? Nonetheless, looks great so far!
YoungHouseLove says
Yes it would have been so small we opted to go without it.
xo
s
Stacy says
Not sure if you know about this, but there’s a company called Semihandmade (www.semihandmadedoors.com) that makes custom doors specifically for IKEA cabinets – in a ton of wood finishes, or completely unfinished if you want to paint them yourselves. Faith from The Kitchn used them for her kitchen remodel, and I’m strongly considering doing the same for mine.
Not that this is something that would be really necessary for a space with this few cabinets, but if you’re considering IKEA for your kitchen down the line, it’s worth a look if you wanted, say, that shaker door in a color other than IKEA’s odd white.
YoungHouseLove says
Someone else told me that too! So good to know. Really smart business I think!
xo
s
Jenny V says
We just bought our 1st home; the kitchen needed a full gut and I knew I wanted the Ikea Lidingo kitchen. I love my kitchen! it’s paired with a quartz counter, purchased through Ikea, and great hardware (Martha Stewart finial pulls from HD). Best part was that the I bought the kitchen cabinets/fronts/counter during the 20% sale so all my materials were only $5500! Even with labor I was under $10k yet my kitchen looks much more expensive. Love love love love my ikea kitchen
YoungHouseLove says
That’s amazing!
xo
s
Linda M. says
It looks great! Cannot wait to see the finished laundry room :) . A burning question here from my house is can you please tell me the brand/model/whatever of your Washer pan thingy? We have one but it’s much bigger and quite unsightly. If I have to have one I want it to look like yours!
YoungHouseLove says
I wish I knew! It was just a generic white pan the plumber provided when he moved the drain line as part of his fee. Maybe try Home Depot or a local appliance or plumbing shop?
xo
s
katalina says
I think this beautiful space needs a chandelier out of something–clothespins or something sparkly!!!