I was lying in bed thinking about what random lessons we’ve learned in over nearly seven years of homeownership and DIY, and I realized it might make a good post. Shoulda woulda coulda – ya know? Here’s what I came up with (which is by no means all-inclusive, but hopefully will help someone else out there who’s just learning as they go like we’re apt to do). Who’s ready for number one? Ok, since I can’t actually hear you guys (but clearly you’re all screaming “we are!”), I’ll continue.
1. It’s not always best to blindly follow one sentence tips in home improvement magazines without knowing if they’ll work for your system/house. For example, we read somewhere that shoving a piece of insulation up your not-in-use chimney was a great way to save energy since you won’t be losing heat or cool air through the chimney. So we did it, just shoved in some insulation (warning: if you are eating or afraid of bugs, don’t read this tip).
A few weeks later after a lot of rain while John was away on a business trip I was walking into the kitchen, past the fireplace without my contacts in. And I saw what could best be described as a bunch of white pieces of rice on the floor. So I knelt down to look a little closer and they were… maggots. Crawling out of the fireplace.
Probably fifty or more of them. Thankfully I’m not too squeamish (although I did take a moment to resent John for missing this debacle entirely by being gone on business) so I used a paper towel to gather them all up and fling them outside. Then I shined a light up the chimney only to realize that somehow the chimney cap must have leaked and the moist insulation was the perfect place for a fly to lay her eggs, which had hatched and were now in their larvae stage.
How did I know they were flies? Because apparently I missed a few of them and a few days later flies were all over the house. Thankfully I could solve the problem by removing that nasty piece of insulation, resolving to get the chimney cap looked at (we later resealed it with some silicone caulk) and reminding myself that perhaps every one-sentence tip in a magazine isn’t a blanket this-is-definitely-best-for-your-house rule.
2. Don’t decorate around a stump. Just pay to get it ground instead of sinking money into trying to make it look like a pretty planter. Although I’m sure some folks could totally pull it off, we couldn’t. We thought we could, so we attempted to make a little octagonal planting bed with some wood on top of the stump but it always looked like a tree stump in the corner of our driveway with a weird wood planting bed on it. So when we later decided to get our pebble driveway paved for our backyard wedding, we jumped at the chance to finally get that stump ground once and for all so we could reclaim that corner of the driveway and no longer look at our mutton-dressed-as-lamb stump.
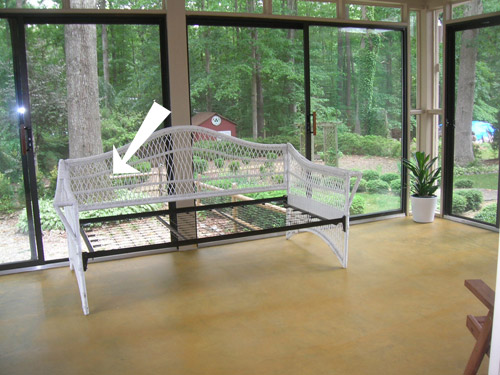
Note: here’s where I’d put a picture of the hideous octagonal planter that we built on top of our giant 3′ wide stump, but the thing was so ugly we never snapped a picture. But you can see the tree that we had to remove (it was dead when we bought the house) which left the stump in the background of this picture of the sunroom:
I think this is probably a wider concept, actually. For example, if you have an ugly obstacle (gross wallpaper you haven’t gotten around to removing), don’t try to pick art, drapes, and accessories in that color palette to try to make the ugly thing work if you don’t even like said ugly thing. If at all possible, just save up money (or wait to have some spare time) and remove it if you can. Then you can spend money and energy towards creating a room/feature that you love instead of spending money and sweat to try to disguise something that makes you twitch whenever you see it.
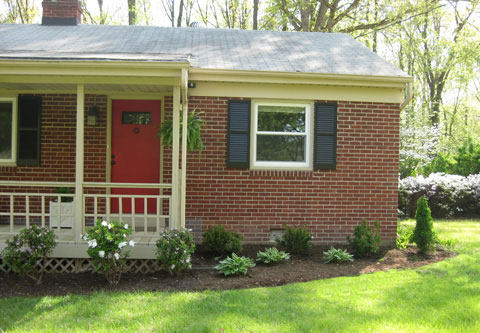
3. Plant things a safe distance from your house’s foundation. Some things we dug in at first were borderline too close, so we learned that even though planting a dwarf tree four feet from the house feels oddly far, from the street it looks just fine and it’s much better for the foundation (and the tree itself since it gets more sun and rain than it would if it was half-tucked under the eave of the house).
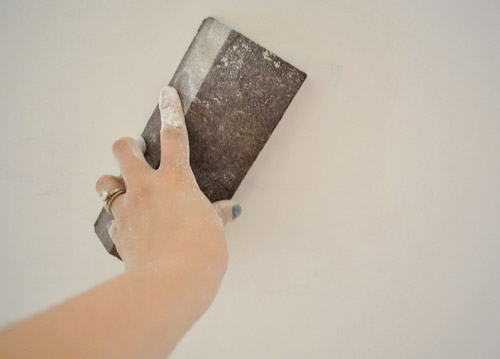
4. Spackle and drywall mud need to be smooth before you prime or paint. Primer and paint actually will enhance any irregularities, so they won’t hide any sins at all. And once those things are painted if they’re not smooth, you can no longer just easily sand them to make them smooth (paint is really hard to sand and get the same smooth look as caulk or putty or drywall mud before the paint is applied).
So when in doubt, we like to spackle and sand and spackle and sand – at least two rounds just to make sure we fill everything in that needs to be flush and sand everything down that needs to be smooth. The instinct is to hurry up and get done as quickly as possible, so you really have to fight yourself to make sure you sand things well so they’re nice and smooth (in the end it’ll save you lots of time since going back and trying to fix things after they’re painted over is a royal pain in the behind).
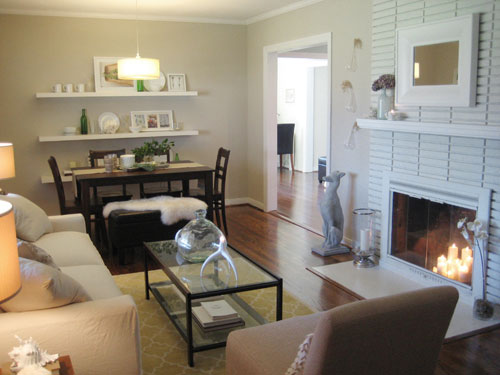
5. Your first idea isn’t always your best idea. Take our first house’s kitchen for example. For a while we were planning to just get new cabinets and put them in the same configuration as the old ones. But after a while of thinking and rethinking and brainstorming we came up with removing the door to the old dining room, making that a third bedroom (it already had a closet), moving the dining area off of another kitchen doorway in our extra-long-never-used living room, and making a completely functional and much more beautiful u-shaped kitchen instead of the old i-shaped counter that used to be there (we gained at least three times the storage and counter surface along with making our house more valuable since we added a bedroom).
Similarly, in our current house we initially wanted to add an island to the kitchen. And then we considered a banquet.
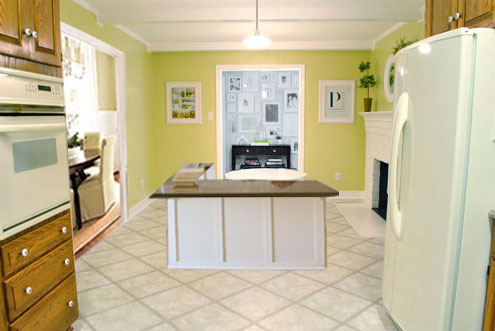
It took us a while to get to the peninsula idea, which we definitely think was the right way to go.
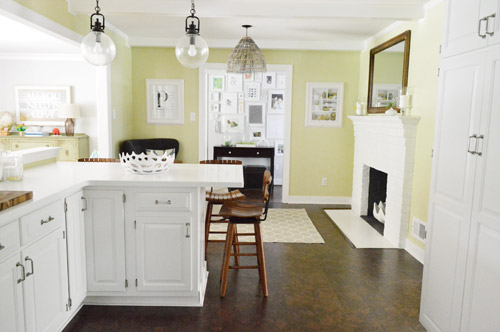
So try not to rush into anything major without really thinking and rethinking everything. We find that living in a house for a while to get a feel for it can give you major layout-change and floor-plan ideas that you never could have come up with if you renovated off the bat.
And there you have it. Five things we learned the hard way. Well, I guess the last one wasn’t something we learned the hard way because we rethought things enough to narrowly miss creating a similarly small and cramped kitchen in our first house and a room with an oddly placed island or banquette in our current house. But it’s still definitely a lesson we learned along the way. What have you guys learned the hard way? Share and share alike.
Update – Wanna know where we got something in our house or what paint colors we used? Just click on this button:


Jenna says
#2 is something I need to listen to. There is a hideous backsplash in our kitchen (and counters) that we wont be able to replace for at least a year and I’m trying to figure out what to paint the room to make it fade into the background a little more but I can’t find a paint color I like! Although, the tip in your book about putting beadboard over it temporarily might be a cheap and easy solution for now :) Then I just have to live with the counters..
Sally says
Ha! I thought #2 WAS a metaphor until I read further.
Question – do you hand sand after spackling? Or does that just make a better photo than the electric sander?
YoungHouseLove says
Oh yes, I do both, depending what’s closer – haha!
xo
s
Aurelie says
Thanks for keepin’ in real, as always. We had our own maggot incident 2 summer ago. I was 6 weeks post partum so clearly in a haze, but I do recall having to boil countless pots of water, lug them downstairs to my husband, who painstakingly poured bucket after bucket on those suckers (who were luckily outside – works like a charm but perhaps not so easy to pull of inside). Note to self: don’t leave the compost bin partially open in the dead of summer. A few weeks later when I looked at my google search history it was like “foods to avoid while breast feeding”, “when to introduce a pacifier” and “how to kill maggots”. It really just encapsulated the insane newborn period for us! Looking forward to seeing you guys in the Seattle area!!
mp says
Holla on the chimney! I had a cap put on my bedroom fireplace when it was cleaned in 2008 (freeze-dried squirrel inside), but still get cold air. However, I’ve read enough horror stories about the various problems with sealing chimneys that I decided to just deal with the chill.
Melissa Harrell says
Love this. And impressed at your maggot handling. :)
Maranda says
We started out with every intention of doing perfect prep work on the walls but finally gave in to “thats good enough”—it wasn’t. Now I hatehatehate several spots on my walls. Particularly a large poorly spackled hole in the guest bath left by the previous homeowners. Unfortunately we have textured walls. Any advice on how to fix imperfections that will still allow them to blend in when painted?
YoungHouseLove says
Anyone have tips on that for Maranda? We’ve never tackled that.
xo
s
LadyCiani says
The key to fixing textured walls is spray texture in a can. And buy the float thingy that looks like a squeegee with a foam blade.
It kind of looks like cheese-in-a-can. The cans have dials on the nozzles to give you bigger spatters (for heavy knockdown) and smaller spatters. The home stores have these sample chips hanging next to the cans. They’ll be labeled with things like “orange peel” or “knockdown” or “heavy knockdown.” Pick the chip that best matches the texture on your walls, and buy the appropriate can.
The process is not hard at all. First do your taping/patching/spackling, then let the area dry and sand it smooth. Then prime your repair area and let it dry before you apply the first coat of spray texture.
When you spray the wall make sure you cover an area much bigger than the actual repair (this helps it blend in to the rest of the wall, kind of like when you feather paint around a repair).
After you spray a coat of texture you want to set a timer for about 10 minutes and let it set up (it dries slightly and excess water evaporates), then take your float thingy, hold it so the foam is almost flat to the wall, and drag it lightly across the wet spatters. You’re not trying to scrape them off the wall, just flatten them. Then let it all dry completely, and then prime and repeat.
Expect to do at least 2 layers of spray texture, and you get best results if you prime before and after each layer. So your steps will be: 1) tape/patch/spackle/sand, 2) prime, 3) spray texture, 4) wait 10 minutes and then flatten texture, 5) prime, 6) spray texture, 7) wait 10 minutes and flatten texture, 8) prime. Then check your texture and you’re probably good for real paint.
Big tip: Before you spray texture on the walls, take your can of spray texture outside and try changing the dial settings and spraying it out on some big sheets of cardboard. This will get you used to how it sprays, and helps you figure out your pattern for coverage. Do big arcs and keep moving, just like using spray paint.
Nichole says
long time reader, first time commenter. i was inspired by all your diy and had my husband build me a farmhouse table! i bought some tolix style chairs to go with it but now that i have them, my husband wants to go another direction. i’m trying to sell them on ebay and was hoping someone might read the comments and be interested in purchasing them.
http://www.ebay.com/itm/271119913388?ssPageName=STRK:MESELX:IT&_trksid=p3984.m1555.l2649#shId
YoungHouseLove says
Good luck Nichole! Hope someone snatches them up!
xo
s
KerryQ says
Our house is O.L.D. Like 1780. With a splash of 1970 thrown in. Our house laughs at your list. What if that ugly wallpaper is actually holding up the walls. Or how about the living room being 35 degrees. Or slates that were tarred on to the roof. Or 3,000 sq. ft. and 2 closets. It’s been 11years, and 3 kids. We’ve thought about throwing in the towel, especially after a lead scare, but we are slowly chipping away at our ridiculous to-do list.
Kathleen says
#4 made me think of the debacle of painting our dining room. I had a friend come over to help and we were painting a deep plum that looked like blood when wet. So of course we started writing creepy messages to each other on the wall with the paint…. No matter how many coats we put over it you could still see our words underneath. We eventually hand-sanded most of the wall and covered up the rest with a painting… haha
-Kathleen
YoungHouseLove says
Oh my gosh! No way!
xo
s
Nam Khoa says
I spend too much money on unnecessary things, thanks for your advice I realized it
Sara R says
Thank you for posting this! I have been reading your blog since the beginning and tip #1 was the most helpful thing I have come accross. Just today my husband mentioned putting some insulation in our fireplace and I immediately said that he had to read this. Just the word maggot freaked us both out, so I will be forever thankful for stopping a potential horrible holiday season with this great warning! Keep up the good work, hope to see you in Cali!
Sarah says
I am getting so many good tips from you guys. My husband, baby, and I just moved to North Carolina and bought our first house here. We have a colonel-style house too. Coming from the west coast, things like crawl space was a new concept for us. Thanks for sharing all your helpful ideas. I am definitely going to be using this blog as a reference as we improve our own house.