A newly tiled floor in a new room of the house is almost enough to give me jazz hands (a York peppermint patty is enough to give Sherry jazz hands, so clearly we have different thresholds).
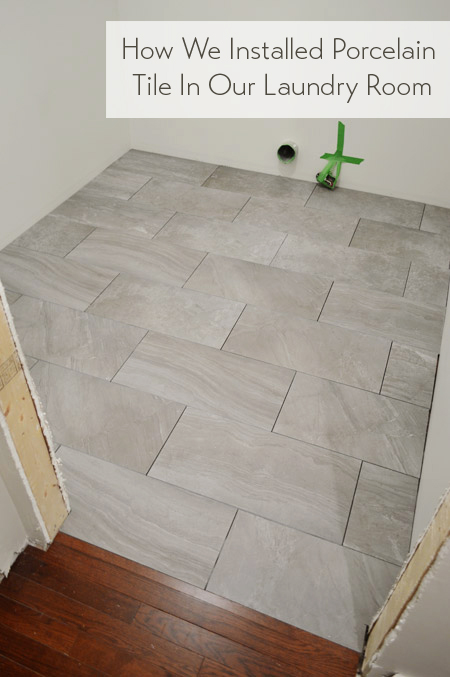
We’re completely enamored with this floor – and there’s a budding romance that involves a saw – so let’s cover the laundry room tile installation, from floor prep to grouting & sealing.
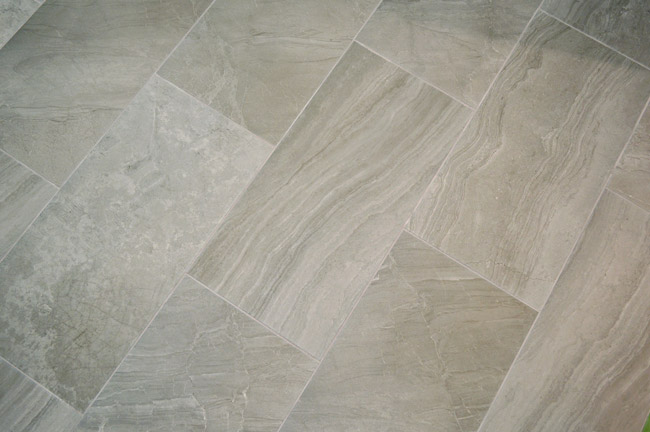
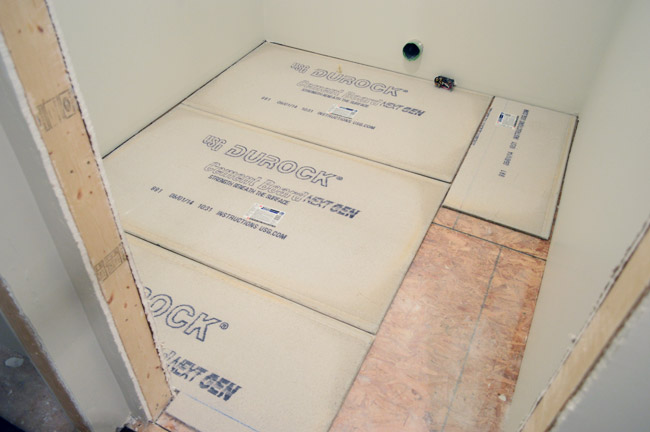
Before any tile could get installed, the subfloor needed to be prepped with some cement board, which is a preferred surface for tile installation. They come in 3ft x 5ft sheets, so I was able to fit two full pieces plus a few strips in the room. I cut them all by just scoring them with my utility knife and then breaking them along that line.
Once I had “dry fit” all of my pieces, it was time to actually adhere them with thinset. The layer of thinset between them and the wood subfloor will help keep them from shifting, grinding or flexing against one another. I used the same thinset I would later use for my tile install, mixed with water (just by following the directions on the bag) and my drill’s mixing paddle. I’ll get into more details about the whole mixing-of-the-thinset process in a second.
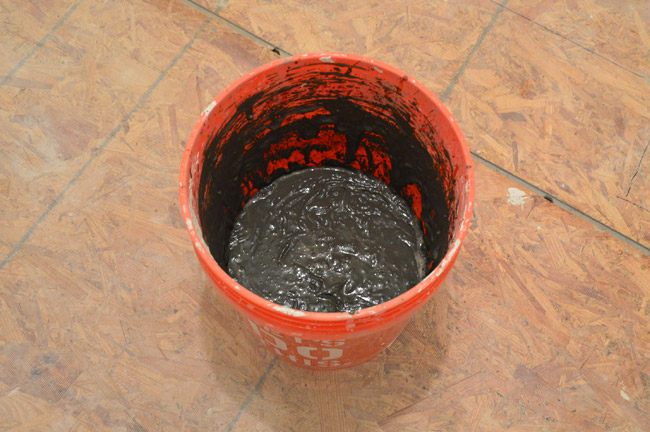
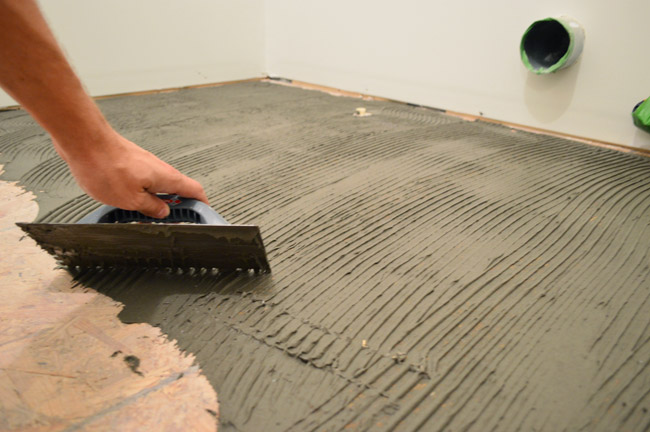
I spread the thinset using a 1/4″ notched trowel – coating the surface with the flat side of the trowel (doing one cement board area at a time) and then scraping grooves into it using the notched side, just like you do when you install tile.
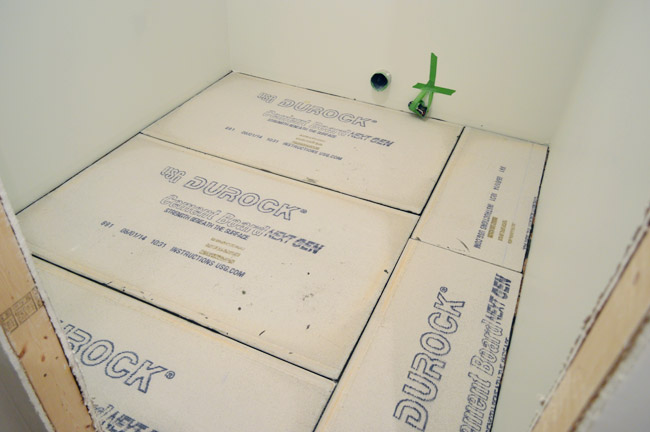
Then I was able to press the cement board pieces in firmly and move right along. Here are all of the sheets down, with about an 1/8″ gap between them and the wall.
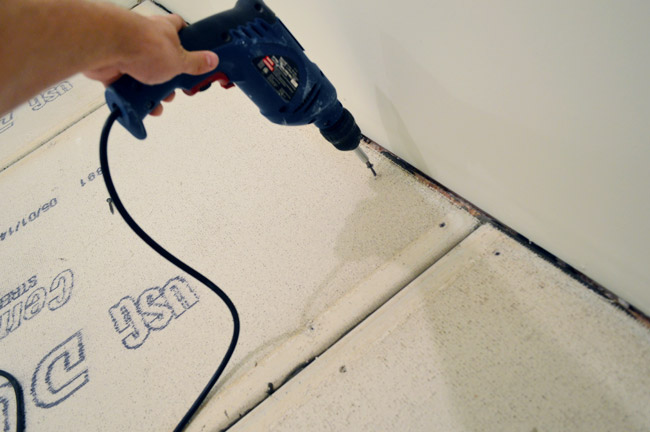
To help pull them securely towards the floor during drying (and to further stabilize them for the long term) I screwed down the edges (about every 6-10″) using special cement board screws. And I threw a few in the middle too – about every 12 to 16 inches.
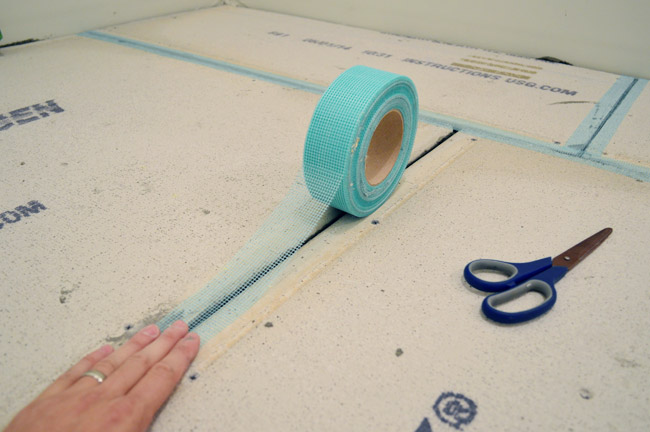
Many tutorials have you tape and mud (with thinset) all of the seams and screw holes next, just like with drywall. I’ve found it easier to just apply the mesh tape on the seams now and then apply the thinset during the tiling process. For me, it keeps me from accidentally creating any high ridges at the seams or screw hole bumps that the extra layer of thinset might create.
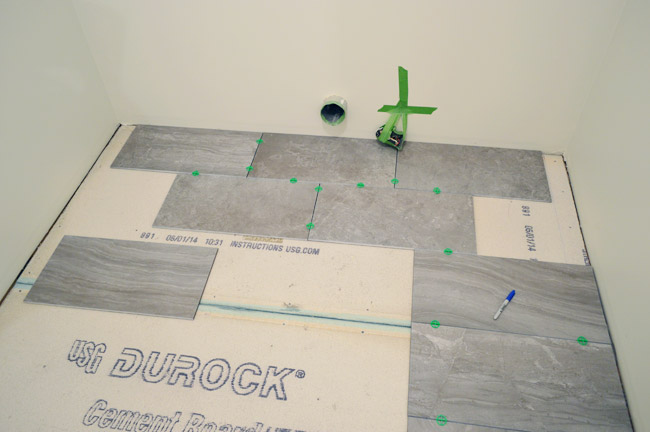
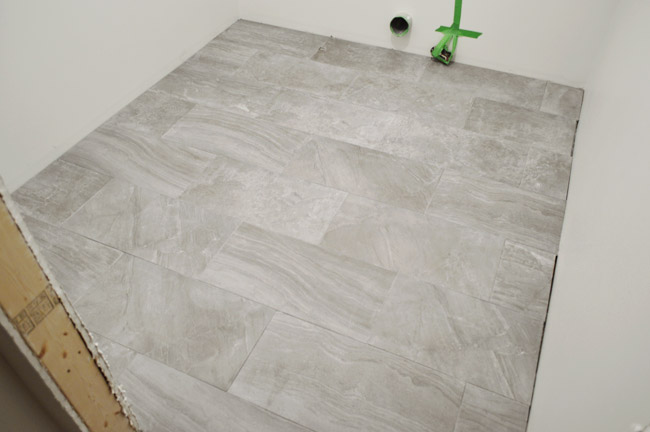
After mesh taping all the seams, we could start dry fitting our tiles, just to figure out the best way to situate the brick-pattern we were going for. We started off by centering the pattern, but we weren’t crazy about the thin slivers of tile it would have left on either side of the room. Note: Just look at the back two rows here (the closer tiles are just randomly placed).
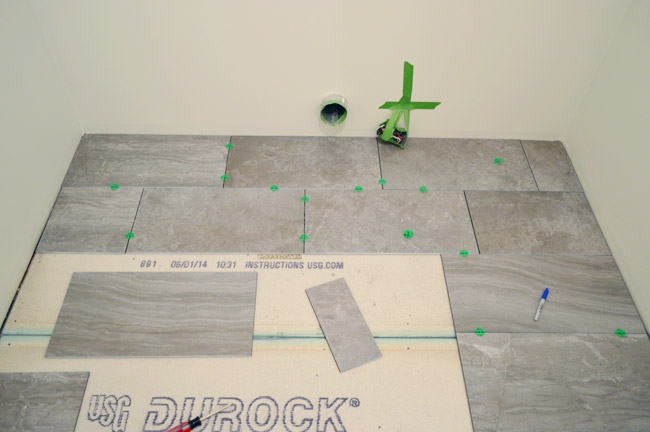
After a decent amount of experimenting, we opted to shift the pattern slightly towards the left wall, which meant we could use a full tile on the left side, and also left room for a bigger piece of tile on the right end (no more tiny slivers). The washer and dryer will be offset to the left side of the room anyway, so we think it’ll feel nicer this way (especially since those few smaller cuts of tile on the right side will mostly be hidden by a base cabinet in that back corner and the door to the room, which will swing to rest along that side. Note: Once again, just the two back rows of tile are placed in their intended positions here.
Cutting the tiles was super easy. Why? Because we finally bought a full-size wet saw. After nearly five years of using our old $99 hand-me-down tabletop wet saw to tile our first house’s bathroom, our second house’s patio, and the sunroom floor in this house, I finally dropped $277 on this one at Home Depot thanks to a $20 off coupon (that’s not an affiliate link). The difference was incredible. I love this thing so much, I want to take it out to dinner.
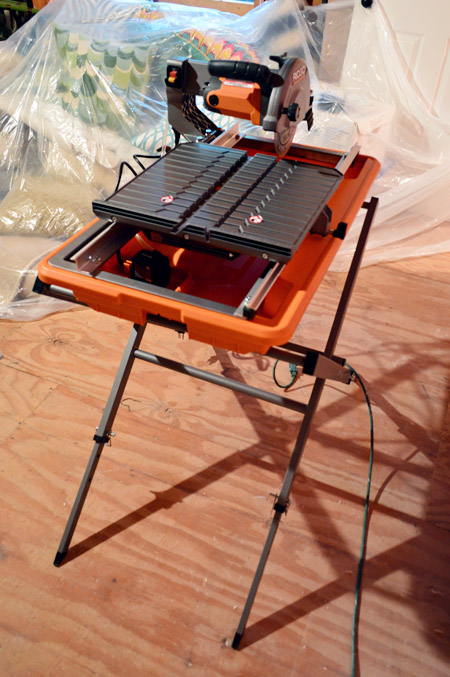
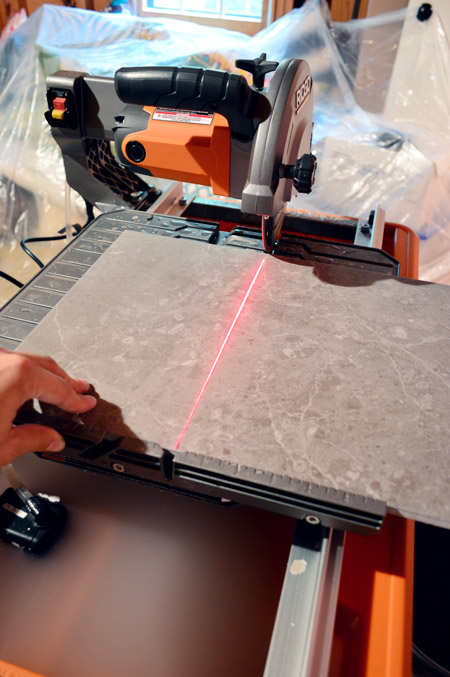
I’ve yet to decide my favorite part. Could it be the stand that allows you to work at regular height instead of crouching on the floor? The big water tray that means you don’t have to stop to replace/de-sludge the water all the time? The laser to help keep cuts nice and straight? All contenders. But probably my favorite feature is the rolling tray that I can just set my tile on and slide through the blade. It’s not only a lot faster, it also helped me keep all of my cuts super straight.
Anyways, let’s get back to the tiling process before I sound like someone trying to sell you a Super Shammy (“this will solve all of your problems and change your life!”).
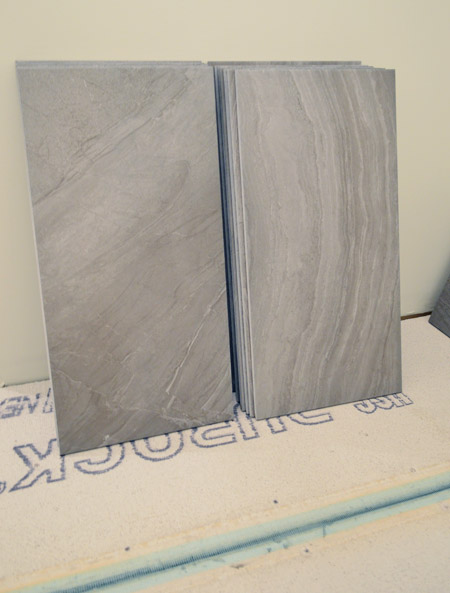
After getting some of the first few cuts done for our dry fit, Sherry and I went through all of our tile boxes to take inventory on the ones we liked best. We love the movement and veining in the tiles, so we wanted to be sure the best ones ended up in highly visible spots in the room (no sense hiding our favorites under the washer & dryer). So we sorted through them and pulled out favorites (which we’d be sure to position in the middle of the room), regulars (not amazing, but not bad either – ones we could use near the door or along the wall), and a third pile we affectionately dubbed “the not-as-nicers” (not pictured). They were more spotty than veiny, so we reserved most of them for the where the appliances would go.
Here’s the gist of my supplies for actually laying the tile (wet saw excluded, obviously).
- Bucket for mixing thinset (using water & the mixer attachment for my drill)
- Margin trowel for scooping thinset out (when I wasn’t just dumping it out directly from the bucket)
- Notched trowel for spreading thinset
- Square and pencil for marking cuts
- Spacers for keeping tiles spaced equally (we used 1/16th spacers)
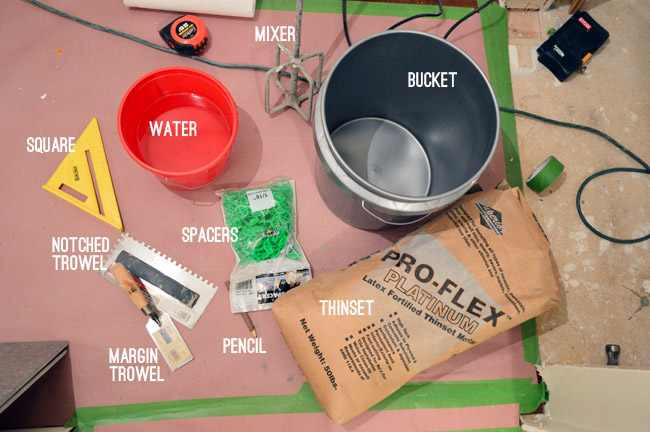
I have a tendency to mix my thinset too thick, so I made a conscious effort to use a bit more water this time. They often say it should be like pancake batter and I like my pancakes thick, so I should’ve realized this about myself a while ago.
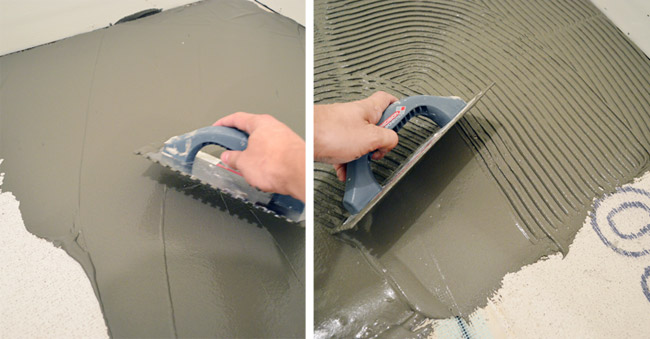
I worked about two rows at a time, doing my cuts as I went. It helps to have a nice long level on hand to check that none of your tiles are sticking up oddly for a smooth, level result.
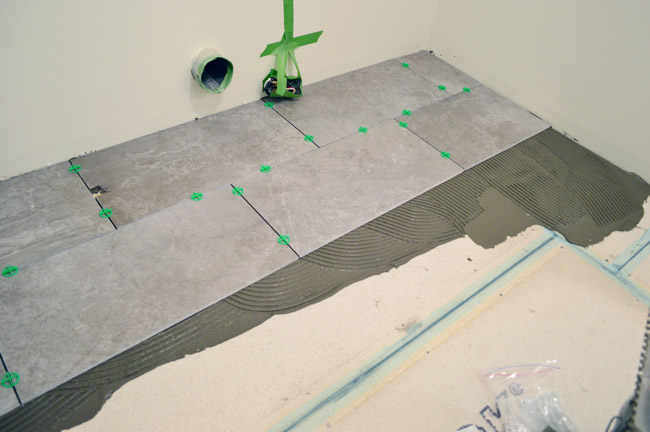
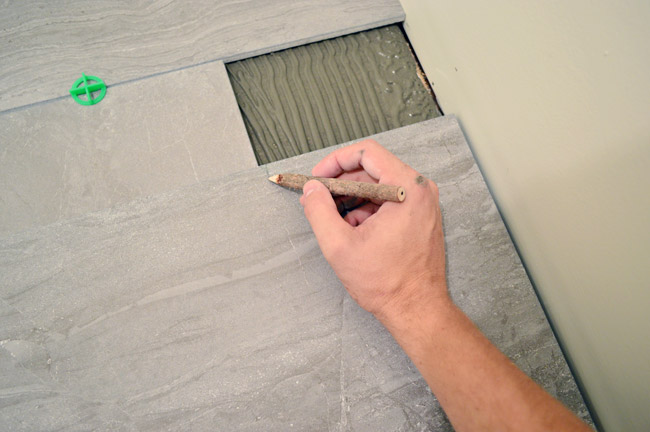
These sorts of cuts were very straightforward. I started at the end with the full tile (or the 12″ half-cut tile) so once I got to the other side I just held up a full tile and marked where it needed to be sliced. Who knows how I ended up with this weird wooden tree pencil.
It took me less than two hours to get the whole thing down once I started actually placing tile, so it was definitely one of my faster tile jobs.
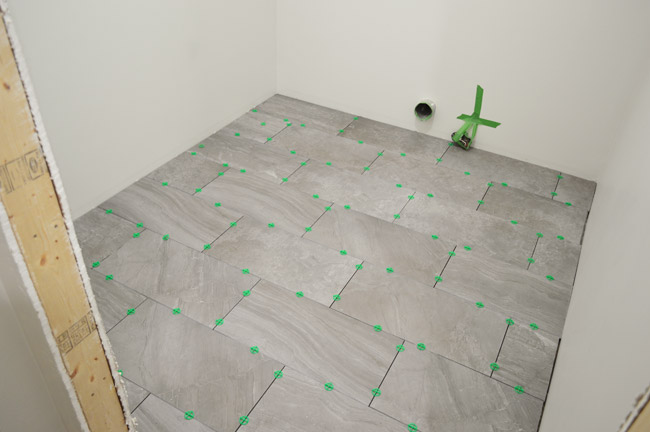
I left everything dry about a day and a half before pulling out my spacers (I opted to keep my painters tape contraption around the dryer plug through grouting).
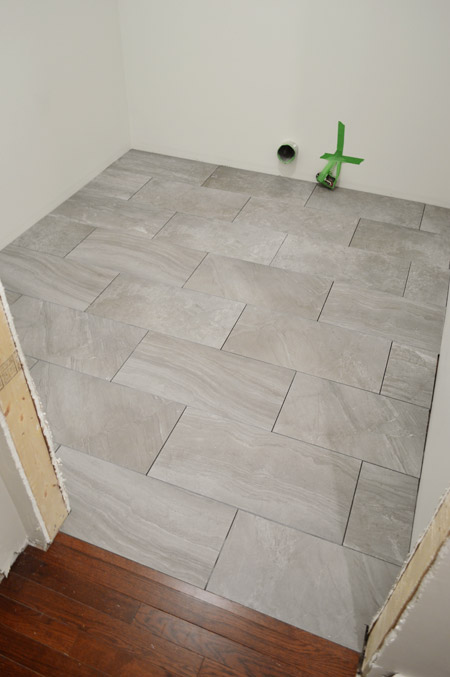
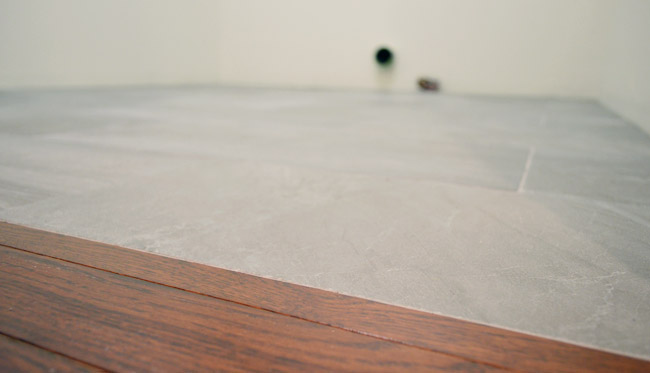
One of the parts I’m most proud of in this project is the transition, which Sherry and I decided we should attempt to make, well, transition-less. I had originally planned that we’d have some sort of transition piece (you know that slopes up a little to connect two different flooring types), but we’ve always liked the two transition-free tile-to-wood doorways downstairs (it’s perfectly flush where the tiled foyer meets the wood-floored office and dining room) so we opted to give it a go here too.
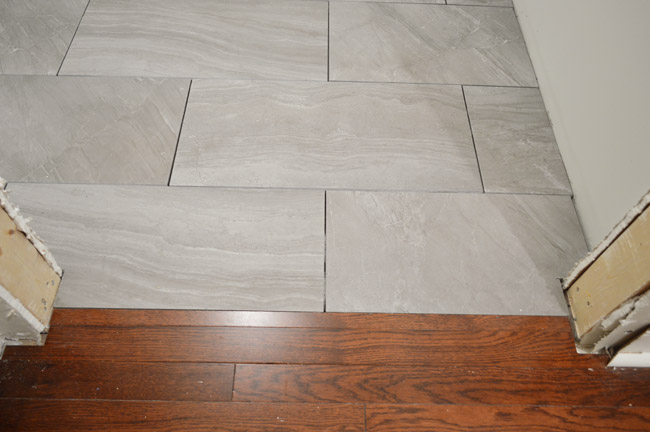
It required adding back two pieces of wood first (to bring the hardwoods about halfway into the middle of the doorway) and thankfully my planning with the subfloor height paid off: the floors are EXACTLY the same height. I still can’t believe it. Here they are all grouted and complete just so you can see what I mean:
Speaking of grouting, after letting the thinset cure for 48 hours, it was time to grout. The material list was somewhat similar:
- Small bucket for mixing grout, using the margin trowel
- Non-sanded grout (since our joints are smaller than 1/8″) – we went with a color called Dolorean Gray from Home Depot
- Water for mixing with grout powder, and for wiping clean
- Float for applying grout
- Sponge for wiping it off
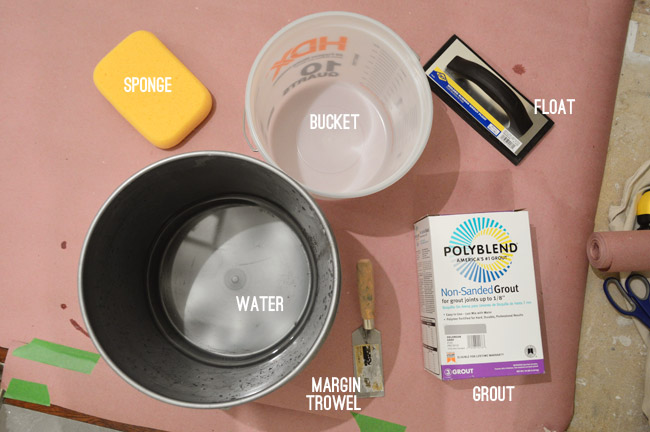
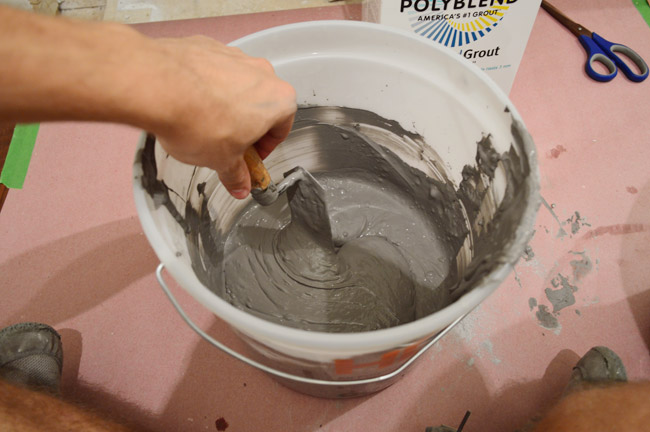
You add the water to the bucket first, then the grout powder. I started with a crazy amount of water for some reason, so I ended up mixing up a ridiculously large batch of grout for such a small room with so few joints.
Grouting is pretty easy, especially when you’re working with big tiles, since it’s quick to cover all of the joints. Using the rubber float you press grout between the tiles, then at an angle you wipe off the excess.
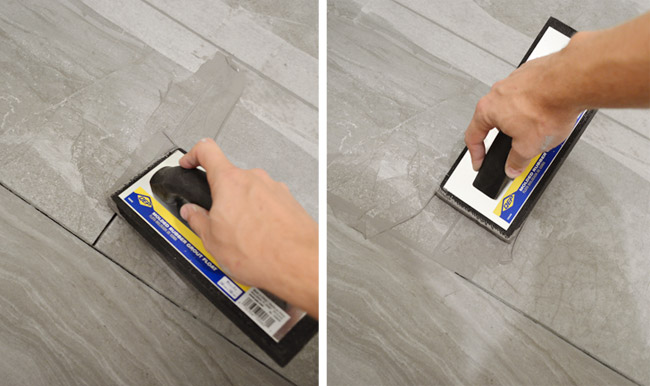
I was able to grout the whole room in about 20 minutes, and you can see how it starts to dry lighter – indicating that it’s time to start wiping it off.
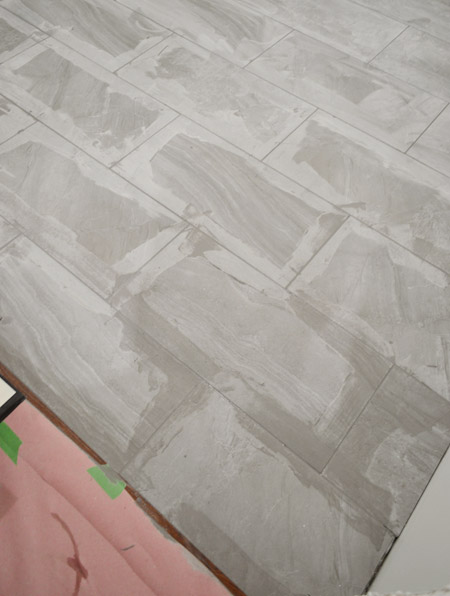
I made the mistake of using too much water when grouting the sunroom (which we think caused the grout to dry lighter than we had intended) so I was really careful to make my sponge only slighty damp when wiping off the excess this time.
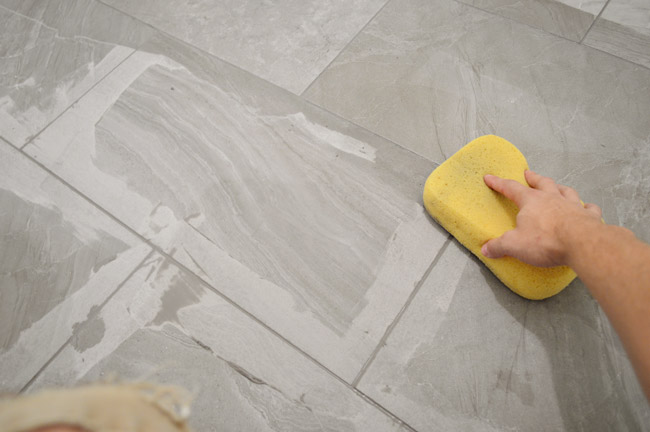
After a couple of passes with my barely-wet sponge, it still looked extremely hazy (this is the point where I think I panicked in the sunroom and got water crazy).
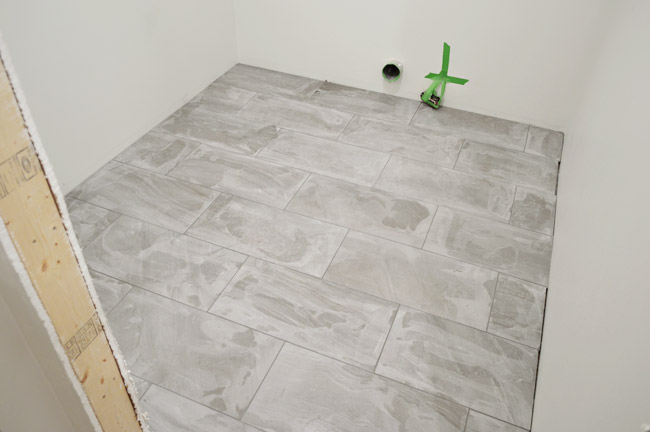
But this time around I let it dry another 90-minutes and then came back with a completely dry microfiber cloth (they recommend cheese-cloth, but I didn’t have any handy). The microfiber cloth seemed to do the trick just as well, and some light scrubbing buffed off a lot more of the haze.
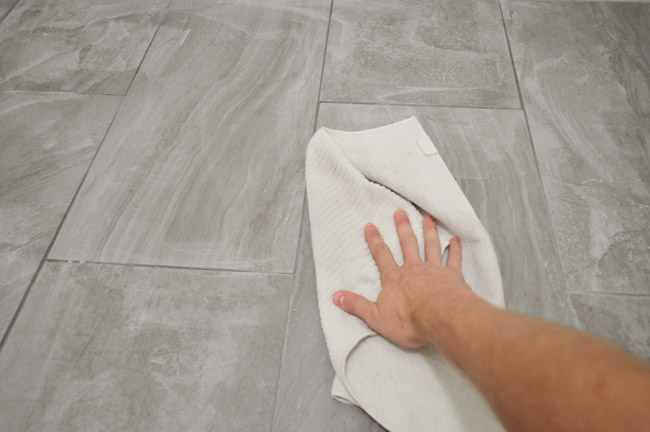
Here’s the floor post-buffing. MUCH better. Phew.
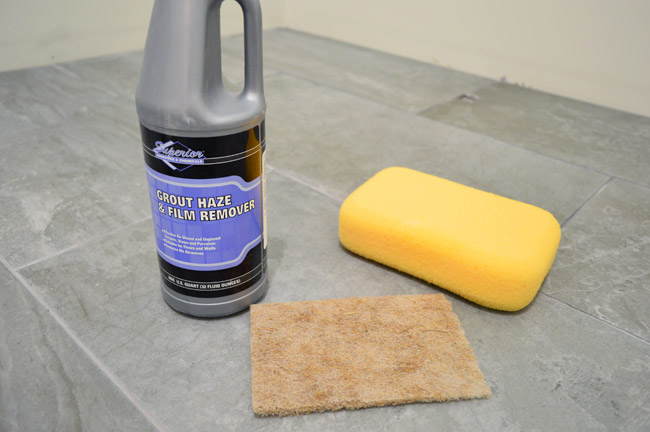
We let the grout dry for 3 day, per the instructions. Things were still looking a little hazy in there, so Sherry busted out some grout hazer remove that we had leftover from the sunroom project. You basically spread it on liberally with a sponge, let it sit for a few minutes, then wipe it off with a scrub pad. Then she wiped the room down with clean water a couple of times to get all of the haze remover off.
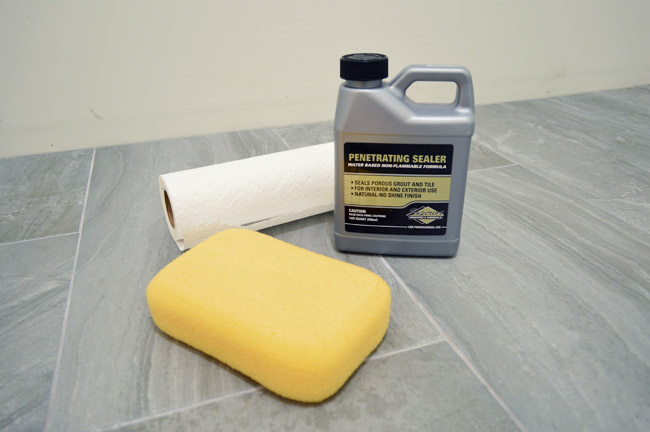
Then we waited for that to dry out for around 12 hours before applying a sealer on both the tile and the grout to help protect it from staining. It too is pretty easy to do – just wipe it on with a sponge, let it soak in for a few moments, and then wipe any excess off with paper towels.
Those two steps definitely brought the tile to life a bit more, which is why we recommend not skipping over the haze remover step.
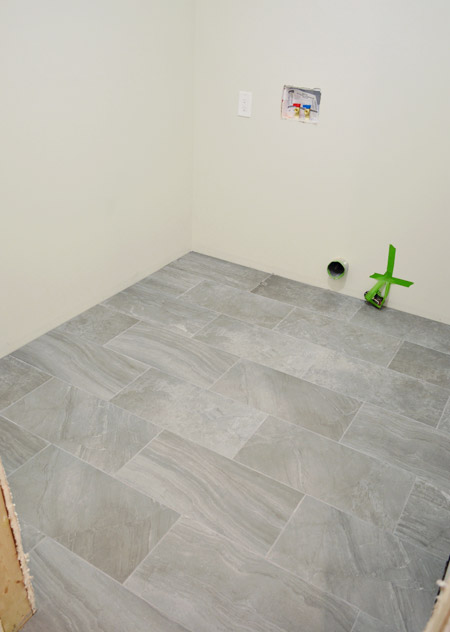
Sometimes you don’t realize the film leftover from the grouting process until it’s gone.
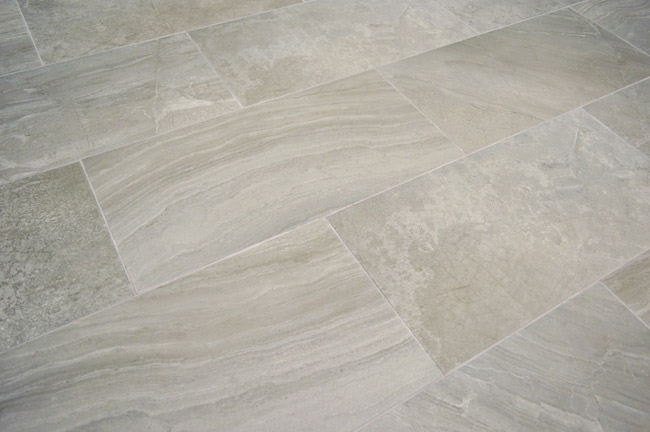
Here’s the cost breakdown for the floor tile project:
- Cement board & screws from Home Depot:$48
- Blast Anthracite 12 x 24″ tiles from The Tile Shop: $353
- Thinset from The Tile Shop: $29
- Grout in Dolorean Gray from Home Depot: $13
- Buckets, sponges, trowels, spacers, float: $8 (since we already owned most of them, but add $25 or so if you don’t)
- Superior Haze Remover: $0 (we had some leftover, but it’s $9 at The Tile Shop)
- Superior Penetrating Sealer: $0 (we had some leftover, but it’s $13 at The Tile Shop)
- TOTAL: $451
So it was pretty much $350 in tile and $100 in supplies. I’m excluding our new wet saw since it’s not a cost specific to this one project, and I don’t want someone to think that $277 must be incurred on a project like this, but after seeing what a difference it made, if you’re working with a cheap old tile saw I highly recommend the upgrade. I’m actually mad that I did our giant sunroom without my new tiling toy.
Wrapping up this tile job means we can actually start putting this room together. Which is especially exciting because we bought our cabinets at Ikea on Friday (ignore the random pillows in that basket, they were for a cousin we met up with on the same trip).
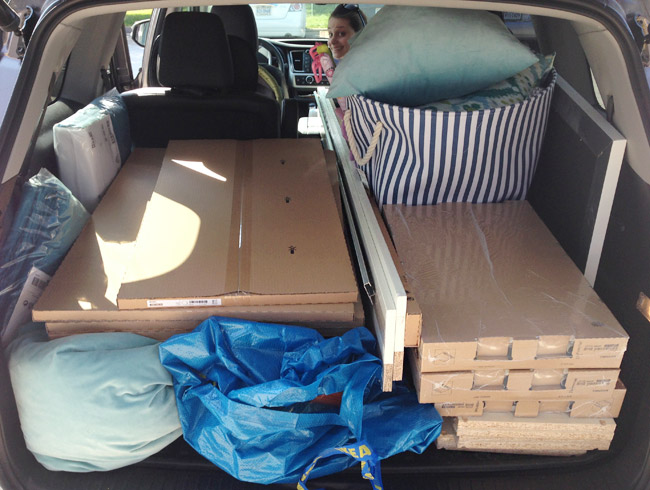
We’re thinking we’ll get at least the upper cabinets hung before we bring the washer & dryer in, since dropping cabinets on expensive appliances is not a risk we want to take. But once those are in, we may finally be back in business to wash our clothes at home again. High five! Anyone? High five? Are you leaving me hanging because I smell like a guy that just tiled without a washing machine?

Anele @ Success Along the Weigh says
Jazz hands. Happy Feet. Shakin’ booty. I’d have it all over that tile! LOOOOOOOVE it! I want that for our bathroom! Hmm…..
Shell says
You guys!!! That floor looks fantastic! How awesome to be so close to washing your clothes in that beauty of a room. High five!!
Marissa says
Wow!! The floor looks beautiful! Great job guys!
Vanessa says
This floor looks great. Love how you guys have tons of room in your vehicle now. Perfect for your family. Cannot wait to see the laundry room transition.
Amanda says
I love the striped basket in the last photo. Is that also one of your IKEA finds? I could not find it on their website.
YoungHouseLove says
That’s a HomeGoods find about a month ago (it’s awesome for carting things back and forth in the car so we tend to use it for that).
xo
s
Anne @ Planting Sequoias says
Super beautiful! I’m mentally planning our laundry room remodel (well, construction? Finishing an unfinished part of the basement?), but our crazy ceiling has me stumped. But it probably isn’t too soon to start tile shopping, right?!
YoungHouseLove says
Haha, it’s never too soon!
xo
s
Bethany says
Looks great! I love that you took the time to pick out the best tiles and place them where they’d get the most visibility. Question for you, though – is there a reason you use sealer after grouting, instead of buying the stuff that mixes right in with grout?
YoungHouseLove says
Even when we use admixture with the grout we like using the sealer afterwards. It just tends to protect everything at the same time (both the tiles and the grout) once it has been set/placed.
xo
s
Dorothee Bouquet says
That looks fantastic! What is your plan for baseboards? Tiles?
YoungHouseLove says
We’re bringing wood ones back in (like the rest of the house). Soon I hope! Along with a door!
xo
s
Jackie says
On this topic- though probably a dumb question – will you do the baseboards with the cabinets before bringing the appliances back in? The left wall looks so flush I wouldn’t even think you’d need it.
Another dumb question – do you do crown moulding in laundry rooms or is that not worth the time expense?
You guys did a really pro job on this – I think it looks awesome and I love the details on how you picked the tile placement pattern and tile design-pattern based on the specific features/design of the individual tiles. It was my favorite part of the post. :)
Best,
Jackie
YoungHouseLove says
Thanks Jackie! We will most likely add that back wall of baseboard before pushing the washer & dryer in (we like the idea of baseboard for the contrast/architecture it’ll add), and as for the crown, we think we’ll add it just to integrate the upper cabinets in a really clean way (it’s such a small room so it shouldn’t be too much money).
xo
s
Theresa says
Looks fantastic. My hubby has preaching the “right tools for the job” mantra for years. The right tools always come around to help in future projects so keep growing your collection.
Peggy says
Love that tile! It’s a lot like what I put in our hall bath last year, and I still like it just as much as when we first put it in. The guy who did that floor said it’s not really the “professional” way to not use a transition strip between different floors, but I agree with y’all that it looks better. We don’t have strips between our kitchen and DR and it’s worked out fine.
I’m really looking forward to seeing the final reveal!
YoungHouseLove says
So glad to hear that!
xo
s
Mary | Lemon Grove Blog says
It’s coming together! Great pick on the floor – it looks great with your existing wood floors in the hall!
susan says
okay, first off, peppermint patties totally = jazz hands!
second, i also have a tree pencil with no idea where it came from, well, besides a tree that is…
third, that tile and that wall color is fab.u.lous! can’t wait to see the finished room.
(p.s. went to a baseball game saturday night and watched our portland sea dogs beat your richmond flying squirrels in extra innings. have you been back to the ball park there?)
YoungHouseLove says
Oh man, sad about the Squirrels! Sounds like it was an awesome game though! We love going to their games in Richmond (Clara is a huge fan).
xo
s
Elizabeth says
Would love a post on what criteria you use on deciding whether to buy or rent tools/machinery!
YoungHouseLove says
It usually breaks down to how often we’ll use something. If it’s a hole digger to build a deck that we’ll never use again, we’d rent it (same with soemthing like a drywall holder, since most of our house is already drywalled). But if we have three bathrooms and a kitchen to renovate (lots of tile!) then buying a better tiling tool makes more sense than renting it.
xo
s
Tiffany says
I love the tiles! I was a little resitant in the picture from The Tile Shop but seeing them installed changed my mind! Can’t wait to see the room complete! We’re currently building and our laundry room is about the same size….looking for inspiration :)
Gabby {Cookie Cutter Unique} says
Looks great! I feel tired just looking at all of the work y’all have done in there.
nicole @ I am a Honey Bee says
HIGH FIVE!!!!!
Looks awesome. reminds me of when I helped my dad tile his kitchen when I was younger. It was so much fun. Prob because I was little and just had to do the spacers and grout but still fun.
PS… you stink! ha!
YoungHouseLove says
Ha! Thanks for not leaving me hanging, Nicole.
-John
Gina says
Love it!
I can’t believe how fast this is going and with the cabinets bought, it makes me wonder if you are going to finish it within the week! Because it sure feels like it!
Congrats on this incredible project!
http://imperfectlybuilt.blogspot.ca
Reenie says
Great job!!! Looks fantastic. :)
Alexa @ travelmiamor says
love, love, love that tile!!!!
Lynne says
Wow, love it! Interesting that one is supposed to use both thinset and screws to hold down the cement board on the floors. I did not know that. Then again, whoever tiled the powder room in my house just put the tile right on the subfloor. Needless to say, we have tiled popping off all over the place. It’s a rental, and my landlord is cheap, so I just live with it.
Having recently spent a lot of time without a working washing machine (see above, cheap landlord), I would have moved those puppies back in as soon as the grout had dried!
Christine says
I was thinking the same thing! I bought the cement board and tile and special screws from home depot a month ago to prep for our mudroom redo and the home depot person helping me said nothing about putting thin set under the cement board. The one I got has special screw marks, about every 12 inches over the entire board, sides, middle, etc. Does that mean I don’t need to do it?
YoungHouseLove says
The more I researched it the more the Thinset step seemed to be recommended (just to reinforce things) so it made us the most comfortable to go that route. I did see some tutorials without it though, so you might be ok skipping it. Maybe it would be worth asking the Home Depot person in that area what they recommend with that specific cement board?
-John
Joanna says
What’s your secret to getting to and from Ikea without the crazy traffic? I also live in Richmond and would love to go to Ikea more often.
YoungHouseLove says
We were stuck in 6 hours of traffic (they completely closed 95 thanks to a truck that spilled acid on the road), so sadly we have no secrets. Only a burning desire for a Richmond Ikea. Thank goodness we were doing other things (like meeting up with family and taking care of some book stuff) on that trip too, so it wasn’t just for Ikea.
xo
s
kate says
I live in Northern Virginia about 20 minutes from the Ikea that is closest to you. Even I complain about the traffic to get there. Now knowing that you make the trip from Richmond I am sticking my foot in my mouth and counting my blessings.
YoungHouseLove says
You LUCKY DOG!
xo
s
Katie says
Holy bananas! Was that 6 hours of traffic with 2 kids in the car? Just reading that gave me anxiety!
YoungHouseLove says
Yes, they were such good sports. There were a few feeding stops for Teddy boy!
xo
s
Claire says
Our nearest ikea is a 4 hour plane trip to another country :( we have managed it once but baggage restrictions meant I couldn’t bring back half what I wanted to!
YoungHouseLove says
Oh man!!
xo
s
Darlene says
Don’t hate me when I tell you that I live like 10 minutes away from Ikea!
Stevie Storck says
I was looking forward to seeing an update on the tile work all weekend! The tile looks beautiful and I love that you were able to do without a transition strip. I can’t wait to see the installation of the awesome backsplash tile you guys selected!
Julia @ The Domestic Blonde says
YOU GUYS! This looks amazing!!! I am so happy you decided to go full-steam ahead with this project. Going to make a HUGE difference.
Next up… the dining room blue trim!!!! It’s killing me haha (as if your house is actually mine… so weird)
:)
YoungHouseLove says
Oh man, you should see that room right now. With book project stuff everywhere it’s a CODE RED. Haha!
xo
s
Jackie says
PROVE IT! PROVE IT! INSTAGRAM INSTAGRAM! :)
Christina Payson says
It looks amazing!!! So much so that I went looking for the tile and had a tough time as it is ‘Blast’ anthracite not ‘black’ as listed in your breakdown.
I hate to be a corrector, just trying to help searchers like me!
YoungHouseLove says
Thanks Christina! Sorry about that! All fixed :)
xo
s
Amanda says
Nice job. Is there a small hole cut in the back, to the left of the dryer vent? What is that for?
YoungHouseLove says
That’s the washer overflow drain (so if things leak the water will be routed into the dryer pan and down that pipe so the laundry room doesn’t flood).
xo
s
Heather says
I’m confused since I didn’t see any mention of an overflow drain nor do any of your pictures show one (there should be a hole in your cement board if you had a hole cut out for a drain in the floor). It looks like you chipped a piece of the tile then filled it in with grout when you grouted the floor – not that you have an overflow drain. If you guys did install an overflow drain, that would be incredibly helpful information for your readers if they attempt to tackle this project themselves.
YoungHouseLove says
The plumber installed that overflow drain when he did all the plumbing (moving the washer drain, etc). I think we mentioned it a bunch of times (you can see it sticking up in this picture from the post about the plumbing). You can also see the pipe sticking out above the U in Durock in this picture and through the thinset in this picture. When we reinstall the washer & dryer we plan to share detailed instructions about how we attach the washer pan to that pipe to make sure the water is routed down there – so you’ll get more details and close-ups then :)
xo
s
Blair R says
Did you have to wait for the thinset to dry before you could walk on it to add the tape and screws? Also, did you grout joint where the tiles met the wall or where the tiles meet the hard wood floor in the hall?
YoungHouseLove says
I gave that thinset a few hours to dry before adding the tape and screws later in the afternoon (although I did walk on them right after putting them down just to press them in). As for the joint where the tiles meet the wall, I didn’t grout it (to leave room for expansion of the wall – plus it will be covered by baseboard) but I did grout the space where the tiles meet the wood in the doorway so it looks nice and clean (that’s how it’s done downstairs).
-John
Erin says
It looks gorgeous!
Richelle B says
It looks so good!! I LOVE that tile and I can’t wait to see it with the backsplash tile you guys picked out!
Catherine says
Have you let Clara in to dance on that pretty floor yet? :)
Looks so nice! I am so impressed by your skills, especially that transition – awesome work!
YoungHouseLove says
She’s so funny! She loves “the new secret room” – even though I told her it’s not a secret, she is convinced it’s for playing hide and seek. Might be sad to see a washer & dryer in there soon. Haha!
xo
s
Catherine says
Ha! Reminds me of my 5 year old. When we rolled out a new rug in the living room, she was so excited to have a dance studio! When we put furniture back in, she was quite sad.
YoungHouseLove says
So cute!
xo
s
Treana B says
HIGH 5 JOHN! HIGH 5! I’ll even risk the exposure to your underarm stank for that well-deserved five-r. This whole adventure has got me itching (not from lack of clean clothes) to re-do our laundry room.
http://houseofbennetts.com/2014/05/13/laundry-room/
YoungHouseLove says
Thanks for not leaving me high and dry Treana!
-John
Treana B says
I see what you did there John… dry… dryer. So clever.
Chrissy says
We did a similar tile in our hall bathroom and we love it so far. It was pretty easy to install with the large tiles and the grey is such good choice for longevity.
YoungHouseLove says
So glad to hear that!
xo
s
Corrin says
Cant wait to see the cabinets up, I know Ikea products take some time and effort to construct ;)
Janette @ The 2 Seasons says
The tile looks great. I’m so glad you put in an overflow drain. We have had upstairs laundry rooms in four houses, and it comes in handy, if you know what I mean. I still highly recommend a tube sky light. It will rock your world. You will hunt me down and give me a kiss for making the suggestion. I promise. We have three in this house in baths with no windows, and they are such a treat.
YoungHouseLove says
Haha, that sounds amazing!
xo
s
Leah says
Another vote for the solar tube skylight! They are the bee’s knees. I had one in my bathroom growing up. We didn’t even need to use a light during the day.
YoungHouseLove says
Sounds awesome!
xo
s
Lisa in Seattle says
We have a 2′ x 2′ skylight in our bathroom, but I wish we just had one of those Solatubes instead. Numerous times I’ve looked up to see a crow or flicker peering down interestedly at me while I do my business. Disconcerting.
YoungHouseLove says
Ha!
xo
s
Emily says
So when y’all were putting the tape and screws into the cement board, were you able to stand on it while the thinset was still wet or just reach across the board?
Also, it’s been great to see you guys doing more DIY these days. It sounds weird, but this laundry room re-do feels like it has brought new life back to your blog :)
YoungHouseLove says
Thanks Emily! I gave that thinset a few hours to dry before adding the tape and screws later in the afternoon (although I did walk on them right after putting them down just to press them in).
-John
Chase says
Looks great!! I have to say, we just bought our first house last weekend and I’ve been poring over old posts looking for tips and tricks! Thanks for being such a great resource!
Laurie says
That tile really does look gorgeous! It almost seems a shame to cover it with anything.
Suzanne says
I’m impressed– it looks perfect. The even transition is awesome!
Sheila F. says
I really like how the tile ties into to foyer tile. And the threshold match is spot on! Just lovely! I do have one question. Have you thought about a built in ironing board? The room seems to have the space for it. Or do you prefer the full size portable board. Just a question that popped into my head. Lol
YoungHouseLove says
That would be nice, but we’re with you on the whole it’s-nice-to-move-it perk (for example, I have ironed the bottom of curtains as they hang on the wall in the room) so we’re still mulling that over…
xo
s
Mrs. Ballard says
Question – why did you choose non-sanded grout? I thought if space between tiles more than 1/8 inch one should use sanded grout.
I only ask as son and wife have just redone kitchen and tile men did not do a good job of grouting – too little grout and voids and TOO dark. It needs to be redone and I told them sanded grout is what they needed.
YoungHouseLove says
Oh yes, always use sanded if the space is more than 1/8″! Our spacing was 1/16th (half as much as a 1/8th gap) so we didn’t use sanded grout in this case.
-John
Danielle says
Wow – love that tile! Can’t wait to see the finished room!
Nicole says
Damn, that’s a fine transition! I’d be patting myself on the back too.
YoungHouseLove says
Haha!
xo
s
Lauren @ Bless'er House says
Lookin’ good! Totally jazz hand worthy! And that is the absolute coolest saw ever. Have the walls already been painted? I thought I’d read last week where you guys picked the color but I guess it’s hard to tell with nothing else being in the room yet. Can’t wait for the next update!
YoungHouseLove says
Yes, they’re painted but it’s so hard to tell without white trim/baseboards/door!
xo
s
Isabel says
High five on that awesome floor, high five on getting the washer/dryer back in, high-five on the project as a whole and one more high-five for the heck of it, with some jazz hands at the end for good measure!
YoungHouseLove says
Thanks Isabel!
-John
Kim says
I just love the transitionless transitions! I did this recently when we had our kitchen and hall tiled. It is great for cleaning, rolling items from room to room, and easy on your barefeet.
Melissa says
We put the exact same floor in our laundry room and we LOVE it! Very easy to clean and it doesn’t show every speck of dust (or dryer lint!)
YoungHouseLove says
SO GLAD!
xo
s
shannon c. says
Just wanted to say I think sorting through the tile to have your favorites in good spots is an inspired idea. Makes so much difference, especially in a space where lots of it will be covered up.
Emily says
My husband has been telling me a new and more expensive wet saw is something we might need to “invest” in. I just assumed it was him being a man who is obsessed with tools. He has been eyeing this exact wet saw, seeing the laser, the wet tray, and the fact that it has a stand. This just might be a situation where my husband was right. I blame you :)
YoungHouseLove says
It’s all my fault. I take the blame! Honestly, I’m one of those guys who sometimes believes you’re paying extra for a brand name and there’s not much difference, but in this case the difference was incredible and completely worth it.
-John
Michele from IL says
Looks fantastic! I see you have rosin paper down by the threshold, but it doesn’t look like it totally covered the wood. Did the grout scratch the wood at all? I also go all jazz hands for York, Sherry! :)
YoungHouseLove says
Thanks to it being unsanded it didn’t scratch the wood at all. We actually pulled the rosin paper back while grouting to make sure the tape/paper didn’t cover an area that needed to be grouted. Then we just wiped down the wood and it was all good.
xo
s
Liz says
So you used grout between the tile and wood? I thought that grouting a transition was a big no-no and that it will end up cracking?
YoungHouseLove says
I’m not sure if you can tell from the photos (like this one or this one) but it was an extremely close seam, so we don’t think there are large enough pieces of grout to crack or flake, but it’s such a hairline space that we could just leave it bare if anything comes out. The wood-to-tile seams downstairs seem to be doing ok 30 years after they were put in, so we have hope it’ll work out. We’ll keep you posted of course!
xo
s
Sarah @ Sarah's Daybook says
Woohoo!!! That is so exciting! I am amazed at how beautiful that tile is.
Greetings from Wyoming, where I actually am staying at the same place as Joan Rivers! She’s super sweet!
Sarah
YoungHouseLove says
NO WAY!
xo
s
Jess says
I like the tile, looks great! Have you two ever consider supporting a local craftsman and having cabinets built instead of popping over to Ikea for everything?
YoungHouseLove says
We definitely would consider that! This is actually our first time trying Ikea cabinets (we used Kraftmaid ones for our first kitchen through Home Depot, and secondhand ones from the Habitat ReStore for our second house’s kitchen and the office built-ins we added there). Do any locals have any cabinet maker recommendations for us?
xo
s