A newly tiled floor in a new room of the house is almost enough to give me jazz hands (a York peppermint patty is enough to give Sherry jazz hands, so clearly we have different thresholds).
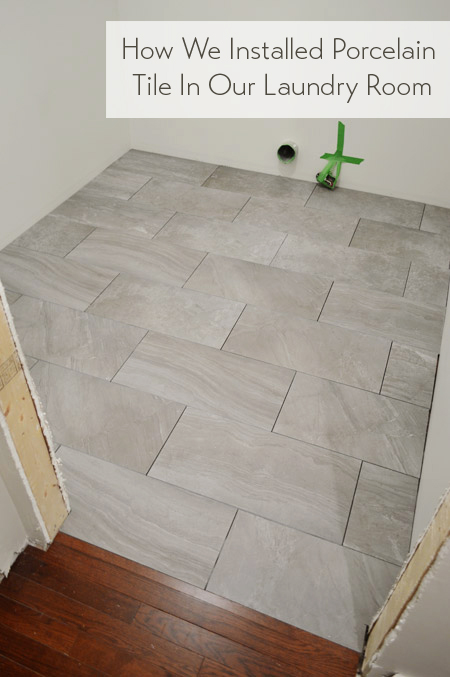
We’re completely enamored with this floor – and there’s a budding romance that involves a saw – so let’s cover the laundry room tile installation, from floor prep to grouting & sealing.
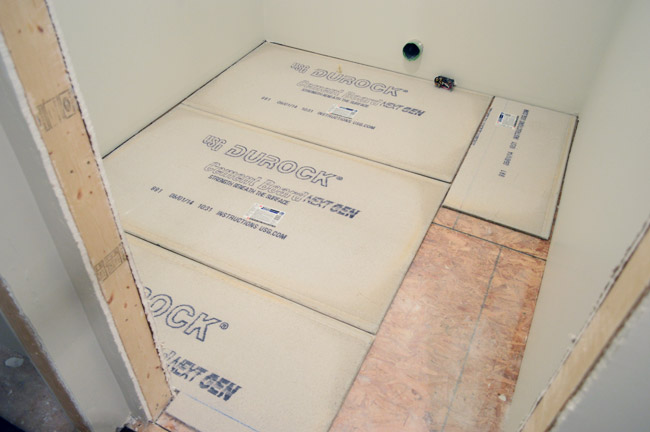
Before any tile could get installed, the subfloor needed to be prepped with some cement board, which is a preferred surface for tile installation. They come in 3ft x 5ft sheets, so I was able to fit two full pieces plus a few strips in the room. I cut them all by just scoring them with my utility knife and then breaking them along that line.
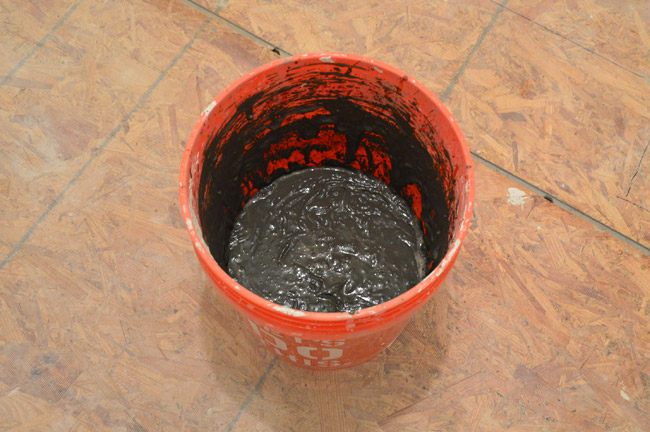
Once I had “dry fit” all of my pieces, it was time to actually adhere them with thinset. The layer of thinset between them and the wood subfloor will help keep them from shifting, grinding or flexing against one another. I used the same thinset I would later use for my tile install, mixed with water (just by following the directions on the bag) and my drill’s mixing paddle. I’ll get into more details about the whole mixing-of-the-thinset process in a second.
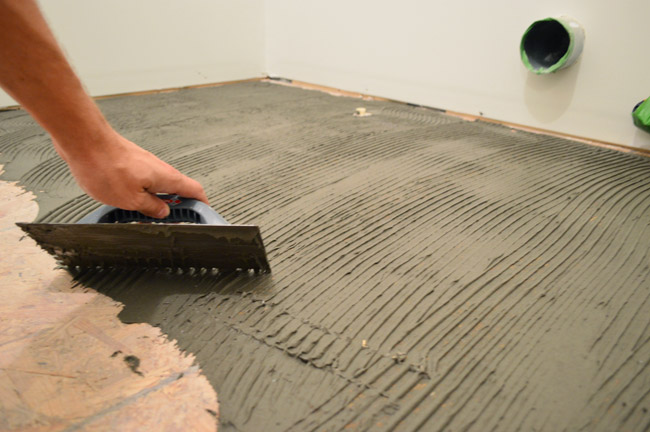
I spread the thinset using a 1/4″ notched trowel – coating the surface with the flat side of the trowel (doing one cement board area at a time) and then scraping grooves into it using the notched side, just like you do when you install tile.
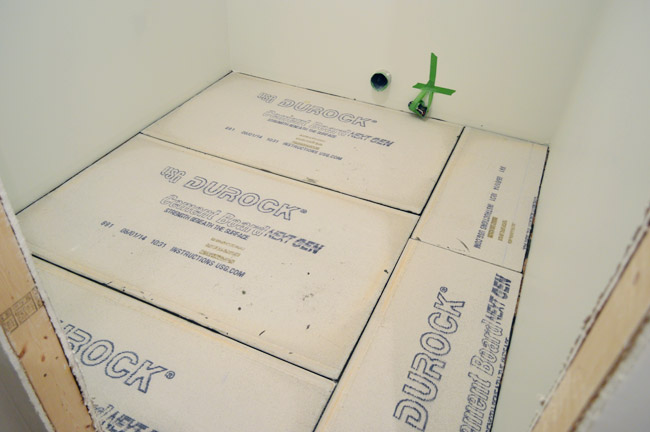
Then I was able to press the cement board pieces in firmly and move right along. Here are all of the sheets down, with about an 1/8″ gap between them and the wall.
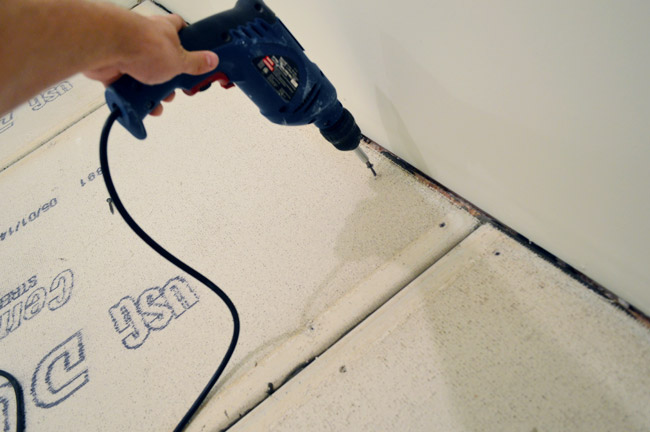
To help pull them securely towards the floor during drying (and to further stabilize them for the long term) I screwed down the edges (about every 6-10″) using special cement board screws. And I threw a few in the middle too – about every 12 to 16 inches.
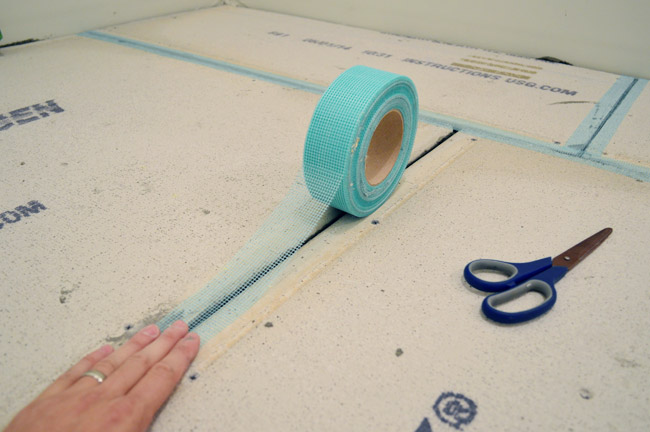
Many tutorials have you tape and mud (with thinset) all of the seams and screw holes next, just like with drywall. I’ve found it easier to just apply the mesh tape on the seams now and then apply the thinset during the tiling process. For me, it keeps me from accidentally creating any high ridges at the seams or screw hole bumps that the extra layer of thinset might create.
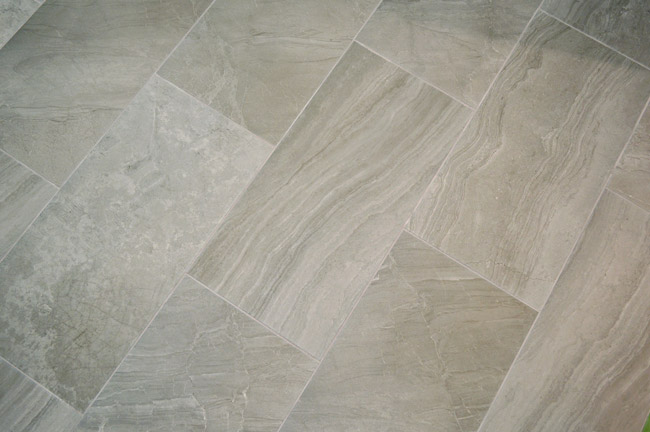
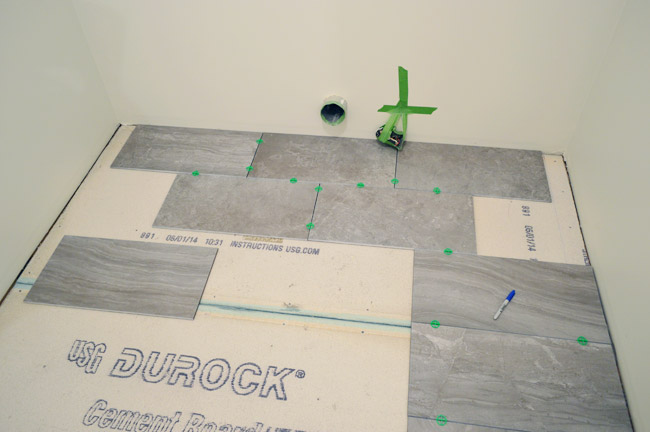
After mesh taping all the seams, we could start dry fitting our tiles, just to figure out the best way to situate the brick-pattern we were going for. We started off by centering the pattern, but we weren’t crazy about the thin slivers of tile it would have left on either side of the room. Note: Just look at the back two rows here (the closer tiles are just randomly placed).
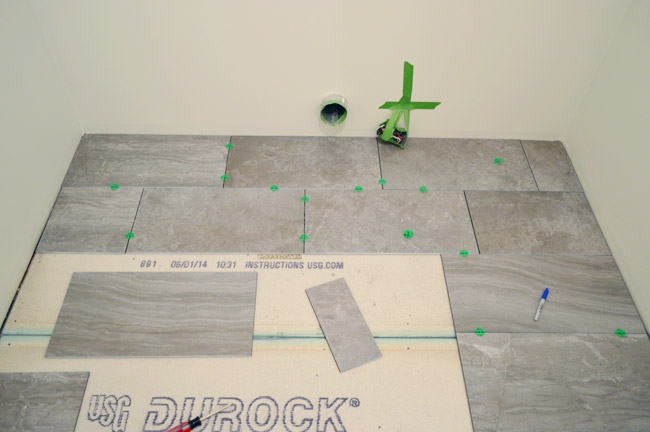
After a decent amount of experimenting, we opted to shift the pattern slightly towards the left wall, which meant we could use a full tile on the left side, and also left room for a bigger piece of tile on the right end (no more tiny slivers). The washer and dryer will be offset to the left side of the room anyway, so we think it’ll feel nicer this way (especially since those few smaller cuts of tile on the right side will mostly be hidden by a base cabinet in that back corner and the door to the room, which will swing to rest along that side. Note: Once again, just the two back rows of tile are placed in their intended positions here.
Cutting the tiles was super easy. Why? Because we finally bought a full-size wet saw. After nearly five years of using our old $99 hand-me-down tabletop wet saw to tile our first house’s bathroom, our second house’s patio, and the sunroom floor in this house, I finally dropped $277 on this one at Home Depot thanks to a $20 off coupon (that’s not an affiliate link). The difference was incredible. I love this thing so much, I want to take it out to dinner.
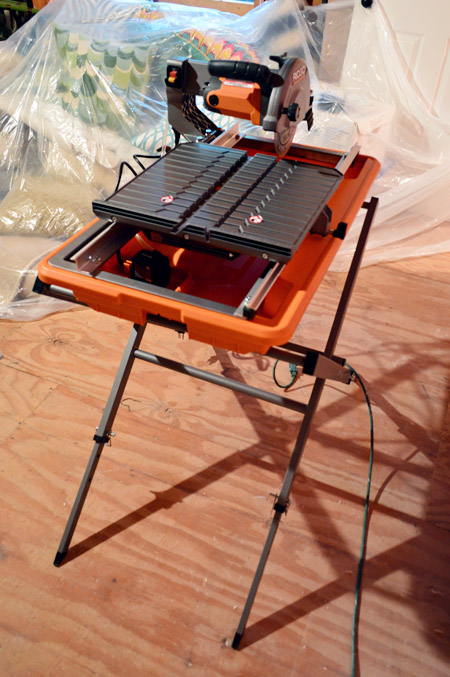
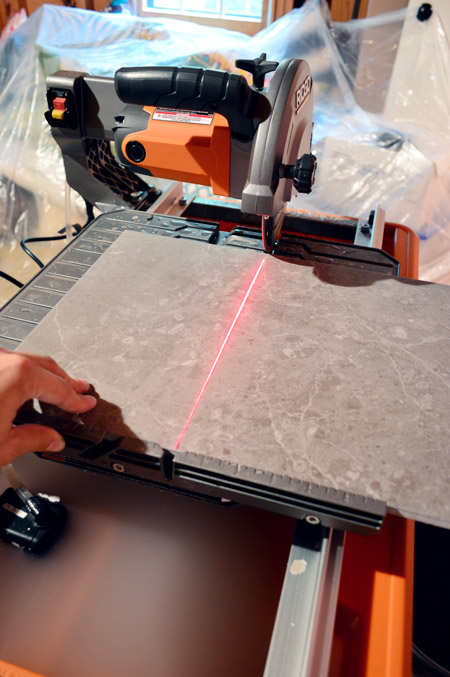
I’ve yet to decide my favorite part. Could it be the stand that allows you to work at regular height instead of crouching on the floor? The big water tray that means you don’t have to stop to replace/de-sludge the water all the time? The laser to help keep cuts nice and straight? All contenders. But probably my favorite feature is the rolling tray that I can just set my tile on and slide through the blade. It’s not only a lot faster, it also helped me keep all of my cuts super straight.
Anyways, let’s get back to the tiling process before I sound like someone trying to sell you a Super Shammy (“this will solve all of your problems and change your life!”).
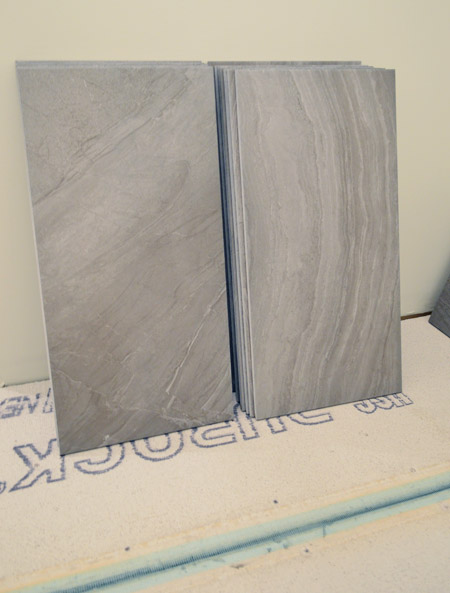
After getting some of the first few cuts done for our dry fit, Sherry and I went through all of our tile boxes to take inventory on the ones we liked best. We love the movement and veining in the tiles, so we wanted to be sure the best ones ended up in highly visible spots in the room (no sense hiding our favorites under the washer & dryer). So we sorted through them and pulled out favorites (which we’d be sure to position in the middle of the room), regulars (not amazing, but not bad either – ones we could use near the door or along the wall), and a third pile we affectionately dubbed “the not-as-nicers” (not pictured). They were more spotty than veiny, so we reserved most of them for the where the appliances would go.
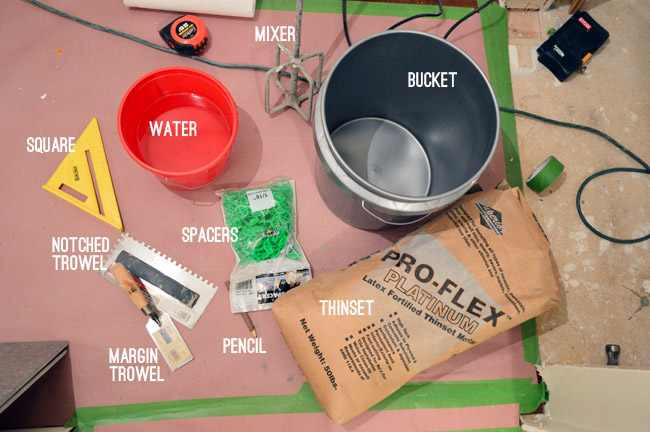
Here’s the gist of my supplies for actually laying the tile (wet saw excluded, obviously).
- Bucket for mixing thinset (using water & the mixer attachment for my drill)
- Margin trowel for scooping thinset out (when I wasn’t just dumping it out directly from the bucket)
- Notched trowel for spreading thinset
- Square and pencil for marking cuts
- Spacers for keeping tiles spaced equally (we used 1/16th spacers)
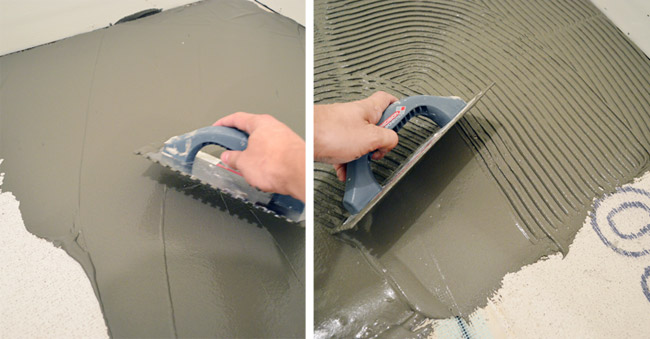
I have a tendency to mix my thinset too thick, so I made a conscious effort to use a bit more water this time. They often say it should be like pancake batter and I like my pancakes thick, so I should’ve realized this about myself a while ago.
I worked about two rows at a time, doing my cuts as I went. It helps to have a nice long level on hand to check that none of your tiles are sticking up oddly for a smooth, level result.
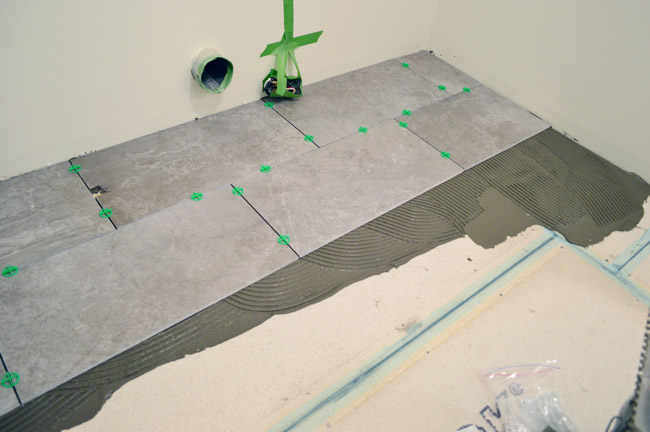
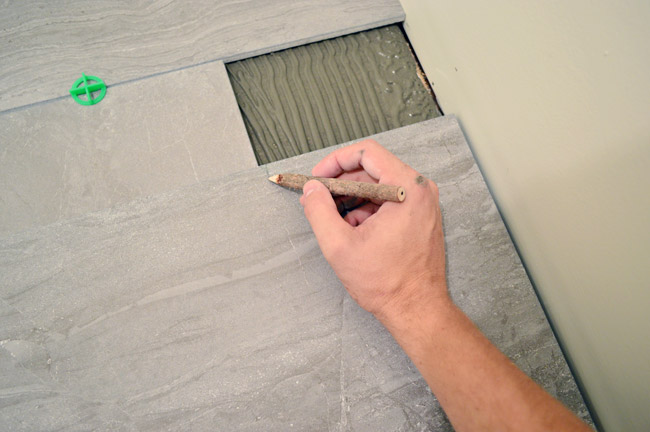
These sorts of cuts were very straightforward. I started at the end with the full tile (or the 12″ half-cut tile) so once I got to the other side I just held up a full tile and marked where it needed to be sliced. Who knows how I ended up with this weird wooden tree pencil.
It took me less than two hours to get the whole thing down once I started actually placing tile, so it was definitely one of my faster tile jobs.
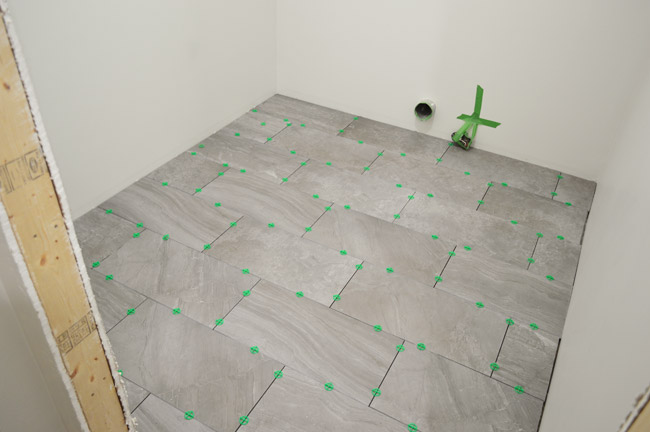
I left everything dry about a day and a half before pulling out my spacers (I opted to keep my painters tape contraption around the dryer plug through grouting).
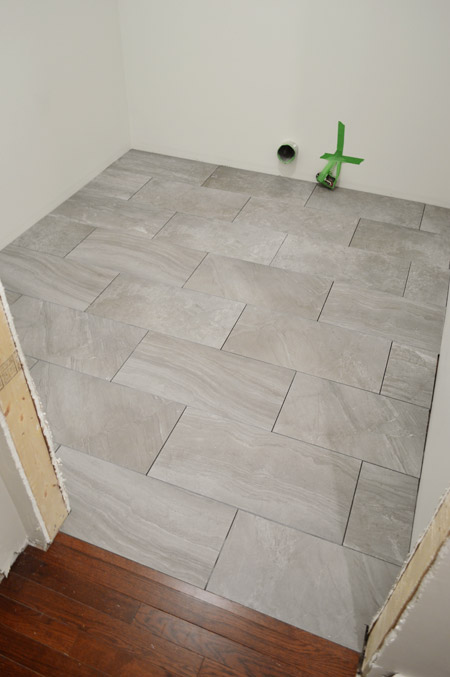
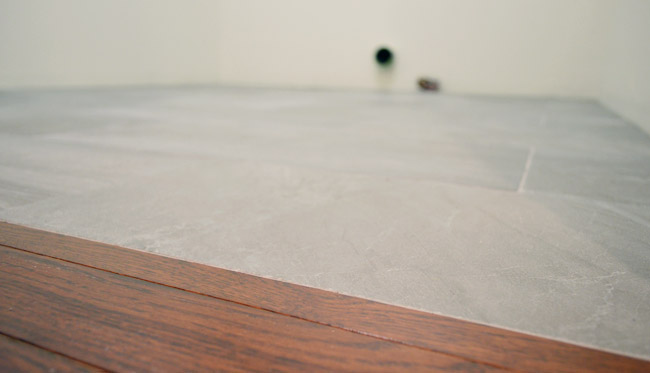
One of the parts I’m most proud of in this project is the transition, which Sherry and I decided we should attempt to make, well, transition-less. I had originally planned that we’d have some sort of transition piece (you know that slopes up a little to connect two different flooring types), but we’ve always liked the two transition-free tile-to-wood doorways downstairs (it’s perfectly flush where the tiled foyer meets the wood-floored office and dining room) so we opted to give it a go here too.
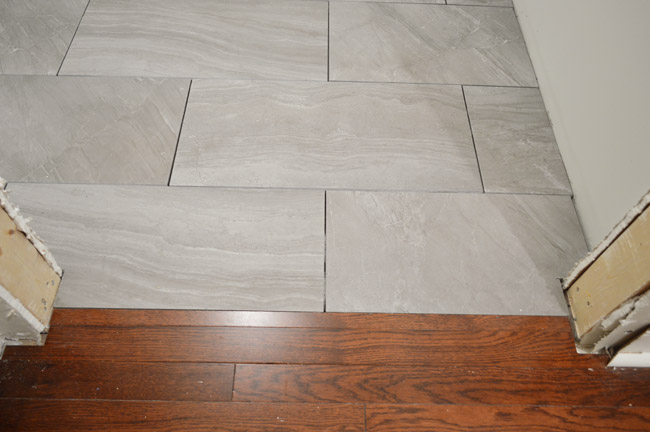
It required adding back two pieces of wood first (to bring the hardwoods about halfway into the middle of the doorway) and thankfully my planning with the subfloor height paid off: the floors are EXACTLY the same height. I still can’t believe it. Here they are all grouted and complete just so you can see what I mean:
Speaking of grouting, after letting the thinset cure for 48 hours, it was time to grout. The material list was somewhat similar:
- Small bucket for mixing grout, using the margin trowel
- Non-sanded grout (since our joints are smaller than 1/8″) – we went with a color called Dolorean Gray from Home Depot
- Water for mixing with grout powder, and for wiping clean
- Float for applying grout
- Sponge for wiping it off
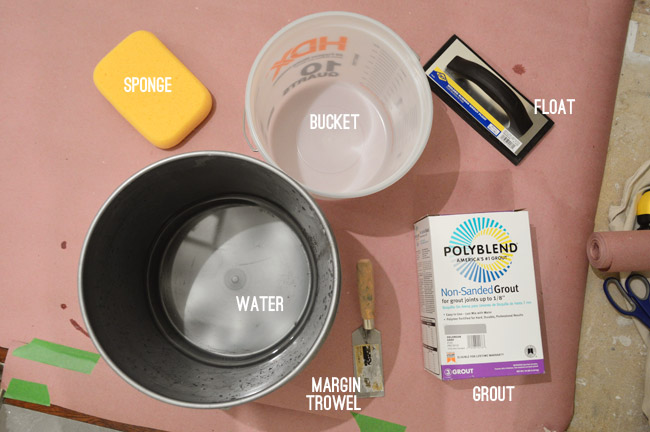
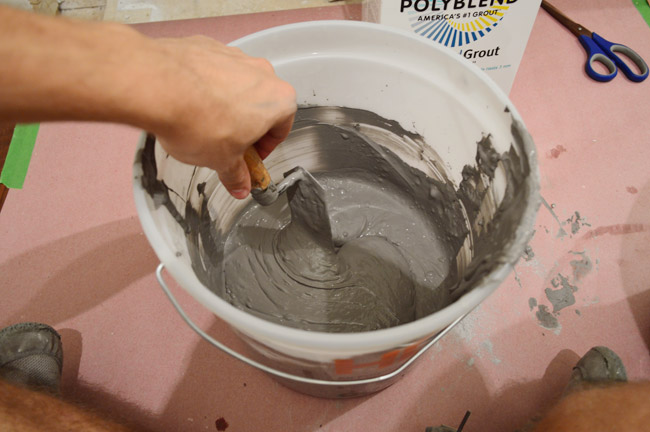
You add the water to the bucket first, then the grout powder. I started with a crazy amount of water for some reason, so I ended up mixing up a ridiculously large batch of grout for such a small room with so few joints.
Grouting is pretty easy, especially when you’re working with big tiles, since it’s quick to cover all of the joints. Using the rubber float you press grout between the tiles, then at an angle you wipe off the excess.
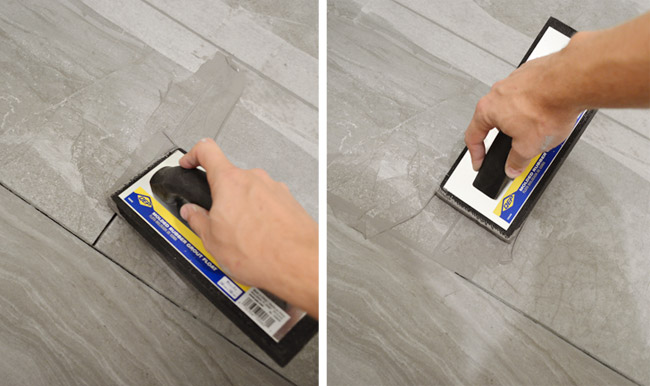
I was able to grout the whole room in about 20 minutes, and you can see how it starts to dry lighter – indicating that it’s time to start wiping it off.
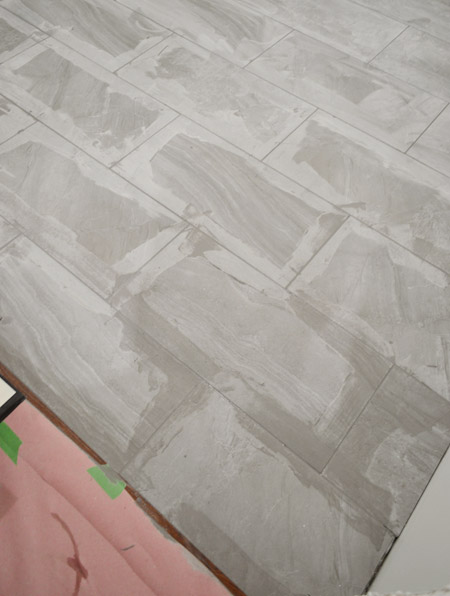
I made the mistake of using too much water when grouting the sunroom (which we think caused the grout to dry lighter than we had intended) so I was really careful to make my sponge only slighty damp when wiping off the excess this time.
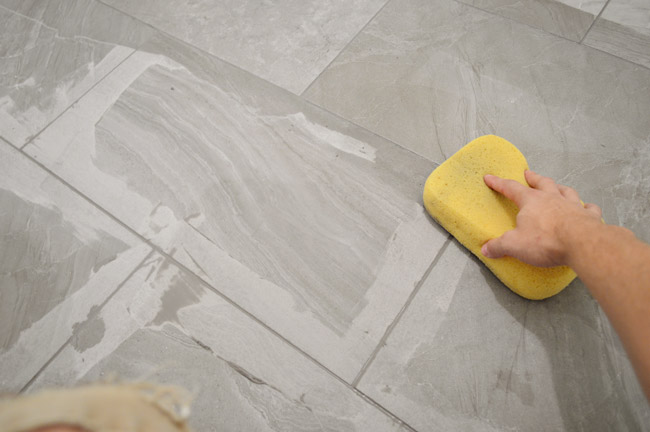
After a couple of passes with my barely-wet sponge, it still looked extremely hazy (this is the point where I think I panicked in the sunroom and got water crazy).
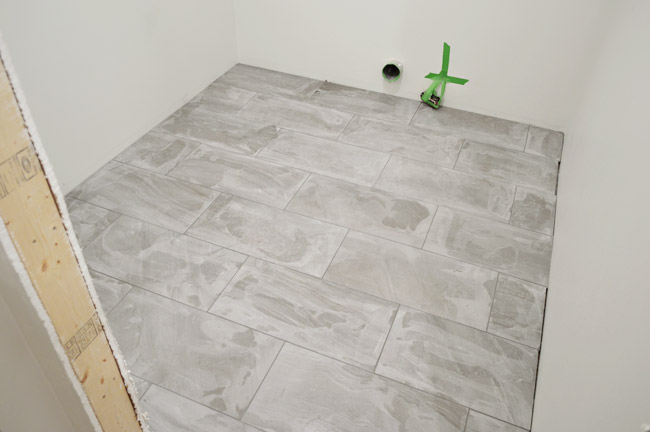
But this time around I let it dry another 90-minutes and then came back with a completely dry microfiber cloth (they recommend cheese-cloth, but I didn’t have any handy). The microfiber cloth seemed to do the trick just as well, and some light scrubbing buffed off a lot more of the haze.
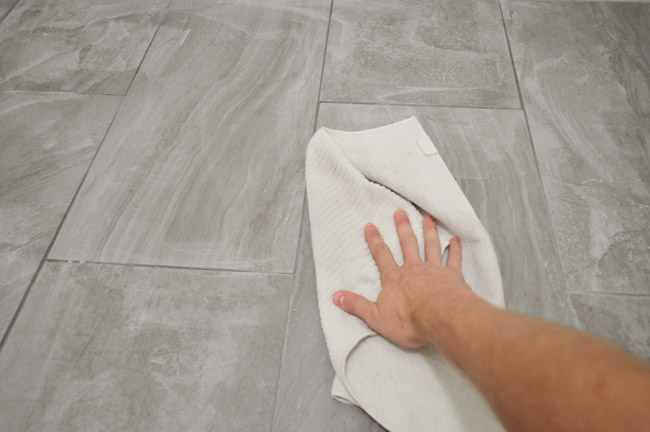
Here’s the floor post-buffing. MUCH better. Phew.
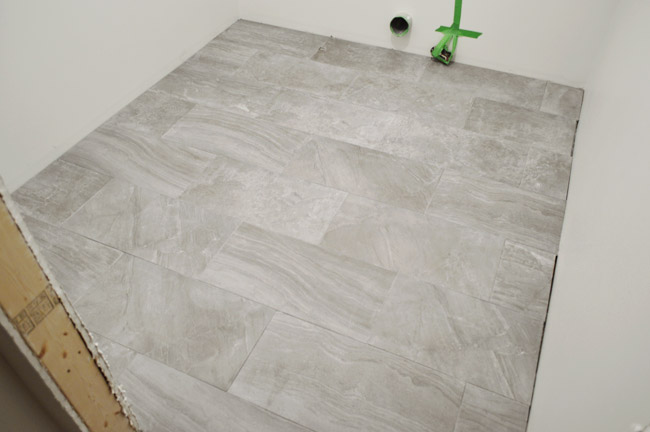
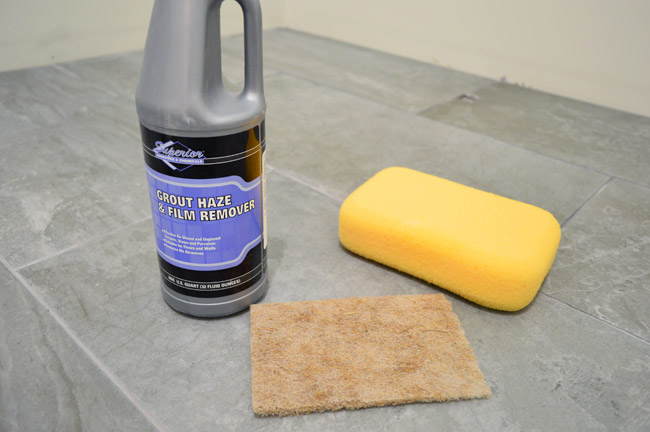
We let the grout dry for 3 day, per the instructions. Things were still looking a little hazy in there, so Sherry busted out some grout hazer remove that we had leftover from the sunroom project. You basically spread it on liberally with a sponge, let it sit for a few minutes, then wipe it off with a scrub pad. Then she wiped the room down with clean water a couple of times to get all of the haze remover off.
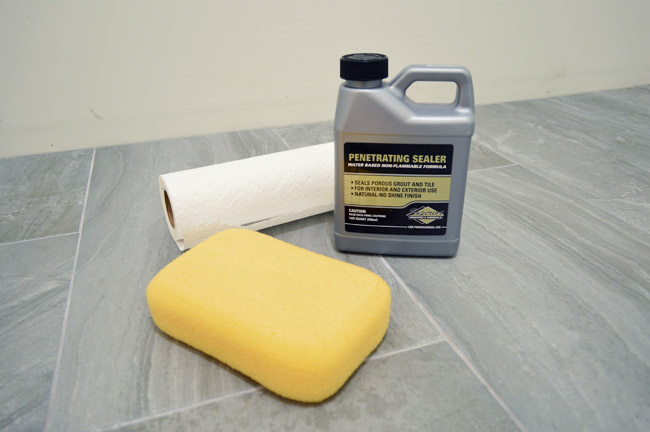
Then we waited for that to dry out for around 12 hours before applying a sealer on both the tile and the grout to help protect it from staining. It too is pretty easy to do – just wipe it on with a sponge, let it soak in for a few moments, and then wipe any excess off with paper towels.
Those two steps definitely brought the tile to life a bit more, which is why we recommend not skipping over the haze remover step.
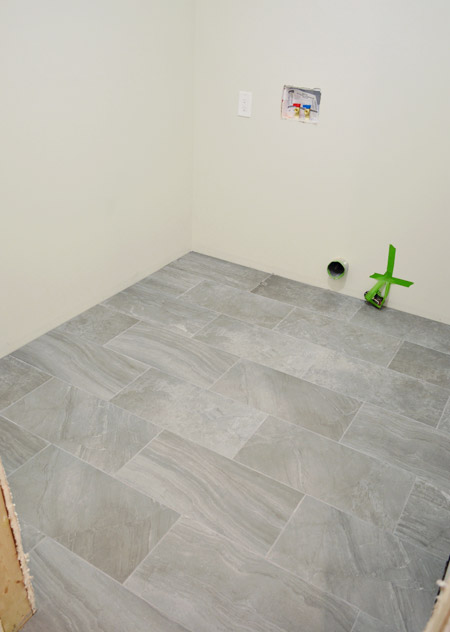
Sometimes you don’t realize the film leftover from the grouting process until it’s gone.
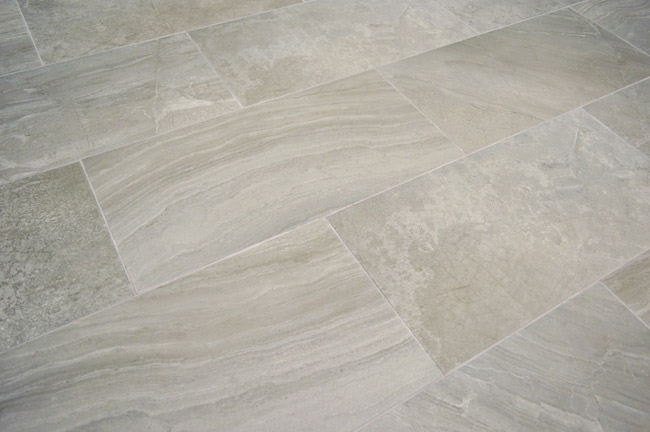
Here’s the cost breakdown for the floor tile project:
- Cement board & screws from Home Depot:$48
- Blast Anthracite 12 x 24″ tiles from The Tile Shop: $353
- Thinset from The Tile Shop: $29
- Grout in Dolorean Gray from Home Depot: $13
- Buckets, sponges, trowels, spacers, float: $8 (since we already owned most of them, but add $25 or so if you don’t)
- Superior Haze Remover: $0 (we had some leftover, but it’s $9 at The Tile Shop)
- Superior Penetrating Sealer: $0 (we had some leftover, but it’s $13 at The Tile Shop)
- TOTAL: $451
So it was pretty much $350 in tile and $100 in supplies. I’m excluding our new wet saw since it’s not a cost specific to this one project, and I don’t want someone to think that $277 must be incurred on a project like this, but after seeing what a difference it made, if you’re working with a cheap old tile saw I highly recommend the upgrade. I’m actually mad that I did our giant sunroom without my new tiling toy.
Wrapping up this tile job means we can actually start putting this room together. Which is especially exciting because we bought our cabinets at Ikea on Friday (ignore the random pillows in that basket, they were for a cousin we met up with on the same trip).
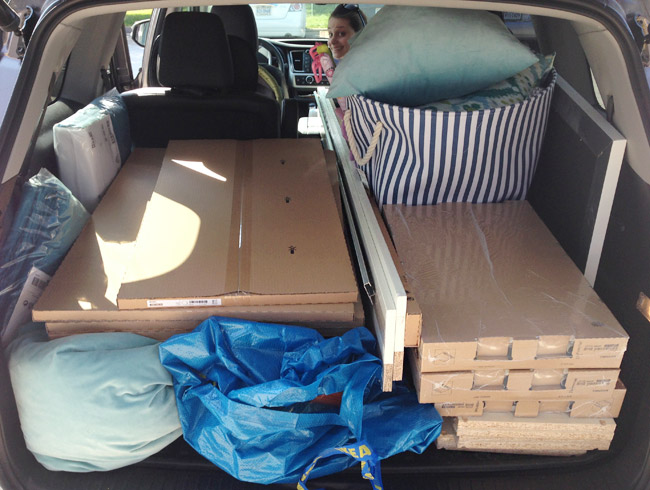
We’re thinking we’ll get at least the upper cabinets hung before we bring the washer & dryer in, since dropping cabinets on expensive appliances is not a risk we want to take. But once those are in, we may finally be back in business to wash our clothes at home again. High five! Anyone? High five? Are you leaving me hanging because I smell like a guy that just tiled without a washing machine?

Ann says
I really like that tile! Looking forward to seeing the room come together. I do want to mention something though. When you lay Durock or Hardie board it’s best to stagger all of the boards (like you staggered the tile). It makes for a stronger installation with no weak points in the substrate. Also, silicone caulk is recommended for transitions between wood and tile. I know that you mentioned grout used elsewhere in the house but there’s probably green board used behind the tile in your bathroom wet areas. Would you replace it with more green board? Hopefully not.
Did you calculate deflection before you laid the tile? This would be a good lesson to go over with readers since it’s the most important part of any tile project over joists.
YoungHouseLove says
Thanks for the tips Ann!
xo
s
Jaz says
Hey you guys, that tile looks nice, but I don’t need to talk about the making of the tiles this time. I’m taking the time to try to improve your tile installation methods so that the job will last a long time. Yes, you made several mistakes, some of which may cause a failure in a few years. I’ll try to list some of the obvious problems;
* In pic #4, you can see there isn’t enough thinset spread to the subfloor.
* The gap between sheets varies, but leave 1/4″ at perimeter.
* The thinset is not there to bond the boards to the floor. It’s used to “support” the concrete board. You need to fasten every 6-8″ on edges and 8″ in the field.
* You should use the special screws for the brand you’re using. Do not use those cheap drywall screws. Galvanized roofing nails are fine and some think even better.
* Large rectangular tiles are often set with a 50% offset, as shown. However, because large tiles are usually warped, the manufacturers and industry recommends to offset of more than 33% to minimize lippage.
* You should use a 1/4×3/8×1/4 trowel as your standard for tiles that are 12″ or larger, if the backs are relatively flat. Some will require larger notches.
* After applying the thinset with the flat side of the trowel, you need to apply more and then trowel leaving the notches all going the same direction. So the notches go east-west then you set the tile and press/push north-south to collapse the grooves. This gives you much better coverage with little or no voids.
* Pic #14 & 16 clearly shows the thinset is too thin and not enough applied, wrong trowel.
* Be sure to leave a gap around the perimeter of at least 1/4″ and do not grout this expansion gap. If you want to fill it, use caulk.
* Do not grout at the doorway to other floorings. Leave an expansion gap and caulk.
* Most grout sealers are applied 2-3 days after grouting and final cleanup. Follow directions of the container.
Note: Since many people buy their materials at a Big Box where accurate info is hard to come by. Do some research before you decide on the installation method. Do NOT be tempted to use pre-mixed adhesive to set tiles on any floor OR any WET area, floors or walls. Mastic can be used on walls that get no water, like a kitchen backsplash. Exceptions apply, such as when installing natural stone tiles.
Jaz
YoungHouseLove says
Thanks for the info!
-John
Grace says
John, making those floors perfectly match up is ah-mazing. Awesome job! I am thinking about tiling my kitchen and fireplace surround myself, but I’ve got to build up my confidence a little before I bust up the place. Thanks for the inspiration!
Dr. Archer says
Wait, did you guys get a new car? SUV or minivan?
YoungHouseLove says
We got a Highlander a while back (before Teddy was born). Love it so much!
xo
s
Heather MacFeather says
Gorgeous tile. Gorgeous installation. Congrats.
Amy says
Thanks for this post! We have old tile in our entry that is laid directly on subfloor and keeps popping up. It’s also in terrible shape (chipped corners, etc.); this post makes me more confident I can do it myself.
Andrea says
I’ve always wondered (particularly when I’m cleaning tiled floors) why the grout between tiles is recessed? Would it be possible to have the grout flush with the tile top thus allowing for easy cleaning? Following you from South Africa …
YoungHouseLove says
Thanks Andrea! I think the grout naturally recesses a bit from the face of the tile since it usually has slightly curved sides, but one thing to make cleaning the grout easier is to seal it! It has really made a difference in our experience (even when it’s white grout, which tends to show everything!).
xo
s
Alex the Airhostess says
Hey Andrea,
Another reason the grout is usually recessed is that it isn’t as durable or wear resistant as the porcelain/ceramic/stone tile, so direct wear on grout would likely show long before your tile would wear out. :)
Peggy McKee says
I know you’ll be happy every time you step from hall to laundry room that you took the extra time and trouble to keep the floor heights the same. Bravo!
Question 1: Are you going to use a threshold saddle between the 2 rooms?
Question 2: Are you going to tile the backsplash before reinstalling washer/dryer?
I love those large 12 x 24 tiles–glad you used them.
YoungHouseLove says
Thanks Peggy! We think the threshold is all set as-is but will keep you posted (we can always pop out that last piece of wood we added to bridge the gap if we need to add a saddle) and we think we might end up hooking up the washer and dryer but pulling them out slightly and covering them to add that backsplash (we really are itching to get them running again!). Will keep you posted!
xo
s
Emily W. says
Looks fabulous! I love smooth transitions!! Though I was wondering about the joint right in the middle of the entry. From what I’ve learned with tiling, you want the entry way to be as joint free as possible in an effort to reduce grout/tile cracking. When you enter the room and step into the tile, your foot (ahem, weight) lands on a solid piece of tile rather than a joint. Just curious on your take. (Side note: When we tiled our laundry room we started the tile from the entry way first and tiled from there because most the of the tile would be covered by the washer pan, washing machine, and dryer. I noticed you started from the back and moved to the entry way. I’m not saying it is wrong, just noticed.) Again, looks great just curious on your take re: joints. Grout joints that is :)
YoungHouseLove says
Thanks Emily! In our case since this room only has one door, starting in the far corner and tiling back out the door seemed to make the most sense to us (starting at the door felt like someone could end up trapped in the room, which would mean walking on freshly laid tile and compromising the installation). We usually use smaller tiles than these (for example, we laid 12″ ones in our first bathroom) so avoiding any joints in a 32″ doorway is usually hard for us, but they seemed to hold up well! Of course it’s can’t hurt if you can avoid them though :)
xo
s
Emily W. says
Thanks for the insider view and reply! I really enjoy your blog!!
YoungHouseLove says
Thanks so much Emily!
xo
s
Sarah Pendergast says
The tile is absolutely beautiful. Can you give any details as to what it’s made from and if there’s any texture on the tile? The tile shop website does not give many details.
YoungHouseLove says
They’re porcelain tiles and they’re mostly smooth on top (a bit of the veining has a very very slight texture).
xo
s
Samantha @ Fabulous Fabris says
Wow, looks great! Can’t wait to see it all finished :)
kimi says
Im in love with the tile!!! Looks wonderful!!! Can’t wait to see the rest of the room come together!!! ahh!!;)
Megan says
Dang guys! Tile on! Looks great.
Sidenote: Sweet Teddy is looking a lot like Miss Clara in week 17!
YoungHouseLove says
We think so too!!
xo
s
Meghan says
Weird and off topic (and you may have talked about this on the blog before and I’ve just missed it!), but what car do you guys have? We have a 17 month old and one on the way in February and we’re looking to size up from our little (but loved–hello gas mileage!) Ford Focus. As the proud owners of two carseats and lots of loads to haul what vehicle did you guys end up with??
Thanks!
Meg
YoungHouseLove says
We have a Toyota Highlander and love it so far! We just have one car, so we like that it’s not giant or a super gas guzzler but it has a lot of storage room in the back when we need it!
xo
s
Meghan says
Awesome–our brother and sister in law have one too and love it! Thanks for the response–its so nice to know that you guys take the time to answer even random questions like this!
Maddy says
I was wondering what the square footage of the room is, because I love that tile, and was wondering how much space you covered for the cost. Thanks so much, looking good!
YoungHouseLove says
Thanks Maddy! The room is close to 8 feet deep by 7 feet wide and the tile cost is in this post for ya: https://www.younghouselove.com/2014/08/more-tile-room-plans-and-a-new-door/
xo
s
Marie says
I want a John. I’ll trade you your John for my Charlie…
YoungHouseLove says
Haha!
xo
s
Emily says
That tile is gorgeous!! I love, love, love it. Nice work!
Corinna says
Beautiful! Thank you for the in-depth “how-to”!
Melissa says
Question- I noticed that you didn’t add any texture to your walls. Do you just not have texture in other parts of your house or are you forgoing it here? I wonder because texture is one of the hardest steps for me- trying to match it specifically and I was hoping to see a tutorial during your remodel process.
YoungHouseLove says
Yes, our walls are smooth here (they were at our other houses here too, I think it’s regional!)
xo
s
Julie says
We just had this exact same tile installed in a kids bathroom last month. I made the exact same piles of my two that were far and above my favorite of the designers (and luckily there were a lot more of them). Glad to see my choice gets Young House jazz hands. I love it.
YoungHouseLove says
Haha, I love it!
xo
s
Cassie D says
“I love this thing so much, I want to take it out to dinner.”
A little bummed you didn’t quote Tracy Jordan :D Love me some 30 Rock!
http://youtu.be/xnxz3acXM6w
YoungHouseLove says
Ha! This saw brings out the gentleman in me…
-John
Sarah C. says
I will high five this project! I am extremely impressed at how quickly you guys have managed to put the room together! We started our kitchen remodel in April and we’re nowhere near finished.
J Bagley says
“Dolorean Gray” grout! That “Back to the Future” color name is fantastic!
This whole process is great to watch. Loving the transformation.
Kelsey says
Love the tile! Where did you get it from?
YoungHouseLove says
It’s called Blast Anthracite from The Tile Shop.
xo
s
Shane D says
Do you find it makes any difference if you use the natural stone vs. ceramic/porcelain sealer for the grout? There is a pretty significant price difference between the two.
YoungHouseLove says
We try to just use whatever is recommended to us for that tile-job (we usually pick it up at The Tile Shop). Hope it helps!
xo
s
Lina Goldberg says
Sherry and John,
First of all, love the tile you chose for your laundry room! Very nice choice. I’m a designer for an architecture firm and I specify a lot of large scale tiles for projects, especially 12″ x 24″. Just wanted to let you both know that with the growing popularity of large format tiles, the TCNA has guidelines for installations like this. It is recommended, with rectangular tiles, use thickset mortar bed and 33% running bond. These larger tiles tend to cause lippage that is more noticeable at an offset of 50%. In the commercial industry, these are the standards that we use. See link below for more information.
http://www.crossvilleinc.com/literature_library/Pressed%20Rectangular%20Tile-Large%20Format%20revised%20Jun2011.pdf
Thanks for sharing your home renovations! I love reading your blog!
Lina
YoungHouseLove says
Thanks so much for the info and the link Lina!
xo
s
Erin says
No way! We just installed the same flooring in our laundry/mudroom area! Same hardwood too.
Great minds think alike!
http://redhousereno.com/our-house/house-update/
YoungHouseLove says
Looks awesome!
xo
s
Lizzie says
Am I the only one to spot Burger in the tile dots in one of the tiles you’re hiding? Pic below your thinset with two rows of tiles down, the 2nd from the left in the row nearest the wall. Maybe it says more about me than your tiles!
YoungHouseLove says
Hilarious!
xo
s
Maria Peterson says
What a great work!It’s looks awesome! I’ve never tiled any floor but I did some grout work in the bathroom.I’m pretty sure I can feel your pain. Such a messy, hard, no-fun-at-all job!Now I am sure you are feeling so good to have that done.
Monica says
Although I’ve never posted a comment here, I’m a huge fan of your blog! We’re in the process of buying a house (fingers crossed!) that needs a bit of TLC to make it feel like home, so your posts are lifesavers. We’ve never done any sort of DIY before and we’re doing our research before we move. The laundry room looks amazing, I love every single aspect of it. I just had a question regarding the tiling, hope you don’t mind: in some photos (for example, http://images.younghouselove.com.s3.amazonaws.com/2014/08/Tile-22-After-Wiping.jpg or http://images.younghouselove.com.s3.amazonaws.com/2014/08/Tile-24-Buffed.jpg), you can see some spaces on the right, along the wall. They don’t seem to be grouted etc., so I was wondering what you plan to do about them. Thanks in advance :)
YoungHouseLove says
Good question! You’re actually not supposed to grout the edges of the room like that, instead you can caulk them or just leave them open to breathe and add the baseboard (which hides it and makes for a nice even seam).
xo
s
Monica says
Many thanks for getting back to me and explaining! This is the type of question that a beginner with no clue whatsoever usually asks :)
YoungHouseLove says
Of course!
xo
s
Leslie says
Looks fab! I’m considering tiling my entryway (about a metre square) for my first ever DIY tiling job. The Subfloor looks like concrete, and was previously home to those nasty school-cafeteria style tiles (they might have been actual lino, they’ve been there since the 60s at least). Do I need to put down cement board or can I just get away with self-levelling concrete?
YoungHouseLove says
I think if it’s concrete you can just do the self leveling stuff (we did that for our back porch outside, without adding cement board) but maybe ask the tiling shop or home improvement expert in that area just to be sure?
xo
s
Morgan says
Hi J&S! When I took the survey I couldn’t think of any design/project challenges to list, but since then I’ve thought of two. It might be too late to have them included but here they are: We have had trouble embracing design risks and as a result our house is incredibly neutral (brown, tan, white, black). Any tips on getting out of our comfort zone would be major. We have also struggled to find time (and energy) to decorate/remodel given our full work schedules. How do you keep working on your house between raising two cuties, a dog, exercise and social/family engagements? Thanks! Morgan
YoungHouseLove says
Thanks Morgan! Love those!
xo
s