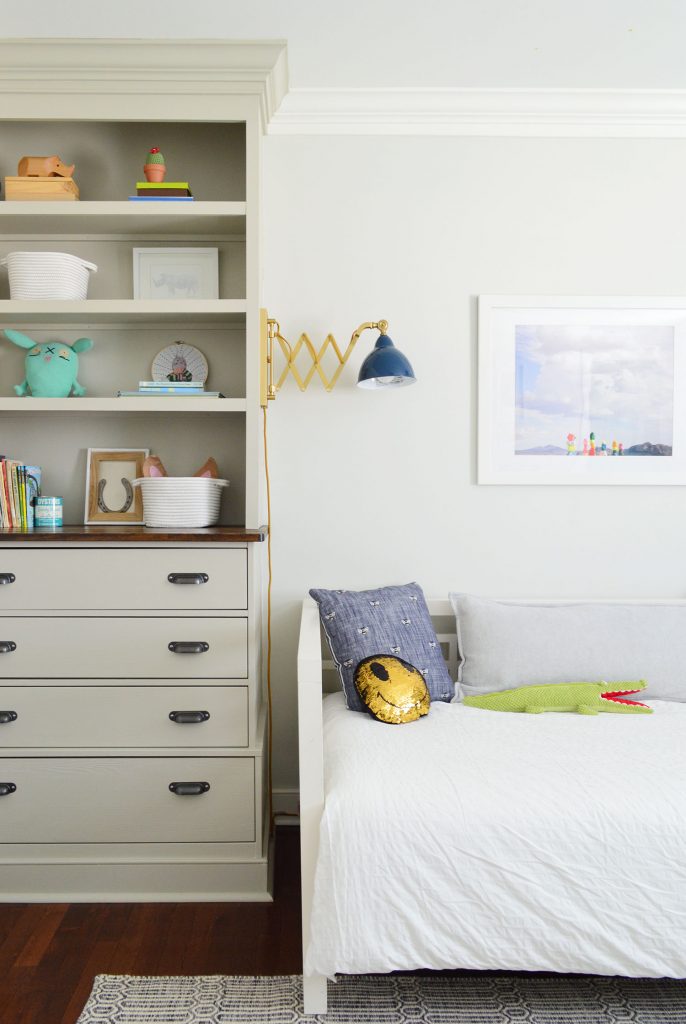
Today we’re going to show you how we built the bookshelves in our son’s room. It’s an easy project that we’ve since used to create custom shelving everywhere from our living room to our beach house pantry. But these bedroom shelves were our very first attempt at them and we absolutely loved how they turned out.
This tutorial specifically focuses on building the actual shelves, aka the top portion of these built-ins. You can separately read about how we first built-in the cabinet bases (it’s an Ikea hack!) and later finished them off with crown molding. But since not every bookshelf needs those features, we’re talking just about the shelving today.

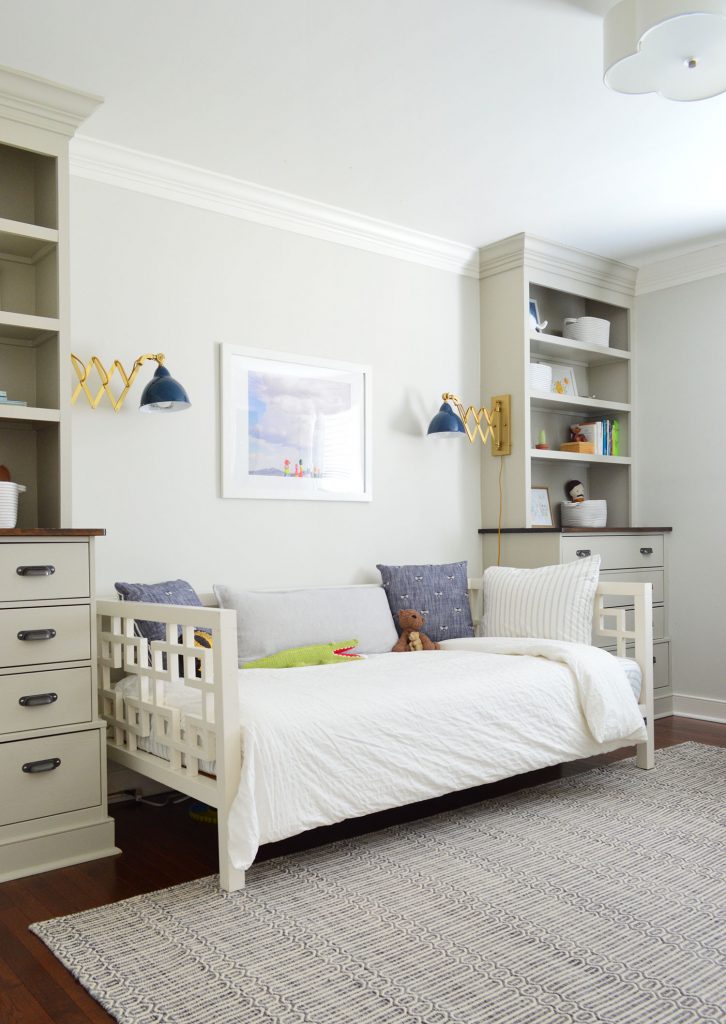
You also can take a tour of the finished room both in it’s initial version as our son’s nursery and then later when we updated it with a big boy bed.
Tools & Materials To Build A Bookshelf
Here are the supplies and tools you’ll need to build your bookshelf. If you don’t have a table saw or circular saw, try renting one from your local home improvement store. Some stores will also cut your wood for you, but this is a project where you’ll really like having one around.
- 1/2″ MDF or plywood for the shelves
- 1×3″ pine (ripped in half) for support pieces
- 1×2″ pine for face pieces
- 1×4″ or 1×6″ pine for top brace
- Measuring tape
- Stud finder
- 24″ level
- Clamps
- Nail gun with finish nails
- Miter saw
- Table saw
- Circular saw
- Power drill/driver
- Wood glue
- Paintable caulk
- Primer & paint
- Painting supplies
The exact amount of wood you’ll need depends on the specs of your bookshelf build. That’s why the first step is so important!
Step 1: Plan Your Build
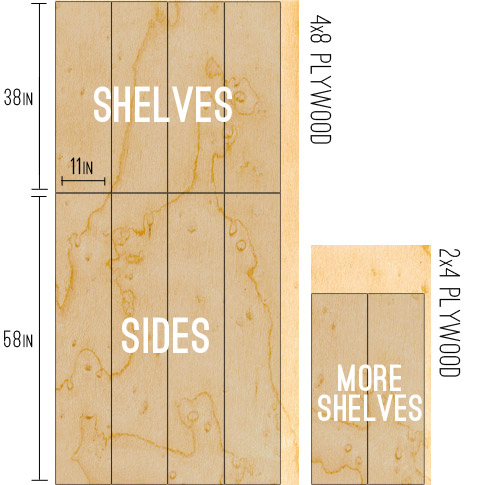
Start by measuring your space and sketching out your bookshelf on paper. This will help you figure out how material you may need. You can still adjust as you build (like you might change your shelf spacing as you go) but always take time upfront to make a plan. For us, this made sure we bought enough – but not too much! – plywood for our shelving. You can see below how figuring out exactly how to maximize a 4×8′ sheet of plywood was almost like a puzzle.
NOTE: We used plywood for this build to better match the subtle wood grain in the base cabinets. However, for a smooth, painted finish we recommend using MDF instead.
Step 2: Cut Your Shelf Pieces
The first building step is to cut your plywood or MDF into the big shelves and side pieces. You can do this with a table saw or circular saw, like you see below. That photo is actually from our pantry shelf project because we got our plywood cut in-store for these bedroom bookshelves. The Home Depot guy ripped my plywood into 11″ strips after seeing my sketch, which was a huge help. He was able to lock his big saw into place to ensure I got equal and even cuts on all of my shelves.

If you are cutting at home, I recommend careful measuring and taking your time. You can also see above that I had clamped two pieces of MDF together so that I could make two cuts at once to ensure the shelves matched.
Step 3: Prime & Paint Your Shelves
We find it easier to paint all of our big pieces BEFORE installing them. It’s typically easier to paint flat surfaces with a roller when you don’t have to worry about edging against walls or cutting in to corners. You will still need to do some touch-ups after building, but this saved us a lot of time.
Just be sure to prime the pieces first, especially if you’re starting with raw plywood or MDF. The color we used was Benjamin Moore Senora Gray.
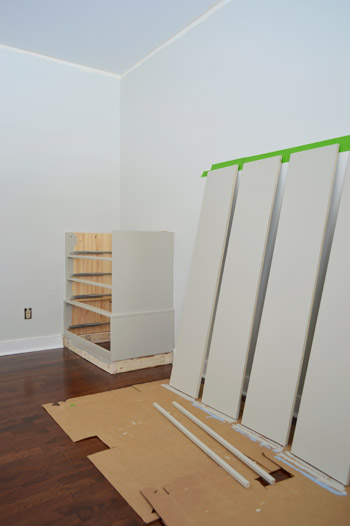
Step 4: Build Your Bookshelf Frame
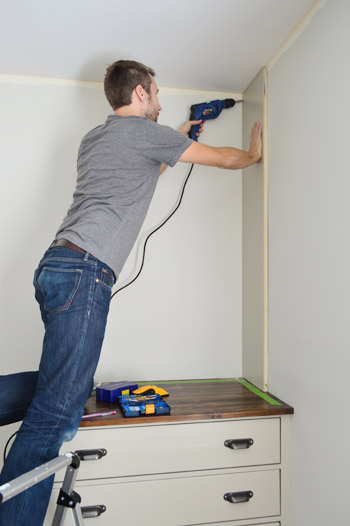
One our paint was fully dry, we began construction by securing one of the tall side pieces directly into the wall. We used a stud finder to locate studs and attached the piece with countersinking screws that we could putty over later.
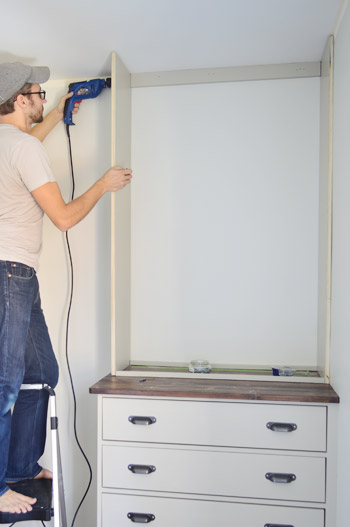
Attaching the next side piece was a bit more involved since I wasn’t screwing directly into a wall. I knew it would become sturdy once I added my shelving, so the challenge was to keep it in place in the meantime.
To do that, I attached a 1×3″ brace piece along the top of the back wall into a couple of studs. This piece wouldn’t be visible in the final bookshelf, but it gave me a place to screw the vertical side piece into. An alternative plan would’ve been to purchase a large piece of MDF or plywood to act as a solid back behind the bookshelf. We opted to just use the wall itself instead, mostly to cut down on cost.
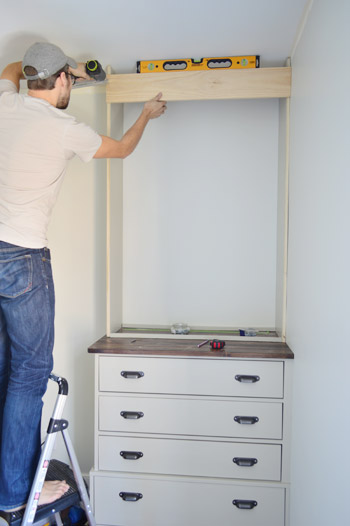
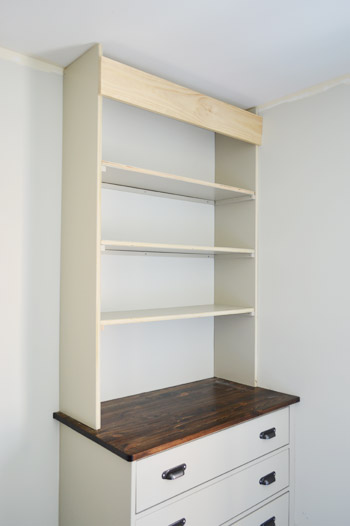
I also add a 1×6″ brace piece across the front of the bookshelves to help keep things square. I hadn’t planned on this piece originally, which is why it’s not painted.
You can also see some pieces at the bottom helping to keep things square down by the base of the bookcase. These were cut to the same length as the eventual shelves just laid there temporarily.
Step 5: Add Your Shelves
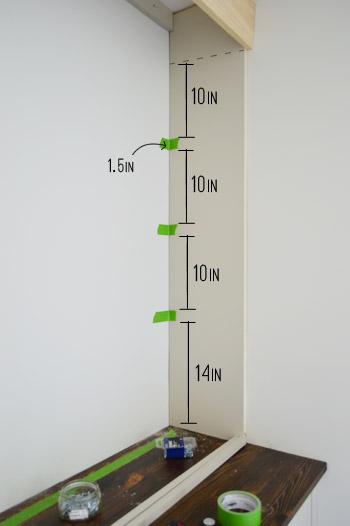
With the sides in place, we turned our attention to the shelves. First we needed to finalize our shelf spacing, so we broke out a ruler and some painter’s tape to help visualize spacing options. Ultimately we ended up with evenly spaced 10″ shelves with a little bit of extra room at the bottom. Just be sure to account for the 1.5″ width of the shelves themselves, as represented by our painter’s tape.
Next it was time to attach the shelf supports. These are thin strips of wood under each shelf on 3 sides. I cut these pieces by ripping a 1 x 3″ along my table saw into .75″ wide pieces. This will make more sense in a moment, but any thicker than that and the supports would be visible below the face pieces added later to the front of each shelf.
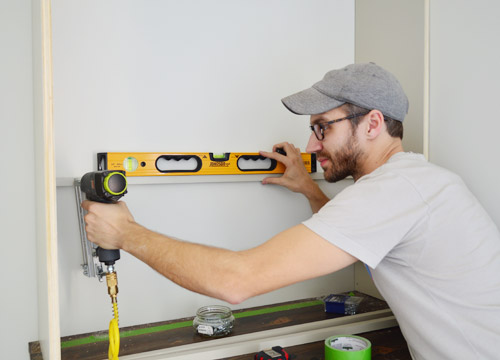
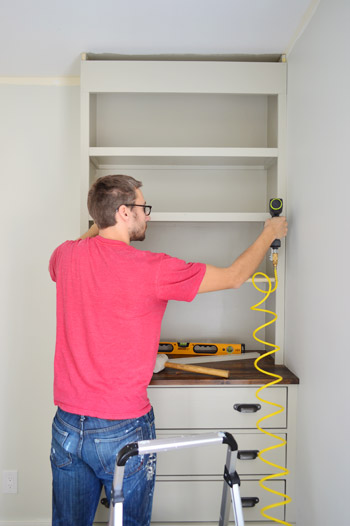
I first nailed the braces into the wall and the sides being sure to keep things level as I went. This was just a speedy way to get everything in the right place. Then I went back and screwed each piece more securely into a stud (along the back) and into the wood (along the sides). This enables the shelves to bear more weight over time.
Once all of the support pieces were screwed in, it was easy to pop the plywood shelf pieces into place. After all, we’d already cut, primed, and painted them!
I also nailed each shelf down into the brace piece so they won’t pop out or jiggle or anything.
Step 6: Finish With Face Pieces
The next step is my favorite because it makes the bookshelf look way more finished. We cut and nailed in 1×2″ pine pieces (already primed and painted) to cover all the exposed edges along the front of the shelves. This not only hides the raw edges, but also makes your shelves look thicker than they actually are! This is also why you want those support pieces cut thinner in the previous step.
You can also see before this step I had done some painting – both the back wall and the brace piece at the top. I also had done some caulking, but you can do this as a final step as well.
Step 7: Caulk & Touch-Up Paint
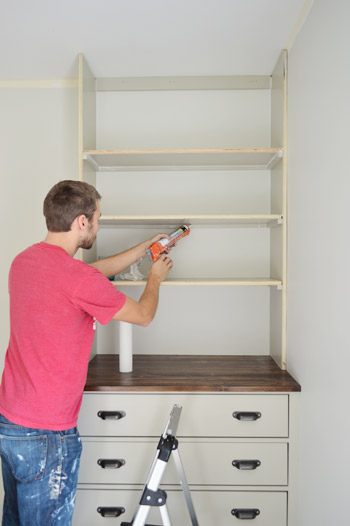
Once everything is constructed, you’ll want to caulk your seams, fill any nail holes, and do any necessary touch-up paint. The caulking will take some time, since you’ll want to caulk any place two surfaces meet: shelf meets wall, wall meets support piece, support piece meets shelf, etc. We did a little bit of this as we went, especially to fill gaps where our wall wasn’t very flat.
Once your caulk is dry, you’ll need to do touch-up paint over it. This may feel tedious because you already painted, but I promise you this is much faster to do quick touch-ups than be painting from scratch at this point.
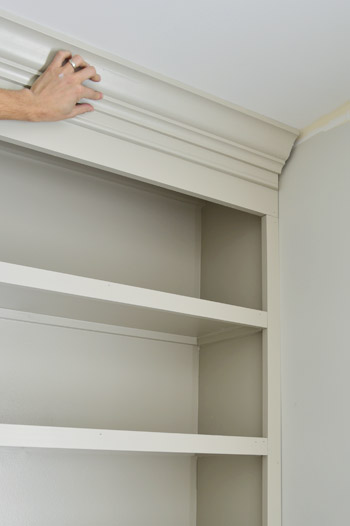
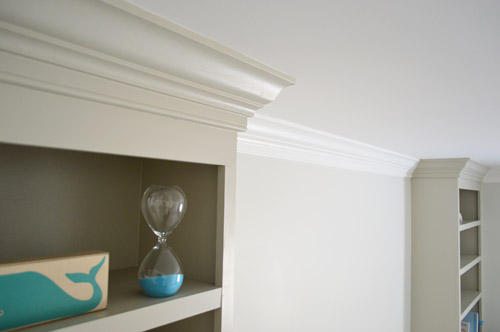
Step 8: Add Crown Molding (Optional)
For our bookshelves, we decided to finish off the top with crown molding that integrated with the crown we’d put installing around the whole room. We would be using a “beefy crown” method we’d tried first in our daughter’s room. It’s involved putting a piece of baseboard around the top of the room first, to make the crown look thicker.
You can read more about the process of installing crown molding in this room.
We love how these bookshelves turned out, especially how easy and affordable they were to create – they were about $60 each. And that includes all of the material for the bottoms too! They’ve also been great for both functional storage and cute display items.
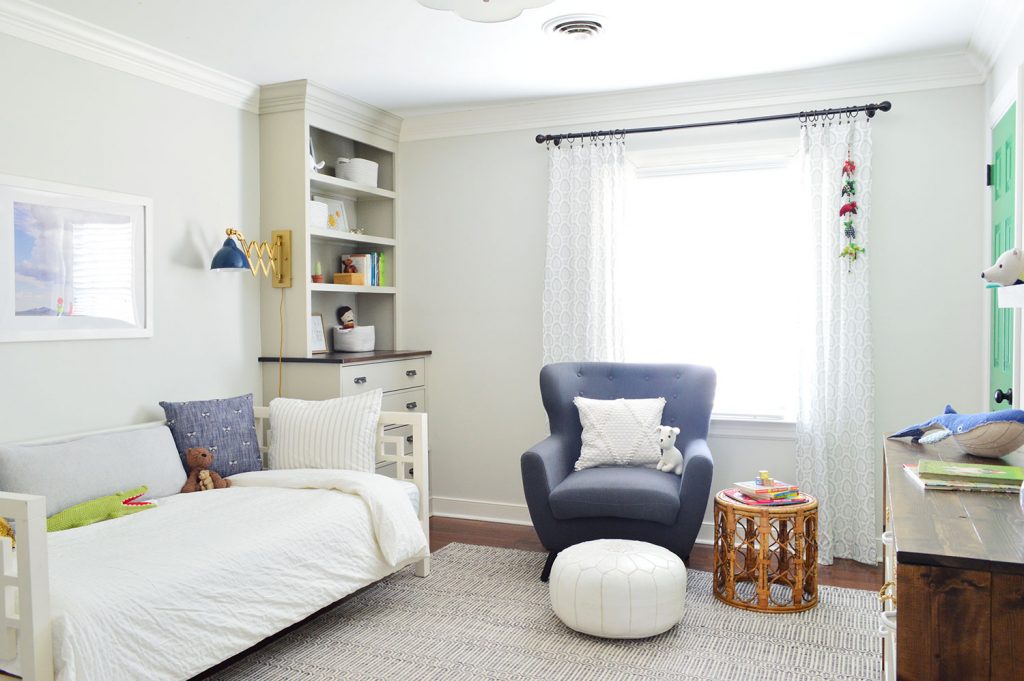
Again, you can read more about how we finished this room in its first iteration as his nursery, and then a few years later as a big boy room.
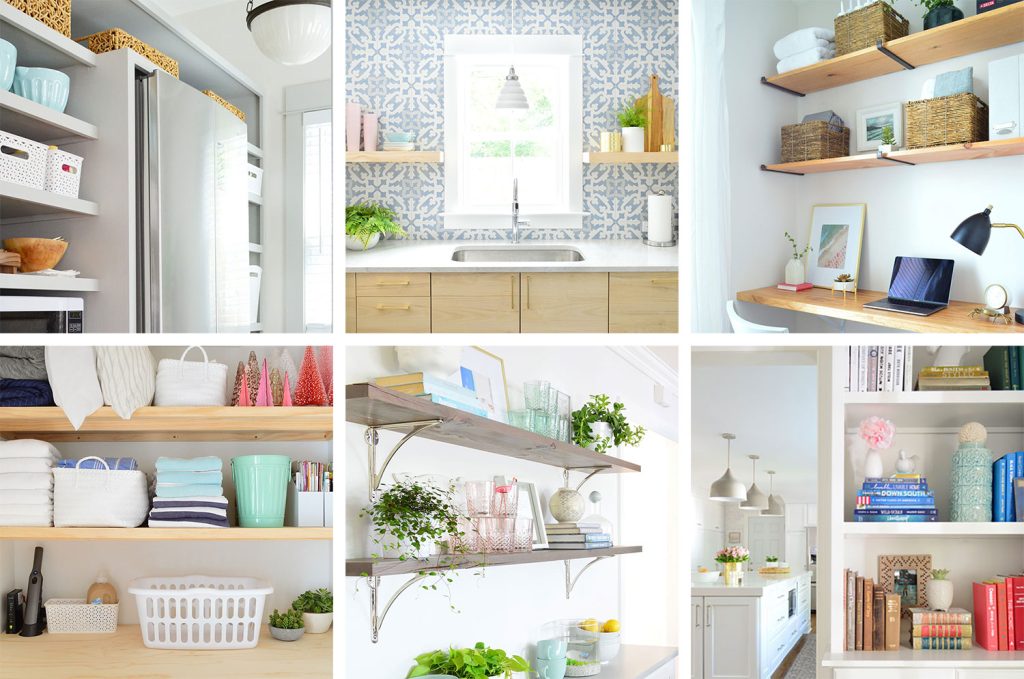
More DIY Shelving Projects
If you’d like more DIY shelving ideas, we wrote a roundup of 15+ shelf projects you can build yourself. You can even see how we used a similar technique shown here to create kitchen pantry shelving!
P.S. And when it comes to the items in our house, we hear “where’d you get that?!” a lot – so here’s a page full of our home’s paint colors & stuff we’ve bought/loved.
*This post contains affiliate links*

Rosie S says
Perfect! Love that you chose BIG furniture for the baby to grow into and are doing the room for the life of the child, not just baby mode. Cannot wait to see the finished project.
Rosie S says
Oh yeah, just noticed the above comment, I noticed the bare feet too….and I must say I do the same thing, in fact, I painted off the ladder yesterday with my toes clinging to the steps like a monkey….just makes me feel safer! Weird, but effective!
J Bagley says
Are you guys going to leave a little note in the top-of-the-built-in space behind the crown? A time capsule story about how you designed and crafted those awesome built-ins for ‘the Barnacle’? That.would.be.cool.
YoungHouseLove says
Ahhh! We should totally do that! Thanks for the idea JBagley!
xo
s
Martha says
This post, and all the other baby-posts, make me wonder if you’re looking for a new, larger car since you’ll soon be a family of four. Well, five with Burger, can’t forget Burger!
YoungHouseLove says
We have been considering a slightly larger car, just to accommodate two carseats (and a dog crate when we travel) more easily, but we’re not sure when we’ll make the move. November always has nice sales, so maybe then?
xo
s
Ashley says
I can’t believe anyone would even be thinking storage overkill! Ha! Number one, who ever has too much? And secondly, I was too busy freaking out over how amazing they look!! I think matching trim turned out so well! I couldn’t picture it, but knew y’all knew what you were doing. I was right anout that! So much better than the white trim would have looked! Brilliant! Awesome job!!
YoungHouseLove says
Aw, thanks Ashley!
xo
s
Theresa M. says
John you’ve really outdone yourself in the building of furniture. Great job! But I do have one question regarding the little ladder you’re using? Is that a one step or 2 step ladder? My husband just bought me a 1 step ladder so I can reach second and third selves in the kitchen without dragging over a chair. He rocks like that. And is the top step extra wide? I see you have your feet on both sides or are you just bucking the safety trend? Once again, great job on the construction!
YoungHouseLove says
It’s a two step ladder. The top step is a nice big platform, so it’s easier to place my feet wherever I feel the most sturdy, depending on how I’m bending or what I’m doing. In most cases keeping both feet on one side is the most stable, but sometimes one goes over to the other side if I’m bending and want more stability that way.
-John
Cair says
*wiping the drool off my chin.
I keep coming back and staring at these built-ins. Absolutely incredible. They look like ones I’ve seen in houses built 100 years ago (which, in my book, is a huge compliment). Now I’m wandering around my house trying to figure out where I could build some (not likely since there is no wall space in this house with too many doorways and lots of windows).
YoungHouseLove says
Thanks so much Cair!
-John
bekah says
Looking AWESOME! When I saw your mock-up of this I kind of didn’t like it (hey, to each their own right?) but I’m sold now. Nice job!
Jenn says
Looks great! I love a good built-in (we did something very similar in our guestroom).
Let me just take a moment to say that in the second photo down, the shadow on your left arm makes it look like you are rocking a most excellent mustache (or goatee) upon first glance. I had to check the other photos to see if it was true ;)
YoungHouseLove says
Haha!
xo
s
Rachel K says
Wow, this is super impressive!! Like usual, it looks totally professional and well planned.
I used the same method to decorate my sons nursery. I started out very neutral with teh walls, shelves, toy baskets, rug and crib then hung a lot of colorful art and of course his mountains of toys add color as well. I’ve learned the hard way that this is usually teh best way to go for novice decorators like myself. It’s really easy for a room to get too busy too soon and tough to undo.
YoungHouseLove says
That sounds like a really smart approach Rachel!
xo
s
Kimmie says
Can I ask a question? When I purchased my house the previous owner left marks or scratches so a friend suggested I used mr clean magic erasers so I did and the water alone made the paint drip and now I am left with white spots on a tan wall :-( I’ve never heard of paint washing off what happened? What do I do?
Thanks I know y’all are super busy
Kim
YoungHouseLove says
Eeks, maybe the paint isn’t thick and good quality? Some older paints are thinner and a lot less scrubbable. I would just guess that’s what happened. I’d try touching it up in those areas with a brush and lightly feathering the paint out a bunch (like a foot in diameter) so it’s hopefully nice and subtle.
xo
s
Anna Espich says
…I think I am in love! <3
Nikki says
Amazing job! NEVER NEVER too much storage … take it from a mom of 4 boys who are growing up way too quickly!!
Crystal says
I think these are my favorite things you have built! The detail in posts like these are one reason I have been reading this blog so long. I’ve been planning a new closet along one wall of our bedroom and now I’m thinking I might do a small dresser with a bookshelf on top for the middle of the closet. I’ll be coming back here for the details when I get ready to build – so thank you!
YoungHouseLove says
Thanks Crystal. Good luck with your new closet build!
-John
Keri says
Wow, these really turned out very nice! Great job on such an inspiring DIY. Just a question…where did you guys find the rug featured in the first photo? It is just excellent!
YoungHouseLove says
Thanks keri! That’s a nursery rug we found at HomeGoods a few weeks (maybe a month?) ago! Hope it helps!
xo
s
Bethany @ Dwellings by DeVore says
You guys are so talented! It looks amazing!
YoungHouseLove says
Thanks Bethany!
-John
Katie says
These are amaze-a-roni! For a millisecond I thought about showing this to my hubs for our daughter’s “big-girl room” but I know for certain this is waaay beyond his reach (no offense to him, John is just that talented).
My totally off topic question is, have you guys settled on your 2-3 names for the bun? I know you like to make a final decision once you meet him and then share with everyone. Just wondering if you have your final contenders.
YoungHouseLove says
We have some family names that have floated to the top, but with 10 weeks left I think things could still easily change :)
xo
s
amy says
This project ya’ll tackled has inspired me to make a custom entertainment center in my living room!!… We have very high ceiling and the 18ft was our tv in on looks so bare… i have priced custom entertainment centers and is way too expensive!! But this is so doable!! Thanks again for sharing all your ideas and projects.
YoungHouseLove says
That sounds awesome! Send us pics!
xo
Justine says
I have to say that I wasn’t convinced how well these were going to look when I saw the photoshop version. After seeing them almost finished and the lighter color I love them. I would love to put something life this in my house!
YoungHouseLove says
Thanks Justine!
xo
s
Joanne Couture says
Wow! Good for you guys! They are gorgeous!
Can you come to my house and do the same?!?!
YoungHouseLove says
Ding dong! (can you imagine if we were outside holding all of our tools, haha)
xo,
s
Megan says
The built ins look wonderful! I just love checking your blog everyday for updates! I am expecting this year as well and I love the crib you have! Where did you get it? You guys have the best ideas! I look forward to simulating some in our own nursery! Thanks for all of the laughs too! You guys crack me up!
YoungHouseLove says
Thanks Megan! Here’s the post about the crib for ya (we’re still really happy with it): https://www.younghouselove.com/2010/02/nursery-progress-crib-notes/
xo
s
Emily says
THANK YOU for sharing! I’ve been thinking about adding built-ins to my living room since I moved in 4 months ago. This looks like an “easy” / totally doable project. I could definitely handle this :) Looks like another home improvement project is in my future!!
Megan says
Thanks Sherry!!
Tasha @ Designer Trapped in a Lawyer's Body says
Ooooh, these are looking awesome! I can’t wait to see your son’s nursery all finished. Loving the color scheme, rugs and plans so far!
Emily @ Life on Food says
I am new to this whole home owning/house renovation thing. I cannot believe how fast they came together and how much it looks like they have always been there. I am eagerly awaiting the decorations.
Jess says
Beautiful built-ins! I just published our nursery reveal which depended heavily on your tutorial for bookshelves (with a link back). They are fantastic! Thanks so much!
Koen @ TownHouseHome says
Nice work, always fun to create something from scratch and see how it turns out. I’d also go for molding painted to match the cabinets, I don’t think it’ll look any good otherwise.
Marissa says
You’ve probably already seen these, but Caravan Shoppe has the sweetest printable bicycle art:
Here’s the poster:
http://caravanshoppe.com/product/ride-along-bicycle-poster/
And individual watercolor prints:
http://caravanshoppe.com/product/ride-along-watercolor-bikes/
The nursery looks great!
YoungHouseLove says
Love them! Thanks for sharing the links Marissa!
xo
s
Jake says
If you dado the sides at the shelf heights and assemble the carcass before installation, you could build that in much less time and avoid the hassle of laying out those ledger pieces in place.
YoungHouseLove says
Thanks for the tip Jake!
xo
s
Nicole M says
I LOVE these built-ins. I have been looking for something like this for my craft room. I have dresser full of yarn and would like to add a book shelf on top so that I can have more storage without needing another dresser. my Mister agreed to build me some shelves and this is the perfect tutorial for him to follow! I love all the pictures and details that you guys put in your posts.
Keep up the good work!
Much <3!
SeaEyes says
I am about to make a similar built in as a wardrobe, so deeper and full height. I was wondering what you used to secure the non-wall side to the back brace that is screwed into the studs. Screws or nails? I am thinking about making it out of birch plywood and it would be great to not have screws on the side. Any thoughts? A friend has a Kreg jog they offered to lend me but I haven’t ever used one. The room is looking great!
YoungHouseLove says
I used nails and wood glue (nailed it into the back brace) just to keep it in place, and then I used more nails and glue when I added the shelves, so that it’s actually supported from top to bottom at various points. Hope that makes sense.
-John
Eli says
I absolutely love what you guys did with this and it’s my first time ever commenting. I had to share– I sent your link to a few local carpenters to see if they would make these 2 identically for my home office. I got quotes back ranging from $4800-$5200! Insane, right?! I just wish I had your skills to make this happen!
Thought you guys would love to hear how much you saved by doing this!
Thanks for the inspiration :)
YoungHouseLove says
WHOA! That’s amazing Eli! Thanks for sharing that. I can’t wait to tell John!
xo
s
Kristen says
What paint color did you use on the cabinets? I love it!
YoungHouseLove says
Thanks Kristen! They’re Senora Gray by Ben Moore.
xo
s
Jesse says
Sorry if this is posted elsewhere, but what color did y’all paint the built-ins?
Jesse says
Ugh–just saw it!! never mind :)
Pilar says
The nursery is looking amazing, just like everything you guys do! I have a quick question since I am planning on painting a built-in bookcase in my house. Do you use flat or semi-gloss paint for that?
YoungHouseLove says
I think they’re a satin finish since we used Advance (we love that finish in that paint since it’s self leveling and great for furniture/built-ins).
xo
s
adri says
I love the pulls on the built ins. where did you get them?