So we did it. We concrete’d our kitchen’s laminate counters. Sherry shared this quick peek at our first coat in Friday’s post, and we’re back with the final results, the details of how we got there, and an in-action video to hopefully help explain the process.
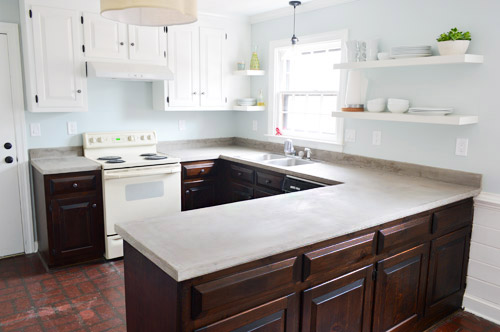
We’re really happy with how they turned out. Pictures don’t do it justice, but the whole room feels a lot more updated and less laminate-y. It’s giving off kind of a stark/cold vibe in these photos, but after we add some colorful window treatments, stuff on the shelves/counters, and remedy that bad faux brick flooring (and that almond stove) we think it’ll feel like a whole new room.
I’m not going to sugar coat it, though. It was a lot of work. And a lot of dust.
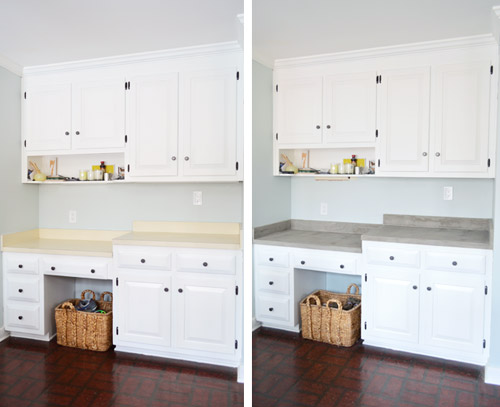
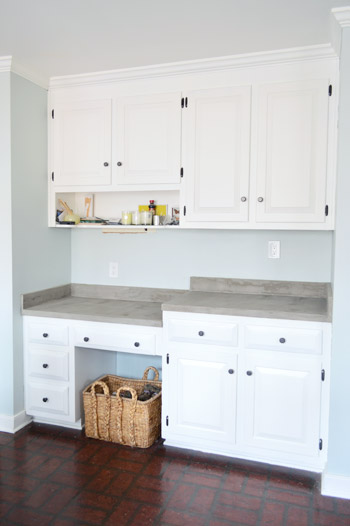
Here’s a reminder of what the counters looked like before. We had creamy-yellow laminate (with the occasional burn mark or scratch). In addition to the main kitchen area, we also gave the concrete treatment to the nearby nook by the eat-in part of the kitchen. We haven’t sealed the counters yet (we haven’t been able to track down either of the two products that our research points to using), so the color will probably get a bit deeper after that step.
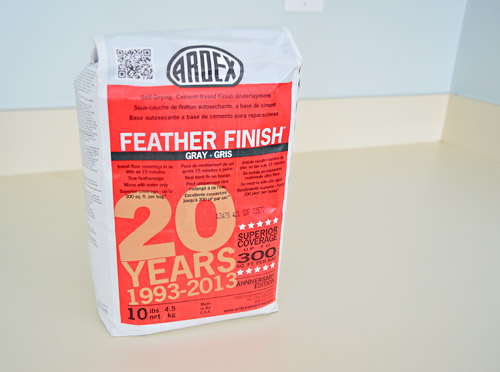
We did this using Ardex Feather Finish, which we’ve been really interested in trying since seeing a few other attempts like these from Kara Paslay, Little Green Notebook, Sarah’s Big Idea, and A Beautiful Mess. Somewhere between all of their pretty pictures and the low price tag for Ardex ($19 per bag) I had assumed this would be a quick and easy task. Oh silly me…
Maybe it was because we’re first timers, or maybe it was because our work area was especially large (we were dealing with 45 square feet of counters thanks to the U-shaped area in the cooking zone and the nook area by the table), but it turned out to be a tiring and messy job that spanned across five days. It wasn’t very complicated or difficult, just more labor and time intensive than we realized we were getting ourselves into. So let’s dive into the process. Forgive our photos for not being chronological. We took a bunch throughout our four rounds of applying/sanding the Ardex and I’m just using the ones that are most helpful. Let’s begin with supplies!
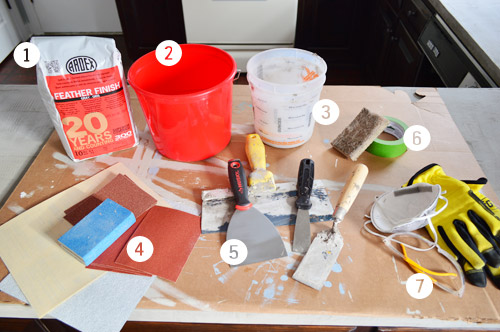
- Ardex Feather Finish, obviously. It’s not easy to come by, but you can hunt for a local distributor on their site or just follow this affiliate link to get it on Amazon. We ended up using 2.5 bags, though I think we applied it a bit thicker than necessary.
- Mixing buckets: We used one of these small red buckets for mixing our Ardex (it mixes with water). We made pretty small batches, so this was a great size.
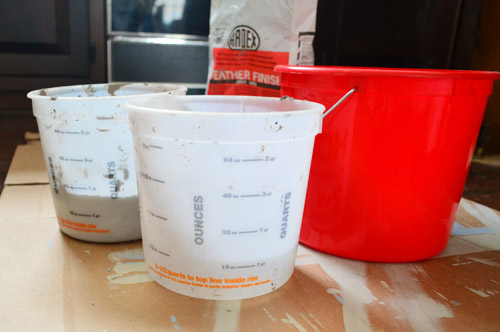
- Measuring buckets: We used these (one for water, one for Ardex powder) to make sure we were mixing the right ratio in our red bucket.
- Sandpaper: A variety of grits – both high and low, as well as a sanding block for easy gripping. We used mostly 60, 120, and 220 grit.
- Spreading tools: We used the flat trowel (on right) for mixing in the bucket, then used the other three for spreading. The big 10″ drywall knife was good for big flat areas, the 4″ putty knife was great for backsplash and edges, while the small guy helped us get into tight spots, like around the sink.
- Stuff for keeping walls clean: We kept a sponge and paper towels on hand to clean up any drips or splatters on the wall. We also taped off some areas too (more on that later).
- Protective gear: During the sanding process the glasses and dust mask helped keep stuff out of our faces (Sherry preferred our heavy duty respirator) while the gloves were great for keeping our fingers from getting crazy raw.
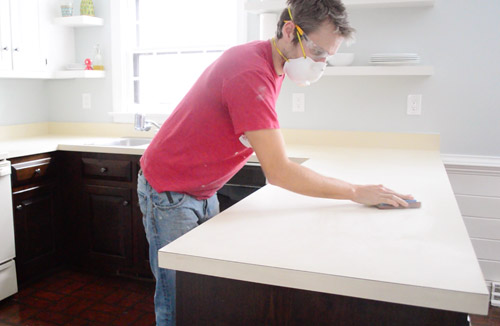
Speaking of sanding… the first step was to rough up the existing counters with some high grit sandpaper. This was before we realized our fingers would be taking a beating from all of the sandpaper gripping. We wised up and added gloves and used nice big sanding blocks wrapped in high grit paper about ten minutes into it. It went much easier after that.
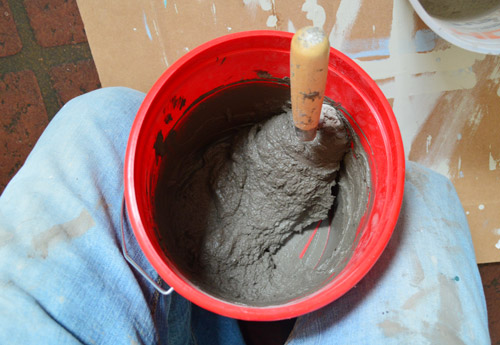
The Ardex bag suggests a mixture of 2-parts powder to 1-part water, but we found that balance to be a little bit on the thick side – making it hard to spread and what we believe led to our first layer being, well, on the thick side too. So we erred on the side of a bit more water from that point on.
Like grout or thinset, the goal seems to be a toothpaste-like consistency. Thick enough that it doesn’t run or drip off your blade, but thin enough to spread easily. If you’re mixing larger batches it suggests a paddle mixer, but we did just fine by hand (Sherry took a turn mixing things too and didn’t have any issues doing it by hand). Since it starts to harden within about 15-20 minutes, we never wanted to mix up too much at once anyway.
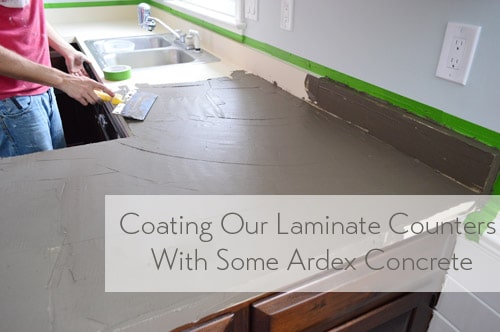
Spreading it on the flat surfaces was kinda fun, in a weird way. It was like icing a giant cake and using a big 10″ blade made it pretty fast to get the big areas covered. The backsplash was another story, but we’ll get to that in a second.
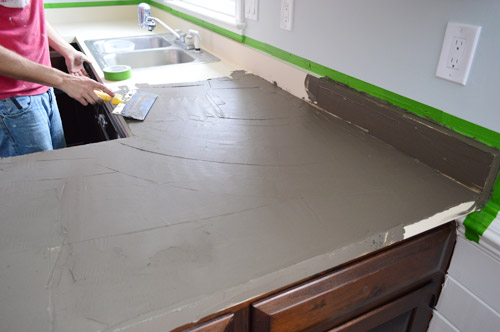
Here’s a quick video Sherry took of me applying the third coat, since we thought it’d helpful for you to see the stuff in action. I’m not claiming my technique to be great or anything, but we did find we got a bit better each round (Sherry also thought we got better at sanding/smoothing each layer as we went). Which is good news because your first couple of layers will get covered up anyways – so they’re kind of like low-risk practice rounds.
When it came to doing the sides, we switched to a smaller putty knife. We usually did these after we had applied most of our mixture to the top, that way what was left in the bucket had set a bit more and was less likely to slide off the vertical surface.
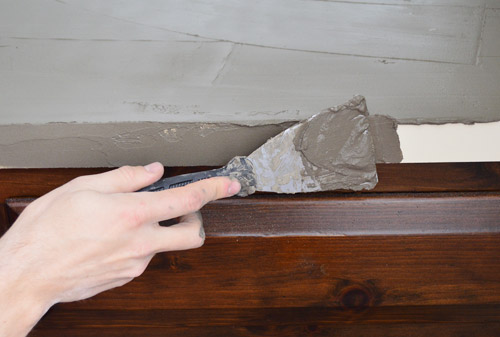
At first we found the edges to be challenging since it was easy for stuff to build up there. What we realized a couple of rounds in was that after about 20 minutes the Ardex had hardened to an almost clay-like consistency, and Sherry or I could come back and smooth the edges with a damp finger. My favorite part was sneaking up behind Sherry all Ghost-style to smooth them from behind her back. Who says there’s no romance in DIY?
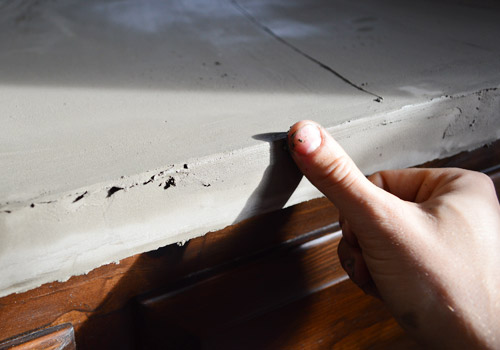
Here’s our first round after it dried. You can see Sherry taped off the wall to protect it when I lamented how much was getting on them as I went. In hindsight we’re still unsure whether that ended up being a smart decision. It certainly made us less paranoid about being messy as we went, but removal was a bit of a pain and not perfect since we were essentially concrete-ing the tape to the wall in a few spots.
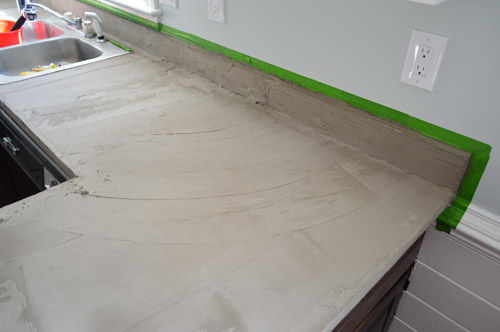
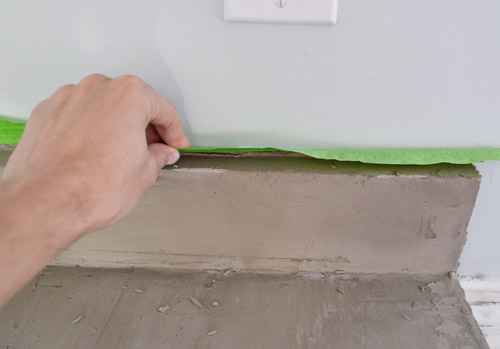
We decided to ditch the tape after our second round of counter smoothing, so we slowly worked our way around the room peeling it off (we feared that too much concrete build-up would trap the tape in place forever). One thing that we found during this process was that pulling it down from the top (rather than ripping it to the side like we do after painting) did a better job of getting a clean edge and not just tearing the tape. But we did have to chisel it free in a few areas… so I’m not sure if it was a time saver in the end.
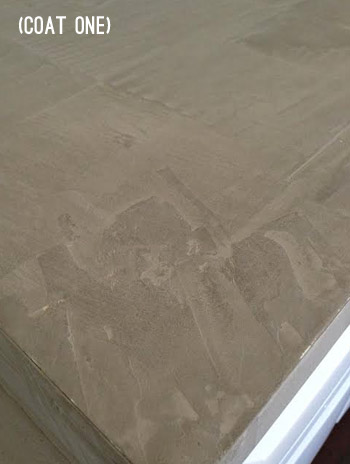
Things looked pretty rough after our first round (well, after every round actually). But that’s where the fun mess begins: the sanding step. Here’s where you smooth out any rough spots or ridges so that the next layer can go on evenly and ultimately get you to a flat, smooth finish.
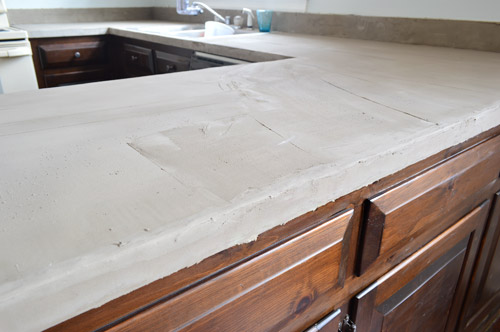
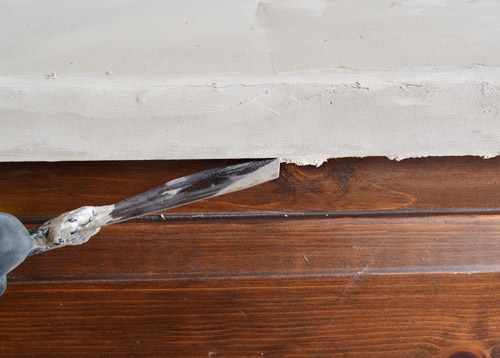
After letting the surface dry overnight, first Sherry would go across the top with a putty knife and scrape off any obvious ridges that were left by the drywall knife during the Ardex application. Even though it had hardened, it wasn’t tough to do. Blobs and ridges just popped right off as she scraped back and forth over them.
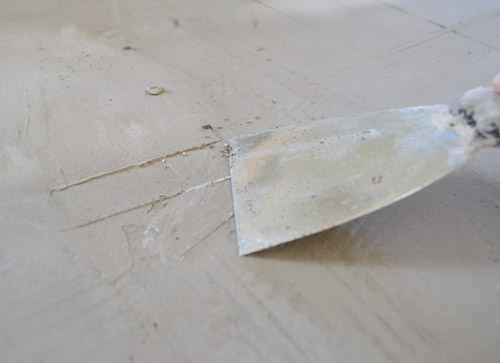
The most satisfying thing was cleaning off the bottom edge. Sherry realized we could just run our smaller putty knife along those and sheer off any irregularities, which left us with an awesomely crisp line on the bottom. Best part of this project by far. Could’ve done it all day.
That step was quickly followed by our least favorite part: sanding, sanding, and more sanding. We chose to do it all by hand, since we feared that our power sander would just sand everything down to the laminate again (or leave rough ridges or marks as it traveled around the counter). Plus, with all of the tight spots like the backsplash and around the sink, we figured it would be easier to maneuver by hand.
We used a sanding block (for easy grip) wrapped in fresh sandpaper each time. For sanding every layer except for the last one we used a really rough 60-grit paper to make smoothing ridges and rough spots easy, but after the last coat of Ardex (we did four coats) was all smoothed on and dry, we switched to 220-grit paper to make sure we didn’t leave big/rough scratches in that top coat of concrete.
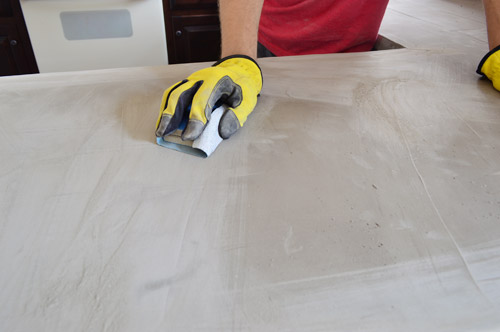
Sherry also realized that it was helpful for us to pause while sanding each section to vacuum off the excess dust as we went (thanks shop vac!). This was especially helpful because sometimes the dust would disguise an area that needed a bit more sanding. Plus, it just helped for sanity reasons, since we felt like we were keeping the mess more contained that way.
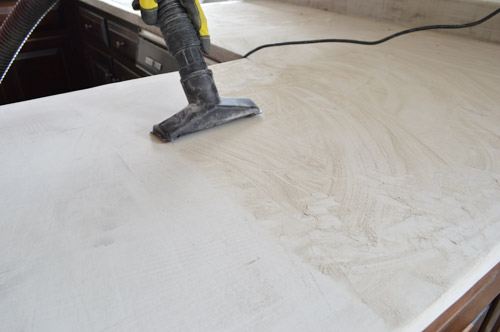
Speaking of which, the mess was the biggest surprise to us. Despite reading other people’s experiences with it (and obviously, we knew sanding was involved), I don’t think either of us had mentally prepared for the fact that there’d be a fine gray build-up of powder EVERYWHERE. And since the kitchen is such a central and highly traffic area of our house, keeping it clean ended up being a big time suck (after each round we would sweep, then vacuum, and then mop the floors to be sure nobody tracked anything throughout the house when they passed through over the five days that we worked on it).
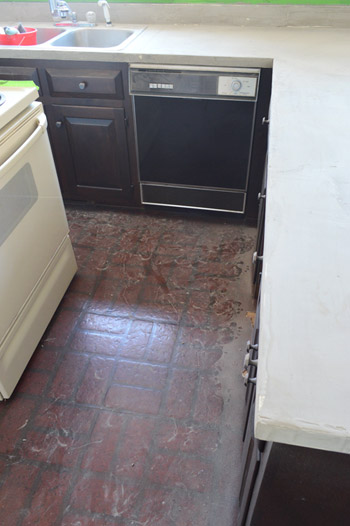
After our first coat, we noticed the laminate was peeking through in a few spots after our initial sanding step – mostly on edges where it’s really easy to scrape everything off if you’re not careful. But that’s one reason you do multiple coats, so we weren’t too panicked.
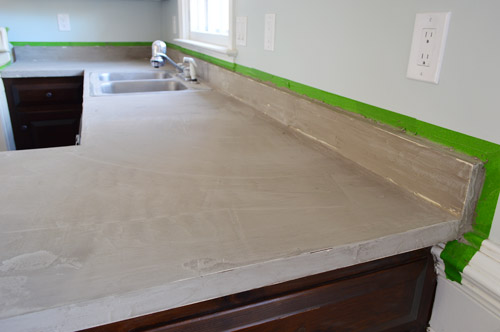
Here you can see a second coat beginning to get applied over the first. Note the difference in color between the wet Ardex vs. the lighter stuff (that’s how it dries). We actually think once we seal it, it’ll get closer to the wet color though, so that should be interesting to see.
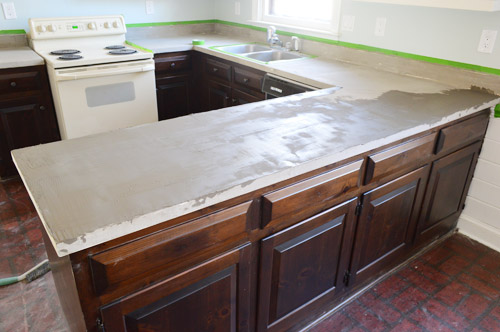
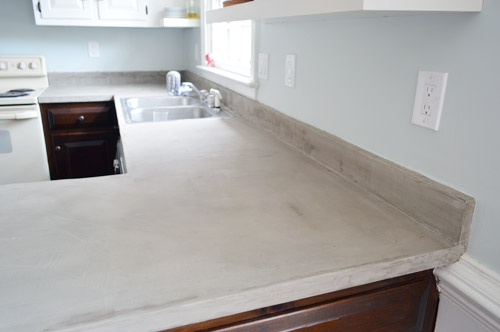
Here’s a shot of our final counters (well, pre-sealing). You can see it’s still not perfect, which everyone notes is one of the charms of this Ardex technique. You get that sort of imperfect, industrial look, but it definitely feels more solid & stone-like (as opposed to plastic-y like laminate).
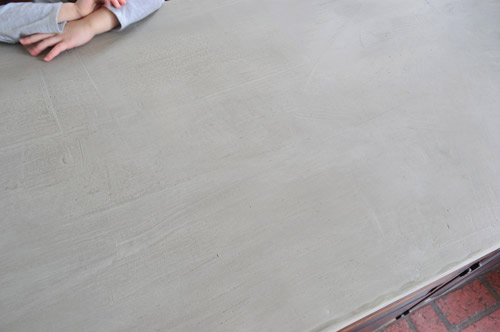
I’ll admit that I had to come around to the idea of appreciating the flaws of the finish. Sherry was immediately charmed by it, but the perfectionist in me resented the fact that this type of project doesn’t yield perfectly uniform results. I think once we seal it I’ll appreciate it even more (that will darken it a little and remove the chalky finish in favor of a more polished look) so I’m really looking forward to that.
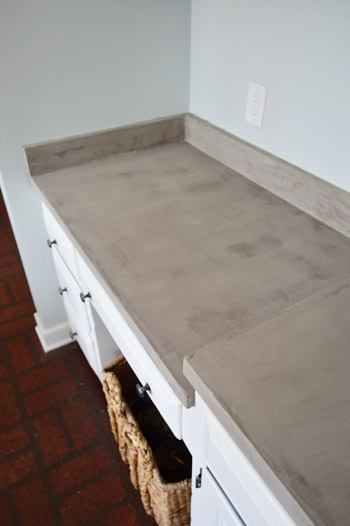
By far the hardest area to get smooth was the backsplash, just because it was a small area that was difficult to reach and seemingly made up entirely of edges and corners. So both applying the Ardex and sanding it was challenging and required a bit of body contorting on my part (lucky Sherry was too pregnant to reach it in most areas thanks to her belly being in the way, which had me slightly envious by the end of this process).
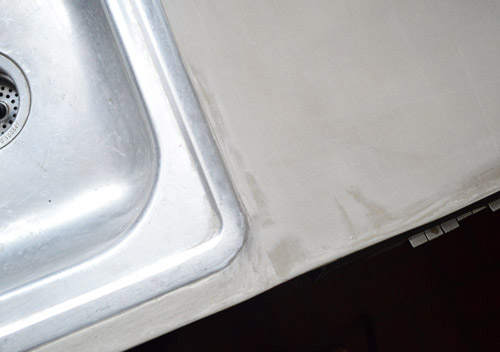
Another tough spot was around the sink. If this were our “forever” counter, I would’ve gone through the trouble of removing the sink, but we’ve got some old copper pipes that are pretty much corroded together down there (which would mean bringing in a plumber to switch this out). So we opted to save that for Phase 2 of our kitchen update and just taped / sanded around it. The results were actually better than I expected.
Challenges and flaws aside, we’re happy with the overall improvement to the space. It feels good to rid the kitchen of another old yellowed surface and make the room feel a bit more updated. Just cover the floor with your hand and squint – ok?
And although the time that we spent on this update was longer than we envisioned (probably around 15 hours spread across five days, including prep and clean-up) the cost was still pretty fantastic. The three bags of Ardex (again, we only needed 2.5 to do four coats) cost $57 in total – and we probably spent another $20 in buckets and sandpaper. So for 45 square feet of countertops, we paid just $1.71 per square foot to update it – which is pretty hard to beat.

That doesn’t include the sealer though, which is next on our list. We’ve read a ton of sealer reviews since it seems that the wrong sealer can cause more scratches, stains, and even issues like bubbling down the line – so we want to get it right. The two most highly recommended products seem to be Ardex Clear Concrete Guard High Performance Sealer and GST International Satin Seal Water Based Acrylic Sealer. Does anyone out there have a preference between the two? We can’t find either of them locally so we’re going to have to order one of them online and wait for it to come, but we’ll definitely share what we end up going with, how it goes on, and what it does to change this finish – as well as updating you guys on how these counters end up wearing for us over time.
Update: You can check out what we used to seal them here, and read an update on how they’re holding up here.
Psst – Wanna know where we got something in our house or what paint colors we used? Just click on this button:


jenn says
Ardex coating my countertops has been on my to do list for awhile. Thanks for the pics, every blog post relieves a bit of my fears. Great job, looks wonderful and exactly what I want to accomplish.
Re: the floor- I stole this technique from Anna @ Doorsixteen, she stole it from somebody else. Worked great, has be installed in my kitchen over linoleum tiles for a year now. Highly recommend. It cost 25 bucks to do my smaller than your kitchen.
http://www.doorsixteen.com/?s=kitchen+floors
YoungHouseLove says
Really cool!
xo
s
Melinda says
This looks great! Do you know if this would work on granite? All of the examples I’ve seen online are wood or laminate. Have you seen anything in your research?
Our kitchen is rocking some pink granite counters that I’d love to cover up, and I’m at my wits end about how I can make them less unattractive. Maybe you have some other ideas?
YoungHouseLove says
I’d contact Ardex and ask if it would work on marble, just to be sure!
xo
s
Helen says
I’m very curious about this technique. We are doing a simple kitchen remodel to get our house market ready and I just pulled tile off a large kitchen island. The base is 1 1/2 inch plywood, but the tiles were attached with some glue, not your typical mastic. It would take some significant time to get the ply wood smooth so, I’m wondering how smooth I need the plywood to be to start the layers? Does it matter that much if you have 3-4 layers?
YoungHouseLove says
I’m not really sure. I definitely would describe the Ardex as a thin thin skim coat (3-4 layers might add up to one centimeter of height) so if there are some deep pits or valleys those might show. Good luck!
xo
s
Grace Tay says
Ever heard of Henry 555 self leveling underlayment? I searched Arden on Home Depot and that came up instead. Wondering how different they are.
YoungHouseLove says
Never tried that! Anyone have advice for Grace Tay?
xo
s
Suzanne says
ardex and henry 549 are the same. Henry is made by Ardex and is the retail version of the original Ardex product. the self leveling is for use with the pour in place counter top and not the version used in this application
Mollie says
How are the feather finish counter tops holding up? I read one blog and those folks had a terrible experience and had to replace the counter tops in the end.
YoungHouseLove says
They’re doing great! I think a lot has to do with how you seal them. Still really happy with ours.
xo
s
Mollie says
Ok thanks! I really want to do it. Have already ordered and received the product and then read this blog (below)! Yikes!!!
http://412love.wordpress.com/tag/ardex-feather-finish/
Wonder why they had so much trouble??? If you have a chance to read their blog and have an opinion on how I can avoid what happened to them, I would very much appreciate it! Your counter tops look great!
Thank you!
YoungHouseLove says
I read that post, but I have no idea why they had that trouble. Seems like a huge pain! We read about other bloggers who use Ardex a lot (like Kara Paslay and Jenny at Little Green Notebook) so we just hoped for the best and gave it a whirl!
xo
s
Mollie says
Gotcha! I’ve read those posts and also a Beautiful Mess. This was the first time I had even seen a negative post about this process. So naturally, it made me nervous! Thank you again!
Eva says
Just curious, how are the countertops holding up after a few months of wear?
YoungHouseLove says
So far we really like them!
xo
s
Ann Marie @ Twice Lovely says
How many hours would you say your countertop took to finish?
YoungHouseLove says
Oh man, it has been so long and we’ve done so many project since this one that it’s kind of a blur. My best guess would be around 12-14 total.
-John
Suzanne says
Just started ours today. We added a charcoal color to the mix and so far it is coming out great. Using Home Depot products, Henry 549 and concrete pigment charcoal
YoungHouseLove says
Good luck Suzanne!
xo
s
Lisa E says
Wondered if you would share how you are liking the concrete counter tops. Also, I had to share Kristi’s post yesterday. If you are happy with your counter tops, you might consider the full monty for your final remodel: http://www.addicted2decorating.com/diy-pour-in-place-concrete-countertops-part-2.html#comment-417000
YoungHouseLove says
So cool! Wow! Thanks for the link, Lisa. And this morning on the blog we just posted an update on how we like the counters so far!
xo
s
Nicole says
Can I just say — this TOTALLY blew my mind! Why did I not realize this was possible to do. I love it! It turned out great, and I might have to do this to my horribly ugly kitchen counters…
Carrie says
Thank you so much for sharing your project! You were our inspiration in covering the forest green tile countertops in our kitchen. We were so nervous, but the detailed diary of your journey gave us the courage to go for it!
We love our new countertops….today we will re-plumb the sink and begin using the kitchen again. Our project, like yours took about 5 days (lots of waiting ;) ).
The only thing we did differently was to add a semi-transparent concrete stain to ours. We wanted more of a brownish color to match our decor. It worked BEAUTIFULLY! Because the Ardex feather finish does not take the stain evenly, it actually created an incredible stone look on the countertops. There is nothing uniform about them and we LOVE it!
Thanks again for sharing and good luck on any and all of your future adventures <3
YoungHouseLove says
Sounds amazing! So happy it turned out well!
xo
s
Shannon says
Your countertops are beautiful! I have plans to try the same thing, do you think that the Giani granite kit over the Ardex Feather Finish would work and look ok? I have 40 year old harvest gold formica in fairly ok shape that I cant stand to look at for another minute! I am so excited and inspired by what you’ve done with yours, thank you for the step by step instructions, tips and pics!
http://m.homedepot.com/p/Giani-Granite-1-25-qt-Sicilian-Sand-Countertop-Paint-Kit-FG-GI-Sicilain/203644684/
YoungHouseLove says
I’m not sure since we never tried that. Maybe google around to see if someone has? Good luck!
xo
s
DIYBea says
Thanks for this great idea. I purchased the Ardex and really excited to get started. Can you tell me the drying time between layers. Bea
YoungHouseLove says
We gave each layer around a day I think? It has been a few months so it’s fuzzy, but we tried to outline those details in this post.
xo
s
Hannah says
I did this to my kitchen after reading this post. I had to do something to cover up the terrible RED countertops with oak trim. The cement is amazing and so easy to apply! You guys are awesome!
YoungHouseLove says
So glad!
xo
s
Becki says
I love this and can’t wait to try it! I have laminate counter tops and I’ve been reading the comments on taking of the backsplash. The backsplash I have wouldn’t leave a hole it’s butted up to the the wall on top of the countertop. I removed a small piece (next to the cooker) and there was a lot of glue marks (I’m guessing maybe liquid nails or something. Any idea on how to remove these glue marks? I’ve searched the internet and asked at my local hardware store and no one seems to have any idea. I would love to do the concrete look with a nice backsplash. Any thoughts or ideas would be greatly appreciated! Thanks again!
Please note I am new to the remodeling (new homeowner)
YoungHouseLove says
If it’s just glue on the drywall I’d try sanding it down to get it smooth! Hope it helps!
xo
s
Stephanie says
So I just did a trial run on the smallest piece of countertop I have in the kitchen… I just couldn’t get the backsplash and the corners with my putty knife! Even with my fingers, I couldn’t get the angles. And the rest of the countertop is not that great either. I hope I never have to ice a cake!
So my first layer being a super thick mess, I sanded it real good, and then… I applied the second coat using an old craft paintbrush, the type with the hard bristles. It took me only 15 minutes to cover the whole thing and have nice sharp edges and angles. When I was 2/3 done, the “batter” became a little harder to apply, but nothing compared to the first layer! So… Am I a genius, or is there something I overlooked and it’s going to go terribly wrong?
Hannah says
The first layer was the hardest. Working in small batches really helped me. I also found that sanding could only help a little bit to fix my mistakes, I really had to pay attention to applying the mixture and make it as smooth as I possibly could.
Hannah says
Just have to put in my two cents. I referred to YHL a million times when I did my counters…
1. Bought the exact same products. This was key because I read about so many concrete counters gone bad with wrong sealers.
2. The Feather Finish package says NOT TO mix more water than recommended and I was so nervous, but just followed YHL directions and had a toothpaste-like consistency.
3. GO IN SECTIONS. Once the mix begins to harden on your putty knife or bowl, tiny dried pieces will ruin an otherwise smooth finish on your countertops. Work in small batches.
4. START AT THE BACKSPLASH. My “backsplash” is just like YHL, I did most of it with my fingers and came back when it hardened to clay consistency to smooth out bumps with my wet fingers.
5. I used a palm sander to sand. I probably would have died sanding those counters by hand. I’d definitely recommend a palm sander.
6. The last Safecoat Sealer is AWESOME. Expensive, but totally worth it. I want to seal everything with it now! It’s very hard, and nice a glossy. There were hardly any fumes applying it and it dried soo quickly I could easily do two or three coats a day.
7. I ran out of the feather finish (ordered from amazon like $30/ bag) so I used Henry from Home Depot. Same product, don’t bother with the Ardex Feather Finish, just get Henry at $15/ box.
Hannah says
ALSO: Air bubbles. Embrace them. I couldn’t figure out why it was happening.
Oh, and concrete got all over my walls from trying to do the backsplash without taping off like J&S did. I would’ve rather taped off. It was messy and took chunks out of my drywall trying to putty-knife it off.